

Page 1
Invisible In-Wall Speaker Cutout Template
Stud
1
3
2
Installation Instructions
1. Tape this template to the drywall.
Center the template between the studs. Make sure that
13 1/4”W x 21”H x 3”D is available for the speaker and
installation blocks.
2. Mark the location of holes.
Use a punch or screw to mark holes #1 through 18 at the top
and bottom of the template.
3. Remove the template and drill holes.
4
Speaker Cutout Dimensions- 13 1/4”W x 16 1/2”H
5
Minimum Wall Depth- 2 13/16”
Tips & Tricks
Placement
• Works with metal or wood studs.
• May be placed in ceilings, soffits, and walls in any location.
• Safe to use in humid and outdoor areas like showers and marine
environments.
Template
Holes #1, 9, 10, & 18 define the speaker cutout. The other holes
mark where the mounting block screws must be located.
6
7
8
9
Stud
Using a 1/8” or smaller bit, drill through all the holes marked at
locations #1 through 18.
4. Cut the drywall opening.
Make the speaker cutout by cutting between the corner holes
#1, 9, 10, & 18 (follow the dotted line of the speaker cutout
on this template).
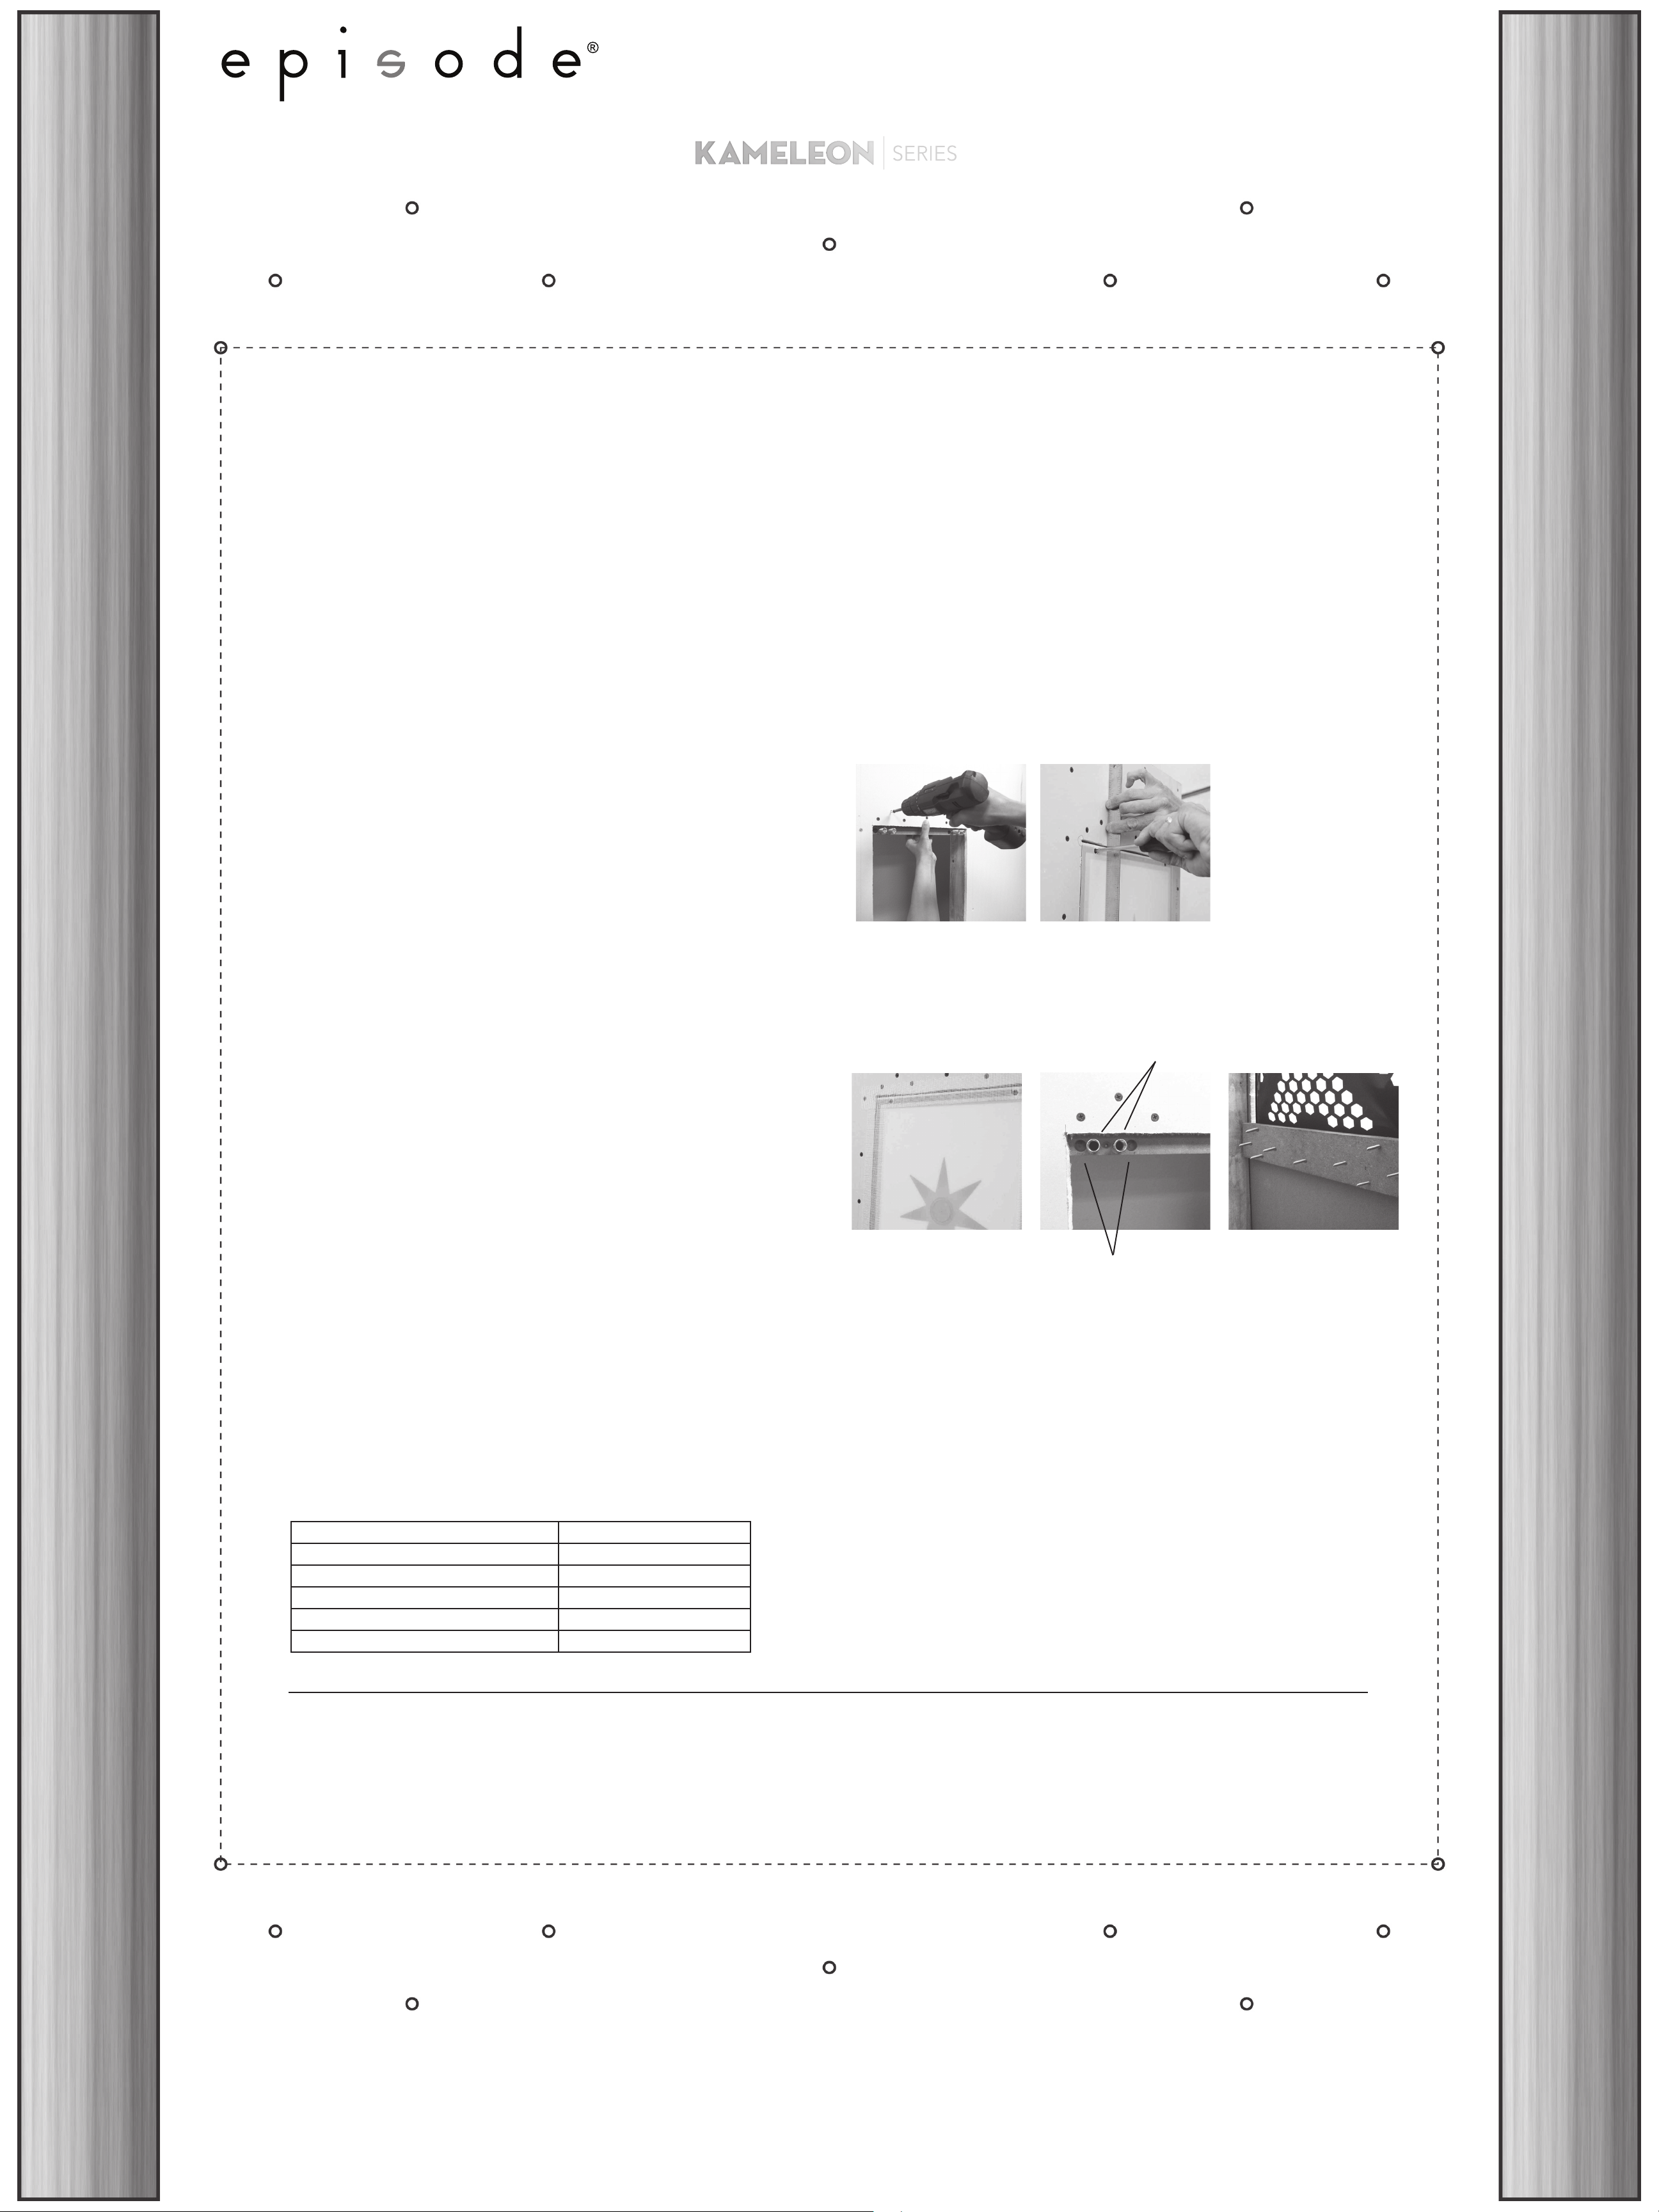
5. Install the installation blocks and springs.
Using 14 of the supplied drywall screws, attach the
installation blocks to the top and bottom of the speaker cutout.
(Figures 1 and 4)
6. Connect the speaker wires.
Using the supplied wire nuts, connect the speaker observing
proper polarity. Place the speaker on the springs, and loosely
secure it using the supplied screws. A slow screw gun is ideal
for this operation.
7. Flush the speaker to the wall.
Using a conventional screwdriver, adjust the four speaker
screws by hand until the diaphragm of the speaker is perfectly
flush to the surrounding drywall. Use a straight edge for this
operation. (Figure 2)
Mounting blocks
The supplied mounting blocks accommodate drywall from 1/2 to 1”
in thickness. (Figure 4)
Figure 1 Figure 2
Leveling
To avoid unwanted bumps in the finished drywall, set the speaker as
flush to the wall surface as possible.
Install springs in the
inner cavities for 3⁄4”
or thinner drywall.
8. Test the speaker.
Test the speaker thoroughly by playing music under actual
conditions.
9. Tape and mud over the speaker.
Tape the edges and finish the area using drywall compound prepared with adhesive mix (50% water and 50%
acrylic admix; Westpac Materials recommended). (Figure 3)
The total thickness of the drywall compound and texture
(if any) must not exceed 1/16”.
10. Wait at least 2 days.
Let the drywall compound dry completely.
11. Check for ghosting.
Apply a thin skim coat of mud if the speaker begins ghosting.
12. Paint over the speaker and wall.
Paint, and allow the area to dry completely before using
the speaker.
Specifications
Figure 3 Figure 4 Figure 5. Mounting blocks seen
from behind.
Install springs in
the outer cavities
for 1” drywall.
Mudding
• A thin coat of drywall compound and texture, less than 1/16”, is
all that’s required to hide the speaker.
• For a smoother finish, sand around the entire perimeter of the
speaker location after the mud has completely dried. Sanding
eliminates shrinking marks and ensures a flat, even finish.
• If scratches or bubbles are visible after sanding, apply one
additional “skim coat” after the first coat of mud. Sand lightly
after it dries completely.
10
11
Overall speaker dimensions 13.0”W x 16.3”H x 2.8”D
Weight (speaker only) 6.1 lbs
Recommended Amplifier Power 100W RMS
Impedance 8 ohms
Frequency extension
Sensitivity (SPL, 1W, 1m) 87 db
60 Hz, 22 kHz
Episode 5 Year Limited Warranty
This SnapAV® product has a 5 year Limited Warranty. This warranty includes parts and labor repairs on all components found to be
defective in material or workmanship under normal conditions of use. This warranty shall not apply to products which have been
abused, modified or disassembled. Products to be repaired under this warranty must be returned to SnapAV or a designated service
center with prior notification and an assigned return authorization number (RA).
13
Note
Invisibility of the Kameleon speaker is predicated on the skill of the
drywaller. Standard level 5 finishing is required to ensure a high
quality finish.
Speaker Cutout
15
18
17
12
14
16
Por favor vea el reverso para instrucciones en Español
131126-1430© 2013 Episode ®
 Loading...