

Page 1
TreadClimber
®
BY
I
S
TAR TRAC®
NSTALLATION &
O
WNER’S
M
ANUAL
Page 2

TREADCLIMBER by STAR TRAC - OWNER’S MANUAL | 2
Page 3

Table Of Contents
Safety Instructions 5
Precautions 5
Assembly and Setup 21
Assembly Instructions 22
Operating Instructions 32
Display Control Panel Features 33
Hot Bar® Control Features 35
Hints and Tips for Getting Started 36
Quick Start 37
Preset Programs 38
Goal-Based Programs 38
Intervals 38
Rolling Hills 38
Heart Rate Training Programs 39
Constant Heart Rate Control 39
Heart Rate Intervals 39
Cooldown Cycle 40
Using the Cooling Fan 40
Heart Rate Monitoring 40
Contact Heart Rate Monitoring 41
Chest Strap Heart Rate Monitoring 41
Setting & Testing 42
Manager Mode 42
Maintenance Mode 43
Motor Calibration 46
Troubleshooting 47
Regulatory Information 48
International Regulations 49
Maintenance 50
Daily Maintenance 50
Weekly Maintenance 50
Monthly Maintenance 50
Adjustments 51
TREADCLIMBER by STAR TRAC - OWNER’S MANUAL | 3
Page 4

Introduction
This Owner’s Manual will acquaint you with the assembly, operation and maintenance of your TreadClimber® by STAR
TRAC cardio machine.
E-TC, E-TCi – TreadClimber
We highly recommend that you read this owner’s manual prior to setting up and using your machine. The information on
the following pages will enable you to begin easily, quickly and safely.
®
by STAR TRAC
Warning
Your TreadClimber is designed for aer obic exercise in a gymnasium or health club environment. Please che ck with your
physician prior to beginning any exercise program.
Do not push yourself to excess. Stop if you are feeling faint, dizzy, or exhausted. Use common sense when usin g this
machine. Please read the owner’s manual in its entirety before operating.
Manufacturer
Core Industires LLC, d/b/a STAR TRAC
4400 NE 77
Vancouver, WA 98662
Telephone: (800) 228-6635, (714) 669-1660
Fax: (714) 508-3303
http://www.startrac.com
th
Avenue, Suite 300
Customer Support
If any items need replacement contact the Star Trac Customer Support Department at 800-503-1221 or 714-669-1660.
STAR TRAC
TreadClimber is a registed trademark of Nautilus Inc. and used under licence.
®
and the Star Trac logo are registered trademarks of Core Industries.
TREADCLIMBER by STAR TRAC - OWNER’S MANUAL | 4
Page 5

Safety Instructions
Important Safety Instructions
This product will be wired for either 120 Volts AC nominal power input OR 230 Volts AC nominal input. It is factory-equipped
with a specific electric cord and plug to permit connection to the proper electric circuit. Make sure that the product is
connected to a dedicated power line having an outlet with the same configuration as that of the plug. NO adapter should
be used with this product. If the product must be reconnected for use on a different type of electri c ci rcuit, the
reconnection should be made by qualified service personnel. Warning: If the supply cord is damaged, it must be replaced
by the manufacturer, its service agent, or similarly qualified persons in order to avoid hazard.
Save These Instruc tions
Attention
Star Trac recommends that units be spaced a minimum of 8 inches (200 mm) apart to allow safe and easy ingress and
egress. More importantly, there must be at least 48 inches (1.25 m) of free space behind them each unit.
As with any motorized equipment, the area where the units are located must be free of obstructions and fixtures with
sharp edges to prevent injury in the event that a user trips or loses balance and falls. Failure to follow the obstruction
free spacing requirement may result in entrapment of the user and cause significant injury. DO NOT place near wet
areas (such as pools, showers, etc.).
This chapter includes precautions and fitness safeguards for the installation and use of the TreadClimber. These safety
notes are directed to you as the owner of the machine. Please read this chapter carefully before installing or using your
equipment and be sure to train all your members and fitness staff to follow these safety instructions. Please read this
chapter carefully before installing or using your equipment.
Safety instructions are provided in the following languages (in the order shown):
English
Dutch
French
Italian
Portuguese
Spanish
Swedish
TREADCLIMBER by STAR TRAC - OWNER’S MANUAL | 5
Page 6

Precautions
CAUTION: READ THE OWNER’S MANUAL
COMPLETELY BEFORE OPERATING THIS
These safety notes are dir ected to you as the owner of the TreadClimber
members and fitness staff to follow these safety instructions.
DO
Do encourage your members to discuss their health
program or fitness regimen with a health care
professional, especially if they have not exercised for
several years, are over 35, or have known health
conditions.
Do read all instructions in this manual before using
your TreadClimber.
Do use your TreadClimber only for its intended
use, as described in this manual.
Do check to ensure the belt is not moving prior to
using the TreadClimber.
Do keep the belt surface clean and dry.
Do stop operating your TreadClim ber if you feel
dizzy, faint or exhausted.
Do exercise slowly until you reach a level of comfort
and security.
Do be aware of the location and p roper use of the
emergency STOP key and pull cord STOP.
Do perform regular inspection and preventive
maintenance as specified in the manual.
TREADMILL
CAUTION: BEFORE CLEANING OR SERVICING,
DISCONNECT POWER SUPPLY
CAUTION: MOVING PARTS, KEEP HANDS AND
FEET FROM UNDER THE TREADCLIMBER WHEN
OPERATING
DO NOT
Do not let children operate y our. Supervise invalids or
disabled persons who use your TreadClimber. Use the
lockout feature to prevent unauthorized or
unsupervised use.
Do not exceed the maximum allowable weight
limit (350 lbs. / 159 kg) for the TreadClimber.
Do not leave your TreadClimber unattended when it is
plugged in. Use the safety lockout feature to prevent
unsupervised use.
Do not use your TreadClimber without athletic shoes.
Do not wear loose or hanging clothing while using the
TreadClimber.
Do not step or jump on or off your TreadClimber if
the belt is moving.
Do not use or store your TreadClimber outdoors or in an
enclosed pool environment.
Do not ever drop or insert any object, hands, or feet into
any opening, or underneath this equipment.
Do not place water bottles or cups on your
TreadClimber unless you are using the designated
holders for the TreadClimber
TREADCLIMBER by STAR TRAC - OWNER’S MANUAL | 6
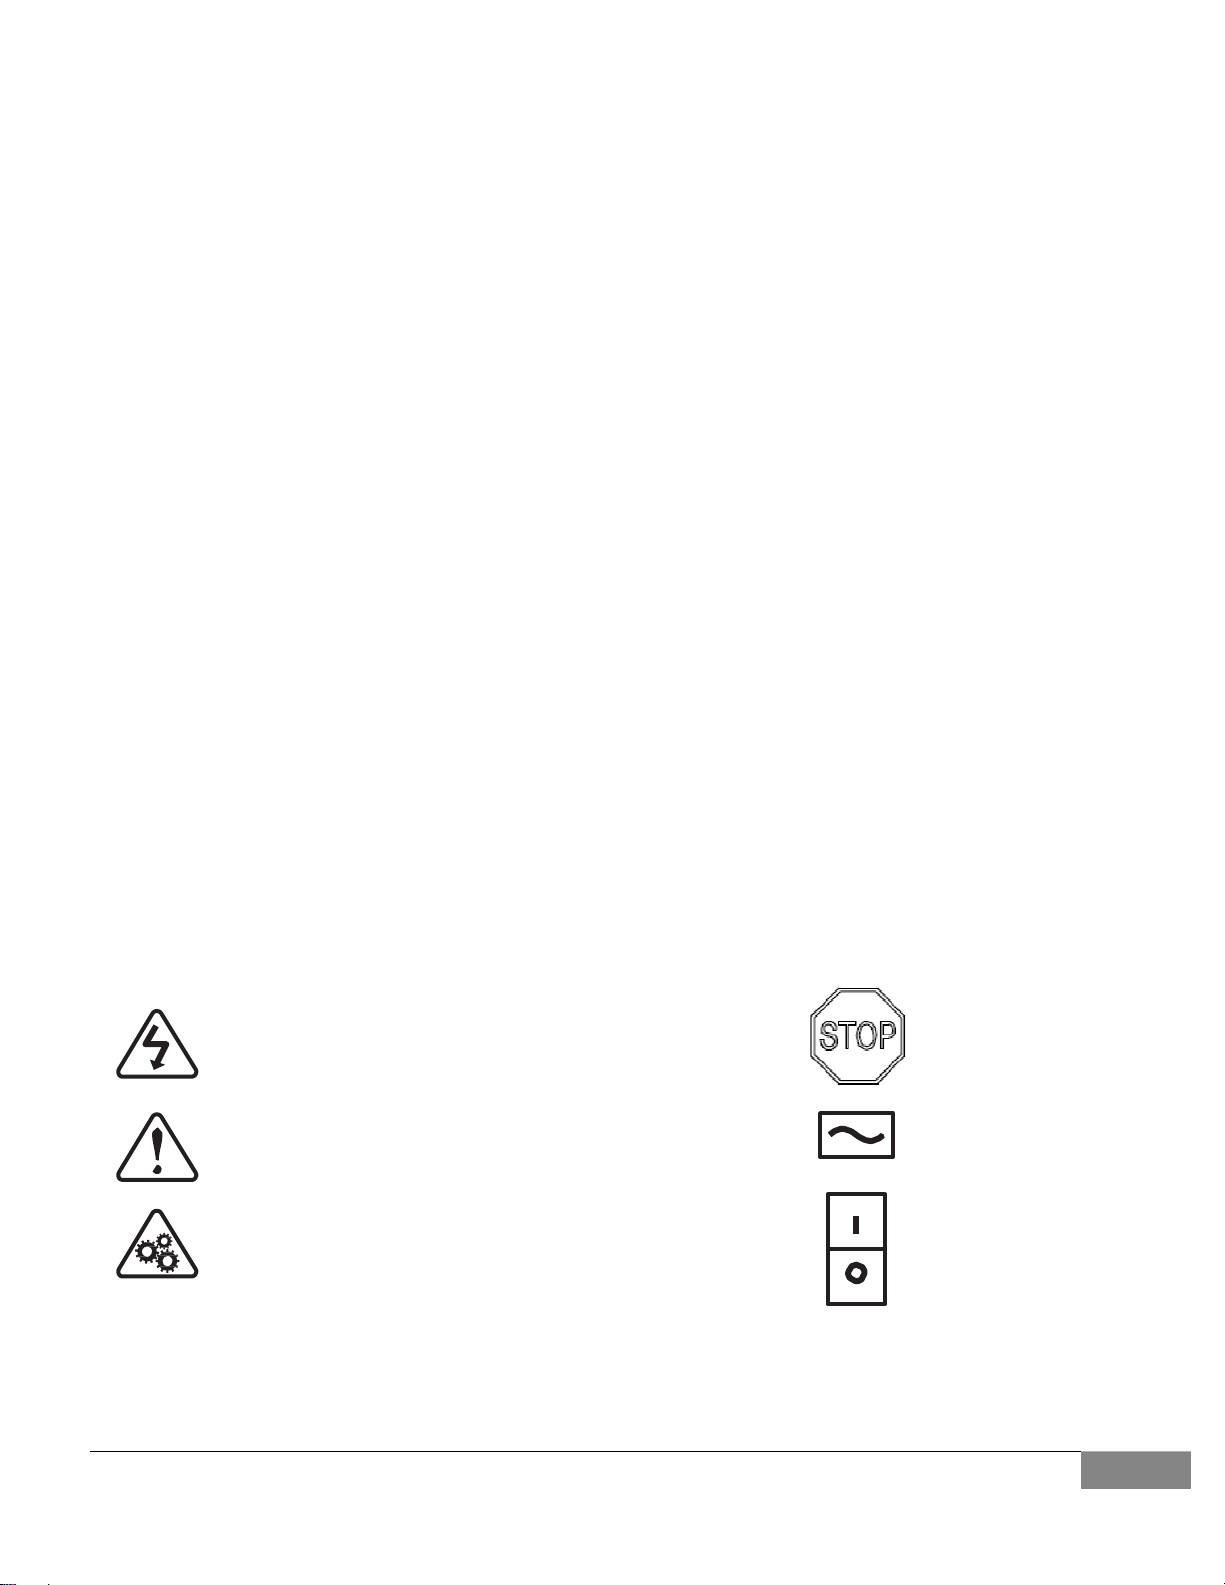
ON
OFF
STOP (OF ACTION)
ALTERNATING
CURRENT
ON
OFF
®
for safety purposes, please train all your
Page 7

Do keep the TreadClimber air openings free of lint, hair,
etc.
Do keep the electrical cord away from sources of
excessive heat designated holders for the
TreadClimber.
Do unplug your TreadClimber befo re doing any
maintenance or cleaning.
Do warm up and cool down before and after each
workout.
Do set your goals.
Do try charting your progress u sin g the feedback
from your TreadClim ber.
Do try using the incline feature to burn more calories
and strengthen your lower-body muscles.
Do be careful when mounting and dismounting the
TreadClimber. Always use the handrails, rear step and
side footsteps for support.
Do use the handrails when walking, to help your
balance and start your workout at slow speeds and
gradually increase to your desired workout level.
Do not use your TreadClimber where aerosol (spray)
products are being used or where oxygen is being
administered.
Do not use attachments or parts not recommended by
the manufacturer.
Do not use the equipment with the motor shroud
removed, or modify the equipment in any way.
Do not over tighten the running belt.
Do not operate your TreadClimber if the unit has a
damaged cord or plug. Do not use the unit if it is not
working properly, if the unit has been dropped or
damaged, or if the display console shows an error code.
Contact the Star Trac Customer Support Department at
800-503-1221 or 714-669-1660 for instructions before
retuning the unit to operation.
TREADCLIMBER by STAR TRAC - OWNER’S MANUAL | 7
Page 8

VEILIGHEIDSINSTRUCTIES
WAARSCHUWING
Dit prodkt is voor gebruik op een circuit met een nominale waarde van 220 volt en is in de fabriek uitgerust met een
speciaal elektrisch snoer en stekker om verbinding met een passend elektrisch circuit toe te staan. Zorg ervoor dat dit
produkt verbonden is met een stopcontact dat dezelfde configuratie heeft als de stekker. GEBRUIK GEEN ADAPTER
BIJ DIT PRODUKT. Als het produkt opnieuw verbonden moet worden met een ander type van elektrisch circuit, dan
moet deze verbinding gemaakt worden door gekwalificeerd onderhoudspersoneel.
VOORZICHTIG: NEEM DE STEKKER UIT HET
STOPCONTACT VOOR HET RENIGEN OF
Deze veiligheidsinstructies zijn aan u gericht als de eigenaar van de TreadClimber
fitness- personeel om deze veiligheidsinstructies te volgen.
LEES ALLE INSTRUCTIES VOORDAT U DE HARDLOOPBAND GEBRUIKT.
WAARSCHUWING: Om het resico van een ele ktrische schok te verminderen, dient u de stekker van de hardloopband
ALTIJD uit het stopcontact te nemen voordat u hem schoonmaakt
ONDERHOULD.
VOORZICHTIG: LEES HET INSTRUCTIEHANDBOEK
VOORDAT U DE MACHINE BEDIENT.
VOORZICHTIG: BEWEGENDE ONDERDELEN.
HOUD UW HANDEN EN VOETEN ONDER DE
LOPENDE BAND VANDAAN.
DOE DIT WEL
Stop de bediening van de hardloopband als u zich
duizelig voelt of het gevoel heeft dat u flauwvalt.
Weet hoe ver u kunt gaan.
Zorg ervoor dat het oppervlak van de band schoon
en droog blijft.
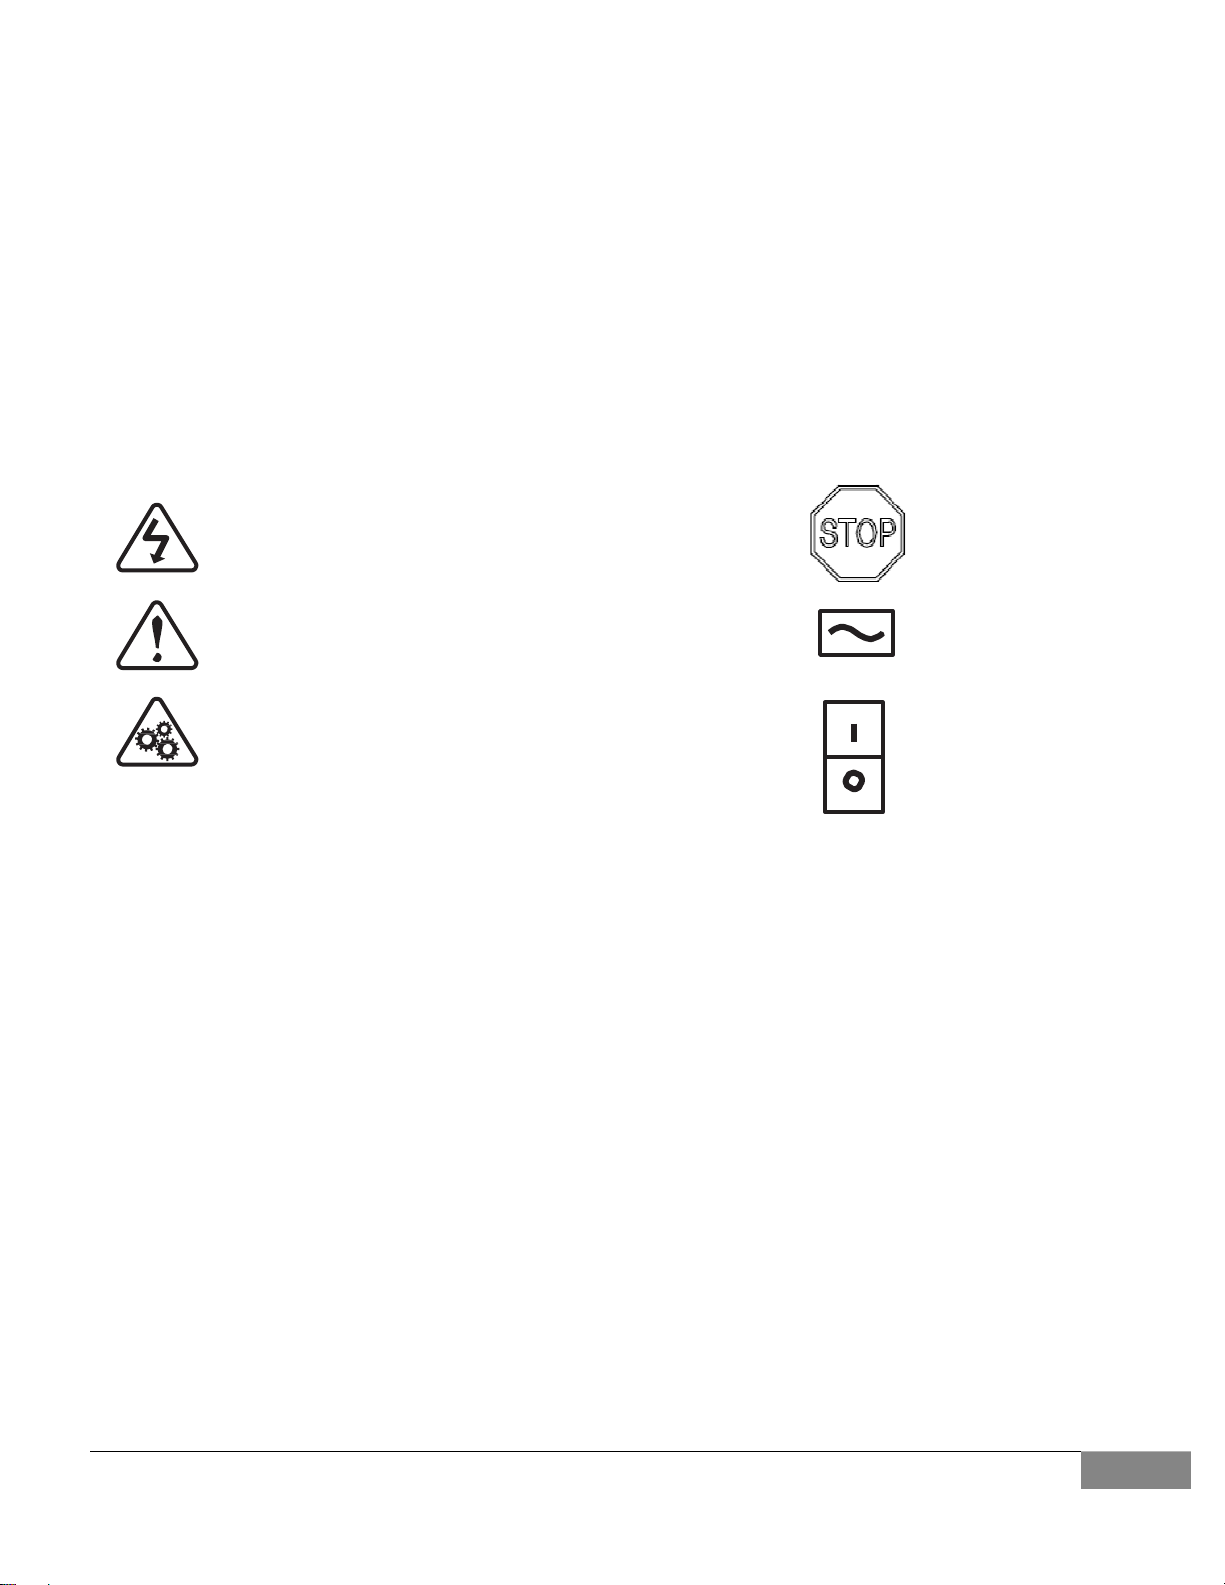
STOPPEN (VAN ACTIE)
WISSELSTROOM
ON
OFF
®
by STAR TRAC®. Train uw leden en
AAN
UI
DOE DIT NIET
Laat kinderen niet zonder toezicht de hardloopband
bedienen.
Zorg ervoor dat het maximaal toegestane gewicht (159
kg) niet wordt overschreden.
Ga de band niet op af terwijl deze loopt.
Zorg ervoor dat u weet waar de noodstop zit en hoe
deze werkt.
TREADCLIMBER by STAR TRAC - OWNER’S MANUAL | 8
Page 9

Verricht regelmatig preventief onderhoud. Houd het
snoer bij verwarmingssystemen
vandaan.
Wacht totdat de lopende band stil staat voordat
u van de hardloopband stapt.
Houd luchtopeningen vrij van pluizen, haar etc.
Bedien de hardloopband nooit met beblokkeerde
luchtopeningen.
Schakel de stroom uit bij de
contactschakelaar.
Neem de stekker uit het st opcontact voordat u de
band reinigt of welk onderdeel dan ook verwijdert of
vervangt. Gebruik dit product alleen voor het
doeleinde vaarvoor het bestemd is.Niet buiten
gebruiken.
Draag geen loszittende kleding als u de lopen de band
bedient.
Draai de lopende band niet t e strak aan. Bedien de
hardloopband niet als deze een
beschadigd snoer of stekker heeft, als hij
niet goed werkt of als hij gevallen of
beschadigd is. Neem contact op met uw
geautoriseerde Star Trac
of de onderhoudsafdeling van Star Trac
op +1 800-503-1221 of bezoek onze
website op http://www.startrac.com
een onmiddellijke inspectie of reparatie.
Gebruid de hardloopband niet zonder gymschoenen.
Laat nooit objecten in het apparaat vallen en steek
geen objecten, handen of voeten in welke opening
van het apparaat dan ook of onder het apparaat.
Plaats geen waterflessen of bekers op uw
hardloopband tenzij u een houder heeft die speciaal
ontworpen is voor hardloopbanden. Gebruik uw
hardloopband niet in een omgeving waar spuitb ussen
worden
gebruikt of waar zuurstof wordt toegediend.
Bedien het aparaat niet zonder de motorafscherming of
pas het apparaat op geen enkele wijze aan.
®
detailhandelaar
voor
TREADCLIMBER by STAR TRAC - OWNER’S MANUAL |
9
Page 10

MESURES DE PRECAUTION
ATTENTION: LISEZ SOIGNEUSEMENT LE MANUEL
D’UTILISATION AVANT D’UTILISER C E TAPIS
Ces instructions sont destinées su propriétaire du TreadClimber
vos adhérents les suivent toujours.
Encouragez vos adhérent s à parler de leur
programme d’entraînement à un médecin ou un
entraîneur, en particulier s’ils n’ont pas eu d’activité
sportive pendant plusieurs années, s’ils ont plus de
35 ans ou s’ils ont des kilos superflus.
Lisez le manuel avant fair fonctionner le tapis.
Utilisez le tapis exclusivement aux fins don’t il est
destiné. N’utilisez pas d’accessoires qui n’ont pas été
recommandés par le fabricant.
Attachez toujours vos la cets ets vêtements quand
vous courez sur le tapis.
Conserver la surface du tapis propre et sèche.
Arrêtez si vous êtes pris de vertiges ou
épuisé.
Commencez toujours à une vitesse lente.
Respectez les périodes d’échauffement et de
récupération.
Vérifier où se trouve l'interrupteur STOP
d'urgence et comment l'utiliser correctement.
ROULANT
ATTENTION: DÉBRANCHEZ A LA SOURCE AVANT
D’EFFCTUER UN ENTRETIEN DU UNE RÉPARATION
ATTENTION: CONTIENT DES PIECES MOBILES.
GARDEZ LES MAINS ET LES PIEDS A L'ECART DE
LA PARTIE INFERIEURE DU TAPIS ROULANT
PENDANT SON FONCTIONNEMENT.
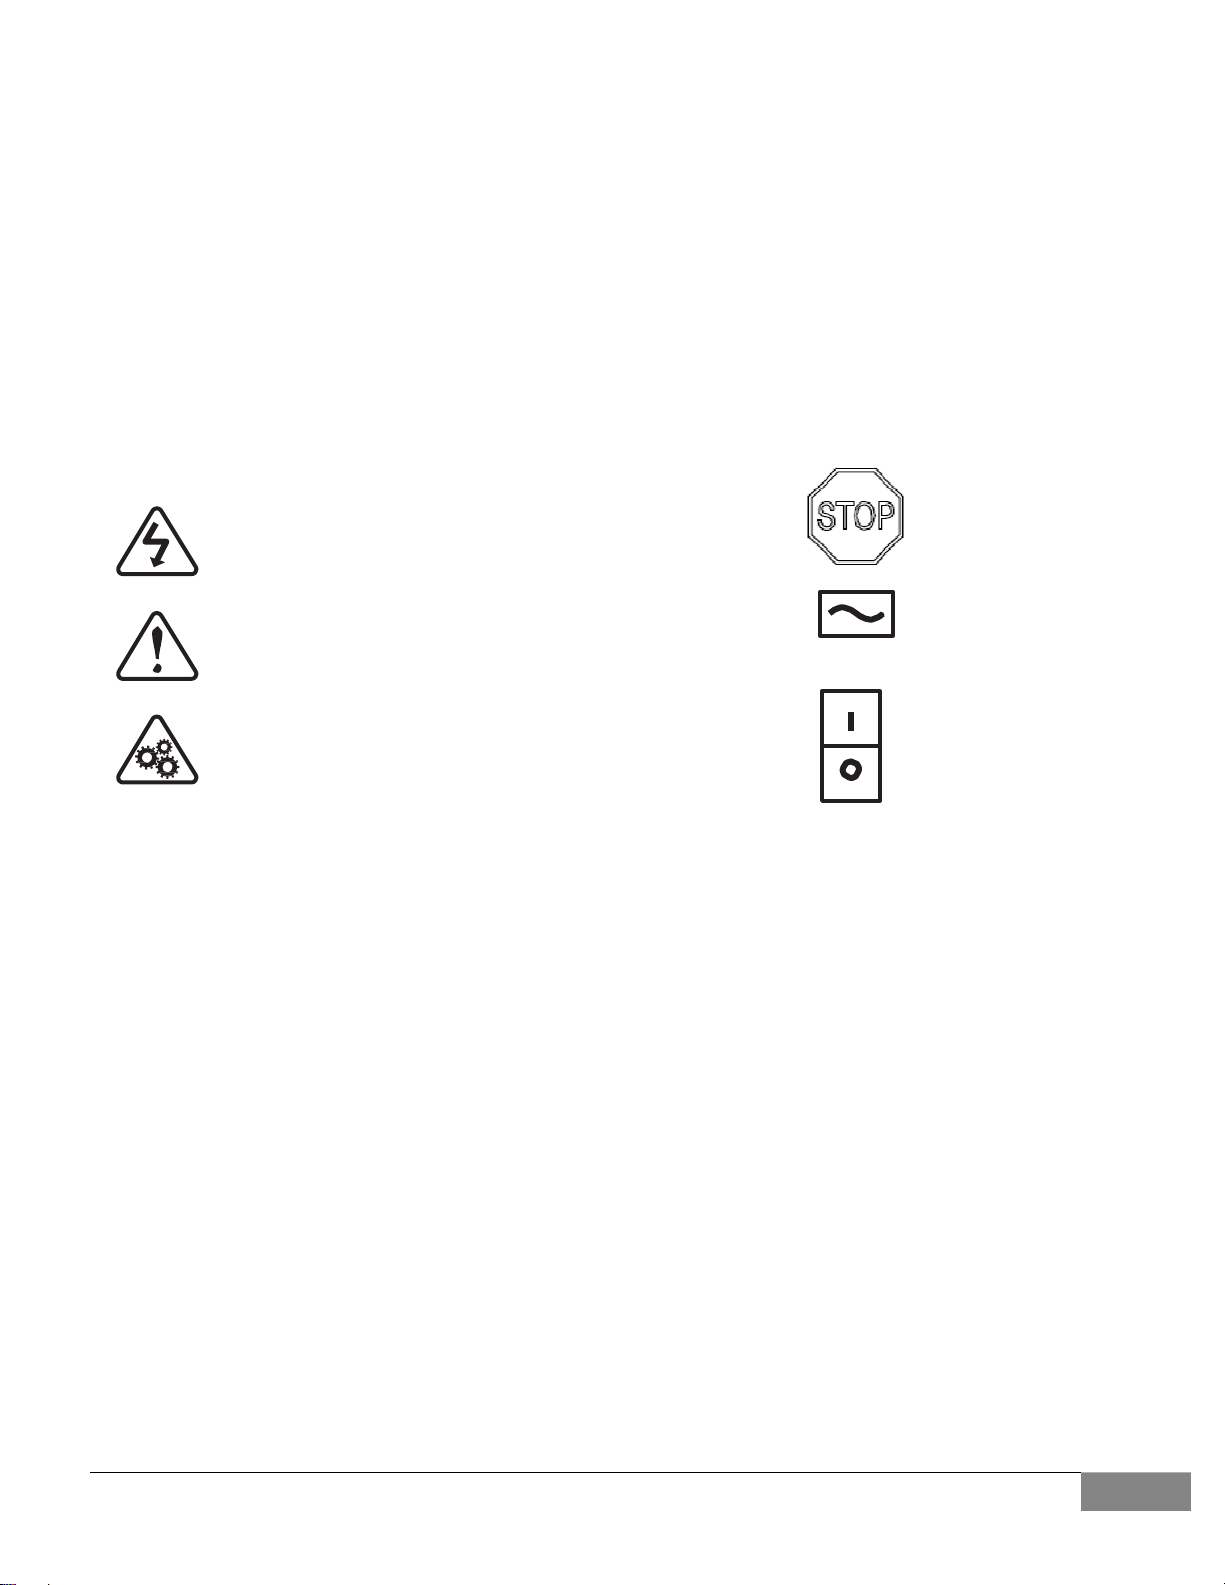
ARRÊT (MISE HORS
®
by STAR TRAC®. Assurez vous que votr personnel et
Entrez vos objectifs (voir chapitre 4).
Ne laissez pas d’enfants non-accompagnés sur le tapis.
Une surveillance très stricte est néecessaire si des
personnes invalides ou handicapées utilisent le tapis.
Ne pas dépasser la charge maximum (159 kg) admise
pour le tapis roulant.
Ne laissez jamais le tapis sans surveillance s’il est
branché. Débranchez le tapis si vous ne l’utilisez pas
ou avant de monter ou démonter des pièces.
Ne pas porter de vêtements large s ou pendants lors
de l'utilisation du tapis roulant.
Utilisez le tapis uniquement avec des chaussures
appropriées.
Ne descendez pas ou ne montez pas sur un tapis qui
est en fonction.
N’utilisez ou ne stockez jamais le tapis à l’extérieur ou
près d’une piscine.
Ne laissez rien rentre r dans les ouvertures. Ne posez
pas vos pieds sous l’appareil.
ON
OFF
SERVICE)
COURANT
ALTERNATIF
OUVRE
FERME
TREADCLIMBER by STAR TRAC - OWNER’S MANUAL | 10
Page 11
Ne posez pas de bouteilles ou verres d’eau sur
l’ appareil sans être équipé avec le ( ) en option.
Complétez votre entraînement par un régime
alimentaire.
Suivez votre progrès grâce aux informations du
tableau de bord.
Essayez d’utiliser l’inclinaison afin de brûler plus de
calories et de renforcer les muscles de membres
inférieurs.
Effectuez régulièrement l’entretien préventif du tapis.
Mettez les fils électriques à l’abri de chaleur.
Enlevez poussière, cheveux etc. de l’aération.
N’utilisez pas le tapis dans les endroits ou
des aérosols ou de l’oxygène ont été utilisés.
Débranchez le tapis avant le nettoyage ou le
changement de fusibles.
N’enlevez pas de vis, ne modifiez pas
l’appareil.
Ne serrez pas trop fort la suface caoutc houtée.
N’utilisez pas cet appareil si les fils ou la fiche sont
endommagés, s’il est tombé ou cassé. Appelez votre
distributeur pour une révision ou réparation.
SICHERHEITSVORSCHRIFTEN
WARNUNG
Dieses Produkt ist für den Gebrauch an einer passenden Netzsteckdose mit 220 Volt Spannung bestimmt und
werkseitig mit einer dafür vorgesehenen Netzleitung und einem Netzstecker ausgerüstet. Stellen Sie sicher, daß das
Gerät nur an einem Anschluß mit gleicher Bauart wie der Stecker angeschlossen wird. VERWENDEN SIE DEINEN
ADAPTER FÜR DEN BETRIEB DES PRO / PRO S. Wenn das Gerät zum Betrieb an einem anderen Stromnetz auf
einen anderen Netzstecker umgerüstet werden muß, sollte die Umrüstung durch einen qualifizierten Elektriker
durchgeführt werden.
ACHTUNG: GERÄT VOR DEM REINIGEN ODER
WARTEN VON DER STROMVERSORGUNG
TRENNEN
ACHTUNG: VOR DER BENUTZUNG
SICHERHEITSVORCHRIFTEN LESEN
ACHTUNG: BEWEGLICHE TEILE - BEI BETRIEB
HÄNDE UND FÜSSE VOM BEREICH UNTERHALB
DES LAUFBANDES FERN HAL TEN
BEDIENUNG
UNTERBRECHEN
ON
OFF
WECHSELSTROM
EIN
AUS
TREADCLIMBER by STAR TRAC - OWNER’S MANUAL |
11
Page 12

®
Sicherheitshinweise sind an Sie, den Besitzer des Laufbandes TreadClimber
Sie Ihre Mitglieder und Ihre Fitneß-Mitarbeiter an, sich an die folgenden Sicherheitsvorschriften zu halten.
LESEN SIE ALLE ANWEISUNGEN VOR DER BENUTZUNG DEL LAUFBANDES.
WARNUNG: Um das Risiko eines elektrischen Schlages zu vermeiden, nehmen Sie den Stecker des Laufbands vor dem
Reinigen IMMER aus der Netzsteckdose.
SIE SOLLTEN
Die Benutzung des Laufbandes beenden, wenn
Schwindel oder Benommenheit aufritt.
Au Ihre Grenzen denken.
Das Laufband vor jeglichen Wartungsund
Reinigungsarbeiten abschalten.
Das Gerät nur für den vorgesehenen
Verwendungszweck benutzen.
Halten Sie die Oberfläche des Bandes sauber und
trocken.
Informieren Sie sich über den Ort und die korrekte
Verwendung des Stoppschalters für den Notfall.
Regelmäßige v orbeugende
Wartungsarbeiten dur chführen.
Die elektrischen Leitungen von
Wärmequellen fernhalten.
Den Stillstand des Laufriemens abwarten, bevor Sie das
Laufband auseinanderbauen.
Die Lüftungsöffnungen frei von Staub, Haaren und
Ähnlichem halten.
Das Laufband niemals mit verdeckten Lüftungsschlitzen
betreiben
Die Stromversorgung immer am Netzschalter
abschalten.
SIE SOLLTEN NIEMALS
Kinder das Laufband unbeausfsichtigt benutzen lassen.
Achten Sie darauf, die Höchstgewichtsgre nze 159 kg) für
das Laufband nicht zu überschreiten.
Schutzvorrichtungen entfernen oder das Gerät
umbauen.
Tragen Sie keine lockere oder herabhängende
Kleidung, wenn Sie das Laufband benutzen.
Das Gerät im Freien benutzen.
Den Laufriemen überspannen.
Das Laufband mit beschädigter Net zleitung betreiben,
wenn es nicht richtig funktioniert, heruntergefallen ist
oder beschädigt wurde. Für sofortige
Reparaturunterstützung kontaktieren Sie einen
autorisierten Händler oder den Kundendienst von Star
Trac telefonisch unter +1 800-503-1221, bzw. Benutzen
Sie unsere Web-Seite unter http://www.startrac.com.
Das Laufband ohne die pa ssenden Sportschuhe
benutzen.
Gegenstände in eine Öffnung am Gerät hineinfallen
lassen.
Gegenstände, Hände oder Füße in eine Öffnung am
Gerät stecken oder diese unter das Gerät legen.
Wasserflaschen oder Trinkbecher auf das Laufband
stellen, es sei denn, Sie haben ein speziell für diesen
Zweck und für dieses Laufband gedachtes Zubehörteil.
Das Laufband in Räumlichk eiten benutzen, in denen
Produkte in Aerosol dosen (Sprays) angewandt werden
oder in denen Sauerstoff verabreicht wird.
.
by STAR TRAC®, gerichtet. Bitte weisen
TREADCLIMBER by STAR TRAC - OWNER’S MANUAL | 12
Page 13
ISTRUZIONI DI SICUREZZA
ATTENZIONE
Questo prodotto è da usare su un circuito elettrico con una tensione nominale di 220 volt ed è fornito dalla fabbrica con
un cavo elettrico e spina specifici per permettere il collegamento ad un circuito elettrico appropriato. Assicuratevi che il
prodotto sia collegato ad una presa che abbia la stessa configurazione della spina. NESSUN ADATTATORE DEVE
ESSERE USATO CON QUESTO PRODOTTO. Se il prodotto deve essere recollegato per l’uso su un circuito elettrico
diverso, il ricollegamento deve essere effettuato da un elettricista qualificato.
Queste indicazioni sono indirizzate ai proprietari del TreadClimber
palestra e al vostro staff di seguire queste istruzioni di sicurezza.
LEGGETE TUTTE LE ISTRUZIONI PRIMA DI USARE IL TREADCLIMBER.
ATTENZIONE: per redurre il rischio di scossa elettrica, staccate SEMPRE la spina della corrente del TreadClimber
STAR TRAC
®
ATTENZIONE: PRIMA DI PULIRE O ESEGUIRE LA
MANUTENZIONE, TOGLIETE LA SPINA
ATTENZIONE: PRIMA DI USARE LEGGETTE IL
MANUALE DELLE ISTRUZIONI
ATTENZIONE: PARTI IN MOVIMENTO. DURANTE IL
FUNZIONAMENTO DEL TREADCLIMBER ALLONTARE
MANI E PIEDI DAL SUO RAGGIO D'AZIONE
prima di pulirlo.
FERMA IL
MOVIMENTO
®
by STAR TRAC®. Chiedete a tutti I membri della vostra
ON
OFF
CORRENTE
ALTERNATA
ACCESO
SPENTO
®
by
TREADCLIMBER by STAR TRAC - OWNER’S MANUAL |
13
Page 14

DA FARE
Fermate il TreadClimber by STAR TRAC
svenire o avet e capogiri.
Siate coscienti dei vostri limiti. Mantenere il
nastro asciutto e pulit o.
Staccat e la spina prima di pulire, spostare o
cambiare qualsiasi parte del TreadClimber by
STAR TRAC.
Usate questo prodotto solo per l’uso inteso.
Assicurarsi di essere a conoscenza della
posizione e dell'uso corretto del pulsante di
emergenza STOP.
Eseguite la manutenzione r egolare. Mantenete la
corda elettrica lontana da fonti
di calore.
Aspettate fino a quando il nastro è completament e
fermo prima di scendere dal TreadClimber
Pulite le prese d’aria da polvere, capelli e simili. Non
usate mai il TreadClimber con le prese d’aria
bloccate.
Spegnete la macchina tramite l’interruttore.
se vi sentite
DA NON F ARE
Non permettete a bambini di usare il TreadClimber by
STAR TRAC senza sorveglianza.
Non superare il peso limite massimo consentito
(159 kg) per il TreadClimber.
Non salite o scendete dal TreadClimber by
STAR TRAC mentre è in funzione.
Non usatelo all’aperto.
Durante l'uso del TreadClimber by STAR TRAC non
indossare indumenti che possano impigliarsi in organi
in movimento.
Non tirate troppo il nastro.
Non usate il TreadClimber by STAR TRAC se il cavo
elettrico o las spina sono danneggiati, se non funziona
come dovrebbe o se è caduto o è danneggiato.
Contattate il volstro rivenditore autorizzato Star Trac o
l’ assistenze clienti dello Star Trac al numero +1 800503-1221 o visitate il nostro sito Internet a
http://www.startrac.com,
immediata. Usate il TreadClimber by STAR TRAC solo
se calzate scarpe da ginnastica.
Non lasciate cadere oggetti e non inserite mani or piedi
nelle aperture o al di sotto del TreadClimber by STAR
TRAC.
per esame o riparazione
Non appoggiate bottiglie d’acqua o bicchieri sul
TreadClimber by STAR TRAC a meno che non stiate
usando un supporto progettato appositamente per il
T readClimber b y S T A R T R A C .
Non usate il TreadClimber by STAR TRAC in posti dove
sono usati prodotti aerosol (spray) o dove è
somministrato dell’ossigeno.
Non accendete il TreadClimber by STAR TRAC con il
coperchio del motor e remosso, e non modificatelo in
nessun modo.
TREADCLIMBER by STAR TRAC - OWNER’S MANUAL | 14
Page 15
INSTRUÇÕES DE SEGURANÇA
ADVERTÊNCIA
Este produto deve ser u sado em um circuito com tensão nominal de 220 volts. Ele foi fabricado com um cabo de
alimentação e plugue específicos para permitir a sua conexão com um circuito elétrico apropriado. Certifique-se de que
o produto esteja conectado a uma tomada com as mesmas configurações do plugue. NÃO UTILIZE ADAPTADORES
PARA ESTE PRODUTO. Se for necessário reconectar a produto para utilização em um tipo diferente de circuito
elétrico, este procedimento deverá ser executado por pessoal qualificado.
ATTENÇÃO: ANTES DE LIMPAR OU FAZER
MANUTENÇÃO, DESCONECTE O APARELHO DA
TOMA DA
ATTENÇÃO: LEIA O MANUAL DE INSTRUÇÕES
ANTES DE OPERAR A ESTEIRA
CUIDADO: PROTEJA AS MÃOS E OS PÉS AO
MOVER PEÇAS COM A ESTEIRA EM
FUNCIONAMENTO.
ON
OFF
PARE (A AÇÃO)
CORRENTE
ALTERNADA
I LIGAR
O DESLIGAR
Estas observações de segurança destinam-se à você, proprietário de TreadClimber® by STAR TRAC®. Treine todos os
membros e funcionários que utilizarão o equipamento para que sigam estas instruções de segurança.
LEIA TODAS AS INSTRUÇÕES ANTES DE USAR SUA ESTEIRA
ADVERTÊNCIA: para reduzir os rescos de choque elétrico, SEMPRE desconecte a esteira da tomada antes de limpá-la
Pare de usa r a esteira se você se sentir fraco ou com
tontura.
Conserve a superfície da correia limpa e seca.
Reconheça seus limites.
Desconecte a esteira da tomada antes de limpá-la ou
antes de remover ou substituir qualquer peça.
Utilize este equipamento única e
exclusivament para o seu devido fim.
Informe-se sobre a posição e o uso ad equado da
chave de emergência STOP.
Não permita que crianças operem a est eira sem
supervisão de um adulto.
Não ultrapasse o limite de peso máximo permitido
(159 kg) especificado na esteira.
Não suba ou desça da esteira en quanto ela estiver
em movimento.
Não use roupas folgadas enquanto estiver utilizando
a esteira.
Não utilize a esteira ao ar livre.
Não estique demais o tapete da esteira.
TREADCLIMBER by STAR TRAC - OWNER’S MANUAL |
15
Page 16

Faça manutenção preventiva regularmente.
Mantenha o fio afastado de superfícies
aquecidas.
Espere até que a esteira esteja completamente parada
antes de descer do aparelho.
Mantenha as saídas de ar desobstruídas de fiapos de
tecidos, cabelos e outros objetos. Nunca opere a
esteira coma as saídas de ar bloqueadas.
Desligue o aparelho com o interruptor de força.
Não opere esta esteira se o cabo de alimentação ou
o plugue da tomada estiverem danificad os, se ela
não estiver
funcionando perfeitamente ou se tiver
sofrido queda ou danos. Procure seu
®
revendedor autorizado Star Trac
ou o
departamento de assistência técni ca
Star Trac pelo telefone 1 800-503-1221
ou
acesse nosso “web site” no ende reço
http://www.startrac.com
para fazer uma
consulta ou conserto imediato.
Não utilize a esteira sem calçar tênis.
Não deixe cair nem introduza nenhum objeto,
as mãos ou pés em nenhuma abertura do
equipamento ou deb aixo deste.
Não coloque garrafas d’água nem copos na
esteira se não estiver utilizando o devido
acessório projetado para esse fim. Não utilize a
esteira onde estejam sendo usados produtos de
aerosol (spray) ou em lugares onde esteja
sendo administrado oxigênio. Não opere o
equipamento com a tampa do motor removida
nem faça nenhuma modificação no
equipamento.
TREADCLIMBER by STAR TRAC - OWNER’S MANUAL | 16
Page 17

INSTRUCCIONES DE SEGURIDAD
ADVERTENCIA
Este producto está preparado para utilizarse en un circuito de 220 voltios y se suministra equipado de fábri ca con un
cable y un enchufe eléctricos específicos para permitir su conexión a un circuito eléctrico apropiado. Asegúrese de
que el producto se conecte a una toma de corriente con la misma configuración que el enchufe. NO UTILICE NINGÚN
ADAPTADOR CON ESTE PRODUCTO. Si este producto necesita ser modificado eléctricamente para utilizarse en un
tipo diferente de circuito eléctrico, dicha modificación debe ser realizada únicamente por el personal d e servicio
calificado.
ATENCIÓN: DESCONECTE EL SUMINISTRO DE
Estas notas sobre seguridad van dirigidas a Vd. Como propietario del TreadClimber
todos los usuarios y preparadores físicos cumplan estas instrucciones de seguridad.
LEA TODAS LAS INSTRUCCIONES ANTES DE UTILIZAR SU TAPIZ RODANTE.
ADVERTENCIA: Para reducir los riegos de sufrir una descarga eléctrica, desenchufe SIEMPRE el tapiz rodante
antes de limpiarlo.
CORRIENTE ANTES DE LIMPIAR O REPARAR
ATENCIÓN: LEA EL MANUAL DE INSTRUCCIONES
ANTES DE SU UTILIZACIÓN
ATENCIÓN: PIEZAS EN MOVI-MIENTO! MANTENGA
LAS MANOS Y LOS PIES ALEJADOS DE LA PARTE
INFERIOR DE LA CINTA CUANDO LA MISMA ESTÉ EN
FUNCIONAMIENTO
PARAR (EL
FUNCTIONAMIENTO)
CORRIENTE ALTERNA
ON
OFF
®
by STAR TRAC®. Haga que
ENCENDIDO
APAGADO
QuÉ HACER
Detenga el tapiz rodante si se nota
desfallecido o mareado.
Mantenga la superficie de la cinta seca y
limpia.
Conozca sus limitaciones.
Desenchufe el tapiz rodante antes de limpiar, quitar o
cambiar alguna pieza.
TREADCLIMBER by STAR TRAC - OWNER’S MANUAL |
QuÉ NO HACER
No permita que los niños utilicen el tapiz rodante
sin supervisión.
No sobrepase el peso máximo permitido (159 kg) para
la cinta andadora.
No suba o baje del tapiz rodante mientras está
funcionando.
No lleve ropa suelta ni que cuelgue mientras utiliza la
cinta andadora.
17
Page 18

Asegúrese de saber dónde está el interruptor de
emergencia STOP y cómo utilizarlo
adecuadamente.
Utilice este producto sólo para los usos que está
diseñado.
Realice un mantenimiento preventivo de manera
regular.
Mantenga el cable separado de fuentes de calor.
Espere a que la cinta móvil haya parado ant es
de descender del tapiz rodante.
Mantenga las entradas de aire libres de pelusa,
pelo y similares. No utilice nunca el tapiz rodante on
las entradas de aire bloqueadas.
Desconecte de la corriente por medio del
disyuntor.
No debe utilizarse en exteriores. No tense demasiado
la cinta móvil.
No utilice este tapiz rodante si tiene el cable o el
enchufe dañados, si no funciona adecuadamente o si
ha sufrido algún golpe o deterioro. Póngase en
contacto con su vendedor autorizado de StairMaster,
con el departamento de servicios de Star Trac
llamando al número +1 800-503-1221
nuestra página de la web en http://www.startrac.com,
para un examen o reparación immediatos.
No utilice el tapiz rodante sin calzado deportivo.
No deje caer ni introduzca ningún objeto, manos o pies
en ninguna abertura del aparato o debajo del mismo.
No deje botellas de agua ni tazas sobre su tapiz
rodante excepto si utiliza el accesorio adicional
diseñado para este fin. No. utilice su tapiz rodante en
lugares en los que se están usando productos
aerosoles (en spray) o en los que se está
administrando oxígeno.
No encienda este aparato con la cubierta del motor
retirada, ni lo modifique de ninguna manera.
o accediendo a
TREADCLIMBER by STAR TRAC - OWNER’S MANUAL | 18
Page 19

SIKKERHEDSINSTRUKTIONER
ADVARSEL
Dette produkt er ber egnet til brug i forbindelse med et el-net med nominel effekt på 220 volt. Det leveres med særlig
ledning og stik fra fabrikken, som kun passer til den korrekte type el-net. Sørg for, at produktet
er sat til en stikkontakt, som har samme konfiguration som stikket. DER MÅ IKKE BRUGES ADAPTER TIL DETTE
PRODUKT. Hvis produktet absolut skal omstilles til en anden slags el-net, skal omstillingen foretages af kvalificeret
servicepersonale.
Disse sikkerhedsbemærkninger henvendes til ejeren af TreadClimber® by STAR TRAC®. Sørg venligst for, at alle
medlemmer
og alt kondipersonale kender og følger disse sikkerhedsregler.
LÆS ALLE INSTRUKTIONERNE, FØR DU BRUGER DIN TRÆDEMØLLE.
ADVARSEL: For at mindske risikoen for at få elektrisk stød, skal du ALTID trække trædemøllens stik ud af kontakten,
før du gør den ren.
FORSIGTIG: AFBRYD EL-KABLET, FØR DU GØR
RENT ELLER SERVICERER.
FORSIGTIG: LÆS INSTRUKTIONSHÅNDBOGEN
FØR BRUG
FORSIGTIG: RÖRLIGA DELAR - LÅT INGA HÄNDER
ELLER FÖTTER BEFINNA SIG UNDER LÖPBANDET
NÄR DET ÄR IGÅNG
STOP (AF FUNKTION)
VEKSELSTRØM
ON
OFF
TÆND
SLUK
SKAL
Stig af trædemøllen, hvis du bliv er mat i kroppen
eller svimmel.
Kend dine begrænsninger.
Håll löpbandets yta torr och ren.
Træk trædemøllens stik ud af kontakten, før du gør den
ren, eller fjerner eller udskifter en del.
Brug ikke trædemøllen udendørs.
MÅ IKKE
Tillad ikke børn uden opsyn at bruge trædemøllen.
Överstig inte maximalt tillåtna vikt (159 kg) för
löpbandet.
Stig ikk e på eller af trædemøllen, mens den kører.
Bär inga löst hängande kläder som kan fastna när du
använder löpbandet.
Stram ikke løbebåndet for meget.
TREADCLIMBER by STAR TRAC - OWNER’S MANUAL |
19
Page 20

Brug kun produktet til det formål, det er beregnet til.
Foretag forebyggende vedligeholdelse med
regelmæssige mellemrum.
Tänk på placeringen av löpbandet samt att du endast
använder nödknappen STOP när det är nödvändigt.
Holdledningen fri af varmeanlæg.
Vent til løbebåndet standser, før du stiger af trædemøllen.
Hold ventilationsåbningerne fri for fnug, hår og lignende.
Brug aldrig trædemøllen med blokerede
luftventilationsåbninger.
Sluk for elektriciteten på afbryderkontak ten.
Brug ikke trædemøllen, hvis ledningen eller stikket er
beskadiget, hvis trædemøllen ikke fungerer rigtigt, eller
hvis den er faldet ned eller væltet og er blevet beskadiget.
Kontakt den autorese rede Star Trac
®
, forhandler eller
serviceafde-lingen hos Star Trac Ring på +1 80 0-5031221 eller du kan få fat i os på vores web-site:
http://www.startrac.com
for øjeblikkeligt eftersyn eller
reperation.
Brug ikke trædemøllen uden kondisko. Undgå at tabe
eller at stikke genstande,
hænder eller fødder ind i en åbning i eller
under udstyret.
Stil ikk e vandflasker eller kopper på trædemøllen,
medmindre du har dertil beregnet tilbehør, som er
specielt designet til trædemøllen. Brug ikke
trædemøllen på steder, hvor der bruges
aerosolprodukter (spray), eller hvor der administreres
ilt.
Udstyret må ikke køre uden motorafskærmning, og det er
ikke tilladt at ændre udstyret på nogen måde.
TREADCLIMBER by STAR TRAC - OWNER’S MANUAL | Assembly & Setup 20
Page 21

Assembly & Setup
Use the following procedures to unpack and assemble your TreadClimber
®
Unpacking & Parts List
Remove the top cover from the shipping carton. Remove all parts and shipping supports (except the base) from the
carton, and verify that the following parts are included in your shipment:
Parts List:
Console Frame
Neck Mast
Handrail Grommets
Upper Handrails (Left & Right)
Handrail Beauty Rings
Lower Handrails (Left & Right)
Rear Corner Shroud (Left & Right)
Hardware Pack
Rear Shroud
Neck Grommet
Take time now to enter your TreadClimber serial number in the space below (serial number is located along the base of the
frame in the front). If parts are missing, or if you have any operational questions, please call Star Trac’s Service department
at (800) 503-1221. Have your serial number ready.
Serial No.____________________________________________ _
NOTE: If you are missing any of the parts listed above, inspect the packing material and the box for items that may have
been overlooked. If parts are missing, or if you have any product questions, please call Star Trac’s Service Department at
(800) 503-1221, please have your TreadClimber serial number ready.
CAUTION: Damage to the TreadClimber during assembly is not covered as part of the limited Star Trac warranty.
Note: This manual covers installation of the LED display. If you ordered a PVS kit, please refer to the assembly
and operating instructions included with that product for proper setup and operation.
Tools Required
Your TreadClimber can be assembled using the following tools:
Metric Hex Key Wrenches
Metric Open-End Wrenches
Metric Ratchet Socket Wrench
30mm Socket for Raising Rear Wheels
SetTorque Wrench
Phillips Head Screwdriver
TREADCLIMBER by STAR TRAC - OWNER’S MANUAL | Assembly & Setup
21
Page 22

Assembly Instructions
1. Locate an open area to unbox the packaged
TreadClimber
2. Cut all straps to remove the cardboard packaging along
with any protective wrapping to expose the palletized
TreadClimber base (Fig. 2).
(Fig.1).
Fig. 1
3. Move all unattached components off the TreadClimber
base (Fig. 3).
Hardware:
Console Frame
Neck Mast
Handrail Grommets
Upper Handrails (Left & Right)
Handrail Beauty Rings
Lower Handrails (Left & Right)
Rear Corner Shroud (Left & Right)
Hardware Pack
Rear Shroud
Neck Grommet
TREADCLIMBER by STAR TRAC - OWNER’S MANUAL | Assembly Instructions 22
Fig. 2
Fig. 3
Page 23

4. To move the TreadClimber off the pallet; remove the
alternator shroud to expose the transport grip handles.
With two people and each gripping a handle; drive the
base off the rear of the pallet (Fig. 4).
5. Remove and store the transport grip handles (Fig. 5)
once the TreadClimber base is safely on the floor. The
transport grip handles can be reattached for future
transport.
Fig. 4
6. Mount the neck mast (Fi g. 6) to the ba se by lightly
torquing four socket head cap screws in place at the
front of the base frame.
Final Torque:
o 240 In-Lbs (27 Nm)
Fig.5
Fig. 6
TREADCLIMBER by STAR TRAC - OWNER’S MANUAL | Assembly Instructions
23
Page 24

7. Connect the cables extruding through the lower section
of the neck mask into the corresponding locations on
the lower base (Fig. 7).
8. Mount the left & right lower handrail secti ons to the
TreadClimber
base and loosely thread four socket
head cap bolts to each handrail mount (Fig. 8) along
with sliding on the corresponding left & right handrail
grommets into place.
Final Torque:
o 240 In-Lbs (27 Nm)
Fig. 7
9. Slide a beauty ring onto each lower handrail section
(Fig. 9) and mount the upper handrail by loosely
threading two button head cap screws in place. Verify
that the radius cutout clears the lower securing screw.
Final Torque:
o 35 In-Lbs (4.0 Nm)
Fig. 8
Fig. 9
TREADCLIMBER by STAR TRAC - OWNER’S MANUAL | Assembly Instructions 24
Page 25

10. Slide on the second set of beauty rings (Fig.10) onto
each upper handrail while making sure the radius
cutouts clear the available threaded holes.
11. Slide the console frame onto each upper handrail
(Fig. 11) and rest the center of the console frame on
top of the neck mast plate.
12. Loosely thread four socket head cap screws (Fig. 12)
with washers through the neck mast mount plate on to
the console frame mount plate.
Final Torque:
o 240 In-Lbs (27 Nm)
Fig. 10
Fig. 11
TREADCLIMBER by STAR TRAC - OWNER’S MANUAL | Assembly Instructions
Fig. 12
25
Page 26

13. Secure the console frame to the handrails (Fig. 13) by
loosely threading two button head cap screws trough
the rail into the console frame.
Final Torque:
o 35 In-Lbs (4.0 Nm)
14. Using a torque wrench, go back to steps: 6, 8, 9, 12, &
13 to thread all bolts mentioned in each step to their
corresponding final torque (Fig. 14) specifications
which are listed in the notes section of the step
instructions.
Fig. 13
15. Hover the top half of the display (Fig. 15) over the
console frame.
TREADCLIMBER by STAR TRAC - OWNER’S MANUAL | Assembly Instructions 26
Fig. 14
Fig. 15
Page 27

16. Mate all the applicable electrical connections to the
back of display electronics board (Fig. 16).
17. Slide the left & right display alignment studs (Fig. 17)
into the corresponding console frame guide holes to
rest the top half of the display on to the console frame.
Fig. 16
18. From the back of the display (Fig. 19), connect the
display’s grounding wire to the frame using a washer &
Phillips head screw (Fig. 18).
Fig. 18
TREADCLIMBER by STAR TRAC - OWNER’S MANUAL | Assembly Instructions
Fig. 17
Fig. 19
27
Page 28

19. Secure the display to the console frame by installing
six Phillips head screws with washers (Fig. 18) at the
corresponding circled locations (Fig. 20).
20. Mate the back shroud of the display with the rest of the
assembly by installing eight Phillips head screws at the
corresponding circled locations (Fig. 21).
Fig. 20
Fig. 21
21. Dislodge the rear step shroud from the TreadClimber
base (Fig. 22) and move the handrail grommets up the
handrails.
Fig. 22
TREADCLIMBER by STAR TRAC - OWNER’S MANUAL | Assembly Instructions 28
Page 29

22. Mount the rear shroud to the TreadClimberbase and
secure it in place by installing the corresponding five
Phillips head screws to the top (Fig. 23) and lower
(Fig. 24) sections at the circled locations.
Fig. 23
23. Mount the left & right corner shrouds (Fig. 25) and
secure them in place by installing the corresponding
four Phillips head screws to each shroud at the circled
locations.
Fig. 24
24. Mount the rear step shroud (Fig. 26) and wedge the left
& right handrail grommets into the available open
space between the shrouds. Secure the rear step
shroud by installing the corresponding five Phillips
head screws at the circled locations.
TREADCLIMBER by STAR TRAC - OWNER’S MANUAL | Assembly Instructions
Fig. 25
Fig. 26.
29
Page 30

25. Install the front alternator shroud (Fig. 27) and secure it
in place by installing the corresponding two Phillips
head screws at the circled locations.
26. Wedge the neck grommet (Fig. 28) between the
alternator shroud and neck mast.
Fig. 27
27. With two or more people, have one person carefully
the assembled TreadClimber (Fig. 29) at an angle by
pushing up at the center of each handrail while the
second person installs the rear stabilizing feet.
TREADCLIMBER by STAR TRAC - OWNER’S MANUAL | Assembly Instructions 30
Fig. 28
tilt
Fig. 29
Page 31

28. Transport/push (Fig. 30) the TreadClimberto its final
location by rolling it into position.
29. Dislodge the rear step plugs (Fig. 31) to expose the
wheel jacking bolts. Turn the bolts in a counter clock
direction to retract the rear wheels into the base and
rest the machine on the rear stabilizing feet.
Fig. 30
Fig. 31
30. Wedge the cover plugs back into the rear step shroud
once the TreadClimber is resting on the stabilizing feet.
31. Plug the power cord into the power & connections
panel located at the front of the machine (Fig. 32).
Fig. 32
32. Power on the machine and enter into “Maintenance Mode” to process a “Motor Calibration” procedure.
Once “Motor Calibration” is complete; the TreadClimber is ready for initial use.
TREADCLIMBER by STAR TRAC - OWNER’S MANUAL | Assembly Instructions
31
Page 32

Operating Instructions
Operating the TreadClimber
an article of your clothing, press QUICK START, and begin walking. The belt will begin at 0.5 mph (0.8 km/h) and
the level will be on level 1
IMPORTANT: Before operating the unit, you must be familiar with the following equipment limitations and safety
features.
Maximum Weight: Your TreadClimber is designed for a maximum user weight of 350 lbs/159 kg. DO NOT
exceed the maximum user weight.
S
TOP
SWI
TCH
Emergency Stop: In ca se of emergency, press the STOP on the Hot Bar or pull the Pull Cord Stop on the Hot
Bar.
Immobilizing the Running Belt: To power the unit, set the ON/OFF power breaker to the ON position. To turn
the unit off, set the ON/OFF power breaker to the OFF position. When the unit is turned off, movement of the
running belt is prevented.
Safety Lockout Feature: Allows you to lock out the TreadClimber. When locked, the display shows the message
"LOCKED, ENTER ID TO UNLOCK". The user must press "0", enter a 5-digit ID number (default=12345), then
press ENTER to unlock the unit. Unit will then operate as normal (NOTE: The unit will lock back up if it is idle for
30 seconds). Use the LOCK OUT option in MAINTENANCE SETTINGS to enable/disable the lock out feature;
use the LOCKOUT ID option to change the default ID (see Settings & Testing).
®
is very easy. Simply step onto the treadles, securely attach the pull cord STOP to
ON / OFF POWER BREAKER
TREADCLIMBER by STAR TRAC - OWNER’S MANUAL | Operating Instructions 32
Page 33

DISPLAY CONTROL PANEL FEATURES
Your TreadClimber is equipped to provide you and your users unlimited exercise opportunities. Experiment with its
features to find the right combination for your fitness regimen. The Display panel shown on the following provides
the operating controls and display elements described in the following:
QUICK START Key: Starts your TreadClimber moving using a default weight of 155 lbs / 70 kg and a
time limit of 99 minutes. QUICK START will allow you to manually operate the unit. The QUICK START
Graphic Display: Traces your progress
through each of the pro grams and allows you
to anticipate changes in terrain. Display
elements illuminate from left to right across
the bottom of the display to indicate your
progress through the cou rse. At each step,
display elements illuminate in columns to
indicate your ascent up the gradient that is in
effect.
Speed Window: Shows the speed at which the user is walking/running.
key also
STOP Key : Pauses your workout when pressed once. Ends your workout when pressed twice.
Speed Keys: During Program setup, press the or keys, respectively, until the desired
speed appears in the Information Window, then, press START or key. During a Program, press
the or keys, respectively, to increase or decrease belt speed in 0.1 miles per hour (mph)
or 0.1 kilometers per hour (km/h) increments. Speed cannot be higher than the es tablished
“MAXIMUM SPEED” parameter. These keys repeat when pressed and held.
Incline Level Keys: Adjust the amount of up and down movement of the treadles from 1 (minimum) to 5
(Maximum). These keys repeat when pressed and held.
Incline Level Window: Shows the incline level fr om 1 to 5.
Numeric Keypad: Allow you to enter specific values for program parameters during program setup.
The numeric keypad can also be u se d to adjust TreadClimber
operating.
OK Key: Selects/Enters values and pro grams during set-up.
Time Window: Shows the total time you have walked so far.
Distance Window: Shows the total number of miles or kilometers you have walked thus far.
serves as an “Enter” key in programming modes.
®
speed while the TreadClimber is
TREADCLIMBER by STAR TRAC - OWNER’S MANUAL | Operating Instructions
33
Page 34

Calorie Window: Shows your approximate aggregate caloric expenditure thus far in your workout.
Heart Rate Indicator: Pulsates to indicate your heart rate has been acquired through the use of the
heart rate strap or heart rate grips.
Fan Key: Allows you to control the speed of the personal cooling fan, either OFF, LOW or HIGH.
Heart Rate Display: Shows your current heart rate in beats per minute (BPM) while wearing the heart rate strap or
grasping the heart rate grips.
PROGRAM Keys: Allow you to access a desired workout program.
Information Window: Provides informational messages, prompts during program setup, notification when your
workout is complete, and scrolling summarized workout data during and after a workout. Depending on the program
completed and settings as set in Maintenance Setting s mode, workout data may include:
Time remaining
Distance remaining - miles or kilometers
Calories expended per hour
Minutes per mile/kilometer
Vertical distance travelled - feet or meters
METS
Heart Rate
TREADCLIMBER by STAR TRAC - OWNER’S MANUAL | Operating Instructions 34
Page 35

HOT BAR® CONTROL FEATURES
The Hot Bar is designed to provide
quick access buttons for speed and,
incline adjustment and engaging the
stop button will stop all movement.
Push “+” down on the dual-action
button or away to increase the spe ed
of incline level. Push “-“ down or pull
to decrease.
Stop Butt on: Push on the red
Dual Purpose Stop Button to stop
the unit or to reset after the
emergency lanyard has been
pulled.
Pull Cord Stop: Clip on the Pull Cord Stop to your shirt for proper application. A tug on the cord will trip the emergency
stop switch and the TreadClimber
theTreadClimber.
®
will stop operating. Press on the red Dual Purpose Stop Button to reset
Stop Lanyard Clip
Pull Cord Stop
SAFTEY FIRST
Your TreadClimber is equipped with an easy to reach HOT BAR® that provides you with an additional PAUSE/STOP
button and a Stop Switch.
The Stop Lanyard Clip attached to the HOT BAR® is provided for your protection to stop the machine. Always attach
the Stop Lanyard Clip to your clothing before each workout. Attach it to your clothes near the waistline. If the cord
is pulled the Stop Switch will be activated and the treadmill will stop operating. If the Stop Switch has been activated,
press the smaller yellow RESET button to reset the TreadClimber and resume normal operation.
During use, press the red STOP button to PAUSE your workout. Press the STOP button a second time while in Pause
mode to stop and cancel the workout program.
Important: Facility owners, managers, personal trainers and personnel. Remind users of the importance of always
attaching the Stop Lanyard Clip before operating the unit. It is the facility’s responsibility to train and instruct in the proper
use of the TreadClimer by Star Trac including use of all of the safety features.
Note: A clipping feature is provided in the display housing to store the Stop Lanyard Clip when the unit is not in use.
SAVE THESE INSTRUCTIONS
TREADCLIMBER by STAR TRAC - OWNER’S MANUAL | Operating Instructions
35
Page 36

HINTS AND TIPS FOR GETTING ST ARTED
The following hints and tips will assist in training your users to maximize the fitness b enefits of yourTreadClimber.
Walk at a rate that feels co mfortable and most natural, yet is sufficiently vigorous to get a good cardio workout. When
using the TreadClimber for the first time or after an extended absence, keep the level set to level 1 and build up the
walking speed prior to adjusting to more challenging levels.
Try different walking rhythms. In manual operation, adjust your pace from low speed to high speed, then back to low.
As you become more comfortable with the machine try going faster or using the preset programs.
Watch the Graphic Display to anticipate incline level changes. When you use the preset programs, the display shows
changes in incline level as tall or short columns. The display also notifies you of incline level chang es with a series of
beeps and a flashing display element.
For best workout, use the highest incline level that you can safely control. Using a more challanging incline level
will greatly increase your work effort and calorie burn, even at low speed.
TREADCLIMBER by STAR TRAC - OWNER’S MANUAL | Operating Instructions 36
Page 37

Quick Start
Quick Start lets you begin your workout by simply pressing one key. Quick Start uses a default weight of 155 pounds
and a time limit of 99 minutes. YOU control the speed, incline level and distance for up to the maximum allowed
program time.
To operate the Quick Start program:
1 Stand on the machine and pr ess the QUICK START key. The walk belt slowly accelerates to minimum speed of 0.5
mph (0.8 km/h).
2 You can adjust the incline level of the unit during the program:
You can adjust incline level from 1 to 5. Pr ess the key to increase the level; press the
key to decrease.
3 You can adjust the speed during the program:
You can specify a desired speed using the numeric k eypad. Use the keys to enter your
desired speed then press the key to accept the entered speed.
You can adjust speed in 0.1 mph (or 0.1 km/h) increments. Press the key to increase speed;
press the key to decrease.
4 You can pause the program during your workout by pressing the STOP key once. The program will pause for a
preset period of time (either 30, 45, 60, 90 or 120 seconds, as set in the Manager Mode). The default time is 45
seconds. Press the START key BEFORE the pause timer expires to resume your program. The unit returns to its
minimum speed when you exit the pause mode.
5 When you have reached your workout goal, the unit will enter the Cooldown cycle (see “Cooldown Cycle” for more
information). If you wish to exit your prog ram before you have reached your workout goal, press the STOP key
twice. The unit will slow to a stop. (Press the STOP key once during a Pause t o exit the program.)
TREADCLIMBER by STAR TRAC - OWNER’S MANUAL | Operating Instructions
37
Page 38

Preset Programs
The TreadClimber® offers several preset programs to add variety and challenge to your workout.
Goal-Based Programs (Time, Calories, Distance)
When you begin a workout, often you have a goal in mind. With the TreadClimber, y ou can set your program to your
personal goal, and it will track your progress to help you reach it. You can set a goal for TIME, CALORIES or
DISTANCE.
For all three goal types, after you select the program, the console will prompt you to enter the goal. You can enter the
goal directly using the numeric keypad, or you can use the Speed UP/DOWN buttons to change the number on the
display. When you have the number you desire entered, press the OK button to select. The go al ranges are:
TIME: 5-99 Minutes
CALORIES: 50 - 2,000
DISTANCE: 1 - 19.8 Miles / 1 - 33 Kilometers
After your goal value is entered, the console will ask for user weight. The user weight is important for the calorie
calculation during the exercise session, so it is important to enter this for the most accurate calorie calculation possible.
The user weight is not stored and automatically erased after the exercise session. You will enter the weight in the same
way as the goal values above, and press OK when done.
Once the workout begins, you can adjust speed and incline level as desired.
Intervals
The Intervals program allows you to customize an interval-based workout to your needs. When y ou select this option,
the console will prompt you to enter user weight. Then you will be prompted to enter the Interval Parmeters for the
workout: interval time, number of intervals, speed, lev el and time for both the work (Max) and recovery (Min) intervals.
The entered paramet ers are:
Interval Time
Number of Intervals
Min Interval Speed
Min Interval Incline Level
Max Interval Speed
Max Interval Level
Rolling Hills
This program provides variety by periodically changing the Speed and / or Incline Level over the course of the workout.
When you select this option, the console will prompt you to enter the total time desired for the workout (5 - 99 minutes),
user weight, maximum speed desired and maximum level desired. The workout will begin at a low speed and level, and
the TreadClimber will adjust the Speed and Level as you go. Speed and Level can also be adjusted manually at any
time.
TREADCLIMBER by STAR TRAC - OWNER’S MANUAL | Operating Instructions 38
Page 39

Heart Rate Training Programs
The TreadClimber
NOTE: For best results, use a HR strap. Contact HR grips
may provide a less accurate reading and can le ad to a
less effective workout, due to holding onto the
TreadClimber.
®
offers two HR training programs.
Constant Heart Rate Control
This program is designed to maintain y our HR at a constant level by varying your walking speed over the course of the
workout. Note that your HR will vary above and below the target rate during the program.
When you select this program, the console will prompt you to enter the total time desired for the workout
(5 - 99 minutes), user weight and your target HR (70 - 200 bpm). When all parameters are entered,
the workout will begin and continue for the time entered.
Heart Rate Intervals
This program is designed to gradually elevate your heart rate to the upper end of your sele cted training range, then
gradually decrease your heart rate to the lower end of your training range by setting Incline Level to 5 and varying
speed. During the workout, this cycle will repeat several times, creating an interval training effect that is customized to
your desired training range.
When you select this program, the console will prompt you to enter the total time desired for the workout (5 - 99
minutes), user weight and your Lower a nd Upper Target HR (70 - 200 bpm). When all parameters ar e entered, the
workout will begin and continue for the time entered.
NOTE: during setup, there must be at least an 18 BPM difference between the lower and upper HR limits to ensure an
interval workout.
TREADCLIMBER by STAR TRAC - OWNER’S MANUAL | Operating Instructions
39
Page 40

Cooldown Cycle
Once you have completed y our workout program, the TreadClimber
adjust speed and incline level during this cycle to desired levels.
When the cooldown cycle ends, the unit will slow to a stop. If you wish to exit the cooldown cycle before it ends
automatically, press the STOP key.
®
enters a 2-minute cooldown cycle. You can
Using the Cooling Fan
Star Trac is the originator of integrating a fan into a piece of cardio equipment. The TreadClimber built-in cooling fan can
increase your comfort during a workout. You can control the fan speed during your workout. The fan will automaticlly turn
on one minute into your workout.
To operate the cooling fan:
Press the FAN key once to set the fan speed to high.
Press the FAN key a second time to set the fan speed to low.
Press the FAN key a third time to turn the cooling fan off.
The fan will remain at the set speed if you pause y our program. The fan will turn off automatically if you exit your
workout, or when you complete your program.
If the cooling fan is not available for use, the Information Window displays an advisory message when you press the FAN
key.
Heart Ra te Monitoring
Heart rate monitoring can help you to determine if y our workout is too challenging or not challenging enough. Monit oring
heart rate is easy with the TreadClimber, which provides both chest strap compat ibility, and heart rate grips that allow
you to monitor your heart automatically. Your goal will be to keep your exercise h eart rate at 60 to 90 percent of the
theoretical maximum for your age as listed on the Target Heart Rate table shown on the TreadClimber by STAR TRAC
console.
NOTE: The Heart Rate monitor is not a medical test, nor is it designed as a medical test. It is simply a guide to target
heart rate training. Please consult with your physician prior to engaging in any str enuous physical activity.
IMPORTANT: Star Trac does not warrant the heart rate system performance on this product, as the heart rate system
performance varies, based on a user’s physiolo gy, fitness level, age, method of use and other factors. Furthermore, the
heart rate system is not for medical use.
TREADCLIMBER by STAR TRAC - OWNER’S MANUAL | Operating Instructions 40
Page 41

Cont act Heart Rate Monitoring
You may use the heart rate contact grips to automatically check your heart rate. Just follow these steps:
1 Grasp the stainless steel heart rate contact grips; you do not have t o squeeze tightly.
2 When a heart rate has been detected, the icon displays in the Information Win dow, indicating a
calculation is taking place.
3 When your heart rate has been acquired, the icon will begin pulsating, and your heart rate in beats per minute
(BPM) will be displayed in the Information Window continuously.
4 Release the Heart Rate grips if you wish to remove your heart rate from the display.
NOTE: Contact heart rate may not give accurate BPM.
Chest Strap Heart
Rate
Monitoring
You may use a heart rate strap ( not included) to automatically check your heart rate. Just follow these steps:
1 Before beginning your workout, or d urin g a pause, moisten the back of the transmitter on the heart rate strap (not
included). Place the strap snugly around y our chest with the transmitter resting directly over your sternum.
2 When a heart rate has been detected, the indicator illuminates, indicating a calculation is taking place.
3 When your heart rate has been acquired, the indicator will begin pulsating, and your heart rate in beats
per minute (BPM) will be displayed in the Heart Rate Window continuously.
4 Remove the heart rate strap if you wish to remove your heart rate from the display.
NOTE: The performance of the transmitter may be affected by body types, body oils, metal in clothing, and outside
electrical interference. Always be sure that the transmitter and skin are in good contact. Avoid operating other electrical
equipment near your TreadClimber
®
when you use the heart rate strap.
TREADCLIMBER by STAR TRAC - OWNER’S MANUAL | Operating Instructions
41
Page 42

Settings & Testing
After having used your TreadClimber® for many workouts, you may wish to change some of its settings
Manager Mode
The Manager Mode allows you to query and modify the basic settings of your unit. To enter Manager Mode:
1. Press and hold the , and keys together.
2. A beep will sound and “MANAGER MODE” will display momentarily in the Information Window.
3. Release the keys. “MCI VX.XX CKSM XXXX” will display in the Information Window.
NOTE: The system will automatically exit Manager Mode if no key is pressed for 30 seconds. The following keys are
available in MANAGER MODE:
Incline Keys: Displays the next and previous parameter, respectively. Keys will repeat if held.
Speed Keys: Adjust the value o f the displayed parameter up and down, respectively, in increments of
1 unit or 0.01 unit, as appropriate for the p arameter . These keys do not save the new value – (see Key
below).
OK Key: Updates (saves) the value of the displayed parameter in Flash memory. Alternatively, the
START key may be used (see above).
Number/Program Select Keys: Enter new data item values for numeric parameters.
Stop Key: Exits Manager Mode and restarts the TreadClimber by STAR TRAC greeting.
The items that you may display and change with the previous keys are:
Item Lowest
Value
Default
Value
Highest
Value
Meaning
MC1 V X.XX N/A N/A N/A Display’s primary processor software version and checksum.
LCB V X.XX N/A N/A N/A Display’s secondary processor software version and checksum.
SERIAL NO 0 0 65,535 TreadClimber serial number.
UNITS - ENGLISH - English = units of pounds, miles, hours, minutes, seconds, feet, inches;
TIME 5 99 99 Maximum time in minuts allowed for program, including warm-up.
WEIGHT 1 155/70 500/226 Default (to user), typical weight in lb (UNITS=English), or kg
TREADCLIMBER by STAR TRAC - OWNER’S MANUAL | Operating Instructions 42
Metric = units of kilograms, kilometers, hours, minutes, seconds,
centimeters.
(UNITS=Metric).
Page 43

r
r
Item Lowest
Value
LANGUAGE - English - Language in English, Dutch, French, German, Portuguese, Spanish,
METS OFF OFF ON ON=METS display enabled.
PAUSE 30 45 120 Pause duration during a program, in seconds, either 30, 45, 60, 90 or
AUTO FAN OFF ON ON Turns ON the fan 1 minute into the program.
TREADLE OFF ON ON ON=Elevation function enabled.
SENSE
AUTO STOP OFF OFF ON ON=Auto stop feature enabled.
CSAFE OFF OFF ON ON=CSAFE communication enabled.
LOCK OUT OFF OFF ON ON=Treadmill lock out enabled.
LOCKOUT ID 10000 12345 65535 Treadmill lockout ID.
MINIMUM 0.5/0.8 0.5/0.8 2.0/3.2 Minimum speed in mph (UNITS=English), or km/hr (UNITS=Metric).
SPEED*
MAXIMUM 5.0/5.0 10.0/16.0 12.5/20.0 Maximum speed in mph (UNITS=English), or km/hr (UNITS=Metric).
SPEED*
ACCELERATI- 3 11 30 Time, in seconds, to reach maxmium speed from 0 mph (0 km/hr).
ON TIME
DECELERATI- 3 11 30 Time, in seconds, to reach 0 mph (0 km/hr) from maximum speed.
ON TIME
Default
Value
Highest
Value
Meaning
Swedish, Italian or Katakana.
OFF=METS display disabled.
120.
OFF=Elevation function disabled.
OFF=Auto stop featu
OFF=CSAFE communication disabled.
OFF=T
Caution: See Motor Calabration before making any changes.
eadmill lock out disabled.
e disabled.
When the MINIMUM SPEED or MAXIMUM SPEED parameters are changed, unit will perform an auto calibration. To
terminate the auto calibrati on and return the parameter to its default setting, press the STOP key.
Maintenance Mode
Your Service Representative may need to chec k accumulated data about the past usage of your unit, test its motor and
display controls, or investigate error messages. For these reasons, your unit
is equipped with Maintenance Mode. Maintenance Mode includes all of the items available through Manager Mode, plus
additional items for Service and Diagnostic use. To enter Maintenance Mode:
1. Press and hold the , and keys together.
2. A beep will sound and “MAINTENANCE MODE” will display momentarily in the Information Window.
3. Release the remaining keys. “MCI VX.XX CKSM XXXX” will display in the Information Window.
TREADCLIMBER by STAR TRAC - OWNER’S MANUAL | Operating Instructions
43
Page 44

The following keys are available in MAINTENANCE MODE:
The items that you may display and change with the previous keys are:
Item Lowest
MC1 V X.XX N/A N/A N/A Display’s primary processor software version and checksum.
LCB V X.XX N/A N/A N/A Display’s secondary processor software version and checksum.
SERIAL NO 0 0 65,535 TreadClimber serial number.
OPER 0 0 65,535 Total operating hours.
DISTANCE 0 0 65,535 Total TreadClimber miles (UNITS=English), or km (UNITS=Metric).
UNITS - ENGLISH - English = units of pounds, miles, hours, minutes, seconds, feet,
TIME 5 99 99 Maximum time in minutes allowed for program, including warm-up.
WEIGHT 1 155/70 500/226 Default (to user), typical weight in lb (UNITS=English), or kg
LANGUAGE - English - Language in English, Dutch, French, German, Portuguese, Spanish,
METS - OFF - ON=METS display enabled.
PAUSE 30 45 120 Pause duration during a program, in seconds, either 30, 45, 60, 90 or
AUTO FAN
TREADLE
SENSE
AUTO STOP
CSAFE - OFF - ON=CSAFE communication enabled.
PVS - ATSC - PVS type, ATSC/NTSC OR PAL/SECAM.
LOCK OUT - OFF - ON=TreadClimber lock out enabled.
Incline Keys: Displays the next and previous parameter, respectively. Keys will repeat if held.
Speed Keys: Adjust the value o f the displayed parameter up and down, respectively, in increments of 1
unit or 0.01 unit, as appropriate for the parameter. These keys do not save the new value - see Start
Key and Key below.
Enter Key: Updates (saves) the value of the displayed paramete r in Flash memory. Alternatively, the key
may be used (see above).
Number/Program Select Keys: Enter new data item values for numeric parameters.
Stop Key: Exits Maintenance Settings Mode and restarts the TreadClimber
Default
Value
- OFF - Turns on the f an 1 minute into program.
- ON - ON=Elevation function enabled.
Value
- OFF - ON=Auto stop feature enabled.
Highest
Value
Meaning
Metric = units of kilograms, kilometers, hours, minutes, seconds,
centimeters.
(UNITS=Metric).
Swedish, Italian or Katakana.
OFF=METS display disabled.
120.
OFF=Elevation function disabled.
OFF=Auto stop feature disabled.
OFF=CSAFE communication disabled.
OFF=TreadClimber lock out disabled.
®
greeting.
TREADCLIMBER by STAR TRAC - OWNER’S MANUAL | Operating Instructions 44
Page 45

Item
Lowest
Value
Default
Value
Highest
Value
Meaning
Mc1 V X.XX
LOCKOUT ID 10000 12345 65535 TreadClimber® lockout ID.
MINIMUM 0.5/0.8 0.5/0.8 2.0/3.2 Minimum speed in mph (UNITS=English), or km/hr (UNITS=Metric).
SPEED
MAXIMUM 5.0/5.0 10.0/16.0 12.5/20.0 Maximum speed in mph (UNITS=English), or km/hr (UNITS=Metric).
SPEED
ACCELERATI- 3 12 30 Time, in seconds, to reach maxmium speed from 0 mph (0 km/hr).
ON TIME
DECELERATI- 3 11 30 Time, in seconds, to reach 0 mph (0 km/hr) from maximum speed.
ON TIME
DATE 1.00 1.98 12.99 TreadClimber manufacture date.
STOP - - - Either E-Stop or Lanyard.
LAST DECK 0 0 65,535 Number of miles (UNITS=English), or km (UNITS=Metric) since the
LAST BELT 0 0 65,535 Number of miles (UNITS=English) or km (UNITS=Metric) since the
PROGRAM - - - Provides access to programs usages and counters. (See Sub Menu)
STATS
LED TEST - - - LED Testing function, Press OK to begin
KEYPAD - - - LED Testing function, Press OK to begin
HEART RATE - - - HEART RATE Test function.
TEST
SERIAL - - - RS 232 Ports test (Manufacture Test Only).
TEST
ERROR - - - Provides Access to Error List.
LAST ERROR - - - Last Error List Menu, Press OK to View
LIST
CALIBRATION - - - Provides Access to View Calibration Data.
VALUES
MOTOR - - - Motor Calibration Function, Press OK to begin.
CALIBRATION
TREADLE - - - Display current value of treadle sensor
SENSOR
BURN IN - - - Burn In Mode Function (Manufacture Only).
MODE
CCB V X.XX
USB V X.XX
N/A
N/A N/A Display’s primary processor software version and checksum.
Caution: See Motor Calabration before making any changes.
running deck was last serviced or replaced.
running belt was last replaced.
When the MINIMUM SPEED or MAXIMUM SPEED parameters are changed, the unit will perform an auto calibration. To
terminate the auto calibrati on and return the parameter to its default setting, press the STOP key.
TREADCLIMBER by STAR TRAC - OWNER’S MANUAL | Operating Instructions
45
Page 46

Mot or Calibra tion
The Motor Calibration function allows for calibration of the TreadClimber
Speed setting may expose users to an increase in risk of injury. Any changes to the TreadClimber maximum speed
settings should be clearly communicated to all users of the TreadClimber. To enter the Motor Calibration function:
®
speed function. CAUTION: Changing Max
1. While in the Maintenance Mode, press the key, to navigate the Motor Calibration by
the next or the previous parameter buttons.
2. While in the Motor Calibration, press the key to begin the calibration. The information
window will display “PWM= XXXXXX SPEED=XX.X” where the X’s are data that the test
will generate.
When the test is finished the information window will display one of the 2 messages “Passed Calibration” or “Failed
Calibration”. If “Failed Calibration” is displayed run test again, if it continues, call for maintenance.
3. Press the STOP key to exit the Mot or Calibration function.
TREADCLIMBER by STAR TRAC - OWNER’S MANUAL | Operating Instructions 46
Page 47

TROUBLESHOOTING
Star Trac® recommends that you refer your questions about your TreadClimber® operation and suspected
malfunctions to Customer Service Hotline at (888) 678 2476. However, you may wish to
investigate error messages that appear in the Information Window. You may do so by reviewing the information in this
section.
KEY DOWN: This error generally occurs when a key is held pressed while the ON/OFF switch is moved to ON. It may
also happen if a key becomes stuck. When you see KEY DOWN:
• Set the ON/OFF switch to OFF; wait 2 second s.
• Set the ON/OFF switch to ON. The TreadClimber should be operational again. Notify Service if
additional assistance is needed.
NO STOP: This error generally occurs when the Stop Switch is not connected tightly to the circuit board of the
Display Control Panel. It may also happen if the circuitry associated with the switch develops a fault. When you see
NO STOP:
• Set the ON/OFF switch to OFF; wait 2 seconds.
• Set the ON/OFF switch to ON. Notify Service if additional assistance is needed.
CHECK SPEED SYS and SPEED CHANGE: These errors generally occur when the running belt speed sensor is
disconnected, faulty, or misaligned relative to the revolutions-per-minute (RPM) sensor of the motor. They may also
occur if the speed sensor cable is damaged, or if the Motor Control Board (MCB) is misadjusted or faulty.
When you see CHECK SPEED SYS or SPEED CHANGE:
• Set the ON/OFF switch to OFF; wait 2 second s.
• Set the ON/OFF switch to ON. Notify Service if additional assistance is needed.
TREADCLIMBER by STAR TRAC - OWNER’S MANUAL | Operating Instructions
47
Page 48

Regulatory Informa tion
FCC and Other Domestic / Interna tional Regula tions
The TreadClimber® has been tested and found to comply with the limits for a Class A digital device, pursuant to Part 15
of FCC rules. Under the FCC guidelines, operation is subject to the following two guidelines: (1) this device may not
cause harmful interference, and (2) this device must accept any interference received, including interference that may
cause undesired operation.
The TreadClimber
with the instructions provided in the owner’s manual, interference with radio communications may occur. Likewise, if
unapproved accessories are installed, interference with radio communications may occur. The intent of the FCC Class A
limit is to provide reasonable protection against harmful interference in a residential installation. However, there is no
guarantee that interference may not occur in a specific installation. In the ev ent that interference is experienced, turn off
the unit to verify that it is in fact the source. If the interference clears with the unit off, then try each of the following
measures and combinations there of:
Reorient or relocate the machine.
Reorient or relocate the receiving antenna of your t elevision, radio, and / or VCR recorder. Connect the unit
to a different power outlet.
Consult Product Support, your authorized dealer, or a qualified radio / television technician for assistance.
This product has been tested to meet the following standards:
®
generates and uses radio freque ncy energy. If the products are not installed and used in accordance
UL 1647 (Safety for Motor operated Message and Exercise Machines).
CAN/CSA – E335-1/3E - 94- Safety of household and similar appliance
TREADCLIMBER by STAR TRAC - OWNER’S MANUAL | Operating Instructions 48
Page 49

International Regulations
This product conforms to the requirements of the European Council directives:
89/336/ECC, Electromagnetic Compatibility
92/590/EEC, General Product Safety Directives
73/23/EEC, Electrical equipment Low Voltage Safety Directive
Under the Directive and in addition to Domestic standards, the product also has been tested to meet the following
international standards:
EN 60355-1 Safety of the household and Similar Electrical appliance
EN957-1EE Safety of Machinery
EN55022 Conducted and Radiated Emission Class A
EN55014-1 Disturbance power
EN55014-2 Immunity
EN60947-5-1 Positive open ing mechanism::VDE approval (pending)
EN61000-3-2 Harmonics Current Emission
EN61000-3-3 Flicker and Voltage Fluctuation
EN61000-4-3 Radiated Immunity/ Conducted Immunity
EN61000-4-2 ESD
EN61000-4-4 EFT
EN61000-4-5 Surge
EN61000-4-11 Voltage Dip & Interruption
TREADCLIMBER by STAR TRAC - OWNER’S MANUAL | Operating Instructions
49
Page 50

Maintenance
Your TreadClimber
preventive maintenance can lead to premature wear cumulative damageand other effects, such as misalignment a nd c re at e sa ft y
hazards for the user. Failure to perform regular Preventative Maintenacne will lead to un necceary downtime and may
vo id your warranty For this reason, we highly recommend following the maintenance schedules.listed in this manual. Additionally,
unusual symptoms, such as display codes and blown circuit breakers, should be reported to STAR TRAC CUSTOMER SERVICES
DEPARTMENT at (800) 503- 1221, or USA 1-714-669-1660. If
should be removed from service until repairs can be made. Only components supplied or approved by Star Trac shall be used to
maintain and/or repair the treadmill.
Daily Maintenance
■
Remove excessive accumulations of dust, dirt, and other substances by using a clean so ft cloth and a non-abrasive liquid cleane r,
such as Formula 409
NOTE: DO NOT spray the cleaner directly onto the display board or heart rate grips. Do not use li quid cleaner under the run ning belt.
■
To ensure the longevity of the running belts, clean under the running belts with a soft, dry cloth. To clean, slide the cloth between the
running belt and deck from one side of the frame to the other (you may need a ruler or similar tool to slide the towel under the belt),
then, holding the edges of the cloth, pull the cloth from the headroller do wn to the tailroller.
NOTE: DO NOT clean the running belt by activating the treadmill.
■
Inspect the running belts for alignment and tension. Do not tighten the runni ng belt every day. If you notice slipping, adjust the running belt tension using the instructions provided in “Adjustments-Slipping -Running Belt” (later in th is chapter), or contact Customer
Services as described at the beginning of this chapter.
■
Ensure the power cord is not under moving parts of the TreadClimber. This will prevent the power cord
from being pinched or from binding up the treadles.
®
must be maintained by perfoming regular Preventative Maintenance. Failure to perfom regularly scheduled
any components are found to be worn or damaged, the TreadClimber
TM
or FANTAST IKTM. Wipe down the display board, handrails, shroud and heart rate grips.
Weekly Maintenance
■
Vacuum the floor under and around the TreadClimber. Do so by movi ng the TreadClimbe r by STAR TRAC with its rollers to another
spot.
NOTE: Take care not to damage the power cord while vacuuming.
■
Inspect the inside surface of the running belt if the belt fiber are frayed excesivel y, (it will feel fuzzy to the touch), replace the belt.
NOTE: Never install a new running belt on a used deck.
■
Inspect the display and handrail screws for security, and retighten if necessary.
■
Inspect the display panel/keypad for wear.
Monthly Maintenance
WARNING: To prevent personal injury, always turn the treadmill off and unplug the power cord before performing maintenance inside
the motor compartment.
■
Remove the motor shroud and vacuum around the motor and its ventilation holes. Avoid bumping or damaging parts normally
protected by the shroud.
■
Check the traedle belt tension so the treadles operate freely without making excessive noise.
TREADCLIMBER by STAR TRAC - OWNER’S MANUAL | Operating Instructions
50
Page 51

Adjustments
The running belt and its headroller, drive belt, tailroller, and running deck are designed to be self-centering, slip-free, and smooth-operating without the need for frequent adjustments. Running belt sideward movement, slipping, or grinding after extended use, or
thump-ing during initial use, may be corrected by the following proc edures. Note, each belt must be adjusted separa tely:
Adjust TRACKING: If the running belt is not centered on the tailroller and is either too far left or right, adjust tracking using the following steps:
1.
Turn the TreadClimber® on. Increase TreadClimber speed t o 3.0 mph (5.0 km/h).
2.
Adjust tracking by turning the left Allen screws (located at the front side of the
head roller) with a 1/4" Allen wrench in 1/4-turn increments .
If the running belt is tracking to the left, turn the screws clock-wise in 1/4
turn increments.
If the running belt is tracking to the right, turn the left screw counterclockwise in 1/4 turn increments.
3.
NOTE: ONL Y USE THE LEFT SCREW FOR TRACKING ADJUSTMENT.
4.
After the running belt appears to be tracking properl y, increase the
TreadClimber by STAR TRAC speed to 4.0 mph (6.7 km/h) and verify that
the belt stays centered.
R
UNNING BELT
Slipping-Running Belt: Remove the mot or shroud and operate the treadmill slowly at 1 to 2 mph (2 to 3 km/h). While observing the
tailroller, walk on the belt and try to slow it down by gently applying pressure with your feet while holding the handrails. If only the run-
ning belt, and not the tailroller, slows down, tighten th e running belt by turning both the right and left tailroller adjustment bolts clockwise 1/4-turn. Repeat this adjustment until the running belt no longer slips, ensuring that you turn both tailroller bolts an e qual number
of turns. Re-install the motor shroud. If the headroller and the running belt both slow down, tighten the drive belt as described under
“Slipping-Drive Belt”, below.
Slipping Drive Belt: The drive belt tensioning system is designed
for minimal adjustment throughout the life of the belt. To check if the
drive belt tension needs to be adjusted, do the following:
1.
Run TreadClimber at 2 mph (3km/h) and try and stop
the belt by applying foot pressure while holding onto the
handrails. If the running belt and roller stop, but the motor
continues to turn, the drive belt tension needs adjustment.
2.
Remove the motor shroud.
3.
Release belt tension by releasing the belt tensioner.
4.
Move the spring to the second hole on the tensioner swing
arm.
5.
Re-tension with the tensioner.
6.
Reinstall motor shroud.
TOOLS & MATERIALS
Clean Towel (1)
Paint Stick or Ruler (1)
Diluted All-purpose Cleaner (409), or Bristle Brush
TREADCLIMBER by STAR TRAC - OWNER’S MANUAL | Operating Instructions
51
Page 52

CORPORATE HEADQUARTERS
4400 NE 77
th
Avenue, Suite 300
Vancouver, WA 98662 USA
Phone +1 360-836-3401
Fax +1 360-314-2865
Toll-free within the U.S.A., Canada 1 888-678-2476
http://www.startrac.com
email: support@startrac.com
Star Trac Europe
Unit 4, The Gateway Centre, Coronation Road
Cressex Business Park, High Wycombe,
Bucks HP12 3SU United Kingdom
Phone +44 (0) 1494 688260
Fax +44 (0) 1494 688269
Star Trac Asia
25 North 2nd Road
Xinglin, Jimei District
Xiamen China, 361022
Phone: +86 (0) 592 624 8296
620-8209 Rev A. Aug 2013
 Loading...