

Page 1
TM
instructions
LD
2000
Page 2
Page 3
Page 4
4
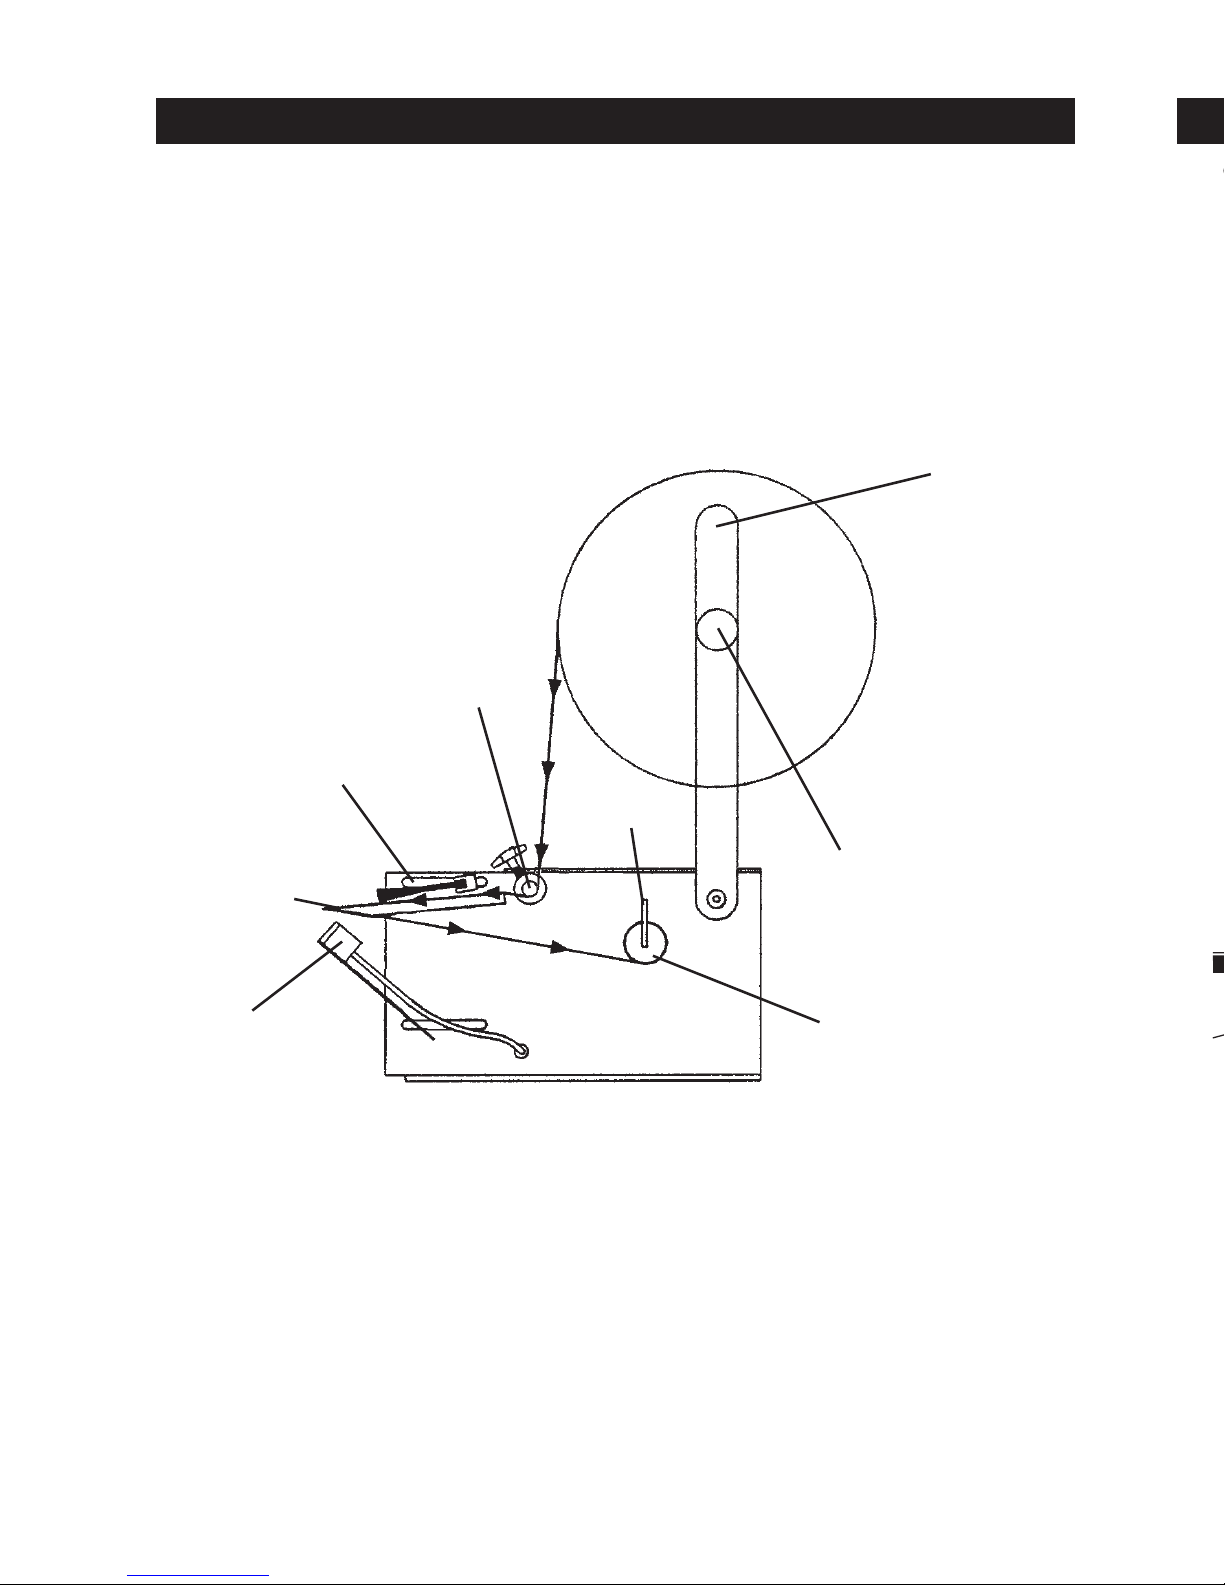
Place the label roll onto the reel hanger bar. The roll should be against a metal lock clip
so that it is held straight. Place second metal lock clip onto reel hanger bar to keep the
labels snug.
Thread the web under the guide rod, between the hold down and the strip plate and
back under the strip plate. Lay the web across the slot in the take-up hub. Lock the web
in position with the metal lock rod. (The take-up hub turns counter-clockwise.)
Hold Down:
Using the upper thumbscrew on the side of the machine, adjust the hold down for
tensioning. For best results, labels should be pressed firmly against the strip plate.
However, if the labels are held too tightly, they will cause excessive drag on the motor.
Photosensor:
The photosensor can be adjusted in any direction by using the lower thumbscrew on the
side of the machine and the thumbscrew underneath the photosensor bracket. Loosening
the thumbscrew on the side of the machine allows the photosensor to move in and out.
This is used to set the overhang distance of the label over the strip plate. The
thumbscrew underneath the photosensor bracket is used to swivel the sensor along the
front of the strip plate. When the label is being fed the correct distance, lock the bracket
in place. If there are 2 or more labels across, align the photosensor with the last label to
be removed. When these screws are locked in place, the machine is set.
Hold Down
Photosensor
Strip Plate
Guide Rod
Lock Rod
Take-up Hub
Reel Hanger Bar
Reel Holder Arm
Sensor sees beyond label
- Will not stop
ADJUSTMENTS
SET-UP INSTRUCTIONS
Daisy-chain option:
LD2000 dispensers can be “daisy-chained” together to operate in series. When a label
is removed from one of the machines, the next label will not feed until the labels are
removed from all the machines. Example: If 3 machines are “daisy-chained” together,
when a label is taken off the first machine, it will not feed; when a label is taken off the
second machine, it will not feed. When the label is taken from the third machine, all
machines will feed their respective labels. (LD2000-CABLE needed to “daisy-chain”
machines.)
Page 5
5
Hold Down:
Using the upper thumbscrew on the side of the machine, adjust the hold down for
tensioning. For best results, labels should be pressed firmly against the strip plate.
However, if the labels are held too tightly, they will cause excessive drag on the motor.
Photosensor:
The photosensor can be adjusted in any direction by using the lower thumbscrew on the
side of the machine and the thumbscrew underneath the photosensor bracket. Loosening
the thumbscrew on the side of the machine allows the photosensor to move in and out.
This is used to set the overhang distance of the label over the strip plate. The
thumbscrew underneath the photosensor bracket is used to swivel the sensor along the
front of the strip plate. When the label is being fed the correct distance, lock the bracket
in place. If there are 2 or more labels across, align the photosensor with the last label to
be removed. When these screws are locked in place, the machine is set.
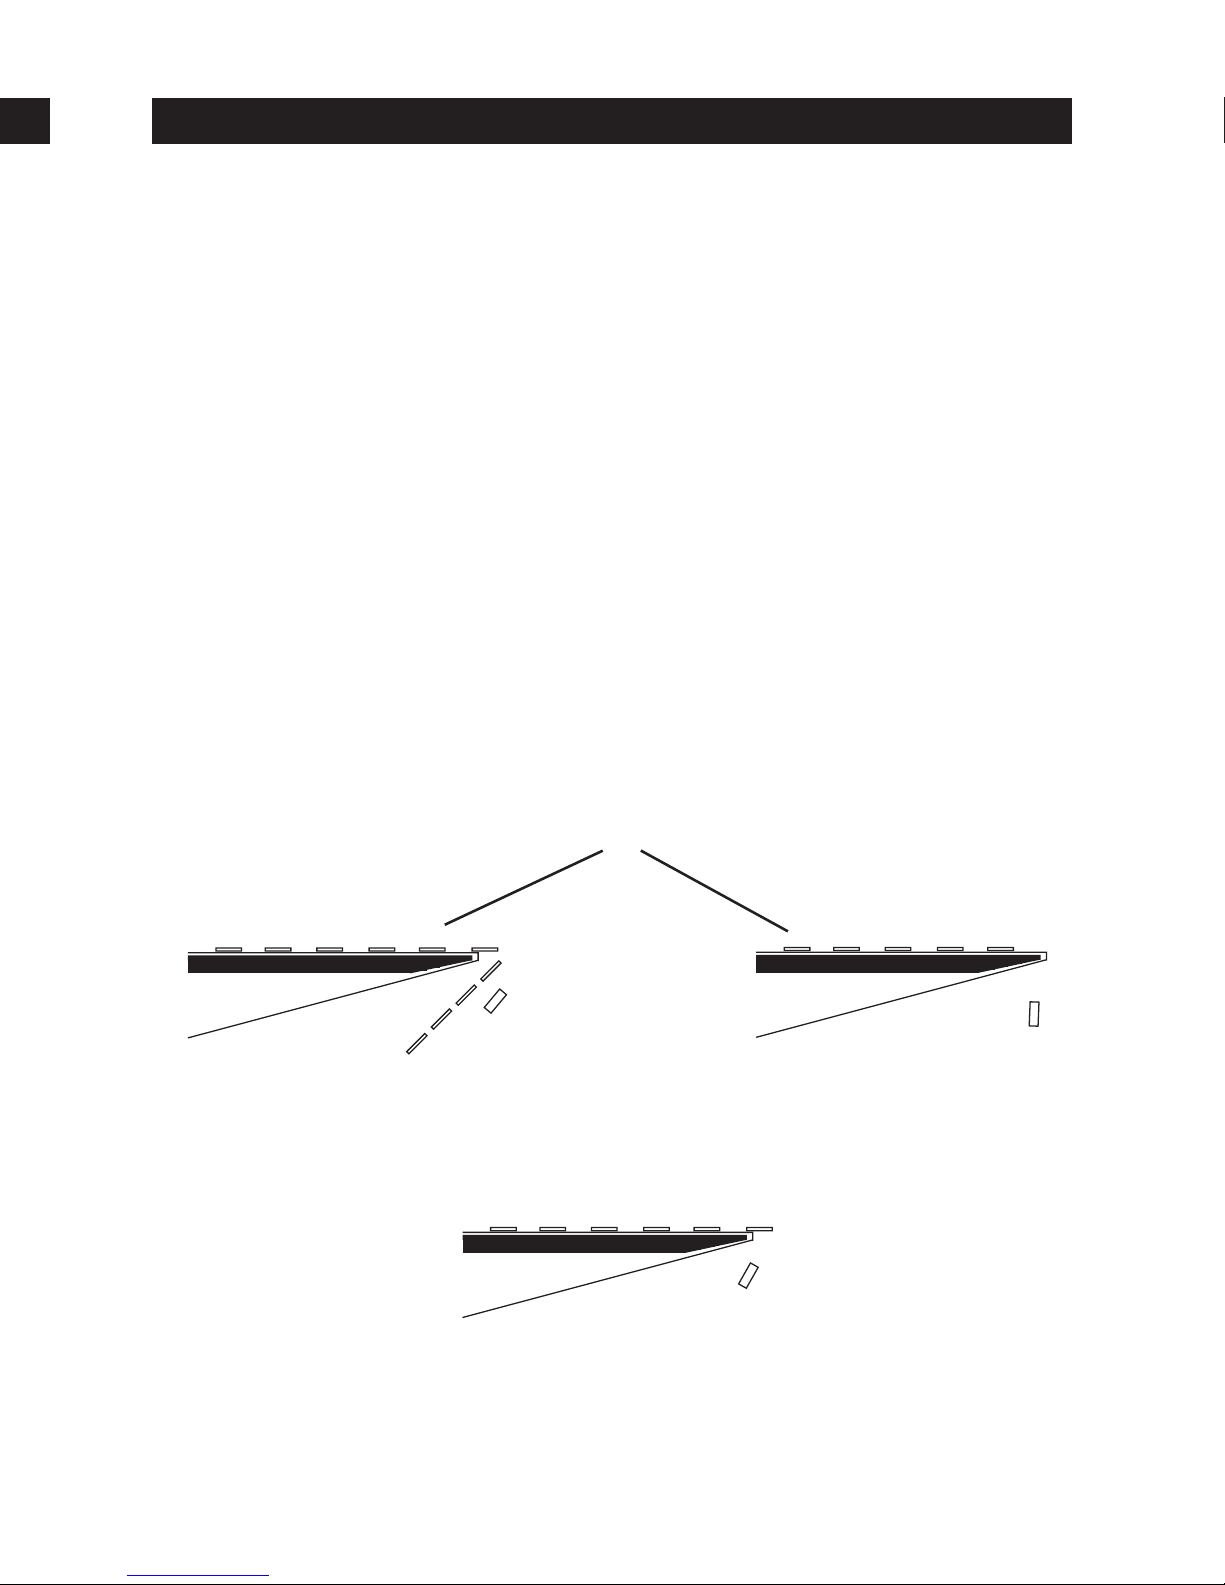
Incorrect
Correct
Sensor sees beyond label
- Will not stop
Sensor sees strip plate
- Will not feed
Sensor sees front edge of label
ADJUSTMENTS
Positioning of Photosensor
Page 6
Page 7

Page 8

02/03
instructions
TM
START International
4270 Airborn Dr.
Addison, TX 75001, USA
Tel 972.248.1999
Fax 972.248.1991
[email protected]
www.startinternational.com
START Japan Corporation
1-26-14 Toshin-Cho
Itabashi-ku
Tokyo, Japan
Tel 81.3.3554.5608
Fax 81.3.5966.9591
[email protected]
 Loading...