

Page 1
Universal Privacy Filter
Quick-Start Guide
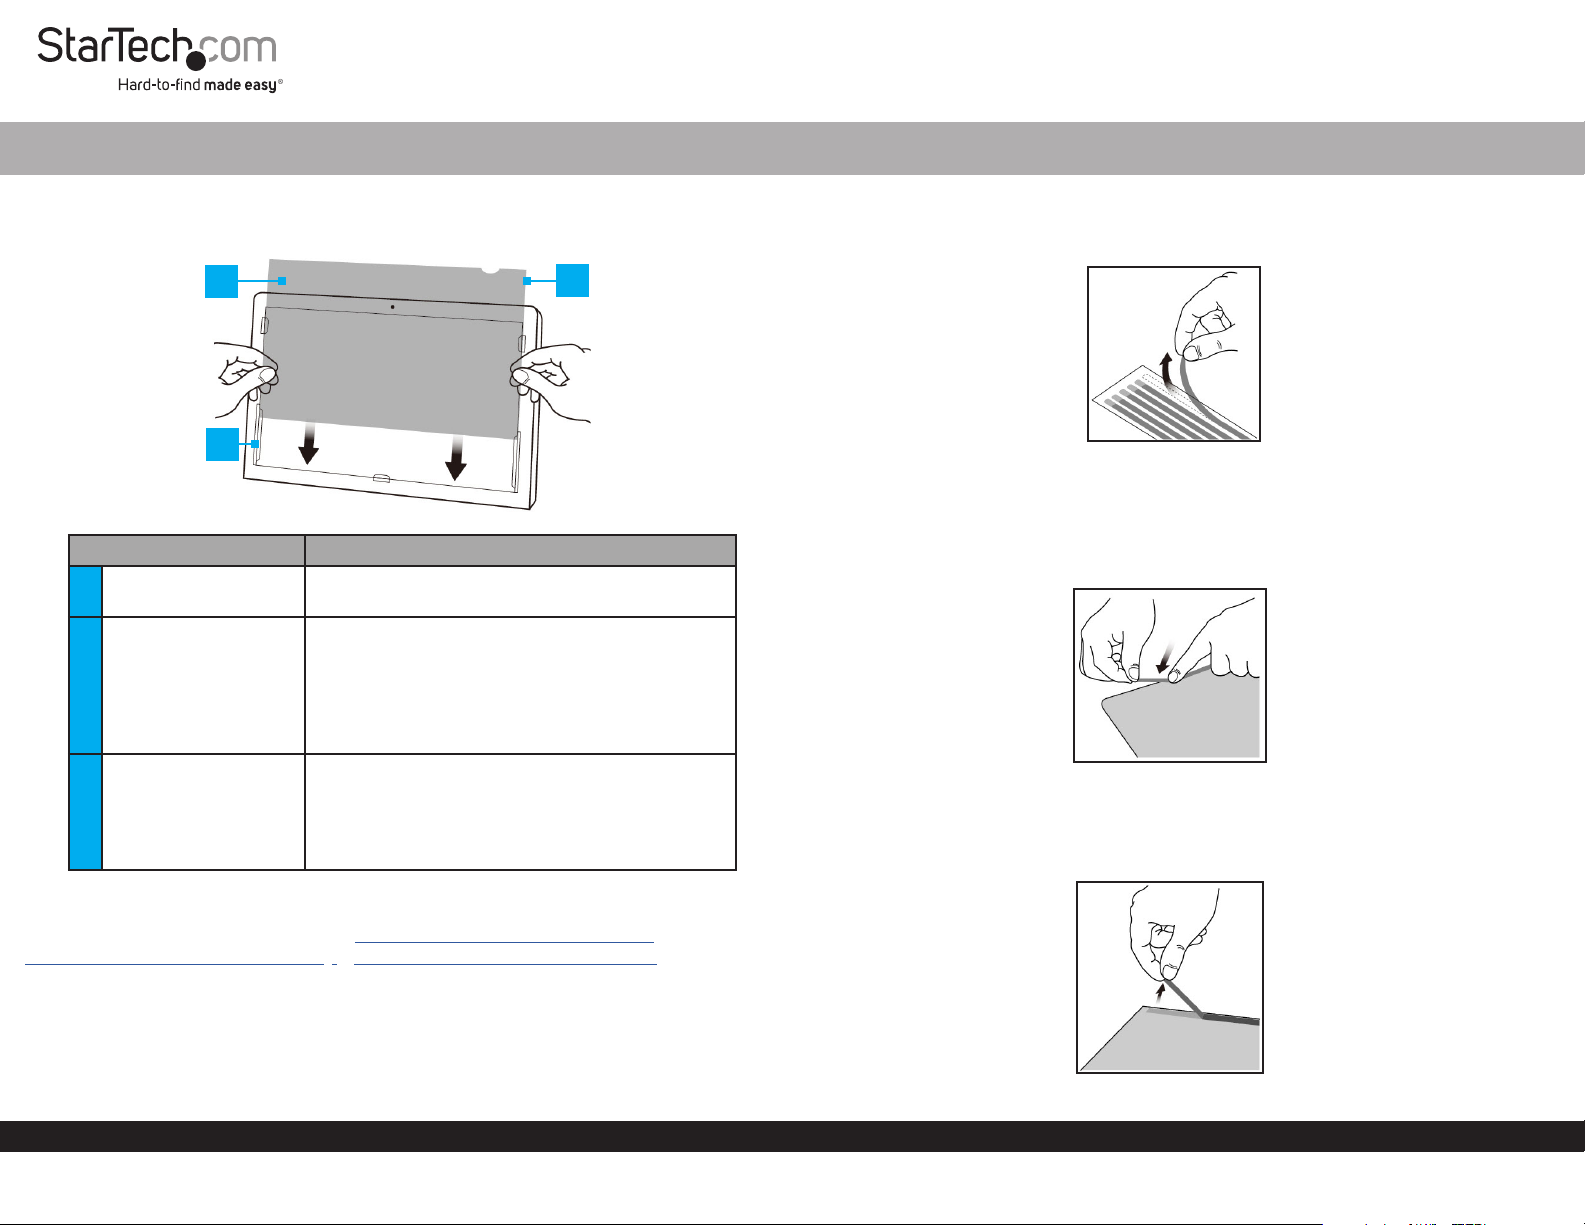
Product Diagram (PRIVSCNMON21, PRIVSCNMON24, or
PRIVSCNMON27)
1
2
Component Function
1 Privacy Filter
2 Mounting Tabs (x 5)
3 Adhesive Strips
• Used to restrict visibility of the Monitor when
viewed past a 30 degree angle.
• Used to secure the Privacy Filter to the
Monitor surface.
• The Adhesive Strips on the Mounting Tabs
can only be removed/reapplied to a surface
a couple of times before they lose their
eectiveness.
• Used to secure the Privacy Filter to the
Monitor surface.
• The Adhesive Strips can only be removed/
reapplied to a surface a couple of times before
they lose their eectiveness.
3
Requirements
1. Clean the Laptop Display and Bezels, using the Wiping Cloth.
2. Pull Adhesive Strips o of the Transparent Lining.
Removing the Adhesive Strips
3. Select which side of the Privacy Filter you wish to face outward (either matte or
glossy side).
4. Carefully align the Adhesive Strips on all the four edges (top, bottom, left, and
right) of the Privacy Filter.
Applying the Adhesive Strips
5. Firmly apply pressure to the Adhesive Strips as you carefully apply it to the Privacy
Filter.
6. Carefully remove the backing from the Adhesive Strips, exposing the adhesive.
For the latest requirements, please visit www.startech.com/PRIVSCNMON21,
www.startech.com/PRIVSCNMON24, or www.startech.com/PRIVSCNMON27
Installing the Privacy Screen Using the Adhesive Strips
It is recommended to use the Adhesive Strips to install the Privacy Screen if you intend
to permanently use the Privacy Screen without removing it from the Monitor. It is also
recommended to use the Adhesive Strips to secure the Privacy Filter to the Screen if
the Monitor does not have an outside Frame.
To view manuals, FAQs, videos, drivers, downloads, technical drawings, and more, visit www.startech.com/support.
Remove the Backing from the Adhesive Strips
Manual Revision: November 25, 2020 11:14 AM
Page 2
7. Apply the Privacy Filter to the Screen of the Monitor, adhesive side toward the
Screen. Start at the bottom edge of the Screen and work your way to the top.
Applying the Privacy Filter
8. Carefully apply slight pressure to the edges of the Privacy Filter in the location where
you applied the Adhesive Strips.
9. Clean any ngerprints on the Privacy Filter, using the Wiping Cloth.
Installing the Privacy Screen Using the Mounting Tabs
It is recommended to use the Mounting Tabs to install the Privacy Screen if you
intend on removing the Privacy Screen from the Monitor.
1. Clean the Laptop Display and Bezels, using the Wiping Cloth.
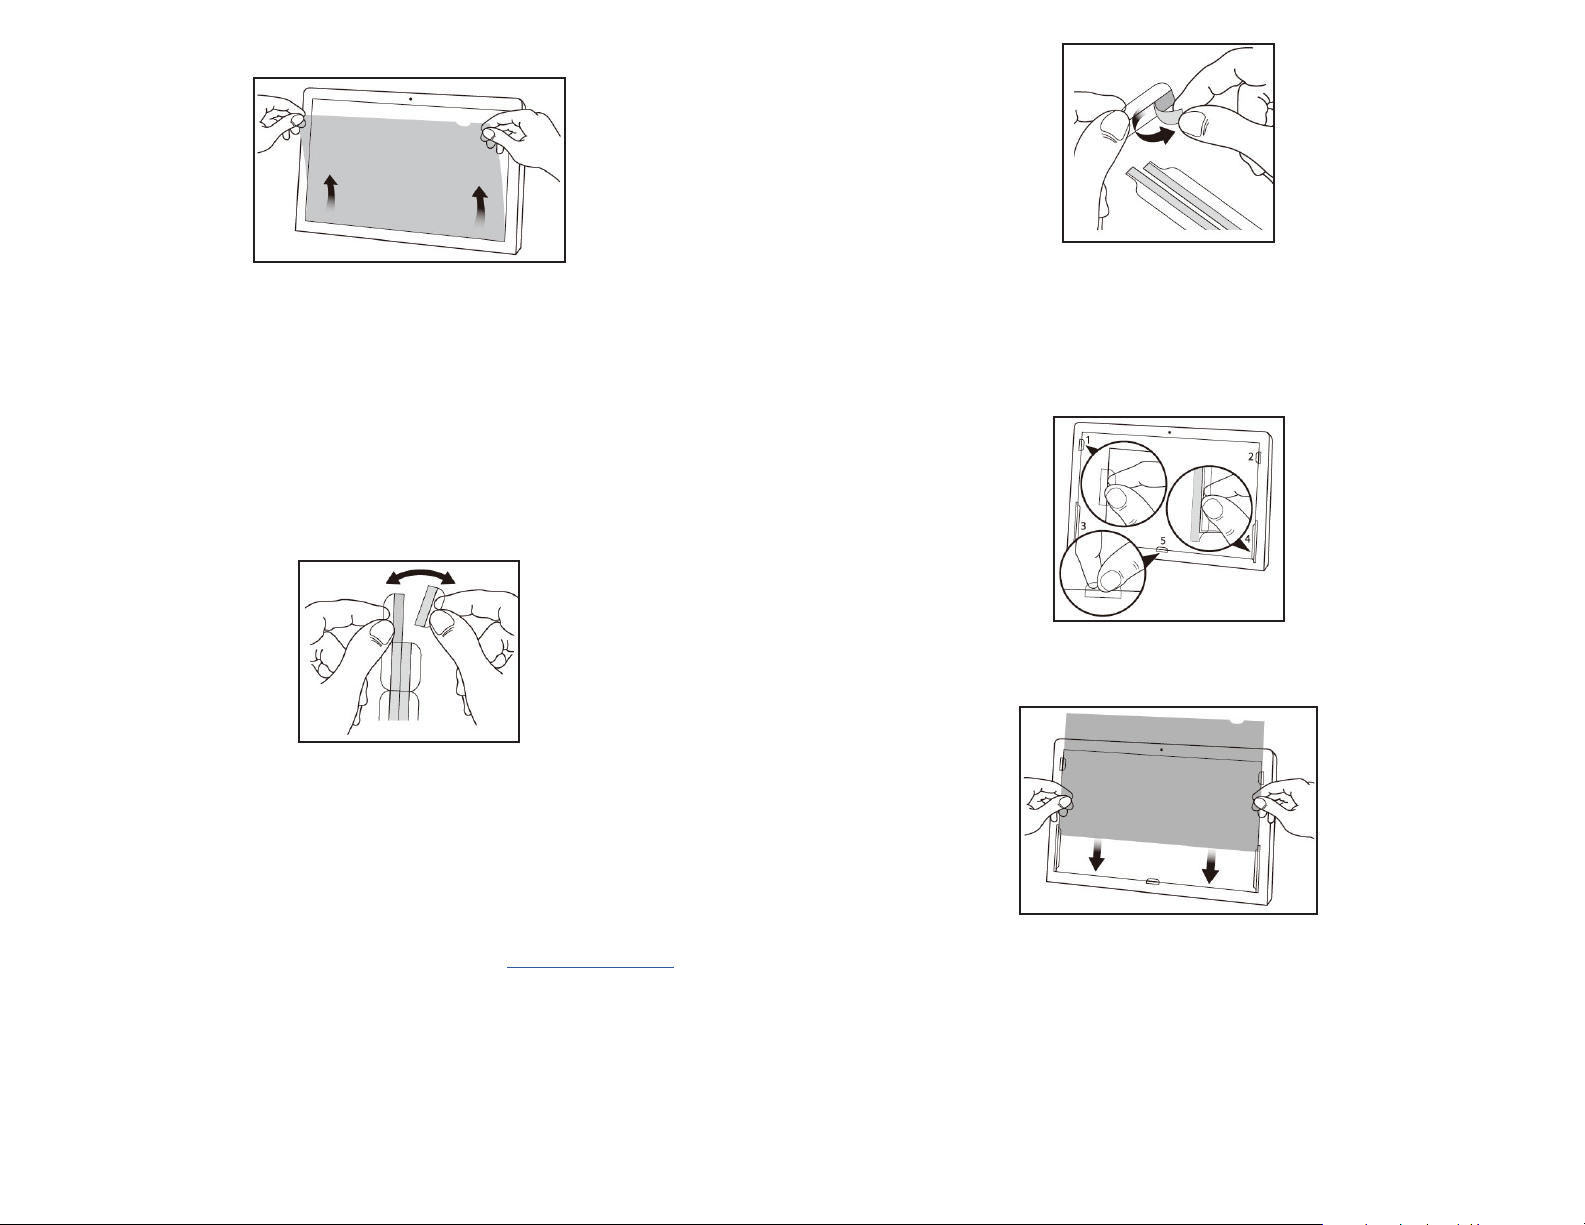
2. Separate the Mounting Tabs.
3. Remove the Protective Backing from the Mounting Tabs.
Removing Protective Backing
4. Apply the Mounting Tabs to the Monitor Frame. It is recommended that you apply
two Mounting Tabs on the left and right side of the Monitor Frame and one in the
center of the bottom of the Monitor Frame.
Note: Make sure to use the Longer Mounting Tabs along the bottom of the sides on
the Monitor Frame.
Separating Mounting Tabs
Use of Trademarks, Registered Trademarks, and other Protected Names and Symbols
This manual may make reference to trademarks, registered trademarks, and other protected names and/or symbols of thirdparty companies not related in any way to StarTech.com. Where they occur these references are for illustrative purposes only
and do not represent an endorsement of a product or service by StarTech.com, or an endorsement of the product(s) to which
this manual applies by the third-party company in question. StarTech.com hereby acknowledges that all trademarks, registered
trademarks, service marks, and other protected names and/or symbols contained in this manual and related documents are the
property of their respective holders.
Warranty Information
This product is backed by a two-year warranty.
For further information on product warranty terms and conditions, please refer to www.startech.com/warranty.
Limitation of Liability
In no event shall the liability of StarTech.com Ltd. and StarTech.com USA LLP (or their ocers, directors, employees or agents)
for any damages (whether direct or indirect, special, punitive, incidental, consequential, or otherwise), loss of prots, loss of
business, or any pecuniary loss, arising out of or related to the use of the product exceed the actual price paid for the product.
Some states do not allow the exclusion or limitation of incidental or consequential damages. If such laws apply, the limitations
or exclusions contained in this statement may not apply to you.
StarTech.com Ltd.
45 Artisans Cres
London, Ontario
N5V 5E9
Canada
StarTech.com LLP
2500 Creekside
Parkwy
Lockbourne, Ohio
43137
U.S.A.
StarTech.com Ltd.
Unit B, Pinnacle 15
Gowerton Rd,
Brackmills
Northampton
NN4 7BW
United Kingdom
FR: startech.com/fr
DE: startech.com/de
ES: startech.com/es
NL: startech.com/nl
IT: startech.com/it
JP: startech.com/jp
Installing Mounting Tabs
5. Slide the Privacy Filter in-between the Mounting Tabs and Monitor Screen.
Installing the Privacy Filter
6. Clean any ngerprints on the Privacy Filter, using the Wiping Cloth.
 Loading...