

Page 1
Universal Magnetic Privacy Filter - For 15” Laptops
Quick-Start Guide
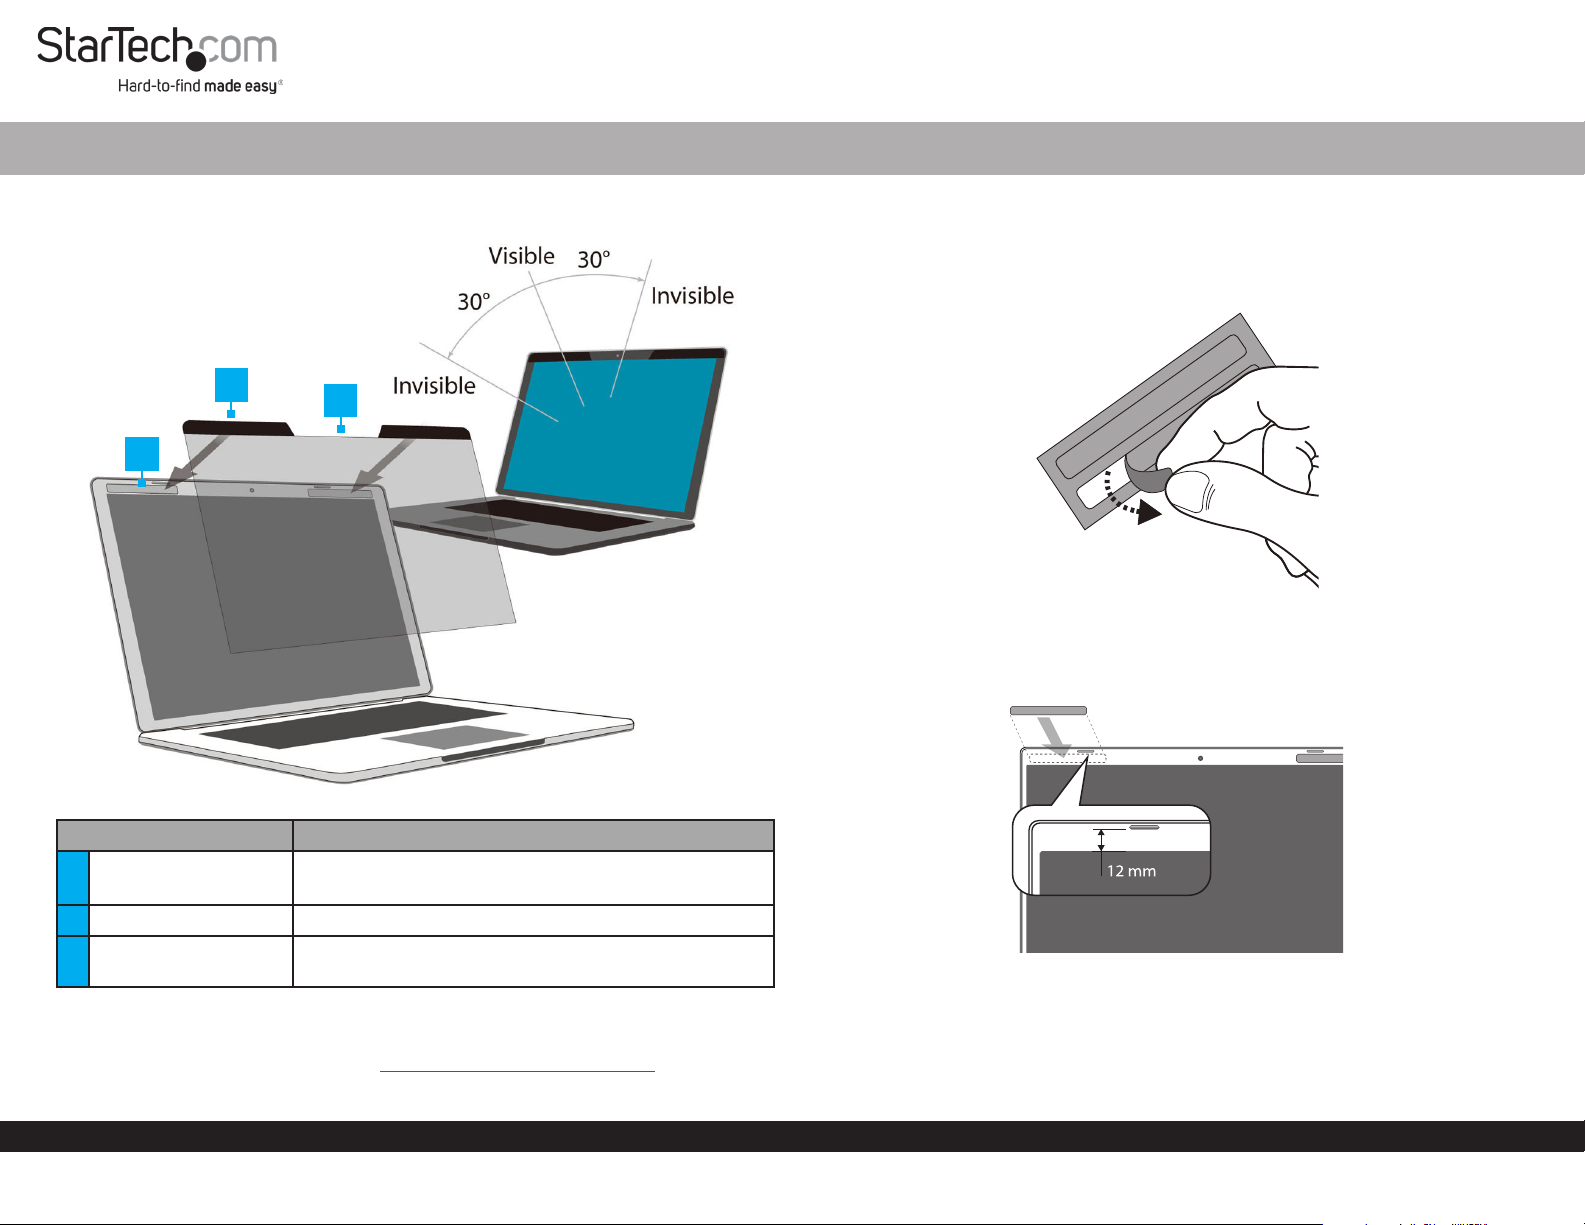
Product Diagram (PRIVSCNLT15)
2
1
3
Installation
1. Use the Wiping Cloth to clean the Laptop Display and Bezels.
2. Peel the Metal Strips o of the sheets. (Figure 1)
Figure 1
3. Align the Metal Strips along the top right and left of the Laptop Display Bezel.
(Figure 2)
Figure 2
Part Function
1 Metal Strips
2 Magnetic Strips • Magnets that cling to the Metal Strips
3 Privacy Screen
• Adhesive strips of metal
• Adhere to the Laptop Display Bezel
• Restricts visibility of the Laptop Display when
viewed past a 30 angle
Requirements
For the latest requirements please visit: www.startech.com/PRIVSCNLT15.
• 15” Laptop x 1
To view manuals, FAQs, videos, drivers, downloads, technical drawings, and more, visit www.startech.com/support.
4. Press and stick to secure the Metal Strips to the Laptop Display Bezel. (Figure 3)
Note: Do not remove the Metal Strips once they are applied to the Laptop Display
Bezel, as it will weaken the adhesive backing.
Manual Revision: October 30, 2019
Page 2
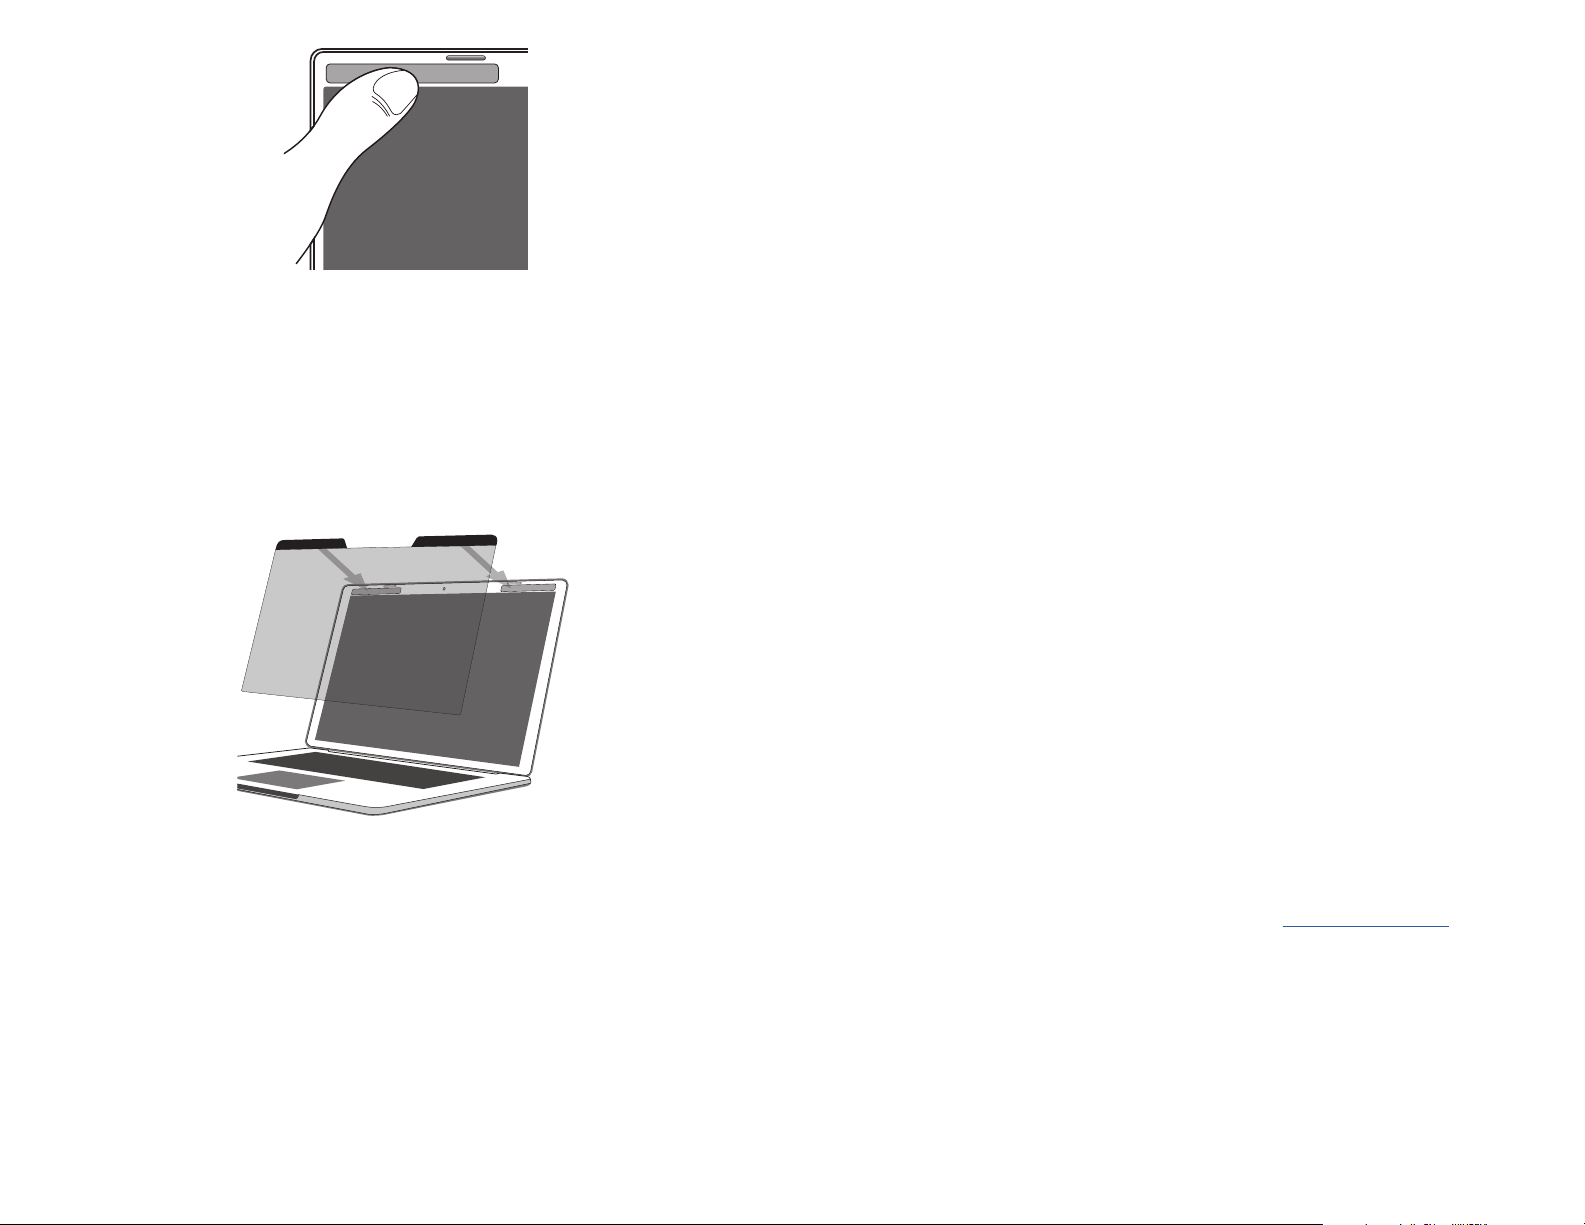
Figure 3
5. Attach the Privacy Screen to the Laptop by aligning the Magnetic Strips against
the Metal Strips. (Figure 4)
Note: The Privacy Screen features a glossy side and a matte side. Choose the side that
best ts the application. Ensure the Magnetic Strips are pointed upwards.
Figure 4
6. Use the Wiping Cloth to clean any ngerprints on the Privacy Screen.
Use of Trademarks, Registered Trademarks, and other Protected Names and Symbols
This manual may make reference to trademarks, registered trademarks, and other protected names and/or symbols of thirdparty companies not related in any way to StarTech.com. Where they occur these references are for illustrative purposes
only and do not represent an endorsement of a product or service by StarTech.com, or an endorsement of the product(s) to
which this manual applies by the third-party company in question. StarTech.com hereby acknowledges that all trademarks,
registered trademarks, service marks, and other protected names and/or symbols contained in this manual and related
documents are the property of their respective holders.
Warranty Information
This product is backed by a two-year warranty.
For further information on product warranty terms and conditions, please refer to www.startech.com/warranty.
Limitation of Liability
In no event shall the liability of StarTech.com Ltd. and StarTech.com USA LLP (or their ocers, directors, employees or agents)
for any damages (whether direct or indirect, special, punitive, incidental, consequential, or otherwise), loss of prots, loss of
business, or any pecuniary loss, arising out of or related to the use of the product exceed the actual price paid for the product.
Some states do not allow the exclusion or limitation of incidental or consequential damages. If such laws apply, the limitations
or exclusions contained in this statement may not apply to you.
StarTech.com Ltd.
45 Artisans Cres
London, Ontario
N5V 5E9
Canada
StarTech.com LLP
2500 Creekside
Parkwy
Lockbourne, Ohio
43137
U.S.A.
StarTech.com Ltd.
Unit B, Pinnacle 15
Gowerton Rd,
Brackmills
Northampton
NN4 7BW
United Kingdom
FR: fr.startech.com
DE: de.startech.com
ES: es.startech.com
NL: nl.startech.com
IT: it.startech.com
JP: jp.startech.com
 Loading...