

Page 1
2-Port Gigabit PoE+ Extender - 802.3at and
802.3af - 100 m (330 ft)
POEEXT2GAT
*actual product may vary from photos
FR: Guide de l’utilisateur - fr.startech.com
DE: Bedienungsanleitung - de.startech.com
ES: Guía del usuario - es.startech.com
NL: Gebruiksaanwijzing - nl.startech.com
PT: Guia do usuário - pt.startech.com
IT: Guida per l’uso - it.startech.com
For the latest information, technical specications, and support for
this product, please visit www.startech.com/POEEXT2GAT.
Manual Revision: 09/28/2016
Page 2

FCC Compliance Statement
This equipment has been tested and found to comply with the limits for a Class A digital
device, pursuant to Part 15 of the FCC rules. These limits are designed to provide reasonable
protection against harmful interference when the equipment is operated in a commercial
environment. This equipment generates, uses and can radiate radio frequency energy and,
if not installed and used in accordance with the instruction manual, may cause harmful
interference to radio communications. Operation of this equipment in a residential area is
likely to cause harmful interference in which case the user will be required to correct the
interference at his own expense.
This device complies with part 15 of the FCC Rules. Operation is subject to the following
two conditions: (1) This device may not cause harmful interference, and (2) this device must
accept any interference received, including interference that may cause undesired operation.
Changes or modications not expressly approved by StarTech.com could void the user’s
authority to operate the equipment.
Industry Canada Statement
This Class A digital apparatus complies with Canadian ICES-003.
Cet appareil numérique de la classe [A] est conforme à la norme NMB-003 du Canada.
CAN ICES-3 (A)/NMB-3(A)
Use of Trademarks, Registered Trademarks, and other Protected Names and Symbols
This manual may make reference to trademarks, registered trademarks, and other
protected names and/or symbols of third-party companies not related in any way to
StarTech.com. Where they occur these references are for illustrative purposes only and do not
represent an endorsement of a product or service by StarTech.com, or an endorsement of the
product(s) to which this manual applies by the third-party company in question. Regardless
of any direct acknowledgement elsewhere in the body of this document, StarTech.com hereby
acknowledges that all trademarks, registered trademarks, service marks, and other protected
names and/or symbols contained in this manual and related documents are the property of
their respective holders.
Instruction manual
Page 3

Table of Contents
Product diagram ....................................................................................1
Front view ....................................................................................................................................................1
Rear view ...................................................................................................................................................... 1
Introduction ............................................................................................2
Packaging contents .................................................................................................................................. 2
System requirements ...............................................................................................................................2
About the extender ...............................................................................4
About power output ................................................................................................................................ 4
About the ports ......................................................................................................................................... 4
Install the extender ................................................................................5
Install a single extender .......................................................................................................................... 5
Install multiple extenders ...................................................................................................................... 5
Mount the extender to a surface ......................................................................................................... 5
Technical support ................................................................................... 6
Warranty information ............................................................................6
Instruction manual
i
Page 4

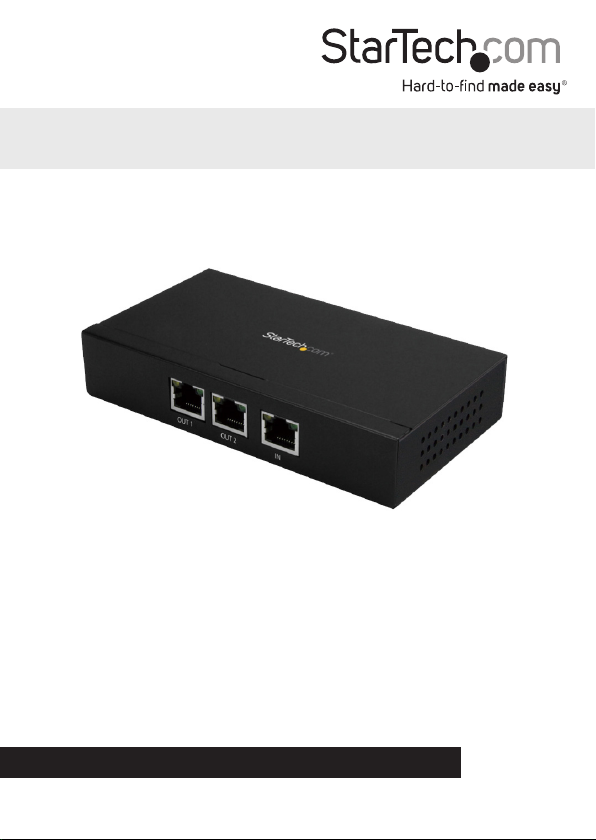
Product diagram
Front view
Rear view
Instruction manual
PoE+
output port
(Gigabit
RJ45)
1
PoE+ input
port
(Gigabit
RJ45)
Grounding
point
Page 5

Introduction
This 2-port Gigabit PoE+ extender spans your Power over Ethernet (PoE) devices
over longer distances, letting you double the 100 m limitations of a traditional PoE
infrastructure. You can connect two Gigabit PoE devices up to a maximum of 200 m
(total distance) away, so it’s easy to install a remote IP camera or access point. Plus, the
extender can be daisy-chained, for more scalability.
Packaging contents
• 1 x Gigabit PoE+ Extender
• 4 x rubber feet
• 1 x quick-start guide
System requirements
• Three RJ45-terminated Cat5 or better Ethernet cables (solid UTP cable is highly
recommended)
• 10/100/1000Mbps compatible network and devices
• One or two PoE or PoE+ Powered Device(s) (PD) that comply with IEEE 802.3at or
802.3af standards (extends up to two PoE or PoE+ devices)
• One PoE or PoE+ Power Source Equipment (PSE) device that complies with IEEE
802.3at or 802.3af standards
Notes:
• Total extension distances might be shorter due to power-delivery voltage drop on
the connected cables. The maximum distances can vary based on the quality of the
UTP cables and the environment the extender is integrated into.
• To ensure optimal performance and extension distance, it’s highly recommended
that you use solid Cat5 or better ethernet cable, rather than using stranded cable.
System requirements are subject to change. For the latest requirements, please visit
www.startech.com/POEEXT2GAT.
Instruction manual
2
Page 6

LED Behavior Status
Solid
green
IN (Input)
Blinking
green
Solid
yellow
There is network activity on the port
The port has input 52-56V PoE power
Solid
green
OUT 1 (Output 1)
Blinking
green
Solid
yellow
There is network activity on the port
The port is providing 52-56V DC in-line power
Solid
green
OUT 2 (Output 2)
Blinking
green
Solid
yellow
There is network activity on the port
The port is providing 52-56V DC in-line power
A port link is established
A port link is established
A port link is established
Instruction manual
3
Page 7

About the extender
The extender supports 10Mbps, 100Mbps and 1000Mbps (Gigabit) network speeds
and will automatically detect the speed of the incoming connection.
The extender should be installed between the PSE (Power Source Equipment) and
the PD (Powered Device). It is powered by the PSE and forwards the Ethernet data
and remaining PoE power to the PDs. The PoE extender does not require an external
power supply and will inject power to the PDs without aecting data transmission
throughput.
Once connected, each cable segment is limited to 100 m, when used with standard
RJ45 terminated Cat5 or better Ethernet cable. Any other non-standard cable, or
distances greater than 100 m, might result in unstable connections.
About power output
The extender accepts 30 watts of power input, with up to 23 watts of power output
shared between the two PoE output ports. It converts IEEE 802.3at 30 watt input to
IEEE 802.3af/at 23 watt output, over a maximum of 100 meters in distance.
Each extender requires approximately 2.5 watts to power the extender itself.
• Check the total power consumption of your devices and the extender(s) before
installation. If the overall power consumption is overloaded, the local PSE might
shut down the entire power system.
Note: The amount of available wattage depends on the number of extenders used, the
number of PDs connected, and the power draw of each of your connected PDs.
About the ports
The extender features three RJ45 ports. The IN port functions as PoE input (data plus
power). The OUT ports function as PoE output (data plus power).
Port Function
IN (Input)
OUT 1 and OUT
2 (Output 1 and
Output 2)
Connects to your Power Sourcing Equipment (PSE) (for
example, a PoE injector, or PoE switch)
Connects to your PoE Powered Devices (PD) (for example, a
PoE camera, or PoE wireless access point)
Instruction Manual
4
Page 8

Install the extender
The extender can be integrated into your PoE network infrastructure as a single unit, or
you can use multiple units in a daisy-chain conguration.
Install a single extender
1. Use RJ45 cable to connect your Power Sourcing Equipment (PSE) device to the
extender’s IN port.
2. Use RJ45 cables to connect your Powered Device(s) (PD) to the extender’s OUT
port(s).
Note: According to the IEEE 802.3at and IEEE 802.3af standards, the extender won’t
inject power to the connected RJ45 cable if it isn’t connected to PoE device that meets
the IEEE 802.3at or 802.3af standard.
Install multiple extenders
Each extender requires approximately 2.5 watts to power the extender itself. Check the
total power consumption of your devices and the extender(s) before installation. If the
overall power consumption is overloaded, the local PSE might shut down the entire
power system.
1. Use RJ45 cable to connect one of the rst extender’s OUT port to a second
extender’s IN port.
2. Use RJ45 cable to connect your remote PoE powered device (PD) to one of the OUT
ports on the second extender, or to the last extender in the chain.
Optional: To daisy chain additional extender units, use RJ45 cable to connect one of
the second extender’s OUT port to a third extender’s IN port. Continue this pattern as
needed to include all extender units.
Note: You can daisy chain up to four extenders to a maximum distance of 500 m.
The amount of available wattage depends on the number, and power draw of the
connected PoE PDs.
Mount the extender to a surface
The extender features two built-in surface-mounting holes on the bottom of the unit.
The mounting holes let you install the extender on a surface (for example, a wall, or a
desk).
To mount the extender, do the following:
1. Secure two screws to your desired surface. Ensure the screw spacing matches the
spacing between the mounting holes on the bottom of the extender.
2. Mount the extender to the surface, placing the extender’s mounting holes over the
screws from step 1.
Instruction Manual
5
Page 9

Technical support
StarTech.com’s lifetime technical support is an integral part of our commitment to
provide industry-leading solutions. If you ever need help with your product, visit
www.startech.com/support and access our comprehensive selection of online tools,
documentation, and downloads.
For the latest drivers/software, please visit www.startech.com/downloads
Warranty information
This product is backed by a two-year warranty.
StarTech.com warrants its products against defects in materials and workmanship
for the periods noted, following the initial date of purchase. During this period,
the products may be returned for repair, or replacement with equivalent
products at our discretion. The warranty covers parts and labor costs only.
StarTech.com does not warrant its products from defects or damages arising from
misuse, abuse, alteration, or normal wear and tear.
Limitation of Liability
In no event shall the liability of StarTech.com Ltd. and StarTech.com USA LLP (or their
ocers, directors, employees or agents) for any damages (whether direct or indirect,
special, punitive, incidental, consequential, or otherwise), loss of prots, loss of business,
or any pecuniary loss, arising out of or related to the use of the product exceed the
actual price paid for the product. Some states do not allow the exclusion or limitation
of incidental or consequential damages. If such laws apply, the limitations or exclusions
contained in this statement may not apply to you.
Instruction manual
6
Page 10

Hard-to-nd made easy. At StarTech.com, that isn’t a slogan. It’s a promise.
StarTech.com is your one-stop source for every connectivity part you need. From
the latest technology to legacy products — and all the parts that bridge the old and
new — we can help you nd the parts that connect your solutions.
We make it easy to locate the parts, and we quickly deliver them wherever they need
to go. Just talk to one of our tech advisors or visit our website. You’ll be connected to
the products you need in no time.
Visit www.startech.com for complete information on all StarTech.com products and
to access exclusive resources and time-saving tools.
StarTech.com is an ISO 9001 Registered manufacturer of connectivity and technology
parts. StarTech.com was founded in 1985 and has operations in the United States,
Canada, the United Kingdom and Taiwan servicing a worldwide market.
 Loading...