

Page 1
Spiral Cable-Management Sleeve - Black
Quick-Start Guide
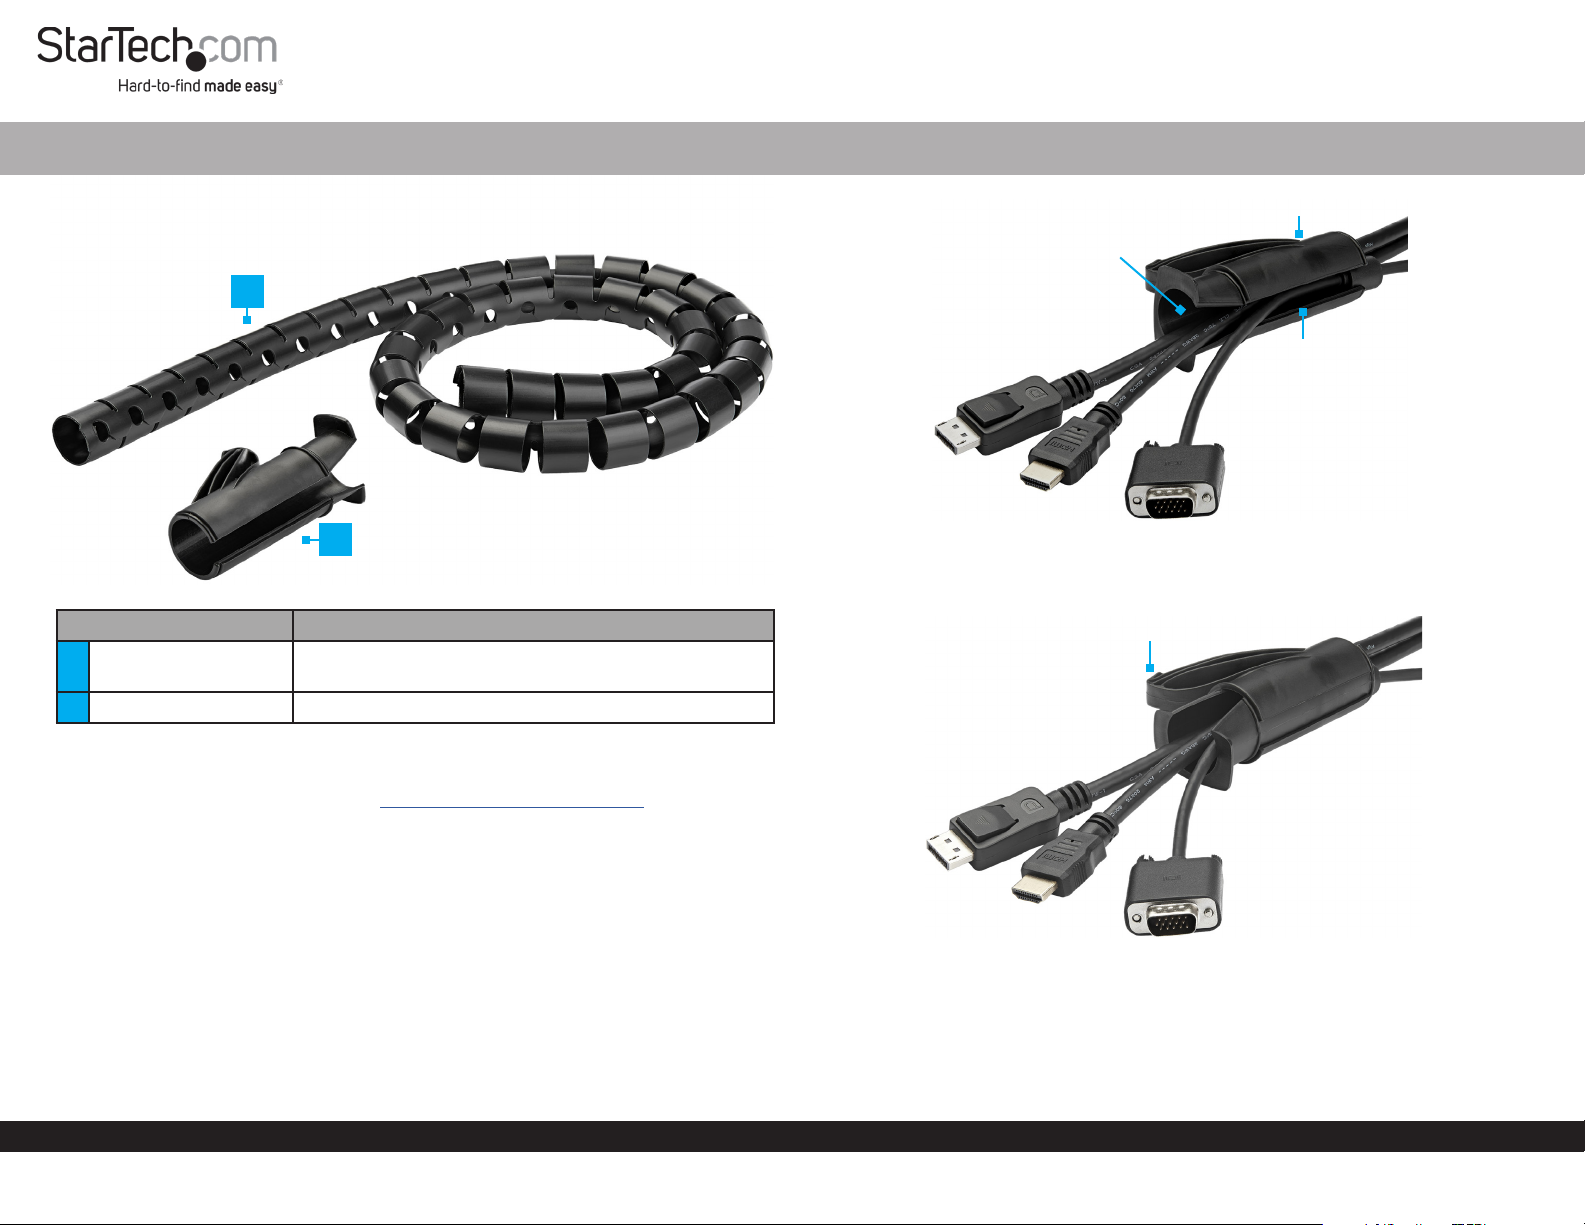
Product Diagram (CMSCOILED)
1
2
Part Function
Cable-Management
1
Sleeve
2 Cable Insertion Tool • Guides Cables into the Cable-Management Sleeve
• Organize Cables into one bundle
Requirements
Figure 1
3. Rotate the Tube in the Cable Insertion Tool to close the Cable Channel. (Figure 2)
Figure 2
V-Shaped
Opening
Nose
Tube
Cable
Channel
For the latest requirements please visit: www.startech.com/CMSCOILED.
Installation
Basic
1. Open the Cable Channel by rotating the Tube within the Cable Insertion Tool.
2. Feed the Cables into the Cable Insertion Tool though the V-Shaped Opening in
the Tube. (Figure 1)
To view manuals, FAQs, videos, drivers, downloads, technical drawings, and more, visit www.startech.com/support.
4. Insert the Nose of the Cable Insertion Tool into one end of the CableManagement Sleeve.
Manual Revision: August 30, 2019
Page 2

5. Pull the Cable Insertion Tool through the entire length of the Cable-Management
Sleeve. (Figure 3)
Note: It may be necessary to hold the Connectors of the Cables to prevent them from
being pulled into the Cable Insertion Tool.
Figure 3
6. Rotate the Tube in the Cable Insertion Tool to open the Cable Channel.
7. Remove the Cables from the Cable Insertion Tube.
Advanced
If the application requires specic Cables to exit the Cable-Management Sleeve at
dierent points, follow these instructions.
1. Follow steps 1-3 from the Basic Installation, loading only one Cable into the Cable
Insertion Tube.
2. Determine the location where the Cable must exit the Cable-Management Sleeve.
Gently pry apart the selected section of the Cable-Management Sleeve and follow
steps 4-7 from the Basic Installation.
3. Repeat the Advanced Installation steps for any additional custom Cable
congurations. (Figure 4)
Figure 4
Removal
Pull the Cables out of the Cable-Management Sleeve. Press the pliable CableManagement Sleeve back into shape if it has stretched out.
Use of Trademarks, Registered Trademarks, and other Protected Names and Symbols
This manual may make reference to trademarks, registered trademarks, and other protected names and/or symbols of thirdparty companies not related in any way to StarTech.com. Where they occur these references are for illustrative purposes
only and do not represent an endorsement of a product or service by StarTech.com, or an endorsement of the product(s) to
which this manual applies by the third-party company in question. StarTech.com hereby acknowledges that all trademarks,
registered trademarks, service marks, and other protected names and/or symbols contained in this manual and related
documents are the property of their respective holders.
Warranty Information
This product is backed by a two-year warranty.
For further information on product warranty terms and conditions, please refer to www.startech.com/warranty.
Limitation of Liability
In no event shall the liability of StarTech.com Ltd. and StarTech.com USA LLP (or their ocers, directors, employees or agents)
for any damages (whether direct or indirect, special, punitive, incidental, consequential, or otherwise), loss of prots, loss of
business, or any pecuniary loss, arising out of or related to the use of the product exceed the actual price paid for the product.
Some states do not allow the exclusion or limitation of incidental or consequential damages. If such laws apply, the limitations
or exclusions contained in this statement may not apply to you.
StarTech.com Ltd.
45 Artisans Cres
London, Ontario
N5V 5E9
Canada
StarTech.com LLP
2500 Creekside
Parkwy
Lockbourne, Ohio
43137
U.S.A.
StarTech.com Ltd.
Unit B, Pinnacle 15
Gowerton Rd,
Brackmills
Northampton
NN4 7BW
United Kingdom
FR: fr.startech.com
DE: de.startech.com
ES: es.startech.com
NL: nl.startech.com
IT: it.startech.com
JP: jp.startech.com
 Loading...