

Page 1
APPLICA TIONS MANUAL
80821885
Page 2
Trademark Acknowledgements
LaserPrinter 4111:Star Micronics Co,, Ltd.
PageMaker: AldusCorporation
Applesoft: Apple Computer Inc.
Bitstream: Bitstream Inc.
Canon:Canon Inc.
HP, LaserJet:Hewlett-Packard Company
LaserControl:Insight Development Inc.
IBM PC: InternationalBusiness MachinesCorp.
Century Schoolbook: Linotype Corporation
Lotus 1-2-3:Lotus DevelopmentCorporation
MS-DOS, Microsoft BASIC, Windows, Word: MicrosoftCorporation
MultiMate: Multimate International
WordPerfect:WordPerfect Corporation
Ventura Publisher: XeroxCorporation
NOTICE
● All rights reserved. Reproduction of any part of this manual in any form whatsoever without
STAR’s express permission is forbidden,
● The contents of this manualare subject to cbange without notice
● Alleffortshavebeenmadetoensure theaccuracyofthecontentsofthis manualatthetimeofpress.
However,sbouldanyerrorsbedetected, STAR would greatly appreciate being informed of them.
. The above notwithstanding, STAR can assume no responsibility for any errors inthis manual
@Copyright 1992Star Micronics Co,, Ltd
Page 3
I
PREFACE
About this manual
This StarLu.~erPrinter4111Application.~Manual gives you the information
you need to program the Star Micronics LaserPrinter 4111.
Why would you read this book? Most people using a laser printer just run
softwarepackageswithbuilt-inprinter drivers, which look after everything
theircomputers sendtheir printers.Butmany of us— smallbusiness people
and home computer users, not to mention the wizards who write those
softwarepackages—wanttobenefitfromall thenew featuresoffered byour
printers.
Doyouwantcompletecontroloverthecharacters andimagesyouprint?This
manual provides the software help you need to get the most from your
LaserPrinter 4111.
Though this Applications Manual is really intended for intermediate to
advanced computer users, we’ve tried to accommodate relative novicestoo.
The information is organized so you can walk through the general theory
underlying printer programming before dancing into specific details. It
makessense,therefore, toread thefirstthreechaptersbeforejumping intothe
middle.
There’s agoodreason toreadeach chapter from itsstarttoo. People learning
how to use a new printer often find the terminology a barrier. So instead of
burying what may be newjargon in a Glossary at the back, we define each
newterm thefirst timeitappears.Thewhole firstpart ofthechapteron fonts,
forexample, defines different aspects of afhzt (acollection ofcharacters of
the same size and style).
Page 4
I
What’sin this manual?
●
●
●
●
In “Getting to Know Your Star LaserPrinter 4111”we provide a listof the
features that make this a splendid printer, to help you choose which
features you want to exploit. There’s a bit on how laser printers work,
inside and out. The chapter then explains software in general terms,
including how to write control and Escape commands to make those
features work.
‘&ControllingYour Printer” examines the parameters you give the Star
LaserPrinter 4111to direct precisely how you want it to behave. These let
you control theprinter, manage page formats, and specify what you want
printed.
Formostofus,the“Fonts”chapterwillbeuseful:howto usethefontsbuilt
intotheLaserPrinter 4111,plus thosethatcome on cartridges or computer
disks.
You may look at chapters 4 and 5, which cover Star LaserPrinter 4111
commands. Your LaserPrinter 4111emufates (imitates) Hewlett-Packard
LaserJet 111by accepting the same commands they do.
If you want to write or modify a program that uses the Hewlett-Packard
LaserJet III, chapters 4 and 5 show how your Star LaserPrinter 4111can
emulate to accordingly.
The chapter on “Printer Control Language” is longer and more detailed
than the other. That’s because you are more likely to use laser printer
comtiands than commands for vector graphics.
Thefinal“Technical Supplement”containingthecommand and character
reference tables will m-obablvget thumbed the most.
●
✌
JG-
Page 5
Conventions
Incidentally,oneofthoseTechnical Supplement tables suggestsa couple of
typographic conventions we’ll use. Base ten (decimal) numbers will generallybeusedhere; ifwehavetousebasesixteennumbers(hexadecinzczi)we’11
expressly say so.
And second, the lowercase L is practically identical to the number one
(1versus 1).Because lowercase L is used in many command descriptions,
we’11use the character ~ to avoid confusion.
The Star LaserPrinter 4/// Operations Manual
ThismanualisthecompaniontotheStarLuserPrinter41110peration.rManual
that came with your printer. A laser printer is a fairly complex tool that
requirescare and delicate handling. Soto usethisApplications Manual best,
make sure you understand that OperationsManual first.
Your OperationsMattualholdsessential informationabouttheLaserPrinter
4111.such as how to:
●
●
●
●
●
●
●
●
unpack and set up your laser printer,
connect the Star LaserPrinter 4111to your computer’s serial or parallel
port.
link the LaserPrinter 4111into a network of several computers,
configuretheLaserPrinter41Hto yourneeds (withvariablessuchaspaper
size and speed of data transfer),
load paper and the toner cartridge,
operate the panel switches and display,
run the LaserPrinter 4111self-test,
look after your printer to keep it in peak condition.
Page 6

TABLE OF CONTENTS
1. Getting to know Your Star LaserPrinter 4111............................................. 1
1.1Star LaserPrinter 4111Hardware ................................................. 1
1,2Star Laserprinter 4111software ...........................................,,.....5
2. Controlling Your Printer
............................................................................
13
2.I Printer Parameters ...........
....................................................... .
13
2.2 Controlling the Printer .............................................................. 16
2.3 Controlling the Page .................................................................20
2.4 Controlling the Printing ............................................................25
2.5 The Star LaserPrinter 4111Superset ..........................................26
3. Fonts .............................................................................................................27
3.1 Font Terminology .....................................................................27
3.2 How the Star Laserprinter 4111Stores Fonts ............................30
3.3 Symbol Sets ..............................................................................33
3.4 Managing Fonts........................................................................34
4. Printer Control Language ..........................................................................4l
4.1 Printer Control Language .........................................................41
4,2 Controlling [he printer ..................................................,...........43
4.3 Page Orientation .......................................................................46
4.4 Moving the Print Position ........................................................51
4,5 Controlling Fonts......................................................................61
4.6 Using Your Own Fonts ............................................................79
4.7 Raster Graphics ........................................................................84
4.8 Pattern Graphics .......................................................................87
4.9 Macros ......................................................................................93
5. Vector Graphics .....................................................................................,....97
5.1 GL/2 Commands and Syntax ...................................................97
5,2 controlling the prin[er ......................................... ....................99
5.3 Configuration and Status ........................................................ 102
5,4 Vector Group........................................ ................................. 106
5.5 Polygon Group ....................................................................... 110
5.6 Line and Fill Attribute Group................................................. 113
5.7 Character Group ..................................................................... I19
5.8 Escape Sequences in GL/2 Mode ........................................... 126
Page 7
6. Technical Supplement ............................................................................... 129
6.1 CommandSummary............................................................... 129
6.2 Symbol sets ............................................................................ 134
Index .............................................................................................. .. ....... .... 165
Page 8

Page 9

m
Gettingb KnoW’Yow ‘” “
StarLaserPrinte~
4111
This chapter introduces both the hardware and software aspects of the Star
LaserPrinter 4111’spersonality, from fonts and print engine to ASCII and
Escape sequences.
1.1 STAR LASERPRINTER 4111HARDWARE
1.1.1 Versatility
Your Star Micronics Star LaserPrinter 4111 works with practically all
commercial softwareprogramsandcomputers.With featuresthatgo beyond
Star’s easy, affordable 9-pin and fast, quality-printing 24-pin dot matrix
printers,the StarLaserPrinteristhe logicalnext stepinthe seriesoffineStar
Micronics printers.
Your Star LaserPrinter 4111produces pagesthat lookclose totypesetquality,
with up to 90,000 dots per square inch— no more NLQ (near letter quality)
compromises. The Star LaserPrinter 4111produces four of those pages a
minute. These numbers translate to about five times more resolution and
about three times more speed than the average dot-matrix printer.
Star’snew printer isremarkably versatile. Youcan printcomplicated forms
(widthwiseifyouwant)...detailedgraphs...yourowncustomized typestyles
...digitizedphotographs ...
otherlanguages(includingArabic andJapanese).
You can even print your letterhead and logo as you print your letter, and
reprint them directly onto a business envelope. You don’t even need to
remove thepapertraytoprinttheenvelope:just slideit into themanual feed
slot.
1
Page 10
The Star LaserPrinter 4111is ideal for desktop publishing. The pages it
produces make perfect photocopy orinstant-printmasters. And allthemain
desktoppublishingsystems,includingAldusCorporation’sPageMaker and
Xerox Ventura Publisher, work splendidly with the Star LaserPrinter 4111.
With “page makeup” programs likethese you will be able — maybe for the
first time — to deliver communications with the impact of top-notch
graphics.
1.1.2Font options
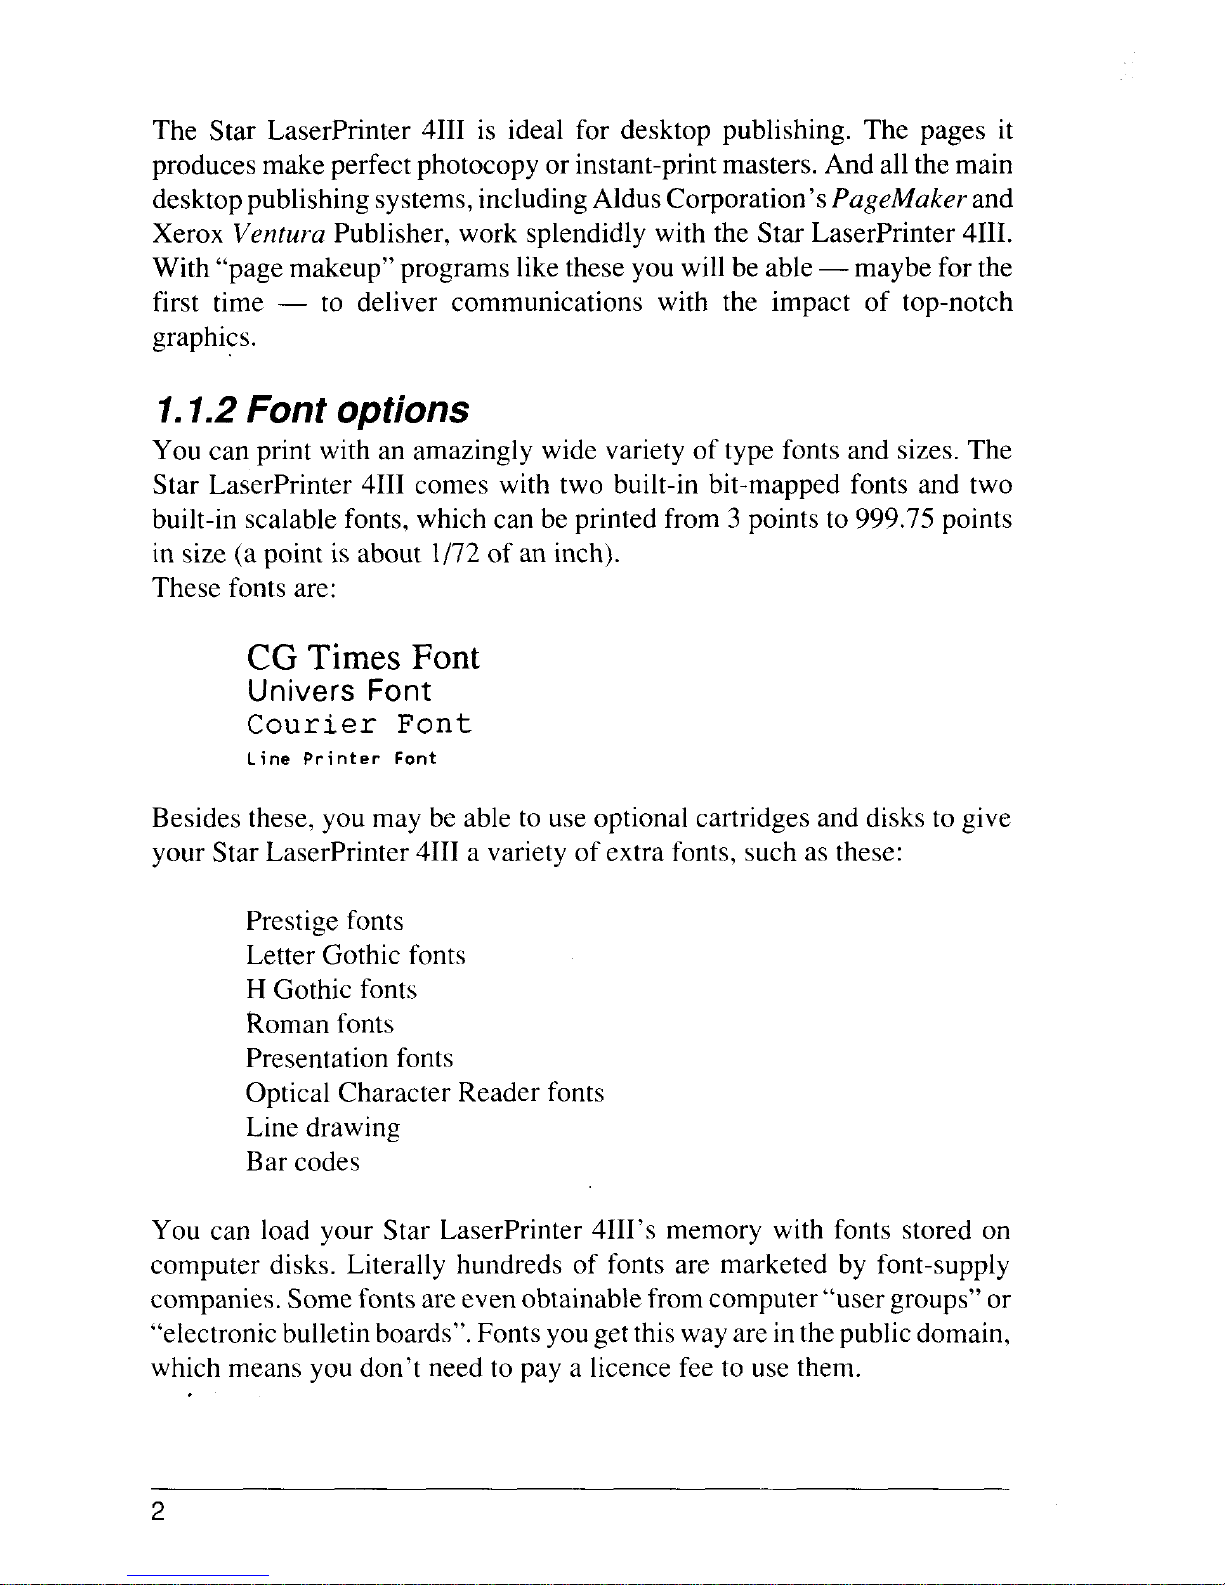
You can print with an amazingly wide variety of type fonts and sizes. The
Star LaserPrinter 4111comes with two built-in bit-mapped fonts and two
built-in scalable fonts, which can be printed from 3 points to 999.75 points
in size (a point is about 1/72of an inch).
These fonts are:
CG Times Font
Univers Font
Courier Font
Li ne Printer Font
Besides these, you may be able to use optional cartridges and disks to give
your Star LaserPrinter 4111a variety of extra fonts, such as these:
Prestige fonts
Letter Gothic fonts
H Gothic fonts
Roman fonts
Presentation fonts
Optical Character Reader fonts
Line drawing
Bar codes
You can load your Star LaserPrinter 4111’smemory with fonts stored on
computer disks. Literally hundreds of fonts are marketed by font-supply
companies. Some fontsareevenobtainablefrom computer “user groups” or
“electronicbulletinboards”.Fontsyougetthiswayare inthepublicdomain,
which means you don’t need to pay a licence fee to use them.
2
Page 11
Ask your Star LaserPrinter 4111dealer about resources like these. Desktop
publishing with laser printers is fast-changing territory, and some Star
Micronics staff people have found electronic bulletin boards and computer
usergroups quitehelpfulinkeeping up withthechanging pace. If you invest
a littletime this way it may repay you well.
.1.1.3How your laser printer communicates
Your computercommunicates with the Star LaserPrinter 4111througheither
aparallel cable or one of two kinds of serial cable. The printer’s inter-ace,
thelinkorboundaryitshareswithyourcomputer,defines whethertheprinter
willacceptcharactersandcommands fromyourcomputer onebyteoronebit
at a time.
A bit is the smallest unit of computer or printer memory. It has either a low
or high electric charge, which we represent with the digits Oand 1.Usually
eight adjacent bits are grouped to form a byte. Since a byte normally
represents one character, this stringof bits— 01000001— might represent
the letter A.
The serial interface accepts just one bit at a time from your computer. A
parallel interfacecan handle a wholebyteat once, bymovingdata bitssideby-sidealong separate wires. You choosewhich interface method you want
to use by selecting it on the operator panel, as explained in your Sfar
LaserPrinter 4111Operations Manual.
1.1.4 The Star LaserPrinter 4111is a computer
The Star LaserPrinter 4111firstmaps the characters to be printed intoitsown
random access memory (RAM). That is, the printer builds.a “picture” in its
memory corresponding to thepage you want to print. When that’s done the
printer can reproduce thepage onto paper on itsown, lettingyourcomputer
get on with other work.
Your Star LaserPrinter 4111comes with one megabyte of RAM — the
equivalent of about one million characters. A Star LaserPrinter 4111option
lets you add a second megabyte of RAM if, say, you need to map full-page
graphics or store more fonts. Accompanying all that RAM is another 2
megabytes of read only memory (ROM), containing a library of internal
fonts and the programs that let the Star LaserPrinter 4111emulate other
printers.
3
Page 12
An Intel 80960SA computer chip controlsboththe memory andtheprinting
mechanism inthe printer, called the printengine.The printer stores a whole
page in RAM before printing it. (If a page is so dense that it overflows
memory—amost unlikelyevent—the Star LaserPrinter4HI printsthepage
on two sheets.)
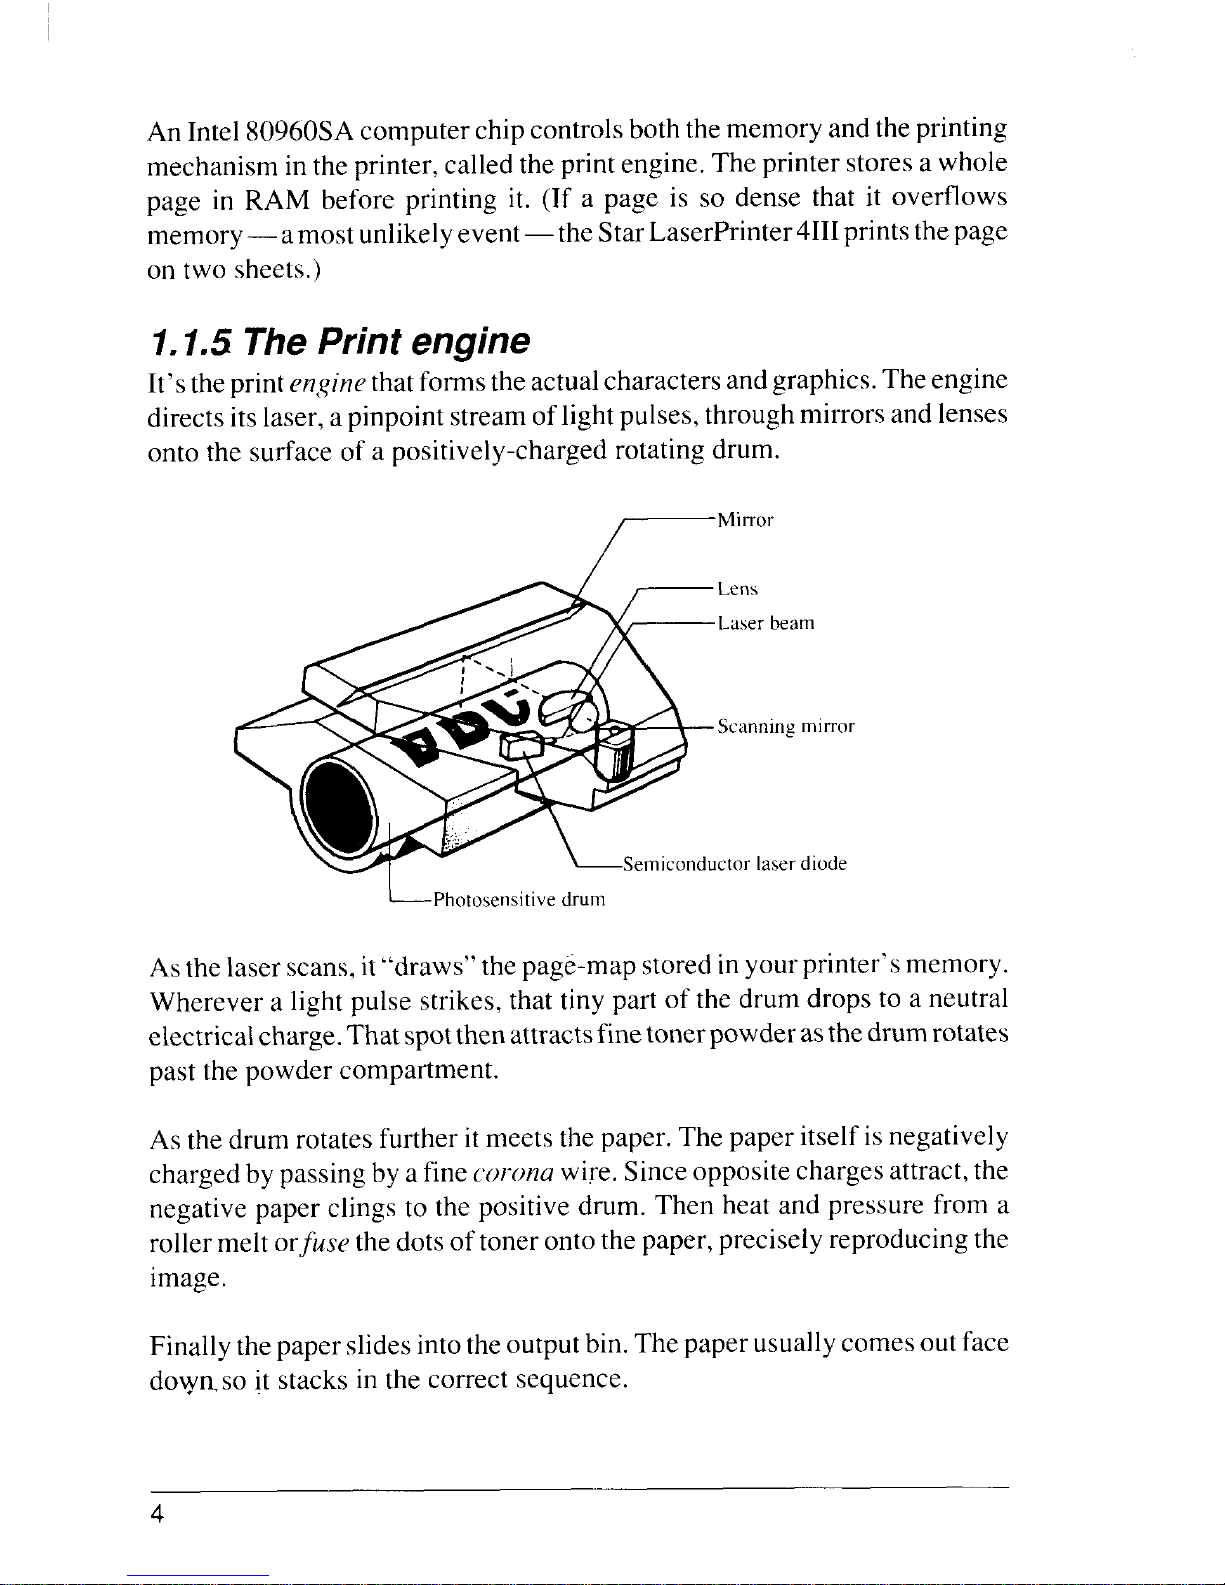
1.1.5 The Print engine
It’stheprintenginethatformsthe actualcharacters andgraphics.The engine
directs itslaser, a pinpoint streamoflightpulses,throughmirrors and lenses
onto the surface of a positively-charged rotating drum.
r“i””r
Lens
Laserbeam
Scanningmirror
ctor laserdiode
~Photosensitive drum
Asthe laser scans, it“draws” the page-map storedinyourprinter’smemory.
Wherever a light pulse strikes, that tiny part of the drum drops to a neutral
electricalcharge.Thatspotthen attractsfinetonerpowder asthedrum rotates
past the powder compartment.
As the drum rotates further itmeets the paper. The paper itself isnegatively
charged by passingbya finecoronawire.Sinceoppositechargesattract, the
negative paper clings to the positive drum. Then heat and pressure from a
rollermeltor,fusethe dots oftonerontothe paper, precisely reproducingthe
image.
Finally thepaper slides intotheoutputbin.The paper usuallycomesout face
dowmso it stacks in the correct sequence.
4
Page 13
1.2 STAR LASERPRINTER 4111SOFTWARE
1.2.1 Binary and hexadecimal arithmetic
Ifyoualreadyknowwhathexadecimal numbersare, youcan skipthissection
and go ahead to read about ASCII.
The decimal number system with which we’re all familiar is a positional
counting system. There’s the “ones” position, the “tens” position, the
“hundreds”positionandsoon. Each higherposition isworthtentimesmore
than the position to therightof it, sincethe decimal system uses the base of
ten. Moreover, we need ten symbols to show the actual values that may be
in each position.
The binary system ispositionaltoo. There’s the “ones”position,the “twos”
position,the“fours”position,the “eights”positionand so on. Inbinaryeach
positionisworthonlytwice thatofthepositionto itsright.Andweonlyneed
two symbols—O (zero)and 1(one)—to show thevaluesthatmaybe in any
position. So in binary we get numbers that look like 1010or 10001100.
The hexadecimal system is made of base-sixteen numbers. Hexadecimal is
positionalliketheothercountingsystems. Andeach higherposition isworth
sixteen times as much as the position to its right.
We need sixteen different symbols to show all the possible values one
hexadecimaldigitcouldhave.We canuseourdecimal system’sten symbols,
butwe’vehadtoborrowafew more fromouralphabetto get allthe symbols
we need. In hexadecimal, therefore, you can have a number that looks like
2C7C, or even FACE.
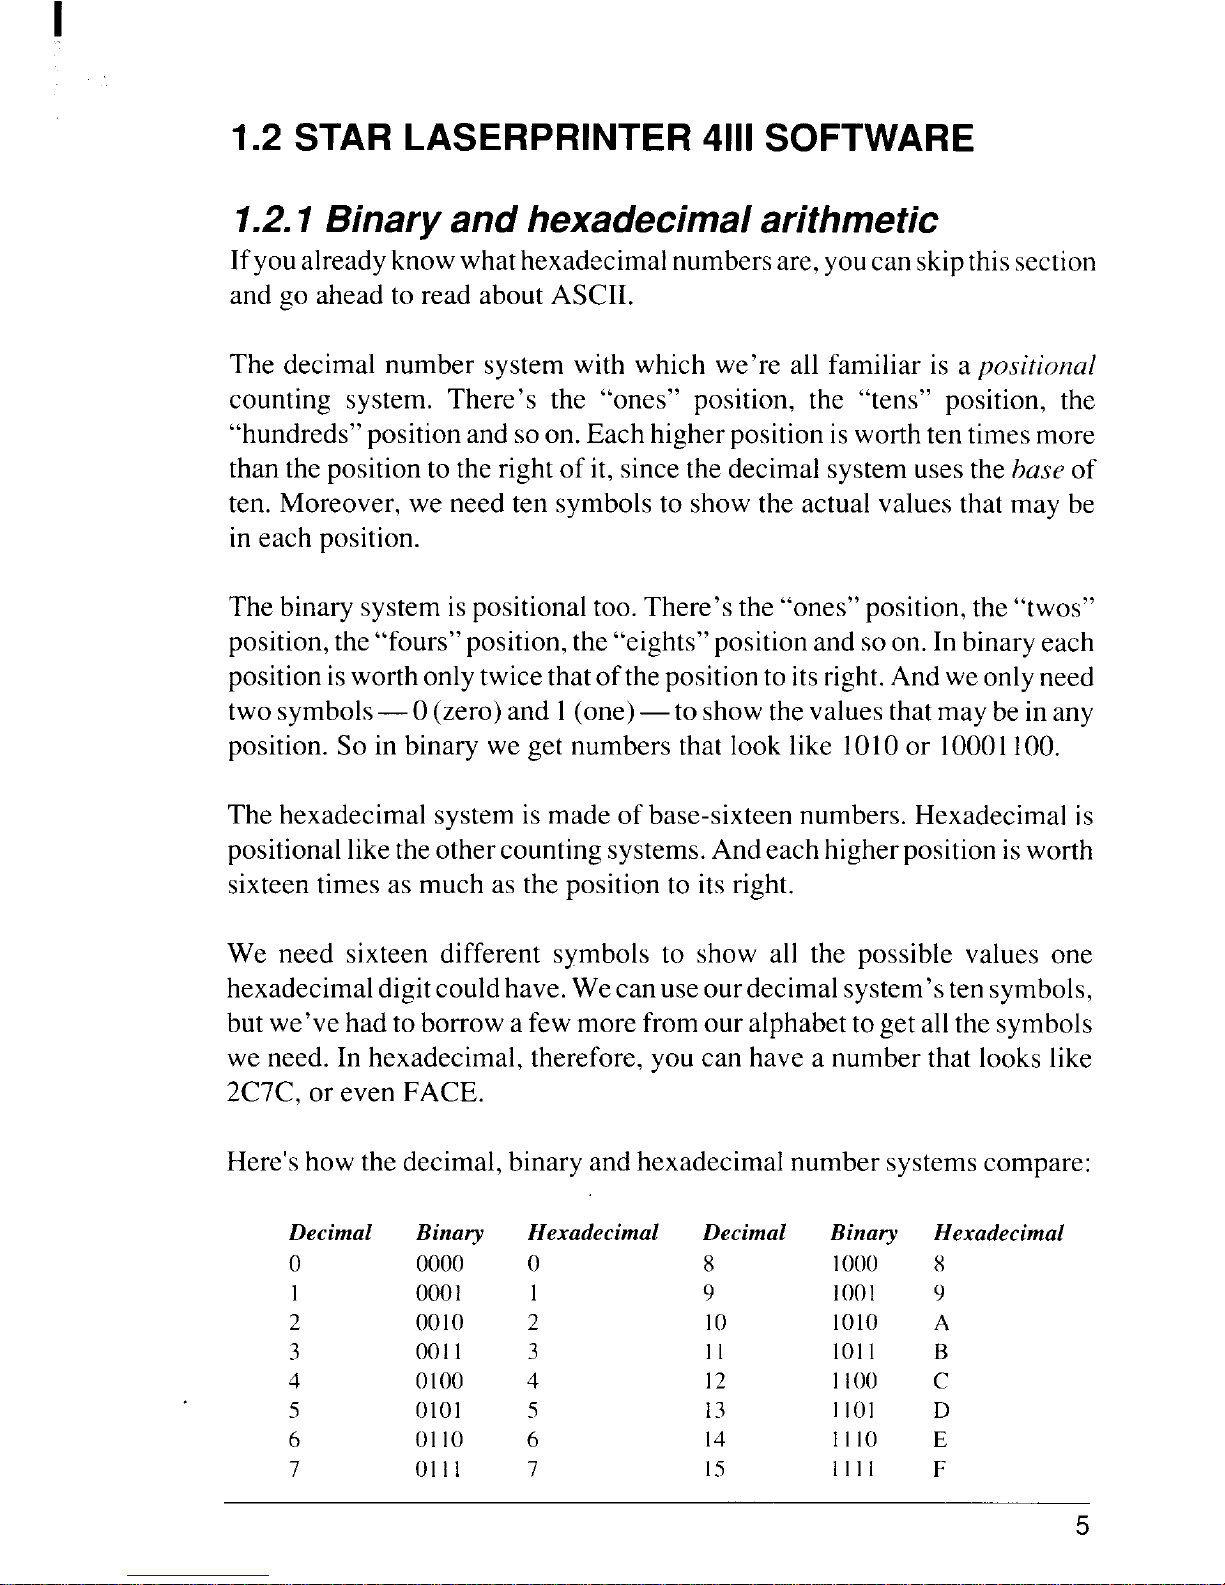
Here’show the decimal, binary and hexadecimal number systemscompare:
Decimal Binary
o 0000
I
0001
2
0010
3 0011
4 O1oo
5
0101
6 0110
7 01I1
Hexadecimal
o
2
3
4
5
6
7
Decimal
8
9
10
11
12
13
14
15
Binary
1000
100I
1010
lo]I
I100”
IIol
I110
1111
Hexadecimal
x
9
A
B
c
D
E
F
5
Page 14
The importantthingto realize is that there’s more than one way to showthe
samenumeric value.Computerprogrammers, for example,occasionallyuse
the hexadecimal system because it’s so compact. (Programmers often just
say “hex”.) This binary number:
101001011111110100110111111011010010110100001001
looksquiteabittidierwhen itiswritten asA5 FD 37ED 2D09, whichmeans
the same thing.
1.2.2 TheASCII table
Where does the Star LaserPrinter 4111get the characters and instructions it
needstoprintinthefirstplace? Itgetsthemfromyourcomputer, which sends
a stream of text and commands to your printer.
The program in your computer that controls everything sent to the printer
(called the printer driver) will usually be included with your computer
programs, such asyourword processor. Butthecommands couldalsocome
from aprogram you’ve written, perhaps inBASZC,a programming language
that uses common English words.
Internally, computers and printers use only the binary number system to
representbothcommands andallthealphabetic,numericandotherkeyboard
symbols. Nearly all of those machines use the same scheme to code those
symbols,theAmerican StandardsCodeforInformationInterchange(ASCII).
An example:inour familiardecimalsystem,binary01001010adds uptothe
number 74. Depending on which program your printer is using, it can
interpret that binary string 01001010 as either the number 74 or the symbol
J. The printer stores the symbol./ at position 74 in a table in its memory.
That eight-bit binary string,or byte.,can be broken intotwo halves. The left
or high-order part containing 0100 is called the zone portion; the right part
holdingthe 1010iscalled thedigits portion.And in thehexadecimal number
system, the zone and digit parts of that byte are represented as 4 and A
respectively (look them up in the list above).
6
Page 15
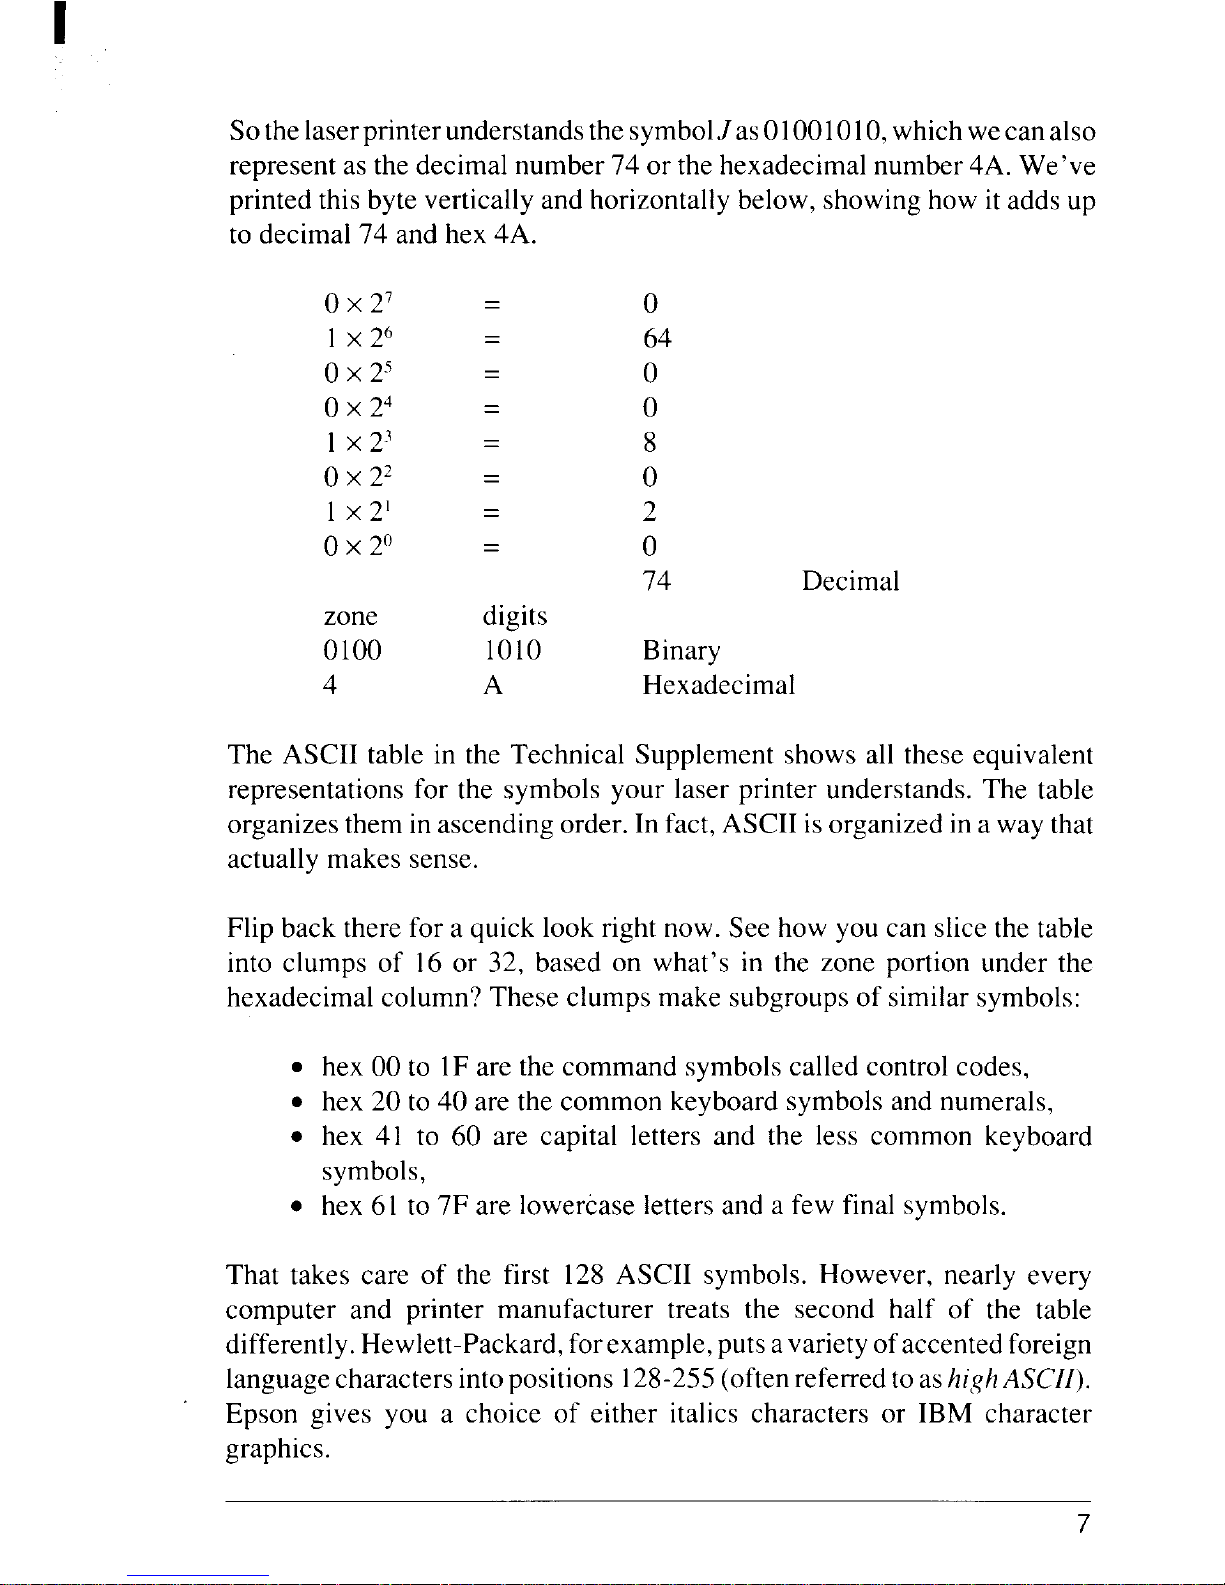
Sothe laserprinterunderstandsthe symbolJas 01001010,whichwecanalso
represent as the decimal number 74 or the hexadecimal number 4A. We’ve
printed this byte vertically and horizontally below, showing how it adds up
to decimal 74 and hex 4A.
o x 27
1x 26
0x 25
0x 24
1x 23
0x 22
1x 2’
ox 2°
zone
0100
4
—
—
—
—
—
—
—
—
—
—
—
—
—
—
—
—
digits
1010
A
o
64
0
0
8
0
2
0
74
Decimal
Binary
Hexadecimal
The ASCII table in the Technical Supplement shows all these equivalent
representations for the symbols your laser printer understands. The table
organizes them in ascending order. In fact, ASCII isorganized in a way that
actually makes sense.
Flip back there for a quick look right now. See how you can slice the table
into clumps of 16 or 32, based on what’s in the zone portion under the
hexadecimal column? These clumps make subgroups of similar symbols:
● hex 00 to 1F are the command symbols called control codes,
. hex 20 to 40 are the common keyboard symbols and numerals,
. hex 41 to 60 are capital letters and the less common keyboard
symbols,
. hex 61 to 7F are lowercase letters and a few final symbols.
That takes care of the first 128 ASCII symbols. However, nearly every
computer and printer manufacturer treats the second half of the table
differently.Hewlett-Packard, forexample,puts avariety ofaccented foreign
languagecharacters into positions 128-255(oftenreferred toas/zighASCZl).
Epson gives you a choice of either italics characters or IBM character
graphics.
7
Page 16
1.2.3 Control codes
The ASCII table shows symbols like .Jor2 theway they actually printonthe
laser printer. But ASCII includes more than just printable characters: none
of the control code commands at the beginning of the table actually print.
Instead,when yourcomputer sendsacontrolcode tothe laserprinteritmakes
your printer do other things, such as sound its beeper.
Control codes mostly handle communications between your computer and
theprinter atthe lowest level,atcablelevel.For example, acouple ofcontrol
codes make sure theprinter lmjfer (your printer’s storagememory) doesn’t
overflow. In this book we’ll indicate control codes enclosed by angle
brackets to their abbreviations in the table: <FF> means the Form Feed
controlcode, which advances the printer to the next page-just as the [PRINTI
button does.
1.2.4 Escape sequences
Control code 27, <ESC> or Escape, is a particularly important one for
printers.To tellyourprinterallthethingsyou mightneed— settingmargins,
saying where to print,choosingaparticularfont, startinggraphics and soon
— requires many more than just two or three dozen control codes. So the
<ESC> control code has a special meaning: <ESC> means “the next
character specifies a command, not something to be printed”.
Therefore if you send just the chara$ter:
to the printer it will print a J and
that’s all. But if you send the <ESC> codejust before the cthen the printer
willswitchoverto print selftest.Extending thecontrol codes this way gives
you many more commands to control your printer. In fact, these “Escape
sequences” make up most of the Star Laser Printer’s language.
In this book we’ll leave spaces between characters when we show escape
sequences. You’ll find
<ESC>
(S OP IOh
a bit more readable than
12vos 3T
<ESC>
(sop IOh12vOS3T
8
Page 17
But remember that you are not to send those spaces if you send commands
to the printer.
To sum up, printer commands are of two types. A cw?trolcode is a singlecharacter command that tells your printer to do something, likemove down
one line. An Escape sequence controls a printer operation too, but is more
than onecharacter long.Sincethey are commands, neither controlcodesnor
escape sequences are usually printable characters.
1.2.5 Printer drivers
Most software packages already include the printer commands they need.
The programs that send commands to the printer so you don’t have to enter
them yourself are called printer dri~’ers.
Many programs ask you to install or configure your printer, which usually
means keying into a menu the particular setup information describing your
Star LaserPrinter 4111.You enter such thingsashow you want to underline,
alter line spacing, or move to a new print position.
Someprograms, such as WordPerjict and thesystemsfrom Lotus DevelopmentCorporation, letyou putprinter Escape sequencesbefore orrightinside
thedocument you wanttoprint.To turn on boldface,forexample, you might
hold down special keys on your keyboard, often Iabelled CONTROL or
ALT, asyoupressanotherkey.Oryoumightusea specialFunctionkey,such
as F6.
In fact, to take real advantage of your Star LaserPrinter 4111’sspecial
abilities, you might opt for a word processor that lets you specify font
changes easily. WordPerfect and Microsoft Word are strong at this, but are
by no means the only good font manipulators.
If you have trouble using a particular program with your Star LaserPrinter
4111,you’ll probably get answers most quickly by asking your software
supplier how the program interacts with your printer.
In thismanual we refer to programs, fontsand other productssoldby several
companies. Pleaserealizethatmentioning theseproductsdoesnot mean Star
Micronics endorses them in any way.
Page 18
1.2.6Sending your own printer commands
Withoutaprinterdriver,sendingcontrolcodes andEscape sequencestoyour
printer properly requires some knowledge of a programming language like
BASIC or Pascal, or at least of how to put such codes into a program. With
programming languages,the computerdoesn’tact onthecommands youput
into a program until you tell it to run that program.
When you give a command to the printer from a computer program, you
normally enter each part of the command as a separate character. This way
you don’t affect anything else happening on the computer. You often send
each code or character in the command by giving its position in the ASCII
table, as a decimal or hex number.
1.2.7A BASIC example
Here’s an example you can type in right now, to clarify what we’re saying.
It’s written in Microsoft BASIC for a computer that uses the MS-DOS
operating system, so if you have a different computer or BASIC you may
have to translate a bit.
The LPRINT commands all send data to the printer. Ifthe data is something
youwantprintedyoujust putitinquotationmarks. Ifthedataisacontrol code
you just say where it is in the ASCII table, giving its position as a regular
decimal number.
BASIC usuallysendsacarriage return after every 80 characters, to keep the
print position moving when it hits the end of a line. Unasked-for carriage
returns can mess up your printing, however, so it’s a good habit to put in a
WIDTH statement as shown. That lets us print over the whole page area.
The <BEL> control code— ASCII code7— is sent inBASIC as CHR$(7).
The <ESC> code itselfisCHR$(27). And because we’re using thecharacter
z as part of an <ESC> command, we type CHR$(112) instead of
“z”.
So if you start BASIC and type these commands:
10
Page 19
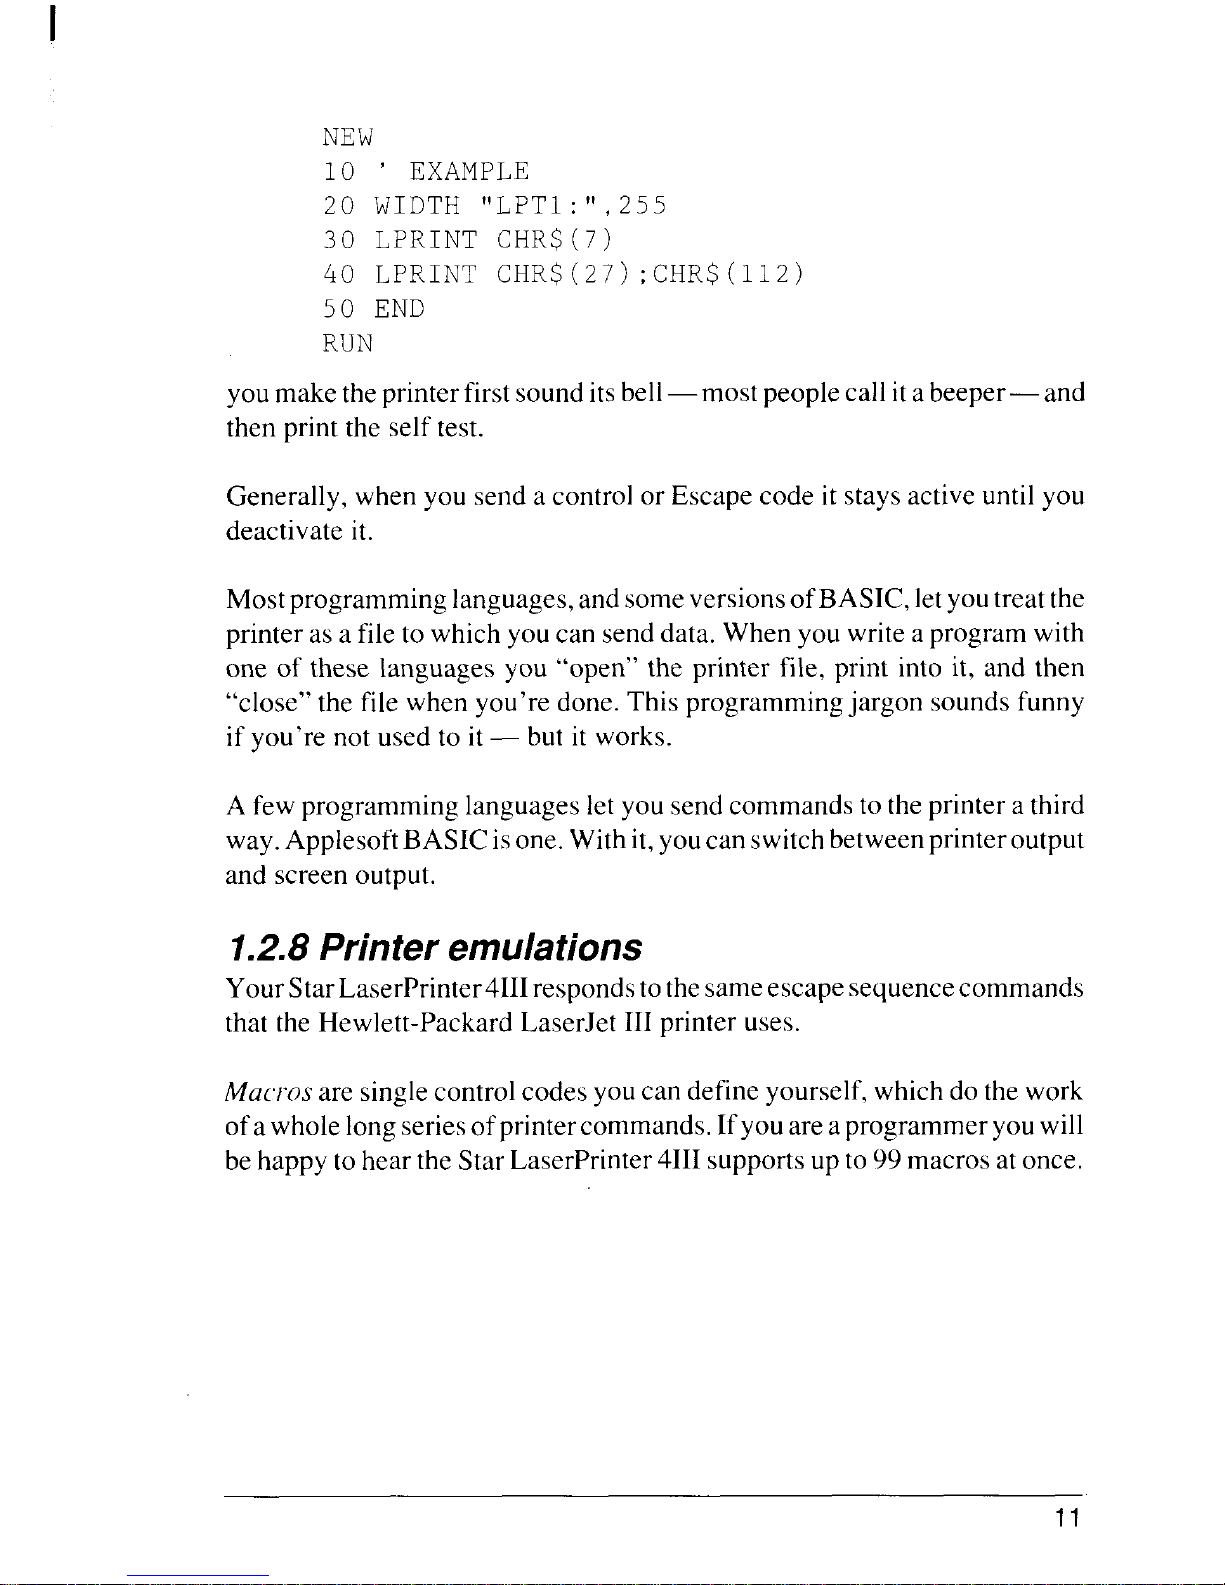
NEW
10 ‘ EXAMPLE
20 WIDTH “LPT1:’’,255
30 LPRINT CHR$(7)
40 LPRINT CHR$(27);CHR$(112)
50 END
RUN
youmakethe printerfirst sounditsbell—most peoplecallitabeeper— and
then print the self test.
Generally, when you send a control or Escape code it stays active until you
deactivate it.
Mostprogramming languages,andsomeversionsofBASIC,letyoutreat the
printer as a file to which youcan send data. When you write a program with
one of these languages you “open” the printer file, print into it, and then
“close” the file when you’re done. This programming jargon soundsfunny
if you’re not used to it— but it works.
A few programming languages letyou send commands to theprintera third
way.ApplesoftBASICisone. With it,youcan switchbetweenprinteroutput
and screen output.
1.2.8Printer emulations
YourStarLaserPrinter4111respondstothesameescape sequencecommands
that the Hewlett-Packard LaserJet III printer uses.
Macros are singlecontrolcodesyoucan defineyourself, which do the work
ofawholelongseriesofprintercommands.Ifyouare aprogrammer youwill
be happy to hear the Star LaserPrinter4111supportsupto99macrosatonce.
11
Page 20

MEMO
12
Page 21
You can control your Star LaserPrinter 4111in two ways, either through
controlpanelparameters or through software commands. In this chapterwe
will consider printer controls mostly from the perspective of the control
panel.
2.1 PRINTER PARAMETERS
2.1.1 The control panel
The easiest way to control your Star LaserPrinter 4111is through its control
panel, as explained in your Star LaserPrinter 4111OperationsManual.
When your printer is onfine (connected to and under the control of your
computer), its control panel display shows you the printer’s status. For
example, the READYlightblinks when the printer is warming up. The DATA
light comes on whenever the printer is holding data it hasn’t printed yet.
When you press the [ON LINE] button, the printer changes from normal to
offline mode and cannot accept data from yourcomputer. When the printer
is offline you can usethe other panel buttons.For instance, if you press the
[TEST/>] button for two seconds and release itjust after STATUS SHEET is
displayedwhen thelaserprinter isoffline,itfinishesprintingthecurrentpage
and then feeds in and prints a status sheet.
Some buttons on the panel let you perform two functions. Holding one of
those buttons down, rather than quickly pressing it, selects a different
operation. For example, holding down the [TEST/>] button for over five
seconds makes the Star LaserPrinter 4111print its font list.
13
Page 22
I
2.1.2 Parameter settings
From the panel you can also change the parameters that define how your
printer works. Parameter just means
“variable”. If you’re familiar with
earlier kinds of printers, you’ll understand that laser printer parameters
controlpretty much thesamethingsDZPswitches do.(A DIP switchor’’dual
in-linepackage switch”isa setofsmallswitchesthat controlvarious printer
functions.)
The printer stores these parameters aseasy-to-useprogram menu items that
you can select from the control panel. These parameters specify:
●
●
●
●
●
●
●
number of copies (how many sheets of each page to be printed)
character (what character font to print)
page size (what size the printer will use)
layout (how pages will be formatted)
paper feed (what paper the printer will use)
input buffer (what size the printer can store the input buffer)
interface (how the printer communicates with your computer)
A dejbult is the setting the Star LaserPrinter 4111will use if none is
specificallyselectedbyaprogram. When you firstturnon or later reset your
printer these default settings will take effect.
Your main usefor the control panel will likely be to set the default settings
you want for these parameters. However, you will probably find the panel
convenient too when you want to switch between manual and automatic
paper feed.
2.1.3 Four versions of parameters
The Star LaserPrinter4111actually storesfourversionsoftheseparameters:
●
●
●
●
its “ultimate default” factory settings,
the user default settings in effect when you first turn on the printer,
your initialsettingsfor one particular session,
and the current settings that the printer is using now.
These are in priority order. The current settings always override the initial
sessionsettings,which inturnoverridetheuserdefaultsettings,which inturn
override the factory settings.
14
Page 23
Factory settings are programmed into the Star LaserPrinter 4111when it is
builtatthe factory. Your printerkeepsthefactory settingsfor itsparameters
in ROM; they never change. You can copy them into the current settings or
any other settingsasneeded. But theonly way you can return to the factory
defaults is from the control panel; no commands do this.
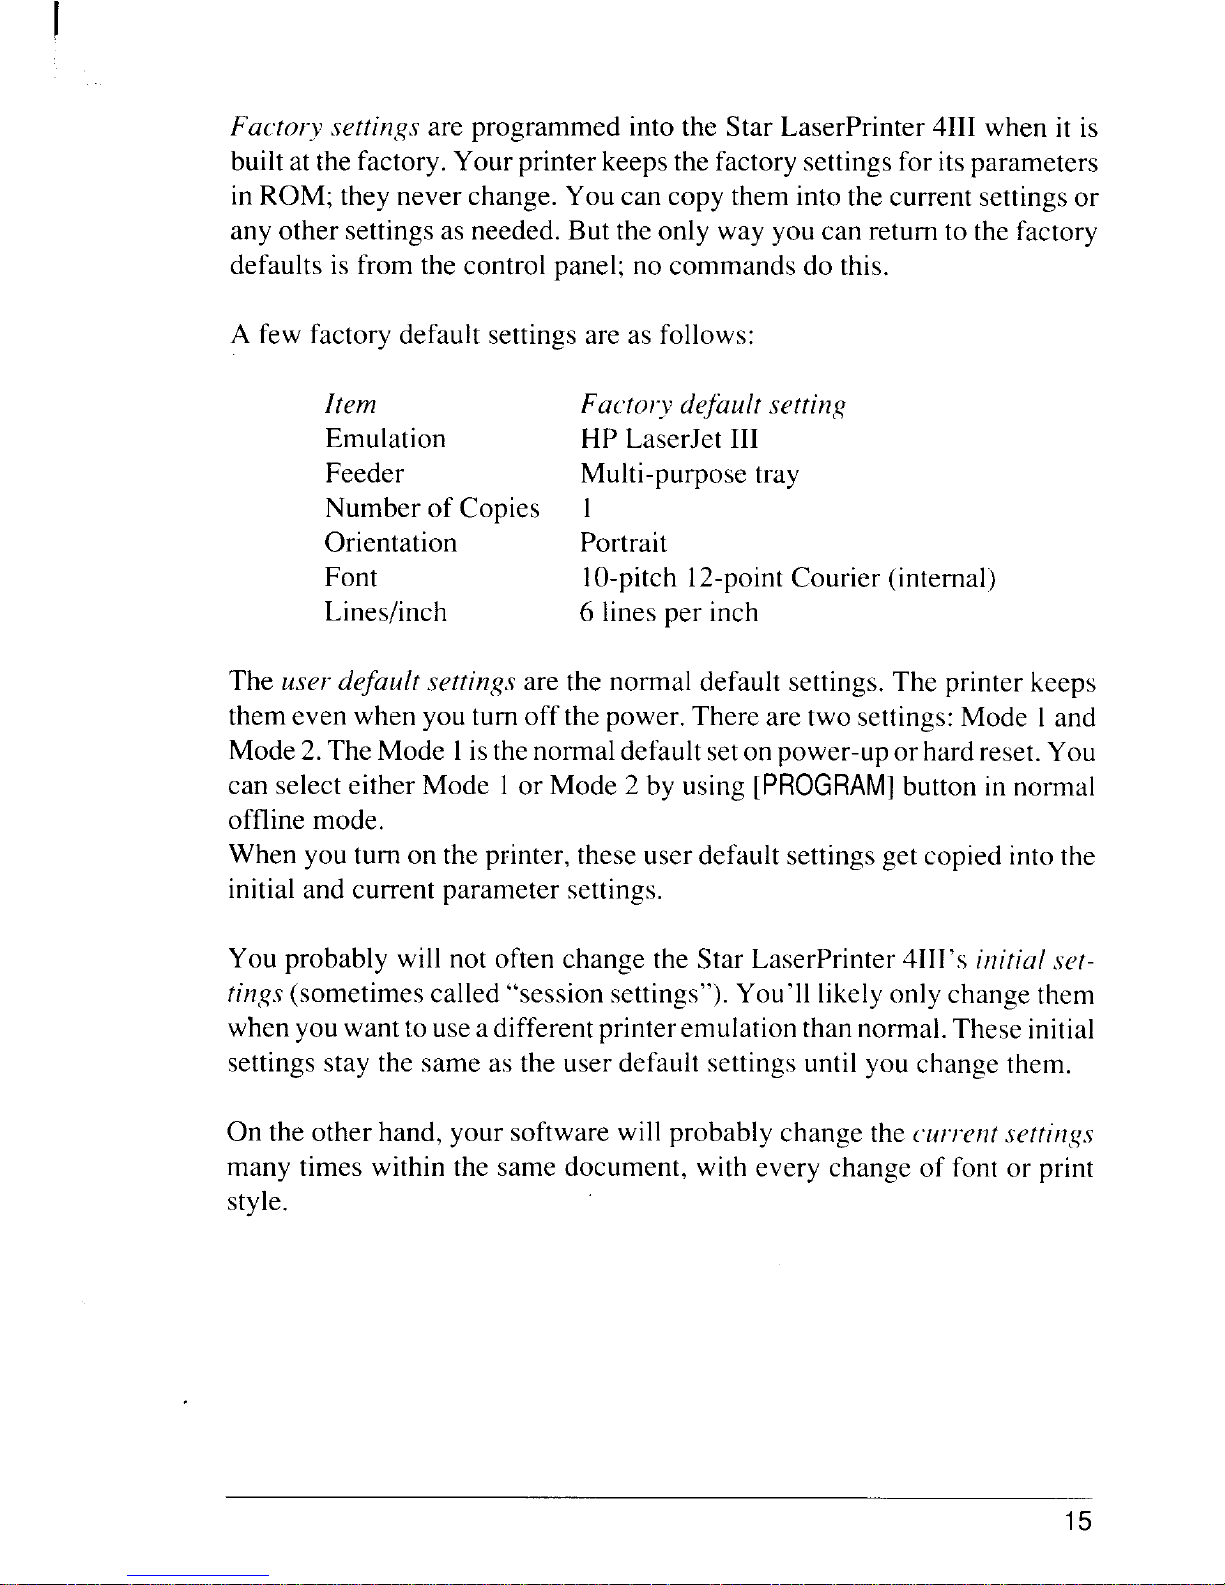
A few factory default settings are as follows:
Item
Fuetory deftiult settincq
Emulation HP LaserJet III
Feeder
Multi-purpose tray
Number of Copies 1
Orientation
Portrait
Font 10-pitch 12-pointCourier (internal)
Lines/inch
6 lines per inch
The user default setti}?gsare the normal default settings. The printer keeps
themeven when you turn off the power. There are two settings:Mode 1and
Mode2. The Mode 1isthe normaldefault setonpower-up or hard reset. You
can select either Mode 1or Mode 2 by using [PROGRAM] button in normal
offline mode.
When you turn on the printer, these user default settingsget copied intothe
initial and current parameter settings.
You probably will not often change the Star LaserPrinter 4111’sinitial set-
tings(sometimes called “session settings”). You’11likely only change them
when youwantto useadifferent printeremulationthannormal. These initial
settings stay the same as the user default settings until you change them.
On the other hand, your software will probably change the (urrent settings
many times within the same document, with every change of font or print
style.
15
Page 24
I
2.1.4 How to change parameters
With the printer offline, ifyoupressthe [PROGRAM] button theprintergoes
into “program” mode. You can then step through the laser printer’s four
levels of program menu to configure your printer. That’s the process of
changing certain printer settings so your computer and printer can communicate properly.
It’s actually pretty easy. Flipping through and setting parameters from the
panel isdescribed in detailintheStarLaserPt”inter4111OperationsManual.
Basically, all you do is press the [<]or [>]buttons to scroll through the sequence of possible parameters and values, which is clearly shown on the
panel display. You press [v] when you want to go down and scrollthrough
alower menulevel.And youalsopress
[A]when youwanttosaveaparticular
menu item as the value for a current parameter setting.
The two last menu headings let you load one version of the parameters into
another version. One moves the current parameter values into user default
parameters. The final menu option goes the other way, letting you load the
factory parameter settings as your current settings.
2.2 CONTROLLING THE PRINTER
Inthissectionyou’llmeettwoseparatecontrolsoverhowtheStarLaserPrinter
4111itself works. The INTERFACE parameter controls communications
between the printer and your computer. You can set the INTERFACE
parameters on the control panel.
2.2.1 The l/VTERFACEparameter
The INTERFACE parameter, the most basic of the Star LaserPrinter 4111’s
configuration settings, defines how your computer connects to the printer.
You can set the INTERFACE to either Serial or Parallel. In most singlecomputerenvironmentsyou’lloptforthe fasterParallelinterface; inamultiuser network you may be better off with Serial.
The particularprinterinterface settingsdon’tmatterasmuch asmaking sure
they match those on your computer. If you use an MS-DOS computer, you
can”set your computer’s parameters with the MODE command. See your
MS-DOS manual.
16
Page 25

Most MS-DOS and AT-compatible computers support up to three parallel
and two serial ports, which come on expansion boards you plug into your
computer.Whenyouinstallsuch boardsyoumustsetswitchestoindicatethe
numberandaddresses ofthese ports. Ifyou specifythe wrong addresses,you
won’t be able to print.
Serial interface: rate
If you ask forthe Serial interface you’llhaveto tell your printer more about
how the data will be coming in— in particular itsrate and unitsize and the
meanings of any special bits.
The Rate parameter specifies how fast data will be arriving, measured in
baud (named aftertheFrench communications engineer Jean Baudot). Pick
any of the following data transfer rates:
300 baud
600 baud
1200 baud
2400 baud
4800 baud
9600 baud (the default)
19200 baud
38400 baud.
Roughly,onecharacterasecond worksoutto 11baud. Ifyou’renotsurehow
fast your computer will transmit, the general rule is to experiment. Try
sending a page to print at the highest speed, and work your way down until
the printer’s output looks OK.
Serial interface: special bits
In Serial mode you’ll also have to specify if your computer sendsdata bits
in groups of seven (most computers send eight, the default for a byte).
Sometimes an extra bit gets appended to make the sum of all bits in each
character always odd or even; that’s calledparity. A parity bitcan help spot
transmission errors. If yourcomputer sendsthat extra parity bit, you’ll have
tosay whetheritproducesanevenorodd numberof“on”bitsinthecharacter.
17
Page 26
You’ll also have to indicateifyourcomputer sends two stop bits to indicate
the end of a byte, instead of one, the default. These serial interface settings
are described in more detail in your Star LaserPrinter 4111Operations
Manual.
Serial interface:protocol
Finally,inSerialmodeyourcomputer willuseone oftwoprotocolsto ensure
dataissentproperly.Protocol(sometimesalsocalled “handshaking”)means
“who says what when”, and is the way your printer tells your computer it’s
ready to receive data. Your computer and printer communicate by sending
protocol control codes (they’re at the front of the ASCII table).
Someprogrammers callthe XON and XOFFcontrol codes “kisson and kiss
off’; otherscallthesameprotocol DC1and DC3 (fordevicecontrol). Either
way, these codes let your printerrun the show, telling the computer when to
startand stop sendingdata.Yourprinter askstohavedata held back when its
memory is nearly full or when it senses an ERROR condition.
DTR (Data Terminal Ready) protocol does the same thing slightly differently. The printer sends a continuous high-voltage signal over the cable as
long as it can accept data, but drops the voltage to say “whoa” to the
computer.
Look in your computer’s operations manual, in the section dealing with
communications protocols, to see which is best for your system. You can
sticktothe printer’sdefaults ifyour computerdoesnotusetheDTR,butdoes
use XON/XOFF.
2.2.2 Checking your connections
Your computer andprintermay have troublecommunicatingwhen you first
introducethemto each other. The quick way to find out if your settings and
printer cable are working isto send your printer a printout from your screen
(CTRL-P with MS-DOS).
When that done you will also have to presstheprint button on the printer,
which makes the printer advance to a new sheet. No laser printer printsand
ejects a page untilit’stold to feed aform,or untilithas received all the lines
the page can hold.
18
Page 27
If your Star LaserPrinter 4111doesn’t print what’s on the computer screen,
recheck your connections and interface settings. With an applications
program likeLotus 1-2-3 or Microsoft Word, you use a printer setuproutine
to match your computer with your printer’s operating characteristics. So
double-check your software settings;your computer’s output, for example,
might not be going to the proper port.
2.2.3 Hints: The hex dump
To make your Star LaserPrinter 4111print in hexadecimal rather than the
usual ASCII symbols, press the control panel buttons that put the printer
offline and in PROGRAM mode. Move to the EMULATION parameter’s
HEX DUMP setting and select it.
Some control or Escape codes can be problems on a few computers; those
computers change certain codes when sending them to the printer. If you
think you have this problem you need to see exactly what your printer is
receiving. We recommend you run a short program that loops through and
prints the ASCII table. Print in hexadecimal rather than the usual ASCII
symbols.
If you spot a problem code you can try to bypass the problem, either by
sending each code directly to the printer, or by changing your system’s
printer driver. Such computer-specific solutions, though, are beyond the
scope of this manual. We suggest that if necessary you consult another
programmer more familiar with your computer.
Actually, if you are debugging any program you may find this hex-dump
mode helpful. It can be a great trouble-shooter.
19
Page 28
I
2.3 CONTROLLING
In this section we look at two controls you have over how the Star
LaserPrinter 4111handles and formats its pages: You can set values for the
PAPER FEED and LAYOUT parameters onthecontrol panel. At theendof
this section we’ll also preview different ways to move the print position.
2.3.1 The PAPERFEED parameter
The PAPER FEED parameter lets you specify both what kind of paper you
want and how the paper is fed.
One convenient thing about a laser printer is that itdoesn’t need continuous
forms, sometimes called ~bnfbki paper. Other printers feed in a stack of
forms— withpages alljoined byperforations— byhaving sprocketsengage
and pullalongpinfeed holespunched alongeach sideofthepaper. After it’s
printed you have to tear off the pinfeed-hole strips and then separate the
pages,
With the Star LaserPrinter 4111you can print on a variety of ordinary cut
sheet pages.
For the Feeder value of this PAPER FEED parameter, you first enter either
multi-purpose tray, manual feed or cassette (option) to indicate where you
wantpaper fed from. The multi-purposetray handles varioustypesand sizes
ofpaper (Letter, Legal, A4, B5, Executive, OHP sheets,Labels,Envelopes).
Manualfeedmeansyoufeed each sheetby handfromthemulti-purposetray.
The cassette tray automatically feeds single sheets, much like sheet feeders
on other types of printers.
ThedefaultpapersizeisA4, youcan specifyother sizestoo.A different-sizes
tray automatically selects that different paper size,
●
●
●
●
8.5 by 11 inch letter-size paper
8.5 by 14 inch legal-size paper
B5 international (used in every country except North America)
(182 by 257 mm)
the narrower “executive” size (7.25 by 10.5 inches)
20
Page 29
Oneothernice thingyoucan doisprintdirectly onenvelopes.With thisPaper
Size parameter you can specify envelopes in sizes, Monarch, COM-10,
InternationalC5andDL.Thenjust work outwhereto put theaddress,setthe
orientationto landscape (see below), and slideyour envelope intothemultipurpose tray!
2.3.2 Hints: Pape6 labels and transparencies
●
●
●
●
●
The best paper forthe Star LaserPrinter 4111has a smooth finish and is of
60 to 105g/mz(20 to 24 pound) weight. Any paper designed for photocopiersshoulddothetrick though;Xerox4024andCanon NPprint nicely.
High quality cotton bond paper, which contains up to 25 percent cotton
fibres, works passably well with even heavier weights.
Theabsolutelimitsare 16-poundpaper atthelightend and 35-poundstock
at the heaviest. With heavy paper, open the tray so the pages will be
delivered face up and won’t have to bend over the final rollers.
Be aware that any puckered or woven finish may not print as sharply as
you’d like. Avoid shinycoated paper ormultipartforms. And don’t even
think about putting in stapled or ripped pages.
If you frequently change paper weights, you will probably get skewing
problems — lines thal print at an angle because of misfeeding. For best
results, when your Star LaserPrinter 4111is first set up have the paper
feeder“squared” forpaperofatleast60grams(20pounds). Lighterpaper,
though cheaper, isn’t really,the way to economize.
Want to print on your own preprinted letterhead?Fine— so longas your
logoisn’tthermographed.Thickcolored inkmay lookluxurious,butitcan
also wind up stuckalloveryourprinter’sroller. Stay away from any inks
that soften at relatively low temperatures; your printer fuses pages at
200”C.
This warning appliestocoloredpaper too, ifithas been tinted with a lowtemperature dye.
When printing startsfading becausethetoner islow,remove thecartridge
and gently rock itback and forth half adozen times. Don’t tip it up or the
tonermay spillout.Redistributingthe tonerpowder this way can keep the
cartridge going for another tray of paper.
21
Page 30
I
. No question, working with single label sheets is more convenient than
with continuous labelstock.Laser printers are faster and produce betterlooking labels than other printers. But laser printers, which work by
electrostatic photographyratherthanimpactpressure,putdifferentstresses
on labelpaper. Each sheethas to bend overandthroughtheguide rollers;
moreover, fusing toner to the paper involves heat. You can eliminate
trouble by always feeding label sheets manually.
Both Avery’s “Lasergraphic” labels and Canon’s labels seem to work
fine. Your main concern is that the labels completely cover the backing
sheet so itshowsonly at the outside margins. That way individuallabels
can’t easily peel off.
The safestapproach isto laser-printsharpmastercopiesonpaper andthen
photocopy those lists onto labels. This will avoid putting your printer’s
adjustment for paper thickness out of adjustment.
. Ifyou.wanttoprinttransparenciesforyouroverhead projector,somefilms
will actually melt in your laser printer. Stick to 3M’s medium-weight
transparency film (type 501 ) or to Hewlett-Packard’s #92285J.
2.3.3 The LAYOUTparameter
The layoutorformat orsetup ofapage refers tohowtextispositionedon the
page. Layout includes page orientation, margins and the spacing of charactersacrossand linesdownthepage.Youcan controlthese withtheLAYOUT
parameter.
You probably won’t use the LAYOUT parameter on the control panel’s
program menu very much though. Most of the time you’ll either leave the
Star LaserPrinter 4111with its default settings, or lookafter page formatting
with commands you send from your computer.
Page orientation
A page’s orientation tells you inwhich direction the print goes on thepage.
When youuseportraitorientationthelinesare printedas theyare inanormal
business letter, across the width of the page. A portrait painting of a person
is usually vertical — hence the name.
22
Page 31

Landscape
Porlraii
When you use landsmpe orientation the words are printed “on their sides,”
vertically up the length of the page. Text written with landscape orientation
only lookscorrect when you turnthepagesoitslength runsside-to-side,just
like the painting of a landscape.
Envelopes must be printed with landscape orientation. You also will use
landscape regularly to print charts or banners, and spreadsheets or reports
with so many columns they wouldn’t otherwise fit on the page.
All internal fonts, and almost allcartridge and downloaded fonts, are stored
in the Star LaserPrinter 4111with portrait orientation.
Margins, columns and lines
Youcan change margin settingsfor allfouredges ofa page.The leftandright
side margins can have values from Oto 132,defining the margin columns
between which words and images can be printed. And the top and bottom
margins can be set at anywhere from Oto 112 lines.
Text
Length
Portrait
I
Top Margin
\
<T-n”/
‘ Bottom Margin
‘/
Landscape
Orientation
Orientation
23
Page 32

The meaning of a line(sometimes called a “row”) isdefined by the t’ertical
motim?index (VMI). The printer moves the printposition down a line when
it gets a Line Feed code, usually when it bumps into the right margin.
You’ll probably letyourcomputer program set the linedepth. But from the
panelyoucan.setthe VMIvalue inincrementsfrom 1/48to255/48of aninch.
Auto’parameters
The print position refers to the point on the page where the next character
will be printed. When the printer reaches the end of a line, the Auto
Parameters settings tell it whether or not to automatically:
. move the print position down one line (Iinefeeci),
. or keep text out of the side margin (auto wrap).
2.3.4 Moving the print position: a preview
Withdot-matrixprinter,youpick where toprinton thepageeither bymoving
the printhead back and forth or by moving the paper itself. Laser printers
don’t have printheads, but the principle remains the same: you have to say
exactlywhereonthepageeach pictureand stringof textisto go,soeach page
can be constructed in the printer’s memory.
Instead of talking about printheads we talk about moving the printposifion
(some people call it moving the “cursor”,
using the computer-screen analogy). Horizontally, you can move the print position with backspace and
carriage<return commands. Vertically,youcan move theprint positiondown
thepageby printing so many lines per inch,or by sendingline-feedandhalf
line-feedcommands. You canalsomovetotab settingsbothhorizontallyand
vertically (handy for tables and blank forms, or making room for your
diagrams).
But those aren’t all. You can tellthe Star LaserPrinter 4111to move the print
position vertically or horizontally in increments of:
1/10, 1/12or similar fractions of an inch (pitch settings),
1/48,or 1/120inch (line or column definitions),
.
1/300inch (dots), or
1/720inch (tenths of a point).
24
Page 33

These increments reflect the history of twentieth century printing. Pitch,
referring tothenumber of characters printed in each horizontalinch, derives
from how typewriters space their characters. Lines and
columns were first
used by earlier computer printers (on which they are called horizontal and
verticalmotion indexes). You already know about the StarLaserPrinter4111
beingabletoprint300dots totheinch.And theunitby whichtypesettershave
measured text for centuries is the point,
about l/72nd of an inch.
Onehintaboutmovingtheprintposition:youcanconfuse yourselfifyouuse
more than one or two different units during the same session. So decide
beforehand how accurately you need to move the print position (notforgetting any graphics you want to include).Then stick to the unit(s)you choose.
The commands that move the print position in all these ways are described
in chapter 4.
2.4 CONTROLLING THE PRINTING
The CHARACTER parameter defines font attributes and setup values (if
any) for the Star LaserPrinter 4111.
A font attributes or characteristics determine what that font will look like
when it isprinted. Thenext chapter, “Fonts”, exploresthedetails of all font
attributesinmore detail.Butlet’shave aquickoverviewnow, because you’ll
meet these terms on the control panel program menu.
Font attributes: a preview
Orientation (portraitor landscape as described earlier) is usually thoughtof
as one attribute of a font; it’s not really a page formatting issue. Besides
orientation, the fonts with which you print have these attributes:
Symbol seris sometimes called “character set” — which can be confusing,
since some people say “character set” when they mean a font. Symbol sets
are subgroups of a font’s symbols that are most appropriate for particular
countries, such as the UK (f), France (a), Latin America (ii) or Japan (Y).
Spacing andpitch are linked. Characters can be spaced on the linepropor-
tionally,so a narrow letter suchasitakes lessroomthan a wide letter like W,
Or characters can be spacedallthesamewidth:twelve characters to the inch
is the monospaced spacing called 12 pitch.
25
Page 34

Pointsi:e defines how bigcharacters willprint, such as 10or 12points high.
St]’ledefines whether characters print in upright or italic style.
Stroke weight defines how bold a typeface prints.
Finally.,t]p<face itself means the artistic design of a font. Your printer’s
internaltypefacesinclude,CourierandLinePrinter.WiththeStarLaserPrinter
4111you can also use Roman, Prestige, H-Gothic, L-Gothic, Orator and
hundreds more typefaces, which you load into the printer from cartridge or
computer disk.
When you enable font .~[~tzippu)un?ete}-.~on the control panel, itmeans you
start off with particular font attributes as defaults.
2.5 THE STAR LASERPRINTER 4111SUPERSET
Here’s an important fact: you can set nearly every one of the above
parameters by sending your printer a corresponding Escape sequence command.Those Escapesequencecommandswilloverrideanysettingyoumake
from the control panel.
The main thing to realize about most printer commands, though, is that you
probably don’t need to use them. Nearly all popular software packages
include printer drivers, which send commands to the printer so you don’t
have to type them yourself. Some of those programs ask you to key in setup parameters about your printer. Other programs let you put printer
commands before or inside the document you want to print.
But maybe thesoftware you use doesn‘thave printerdrivers for any printer
yourStarLaserPrinter4111emulates: You stillmight nothavetowrite printer
commands yourself.
Severalcompanies sellprograms thatlookafterlaser-printingcommands for
such software. Ask yourdealer aboutLaserControl, Printiorks ji)r Lasers,
PCLPakandRAMResidentPrit?tmerge.There’snotmuchpointinreinventing
the wheel.
26
Page 35

Em
Am
m
Fonts
The fontsyou use determine what your pages will look like. In this chapter
we’ll first clarify the meanings of words people use when they talk about
fonts.
Next we’ll examine the three kinds of fonts (internal. cartridge and downloaded) that you can use on your Star LaserPrinter 4111.We’ll cover the
particular sets of symbols you can choose for those fonts too.
Finally, we’ll find out how to load the printer with your selection of fonts.
3.1 FONT TERMINOLOGY
3.1.1 Typefaces and fonts
First, a few definitions. A typeface is a family of characters with the same
basic design. The artisticcharacter design you choose establishesthe “tone
of voice” for all your documents.
Several variables can characterize typefaces, including weight (light, medium, bold), width (condensed or extended), and style (upright or italic).
Courier,forexample, isatypeface family thatincludesthecharactersinboth
Courier mediurnitalic and Courier bold upright.
Let’sconsiderthesevariables.Bold print issometimescalled “emphasized”
or“double-strike”.On earlier printersboldfaceisgenerated by printingeach
character twice;dot-matrix machinesprint the second impressionjust a hair
below or to the right of the first one.
With the Star LaserPrinter4111you can have different strokeweights intwo
ways.You canhavetwodifferent fonts,storingandswitchingbetween abold
and a medium version ofthe font. Or you can usejust one font and set bold
on and off with Escape sequences. The latterway usesjust half as much font
memory.
27
Page 36

I
Narrow condensed faces used to be called “compressed”. They cram about
fivecharacters inthe spacewherethree usuallygo— idealforspreadsheets.
An extended face, particularly on a dot-matrix printer, goes by several
names: “expanded
“,“enlarged”or“double-width” printing.No matter what
it’scalled, extended print is wider than it is high, and can be fairly effective
in page headings.
Italiccharacters (sometimescalled “oblique”) are slanted.Ordinary upright
characters are often called “roman”. Your StarLaserPrinter 4111comes with
abuilt-inupright Couriertypeface.Moreover,fromanyoftheStarLaserPrinter
4111’sbuilt-in typefaces you can select a subset of upright symbols called
Roman-8.
A,font is a complete set of characters in a particular size and typeface. In
the world of laser printers, the three variables mentioned above — weight,
width and style— are a few~ont attributes (sometimes called “font characteristics”). Let’s consider three more attributes: font height, spacing and
pitch.
3.1.2 Font height
The baseline is the invisible line upon which characters of type sit. Since
thefirst letter blocksweremadeofleadalloy,thedistancefrom one baseline
to thenext iscalled leading(pronounced “ledding”).Type itselfismeasured
from the top ofanuscender (the partextending up intheb ork, forexample)
to the bottom of a descender (the down-stroke of they or q).
The measurements used to describefontsarepoints andpicas (derived from
the marks and letters in medieval church almanacs). There are 12points to
the pica, and almost exactly 6 picas (72 points) to the inch.
Laser printers for computers measure~ont height inpoints.Onlaser printers
the “white space” above ascenders and below descenders depends on how
the line is defined, so the line corresponds to leading. This type you’re
reading has a font height of 12points, and is spaced a little less than 5 lines
per inch.
28
Page 37

The o has been kerned
The font height (24 points) is measured
closer to the f.
from ascender to descender.
t
size and type~ace.
Baseline
Ill
Proportional
Serif
spacing
L;ading is the
baseline to baseline
measurement.
3.1.3 Font spacing and pitch
You probably first heard the word pitch in connection with typewriters.
Typewriters normally usemonospaced spacing:they giveeachcharacterthe
same amount of space on the line.
Abouthalf thefontsavailable for laserprintersusemonospaced spacingtoo.
Pitch is always expressed as so many characters per inch. Ten-pitch, for
example, means a font with ten characters in each inch of the line.
Typesetters for centuries have used two special sizes of type for most text.
Elite characters are 10pointshighand print 12characters per inch. Andpica
characters are 12points high and pitchedat 10characters to the inch. You’ll
often run across these monospaced font sizes in the laser printing world.
ideally each character ina word should nestle against itsneighbors sothey
appear evenly spaced. But adjacent round characters are apt to look too far
apart, while flat-sided characters may appear too close.
Proportional spacincqtakes into account the differences in widths among
letters(compare iiwith w. Proportionally spaced printingiseasier to read
thantypewriter-style printing inwhich allcharacters, includingpunctuation,
have the same width.
Real typesetters equip certain characters with kerns, letterparts that extend
out to overlap adjoining letters. In this word TJ!PCJthe J is kerned closely
against the T. Kerning separates great type from good type.
29
Page 38

3.2 HOW THE STAR LASERPRINTER 4111
STORES FONTS
3.2.1 Bit-mapped fonts
StarMicronicshasearned areputation forattractive,well-designed fonts on
its printers, and this laser printer continues the tradition.
The StarLaserPrinter4111usesbit-mappedfonts. Each character ismade up
of a pattern or “map” of dots, just like characters on a dot-matrix printer or
on your computer screen. Resolution makes the difference: to make each
character the StarLaserPrinter 4111uses ten or twenty timesasmany dots as
a dot-matrix printer or computer screen does.
Every sizeofprint youwant,plusevery italicorboldfaceversion,hasitsown
bit map and is normally considered a separate font. It takes a good deal of
printer memory to hold all the fonts you might want at any given moment.
Star LaserPrinter 4111fonts can be grouped into three categories: internal,
cartridge, and downloadable fonts.
3.2.2 Internal fonts
The Star LaserPrinter 4111has seven built-in interml fonts that reside permanently in its read-only memory (ROM). That’s why these are sometimes
called “resident fonts”:
Courier
10pitch,
Courier 10pitch,
Courier 10pitch,
Courier 12pitch,
Courier 12 pitch,
2 point medium
2 point bold
2 point italic
Opoint medium
Opoint bold
Courier 12pitch, 10 point italic
Line Printer 16.6pitch, 8.5 point medium
Courier is thefaceusedon the mostcommon electric typewriters. Courier is
not printed with proportional spacing. The Line Printer font, designed
originally for mainframe computers, is small and designed to pack a lot of
characters into every inch of print (great for spreadsheets).
30
Page 39

I
The StarLaserPrinter4111’sscalablefontshave thesamerelativedimensions
and general appearance as the following LaserJet III fonts:
CG Times
CG Times
CG Times
CG Times
Univers
Univers
Univers
Univers
regular
bold
italic
bold italic
regular
bold
italic
bold italic
With these most frequently used fonts in ROM, a page can be assembled
muchfasterthan ifthe fontshad tobeloadedintothe printerfor each printing
job.
3.2.3 Cartridge and downloaded fonts
YourStarLaserPrinter4111can usetwoother kindsof fonts,along withthose
built into the printer.
Cartridge fonts, like the internal ones, are permanently stored on ROM
chips.The difference is that those ROMs are in removable cartridges. Your
Star LaserPrinter 4111has a slot for one font cartridge.
A cartridge may hold anywhere from half a dozen to two dozen fonts, all
differing from the internal fonts in size, style, stroke weight or symbol set.
You’ll find that cartridge fonts open up awider range of typefaces too, such
as Roman, Prestige, H-Gothic and L-Gothic. Generally, cartridge and
internal font typefaces are suitable for both text and headlines.
The third kind of font is neither built into your Star LaserPrinter 4111nor
available just by slipping in a cartridge. You do~’nloucithis kind of font,
which means you use a computer program [o send characters from a
computer disk to your printer’s memory. Any downloaded font (sometimes
called a “soft” or “installed” font) that you put into the printer’s RAM
disappears when you turn off the printer, so you have to download that font
again next time you want it.
31
Page 40

I
Downloadable fonts run the gamut from Egyptian hieroglyphics to those
eye-catching decorative fonts known as display fonts.They also include the
more exotic foreign-language characters, such as Arabic or Cyrillic, and
symbol and mathematical fonts (sometimes with fractions).
How can you compare cartridge and downloadable fonts? When you use
cartridge fonts you don’t have to take time to download them. They don‘t
take any of your Star LaserPrinter 4111’s RAM memory either. But
downloadable fonts offer many more choices. Downloadable fonts usually
cost less too.
The printer always knows where its internal fonts are. For each emulation
program, italsokeepstrack ofcartridgeand downloaded fonts inapart of its
memory called the~ont table.
So with the Star LaserPrinter 4111you can have many fonts available at any
one time — the internal fonts, the fontson any cassettes you’ve plugged in,
and any fonts you have downloaded. You can change fonts in mid-line to
emphasizeawordortwo whenever youwant.Youcanmix internal,cartridge
and downloaded fonts in the same document.
3.2.4 Hints: Where to get fonts
●
●
●
You can print any downloadable font that works on the HP LaserJet HI.
Several other companies sell downloadable fonts which are compatible
with your Star LaserPrinter 4111.The Bitstream Corporation in Boston is
oneofthemore popular; Conographic is another. Xerox includesa setof
fontswith its Venm}a Publisher desktop publishing software, which you
can use with your printer.
The SoftCraft company now markets a Bitstream-developed product
called “Fontware”. With Fontware you can generate bit-mapped fonts of
any size from a library of outline fonts. In outlinefonts each character’s
profile isdefinedjust once and the printer generates any font height from
that profile, which saves printer memory.
Don’t hesitate to ask your Star dealer where you can buy cartridge and
downloadable fonts. If you really can’t find the one you need, you can
design and download yourown customized fonts.This is noeasyjob, but
if you’re curious it’s described in chapter 4.
32
Page 41

3.3 SYMBOL SETS
Let summarize briefly, to put the subject of symbol sets in context.
The attributes of a font determine what that font will look like when it is
printed. We covered all but orientation at the start of this chapter, and
orientation in the last chapter. A font’s attributes include:
●
●
●
●
●
●
●
●
orientation (portrait or landscape)
symbol set (which we’ll look at next)
spacing (monospaced or proportional)
pitch (10 or 16.66characters per inch, for example)
font height (measured in points)
style (upright or italics)
stroke weight (light, medium or bold)
typeface (Line Printer, Courier and so on)
Though they are not font attributes, such printing features as subscripts,
superscripts and underlining are treated along with fonts in the following
chapters.
Incidentally, the best way to underline is to use the underline command,
insteadofbackspacingand overprinting with the separate underline charac-
ter(–).Ifyoudothelatterwithproportionallyspacedtext,you’llusuallyfind
the underlining istoo long for the text.
3.3.1 What are symbol sets?
Keyboards differ from country to country. The British need their f symbol,
the French need their g and 5,the Spanish need their ~ and fietc. Scientists
need particular mathematical signstoo.There easily could be four hundred
or more possible symbols for any given font.
However, the number of symbols printers store for a font is limited to 256
slots,asinASCII. So some symbols,ortheorder ofsomesymbols,can differ
in any font. Each unique selection and arrangement of symbolsisa symbol
set (sometimes called a “graphic set” or “character set”).
. The symbol at position 91 for example is an open bracket, [, in the usual
ASCII symbolset. Butthe same positionholds A (capital A with an umlaut)
in the German symbol set.
33
Page 42

I
You probably won’t change symbol setsvery often, unlessyouneed special
symbols for your trade or regularly write in a language other than English.
Your printer supports sets containing just symbols, such as the Greek
alphabet(j?),logicsymbols(s), arrows(~), theregisteredtrademark symbol
(09)and so on.
3.3.2 Default font attributes
When you power on your printer, the internal fonts start off with default
attributes which you can change as needed. The default symbol sets is
Roman-8.
Technically, you can use any of the Star LaserPrinter 4111’sresident fonts
when you send commands. If you want a character that’s not in the font
you’re using, don’t hesitate to grab it. Just send the Escape sequences that
select your desired symbol set, print with it, then go back to your original
font.
3.4 MANAGING FONTS
Youcan seewhichfonts arecurrentlyselectedonyour StarLaserPrinter 4111
by printing a status sheet in offline mode, as mentioned at the beginning of
this chapter. Another TEST mode menu item, described in the Srar
La.~erPrinter4111OperationsMunuul, also letsyouprintouta listofallthe
fonts available on the printer at any given moment.
3.4.1 Selecting fonts
Most popular software packages, particularly word processors, let you
choosefontsfrom withintheprogram. They sendthe appropriatecommands
to the printer and you don’t need to understand how they do it. MultiMafe
usespitch to identify different fonts, for example, while WordPerfect uses
print formats. The point is, you may noteven have to worry aboutselecting
which font to use.
But not all packages do thejob for you. If you are in this situation, you can
selectany fontattributementionedabove,either fromthecontrolpanel orby
sending an Escape sequence command.
34
Page 43

If youusethe controlpanelinprogram mode, selectCHARACTER.Just press
the [>]button to get to the font attribute you want to set, press [v] to get to
itspossiblevalues,press[>]toscanthroughthem,andfinallypress[v]toslap
in the value you want.
The procedures for selecting a font from a computer program is a bit more
complicated. These font selection methods are detailed in the nextchapter.
3.4.2 Hints: Desktop publishing and page design
● Desktop publishing systems help you automate your specifications for
margins, cover design, typefaces, font sizes, placement of graphics and
regular features. You build the specifications you want in templates,
standard page designs you later simply call up on your screen and fill in
with text.
. Somedesktoppublishing systems,such asAldus’sPageMaker, are page-
oriented: you put each page together individually. These are great for
shorter documents, such as newsletters, brochures and letters. Other
systems,suchasXerox VenturaPublisher,aredocument-oriented.That
makes them better suited to technical manuals and long proposals or
reports that go through many drafts.
Other ways in which such systems differ include whether they show on
yourscreenwhat you willgetonpaper(code-basedprograms don’t),how
welltheyhandlepictures, andhowhardthey areto learn.Thinkaboutyour
needs before choosing a desktop publishing system.
c A few of today’s computer programs let you see several different font
sizesand typefaces onyourcomputerscreen.That capability isnecessary
if you want to see on-screen exactly what will print on your Star
LaserPrinter 4111.Desktop publishers call this capability WYSIWYG —
“what you see is what you get”.
. When you design your pages, don’t vary font sizejust to fit text into the
space available. Go with a size that’s easy to read and be consistent.
Neverbetempted touseall uppercase letters.When you want tohighlight
text, switch to a bold font or draw a box around it.
● Don’t be afraid to use white space. White space relieves eye fatigue and
looks more attractive.
35
Page 44

I
3.4.3 Optional fonts
ManyoptionalfontsavailableforyourStarLaserPrinter4111complement its
internalfonts.These can give you more variety insymbolsets, spacing,font
height, style and stroke weight. To your Courier fonts, for example, you
mightadd italicsandbold, legalor math symbol sets,and sizesranging from
7 to 14points.
Optional fontsoffer different typefaces too. Ask your Star Micronics dealer
about cartridges or disks for the following:
Prestige fonts
Letter Gothic fonts
H Gothic fonts
Roman fonts
Presentation fonts
Optical Character Reader fonts
Line drawing
Bar codes
3.4.4 Using cartridge fonts
To gain access to a font on a cartridge:
1.Slide the cartridge you want into the slot on the front of the printer.
2. Use either the control panel menu or a command from your computer to
select the font you want.
Note: Donotinsertorpull cartridges outofthe printerwhiletheDATA lamp
is ON.
An interesting note about default cartridge fonts: Say you have selected on
the control panel menu a cartridge font as your default font. Later you turn
offtheprinter.Ifyou slipthe cartridge back inbeforeyouturn on theprinter
again, that font will stillbe your default font.
3.4.5 How to download fonts
To download fonts from computer disk you’ll need more than a small 64K
microcomputer. We recommend at least a 512Kcomputer with a couple of
disk drives (a hard disk is better).
36
Page 45

Many commercial font-management programs are now on the market,
includingInsightDevelopment’sLaserControl, Blaha Software’sHotLead,
SoftCraft’sLaserFonts, and thePCLprinterdriver in Microsoft’s Windo~)s.
Theseutilityprogramshelpyou downloadfonts,then letyou accessthefonts
automatically from your word processor or other programs.
,Most font files on disk that you buy to download into your printer have
Escape sequences right in the file, which simplify the process. Usually all
youhavetodoiscopy thefilefrom yourcomputerintoyourprinter (youmust
assign a font ID number first). If you download fonts with the MS-DOS
COPY utility, make sure to use the COPY /Eloption. That will keep your
computer from “interpreting” thedatayou send,which sometimesproduces
badly shaped characters.
OK, let’s look at a couple of examples.
3.4.6 Downloading a font: example one
Example one is for a computer running just MS-DOS.
Say you’ve bought Hewlett-Packard’s Century Schoolbook fonts and want
to download the regular (upright), italics and boldface characters. The HP
disk labels for each file are CN 100RPN.R8P, CN 100IPN.R8P and
CN1OOBPN.R8P.In case you’re interested, that’s HP’s code for CeNtury,
100decipoints, Regular (or Italic or Bold), ProportioNal, Roman-8 symbol
set, Portrait.
OneofthedisksyougetalsocontainsabatchfilenamedDOWNLOAD.BAT.
To loadthe regularuprightfontyoumake surethe printerisonline,then after
your computer’s A> prompt you type:
DOWNLOAD CN1OORPN.R8P
When the program asksforthefontIDnumber you key inanumber between
Oand 32767. Then when the program asks whether you wantthefontstored
permanently or temporarily you type either P or T (a temporary font
disappears if you press the printer’s [RESET] button). Finally the program
asks if you want to print a sample of the font and you reply Y or N for yes or
no.
37
Page 46

You then do the same for the italics and boldface files, for example typing
for the italics font:
DOWNLOAD CN100IPN.R8P
The promptswill bethesame,butyouhaveto remember to usedifferent font
ID numbers for the upright, italicand boldface fonts.
3.4.7 Downloading a font: example two
Example two is for a computer running Aldus Corporation’s PageMaker
desktop publishing program with Microsoft Windn-t’s.
PageMaker provides a print driver called HPPCL.DRV, and a program
called PCLPFM.EXE which creates thedata itneeds to printagiven font.To
create font data for your Century Schoolbook fonts, at the A> prompt you
type:
PCLPFM CNIOO*.R8P
The asterisk, a “wildcard character”, indicates that PCLPFM is to create a
data file for all three fonts— regular, italics and bold. The program asks if
youwanttocreateafilecalledAPPNDWIN.INI to append intothe Wiruhws
font menu file: type Y for yes.
After PCLPFM has made the font data file, with your word processor open
the Window’sfile called WIN.INI and key in the font defaults you want to
apply. At the section referring to the HPPCL printer driver, insert the
APPNDWIN.INI file you created earlier.
That’s it! From now on your Century Schoolbook fonts will appear on the
print menus of all your Wimkwt’sapplications.
With both examples, how you use the fonts depends on your applications
software. As you know, sending commands to change fonts will probably
require some experimenting: be patient. These commands are described in
the following chapter.
38
Page 47
The process of downloading a font you’ve designed yourself is not so
straightforward. As youcan only do this,creating and downloading fonts is
described further in chapter 4.
3.4.8 Hints: Managing memory
.
Printing fancy stuff can be quite cumbersome foryourprinter. You trade
offfancinessagainstspeed:ifyou optforfewer flourishes, you give your
printer breathing room in memory. And that rewards you with faster
output. Any of the following will slow down your laser printer:
- text over 20 points,
- lots of lines or patterns,
- graphics,
- macros,
-justified text.
. You may choose to add an optionalRAM board toyour StarLaserPrinter
4111if you need to download many fonts.
. Alternatively, consider either a software or hardware print spooler if
printingholdsupyourcomputer more thanyou’dlike. Aspoolerprovides
a separate temporary memory space that holds the documents to be
printed, and is particularly handy in a multi-user system.
● Some page makeup programs automatically download each font as
needed, then flush that font from printer memory to make room for the
next font. This approach can make good sense if you’re sharing your
printer with other people in a computer network. It keeps the printer’s
RAM from becoming overloaded. However, the downloading time can
significantly slow down your printer’s throughput.
. Moretypically,you willdownload afont inthemorning(perhapswiththe
MS-DOS COPY command) beforeyouprintyour firstdocument,andthat
fontwillthenstayinthe printer’smemory. If youusea singledownloaded
font(ormacro) throughouttheday,you will find it mostefficienttokeep
itinthe laserprinter’smemory. Youdefinitely shoulddownload fontsthis
way ifyouusea print spooler.Ifyou’re in anetwork,however, make sure
you don’t download duplicate fonts.
. Howmanydownloadablefontscan youhaveinonedocument?That’snot
soeasy to answer. Mostofyourlaserprinter’s memory isnotavailablefor
storing fonts, because it has to storeeach page before printing it, as well
as any macros or overlays you are using.
39
Page 48

I
To see how much memory is available for extra fonts, put the printer
offlineand pressthe[TEST] buttonto printa statussheet. Yourprinter will
beep and showacontrol panel message if you try to overload itsmemory
by downloading too many fonts. It then will continue printing with the
closest available font to that requested.
As a general rule, you can include at least a dozen downloadable fonts in
adocument. Added totheinternalfonts,thatshouldbeplenty— itdoesn’t
make good design to mix many typefaces. A telltale sign of amateurish
laser printing is too many fonts in one document.
To keep a wide variety of extra fonts in memory, however, many Star
LaserPrinter 4111users (especially those sharingtheprinter on a network)
prefer to add the optional board with the second megabyte of RAM.
40
Page 49

m
FW7terControl ‘● “
Language
A
The Hewlett-Packard LaserJet 111isanearlier kind of laserprinterthan your
Star LaserPrinter 4111.You should have no trouble running most popular
software packages, as those programs likely can send LaserJet III com-
mands.
Becausethe LaserJetIIIisalaserprinter,though, itscommandscan giveyou
more control over your Star LaserPrinter 4111than ispossible with the other
built-in command sets. Recognizing that reality, we’ve put examples into
this chapter.
At the end of the chapter we describe howto create and use your own fonts,
and also how to save time by writing command macros.
4.1 PRINTER CONTROL LANGUAGE
4.1.1 What do Printer Control Language look
like?
The Star LaserPrinter 4111includes a dozen common control codes (such as
<CR> for carriage returns) and single-character Escape sequences (such as
<ESC> E for resetting theprinter). Butalltheother commands you can send
your Star LaserPrinter 4111look like this:
<ESC> cc n C
in which the cc prefix is a symbolor two showing the general category of
commands to which this one belongs, n is some variable you want to use in
this command, and C is the specific command you want performed.
41
Page 50

Two importantdetailsmake PCLcommands.First, allEscape sequencesend
with a capital letter. If you don’t make the last character uppercase, your
printer won’t know whenthe Escape sequence ends and will treat following
characters as part of the same command.
Second, in PCL commands each number or character you put after the
<ESC? code is an actual ASCII symbol.
For example, the PCL command that sets the right margin to column 65 is:
<ESC> &a 65 M
which you would code in BASIC as:
10 LPRINT CHR$ (27):
“&a65M”
That command sends your printer the symbols “6” a~d “5”, which its
program interprets as the column number.
4.1.2 Combining Escape sequences
Later inthis chapter we describe one way to selectafont, byjust specifying
what font attributes you want, such as bold or proportional spacing. If you
select afontby specifying every oneofitsattributes, you can becertain that
you’re selectingsuccessfully.Butitcould mean a fair bitof repetitivetyping
eachtimeyouchooseafont.Thisappliestoothercommands too,notjust font
selection.
Here’s a way you can save yourself a few keystrokes: type in those
commands that have the same command-category prefix as just one long
Escape sequence. To combine commands this way, type the <ESC> and
command-category prefix just once, and capitalize only the last command
character.
42
Page 51

I
For example, to define the style, weight and character face for the primary
font, you might send these command:
<ESC>
(S 1S
<ESC>
(S 7B
<ESC>
(S 3T
which would produce italics boldface Courier.But this single
command does the same thing, all with one blow:
<ESC>
(S I S 7b 3T
4.2 CONTROLLING THE PRINTER
4.2.1 Self test
You can check how your LaserPrinter 4111is printing and have a look at its
parameter settings by sending this Self Test command:
<ESC>
Z
Notice that the z islowercase;this is the only PCL command that ends with
a small letter. After you send a Self Test command, the printer finishes
printinganypages left initsmemory. Then on a newpage it printsitscurrent
parameters (just important items such asnumberof copies and fonts in use).
The printer finishes off the page with a continuous display of all the
characters in itsdefault font.
The printer also quickly checks its interface. Assuming it finds no trouble,
the printer isthen ready for yournext page. If the printer detects a problem
it shows a control panel message, which you can look up h your Star
La.~erPrinter4111Operations Manual.
43
Page 52

I
4.2.2 Set number of copies
Youcan printupto99 copiesofeach ofthepagesyousendtotheprinter. You
may send this command anywhere within the text on a page; it will stay in
effect for that and all subsequent pages until you send another such command:
<ESC> &/n X
All you have to do is change the n sign in this command to the number of
pages you want. (The tcharacter after the & is a lowercase L.)
4.2.3 Set feed selection
One thing you can do isprint directly onenvelopes as well as regular paper.
You use this Feed Selectcommand to tellyour printer to select either a page
or envelope from the multi-purpose tray, or from the cassette (option):
<ESC> &/n H
For n enter one of the numbers from this table:
n
FEED SELECTED
O(zero) the printer only ejects the current page
1(one) theprintertakesits nextpagefrom themulti-purpose
tray
2
the printer takes a regular page manually
3 theprinter accepts an envelopeyoufeed inmanually
4 the printertakesitsnext pagefromthepaper cassette
Should an unprinted page be in the printer’s memory when you give this
command, the paper for that page will feed from where you’ve indicated.
Therefore you can make this the lastcommand on a page. The new feed
setting stays in operation until you change it.
4.2.4 Reset
Most software packages automatically reset the printer to the initialdefaults
beforestartingaprintjob. It’sagood ideaforyou tofollow thesame practice,
just to make sure you get the settings you want.
44
Page 53

When you want to set all your laser printer’s parameters back to their
initial default values (some people call this “initializing” the printer), send
this command:
<ESC> E
.The printer will finish printing any pages left in its memory before
resetting the parameters. Resetting clears unneeded temporary fonts from
your printer’s memory. Any permanent fonts or macros you have down-
loaded, however, will still be there after you send a reset command.
Permanent and temporary fonts are described at the end of this chapter’s
“Controlling Fonts” section.
4.2.5 Example: Printer controls
Let’s see what happens when we put these commands together. Say you
have just turned on your laser printer. What happens when you send the
following commands to your printer?
<ESC>
Z
<ESC> E
<ESC> &/2h 2X
As a BASIC program these would look like this:
NEW
10 WIDTH “LPT1:“,255
20 LPRINT CHR$(27);“Z“
30 LPRINT CHR$(27);“E”
40 LPRINT CHR$(27);“&12h2X”
RUN
First, if it is working properly the printer prints a test print with all the
characters in its default font (Courier).
Next the printer sets all itsparameter values— including feed selectionand
number of copies — to their initial settings.
‘ The last command does two things: it tells the printer to accept paper you
will feed in yourself, and to print each page two times. This is handy when
you want two copies of a letter on preprinted letterhead.
45
Page 54

You can now send your letter from your word processing program to the
printerand feed in thosepages.When you’re done, youmay wantto sendthe
<ESC> E command one more time.
4.3 PAGE ORIENTATION
You might reasonably think of page orientation as a page formatting issue.
To print words widthwise on apage, however, each letter in effect has to lie
on itsback. So orientation is actually a font attribute, and is treated as such
later on in this chapter.
4,3.1 Page Length
Themulti-purposetray setsthe defaultpagesizefor yourlaserprinter. When
you want a different size, you’ll need to reset that page size. You should
always change the page length be@-e you send text for printing. The Page
Length command setsthe number of linesthatcan printon a page (lines per
inch times the number of inches).
The Page Length command format is:
<ESC> &~n P
wheren isthenumber oftextlinesonthepage;itcan be anynumberbetween
5 and 128.
The default number of lines isthe length of the paper tray times 6 linesper
inch.For 11-inchletter-sizepaper that works out to 66 lines (that’salso the
default when you haven’t put in a tray).
If you don’t want the default length, you should send the Page Length
command bejtire you send text for printing. The table below should help
you pick theright number of lines. Decide which orientation and paper size
you want, then use the n under your preferred lines/inch:
46
Page 55

ORIENTATION
Portrait
Portrait
Portrait
Portrait
Landscape
Landscape
Landscape
Landscape
PAPERSIZE
Executive
Letter
A4
Legal
Executive
Letter
A4
Legal
@6LINEs/INcHn @8LINEs/INcH
60 80
66 88
70 93
84
112
43 58
51
68
49
66
*
58
* Printinglandscapes on legalpaper istrickier.Firstsetonportraitmodeand
send the command <ESC> &?84P and then change the orientation to
landscape.
An example: Say you want to manually print legal-size pages at eight lines
per inch.The following commands combine manual feeding with thatpage
le~gth:
<ESC> &t2h 112P
If your command specifies apage length different than the paper in the tray,
the printer will go offline and display a message asking for the proper tray.
After you change the tray, press the [ON LINE] button to restart the printer. It
doesn’t hurt to print short pages on long paper. If you inadvertently print a
legal-sizepage onto executive or letter-size paper,theprinterwill scroll that
page across two sheets.
If you have set the paper feeder from the control panel to “AUTO SELEC-
TION”, a “select page length”command (<ESC> &/n P) will automatically
select the cassette which contains the paper selected by thecommand. If no
cassette currently containstheright size of paper, the display will ask you to
insert the appropriate size of paper.
Also, the Page Length command puts all margins back to their defaults. So
after you send it, check whether you have to send any of the following
margin-setting commands.
47
Page 56

I
4.3.2 Side margins
Margin settingsdefine that part of the page on which the printer can print.
You setsidemarginsto particularcolumns.The widthofacolumn differs for
each font, depending on its pitch. Ten-pitch Courier, for example, puts
column 30 three inches from the left edge of the page (column 0). But 12pitch Prestige Elite puts column 30just two and a half inches in.
You cannot set the left margin further over than the right margin. Use the
following command to set the left margin, setting n to be the column
number where you want the left margin to start:
<ESC> &a n L
Similarly, to settherightmargin, you send this command with yourdesired
column number:
<ESC> &a
?7M
If you want to put both left and right margirisback to the printer’s printable
limits— in other words, to “clear” the sidemargins — send this command:
<ESC> 9
4.3.3 Topmargin
Vertically, the LaserPrinter 4111confines its printing to its “text length”,
which shouldalwaysbelessthan itspage length.Both aremeasured inlines.
You can change the meaning of a “line” with line-spacing commands
described later in this chapter.
When you set the top margin though, it does not change, even when you
change the definition of a line. You can use this command to set the top
margin anytime.Justbe aware thatif thecurrentprint position isbelow your
margin, you’llhave to move the printposition back up. Naturally, you have
to keep your top margin inside the page-length limit.
Use this command to set the top margin, settingn to be the number of lines
down from the top of the page that you want left blank before you start
printing:
48
Page 57

<ESC> &tn E
Note that the character following the “&” is a lowercase “L”.
4.3.4 Textlength and the bottom margin
By default, the LaserPrinter 4111automatically gives you top and bottom
marginsofthesamesize.Soyouonlyneedto sendtheText Lengthcommand
when you want different top and bottom margins.
If you want adifferent bottom margin, firstdecidehow many text lineswill
produce the margin you want. Check that they won’t produce a bottom
margin lower than the page length. Then send the following Text Length
command, entering for
}7 your desired number of lines:
<ESC> &tn F
The Page Length, Top Margin and Text Length commands therefore work
together to set the bottom margin:
bottom margin = page length – (top margin + text length).
The bottom margin is called the “perforation region” with printers that use
continuous forms. You normally want to skip the perforations between the
continuous pages, but sometimes you don’t (for example when you print
labels).
Though you likely won’t often want to do it,the Star LaserPrinter 4111will
letyoucompletely ignorethebottommargin too.Ifyouchoosetoprintbelow
the bottom margin, remember that you might lose words or graphics in the
unprintable region at the edge of the page. The command looks like this:
<ESC> &?n L
If you want to allow printing below the bottom margin, for n enter O(zero).
But if you want to forbid printing below the margin, which is the default,
enter 1(one).
49
Page 58

formatting
4.3.5 Example: Page
OK, let’shave ago at formatting a page. The picture of the page we want is
just below. The actual width of the text on the page depends on which font
weuse. Let’splan onusingour 16.66-pitchLine Printerfontateightlinesper
inch.
column10
column70
topmargin.8lines {
textlength=
100 lines
{
bottommargin. ~
4 lines
.,
I
\
}
pagelength. 1
occasionalfootnotes
12 lines
As it prints, we also want to permit the occasional one-line footnote below
the normal bottommargin.And when we’re finished printing, let’sreset the
side margins so we can switch to our usual font width.
Here are the commands that will produce this format for us:
<ESC> &tl 12P
<ESC> &a 10~70M
<ESC> &/8e lOOfOL
(We’ll send our page here.)
<ESC> 9
50
Page 59

4.4 MOVING THE PRINT POSITION
4.4.1 Many ways to move
The LaserPrinter 4111provides excellent control over the print position —
whereyoupoise yourlaser“pen”.
Horizontally,youcan sendbackspace and
carriagereturncommands.Vertically,you can movetheprintposition down
thepagebyprinting somany linesper inch,orby sending line-feed and half
line-feedcommands. You can move horizontallyorvertically to tab settings
as well.
Those aren’t all. You can also tell the StarLaserPrinter 4111to move itsprint
position, either vertically or horizontally, in increments of:
1/10, 1/12or 3/50 inch (pitch settings),
1/48or 1/120inch (line or column definitions),
1/300inch (dots),
1/720inch (tenths of a point).
All these commands are described below.
One hintabout moving theprintposition: youcan confuseyourselftrying to
use more than two different units during the same session. So decide
beforehand how precise you need to be in moving the print position, not
forgetting any graphics you want to include. Then stick to the unit(s) you
choose.
4.4.2 Lines per inch
Thisverticalline-spacingcommand givesyou more optionsthanjust thesix
or eight lines per inch of early printers. Use thiscommand to set how many
lines you want in each vertical inch of your page:
<ESC> &/n D
For ~ you enter the number of linesper inch you want — any of: 1,2,3,4,
6,8, 12,16,24 or 48. If you enter a number other than these the printer will
ignore the command.
51
Page 60

I
4.4.3 Defining the space and column
Beforeyouuseprintpositioningcommands, youfirstmay wanttochangethe
definitions of the line or space (sometimes called “vertical and horizontal
motion indexes”, VMI andHMI). These definitionsdon’tactually move the
print position. Instead, they define two basic units you can use in print
position commands.
What’s important aboutthespace isthat it defines how far theprintposition
travelsforevery character you print (except for proportionally spaced text).
The space can also be thoughtofasthewidth ofa vertical print column. One
column widthisthe widthofthespacecharacter inthecurrentfont,nomatter
whether it is monospaced or proportionally spaced.
Occasionally you may want to change space width to override the current
pitch setting. Let’s look at an example. The space width comes in units of
l/120th ofaninch,andtheCourierfontcanprint 10characters perinch.Each
character covers a tenth — 12/120ths— of an inch, so that font’s default
space width is 12 units. If we change its space width to 6, each character
would half-overlap the one before it.
If you are using <S1>and <SO> to shift between a primary and secondary
font, it’s a good idea to change the space width after every shift.
To change the space width you send this command:
,<ESC>&k n H
inwhich forn you can enter anumber from O(zero) to 840. A width ofOwill
print characters on top of each other; a width of 840 will print them seven
inches apart.
4.4.5 Defining line depth
The linedep[h(sometimes called the“verticalmotion index”) specifieshow
fardown apagetheprintpositionwill movefor each linefeed. You probably
won’t use the line depth as much as lines-per-inch. Line depth can be more
precise but it isn’t as easy to calculate. The linedepth comes in multiples of
l/48th of an inch.
52
Page 61

The important fact about the line depth is that when you change it you are
changing the actual meaning of a “line”.
When you increase the linedepth
you effectively decrease the number of linesper inch,and increase the page
length.
The command you send to set the line depth looks like this:
<ESC> &t’nC
(notethatthe character after the “&” isa lower-case “L”) in which for n you
can enter anumber from Oto 336. If n iszero, lines will be printed on top of
each other, and if 336, they will be printed 7 inches apart.
4.4.6 Movjng the PRINT posjtjon horizontally
You can use three different units to move the print position horizontally:
columns (space-widths), dots (each l/300th of an inch), or tenths of a point
(decipoints). Both columns and decipoints can be fractions to two decimal
places,suchas45.75 decipoints— whichprovidesagreatdegreeofaccuracy
for graphics applications.
Moreover, for each of these you can move the print positionhorizontally in
two ways. You can move ah.wlurelyfrom the left edge of the page. Or you
can moverelatively,awayfromthe current printposition.To showyou want
to move away from the current print position, you put a plus (+) or minus
(–)
sign before the number of units you want to move.
If you send a command that would put the print position outside either side
margin, the LaserPrinter 4111will let you do just that. However, you can’t
sendtheprintpositionfurtherthan itsprintablelimitsattheedgesofthepage.
4.4.7 Horizontal moves: by columns, decjpojnts
and dots
To move the print position horizontally a number of columns, send the
command:
<ESC> &a n C
in which for n you enter thenumber of columns you wish to move theprint
position,
53
Page 62

So to move to column 45 you send the command:
<ESC> &a 45C
Butto move 45 columns tothe right of the current print position, you send:
<ESC> &a +45C
To move theprintposition horizontally acertain number ofdecipoints, send
the command:
<ESC> &a n H
inwhichforn you enter thenumberofdecipoints you wish tomovetheprint
position(preceded by a+or– signifyouwant tomove away fromthecurrent
position).
Youcanmovetheprintpositionhorizontallyby dotsboth waystoo.You can
move anumberofdots away fromtheleft edge ofthepage, or you can move
a number of dots away from the current print position.
To move horizontally this way, send the command:
<ESC> *p n X
in which for n you put either the number of dots away from the page edge,
or (preceded by a + or – sign) the relative number of dots away from the
current position.
So to move 20 dots from the left edge you send this command:
<ESC> *p 20x
And to move 20 dots to the left of the current position you send:
<ESC> *p –20x
54
Page 63

You can also move thecursor 8 columns at a time horizontally by use of the
horizontal tab command. Simply send a tab character:
<HT>
to do this. Reverse tabbing is not possible.
4.4.8 Moving theprint position vertically
You can use similarunitstomovetheprintpositionvertically:lines,dots,or
decipoints. Bothlinesand decipointscan befractionsto two decimal places.
You can also move the print positionabsolutely down from the top edge of
thepage, or relati}’ely,away from the current printposition.Again, to show
you want to move away from the current print position you put a plus (+) or
minus (–) sign before the number of units you want to move.
The important difference about moving vertically up or down is what the
printer does when the print position hits thepagetoporbottom. Ifyoutryto
move above the top margin, the print position stays rightatthe margin. And
if you move the print position down off the page, the page is ejected and
printing continues on the next page.
4.4.9 Verticalmoves: bylines, decipoints and
dots
To move the print position vertically a certain number of lines, send the
command:
<ESC> &a n R
in which for n you enter the number of lines you wish to move the print
position.Sotomoveto line45, measured from the topedgeofthe page, you
send the command:
<ESC> &a 45R
But to move 45 lines down from the current print position, you send:
<ESC> &a +45R
55
Page 64

Tomovetheprintpositionverticallyacertainnumber ofdecipoints,sendthe
command:
<ESC> &a n V
inwhichforn youenter the number ofdecipointsyou wish to move theprint
positiondown (orprecede thenumber with a + or– sign ifyouwanttomove
up or down from the current position).
Finally, youcan move a number of dotsdown from the topedgeofthe page,
oryoucan move anumber ofdotsupordown from thecurrentprintposition.
To movetheprintpositionupordown an absoluteorrelativenumberofdots,
send the command:
<ESC> *p n Y
inwhich for n you puteitherthe absolutenumber ofdots down, or (preceded
by a + or – sign) the relative number of dots up or down from the current
position.
So to move 20 dots down you send the command:
<ESC> *p 20Y
And to move 20 dots up you send:
<ESC> *p–20Y
4.4.10 Combining move commands
One thing about moving the print position with the above commands isthat
they let you think of your page in terms of Cartesian coordinates.
Allwemean isthat youcan combinehorizontal and verticalmovements that
use the same units. If you send this command,
<ESC> *p 40x 20Y
the print position will move to a spot40 dots from the leftedge of the page
and 20 dots down from the top edge.
56
Page 65

And if you send this one:
<ESC> &a +40h –20V
the print position will move right 40 decipoints and up 20 decipoints.
.4.4.11Backspace
The Backspacecontrolcode worksexactly as youmightexpect:itmoves the
print position one column to the left.
<BS>
Moving theprint position back doesnotdestroy any characters already sent.
In fact, because of that, this command can be quite useful. It lets you
superimpose one character over another.
Say you want to indicatea blank space as the letter b with a slash/ through
it,an old programming symbol.Just send the bandthen follow itwith <BS>
and the slash, and you get this: ~.
4.4.12 Carriage return
The Carriage Return command by itselfonly moves the print position back
to the left margin of the line on which it currently sits:
<CR>
If you want the print position to move down a line as well, send a separate
Line Feed command each time, or use Define Automatic Line Ends (explained below) to couple these two control codes.
4.4.13 Line feeds
The LineFeedcommand advancestheprintposition onelinedownthepage.
The meaning of a line is set by the Line Depth command.
To send a line feed just send this control code:
<LF>
57
Page 66

The Half Line Feed command is the one you want for subscripts. This
command moves the print position down the page one half the current line
depth:
<ESC> =
To sendareverse HalfLine Feed,moving theprintposition upto letyouprint
a superscript, use this command:
<ESC> &a –.5 R
4.4.14 Form feed
This command, like the [PRINT] button, makes the printer advanceto a new
sheetof paper. When you send the<FF> controlcode you are alsotellingthe
printer to print all its stored page information. Remember to send this
command to make sure any lastpartial page in your printer’s memory gets
printed:
<FF>
4.4.15 Define automatic line endings
When youpresstheCarriageReturnkeywhatdoyouexpecttohappen?Most
people think a computer keyboard should work like a typewriter, with a
Can-iage Return starting a new line as well.
Butcomputer programs don’t have to stick to thatanalogy. Some programs
(particularly graphics packages) want a Carriage Return to just move the
print position back to the left edge of the page. And they want a Line Feed
to move down to a new line without going back to the beginning of the line.
So you can specify exactly how you want <CR>, <LF> and <FF> to work
with this command:
<ESC> &k n G
58
Page 67

I
For n enter one of the numbers from this table:
n
AUTOMATIC COMMAND
O(zero)<CR>, <LF> and <FF> work according to their basic
1(one)
2
3
definitions,
<CR> will also generate a <LF> (but <LF> and <FF> stay
the same),
<LF> or <FF> will produce a <CR> too (<CR> by itself
won’t change),
<CR> generates a <LF> too, and either <LF> or <FF>
produces a <CR>.
After you send the command <ESC> &k 2 G for example, every time the
printer gets a Line Feed command it will move the print position down and
over to the start of the line. When it gets a Form Feed, the printer will also
move the print position back to the left.
4.4.16 Autowrap
One nice thing we get used to with a word processingprogram isnot having
toworryaboutwords goingpasttherightmargin. We don’thave to listenfor
that typewriter bell at the margin any more.
This command does pretty much the same thing your word processing
programdoes.The important difference isthat itdoesnot wrap words.When
you turn on Autowrap, if you send too many characters for a line the laser
printer prints the overflow on the next line.
If Autowrap ison,when theprintergets acharacter that would printbeyond
theright margin, itreturnstheprint positionforthatcharacterbackto theleft
and one line down (Carriage Return and Line Feed).
The Autowrap command works like a toggle switch:
<ESC>
&S n C
If for n you enter O(zero) then this wrap-around mode will apply.
But if for n you put 1(one) this automatic wrapping of characters will not
happen. The default if you don’t send a command is no wrapping.
59
Page 68

Note: Even when Autowrap is on, the printer will print beyond the right
margin if you have sent one of the direct positioning commands
described above, which move the print position past the margin.
Also, note that Autowrap doesn’t move the whole word down to the next
line— that’s ajob for a word processor, not your laser printer.
4.4.17 Pushing and popping the print position
This provides a wonderful way to keep track of the print position. It works
by letting you keep a list of up to 20 print positions.
You can “push” the current print position onto the top of the list whenever
you want. Later, you can “pop” off whatever position isatthetopofthelist,
making it the current print position.
When would you want to save and restore print positions this way? Whenever you “needto interrupt what you’re printing now to stick something
special onto the page. This is most handy when you need tojump from text
to graphics and back.
Say you’ve written one routine that puts the page number in the same place
onevery page, andanotherthatundercertain circumstancesprintstwo heavy
lines.You printmerrilyalonguntilyouhaveto printthelines.Youthen push
the current print position to execute the line-printing routine.
Butpartway through thatyouhitthepage-numberspot.Soyou pushtheprint
position again and run the page-number routine.Then you can pop the print
position to print the second line. And when that’s done you pop it again to
return to printing text.
As you might suspect, this can involve fairly complicated programming,
typically using the macro commands described later in this chapter.
To push or pop a print position you send this command:
<ESC> &f n S
Fern youenterOtopush (save)thecurrentprintposition,or 1to pop(restore)
the last position saved off the list.
60
Page 69

Note: The last position pushed onto the list will always be the first one
popped back later.
4.5 CONTROLLING FONTS
4.5.1 Font selection
The Star LaserPrinter 4111lets you define and select fonts three ways: as
primary and secondary fonts, or by font identification number, or by
description.We’lllookatthefirsttwoways now, andexplain selecting afont
by its attributes a little further on.
However youchoosetorefertofonts,remember thatafontmustbeavailable
before you select it.So if you wantto select a cartridge or downloaded font,
you first have to put in the cartridge or download the font.
4.5.2 Selecting primary or secondary fonts
Ofthethree selection methods, you will savethemost programming time by
shifting back and forth between primary and secondary fonts. That’s counterbalanced, though, by the fact that you often need more than two fonts.
Typically, you use primary and secondary fonts to flip back and forth
between two different symbol sets— forexample IBM symbol sets 1and 2.
Youcandesignateany two fonts,whether internal,cartridge ordownloaded,
as primary and secondary.
The wayyoushow you’retalking aboutaprimaryfont inanEscape sequence
is to follow the <ESC> symbol with a left parenthesis. For example,
<ESC>
(S 10H
means you want your primary font pitched at ten characters to the inch.
Typing a right parenthesis instead means you are referring to the secondary
font:
<ESC>
)S 10H
You define a font as primary or secondary as you select it. To make a font
your primary or secondary font,you use font-description Escape sequences
such as those just above, specifying the attributes you want.
61
Page 70

!
If you don’t explicitly indicate what attributes you want for the primary or
secondary font, the printer will use the same default font for both. This
default font’s attributes include the Roman-8 symbol set, 10-pitchspacing,
12-pointheight, upright style, medium weight, and Courier typeface.
After your primary fontisselected, you can choose itforprintingby sending
this Shift In control code:
<S1>
All the text you send after that command will print in the primary font.
Your laser printer shiftsto the secondary font when you send this ShiftOut
code:
<so>
4.5.3 Assigning font ID numbers
The second way to define and select fonts is by using font ID numbers. You
may prefer this method ifyou frequently usemany fonts.Whilenotasshort
as<S1>and <SO>, it’squicker than describing fontattributes over and over
again.
To give an ID number to an internal or cartridge font, you first make it the
primary font. That is, you send a left-parenthesis Escape sequence (a font
attribute,command as described below) and the Shift In control code. Then,
to assign an ID number to the font, you send this command:
<ESC>
*C H D
FornyoucanenteranynumberbetweenOand32767asthefont IDnumber.
(Not that you can have more than 64 fonts in the printer at once, even with
theoptionalmemory board.A printer would need an elephantinememory to
hold 32767 fonts!)
62
Page 71

4.5.4 Selecting downloaded fonts
Theeasiestway to selectamongdownloaded fontsistousefontID numbers.
When you download a font you make the Assign Font ID command above
thefirst command inyour sequence(see“How to download yourownfonts”
later in this chapter). After you’ve assigned an ID number to a downloaded
font,youcanselect itasyourprimaryfont withthisSelectFontID command:
<ESC> ( n X
in which n is your desired font’s ID number.
If you use many fonts you’ll use that command to select among them. But
what if you prefer to just use <S1>or <SO> to shift between primary and
secondaryfonts? You wanttoselectadownloadedfontID asyour secondary
font. This is the command to send:
<ESC> ) rIX
4.5.5 Font attributes
The third way to select a font is to simply describe what font attributes you
want.(Remember, selecting afontdoesnotmodify afont.You can’tgetbold
or 14-pointcharacters ifyoudon’thave abold or 14-pointfontinthe printer. )
In listingtheattributesyouwant, itwillhelpyoutoprioritize them the same
way yourLaserPrinter 4111does. Your printer ranks the various attributesa
font can have this way (from most to least important):
orientation
symbol set
spacing (proportional or monospaced)
pitch (characters per inch)
font height (in points)
style (italic or upright)
stroke weight (lightto bold)
typeface
Page 72

The laser printer just zips down this chain of attributes one by one,
eliminating fonts that don’t match what you want, until it gets down to one
unique font that matches your request. If the printer matches down to, say,
styleor weight but can go no further, it will give you itsclosest font to your
request.
And if you don’t specify a particular value for some attribute, the printer
assume’syou want the value that attribute had in the last font you specified
(or the default value if you‘vejust turned on the printer). This can save you
someeffort: ifthefontyou want has an attributethe same asthecurrent font,
you don’t have to specify that attribute again.
Orientation
Portrait orientation prints text across the width of a page. Landscape
orientation prints text sideways up the length of a page.
The Star LaserPrinter 4111ismore flexible about orientation than mostother
laser printers; it lets you simply rotate any portrait font to the landscape
orientation or vice versa. To startyou off when you change orientation, the
printer resets all its margins and its column and line definitions to their
default settings.
When you want to select the opposite orientation, send this command:
<ESC>&t’n O
in which’for n you put Oto get portrait orientation,
1to get landscape orientation,
2 to get upside-down portrait orientation,
or 3 to get upside-down landscape orientation.
(Notice: the t’characterafter the& is a lowercase L.)
64
Page 73

To select the direction in which characters, raster graphics and fill patterns
are printed, use the following command:
<ESC>&a n P
in which for n you put Oto select the portrait direction,
90 to select the landscape direction,
180to select the upside-down portrait direction,
and 270to selecttheupside-down landscape direction.
Symbol sets: a review
Each font can havemany symbolsets,each being a subsetofallthe possible
characters of the font. These subgroups include different symbols for
differentnationsorforlawyers orartistsormathematicians. Any two symbol
sets, moreover, may storethe same symbol at a different font position inthe
printer’s memory.
The defaultsymbolsetisRoman-8, which includes allASCII characters plus
dozens of accented letters. But you can use any of the sets shown below.
Technically you can pair any symbol set with any internal, cartridge or
downloaded font; however it doesn’t make much sense to print text with a
math or line-drawing symbol set.
TheStarLaserPrinter4111provides twodifferentsymbolsetcommands. You
put a code into one command to select aparticular symbol set for your pri-
mary or secondary font. You use the other command to select the current or
default symbol set for your primary or secondary font.
Selecting a symbol set
This first symbol setcommand lets you select a particular symbol set for the
current font. To select a symbol set for your primary font, send this
command:
<ESC> ( n
For n enter one of the following symbol codes. The first character must be
a digit and the second an uppercase letter.
65
Page 74

I
Note: The symbol sets marked with * can select when the approval Font
Cartridge is installed.
CODEn
OA
OB
OD
OE
OF
OG
01
OK
ON
00
OQ
0s
Ou
OY
ID
IE
IF
IG
10
IQ
IS
IU
2K
2Q
2s
2U
3Q
3s
4s
5M
5s
6J
6M
6S
7J
8M
8Q
8U
;
9U
SYMBOLSET
Math-7symbols*
Line Draw characters*
1S060:Norwegian
RomanExtension*
ISO25:French
HPGerman
1S0 15:Italian
1S0 14:JISASCII
ECMA-94
OCR-A*
Math-8Asymbols*
ISO 11:Swedish
1S06: USASCII
BarCode39*
1S061:Norwegian
1S04: UK
1S069:French
1S021:German
OCR-B*
Math-8Bsymbols*
HPSpanish
Legal
1S057:Chinese
Pifont-Asymbols*
1S0 17:Spanish
1S02:IRV
OCR-BExtension*
1S0 10:Swedish
1S0 16:Portuguese
PSMath
ISO84:Portuguese
MicrosoftPublishing
VenturaMath
1S085:Spanish
DeskTop
Math-8symbols
IBM-PCSet*
Roman-8
BarCodeEAN/UPC*
IBM-PCExtension*
Windows
66
Page 75

10J
10U
1IQ
IIU
12u
13J
14J
15U
PSText
IBM-PC(US)
ECMA-947Bit*
IBM-PC(Denmark/Norway)
PC-850
VenturaInternational
VenturaUS
Pifontsymbols
To select a symbol set code for your secondary font, flip the parenthesis:
<ESC> ) n
and for n substitute your choice from the codes above.
Selecting the current or default symbol set
Your printer can use either the primary or the secondary font as its current
font. And that current font has its current symbol set. Your printer also
remembers its default font and symbol set, which are Courier with Roman8 (unless you’ve changed their initial parameter values through the control
panel menu).
The following command lets you select one of those symbol sets for your
primary font.
<ESC> ( n @
For n enter one of the following selection values for your primary font:
n VALUE
SELECTION
O(zero) or 1 (one)
Selects the default symbol set
2 Selects the current font’s symbol set (this
forcestheprinterto selectitsbestmatching
font)
3
Selects all of the default font’s attributes
(notjust symbol set)
. Similarly, you can selecteitherthedefault or the current symbolsetforyour
secondary font. You also may want to use the same symbol set for both
primary and secondary fonts.
67
Page 76

To do these tasks, you can send the following command to select which
symbol set you want for your secondary font:
<ESC> ) n @
For n enter one of the values from this table:
n VALUE SELECTION
O(zero)
Selects the default symbol set
1(one)
Selects same symbol set as primary font
2 Selects the current font’s symbol set
3
Selects all the default font’s attributes (not just
symbol set)
Example: Symbol set commands
Let’s take a shortlookat how you use these commands. Here’sthe scenario:
You are already using theLinePrintertypeface, but want to use the German
symbolset asyouarewritingareportforyour Berlin office and need umlaut
characters for several names in the report.
Then in the report you decide to use a proprietary product name, so want to
nipoutto grab the @symbolonalegalcartridge font you’ve already loaded,
then return to your German set. When your report’s all done, you want to
return the printer to its Roman-8 default.
Here arethe commands that will do thejob for us:
<ESC> ( OG
(you start your report here)
<ESC> ( IU @
<ESC> ( OG
(you finish your report here)
<ESC> ( O@
Ifyouhad finished with <ESC> ( 3@ theprinter wouldreturn to itsstandard
Courier font, notjust its Roman-8 symbol set.
68
Page 77

Spacing
If you specify monospaced for a font, each character prints with the same
width. But if you specify proportional spacing the design of each character
determines itswidth. Todefinehowyouwantyourprimaryfontspaced,send
this command:
<ESC>
(S n P
in which for n you put O(zero) to get monospaced,
or 1(one) to get proportional spacing.
Ifyouspecifyproportionalspacing itdoesn’tmatter ifyoualso specifypitch,
because spacingisahigher priority fontattribute.Theprinter willjust ignore
the pitch request.
Todefinespacingforyoursecondaryfont, usethesamenumbers andjust flip
the parenthesis:
<ESC>
)S n P
Pitch
Pitch defines how many characters per inch you want for a monospacedpitch font. Your Star LaserPrinter 4111’sinternal monospaced-pitch fonts
havesettingsof 10, 12or 16.66characters perinch.Cartridgeordownloaded
fonts with monospaced pitches often have other settings for characters per
inch.
To select the pitch you want for the primary font, send this command:
<ESC>
(S n H
where for nyouput inhowmany characters per inchyouwant. For example,
<ESC> (s 12Hwill pack twelve characters into each inch.
The corresponding pitch command for the secondary font is:
<ESC>
)S n H
69
Page 78

Youcan useadifferentcommand insteadofthese forgeneral character pitch
setting. This command, since it doesn’t have parentheses, covers both the
primary and secondary fonts. It looks like this:
<ESC> &k n S
For n you enter a pitch code from the following table:
CHARACTERS PER INCH
PITCH CODE n
10
cpi (pica) O(zero)
16.66cpi (condensed)
2
Font height
The height of the characters you print is measured in point sizes. The Star
LaserPrinter4111provides fontsin6,7,8.5, 10,12,14,16,18,24and 36point
sizes. If the font height you specifically ask for is not available, the printer
will select the font with the size closest to your request.
To select font height for the primary font use the following command. For
n enter the font height in points that you want:
<ESC>
(S n V
To select font height for the secondary font, send this command:
<ESC>
)S n V
Style
Styledefineswhether your text isprinted in italicsor upright,the way these
words are. Send this command to select the style you want for the primary
font:
<ESC>
(S n S
in which for n you
enter
Oif you want normal upright text,
or 1 if you want italics.
70
Page 79

To select styleforthesecondaryfont,just reversethe parenthesisandusethe
same n numbers:
<ESC>
)S n S
Remember that styleisarelatively low-priority attribute. If a particular font
satisfiesallhigher priority attributes butdoesn’tcome inthestyleyou want,
you’ll get that font without your style.
Stroke weight
The weight of a font defines how lightly or boldly it prints.
You can be flexible aboutstrokeweight. The following command gives you
arange of 15degrees ofboldness, though not many fontsexploit that range.
Send thiscommand toselecta primary font with yourdesired strokeweight:
<ESC>
(S n B
in which you replace n with a number from –7 (meaning light) to +7 (very
bold). You need the negative sign to get the lighter weights. A weight of O
(zero) produces medium print.
To selectthe strokeweightforthesecondaryfont,usethesamenumbers with
this command:
<ESC>
)S n B
An incidental note: You will likely use optional fonts to give you boldface,
so probably don’t need to know this. But it’spossible to print bold without
even havingabold fontintheprinter.Youjust printthetextyou wantinbold
two times, with the overprint offset by 4 decipoints.
So you can use the command <ESC> &a n H to back up, you just need to
knowthewidth indecipointsofwhatyouwanttooverprint.Inamonospacedpitch font like Courier that’s easy:just keep track of how many characters
you print. In a proportionalfontyou’d keep track of the decipoints by using
acharacter-width table.After backing up4 decipointslessthan thetotaltext
width youjust print your text again.
71
Page 80

Typeface
The lastattributeyou can give to characters is their typeface. The design of
characters iswhat font designers often think of as the main determinant for
afont.But when you select a laser printer font, typeface sits atthebottomof
the list.
To assign the particular face you want for your primary font, send this
command:
<ESC>
(S n T
For n enter one of the font code numbers from this table:
TYPEFACE
Line printer
Pica
Elite
Courier
H-Gothic
Roman
L-Gothic
Script
Prestige
Caslon
Orator
Presentation
Line Draw
PC Line
OCR
Bar Code
n
O(zero)
1(one)
2
3
4
5
6
7
8
9
10
11
12
13
14
15
To assign a character face tothesecondary font,just flip the parenthesisand
use the same n numbers:
<ESC>
)S M T
72
Page 81

Example: Font attributes
Let’s put the last half dozen font attributes together in an example. Say we
want to select a nice font — a small Line Printer — for the footnotes in a
reportwe’vefinished.Let’smakeitoursecondary font,since’thebodyofour
report is done in the primary font.
We’llgo withthedefaultsfororientationand symbolset.Butlet’sbespecific
about the other attributes, and let’s remember to put them in priority order.
We decide on amonospacedof 16.66characters per inch andaheight ofjust
seven points (footnotes should look smaller than our regular text). To keep
it readable, we opt for the ordinary upright style and medium weight in the
LinePrintertypeface.Oursequenceofindividual commandswould looklike
this:
<ESC>
)S OP
<ESC>
)S 16.66H
<ESC>
)S 8.5V
<ESC>
)S OS
<ESC>
)S OB
<ESC>
)S OT
Since these font attributes all start with the same )s command-category
prefix, let put them all together in one command:
<ESC>
)S op 16.66h 8.5v os ObOT
The BASIC statement we could send to select our desired font would look
like this:
100 LPRINT CHR$ (27);“)
sopl 6. 66h8 .5vOsObOT”
And assuning we have such a font in our printer, we’d get a font that looks
1i
ke this sentence for our footnotes.
73
Page 82

4.5.6 Underline
Underlining is printing feature, not a font attribute.
You can
underline in two ways: as a print feature, or with the – underline
character. If you backspace and use the underline character, however, you
often find the underline doesn’t come out the same length as your text.
The underline command works better. When you turn on the underline
feature this way, the printer will underline all subsequent printable charac-
ters, including spaces.
Send this command to turn on the underlining mode:
<ESC> &d n D
in which for n you put
O(zero) to get fixed underline,
or 3 to get floating underline.
And send this command to turn off the underline mode:
<ESC> &d@
4.5.7 How to print Escape sequences and
control codes
You use both Escape sequences and control codes to print. So how do you
print Escape sequences and control codes?
Butyou actually can print commands, and intwodifferentways.You would
do this when you wantto see everything exactly as it is senttotheprinter—
for example, to debug a string of text and commands that doesn’t print the
way you think it should.
The Transparent print command prints the string of data that follows it
without paying attention to any embedded Escape sequences or control
codes. Transparent print even prints Carriage Return codes withoutzapping
the”print position back to the left margin.
74
Page 83

To useTransparent print,just putthiscommand immediatelyinfrontofyour
print data:
<ESC> &p n X
For n you specify the number of bytes of data you want to print .
Display Functions, like the Transparent print command, prints Escape
sequences and control codes without actually executing them. But Display
FunctionspaysattentiontoCarriage Return codes,sotextlooksmore likethe
way it normally prints. Display Functions also prints commands as blanks,
not as symbols.
Display Functionsactually involvestwo Escape sequences,oneto turn iton
and another to turn itoff.To turn on Display Functions, send this command
just before the data you want displayed:
<ESC> Y
And to turn off Display Functions, send this command at the end of the
displayed print data:
<ESC> Z
That Escape Z sequence itself prints as a blank followed by a Z.
4.5.8 Font control
The FontControlcommand has two main functions:defining a font’sstatus,
and deleting fonts.
You can make a font either permanent or temporary with the Font Control
command.Thishelpsyoucontrolwhich fontsyou delete,aspermanentfonts
do not get deleted when you reset the system. The permanent or temporary
statusyou give to a font will apply only to the font you lastspecified,using
one of the font ID commands described above.
When your printer’s memory gets stuffed with fonts, you can also use this
command to delete some of them. You can only delete fonts you’ve
downloaded,asinternalandcartridgefontsareneverdeleted.No textwillget
lost when you delete a font, even when that font is on an unprinted page in
the printer’s memory.
75
Page 84

I
To control fonts you send this command:
<ESC>
*C r? F
For n enter one of the numbers from this table of functions:
.n
O(zero)
1(one)
2
3
4
5
~.
FUNCTION
Delete all temporary and permanent fonts
Delete all temporary fonts (another way to delete
all temporary fonts is to send a reset command)
Deletejust thefont withthemostrecently specified
ID
Delete just the last character of the font you have
downloaded
Make the current font ID temporary
Make the current font ID permanent
Make a temporary copy of the current font
A bit of explanation about that last function 6: When you give a font ID to
anyfont you first need a temporary copy of that font in memory. That copy
isalready there for downloaded fonts. But you willneed function 6 to create
a temporary copy of an internal or cartridge font.
Here’s how to assign ID numbers to an internal or cartridge font. You first
selectthefont,then send the Font ID command to give itan ID number, and
finally copy the font into memory with FontControlfunction6.If you want
thatcopyto stayinRAM when youreset theprinter,youconcludebysending
Font Control function 5.
4.5.9 Example: Controlling fonts
Let see how those last few commands work. translated into BASIC.
Pretendyouwanttomakeashorttestwith yourcurrent font(itdoesn’tmatter
whatitis):you wanttoprintwhat’sinASCIItable positions 128through 130.
There’s nothing there in your normal Roman-8 symbol set, but some other
sets keep control codes or international characters there.
76
Page 85

Assuming you like what you see printed from those ASCII positions, you
then want to make that current font permanent. Finally, you also want to
dump all the temporary fonts from printer memory to make room for some
graphics you’ll be printing.
Let’s start with a reset and an underlined heading for your test print:
100 LPRINT CHR$(27);“E”;
110 LPRINT CHR$(27);“&dOD” :
120 LPRINT “Underlined heading for test print
of ASCII 128 130“;
130 LPRINT CHR$(27);“&d@”
140 LPRINT CHR$(27);“&p3x” :
150 LPRINT CHR$ (128);CHR$ (129);CHR$ (130);
160 LPRINT CHR$ (12);
170 LPRINT CHR$ (27):“*C5flF”;
Line 100isjust the<ESC> E reset command. Lines 110and 130turn on and
off the underline feature.
Line 140 turns on transparent printing, which forces printing even for
normally unprintable control codes.The three bytes you wantto print are in
line 150.To see what’s there, you send a form feed command in line 160.
And finally,line 170 uses thefontcontrolcommand tomakethecurrent font
permanent and then delete all temporary fonts.
.
77
Page 86

4.5.10 Example: Assigning font numbers
Now let’s do a program in BASIC. First we’ll assign font numbers to the
Courier and Line Printer resident fonts and to a cartridge font, IBM PC
Courier. Then we’ll print samples of each font.
100 LPRINT CHR$ (27);“(8U” ;
110 LPRINT CHR$ (27);“
(sOP1Ohl2vOsOb3T” ;
120 LPRINT CHR$ (15);
130 LPRINT CHR$ (27);“*cID”;
140 LPRINT CHR$ (27);“*c6F”;
150 LPRINT CHR$ (27);“(8U” ;
160 LPRINT CHR$ (27);“(sOp16.66h7vOsObOT” ;
170 LPRINT CHR$ (15);
180 LPRINT CHR$ (27);“*c2D”;
190 LPRINT CHR$ (27);“*c6F”;
200 LPRINT CHR$ (27);“(1OU”;
210 LPRINT CHR$ (27);“(sOp10h12vOsOb3T” ;
220 LPRINT CHR$(15) ;
230 LPRINT CHR$ (27):“*c3D”;
240 LPRINT CHR$ (27);“*c6F”;
250 LPRINT CHR$ (27);“lX”;
260 LPRINT “Font 1 Resident Courier”
270 LPRINT CHR$ (27);“(2X”;
280 LPRINT “Font 2 - Resident Line Printer”
290 LPRINT CHR$(27);’’(3X”;
300 LPRINT “Font 3
Cartridge PC Courier”
310 LPRINT CHR$ (27);“(lX”;
320 LPRINT CHR$(12)
Line 100and llOcallstheintemal Courier font and line 120makes itthe
primary font. Line 130 gives it font ID number I, and line 140 makes it
temporary.
Lines 150through 190do the same thing forthe Line Printer font, andlines
200 through 240forthecartridge font. Notice thatthecartridge fonthasthe
IBM symbol setcode 10U.
Lines 250through 300printout samples ofthethree fonts. Finally, line310
resets thedefaultto ourintemal Courierfont, andline320 performsthe final
form feed to print the page.
78
Page 87

4.6 USING YOUR OWN FONTS
4.6.1 Font design is tedious
A warning: font design is an art. Don’t expect to turn out professionallooking fonts in a few hours.
Sometimes, though, you have to build your own typeface, even ifyou don’t
work with a company in the font-selling business. You may, for example,
want to print your own customized company logo. It means building up
characters within a cell or grid, perhaps 50 dots high and 35 wide — lots of
dots.
Becausedefiningyourown typefaceissotedious,make sureyou’vechecked
out as many downloadable fonts as you can find from font development
companies.
Thenexthandiestwaytodo thejob is to askaround,maybewhere youbought
your LaserPrinter 4111,to see if you can get one of the font-creating or fonteditingutilityprogramsnowonthemarket. FonrGenIV+ isone. Keepaneye
out, too, for new word processing tools that might save you the trouble of
painstakingly figuring out details like kerning.
Even with aids like these, building a custom font is an intricate process. It
calls for the creation of a family of up to 200 characters sharing a common
design and proportional scheme, and that’sjust for one type size. No mean
feat.
4.6.2 How to download your own fonts
Characters that you define and store yourself are called “user-defined”
characters. Let assumeyoualreadyknow what text isto be inyourcustom
font, and have designed itstype’face,weight, width and style. Once you’ve
created your own characters. you’ll need to download them to your laser
printer.
79
Page 88

The process of downloading a font you’ve designed yourself is somewhat
detailed.To download your font, you follow the following steps:
1) assign a font ID number to your font,
2) download a font header,
3) identify the position of each character to be downloaded,
4) send a character descriptor and bit map for each character,
5) specify whether the file is to be permanent or temporary.
1)Assigning afont ID toyourfont
Toassignan ID to yourfont, you sendthiscommand (describedabove under
“AssigningfontIDnumbers”) withan IDnumber fern betweenOand 32767:
<ESC> *c n D
Before sending that command though, check whether the ID number is
alreadyallocatedtoanother font.Ifitis,thatexistingfontwillbedeletedwith
the next command.
2) Downloading a headerfor yourfont
Even if the printer doesn’t have enough memory to create your font, it will
delete any existing font with the same ID number when you download the
headerfor your font.
A font’s header isthe list of its attributes, which your printer uses to select
that font. Each font header, 26 bytes long, is stored at the front of the font.
You send a font header command to your printerjust before you download
the font’s characters.
The header command looks like this:
<ESC>
)S n W
and must be followed immediately by the data describing the font’s at-
tributes.The n value istheactualnumber ofbytesof descriptiondata,almost
always26. Note: unlikeothercommands, you mustenter theASCII symbols
2 and6 here, not the number 26.
80
Page 89

Here’s a typical font header command:
<ESC>)s26WO<SUB>OIOOO<RS>O<RS>O2OOl<FF>OdOaOOOO<ETX>
Aside from the actual command at the front, the rest looks like gobbledygook? But there’s 26 bytes there, each one an ASCII character, each one
specifying a particular font attribute. (The enclosed items with brackets are
single ASCII characters that happen to be control codes.)
Each byte in the header is a number, which you send as whatever symbol
happenstobestoredatthatnumeric positionintheASCIItable.Codingsome
of these numbers istricky, however, and we recommend you ask your Star
Micronics dealer to help you build your fontheader. To get you started,the
table below shows what each of those bytes means:
BYTE
o-1
2
3
4-5
6-7
8
9
10
11
12
13
14-15
16-17
18-19
20-22
23
24
25
MEANING
header length
blank
font size
blank
baseline position for characters
blank
cell width
blank
cell height
orientation
spacing
symbol set
pitch
line spacing
blank
style
stroke weight
typeface
81
Page 90

P e c y f
Before you download each character you have totellthe printer where in its
font table to put it. You indicate where by sending this command:
<ESC>
*C n E
For n you put the decimal number, between Oand 255, of the position inthe
font table where you want your character stored.
Your printer’s font table isjust like the ASCII table. Before you send each
character, sayg, you have to saywhereyouwantto putit.In theASCII table,
g is at decimal position 103.So you send this command:
<ESC>
*C 103E
And immediately after it you send the bits that make up the character g.
D e c y f
The next step is to describe each of your characters, “mapping” where you
want each dot to go. Send this command before each character:
<ESC>
(S n W
For Hyou enter the number of bytes you’ll be sending after this command,
to describe and map your character. Sixteen bytes are needed for the
description; the bit-map takes as many bytes as you’ve put into each
character cell — perhaps two or three hundred bytes.
As with the font header, each byte in the character description isa number,
sent as the symbol at that position in the ASCII table. Coding character
descriptions is tricky too, so again we recommend you ask your Star
Micronics dealer for help. The table below shows what the bytes in the
character description mean:
82
Page 91

BYTE
o
1
2
3
4
5
6-7
8-9
10-11
12-13
14-15
MEANING
description length
blank
always 14
always 1
orientation
blank
left offset (blank space to left of character)
top offset (blank space above character)
character width
character height
print position travel (proportional spacing only)
Thebit mapof thecharacter is just the patternofdotsinthe character, starting
at the top left of itscell. You work your way across the cell and down to the
bottom right, giving each dot a value of Oif it’s not to be printed and 1if it
is. Then you group those dots as 8-bit bytes.
P t
The last step indownloading yourown fontis to makethefontpermanent or
temporary, using the Font Control command described earlier. The command <ESC> *c 4 F will allow the font to be erased when you reset the
printer. But the command <ESC>*C5 F will keep your font available even
after you reset the printer.
83
Page 92

R G
The Star LaserPrinter 4111offers raster graphics (sometimes called “bitmapped graphics”), which specify each dot in a graphics pattern.
Be aware, though, that adding graphic elements always slows up printing
with laser printers.
The following stepsshouldbe performed (in theordershown)when printing
raster graphics:
1) Define the resolution
2) Set the orientation of the graphic image
3) Issue the command to start graphics
4) Issue the command to set the compression technique (if any) of
the graphical data
5) Send the commands which transfer the graphics data
6) Send the command to end graphics.
D r
Before graphics are sent to the printer, the resolution must be set. This is
achieved using the following command:
<ESC> *t
77R
Ifthe valueofn isgreaterthan 150,theresolutionof thefinalgraphics image
willbe 300dotsper inch (dpi); ifn is from 101to 150,theresolution will be
150dpi;‘ifn is from 76 to 100,the resolution will be 100dpi; and ifn is75
or less, the resolution will be 75 dpi. The default resolution is 75 dots per
inch. After graphics have started, the printer will ignore any resolution
command until itreceives the command to end graphics.
o g i
To settheorientationofthegraphicimage, transmitthefollowing command:
<ESC> *r n F
where n can take a value of either Oor 3. When the value of n is O,raster
graphicsprintingwilltake place inthelogicalpageorientation, andwhenthe
valueof n is 3,rastergraphics willbe printed along the width of thephysical
page, regardless of the logical page orientation.
84
Page 93

I c s g
The command to start graphics must be transmitted next. The command is:
<ESC> *r n A
wheren cantake avalueofeither Oor 1.IfyouenterO,themargin forgraphics
willbesetat the left-mostprintableedgeofthe page (not thesameasthe left
margin for text). But ifyouenter 1,the margin for graphics will be set atthe
column of thecurrent print position, and your image will appear onlyto the
right of that graphics margin.
I c c t
a g d
Three graphicdata compression formats are available for data transfer. The
data compression format to be used is selected using the following com-
mand:
<ESC> *b n M
where n can take the value O, 1or 2. Any other value is interpreted as O.A
full discussion of data compression technique is outside the scope of this
manual, but a brief explanation of this command should be useful.
Where n = O,no encoding takes place, and a simple binary transfer takes
place. Bit 7 of the first bytecorresponds to thefirstdot ina raster row, bit
6 to the second, and so on.
Where n = 1, run-length encoding takes place. This is a compression
technique where the data is divided into pairs; the first byte of each pair
serving as the repetition count for the data in the second pair. If the first
byteofthe pair isequal to zero,thedatainthe secondbyteisnotrepeated.
Where n =
2, the data to follow is in Tagged Image File Format (TIFF)
conforming to rev. 4.0 standards. The demands of space do not allow a
detailed discussion of TIFF standards here, but briefly, TIFF files combine features of non-encoded and non-encoded files. Many proprietary
graphics packages use TIFF encoding when storing and transmitting
graphic data.
85
Page 94

I
S c w t g d
When transferring raster graphics data, each line of raster data must be
prefixed by the command:
<ESC> *b n W
wheren givesthenumberofdatabytestofollow(themaximum is255before
anothersuchcommand issent).This data mustfollow thecompressionrules
set in the previous command. For instance, a TIFF image interpreted in any
way other than the TIFF format will produce very strange results! Repeat
sending lines of graphics data, prefixed by the above command, until the
whole image has been transmitted.
S c g
To signaltheendofgraphicdatatransmission,send thefollowingcommand:
<ESC> *r B
There are no parameters. The LaserPrinter 4111is now in text mode.
A pro,grainminghint:move your print position in dot increments whenever
you’re dealing with graphics. It’s easier than trying to calculate column-
widths or decipoints.
The Raster Heightcommand specifiesthe height in pixels of the nextraster
graphic (between the start graphics and stop graphics commands).
<ESC> *r n T
The valueof n mustbenon-negative;ifnecessary, itistruncated to the value
of (logical page length) - (y coordinate ofcursor). This command causes all
raster rows after the specified heightto beclipped (disregarded), even ifn =
O.It forced the cursor position to advance vertically by n rows, even if less
than n rows are transferred. The area maps to either opaque or transparent
depending on the source transparency mode.
86
Page 95

The Raster Width command specifies the width in pixels of the next raster
graphic.
<ESC> *r n S
The value ofn must be non-negative;ifnecessary it istruncatedto thevalue
of (logical page width) - (x coordinate of cursor). It will clip all raster rows
longerthan thespecifiedwidth,even ifn = O.Itwillpad any row shorterthan
thespecifiedwidth with zeros.Theareamapsto eitheropaque ortransparent
depending on the source transparency mode.
The default valueisthewidthorlengthof thelogicalpage, depending onthe
orientation. The command is ignored when received between start and end
raster graphics commands or if n is negative.
The Raster Y Offset command advances the verticalpositionand is ignored
when not in the raster mode.
<ESC> *b n Y
If n isnegative or ifthenew position would exceed the current raster height
or the page limit, it isignored.
P G
TheStarLaserPrinter4111alsoprintspa~rerngraphic~,whichprintslinesand
patterned blocks.
Print shops call lines of any thickness rules. A printed line in fact is a rectangulararea with one“skinny”dimension, fromone to manydots thick.We
will use the word “rules” too, to avoid confusion with the lines used to
measure pages.
You follow these three steps when you use rule and pattern graphics:
1) Define the dimensions you need.
2)Choosethegraphicspatternyou want to fill in those dimensions.
3) Print the pattern.
Remember to send the following rule or pattern commands in that order.
87
Page 96

4 D r o p d
Definingthedimensions ofthe areayouwantto filljust meansindicatingthe
horizontaland vertical sizeofthepattern, or therule’s length and thickness.
You can indicate dimensions in either dots or decipoints (tenths of a point).
At 300 dotsor 720 decipoints to the inch, decipoint measurements are more
accurate.Theprinterconvertsdecipointvaluesintodots,using2.4decipoints
tothedot.Itroundsupfractionstothenextinteger.So 1225decipointswould
work out to 510.4 dots, and the printer rounds this up to
511dots.
Your dimension commands specify an area to the right and down from the
currentprintposition. Ifyoudefine an area larger than thepage,yourprinter
will accept thecommand. It will,however, cut off your pattern or rule at the
boundaries of the page’s printable area.
When the printer finishes its print “map” of your rule or pattern, the print
position automatically returns to the spot from which you started. That
means, for instance, that you can make a lightly shaded rectangle and then
startprintingtext right over it. This kind of box can be useful for settingoff
particular information from the main body of your text.
Horizontally,youcanspecifytherule lengthorhorizontalpattern sizeindots
with this command:
<ESC>
*C n A
in which for n you enter how many dotsacrossthepage youwanttheruleor
pattern to be.
Alternatively, to specify the horizontal dimension for a rule or pattern in
decipoints, you can print this command:
<ESC>
*C n H
in which n is the horizontal rule or pattern size in decipoints,
Vertically, you can indicate the size of your rule or pattern in dots with this
command:
<ESC>
*C n B
88
Page 97

inwhich n isthenumberofdotsdefining thethicknessoftheruleorthedepth
of the pattern.
Alternatively, to show the vertical dimension in decipoints, you send this
command:
<ESC> *c n V
in which n is thenumberofdecipoints intherule’sthicknessor thepattern’s
vertical length.
4 C a p a r o p
You need the next five commands to choose and printtheparticularpattern
you want to fillyour defined area. These commands work together.
With thePrintPatterncommand (which actually comes second)youspecify
whetheryouwant to fillyourrectangulararea with a solidblack rule,a finely
dottedgray-scale pattern,ora predefine linearpattern.AndwiththeSpecify
Pattern command you can indicatewhich
particular dotted or linear pattern
you want. You always send the Specify Pattern command before the Print
Pattern command, even if you want a solid black rule.
To indicate the particular pattern you want, send the following command.
The general meaning ofthen valueyou enter actually depends on the command you put after this:
<ESC>
*C n G
If you want a solid black rule itdoesn’tmatter what you put in for
n, as the
printer ignores it.
Ifyouwant a 1-scale dotted pattern,fern youenterhere apercentage number
from 1to 100indicatingthedensitywith which youwantthe boxfilled,from
light to solid. Your n percentage will correspond to one of the eight grayscale densities in the chart below.
1- 2%0
3-10 Yo
89
Page 98

11 -20 0/0
m
36-55 0/0
81 -99 0/0
1fyou want a linear pattern, for Hyou enter here a pattern number between
56-80 ~0
%0
I and 6 inclusive. identifying one of the linear patterns below.
#3
#4
#5
#6
90
Page 99

You always send the following Print Pattern command after a Specify
Pattern command. This Print Pattern command identifies whether the area
youhavedefinedisto befilledwitharule,dotted gray-scalepattern,orlinear
pattern:
<ESC>
*C n P
For n enter a value from the following table. (If you select a linear pattern
here, but a dotted pattern in the previous Specify Pattern command, the
printer will ignore this Print Pattern command.)
n Value Pattern
O(zero) solid black
1 solid (opaque) white
‘2
shaded fill (as selected with <ESC> *c n G)
3 cross-hatched fill (as selected with<ESC> *cn G)
5 currentpatternfill(asselectedwith<ESC> *vn T)
If n = 5 has been selected, you will need the following command.
<ESC>
* n T
Thiscommand selectsthecurrentpattern typetobeappliedto source images
(not rectangular areas) before printing.
17Value Pattern
O(zero)
Solid black
1 Solid white
2
Currently defined shading pattern
4 Currently defined cross-hatched pattern
Fern = 2or3,thepattern definedbythemostrecent <ESC> *cn Gcommand
is used. To change the pattern, a new <ESC> *c n G and a new <ESC> *V
n T command are needed.
91
Page 100

I
The following two commands control “transparency”, whether or notwhite
sections of an image block out black pixels that are already in place.
<ESC>
‘ n N
Thisselectsthesourcetransparency mode.whether white areasof thesource
image should be treated as transparent (and do not “white-out” black pixels
they cover) or opaque (in which case they white-out black pixels).
Set n to Ofor the transparent mode and to 1 for the opaque mode.
<ESC>
* ? O
Thisselectsthepattern transparency mode,similarlyto theabove command,
whether the current pattern should be treated as transparent or opaque.
Set n to Ofor the transparent mode and to 1 for the opaque mode.
4 E P g
To specify a block five incheswideyoucould useahorizontaldimension of
1500dots (5 inches times 300 dots). That command would look like this:
<ESC>
“C 1500A
To print that area with a 25 percent gray-scale pattern. the commands you
send would be:
<ESC> *C25G
<ESC>
*C 2p
Butto print an area filled with the horizontal bar pattern, the commands you
send would be:
<ESC>
*C 1G
<ESC>
*C 3P
(You could combine these commands as <ESC> *c lg 3P.)
92
 Loading...