

Page 1

‘unied, multi-model driver and conguration suite’
Software
Installation Manual
Rev. 1.0
Page 2

Contents
1. Installation .................................................................................................................1
2. Uninstallation ............................................................................................................5
3. Printer Utility ............................................................................................................. 7
3.1 Starting the Printer Utility ............................................................................................................7
4. Revision History ........................................................................................................ 9
Appendix 1. FVP10 Sample Sounds ............................................................................... i
Company and product names that appear in this document are trademarks or registered trademarks of their
respective owners.
Page 3
Introduction
This software runs on Windows XP (SP2 or later), Windows Vista, and Windows 7.
Important: Administrator privilege is required to run the installation.
1. Installation
Follow the instructions below to install the software.
Note: If you are connecting to the printer by USB, carry out the instructions in chapter 1, "Installation,"
and then turn the printer on.
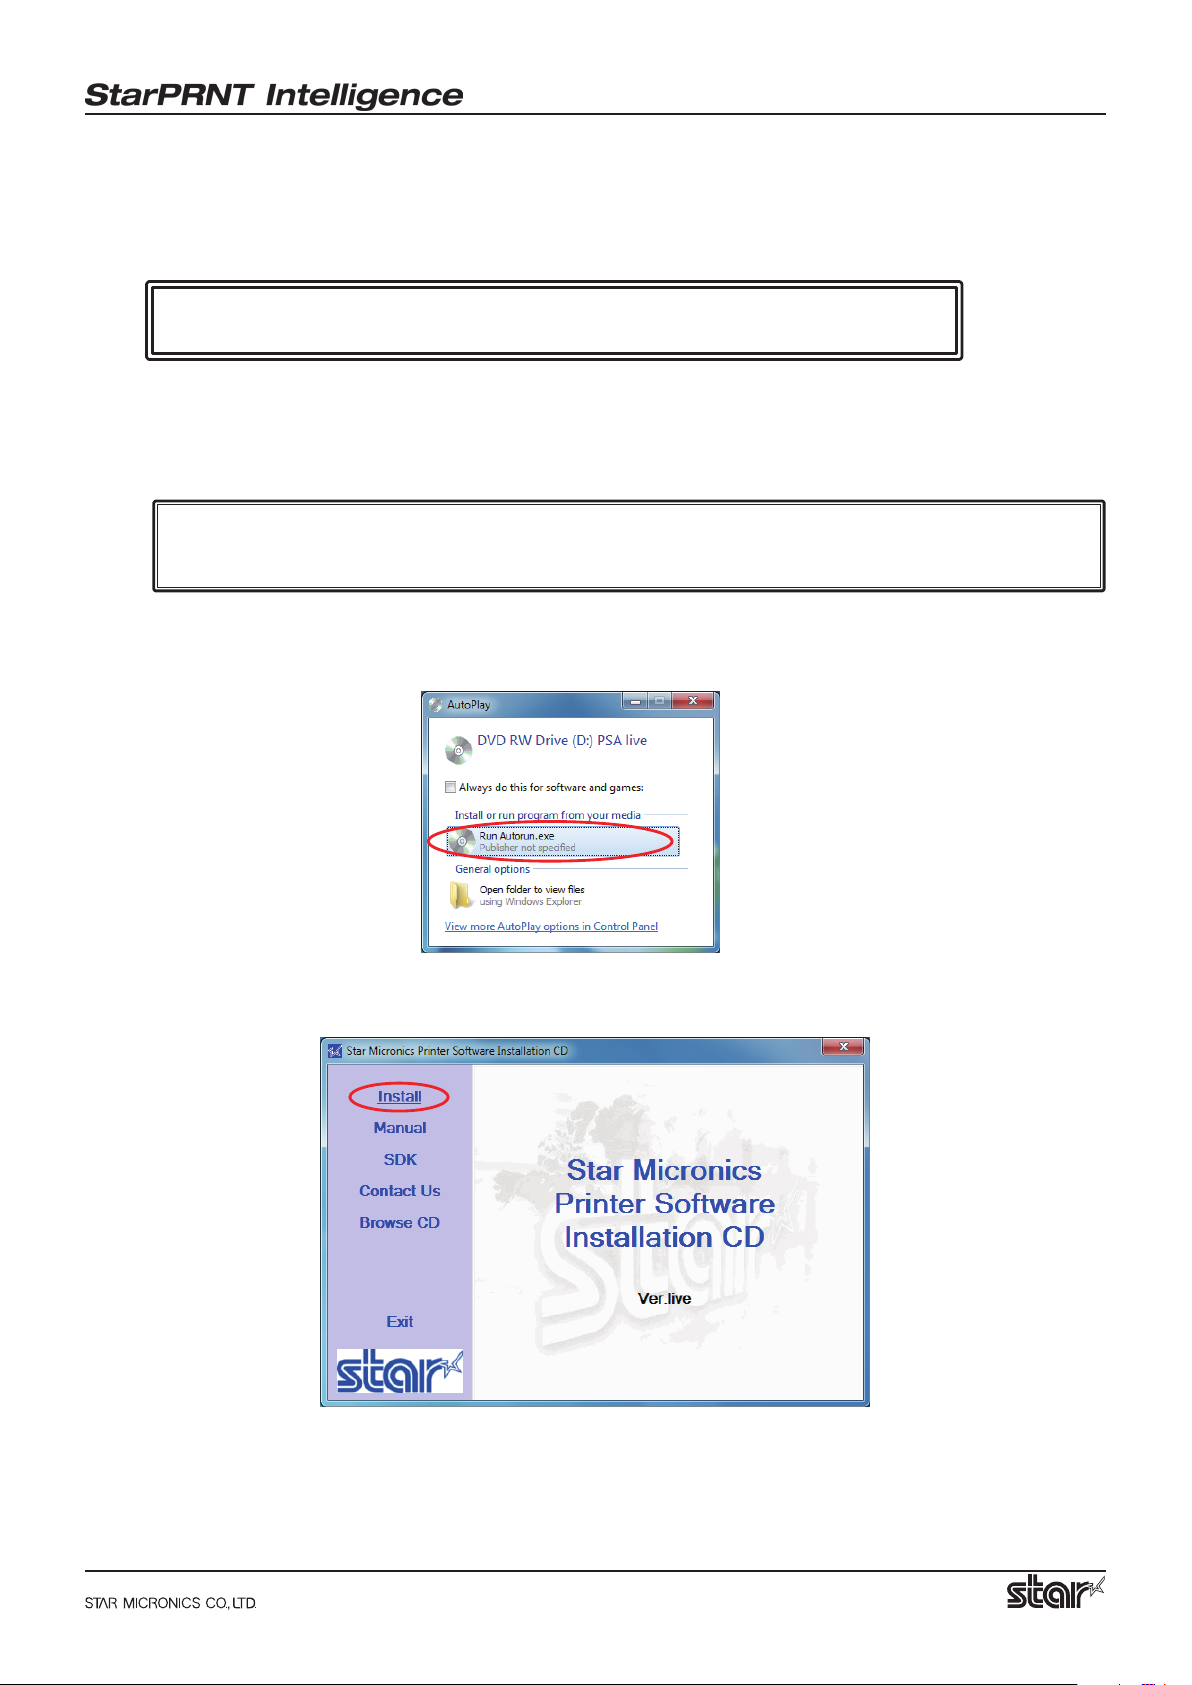
Insert the CD-ROM that came with the printer into the CD-ROM drive.
1
If the following window appears, click 'Run Autorun.exe'.
Installation Manual
The software installation CD window opens. Click 'Install'.
2
− 1 −
Page 4
Installation Manual
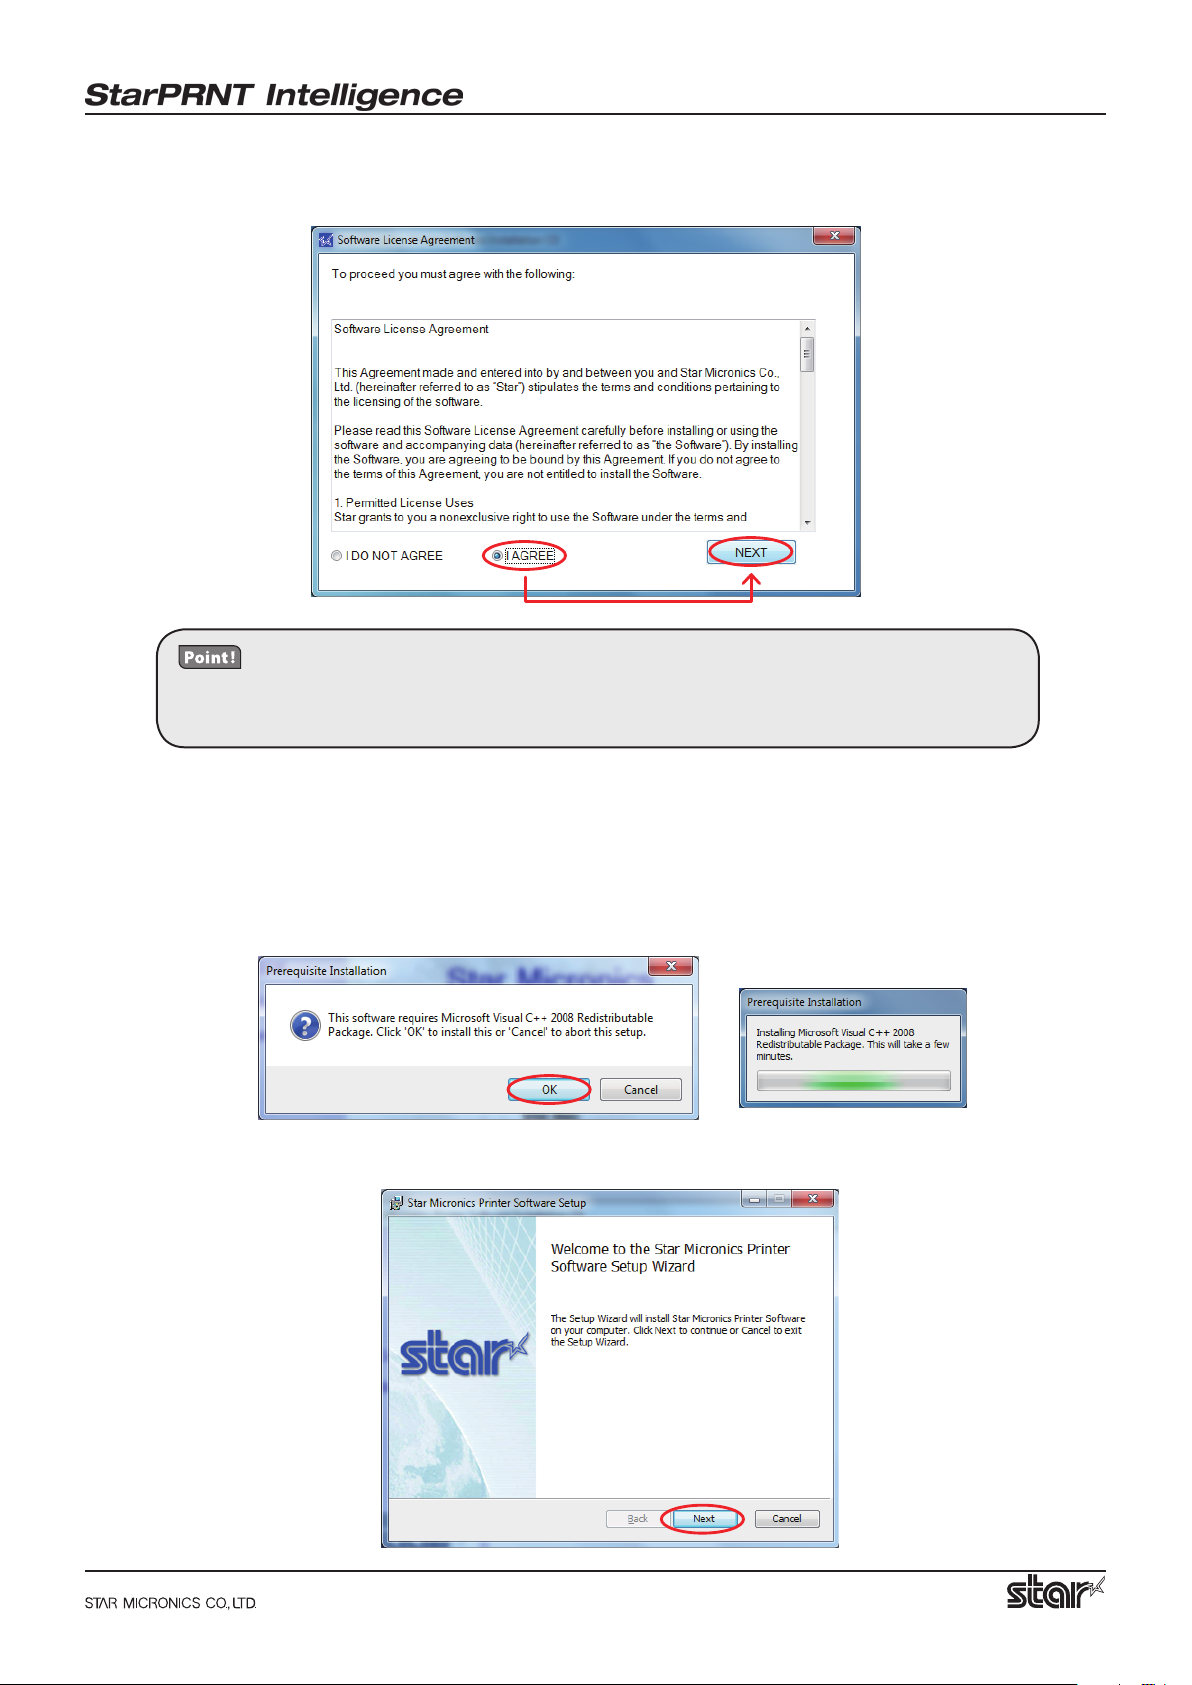
The software license agreement for using the contents of the CD appears. Read the agreement. If you
3
agree with the terms, select 'I AGREE', and then click 'NEXT'.
If you click on any of the items on the software installation CD window, the software license agreement for using the contents of the CD will appear and will
remain until you agree with its terms.
If you are using Windows Vista or Windows 7, the 'User Account Control' dialog appeards.
4
Click 'Continue' or 'Yes'.
If components that are necessary for using the software are not found on your PC, those components
5
are installed rst. On the following conrmation dialog box, click 'OK'.
Depending on your PC environment, this process may take a long time.
Click 'Next'.
6
− 2 −
Page 5

Installation Manual
The End-User License Agreement, an agreement for installing the software, appears. Read the agree-
7
ment. If you agree with the terms, select the 'I accept the terms in the License Agreement' check box,
and then click 'Next'.
Choose the setup type.
8
Click 'Typical' to install the most common, necessary program features.
Click 'Custom' to install only the program features that you will need.
Click 'Install' to start the installation.
9
− 3 −
Page 6

When the software installation completes, the following window appears.
0
Click 'Finish' to close the wizard.
Click 'Exit' to close the software installation CD window.
A
Installation Manual
− 4 −
Page 7

2. Uninstallation
Follow the procedure below to uninstall the software.
If you are using a USB vendor class driver, read the 'Readme_En.txt' le on the CD-ROM.
Turn the printer power switch o.
1
On the Windows taskbar, click 'Start', and then click 'All Programs' > 'Star Micronics' > 'Printer
2
Software' > 'Uninstall Printer Software'.
Installation Manual
If you are using Windows Vista or Windows 7, the 'User Account Control' dialog appeards.
3
Click 'Continue' or 'Yes'.
The following window appears. To continue, click 'Yes'.
4
− 5 −
Page 8

Installation Manual
If the following conrmation dialog box appears, select the 'Do not close applications' option, and
5
then click 'OK'.
If the following conrmation window appears, click 'OK'.
6
The uninstallation program starts and removes all the relevant software components.
7
− 6 −
Page 9

Installation Manual
3. Printer Utility
The printer utility connects to the printer and provides various functions. It includes a function that you
can use to install the printer driver easily. The printer utility connects to the printer according to the settings specied under 'Connection'. The utility functions that you can use vary depending on the printer
model and the connection settings.
For details on how to congure the connection and the utility functions that you can use, see the 'Printer
Utility Help'. You can start the 'Printer Utility Help' by clicking the link at the lower left of the window that
appears when you start the printer utility.
3.1 Starting the Printer Utility
Follow the procedure below to start the Printer Utility.
On the Windows taskbar, click 'Start', and then click 'All Programs' > 'StarMicronics' > 'Printer
1
Software' > 'Printer Utility'.
If you are using Windows Vista or Windows 7, the 'User Account Control' dialog appeards.
2
Click 'Continue' or 'Yes'.
− 7 −
Page 10

Installation Manual
The printer utility window opens.
3
When you start the printer utility for the rst time, the 'Printer Connection Wizard' appears. Specify
settings such as the printer model that you are using, the command emulation, and the interface to
create a connection. You will be able to use the printer utility functions through the connection that
you created.
Starting the Printer Utility Help Printer Connection Wizard
When Using a Printer Driver:
When you have set 'Connection Setting' to anything other than 'USB Printer Class'
and want to use the printer driver, install the driver from 'Windows Printer Queue
Management' of the printer utility.
− 8 −
Page 11

4. Revision History
Rev. No. Date of Revision Changes
Rev. 1.0 Mar . 2010 First edition
Installation Manual
− 9 −
Page 12

Appendix 1. FVP10 Sample Sounds
The following audio les are preinstalled in the FVP10.
Installation Manual
Sound No. Audio Message
Sound 1 Welcome! SP_EN01.wav
Sound 2 Thank you! SP_EN02.wav
Sound 3 Order coming in. SP_EN03.wav
Sound 4 Drink Order coming in. SP_EN04.wav
Sound 5 Food Order coming in. SP_EN05.wav
Sound 6 Order has been cancelled. SP_EN06.wav
Sound 7 New order coming in. SP_EN07.wav
Sound 8 Order to go coming in. SP_EN08.wav
Sound 9 Print nished. SP_EN09.wav
Sound 10 Please take your receipt. SP_EN10.wav
Sound 11 Please come again. SP_EN11.wav
Sound 12 Please give your receipt to the operator. SP_EN12.wav
Sound 13 Now printing, please wait a moment. SP_EN13.wav
Sound 14 Please do not pull the paper until printing nishes. SP_EN14.wav
Name of the
Downloadable File
Sound 15 Thank you for visiting. SP_EN15.wav
Sound 16 Please take the number ticket. SP_EN16.wav
Sound 17 Please have a seat and wait a moment. SP_EN17.wav
Sound 18 Thank you for your purchase. SP_EN18.wav
Sound 19 Please wait here, we will guide you shortly. SP_EN19.wav
You can play back the preinstalled audio les by selecting the appropriate 'Sound No.' from various
functions such as the 'Audio Conguration Function' and 'Text Search Function' of the printer driver
and printer utility.
The preinstalled audio les are stored in the printer's user-data area. If you store new audio les by
using the printer utility's 'Sound Upload Function' or by sending commands directly to the printer,
all the preinstalled audio les will be cleared.
You can download the FVP10's preinstalled audio les from the following URL. You can use them
again by uploading the les that you want to use to the FVP10.
http://www.star-m.jp/eng/dl/dl02_07_02fvp10.htm
The error-warning sounds in the printer are not cleared even if you upload new
audio les to the printer.
i
Page 13

OVERSEAS SUBSIDIARY COMPANIES
STAR MICRONICS AMERICA, INC.
1150 King Georges Post Road, Edison, NJ 08837-3729 U.S.A.
Tel: (int+1)-732-623-5555, Fax: (int+1)-732-623-5590
ELECTRONIC PRODUCTS DIVISION
STAR MICRONICS CO., LTD.
536 Nanatsushinya, Shimizu-ku, Shizuoka,
424-0066 Japan
Tel: (int+81)-54-347-0112, Fax: (int+81)-54-347-0709
Please access the following URL
http://www.star-m.jp/eng/dl/dl02.htm
for the latest revision of the manual.
STAR MICRONICS EUROPE LTD.
Star House, Peregrine Business Park, Gomm Road,
High Wycombe, Bucks, HP13 7DL, U.K.
Tel: (int+44)-1494-471111, Fax: (int+44)-1494-473333
STAR MICRONICS ASIA LTD.
Rm. 1901-5, 19/F., Enterprise Square Two,
3 Sheung Yuet Road, Kowloon Bay, Hong Kong
Tel: (int+852)-2796-2727, Fax: (int+852)-2799-9344
Software Installation Manual Rev. 1.0 2010.3.24
Printed in Japan, 80878375
 Loading...