Number of Copies: A maximum of 99 copies can be made.
Control Codes: It accepts a variety of control codes for printer management.
Frequently Asked Questions
Q1: Which connection options are supported in Star LaserPrinter 8III?
A1: Both serial and parallel connections are supported in Star LaserPrinter 8III.
Q2: Without refilling the toner cartridge, how many prints do you expect it to achieve?
A2: Approximately more than 4000 pages can be printed with a single refill in the toner cartridge of the Star LaserPrinter 8III.
Q3: Is it capable of printing graphics?
A3: Yes, detailed graphs and images can be printed on Star LaserPrinter 8III as well.
Q4: What formats of the paper can be utilized with that printer?
A4: Letter size, legal size, A4 size, executive size and different envelope sizes are among the several formats the printer contains.
Q5: The font currently used in my print job needs to be changed, how will you accomplish that?
A5: By manually controlling the front panel or by sending Escape sequence commands via a computer, you can modify the font.
Q6: There are different emulation modes, how can I change them?
A6: Lower Middle Eastern Emigration super set command or the printer's front panel can be used to switch emulation modes.
Q7: What is the fastest that you can print using the Star LaserPrinter 8III?
A7: About 8 pages a minute is the fastest print speed achieved with the Star LaserPrinter 8III.
Q8: Uses of the printer are vast, does it however allow printing of different media types?
A8: Yes, using the Star LaserPrinter 8III, you can print on various cut sheet papers, envelopes, and laser printing transparencies.
User Manual
Page 1
j ./
Applications Manual
Page 2
Trademark Acknowledgements
LaserPrinter 8111: Star Micro&s Co., Ltd.
PageMaker: Aldus Corporation
Apple II +, Apples&t: Apple Computer Inc.
Bitstream, Zapf Humanist: Bitstream Inc.
Canon: Canon Inc.
Centronics: Cunronics Data Computer Corporatim
HP, LaserJet III: Hewlett-Packard Company
LaserControl: Insight Development Inc.
IBM PC, IBM Proprinter: International Business Machines Corp.
Optima, Century Schoolbook: Linotype Corporatia~
Lotus l-2-3: Lotus Development Corporation
M!?-DOS, Microsoft BASIC, Windows, Word, Microsoft BASIC: Microsoft Corporation
MultiMate: Multimate International
TRS-80: Radio Shack, a division of Tandy Corporatim
l All rights reserved. Reproductim of any w of this manual in any form whatsoever without
STAR’s expnxs pennissim is forbidden.
l ‘lhe contents of this manual are. subject to changp without notice.
l Alleffortshavebeenmade toensurctheaccuracyofthe contents ofthis manual at thetimeofpress.
However, should any ermrs be detected. STAR would greatly appreciate being informed of them.
l The above notwithstanding, STAR can assume no responsibility for any errors in this manual.
Q Copyright 199 1 Star Micro&s Co., Ltd.
-
-
Page 3
PREFACE
About this manual
This Star LaserPrinter 8111 Applications Manual gives you the information
you need to program the Star Micronics LaserPrinter 8111.
Why would you read this book? Most people using a laser printer just run
software packages with built-inprinter drivers. which look after everything
their computers send their printers. But many of us- small business people
and home computer users, not to mention the wizards who write those
software packages- want to benefit from all the new features offered by our
printers.
Do you want complete control over the characters and images you print? Do
you want to make your Star LaserPrinter 8111 work like some earlier kind of
printer? This manual provides the software help you need to get the most
from your LaserPrinter 8111.
Though this Applications Manual is really intended for intermediate to
advanced computer users, we’ve tried to accommodate relative novices too.
The information is organized so you can walk through the general theory
underlying printer programming before dancing into specific details. It
makes sense, therefore, to mad the first three chapters before jumping into the
middle.
There’s a good reason to read each chapter from its start too. People learning
how to use a new printer often find the terminology a barrier.
burying what may be new jargon in a Glossary at the back, we define each
new term the first time it appears. The whole first part of the chapter on fonts,
for example, defmes different aspects of afont (a collection of characters of
the same size and style).
So instead of
Page 4
What’s in this manual?
l In “Getting to Know Your Star LaserPrinter 8111” we provide a list of the
features that make this a splendid printer, to help you choose which
features you want to exploit. There’s a bit on how laser printers work,
inside and out. The chapter then explains software in general terms,
including how to write control and Escape commands to make those
features work.
l “Controlling Your Printer” examines the parameters and “superset”
commands you give the StarLaserPrinter 8111 to direct precisely how you
want it to behave. These let you control the printer, manage page formats,
and specify what you want printed.
l For most of us, the “Fonts” chapter will be useful: how to use the fonts
built into the LaserPrinter 8111, plus those that come on cartridges or
computer disks.
l You may never look atmore than one or two of chapters4 through 6, which
cover Star LaserPrinter 8111 commands. Your LaserPrinter 8111 emulates
other printers:
they do. Just think of your Star LaserPrinter 8111 as three printers hiding
inside one unit.
it imitates other printers by accepting the same commands
. . .
If you want to write or modify a program that uses one of these printersthe Hewlett-Packard LaserJet III, Epson EX-800, IBM Proprinter or chapters 4 through 6 show how your Star LaserPrinter 8111 can emulate
to accordingly. The chapters first describe how to control the printer and
to format pages, then how to move the print position, and finally how to
use fonts and graphics.
The chapter on the LaserJet III is longer and more detailed than the others.
That’s because you are more likely to use laser printer commands than
commands for dot matrix printers. (If you have software designed only
for dot matrix printers, you may have manuals for those printers anyway.)
We recommend you use LaserJet III emulation whenever possible, with
EX-800 emulation as your backup mode.
Page 5
L..
l The final “Technical Supplement” containing the command and character
reference tables will probably get thumbed the most.
L-.
L
L
L ,--
b
Conventions
Incidentally, one of those Technical Supplement tables suggests a couple of
typographic conventions we’ll use. Base ten (decimal) numbers will generally be used here; if we have to use base sixteen numbers (hexadecimal) we’ll
expressly say so.
And second, the lowercase L is practically identical to the number one (l
versus 1). Because lowercase L is used in many command descriptions, we’ll
use the character /to avoid confusion.
The Star LaserPrinter 8/N Operations Manual
This manual is the companion to the Star LaserPrinter 8111 Operations
Manual that came with your printer.
that requires care and delicate handling.
best, make sure you understand that Operations Manual first.
Your Operations Manual holds essential information about the LaserPrinter
8111, such as how to:
l unpack and set up your laser printer,
l connect the Star LaserPrinter 8111 to your computer’s serial or parallel
pofis
l link the LaserPrinter 8111 into a network of several computers,
l configure the LaserPrinter 8111 to your needs (with variables such as paper
size and speed of data transfer),
l load paper and the toner cartridge,
l operate the panel switches and display,
l run the LaserPrinter 8111 self-test,
l look after your printer to keep it in peak condition.
This chapter introduces both the hardware and software aspects of the Star
LaserPrinter 8111’s personality, from fonts and print engine to ASCII and
Escape sequences.
STAR LASERPRINTER 8llI HARDWARE
Versatility
-
-.
“-.
Your Star Micronics Star Laser-Printer 8111 works with practically all
commercial software programs and computers. With features that go beyond
Star’s easy, affordable 9-pin and fast, quality-printing 24-pin dot matrix
printers, the Star Laser Printer is the logical next step in the series of fine Star
Micro&s printers.
. .
with up to 90,000 dots per square inch- no more NLQ (near letter quality)
compromises. The Star LaserPrinter 8111 produces eight of those pages a
minute. These numbers translate to about five times more resolution and
speed than the average dot-matrix printer.
Your Star LaserPrinter 8111 produces pages that look close to typeset quality,
-.
Star’s new printer is remarkably versatile. You can print complicated forms
(widthwise if you want) . . . detailed graphs . . . yourowncustomized typestyles
. . . digitized photographs . . . other languages (including Arabic and Japanese).
-_
You can even print your letterhead and logo as you print your letter, and
reprint them directly onto a business envelope. You don’t even need to
.._-
remove the paper tray to print the envelope: just slide it into the manual feed
slot.
-._
_..
.
1
Page 10
The Star LaserPrinter 8111 is ideal for desktop publishing. The pages it
produces make perfect photocopy or instant-print masters. And all the main
desktop publishing systems, including Aldus Corporation’s PageMaker and
Xerox Ventura Pubisher, work splendidly with the Star LaserPrinter 8111.
With “page makeup” programs like these you will be able- maybe for the
first time- to deliver communications with the impact of top-notch
graphics.
Font options
You can print with an amazingly wide variety of type fonts and sizes. The
Star LaserPrinter 8111 comes with four built-in fonts, which can be printed
from 8.5 points to 12 points in size (apoint is about l/72 of an inch).
These fonts are:
CG Times Font
Univers Font
Courier Font
Line Printer Font
Besides these, you may be able to use optional cartridges and disks to give
your Star LaserPrinter 8111 a variety of extra fonts, such as these:
Helvet
Letter Gothic presentation fonts
Bar codes
line drawing
optical character reader fonts universal product code
You can load your Star LaserPrinter 8111’s memory with fonts stored on
computer disks. Literally hundreds of fonts are marketed by font-supply
companies. Some fonts are even obtainable from computer “user groups” or
“electronic bulletin boards”. Fonts you get this way are in the public domain,
which means you don’t need to pay a licence fee to use them.
Ask your Star LaserPrinter 8111 dealer about resources like these. Desktop
publishing with laser printers is fast-changing territory, and some Star
Micronics staff people have found electronic bulletin boards and computer
user groups quite helpful in keeping up with the changing pace. If you invest
a little time this way it may repay you well.
2
Page 11
How your laser printer communicates
Your computer communicates with the Star LaserPrinter 8111 through either
a parallel cable or one of two kinds of serial cable. The printer’s interjhce,
the link or boundary it shares with your computer, defines whether the printer
will accept characters and commands from your computer one byte or one bit
at a time.
A bit is the smallest unit of computer or printer memory. It has either a low
or high electric charge, which we represent with the digits 0 and 1. Usually
eight adjacent bits are grouped to form a byte. Since a byte normally
represents one character, this string of bits- 01OOOOO1- might represent
the letter A.
--
The serial interface accepts just one bit at a time from your computer. A
parallel interface can handle a whole byte at once, by moving data bits side-
C”..
by-side along separate wires. You choose which interface method you want
to use by selecting it on the operator panel, as explained in your Star
-..
LaserPrinter 8111 Operations Manual.
The Star LaserPrinter 8111 is a computer
The Star LaserPrinter 8111 first maps the characters to be printed into its own
. ..^d
--_
._
_.
random access memory (RAM). That is, the printer builds a “picture” in its
memory corresponding to the page you want to print. When that’s done the
printer can reproduce the page onto paper on its own, letting your computer
get on with other work.
Your Star LaserPrinter 8111 comes with one megabyte of RAM- the
equivalent of about one million characters. A Star LaserPrinter 8111 option
lets you add a second megabyte of RAM if, say, you need to map full-page
graphics or store more fonts. Accompanying all that RAM is another 5 12
kilobytes of read only memory (ROM), containing a library of internal fonts
and the programs that let the Star LaserPrinter 8111 emulate other printers.
A Motorola 68000 computer chip controls both the memory and the printing
mechanism in the printer, called the print engine. The printer stores a whole
page in RAM before printing it. (If a page is so dense that it overflows
memory-a most unlikely event-the Star LaserPrinter 8111 prints the page
on two sheets.)
3
Page 12
The Print engine
It’s the print engine that forms the actual characters and graphics. The engine
directs its laser, a pinpoint stream of light pulses, through mirrors and lenses
onto the surface of a positively-charged rotating drum.
Mirror
Lens
Laser
ning mirror
Scam
Semiconductor
Photosensitive drum
laser diode
As the laser scans, it “draws”the page-map stored in your printer’s memory.
Wherever a light pulse strikes, that tiny part of the drum drops to a neutral
electrical charge. That spot then attracts fine toner powder as the drum rotates
past the powder compartment.
As the drum rotates further it meets the paper. The paper itself is negatively
charged by passing by a fine corona wire. Since opposite charges attract, the
negative paper clings to the positive drum. Then heat and pressure from a
roller melt orfuse the dots of toner onto the paper, precisely reproducing the
image.
Finally the paper slides into the output bin. The paper usually comes out face
down so it stacks in the correct sequence.
4
Page 13
STAR LASERPRINTER 8JlI SOFTWARE
Binary and hexadecimal arithmetic
If you already know what hexadecimal numbers am, you can skip this section
and go ahead to read about ASCII.
The decimal number system with which we’re all familiar is a positional
counting system. There’s the “ones” position, the “tens” position, the “hundreds” position and so on. Each higher position is worth ten times more than
the position to the right of it, since the decimal system uses the base of ten.
Moreover, we need ten symbols to show the actual values that may be in each
position.
The binary system is positional too. There’s the “ones” position, the “twos”
position, the “fours” position, the “eights” position and so on. In binary each
position is worth only twice that of the position to its right. And we only need
two symbols- 0 (zero) and 1 (one& to show the values that may be in any
position. So in binary we get numbers that look like 1010 or 10001100.
The hexadecimal system is made of base-sixteen numbers. Hexadecimal is
positional like the other counting systems. And each higher position is worth
sixteen times as much as the position to its right.
We need sixteen different symbols to show all the possible values one
hexadecimal digit could have. We can use our decimal system’s ten symbols,
but we’ve had to borrow a few more from our alphabet to get all the symbols
we need. In hexadecimal, therefore, you can have a number that looks like
2C7C, or even FACE.
Here’s how the decimal, binary and hexadecimal number systems compare:
Decimal
0
1
2
3
4
5
6
7
Binary
0001
0010
0011
0100
0101
0110
0111
Hexadecimal
0 8 loo0
1
2 10 1010 A
3
4 12 1100
5 13
6
7 15
Decimal
9
11 1011
14 1110 E
Binary
1001
1101
1111 F
Hexadecimal
8
9
B
C
D
5
Page 14
The important thing to realize is that there’s more than one way to show the
-..
same numeric value. Computer programmers, for example, occasionally use
the hexadecimal system because it’s so compact. (Programmers often just
say “hex”.) This binary number:
101001011111110100110111111011010010110100001001
looks quite a bit tidier when it is written as A5 FD 37 ED 2D 09, which means
the same thing.
The ASCII table
Where does the Star LaserPrinter 8111 get the characters and instructions it
needs to print in the first place? It gets them from your computer, which sends
a stream of text and commands to your printer.
The program in your computer that controls everything sent to the printer
(called the printer driver) will usually be included with your computer
programs, such as your word processor. But the commands could also come
from a program you’ve written, perhaps in BASIC, a programming language
that uses common English words.
Internally, computers and printers use only the binary number system to
represent both commands and all the alphabetic, numeric and other keyboard symbols. Nearly all of those machines use the same scheme to code
those symbols, the American Standards Code for Information Interchange
(ASCII).
Anexample: inourfamiliardecimal system, binary01001010 adds up to the
number 74. Depending on which program your printer is using, it can
interpret that binary string 010010 10 as either the number 74 or the symbol
J . The printer stores the symbol J at position 74 in a table in its memory.
That eight-bit binary string, or byte, can be broken into two halves. The left
or high-order part containing 0100 is called the zone portion; the right part
holding the 1010 is called the digits portion. And in the hexadecimal number
system, the zone and digit parts of that byte are represented as 4 and A
respectively (look them up in the list above).
So the laser printer understands the symbol J as 01001010, which we can
also represent as the decimal number 74 or the hexadecimal number 4A.
We’ve printed this byte vertically and horizontally below, showing how it
adds up to decimal 74 and hex 4A.
6
Page 15
we
0x2’ = 0
1x26 =64
0x25 = 0
ox24 = 0
1~2~ = 8
ox22 = 0
1x2’ = 2
Ox2O = Q
74 Decimal
zone digits
-
0100 1010 Binary
4 A
Hexadecimal
The ASCII table in the Technical Supplement shows all these equivalent
representations for the symbols your laser printer understands. The table
organizes them in ascending order. In fact, ASCII is organized in a way that
actually makes sense.
Flip back there for a quick look right now. See how you can slice the table
into clumps of 16 or 32, based on what’s in the zone portion under the
hexadecimal column? These clumps make subgroups of similar symbols:
l hex 00 to 1F are the command symbols called control codes,
. hex 20 to 40 are the common keyboard symbols and numerals,
l hex 41 to 60 are capital letters and the less common keyboard symbols,
l hex 61 to 7F are lowercase letters and a few final symbols.
_..
__
That takes care of the first 128 ASCII symbols. However, nearly every
computer and printer manufacturer treats the second half of the table
differently. Hewlett-Packard, for example, puts a variety of accented
._
foreign language characters into positions 128-255 (often referred to as high
ASCII). Epson gives you a choice of either italics characters or IBM
character graphics.
Control codes
The ASCII table shows symbols like J or 2 the way they actually print on the
laser printer. But ASCII includes mom than just printable characters: none
of the control code commands at the beginning of the table actually print.
Instead, when your computer sends a control code to the laser printer it
makes your printer do other things, such as sound its beeper.
7
Page 16
Control codes mostly handle communications between your computer and
the printer at the lowest level, at cable level. For example, a couple of control
codes make sure the printer buffer (your printer’s storage memory) doesn’t
overflow. In this book we’ll indicate control codes enclosed by angle
brackets to their abbreviations in the table: <FF> means the Form Feed
control code, which advances the printer to the next page just as the PRINT
button does.
-
Escapesequences
Control code 27, <ES0 or Escape, is a particularly important one for
printers. To tell your printer all the things you might need- setting margins,
saying where to print, choosing a particular font, starting graphics and so
on- requires many more than just two or three dozen control codes. So the
<ES0 control code has a special meaning: <ES0 means “the next
character specifies a command, not something to be printed”.
Therefore if you send just the character 4 to the printer it will print a 4 and
that’s all. But if you send the <ES0 code just before the 4 then the printer
(in EX-800 mode) will switch over to italics text. Extending the control
codes this way gives you many more commands to control your printer. In
fact, these “Escape sequences” make up most of the Star Laser Printer’s
language.
In this book we’ll leave spaces between characters when we show escape
sequences. You’ll find
a bit more readable than
<ESC> (sOplOh12vOs3T
But remember that you are not to send those spaces if you send commands
to the printer.
-
_
-
-
To sum up, printer commands are of two types. A control code is a singlecharacter command that tells your printer to do something, like move down
one line. An Escape sequence controls a printer operation too, but is more
than one character long. Since they am commands, neither control codes nor
escape sequences am usually printable characters.
8
Page 17
Printer drivers
Most software packages already include the printer commands they need.
-.-
i
The programs that send commands to the printer so you don’t have to enter
them yourself are called printer drivers.
Many programs ask you to install or conjigure your printer, which usually
means keying into a menu the particular setup information describing your
Star LaserPrinter 8111. You enter such things as how you want to underline,
alter line spacing, or move to a new print position.
Some programs, such as WordPerfect and the systems from Lotus Development Corporation, let you put printer Escape sequences before or right
inside the document you want to print. To turn on boldface, for example, you
might hold down special keys on your keyboard, often labelled CONTROL
or ALT, as you press another key. Or you might use a special Function key,
such as F6.
In fact, to take real advantage of your StarLaserPrinter 8111’s special abilities,
you might opt for a word processor that lets you specify font changes easily.
WordPerfect and Microsoft Word are strong at this, but are by no means the
only good font manipulators.
If you have trouble using a particular program with your Star LaserPrinter
8111, you’ll probably get answers most quickly by asking your software
supplier how the program interacts with your printer.
In this manual we refer to programs, fonts and other products sold by several
-..
_.._
companies. Please realize that mentioning these products does not mean Star
Micronics endorses them in any way.
Sending your own printer commands
m....
L-
. .
_.
Without a printer driver, sending control codes and Escape sequences to
your printer properly requires some knowledge of a programming language
like BASIC or Pascal, or at least of how to put such codes into a program.
With programming languages, the computer doesn’t act on the commands
you put into a program until you tell it to run that program.
When you give a command to the printer from a computer program, you
normally enter each part of the command as a separate character. This way
you don’t affect anything else happening on the computer. You often send
each code or character in the command by giving its position in the ASCII
table, as a decimal or hex number.
9
Page 18
A BASIC example
Here’s an example you can typo in right now, to clarify what we’re saying.
It’s written in Microsoft BASIC for a computer that uses the MS-DOS
operating system, so if you have a different computer or BASIC you may
have to translate a bit. We’ll show commands the way they’re written for an
Epson dot-matrix printer because your Star LaserPrinter 8 understands those
commands.
The LPRINT commands all send data to the printer. If the data is something
you want printed you just put it in quotation marks. If the data is a control
code you just say where it is in the ASCII table, giving its position as a regular
decimal number.
BASIC usually sends a carriage return after every 80 characters, to keep the
print position moving when it hits the end of a line. Unasked-for carriage
returns can mess up your printing, however, so it’s a good habit to put in a
WIDTH statement as shown. That lets us print over the whole page area.
The cBEL> control code - ASCII code 7 - is sent in BASIC as CHR$(7).
The <ES0 code itself is CHR$(27). And because we’re using the character
4 as part of an &SC> command, we type CHR$(52) instead of “4”.
So if you start BASIC and type these commands:
you make the printer (in EX-800 mode) first sound its bell- most people
call it a beeper- and then print the line:
ITALICS!
Generally, when you send a control or Escape code it stays active until you
deactivate it. That’s what happens in line 40 of our program above. All
subsequent text will be italicized until you change it back to upright again.
10
-
Page 19
Most programming languages, and some versions of BASIC, let you treat the
printer as a file to which you can send data. When you write a program with
one of these languages you “open” the printer file, print into it, and then
“close” the file when you’re done. This programming jargon sounds funny
if you’re not used to it- but it works.
A few programming languages let you send commands to the printer a third
L_
way. Applesoft BASIC is one. With it, you can switchbetween printeroutput
and screen output.
Printer emulations
You noticed that we said “in EX-800 mode” up there? Your Star LaserPrinter 8111 responds to the same escape sequence commands that several
L-
e-
other printers use. Being able to emulate the Epson EX-800 lets you use your
Star LaserPrinter 8111 with older programs that haven’t been updated to take
advantage of laserprinters. In fact, because it emulates three of the most
popular printers, you can use the Star LaserPrinter 8111 with just about any
microcomputer program around.
Unfortunately those printers often use different escape sequences for
exactly the same function. Those printers, moreover, provide escape sequences for functions the Star LaserPrinter 8111 doesn’t need. When your
printer gets a command it doesn’t support, it just ignores the command.
Macros am single control codes you can define yourself, which do the work
of a whole long series of printer commands. If you am a programmer you will
be happy to hear the Star LaserPrinter 8111 supports up to 99 macros at once.
11
Page 20
NOTES
12
Page 21
You can control your Star LaserPrinter 8111 in two ways, either through front
panel parameters or through software commands. In this chapter we will
consider printer controls mostly from the perspective of the front panel.
However, we’ll also meet three special commands, the Star LaserPrinter 8111
superset.
Throughout this manual we approach parameters and commands the same
way: overall printer-level controls first, then page-level controls (layout and
print position movements), and finally character-level controls (fonts and
graphics). We’ll discuss these in general terms in this chapter.
The specific commands you can send to your printer to make it emulate, or
work like, other printers are described in chapters 4 through 6. The most
important fact about printer commands, though, is that you may not even
need to know how to use them. If your software systems include their own
printer drivers, you may want to read only this chapter and skip all of
chapters 4 through 6.
PRINTER PARAMETERS
The front panel
- The easiest way to control your Star LaserPrinter 8111 is through its front
panel, as explained in more detail in your Star LaserPrinter 8111 Operations
Manual.
When your printer is online (connected to and under the control of your
computer), its front panel display shows you the printer’s status. For
example, the READY light blinks when the printer is warming up. The
DATA light comes on whenever the printer is holding data it hasn’t printed
yet.
When you press the ON LINE button, the printer changes from normal to
ofline mode and cannot accept data from your computer. When the printer
is offline you can use the other panel buttons. For instance, if you press the
13
Page 22
printing the current page and then feeds in and prints a status sheet.
Some buttons on the panel let you perform two functions. Holding one of
those buttons down, rather than quickly pressing it, selects a different
operation. For example, holding down the TEST/PREVIOUS button for
over five seconds makes the Star LaserPrinter 8 print its test pattern.
Parameter settings
From the panel you can also change the parameters that define how your
printer works. Parameter just means “variable”. If you’re familiar with
earlier kinds of printers, you’ll understand that laser printer parameters
control pretty much the same things DIP witches do. (A DIP switch or “dual
in-line package switch’ is a set of small switches that control various printer
functions.)
The printer stores these parameters as easy-to-use program menu items that
you can select from the control panel. These parameters specify:
l character (what character font to print)
l layout (how pages will be formatted)
l paper feed (what paper the printer will use)
l command (which commands the printer will accept)
l interface (how the printer communicates with your computer)
A default is the setting the Star LaserPrinter 8 will use if none is specifically
selected by a program. When you first turn on or later reset your printer these
default settings will take effect,
Your main use for the front panel will likely be to set the default settings you
want for these parameters. However, you will probably find the panel
convenient too when you want to switch between manual and automatic
paper feed.
-
-
-
Four versions of parameters
The Star LaserPrinter 8 actually stores four versions of these parameters:
l its “ultimate default” factory settings,
l the power-on settings in effect when you first turn on the printer,
l your initial settings for one particular session,
l and the current settings that the printer is using now.
These are in priority order. The current settings always override the initial
session settings, which in turn override the power-on settings, which in turn
override the factory settings.
14
Page 23
override the factory settings.
Factory settings are programmed into the Star LaserPrinter 8111 when it is
built at the factory. Your printer keeps the factory settings for its parameters
in ROM; they never change. You can copy them into the current settings or
any other settings as needed. But the only way you can return to the factory
defaults is from the front panel; no commands do this.
A few factory default settings am as follows:
Item
Emulation
Feeder
Factory default setting
HP LaserJet III
Paper cassette
Number of Copies 1
Orientation Portrait
Font
Linesrtnch
The power-on settings am the normal default settings. The printer keeps
1 O-pitch 12-point Courier (internal)
6 lines per inch
them even when you turn off the power. When you turn on the printer, these
power-on settings get copied into the initial and current parameter settings.
You probably will not often change the Star LaserPrinter 8111’s initial set-
rings (sometimes called “session settings’*). You’ll likely only change them
-
when you want to use a different printer emulation than normal. These initial
settings stay the same as the power-on settings until you change them.
b_
On the other hand, your software will probably change the current settings
many times within the same document, with every change of font or print
style.
. . .
_....
How to change parameters
With the printer offline, if you press the PROGRAM button the printer goes
into “program” mode. You can then step through the laser printer’s four
levels of program menu to configure your printer. That’s the process of
L..
changing certain printer settings so your computer and printer can communicate properly.
It’s actually pretty easy. Flipping through and setting parameters from the
. .
panel is described in detail in the Star LaserPrinter 8111 Operations Manual.
Basically, all you do is press the NEXT or PREVIOUS buttons to scroll
-.
through the sequence of possible parameters and values, which is clearly
shown on the panel display. You press ENTER when you want to go down
15
Page 24
and scroll through a lower menu level. And you also press ENTER when
you want to save a particular menu item as the value for a current parameter
setting.
The three last menu headings let you load one version of the parameters into
another version. Two move the current parameter values into either the
initial or power-up parameters. The final menu option goes the other way,
letting you load the factory parameter settings as your current settings.
CONTROLLING THE PRINTER
In this section you’ll meet two separate controls over how the Star LaserPrinter 8 itself works. The INTERFACE parameter controls communications between the printer and your computer. And the COMMAND parameter determines, among other things, which set of commands the printer will
use. You can set these INTERFACE and COMMAND parameters on the
front panel.
The 1NTERFACE parameter
The INTERFACE parameter, the most basic of the Star LaserPrinter 8’s
configuration settings, defines how your computer connects to the printer.
You can set the INTERFACE to either Serial or Parallel (in IBM or
Centronics mode). In most single-computer environments you’ll opt for the
faster Parallel interface; in a multi-user network you may be better off with
Serial.
The particular printer interface settings don’t matter as much as making sure
they match those on your computer. If you use an MS-DOS computer, you
can set your computer’s parameters with the MODE command. See your
MS-DOS manual.
Most MS-DOS and AT-compatible computers support up to three parallel
and two serial ports, which come on expansion boards you plug into your
computer. When you install such boards you must set switches to indicate
the number and addresses of these ports. If you specify the wrong addresses,
you won’t be able to print.
Serial interface: rate
If you ask for the Serial interface you’ll have to tell your printer more about
how the data will be coming in- in particular its rate and unit size and the
meanings of any special bits.
-
Page 25
The Rate parameter specifies how fast data will be arriving, measured in
bati (named after the French communications engineer Jean Baudot). Rick
any of the following data transfer rates:
300 baud
600 baud
1200 baud
2400 baud
4800 baud
9600 baud (the default)
19200 baud.
Roughly, one character a second works out to 11 baud. If you’re not sure how
fast your computer will transmit, the general rule is to experiment. Try
sending a page to print at the highest speed, and work your way down until
the printer’s output looks OK.
Serial interface: special bits
In Serial mode you’ll also have to specify if your computer sends data bits
in groups of seven (most computers send eight, the default for a byte).
Sometimes an extra bit gets appended to make the sum of all bits in each
character always odd or even; that’s calledpa&y.
A parity bit can help spot
transmission errors. If your computer sends that extra parity bit, you’ll have
to say whether it produces an even or odd number of “on” bits in the
character.
You’ll also have to indicate if your computer sends two stop bits to indicate
the end of a byte, instead of one, the default. These serial interface settings
are described in more detail in your Star LmerPrinter 8111 Operations
Manual.
Serial interface: protocol
Finally, in Serial mode your computer will use one of three protocols to
ensure data is sent properly. Protocol (sometimes also called “handshaking”) means “who says what when”, and is the way your printer tells your
computer it’s ready to receive data. Your computer and printer communicate
by sending protocol control codes (they’re at the front of the ASCII table).
Some programmers call the XON and XOFF control codes “kiss on and kiss
off ‘; others call the same protocol DC1 and DC3 (for device control). Either
way, these codes let your printer run the show, telling the computer when to
start and stop sending data. Your printer asks to have data held back when its
memory is nearly full or when it senses an ERROR condition.
17
Page 26
DTR (Data Terminal Ready) protocol does the same thing slightly differently. The printer sends a continuous high-voltage signal over the cable as
long as it can accept data, but drops the voltage to say “whoa” to the
computer.
Conversely, it’s the computer that holds the reins with the ETX/ACK (Endof-text/Acknowledge) protocol. The computer sends an ETX control code
after each string of data, and when the printer finally gets that code it sends
an ACK code back to the computer, asking for more. This protocol is less
used by modem computers because it doesn’t hold back data when the
printer’s memory gets swamped.
Look in your computer’s operations manual, in the section dealing with
communications protocols, to see which is best for your system. You can
stick to the printer’s defaults if your computer uses neither the DTR nor the
ETX/ACK protocol, but does use XON/XOFF.
If you want to enable DTR or ETX/ACK, or disable XON/XOFF, you’ll
have to set those parameter values accordingly. Turning on one of these
protocols automatically flips off the others.
Checking your connections
Your computer and printer may have trouble communicating when you first
introduce them to each other. The quick way to find out if your settings and
printer cable are working is to send your printer a printout from your screen
(CTRL-P with MS-DOS).
When that’s done you will also have to press the print button on the printer,
which makes the printer advance to a new sheet. No laser printer prints and
ejects a page until it’s told to feed a form, or until it has received all the lines
the page can hold.
If your Star LaserPrinter 8 doesn’t print what’s on the computer screen,
recheck your connections and interface settings. With an applications
program like Lotus 1-2-3 or Microsoft Word, you use a printer setup routine
to match your computer with your printer’s operating characteristics. So
double-check your software settings; your computer’s output, for example,
might not be going to the proper port.
18
Page 27
Printer emulations
OK, you’ve got your printer and computer connected properly. Now let’s
-.
focus on how your printer works.
Your Star LaserPrinter 8111 understands and uses the same commands as
several earlier kinds of printers. Your printer works by emulating one of
these:
l Hewlett-Packard LaserJet III
9 Epson EX-800
l IBM Proprinter
Other laser printers may offer such emulations too, but often require
installation of a new circuit board for each emulation. Star Micronics has
built these three emulations into the Star LaserPrinter 8111.
You select which emulation you want either by selecting it from the print
program menu on the Star LaserPrinter 8111’s front panel, or by sending the
printer one of the superset commands at the end of this chapter.
What are the emulated printers like?
Most of the time you will probably choose HP LaserJet III emulation, which
is the default when you turn on the Star LaserPrinter 8111. That’s because the
LaserJet III, like the Star LaserPrinter 8111, is a laser printer. This emulation
mode gives you the best control over your printer’s features, and works with
most popular applications programs.
-.
The EX-800 emulation is quite powerful too. It includes all the dot-matrix
printer commands (including graphics) used by hundreds of programs.
Mostly, you’ll choose this option when you run a program that cannot send
-_
laser printer commands.
The Proprinter, a dot-matrix printer like the EX-800, has a similar command
set. You likely will opt for Proprinter emulation only when you want to use
computer programs specifically designed for the Proprinter and IBM computer environment.
-.
b_
,I
19
Page 28
The Command parameter
The Star LaserPrinter 8’s Emulation setting defines which printer it is
imitating: Hewlett-Packard LaserJet series II, Xerox Diablo 630, Epson
EX-800 or IBM Proprinter.
Most of the other COMMAND values below can be changed with Escape
codes as well as from the panel.
As the Number of Copies setting suggests, the Star LaserPrinter 8 can print
either just one copy of each page sent to it, or multiple copies up to 99. Most
word processing and other packages, however, let you look after multiple
copies of a document without using this command. You may consequently
prefer to leave this at the default (one copy), changing it only as necessary
through software commands.
Two settings are only meaningful when you are using HP LaserJet series II
commands. First, if you enable Macro Overlay, from zero to 99 macros can
be active.
Second, most of the time you’ll want to print across the width of the page,
but occasionally you may want to print up the length of the page. Unlike most
other laser printers, your Star LaserPrinter 8 lets you rotate fonts to print
either way- you don’t have to buy separate fonts to print sideways on the
page.
Your printer normally feeds a new form when you rotate a font, to avoid
accidentally printing both orientations on the same page. But if you want to
intermix orientations, just change the value of FF on Rotate to NO. (Font
orientation is explained in more detail below with the LAYOUT parameter.)
E
A few computers change certaincontrol or Escape codes when sending them
to the printer, which naturally causes confusion. Moreover, many programmers prefer to see hexadecimal printout when they are debugging programs.
To help with these situations, you can make your Star LaserPrinter 8 print
in hexadecimal rather than the usual ASCII mode by switching ON the HEX
DUMP parameter setting (see the sidebar below).
The last three COMMAND values concern the physical machine. You can
set the intensity of the printer’s LCD display from 1 (faint) to 7 (bright); its
default setting is 4. You can enable or disable both the beeper and the
Warning Alarm (which sounds continuously).
20
Page 29
I
Hints: The hex dump
l To make your Star LaserPrinter 8111 print in hexadecimal rather than the
usual ASCII symbols, press the front panel buttons that put the printer
offline and in PROGRAM mode. Move to the COMMAND parameter’s
HEX DUMP setting and select ON.
l Some control or Escape codes can be problems on a few computers; those
computers change certain codes when sending them to the printer. If you
think you have this problem you need to see exactly what your printer is
receiving. We recommend you run a short program that loops through and
prints the ASCII table. Print in hexadecimal rather than the usual
ASCII symbols.
l If you spot a problem code you can try to bypass the problem, either by
sending each code directly to the printer, or by changing your system’s
printer driver. Such computer-specific solutions, though, are beyond the
scope of this manual. We suggest that if necessary you consult another
programmer more familiar with your computer.
l Actually, if you are debugging any program you may find this hex-dump
mode helpful. It can be a great trouble-shooter.
CONTROLLING THE PAGE
In this section we look at two controls you have over how the Star
LaserPrinter 8111 handles and formats its pages: You can set values for the
PAPER PEED and LAYOUT parameters on the front panel. At the end of
this section we’ll also preview different ways to move the print position.
The PAPER FEED parameter
The PAPER PEED parameter lets you specify both what kind of paper you
want and how the printer is to handle automatic print-position movements
(carriage returns and so on).
One convenient thing about a laser printer is that it doesn’t need continuous
form, sometimes called fanfold paper. Other printers feed in a stack of
forms- with pages all joined by perforations- by having sprockets engage
and pull alongpinfeed holes punched along each side of the paper. After it’s
printed you have to tear off the pinfeed-hole strips and then separate the
pages.
21
Page 30
With the Star LaserPrinter 8 you can print on a variety of ordinary cut sheet
pages.
For the Feeder value of this PAPER FEED parameter, you first enter either
cassette or manual feed to indicate where you want paper fed from. The
cassette tray automatically feeds single sheets, much like sheet feeders on
other types of printers. Manual feed means you feed each sheet by hand.
The default paper size is 8.5 by 11 inch letter-size paper, a different-sized
tray automatically selects that different paper size. If you choose manual
feed you can specify other sizes too:
l 8.5 by 14 inch legal-size paper
l A4 international (used in every country except North America)
(210 by 297 mm)
l B5 international (used in every country except North America)
(182 by 257 mm)
l the narrower “executive” size (7.25 by 10.5 inches)
One other nice thing you can do is print directly on envelopes. With this
Paper Size parameter you can specify envelopes in sizes #lo, Monarch,
European C5 and DL. Then just work out where to put the address, set the
orientation to landscape (see below), and slide your envelope into the
manual feed slot. Easy!
In any emulation mode you can send your printer commands to change paper
size or feed in paper manually; you can also select those parameters from the
panel. Either way, a message in the printer display tells the operator what
paper size to use.
Auto parameters
The printposition refers to the point on the page where the next character will
be printed. When the printer reaches the end of a line, the Auto Parameters
settings tell it whether or not to automatically:
l return the print position to the left margin (carriage return, sometimes
just called “Return”),
l or move it down one line (line feed ),
l or keep text out of the side margin (auto wrap ),
l or keep text out of the bottom margin cform feed ).
22
Page 31
l
return the print position to the left margin (carriage return, sometimes
just called “Return”),
l
or move it down one line (line feed ),
l
or keep text out of the side margin (auto wrap ),
l
or keep text out of the bottom margin uorm feed ).
Hints: Paper, labels and transparencies
l The best paper for the Star LaserPrinter 8111 has a smooth finish and is of
20 to 24 pound weight. Any paper designed for photocopiers should do
the trick though; Xerox 4024 and Canon NP print nicely. High quality
cotton bond paper, which contains up to 25 percent cotton fibms, works
passably well with even heavier weights.
The absolute limits am 16-pound paper at the light end and 35pound
stock at the heaviest. With heavy paper, open the tray so the pages will be
delivered face up.and won’t have to bend over the final rollers.
l Be aware that any puckered or woven finish may not print as sharply as
you’d like. Avoid shiny coated paper or multipart forms. And don’t even
think about putting in stapled or ripped pages.
l If you frequently change paper weights, you will probably get skewing
problems- lines that print at an angle because of misfeeding. For best
results, when your Star LaserPrinter 8111 is first set up have the paper
feeder “squared” for paper of at least 20 pounds. Lighter paper, though
cheaper, isn’t really the way to economize.
l Want to print on your own preprinted letterhead? Fine- so long as your
logo isn’t thermographed. Thick colored ink may look luxurious,
but it can also wind up stuck all over your printer’s roller. Stay away from
any inks that soften at relatively low temperatures; your printer fuses
pages at 200” C.
This warning applies to colored paper too, if it has been tinted with a low-
temperature dye.
l The toner cartridge in your Star LaserPrinter 8111 should print at least 4000
pages, 20 refills of the paper tray. The cost of replacing a toner cartridge
is not much more than that of replacing printwheels and ribbons on a
daisywheel printer.
23
Page 32
l When printing starts fading because the toner is low, remove the cartridge
and gently rock it back and forth half a dozen times. Don’t tip it up or the
toner may spill out. Redistributing the tonerpowderthis way can keep the
cartridge going for another tray of paper.
l No question, working with single label sheets is more convenient than
with continuous label stock. Laser printers are faster and produce betterlooking labels than other printers. But laser printers, which work by
electrostatic photography rather than impact pressure, put different
stresses on label paper. Each sheet has to bend over and through the guide
rollers; moreover, fusing toner to the paper involves heat. You can
eliminate trouble by always feeding label sheets manually.
Both Avery’s “Lasergraphic” labels and Canon’s labels seem to work
fine. Your main concern is that the labels completely cover the backing
sheet so it shows only at the outside margins. That way individual labels
can’t easily peel off.
The safest approach is to laser-print sharp master copies on paper and then
photocopy those lists onto labels. This will avoid putting your printer’s
adjustment for paper thickness out of adjustment.
l If you want to print transparencies for your overhead projector, some
‘films will actually melt in your laser printer. Stick to 3M’s medium-
weight transparency film (type 501) or to Hewlett-Packard’s #2285J.
24
Page 33
.
If you want to print transparencies for your overhead projector, some films
will actually melt in your laser printer. Stick to 3M’s medium-weight
transparency film (type 501) or to Hewlett-Packard’s #92285J.
The LAYOUT parameter
The Zayout orformat or setup of a page refers to how text is positioned on
the page. Layout includes page orientation, margins and the spacing of
characters across and lines down the page. You can control these with the
LAYOUT parameter.
You probably won’t use the LAYOUT parameter on the front panel’s
L
program menu very much though. Most of the time you’ll either leave the
Star LaserPrinter 8111 with its default settings, or look after page formatting
with commands you send from your computer.
Page orientation
A page’s orientation tells you in which direction the print goes on the page.
When you useportrait orientation the lines are printed as they are in a normal
business letter, across the width of the page. A portrait painting of a person
is usually vertical-hence the name.
landscape
-
When you use fun&ape orientation the words are printed “on their sides,”
vertically up the length of the page. Text written with landscape orientation
only looks correct when you turn the page so its length runs side-to-side, just
like the painting of a landscape.
Envelopes must be printed with landscape orientation. You also will use
landscape regularly to print charts or banners, and spreadsheets or reports
- with so many columns they wouldn’t otherwise fit on the page.
All internal fonts, and almost all cartridge and downloaded fonts, are stored
in the Star LaserPrinter 8111 with portrait orientation.
Portrait
25
Page 34
Margins, columns and lines
You can change margin settings for all four edges of a page. The left and right
side margins can have values from 0 to 132, defining the margin columns
between which words and images can be printed. And the top and bottom
margins can be set at anywhere from 0 to 112 lines.
Text
Length
Portrait
Orientation
Orientation
The actual meaning of a column is defined by the setting for the horizontal
motion index (HMI). The HMI just means how wide you want the space
character to be. Each column, running from page top to bottom, will be the
width of a space.
You probably will let your software worry about the space width. But if you
want, you can set the HMI parameter on the panel in increments of l/120
inch- ‘anywhere from 1 to 255 increments.
Similarly, the meaning of a line (sometimes called a”row”) is defined by the
vertical motion index (VMI). The printer moves the print position down a
line when it gets a Line Feed code, usually when it bumps into the right
margin.
Again, you’ll probably let your computer program set the line depth. But
from the panel you can set the VMI value in increments from l/48 to
255/48 of an inch.
26
Page 35
Moving the print position: a preview
With dot-matrix printer, you pick where to print on the page either by moving
the printhead back and forth or by moving the paper itself. Laser printers
don’t have printheads, but the principle remains the same: you have to say
exactly where on the page each picture and string of text is to go, so each page
can be constructed in the printer’s memory.
Instead of talking about printheads we talk about moving the print position
(some people call it moving the “cursor,” using the computer-screen
analogy). Horizontally, you can move the print position with backspace and
carriage return commands. Vertically, you can move the print position down
the page by printing so many lines per inch, or by sending line-feed and half
line-feed commands. You can also move to tab settings both horizontally and
vertically (handy for tables and blank forms, or making room for your
diagrams).
But those aren’t all. Depending on which printer emulation you are using,
you can tell the Star LaserPrinter 8111 to move the print position vertically or
horizontally in increments of:
l/10, l/12 or similar fractions of an inch (pitch settings),
l/48, l/60, l/72, l/120 or l/216 inch (line or column definitions),
l/300 inch (dots), or
l/720 inch (tenths of a point).
These increments reflect the history of twentieth century printing. Pitch,
referring to the number of characters printed in each horizontal inch, derives
from how typewriters space their characters. Lines and columns were first
used by earlier computer printers (on which they are called horizontal and
vertical motion indexes). You already know about the Star LaserPrinter 8111
-
being able to print 300 dots to the inch. And the unit by which typesetters have
measured text for centuries is the point, about 1/72nd of an inch.
One hint about moving the print position: you can confuse yourself if you use
more than one or two different units during the same session. So decide
beforehand how accurately you need to move the print position (not forgetting any graphics you want to include). Then stick to the unit(s) you
choose.
The commands that move the print position in all these ways are described
in chapters 4 through 6, with the specific printer emulation you want to use.
27
Page 36
CONTROLLING THE PRINTING
The EMULATE ATTRIBUTES parameter
The EMULATE ATTRIBUTES parameter defines font attributes and setup
values (if any) for each of the Star LaserPrinter 8’s four emulation modes.
A font’s attributes or characteristics determine what that font will look like
when it is printed. The next chapter, “Fonts,” explores the details of all font
attributes in more detail. But let’s have a quick overview now, because
you’ll meet these terms on the front panel’s program menu.
Font attributes: a preview
Orientation (portrait or landscape as described earlier) is usually thought of
as one attribute of a font; it’s not really a page formatting issue. Besides
orientation, the fonts with which you print have these attributes:
Symbol set is sometimes called “character set”- which can be confusing,
since some people say “character set” when they mean a font. Symbol sets
are subgroups of a font’s symbols that are most appropriate for particular
countries, such as the UK (g), France (a), Latin America (n) or Japan (3).
Spacing and pitch are linked. Characters can be spaced on the line propor-
tionally, so a narrow letter such as i takes less room than a wide letter like
W. Or characters can be spaced all the same width: twelve characters to the
inch is the monospaced spacing called 12 pitch.
Pointsize defines how big characters will print, such as 10 or 12 points high.
Sryle defines whether characters print in upright or italic style.
Stroke weight defines how bold a typeface prints.
Finally, typeface itself means the artistic design of a font. Your printer’s
internal typefaces include Tms Romn, Line Printer, Courier and Prestige
Elite. With the Star LaserPrinter 8 you can also use Helvet, Gothic, Script,
Caslon, Orator and hundreds more typefaces, which you load into the printer
from cartridge or computer disk.
When you enable font setupparameters on the front panel, it means you start
off with particular font attributes as defaults when you first choose an
emulation. With the EX-800 and Diablo emulations you can enable proportional spacing and bold print as setup parameters. EX-800 mode also lets you
start up with half of your symbol set as graphics characters instead of italics.
28
Page 37
THE STAR LASERPRINTER 8IlI SUPERSET
Do you need to send commands?
Here’s an important fact: you can set nearly every one of the above
parameters by sending your printer a corresponding Escape sequence
L
command. Those Escape sequence commands will override any setting you
make from the front panel.
L
The main thing to realize about most printer commands, though, is that you
probably don’t need to use them. Nearly all popular software packages
-.
h.
include printer drivers, which send commands to the printer so you don’t
have to type them yourself. Some of those programs ask you to key in setup parameters about your printer. Other programs let you put printer
commands before or inside the document you want to print.
But maybe the software you use doesn’t have printer drivers for any printer
your Star LaserPrinter 8111 emulates: You still might not have to write printer
.“_
commands yourself.
Several companies sell programs that look after laser-printing commands
--
. _
. .
for such software. Ask your dealer about LaserControl, Printworks for
Lasers, PCL.Pak and RAM Resident Printmerge.
There’s not much point in
reinventing the wheel.
The Star LaserPrinter 8lll superset
Besides the commands that emulate other printers, your laser printer
understands three other commands called the StarLaserPtinter 8111 superset.
The Star LaserPrinter always understands superset commands; it doesn’t
matter which emulation mode your printer is using at the moment. Superset
Escape sequence commands start with cESC> [ so you can quickly spot
them in a list of commands.
One superset command gives you another way to switch from one emulation
to another: you send the Change Emulation superset command instead of
using the front panel. The second superset command lets you change the
printing orientation, so you can print sideways up the length of the page,
instead of across its width in the usual way. The third superset command lets
you change the paper size.
29
Page 38
The Change Emulation command
You can think of the superset ChangeEmulation command as the key to your
Star LaserPrinter 8. The Change Emulation superset command lets you
switch from one set of printer commands to another “on the fly,” through
software.
This is the command that defines what other commands the Star LaserPrinter
8 will accept. With Change Emulation you indicate which printer emulation
program you want the printer to use.
When you start a new emulation you always start a new page.
Note: always send Carriage Return and Form Feed (control codes <CR> and
<FF>) just before you give this Change Emulation command. These force
the printer to print any partial page in its memory and start a new page with
the new emulation. If you forget to issue these control codes first the Star
LaserPrinter 8 will do them for you- but your Change Emulation command
will just reset the printer’s parameters to their initial defaults, and not give
you the emulation you ask for.
You issue the Change Emulation command with the following Escape
sequence:
<ESC> [ E n
-.
For the value of R you enter a number from this table:
n EMULATION
0 (zero) HP LaserJet II
, 1 (one) Diablo 630
2
3
Epson EX-800
IBM Proprinter
30
-
-
-
Page 39
The Select Orientation command
The Select Orientation superset command lets you change the “attitude” in
.
which the Star LaserPrinter 8111 prints.
To change from one orientation to the other you send this Select Orientation
Escape sequence:
-.-
,-..
-
-.
*-
-.
. .
. .
<ES0 [ 0 n
For the value n you put 0 (zero) for portrait orientation,
or 1 (one) for landscape orientation.
When you send this command to print in landscape mode, the printer
. -
automatically rotates its current font so that it prints as landscape.
The spot or line where printing starts on the page is sometimes called the
origin or top ofform. The origin changes when you switch orientations.
That starting print position is in the upper left comer for a portrait page, but
in the lower left comer for a landscape page.
The Star LaserPrinter 8111 lets you mix portrait and landscape orientations on
the same page. Because the starting print position changes when you switch
orientations though, you have to remember to re-orient commands that
move the print position. If you don’t want to allow the printer to mix
orientations, use the front panel program menu to change the COMMAND
parameter FF on ROTATE value to NO.
You probably won’t want to change orientation all that often. Every time you
do, the Star LaserPrinter 8111 also resets the page margins to its limits, and
also how it defines lines and columns. So whenever you give the Select
Orientation command you may want to follow it with Escape sequences to
change the side and top margins and paper length settings. (Alternatively,
you could put the printer offline and reset these from the front panel, as
described under LAYOUT earlier.)
-..
*_
-.
_.
31
Page 40
The Paper Size command
The Paper Size superset command lets you change the paper size in which
the Star LaserPrinter 8 prints.
This is the command that defines what size the Star LaserPrinter 8 will
accept. You issue the Paper Size command with the following Escape
sequence:
<ES0 [ S n
For the value of n you enter a number from this table:
n
1
SIZE
Letter size paper
2 Legal size paper
3
4
5
11
12
A4 International size paper
Executive size paper
B5 International size paper
Monarch size envelope
Corn-10 size envelope
13 International DL size envelope
14
International C5 size envelope
This command controls the size that the printer should use when next
feeding from the selected paper feeder. If the printer does not have the
requested size, the front panel will display a message instructing you to
insert the requested paper/envelope. If the operator overrides that request,
the requested size is ignored and the size of the current cassette is used.
If you have previously set the cassette selection to “automatic”, and one of
the cassettes contains the paper size requested in the command above, that
papercassette will automatically be selected, and paper feed will commence
from there. The lamps on the front panel will change after this command has
been processed, to show you what cassette has been selected.
32
-
Page 41
The fonts you use determine what your pages will look like. In this chapter
we’ll first clarify the meanings of words people use when they talk about
fonts.
Next we’ll examine the three kinds of fonts (internal, cartridge and downloaded) that you can use on your Star LaserPrinter 8111. We’ll cover the
particular sets of symbols you can choose for those fonts too.
Finally, we’ll find out how to load the printer with your selection of fonts.
FONT TERMINOLOGY
Typefaces and fonts
First, a few definitions. A typeface is a family of characters with the same
basic design. The artistic character design you choose establishes the “tone
of voice” for all your documents.
Several variables can characterize typefaces, including weight (light,
medium, bold), width (condensed or extended), and style (upright or italic).
Courier, for example, is a typeface family that includes the characters in both
Courier medium italic and Courier bold upright
Let’s consider these variables. Bold print is sometimes called “emphasized”
or “double-strike”. On earlier printers boldface is generated by printing each
character twice; dot-matrix machines print the second impression just a hair
below or to the right of the first one.
With the Star LaserPrinter 8111 you can have different stroke weights in two
ways, depending on which emulation you are using. You can have two
different fonts, storing and switching between a bold and a medium version
of the font. Or you can use just one font and set bold on and off with Escape
sequences. The latter way uses just half as much font memory.
33
Page 42
Select Simplex/duplex mode (DX type only)
You can change between simplex and duplex mode using software commands in any emulation mode. The command to do this is:
<ESC> [ D n
where n is an ASCII value of either “1” or “2”. If n is set to “l”, then the
printer will enter simplex mode, and if n is “2”, the printer will enter duplex
mode.
If the printer is in simplex mode, the “1”option will have no effect. If the “2”
option is chosen while the printer is in duplex mode, it is only valid if then
face-down output stack has been selected. The page containing this command will become the face of the double-sided page.
If the printer is in duplex mode, the “1” option will force single-sided
printing, commencing with the page containing this command. If the printer
is already in duplex mode, the page containing this command will bc forced
to be the fact of the next double-sided page.
The DUPLEX light on the front panel will indicate the current simplex/
duplex status of the printer following receipt of this command.
-
34
Page 43
The o has been kerned
closer to the f.
The font height (24 points) is measvcd
from ascender to descender.
I
A font is a complete set of
-characters in a particular EII:zr
4
size and typeface.
Proportionrl
uu
t
Leading is the
baseline to baseline
mcasurcment.
spaoing
Serif
Baseline
Font spacing and pitch
You probably first heard the word pitch in connection with typewriters.
Typewriters normally use monospaced spacing: they give each character the
same amount of space on the line.
About halfthe fonts available for laser printers use monospaced spacing too.
Pitch is always expressed as so many characters per inch. Ten-pitch, for
example, means a font with ten characters in each inch of the line.
Typesetters for centuries have used two special sizes of type for most text.
Elite characters are 10 points high and print 12 characters per inch. And pica
chararacters am 12 points high and pitched at 10 characters to the inch
You’ll often run across these monospaced font sizes in the laser printing
world.
Ideally each character in a word should nestle against its neighbours so they
appear evenly spaced. But adjacent round characters are apt to look too far
apart, while flat-sided characters may appear too close.
Proportional spacing takes into account the differences in widths among
letters (compare ii with WW). Proportionally spaced printing is easier to read
than typewriter-style printing in which all characters, including punctuation, have the same width.
Real typesetters equip certain characters with kerns, letter parts that extend
out to overlap adjoining letters. In this word Type the y is kerned closely
against the T. Kerning separates great type from good type.
35
Page 44
Narrow condensed faces used to be called “compressed”. They cram about
five characters in the space where three usually go- ideal for spreadsheets.
An extended face, particularly on a dot-matrix printer, goes by several
names: “expanded,
” “enlarged” or “double-width” printing. No matter what
it’s called, extended print is wider than it is high, and can be fairly effective
in page headings.
Italic characters (sometimes called “oblique”) are slanted. Ordinary upright
characters are often called “reman”. Your Star LaserPrinter 8 comes with a
built-in upright Courier typeface. Moreover, from any of the Star Laser-
Printer 8’s built-in typefaces you can select a subset of upright symbols
called Roman-8.
A font is a complete set of characters in a particular size and typeface. In the
world of laser printers, the three variables mentioned above- weight, width
and style- are a few font attributes (sometimes called “font characteristics”). Let’s consider three more attributes: font height, spacing and pitch.
Font height
The baseline is the invisible line upon which characters of type sit. Since the
first letter blocks were made of lead alloy, the distance from one baseline to
the next is called leading (pronounced “ledding”). Type itself is measured
from the top of an ascender (the part extending up in the b or k , for example)
to the bottom of a descender (the down-stroke of the y or (7 ).
The measurements used to describe fonts arepoints and picas (derived from
the marks and letters in medieval church almanacs). There are 12 points to
the pica, and almost exactly 6 picas (72 points) to the inch. Your Star
Laser-Printer 8 quite handily prints type from 6 to 36 points in size.
Laser printers for computers measurefont height in points. On laser printers
the “white space” above ascenders and below descenders depends on how
the fine is defined, so the line corresponds to leading. This type you’re
reading has a font height of 12 points, and is spaced a little less than 5 lines
per inch.
-
36
Page 45
CG Times
regular
CG Times bold
CG Times
CG Times
Univers
Univers
Univers
Univers
italic
bold italic
mgul=
bold
italic
bold italic
With these most frequently used fonts in ROM, a page can be assembled
much faster than if the fonts had to be loaded into the printer for each printing
job.
Cartridge and downloaded fonts
Your Star LaserPrinter 8111 can use two other kinds of fonts, along with those
built into the printer.
Cartridge fonts, like the internal ones, are permanently stored on ROM
chips. The difference is that those ROMs are in removable cartridges. Your
Star LaserPrinter 8111 has slots for two font cartridges.
Each cartridge may hold anywhere from half a dozen to two dozen fonts, all
differing from the internal fonts in size, style, stroke weight or symbol set.
You’ll find that cartridge fonts open up a wider range of typefaces too, such
as Helvet and Letter Gothic. Generally, cartridge and internal font typefaces
are suitable for both text and headlines.
The third kind of font is neither built into your Star LaserPrinter 8111 nor
available just by slipping in a cartridge. You download this kind of font,
which means you use a computer program to send characters from a
-.
computer disk to your printer’s memory. Any downloaded font (sometimes
called a “soft” or “installed” font) that you put into the printer’s RAM
disappears when you turn off the printer, so you have to download that font
again next time you want it.
Downloadable fonts run the gamut from Egyptian hieroglyphics to those
eye-catching decorative fonts known as disphy fonts. They also include the
more exotic foreign-language characters, such as Arabic or Cyrillic, and
symbol and mathematical fonts (sometimes with fractions).
How can you compare cartridge and downloadable fonts? When you use
cartridge fonts you don’t have to take time to download them. They don’t
37
Page 46
HOW THE STAR
LASERPRINTER 8 STORES FONTS
Bit-mapped fonts
Star Micronics has earned a reputation for attractive, well-designed fonts on
its printers, and this laser printer continues the tradition.
The Star LaserPrinter 8 uses bit-mapped fonts. Each character is made up
of a pattern or “map” of dots, just like characters on a dot-matrix printer or
on your computer screen. Resolution makes the difference: to make each
character the Star LaserPrinter 8
a dot-matrix printer or computer screen does.
Every size of print you want, plus every italic or boldface version, has its own
bit map and is normally considered a separate font. It takes a good deal of
printer memory to hold all the fonts you might want at any given moment.
Star LaserPrinter 8 fonts can be grouped into three categories: internal,
cartridge, and downloadable fonts.
uses ten or twenty times as many dots as
In ternal fonts
The Star LaserPrinter 8 has four built-in internal fonts that reside permanently in its read-only memory (ROM). That’s why these are sometimes
called “resident fonts”:
Courier Prestige Elite
Tms Romn Line Printer
Courier is the face used on the most common electric typewriters. Neither
Courier nor Prestige Elite, another typewriter face, are printed with proportional spacing. Tms Romn however, is always spaced proportionally. Tms
Romn is probably the most readable and most popular commercial typeset-
ting face. The Line Printer font, designed originally for mainframe comput-
ers, is small and designed to pack a lot of characters into every inch of print
(great for spreadsheets).
With these most frequently used fonts in ROM, a page can be assembled
much faster than if the fonts had to be loaded into the printer for each printing
job.
38
-.
.-
Page 47
SYMBOL SETS
Let’s summarize briefly, to put the subject of symbol sets in context.
The attributes of a font determine what that font will look like when it is
printed. We covered all but orientation at the start of this chapter, and
orientation in the last chapter. A font’s attributes include:
l orientation (portrait or landscape)
l symbol set (which we’ll look at next)
l spacing (monospaced or proportional)
l pitch (10 or 16.66 characters per inch, for example)
l font height (measured in points)
l style (upright or italics)
. stroke weight (light, medium or bold)
l typeface (Line Printer, Tms Romn, Courier and so on)
Though they are not font attributes, such printing features as subscripts,
superscripts and underlining are treated along with fonts in the following
chapters. Each emulation has its own way of providing these features.
Incidentally, the best way to underline is to use the underline command in the
emulation you are using, instead of backspacing and overprinting with the
separate underline character (J. If you do the latter with proportionally
spaced text, you’ll usually find the underlining is too long for the text.
What are symbol sets?
Keyboards differ from country to country. The British need their f symbol,
the French need their c and e, the Spanish need their i and A etc. Scientists
need particular mathematical signs too. There easily could be four hundred
or mote possible symbols for any given font.
However, the number of symbols printers store for a font is limited to 256
slots, as in ASCII. So some symbols, or the order of some symbols, can differ
in any font. Each unique selection and arrangement of symbols is a symbol
set (sometimes called a “graphic set” or “character set”).
The symbol at position 91 for example is an open bracket, [ , in the usual
ASCII symbol set. But the same position holds f (capital A with an umlaut)
in the German symbol set.
39
Page 48
Hints: Where to get fonts
l You can print any downloadable font that works on the HP LaserJet series
II. Several other companies sell downloadable fonts which are compatible with your Star LaserPrinter 8. The Bitstream Corporation in Boston
is one of the more popular; Conographic is another. Xerox includes a set
of fonts with its Ventura Publisher desktop publishing software, which
you can use with your printer’s LaserJet II emulation.
l The SoftCraft company now markets a Bitstream-developed product
called “Fontware”. With Fontware you can generate bit-mapped fonts of
any size from a library of outline fonts. In outline fonts each character’s
profile is defined just once and the printer generates any font height from
that profile, which saves printer memory.
Outline fonts demand awesome computing power of the printer though,
so they’ve been available only on laser printers considerably more
expensive than the Star LaserPrinter 8. Now, with programs like
Fontware, your Star LaserPrinter 8 can turn out elegant print in any size
without that high price.
l Don’t hesitate to ask your Star dealer where you can buy cartridge and
downloadable fonts. If you really can’t find the one you need, you can
design and download your own customized fonts. This is no easy job, but
if you’re curious it’s described in chapter 4.
-
40
Page 49
.-
TheEpsonEX-8OOemulationis really versatile. Itlets you havebothofthose
IBM symbol sets plus Epson’s own standard symbol set. This Epson symbol
set is unusual: it contains both upright and italic characters in the same set.
You may also choose from symbol sets for all the countries mentioned above,
plus a second unique set for each of Denmark and Spain.
Default font attributes
When you power on your printer and choose an emulation, the internal fonts
L
L
-
--_
start off with default attributes which you can change as needed. The default
symbol sets depend on the emulation: in the LaserJet III mode the default is
Roman-g, in Proprintermode it’s IBM Set 1, and in Epson EX-800 mode it’s
Epson Std USA.
Besides these, all internal fonts default to portrait orientation, upright style
(not italics) and medium boldness. The table below shows their other default
attributes:
Typeface Spacing Pitch Font height
Courier monospaced 10 12 point
Line Printer
monospaced 16.6
8.5 point
Technically, you can use any of the Star LaserPrinter 8111’s resident fonts
when you send commands emulating a particular printer. But each emulation
only prints properly with the fonts designed for it. Furthermore, you can only
use symbol sets, or arrangements of those fonts, which that emulation can
handle. So be aware that, if you try using fonts other than those recommended
for a particular~emulation, you will usually get printing in the emulation’s
default font.
-.
--
L.
If you want a character that’s not in the font you’re using, don’t hesitate to
grab it. Just send the Escape sequences that select your desired symbol set,
print with it, then go back to your original font.
MANAGING FONTS
You can see which fonts are currently selected on your Star LaserPrinter 8111
by printing a status sheet in offline mode, as mentioned at the beginning of
this chapter. Another TEST mode menu item, described in the Star
LaserPrinter 8111 Operations Manual, also lets you print out a list of all the
, fonts available on the printer at any given moment.
L.
_.
41
Page 50
Selecting fonts
Most popular software packages, particularly word pmcessots, let you
choose fonts from within the program. They send the appropriate commands
to the printer and you don’t need to understand how they do it. MultiMate
uses pitch to identify different fonts, for example, while WordPer$ect uses
print formats. The point is, you may not even have to worry about selecting
which font to use.
2.
il
1
I
But not all packages do the job for you. If you are in this situation, you can
select any font attribute mentioned above, either from the front panel or by
sending an Escape sequence command in one of the emulation modes.
If you use the front panel in program mode, you’ll see these attributes under
the Font Attributes level of the EMULATION ATTRIBUTES menu. Just
press the NEXT button to get to the font attribute you want to set, press
ENTER to get to its possible values, press NEXT to scan through them, and
finally press ENTER to slap in the value you want
The procedures for selecting a font from a computer program is a bit more
complicated, and depends on which emulation mode you are using. These
font selection methods are detailed in the next three chapters.
Hints: Desktop publishing and page design
l Desktop publishing systems help you automate your specifications for
margins, cover design, typefaces, font sizes, placement of graphics and
/
i
I
regular features. You build the specifications you want in templates,
standard page designs you later simply call up on your screen and fill in
with text.
l Some desktop publishing systems, such as Aldus’s PageMaker, are page-
oriented: you put each page together individually. These are great for
shorter documents, such as newsletters, brochures and letters. Other
systems, such as Xerox’s Ventura Publisher, are document-oriented. That
makes them better suited to technical manuals and long proposals or
reports that go through many drafts.
Other ways in which such systems differ include whether they show on
your screen what you will get on paper (code-based programs don’t), how
I
well they handle pictures, and how hard they am to learn. Think about your
needs before choosing a desktop publishing system.
/
I
I
i
42
Page 51
l A few of today’s computer programs let you see several different font
sizes and typefaces on your computer screen. That capability is necessary
if you want to see on-screen exactly what will print on your Star
LaserPrinter 8111. Desktop publishers call this capability WYSIWYG“what you see is what you get”.
While “screen fonts” that match the fonts you use on your Star Laser-
-
Printer 8111 were not available when this manual was written, you may
eventually be able to get them. WYSIWYG depends on what software you
are using.
-
-
. When you design your pages, don’t vary font size just to fit text into the
space available. Go with a size that’s easy to read and be consistent.
Never be tempted to use all uppercase letters. When you want to highlight
text, switch to a bold font or draw a box around it.
.-.
l Don’t be afraid to use white space. White space relieves eye fatigue and
looks more attractive.
_
Optional fonts
-.
--.
L_
. .
_.
-_
Many optional fonts available for your Star LaserPrinter 8111 complement its
internal fonts. These can give you more variety in symbol sets, spacing, font
height, style and stroke weight. To your Courier or Tms Romn fonts, for
example, you might add italics and bold, legal or math symbol sets, and sizes
ranging from 7 to 14 points.
Optional fonts offer different typefaces too. Ask your Star Micronics dealer
about cartridges or disks for the following:
Helvet
line drawing fonts
Letter Gothic presentation fonts
Bar codes
optical character reader fonts
universal product code
Using cartridge fonts
To gain access to a font on a cartridge:
. ..-
1) press the ON LINE button to put the printer offline,
2) slide the cartridge you want into one of the cartridge slots on the front
of the printer,
_...
3) press the ON LINE button to put the printer back online,
43
Page 52
4) use either the front panel menu or a command from your computer to
select the font you want (explained for each emulation in following
chapters).
Note: Do not insert or pull cartridges out of the printer while the printer is
online.
You can use fonts from both cartridge slots within one document.
A couple of interesting notes about default cartridge fonts: First, say you have
selected on the front panel menu a cartridge font as your default font. Later
you turn off the printer. If you slip the cartridge back in before you turn on
the printer again, that font will still be your default font.
Second, some cartridges contain their own default font. That means as soon
as you slide such a cartridge into the printer, that cartridge’s default font
becomes the printer’s new default font automatically. To change the printer’s
default from that on the cartridge you must select another font from the front
panel.
How to download fonts
To download fonts from computer disk you’ll need more than a small 64K
microcomputer. We recommend at least a 5 12K computer with a couple of
disk drives (a hard disk is better).
Many commercial font-management programs are now on the market,
including Insight Development’sLaserControZ, Blaha Software’s HotLead,
SoftCraft’s LaserFonts, and the PCL printer driver in Microsoft’s Windows.
These utility programs help you download fonts, then let you access the fonts
automatically from your word processor or other programs.
Most font files on disk that you buy to download into your printer have
Escape sequences right in the file, which simplify the process. Usually all
you have to do is copy the file from your computer into your printer (in
LaserJet III mode you must assign a font ID number first). If you download
fonts with the MS-DOS COPY utility, make sure to use the COPY/B option.
That will keep your computer from “interpreting” the data you send, which
sometimes produces badly shaped characters.
OK, let’s look at a couple of examples.
Page 53
Downloading a font: example one
Example one is for a computer tunning just MS-DOS.
Say you’ve bought Hewlett-Packard’s Century Schoolbook fonts and want
to download the regular (upright), italics and boldface characters. The HP
disk labels for each file are CNlOORPN.RSP, CNlOOIPN.R8P and
CNlfKlBPN.RgP. In case you’re interested, that’s HP’s code for CeNtury,
100 decipoints, Regular (or Italic or Bold), ProportioNal, Roman-8 symbol
set, Portrait.
One of the disks you get also contains a batch file named
DOWNLOAD.BAT. To load the regular upright font you make sure the
printer is online, then after your computer’s A> prompt you type:
DOWNLOAD CNlOORPN.R8P
When the program asks for the font ID number you key in a number between
0 and 32767. Then when the program asks whether you want the font stored
permanently or temporarily you type either P or T (a temporary font
disappears if you press the printer’s RESET button). Finally the program
asks if you want to print a sample of the font and you reply Y or N for yes or
no.
You then do the same for the italics and boldface files, for example typing
for the italics font:
DOWNLOAD CNlOOIPN.R8P
The prompts will be the same, but you have to remember to use different font
ID numbers for the upright, italic and boldface fonts.
Downloading a font: example two
Example two is for a computer running Aldus Corporation’s PageMaker
desktop publishing program with Microsoft Windows.
PageMaker provides a print driver called HPPCL.DRV, and a program
called PCLPFM.EXE which creates the data it needs to print a given font. To
create font data for your Century Schoolbook fonts, at the A> prompt you
type:
PCLPFM CNlOO*.RSP
The asterisk, a “wildcard character,” indicates that PCLPFM is to create a
data file for all three fonts-regular, italics and bold. The program asks if you
45
Page 54
want to create a file called APPNDWININI to append into the Windows font
menu file: type Y for yes.
After PCLPFM has made the font data file, with your word processor open
the Windows file called WIN.INI and key in the font defaults you want to
apply. At the section referring to the HPPCL printer driver, insert the
APPNDWININI file you created earlier.
That’s it! From now on your Century Schoolbook fonts will appear on the
print menus of all your Windows applications.
With both examples, how you use the fonts depends on your applications
software. As you know, sending commands to change fonts will probably
requite some experimenting: be patient. These commands are described in
the following three chapters.
The process of downloading a font you’ve designed yourself is not so
straightforward. As you can only do this in HP LaserJet III mode, creating
and downloading fonts is described further in chapter 4.
Hints: Managing memory
l Printing fancy stuff can be quite cumbersome for your printer. You trade
off fanciness against speed: if you opt for fewer flourishes, you give your
printer breathing room in memory. And that rewards you with faster
output. Any of the following will slow down your laser printer:
- text over 20 points,
- lots of lines or patterns,
- graphics,
- macros,
-justified text.
l You may choose to add an optional RAM board to your Star LaserPrinter
8111 if you need to download many fonts.
l Alternatively, consider either a software or hardware print spooler if
printing holds up your computer more than you’d like. A spooler provides
a separate temporary memory space that holds the documents to be
printed, and is particularly handy in a multi-user system.
l .Some page makeup programs automatically download each font as
needed, then flush that font from printer memory to make room for the
next font. This approach can make good sense if you’re sharing your
46
Page 55
F
)‘
‘,’
i
i
-.
-.
_.
.-
printer with other people in a computer network. It keeps the printer’s
RAM from becoming overloaded. However, the downloading time can
significantly slow down your printer’s throughput.
l
More typically, you will download a font in the morning (perhaps with the
MS-DOS COPY command) before you print your first document, and
that font will then stay in the printer’s memory. If you use a single
downloaded font (or macro) throughout the day, you will find it most
efficient to keep it in the laser printer’s memory. You definitely should
download fonts this way if you use a print spooler. If you’re in a network,
however, make sure you don’t download duplicate fonts.
.
How many downloadable fonts can you have in one document? That’s not
so easy to answer. Most of your laser printer’s memory is not available for
storing fonts, because it has to store each page before printing it, as well
as any macros or overlays you are using.
To see how much memory is available for extra fonts, put the printer
offline and press the TEST button to print a status sheet. Your printer will
beep and show a front-panel message if you try to overload its memory by
downloading too many fonts. It then will continue printing with the closest
available font to that mquested.
-
As a general rule, you can include at least a dozen downloadable fonts in
a document. Added to the internal fonts, that should be plenty- it doesn’t
make good design sense to mix many typefaces. A telltale sign of
amateurish laser printing is too many fonts in one document.
To keep a wide variety of extra fonts in memory, however, many Star
LaserPrinter 8111 users (especially those sharing the printer on a network)
prefer to add the optional board with the second megabyte of RAM.
47
Page 56
NOTES
Page 57
The Hewlett-Packard LaserJet III is an earlier kind of laser printer than your
Star LaserPrinter 8111. You should have no trouble running most popular
software packages in HP LaserJet III mode, as those programs likely can
send LaserJet III commands.
Because the LaserJet III is alaserprinter, though, its commands can give you
more control over your Star LaserPrinter 8111 than is possible with the other
built-in command sets. You will probably use this emulation’s commands
more than the others. Recognizing that reality, we’ve put more examples into
this chapter.
We follow the same sequence in this chapter as we did in Chapter 2: first
some printer management and page setup commands, then we’ll cover
commands that poise the laser “pen” over the paper, next we’ll pick a font,
and finally we’ll lay down our words and pictures.
At the end of the chapter we describe how to create and use your own fonts,
and also how to save time by writing command macros.
HP LASERJET III COMMANDS
What do LaserJet III commands look like?
The LaserJet III emulation mode includes a dozen common control codes
(such as <CR> for carriage returns) and single-character Escape sequences
(such as &SC> E for resetting the printer). But all the other LaserJet III
emulation commands you can send your Star LaserPrinter 8111 look like this:
<ESC> cc n C
in which the cc prefix is a symbol or two showing the gene& category of
commands to which this one belongs, n is some variable you want to use in
this command, and C is the specific command you want performed.
49
Page 58
Two important details make LaserJet III commands different from the other
printer emulations. First, all Escape sequences end with a capital letter. If you
don’t make the last character uppercase, your printer won’t know when the
Escape sequence ends and will treat following characters as part of the same
command.
Second, in LaserJet III commands each number or character you put after the
<ES0 code is an actual ASCII symbol. With the other emulations, usually
any number you put after an <ES0 code identifies a character in that
position in the ASCII1 table.
For example, the LaserJet III command that sets the right margin to column
65 is:
<ESC> &a 65 M
which you would code in BASIC as:
10 LPRINT CHR$(27);"&a65M"
That command sends your printer the symbols “6” and “5,” which its
LaserJet III program interprets as the column number.
However if you were using Epson EX-800 emulation, the command that sets
the right margin looks like this:
<ES0 Q 65
which in BASIC you would write this way:
10 LPRINT CHR$(27);"Q";CHR$(65)
That command sends the printer whatever character happens to be in ASCII
position 65. Your printer’s Epson Program, though, interprets it only as a
decimal number meaning column 65.
Combining Escape sequences
Later in this chapter we describe one way to select a font, by just specifying
what font attributes you want, such as bold or proportional spacing. If you
select a font by specifying every one of its attributes, you can be certain that
you’re selecting successfully. But it could mean a fair bit of repetitive typing
each time you choose a font. This applies to other commands too, not just font
selection.
50
Page 59
Here’s a way you can save yourself a few keystrokes: type in those
commands that have the same command-category prefix as just one long
Escape sequence. To combine commands this way, type the <ES0 and
command-category prefix just once, and capitalize only the last command
character.
For example, to define the style, weight and character face for the primary
font, you might send these command:
<ESC> (s 1s
<ESC> (s 7B
<ESC> (s 5T
which would produce italics boZ&ace Tms Romn. But this single command
does the same thing, all with one blow:
<ESC> (s 1s 7b 5T
CONTROLLING THE PRINTER
Self test
You can check how your LaserPrinter 8111 is printing and have a look at its
parameter settings by sending this Self Test command:
<ESC> z
Notice that the z is lowercase; this is the only LaserJet III command that ends
with a smaIl letter. After you send a Self Test command, the printer finishes
printing any pages left in its memory. Then on a new page it prints its current
parameters (just important items such as number of copies and fonts in use).
The printer finishes off the page with a continuous display of all the
characters in its default font.
The printer also quickly checks its interface. Assuming it finds no trouble,
the printer is then ready for your next page. If the printer detects a problem
it shows a front panel message, which you can look up in your Star
LaserPrinter 8111 Operations Manual.
51
Page 60
Set number of copies
You can print up to 99 copies of each of the pages you send to the printer. You
may send this command anywhere within the text on a page; it will stay in
effect for that and all subsequent pages until you send another such command:
<ESC> &/n X
All you have to do is change the n sign in this command to the number of
pages you want. (The /character after the & is a lowercase L.)
Set feed selection
One thing you can do is print directly on envelopes as well as regular paper.
You use this Feed Select command to tell your printer to select either a page
from the paper tray, or a page or envelope from the manual feed slot:
<ES0 &6n H
For n enter one of the numbers from this table:
n
0 (zero) the printer only ejects the current page
1 (one) the printer takes its next page from the paper cassette
2
3
Should an unprinted page be in the printer’s memory when you give this
command, the paper for that page will feed from where you’ve indicated.
Therefore you can make this the last command on a page. The new feed
setting stays in operation until you change it.
FEED SELECTED
the printer takes a regular page manually
the printer accepts an envelope you feed in manually
Reset
Most software packages automatically reset the printer to the initial defaults
before starting a print job. It’s a good idea for you to follow the same practice,
just to make sure you get the settings you want.
When you want to set ah your laser printer’s parameters back to their initial
default values (some people call this “initializing” the printer), send this
command:
<ES0 E
-
-
-
52
Page 61
The printer will finish printing any pages left in its memory before resetting
the parameters. Resetting clears unneeded temporary fonts from your
printer’s memory. Any permanent fonts or macros you have downloaded,
however, will still be there after you send a reset command. Permanent and
temporary fonts aredescribed at the end of this chapter’s “Controlling Fonts”
section.
_
Example: Printer controls
Let’s see what happens when we put these commands together. Say you have
just turned on your laser printer and selected LaserJet III emulation on the
front panel. What happens when you send the following commands to your
First, if it is working properly the printer prints a test print with all the
characters in its default font for this emulation (Courier).
Next the printer sets all its parameter values- including feed selection and
number of copies- to their initial settings.
The last command does two things: it tells the printer to accept paper you will
feed in yourself, and to print each page two times. This is handy when you
want two copies of a letter on preprinted letterhead.
You can now send your letter from your word processing program to the
printer and feed in those pages. When you’re done, you may want to send the
<ESC> E command one more time.
.-
53
Page 62
PAGE ORIENTATION
You might reasonably think of page orientation as a page formatting issue.
To print words widthwise on a page, however, each letter in effect has to lie
on its back. So orientation is actually a font attribute, and is treated as such
later on in this chapter.
Page Length
The paper tray you have installed sets the default page size for your laser
printer. When you want a different size, and when you change the tray, you’ll
need to reset that page size. You should always change the page length before
you send text for printing. The Page Length command sets the number of
lines that can print on a page (lines per inch times the number of inches).
The Page Length command format is:
<ESC> &z/n P
where n is the number of text lines on the page; it can be any number between
5 and 128.
The default number of lines is the length of the paper tray times 6 lines per
inch. For 11 -inch letter-size paper that works out to 66 lines (that’s also the
default when you haven’t put in a tray).
If you don’t want the default length, you should send the Page Length
command before you send text for printing. The table below should help you
pick the right number of lines. Decide which orientation and paper size you
want, then use the n under your preferred lines/inch:
ORIENTATION PAPER SIZE
Portrait Executive
Portrait Letter
Portrait A4
Portrait
Landscape
I--dscape
w@
Executive
Letter
Landscape A4
Landscape
md
@ 6 LINES/INCH ’ @ 6 LINESANCH
60 80
66 88
70
84
93
112
43 58
51 68
49 66
*
58
* Printing landscapes onlegal paper is trickier. First set on portrait mode and
send the command &SC> &/84P and then change the orientation to
landscape
54
Page 63
!
_~
An example: Say you want to manually print legal-size pages at eight lines
per inch. The following commands combine manual feeding with that page
length:
<ESC> &/2h 112P
--
-
If your command specifies a page length different than the paper in the tray,
the printer will go offline and display a message asking for the proper tray.
After you change the tray, press the ON LINE button to restart the printer.
It doesn’t hurt to print short pages on long paper. If you inadvertently print
alegal-size page onto executive or letter-size paper, the printer will scroll that
page across two sheets.
-_.
Also, the Page Length command puts all margins back to their defaults. So
L.
after you send it, check whether you have to send any of the following
margin-setting commands.
Side margins
-
_
_-
Margin settings define that part of the page on which the printer can print.
You set side margins to particular columns. The width of a column differs for
each font, depending on its pitch. Ten-pitch Courier, for example, puts
column 30 three inches from the left edge of the page (column 0). But 12-
pitch Prestige Elite puts column 30 just two and a half inches in.
You cannot set the left margin further over than the right margin. Use the
following command to set the left margin, setting n to be the column number
where you want the left margin to start:
<ESC>&anL
Similarly, to set the right margin, you send this command with your desired
column number:
<ESC> &a n M
If you want to put both left and right margins back to the printer’s printable
limits- in other words, to “clear” the side margins- send this command:
<ESC> 9
55
Page 64
Top margin
Vertically, the LaserPrinter 8111 confines its printing to its “text length,”
which should always be less than its page length. Both are measured in lines.
You can change the meaning of a “line” with line-spacing commands
described later in this chapter.
When you set the top margin though, it does not change, even when you
change the definition of a line. You can use this command to set the top
margin anytime. Just be aware that if the current print position is below your
margin, you’ll have to move the print position back up. Naturally, you have
to keep your top margin inside the page-length limit.
Use this command to set the top margin, setting n to be the number of lines
down from the top of the page that you want left blank before you start
printing:
<ES0 &rn E
Note that the character following the “&” is a lowercase “L”.
Text length and the bottom margin
By default, the LaserPrinter 8111 automatically gives you top and bottom
margins of the same size. So you only need to send the Text Length command
when you want different top and bottom margins.
If you want a different bottom margin, first decide how many text lines will
produce the margin you want. Check that they won’t produce a bottom
margin lower than the page length. Then send the following Text Length
command, entering for n your desired number of lines:
-
-
<ES& &tn F
The Page Length, Top Margin and Text Length commands therefore work
together to set the bottom margin:
bottom margin = page length - (top margin + text length).
The bottom margin is called the “perforation region” with printers that use
continuous forms. You normally want to skip the perforations between the
continuous pages, but sometimes you don’t (for example when you print
labels).
Though you likely won’t often want to do it, the Star LaserPrinter 8111 will
let you completely ignore the bottom margin too. If you choose to print below
the bottom margin, remember that you might lose words or graphics in the
56
-
-
Page 65
unprintable region at the edge of the page. The command looks like this:
<ES0 &z/n L
If you want to allow printing below the bottom margin, for n enter 0 (zero).
-._
-
--
. .
--
But if you want to forbid printing below the margin, which is the default,
enter 1 (one).
Example: Page formatting
OK, let’s have a go at formatting a page. The picture of the page we want is
just below. The actual width of the text on the page depends on which font
we use. Let’s plan on using our 16.66-pitch Line Printer font at eight lines per
inch.
column 10 column 70
tap margin = 8 lil
text length I
100 lines
bottom margin
4 lines
\ cctasional footnotes
pageleng!h=llZIines
I
As it prints, we also want to permit the occasional one-line footnote below
the normal bottom margin. And when we’re finished printing, let’s reset the
side margins so we can switch to our usual font width.
Here am the commands that w’ill produce this format for us:
<ES0 &c/l 12P
<ES0 &a lOl7OM
<ES0 &/8e 1OOf OL
(We’ll send our page here.)
<ES0 9
57
Page 66
MOVING THE PRINT POSITION
Many ways to move
The LaserPrinter 8111 provides excellent control over the print positionwhere you poise your laser “pen”. Horizontally, you can send backspace and
carriage return commands. Vertically, you can move the print position down
the page by printing so many lines per inch, or by sending line-feed and half
line-feed commands. You can move horizontally or vertically to tab settings
as well.
Those aren’t all. You can also tell the Star LaserPrinter 8111 to move its print
position, either vertically or horizontally, in increments of:
l/10, l/12 or 3/50 inch (pitch settings),
l/48 or l/120 inch (line or column definitions),
l/300 inch (dots),
l/720 inch (tenths of a point).
All these commands are described below.
One hint about moving the print position: you can confuse yourself trying to
use more than two different units during the same session. So decide
beforehand how precise you need to be in moving the print position, not
forgetting any graphics you want to include. Then stick to the unit(s) you
choose.
Lines per inch
This vertical line-spacing command gives you more options than just the six
or eight lines per inch of early printers. Use this command to set how many
lines you want in each vertical inch of your page:
-cESC> 8ztn D
For n you enter the number of lines per inch you want- any of: 1,2,3,4,6,
8, 12, 16,24 or 48. If you enter a number other than these the printer will
ignore the command.
Defining the space and column
Before you use print positioning commands, you first may want to change the
definitions of the line or space (sometimes called “vertical and horizontal
motion indexes,” VMI and HMI). These definitions don’t actually move the
58
Page 67
print position. Instead, they define two basic units you can use in print
position commands.
What’s important about the space is that it defines how far the print position
travels for every character you print (except for proportionally spaced text).
. . .
The space can also be thought of as the width of a vertical print column. One
column width is the width of the space character in the curmnt font, no matter
-
whether it is monospaced or proportionally spaced.
Occasionally you may want to change space width to override the current
pitch setting. Let’s look at an example. The space width comes in units of
1/12Oth of an inch, and the Courier font can print 10 characters per inch. Each
charactercoversa tenth- 12/12Oths-ofaninch, so that font’sdefault space
width is 12 units. If we change its space width to 6, each character would half-
overlap the one before it.
L_
If you are using <SIB and <SO> to shift between a primary and secondary
font, it’s a good idea to change the space width after every shift.
--
-
To change the space width you send this command:
&SC> &k n H
in which for n you can enter a number fmm 0 (zero) to 840. A width of 0 will
-
print characters on top of each other; a width of 840 will print them seven
inches aprt.
-.
Defining line depth
me line depth (sometimes called the “vertical motion index”) specifies how
far down a page the print position will move for each line feed. You probably
__..
won’t use the line depth as much as lines-per-inch. Line depth can be more
precise but it isn’t as easy to calculate. The line depth comes in multiples of
l/4801 of an inch.
The important fact about the line depth is that when you change it you are
changing the actual meaning of a “line”. When you increase the line depth
you effectively decrease the number of lines per inch, and increase the page
length.
The command you send to set the line depth looks like this:
<ESC> &z/n C
59
Page 68
(note that the character after the “8~” is a lower-case “L”) in which for n you
.~
can enter a number from 0 to 336. If n is zero, lines will be printed on top of
each other, and if 336, they will be printed 7 inches apart.
Moving the PRINT position horizontally
You can use three different units to move the print position horizontally:
columns (space-widths), dots (each 1/3OOth of an inch), or tenths of a point
(decipoints). Both columns and decipoints can be fractions to two decimal
places, such as 45.75 decipoints- which provides a great degree of accuracy
for graphics applications.
Moreover, for each of these you can move the print position horizontally in
two ways. You can move absolutely from the left edge of the page. Or you
can move relatively, away from the current print position. To show you want
to move away from the current print position, you put a plus (+) or minus () sign before the number of units you want to move.
If you send a command that would put the print position outside either side
margin, the LaserPrinter 8111 will let you do just that. However, you can’t
send the print position further than its printable limits at the edges ofthe page.
-
-
Horizontal moves: by columns, decipoints and
dots
To move the print position horizontally a number of columns, send the
command:
(, cESC> &a n C
in which for n you enter the number of columns you wish to move the print
position. So to move to column 45 you send the command:
&SC> &a 45C
But to move 45 columns to the rightof the curmnt print position, you send:
<ES0 &a +45C
To move the print position horizontally a certain number of decipoints, send
the command:
<ES0 &a n H
in which for n you enter the number of decipoints you wish to move the print
60
-
Page 69
position (preceded by a + or- sign if you want to move away from the current
position).
You can move the print position horizontally by dots both ways too. You can
move a number of dots away from the left edge of the page, or you can move
a number of dots away from the current print position.
To move horizontally this way, send the command:
<ESC> *p n X
in which for n you put either the number of dots away from the page edge,
or (preceded by a + or - sign) the relative number of dots away from the
current position.
So to move 20 dots from the left edge you send this command:
<ES0 *p 20X
And to move 20 dots to the left of the current position you send:
<ESC> *p -20X
You can also move the cursor 8 columns at a time horizontally by use of the
horizontal tab command. Simply send a tab character:
<HT>
to do this. Reverse tabbing is not possible.
Moving the print position vertically
You can use similar units to move the print position vertically: lines, dots, or
decipoints. Both lines and decipoints can be fractions to two decimal places.
You can also move the print position absolutely down from the top edge of
the page, or relatively, away from the current print position. Again, to show
you want to move away from the current print position you put a plus (+) or
minus (-) sign before the number of units you want to move.
The important difference about moving vertically up or down is what the
printer does when the print position hits the page top or bottom. If you try to
move above the top margin, the print position stays right at the margin. And
if you move the print position down off the page, the page is ejected and
printing continues on the next page.
61
Page 70
Vertical moves: by lines, decipoints and dots
.~
To move the print position vertically a certain number of lines, send the
command:
<ESC> &a n R
in which for n you enter the number of lines you wish to move the print
position. So to move to line 45, measured from the top edge of the page, you
send the command:
<ES0 &a 45R
But to move 45 lines down from the current print position, you send:
<ES6 &a +45C
To move the print position vertically a certain number of decipoints, send the
command:
<ESC> &a n V
in which for n you enter the number of decipoints you wish to move the print
position down (or precede the number with a + or- sign if you want to move
up or down from the current position).
Finally, you can move a number of dots down from the top edge of the page,
or you can move a number of dots up or down from the current print position.
To move the print position up or down an absolute or relative number of dots,
send the command:
.-
cESC> *p n Y
in which for n you put either the absolute number of dots down, or (preceded
by a + or - sign) the relative number of dots up or down from the current
position.
So to move 20 dots down you send the command:
<ES0 *p 20Y
And to move 20 dots up you send:
<ESC> *p -20Y
Combining move commands
One thing about moving the print position with the above commands is that
they let you think of your page in terms of Cartesian coordinates.
62
-
_
-
Page 71
All we mean is that you can combine horizontal and vertical movements that
use the same units. If you send this command,
<ESC> *p 40x 20Y
-
-
. ..-
._-.
-
__.
--
the print position will move to a spot 40 dots from the left edge of the page
and 20 dots down from the top edge. And if you send this one:
<ES0 &a +4Oh -20V
the print position will move right 40 decipoints and up 20 decipoints.
Backspace
The Backspace control code works exactly as you might expect: it moves the
print position one column to the left.
<BS>
Moving the print position back does not destroy any characters already sent.
In fact, because of that, this command can be quite useful. It lets you
superimpose one character over another.
Say you want to indicate a blank space as the letter b with a slash /through
it, an old programming symbol. Just send the b and then follow it with CBS>
and the slash, and you get this: b.
Carriage return
The Carriage Return command by itself only moves the print position back
to the left margin of the line on which it currently sits:
<CR>
.~
_-
If you want the print position to move down a line as well, send a separate
Line Feed command each time, or use Define Automatic Line Ends (explained below) to couple these two control codes.
Line feeds
The Line Feed command advances the print position one line down the page.
The meaning of a line is set by the Line Depth command.
To send a line feed just send this control code:
<LD
63
Page 72
The Half Line Feed command is the one you want for subscripts. This
command moves the print position down the page one half the current line
depth:
<ES0 =
To send a reverse Half Line Feed, moving the print position up to let you print
a superscript, use this command:
cESC> &a -.5 R
Form feed
This command, like the PRINT button, makes the printer advance to a new
sheet of paper. When you send the cFF> control code you are also telling the
printer to print all its stored page information. Remember to send this
command to make sure any last partial page in your printer’s memory gets
printed:
cFF>
Define automatic line endings
When you press the Carriage Return key what do you expect to happen? Most
people think a computer keyboard should work like a typewriter, with a
Carriage Return starting a new line as well.
But computer programs don’t have to stick to that analogy. Some programs
(particularly graphics packages) want a Carriage Return to just move the
print position back to the left edge of the page. And they want a Line Feed
to move down to a new line without going back to the beginning of the line.
So you can specify exactly how you want <CR>, <LF> and cFF> to work
with this command:
<ESC> &k n G
For n enter one of the numbers from this table:
n
AUTOMATIC COMMAND
0 (zero) <CR>, <LF> and <FF> work according to their basic
definitions,
1 (one) <CR> will also generate a <LD (but <LF> and <FD stay
the same),
2
cLF> or <FF> will produce a <CR> too (<CR> by itself
won’t change),
64
.-
-
-
-
-~
Page 73
3
After you send the command <ES0 &k 2 G for example, every time the
printer gets a Line Feed command it will move the print position down and
over to the start of the line. When it gets a Fonn Feed, the printer will also
move the print position back to the left.
<CR> generates a cLF> too, and either cLF> or d;F>
produces a <CR>.
Autowrap
One nice thing we get used to with a word processing program is not having
to worry about words going past the right margin. We don’t have to listen for
that typewriter bell at the margin any more.
This command does pretty much the same thing your word processing
program does. The important difference is that it does not wrap words. When
you turn on Autowrap, if you send too many characters for a line the laser
printer prints the overflow on the next line.
If Autowrap is on, when the printer gets a character that would print beyond
the right margin, it returns the print position for that character back to the left
and one line down (Carriage Return and Line Feed).
The Autowrap command works like a toggle switch:
<ES0 &s n C
If for n you enter 0 (zero) then this wrap-around mode will apply.
But if for n you put 1 (one) this automatic wrapping of characters will not
happen. The default if you don’t send a command is no wrapping.
Note: Even when Autowrap is on, the printer will print beyond the right
margin if you have sent one of the direct positioning commands described above, which move the print position past the margin.
Also, note that Autowrap doesn’t move the whole word down to the next
line- that’s a job for a word processor, not your laser printer.
Pushing and popping the print position
This provides a wonderful way to keep track of the print position. It works
by letting you keep a list of up to 20 print positions.
You can “push” the current print position onto the top of the list whenever
you want. Later, you can “pop” off whatever position is at the top of the list,
65
Page 74
making it the current print position.
When would you want to save and restore print positions this way?
Whenever you need to interruptwhat you’re printing now to stick something
special onto the page. This is most handy when you need to jump from text
to graphics and back.
Say you’ve written one routine that puts the page number in the same place
on every page, and another that under certain circumstances prints two heavy
lines. You print merrily along until you have to print the lines. You then push
the current print position to execute the line-printing routine.
But part way through that you hit the page-number spot. So you push the print
position again and run the page-number routine. Then you can pop the print
position to print the second line. And when that’s done you pop it again to
return to printing text.
As you might suspect, this can involve fairly complicated programming,
typically using the macro commands described later in this chapter.
To push or pop a print position you send this command:
<ESC> &f II S
For n you enter 0 to push (save) the current print position,
or 1 to pop (restore) the last position saved off the list.
Note:
popped back later.
The last position pushed onto the list will always be the first one
CONTROLLING FONTS
Font selection
The LaserJet III emulation lets you define and select fonts three ways: as
primary and secondary fonts, or by font identification number, or by
description. We’ll look at the first two.ways now, and explain selecting a font
by its attributes a little further on.
However you choose to refer to fonts, remember that a font must be available
before you select it. So if you want to select a cartridge or downloaded font,
you first have to put in the cartridge or download the font.
66
Page 75
:::
F
.:,
p .,
I’
;,
):
\
Selecting primary or secondary fonts
Of the three selection methods, you will save the most programming time by
.
-_
b-.
-.
shifting back and forth between primary and secondary fonts. That’s coun-
terbalanced, though, by the fact that you often need mote than two fonts.
Typically, you use primary and secondary fonts to flip back and forth
between two different symbol sets- for example IBM symbol sets 1 and 2.
You can designate any two fonts, whether internal, cartridge or downloaded,
as primary and secondary.
The way you show you’re talking about a primary font in an Escape sequence
is to follow the <ES0 symbol with a left parenthesis. For example,
<ES0 (s 10 H
means you want your primary font pitched at ten characters to the inch.
Typing a right parenthesis instead means you are referring to the secondary
font:
cESC> )s 10 H
You define a font as primary or secondary as you select it. To make a font
your primary or secondary font, you use font-description Escape sequences
such as those just above, specifying the attributes you want.
If you don’t explicitly indicate what attributes you want for the primary or
secondary font, the printer will use the same default font for both. This
default font’s attributes include the Roman-8 symbol set, lo-pitch spacing,
12-point height, upright style, medium weight, and Courier typeface.
After your primary font is selected, you can choose it for printing by sending
this Shift In control code:
<SI>
All the text you send after that command will print in the primary font.
Your laser printer shifts to the secondary font when you send this Shift Out
code:
<so>
67
Page 76
Assigning font ID numbers
The second way to define and select fonts is by using font ID numbers. You
may prefer this method if you frequently use many fonts. While not as short
as <SI> and <SO>, it’s quicker than describing font attributes over and over
again.
To give an ID number to an internal or cartridge font, you first make it the
primary font. That is, you send a left-parenthesis Escape sequence (a font
attribute command as described below) and the Shift In control code. Then,
to assign an ID number to the font, you send this command:
<ESC> *c II D
For n you can enter any number between 0 and 32767 as the font’s ID number.
(Not that you can have more than 64 fonts in the printer at once, even with
the optional memory board. A printer would need an elephantine memory to
hold 32767 fonts!)
Selecting downloaded fonts
The easiest way to select among downloaded fonts is to use font ID numbers.
When you download a font you make the Assign Font ID command above
the first command in your sequence (see “How to download your own fonts”
later in this chapter). After you’ve assigned an ID number to a downloaded
font, you can select it as your primary font with this Select Font ID command:
<ESC> ( n X
in which n is your desired font’s ID number.
If you use many fonts you’ll use that command to select among them. But
what if you prefer to just use &I> or <SO> to shift between primary and
secondary fonts? You want to select a downloaded font ID as your secondary
font. This is the command to send:
<ESC> ) n X
Font attributes
The third way to select a font is to simply describe what font attributes you
want. (Remember, selecting a font does not modify a font. You can’t get bold
or 14-point characters if you don’t have a bold or 14-point font in the printer.)
In listing the attributes you want, it will help you to prioritize them the same
66
Page 77
way your LaserPrinter 8111 does. Your printer ranks the various attributes a
font can have this way (from most to least important):
orientation
symbol set
spacing (proportional or monospaced)
pitch (characters per inch)
font height (in points)
style (italic or upright)
stroke weight (light to bold)
typeface
. .
The laser printer just zips down this chain of attributes one by one,
eliminating fonts that don’t match what you want, until it gets down to one
c
unique font that matches your request. If the printer matches down to, say,
style or weight but can go no further, it will give you its closest font to your
request.
And if you don’t specify a particular value for some attribute, the printer
assumes you want the value that attribute had in the lust font you specified
(or the default value if you’ve just turned on the printer). This can save you
some effort: if the font you want has an attribute the same as the current font,
A_
you don’t have to specify that attribute again.
Orientation
b^
Portrait orientation prints text across the width of a page. Landscape
orientation prints text sideways up the length of a page.
_.
The Star LaserPrinter 8111 is more flexible about orientation than most other
laser printers; it lets you simply rotate any portrait font to the landscape
-
--.
-
orientation or vice versa. To start you off when you change orientation, the
,-
printer resets all its margins and its column and line definitions to their
default settings.
When you want to select the opposite orientation, send this command:
<ES&& /n 0
in which for n you put 0 to get portrait orientation,
1 to get landscape orientation,
2 to get upside-down portrait orientation,
or 3 to get upside-down landscape orientation.
. _
-
(Notice: the /character after the & is a lowercase L.)
69
Page 78
To select the direction in which characters, raster graphics ands fill patterns
are printed, use the following command:
<ESC>&a n P
in which for n you put 0 to select the portrait direction,
90 to select the landscape direction,
180 to select the upside-down portrait direction,
and 270 to select the upside-down landscape direc-
tion.
Symbol sets: a review
Each font can have many symbol sets, each being a subset of all the possible
characters of the font. These subgroups include different symbols for
different nations or for lawyers or artists or mathematicians. Any two symbol
sets, moreover, may store the same symbol at a different font position in the
printer’s memory.
The default LaserJet III emulation symbol set is Roman-8, which includes all
ASCII characters plus dozens of accented letters. But you can use any of the
sets shown below. Technically you can pair any symbol set with any internal,
cartridge or downloaded font; however it doesn’t make much sense to print
text with a math or line-drawing symbol set.
LaserJet III mode provides two different symbol set commands. You put a
code into one command to select aparticular symbol set for your primary or
secondary font. You use the other command to select the current or default
symbol set for your primary or secondary font.
Selectin’g a symbol set
This first symbol set command lets you select a particular symbol set for the
current font. To select a symbol set for your primary font, send this
command:
<ESC> ( n
70
Page 79
For n enter one of the following symbol codes. The first character must be
a digit and the second an uppercase letter.
CODE n
OA
OB
OD
OE
OF
OG
01
OK
ON
00
OQ
OS
ou
OY
ID
IE
IF
IG
10
IQ
IS
IU
2K
24
2s
2u
3Q
3s
4s
5s
6s
8M
8Q
8U
8Y
9Q
SYMBOL SET
Math-7 symbols
Line Draw characters
IS0 60: Norwegian
Roman Extension
IS0 25: French
HP German
IS0 15: Italian
JIS ASCII
ECMA-94 Latin 1
OCR-A
Math-8A symbols
IS0 11: Swedish
US-ASCII
Bar Code 39
IS0 6 1: Norwegian
IS0 UK
IS0 69: French
IS0 21: German
OCR-B
Math-8B symbols
HP Spanish
I-4@
IS0 57: Chinese
Pi font-A symbols
IS0 17: Spanish
IS0 IRV
OCR-B Extension
IS0 10: Swedish
IS0 16: Portuguese
IS0 84: Portuguese
IS0 85: Spanish
Math-8 symbols
IBM-PC Set
Roman-8
Bar Code EAN/UPC
IBM-PC Extension
71
Page 80
IOU
IIQ
IIU
12u
15u Pi font symbols
To select a symbol set code for your secondary font, flip the parenthesis:
<ES0 ) n
and for n substitute your choice from the codes above.
Selecting the current or default symbol set
Your printer can use either the primary or the secondary font as its current
font. And that current font has its current symbol set. Your printer also
remembers its default font and symbol set, which are Courier with Roman8 (unless you’ve changed their initial parameter values through the front
panel menu).
The following command lets you select one of those symbol sets for your
primary font.
<ESC> ( n @
For n enter one of the following selection values for your primary font:
IBM-PC (US)
ECMA-94 7Bit
IBM-EC (Denmark/Norway)
PC-850
n VALUE
0 (zero) or 1 (one)
2
3
Similarly, you can select either the default or the current symbol set for your
secondary font. You also may want to use the same symbol set for both
primary and secondary fonts.
To do these tasks, you can send the following command to select which
symbol set you want for your secondary font:
<ESC> ) n @
For n enter one of the values from this table:
n VALUE
0 (zero)
72
SELECTION
Selects the default symbol set
SELECTION
Selects the default symbol set
Selects the current font’s symbol set (this
forces the printer to select its best matching
font)
Selects all of the default font’s attributes
(not just symbol set)
Page 81
/
/’
6
fi
I-
I-
,,i
I
I
i
I
I
1 !_
_~
L
L -
-
1 (one)
2
3
Example: Symbol set commands
Let’s take a short look at how you use these commands. Here’s the scenario:
You am already using the Tms Romn typeface, but want to use the Gennan
symbol set as you am writing a report for your Berlin office and need umlaut
characters for several names in the report.
Then in the report you decide to use a proprietary product name, so want to
nip out to grab the @ symbol on a legal cartridge font you’ve already loaded,
then return to your German set. When your report’s all done, you want to
return the printer to its Roman-8 default.
Here are the commands that will do the job for us:
<ES0 ( OG
.
Selects same symbol set as primary font
Selects the current font’s symbol set
Selects all the default font’s attributes (not just
symbol set)
/ I -
I
j
/
I -
-.
t .~
i
I *
j
i
(you s&-t your report here)
;ESC> ( IU @
<ESC> ( OG
(you finish your report here)
.
<ESC> ( O@
If you had finished with <ESC> ( 3@ the printer would return to its standard
Courier font, not just its Roman-8 symbol set.
Spacing
If you specify monospaced for a font, each character prints with the same
width. But if you specify proportional spacing the design of each character
73
Page 82
determines its width. To define how you want your primary font spaced, send
this command:
<ESC> (s n P
in which for n you put 0 (zero) to get monospaced,
or 1 (one) to get pxoportional spacing.
If you specify proportional spacing it doesn’t matter if you also specify pitch,
because spacing is a higher priority font attribute. The printer will just ignore
the pitch request.
To define spacing for your secondary font, use the same numbers and just flip
the parenthesis:
<ES0 )s n P
Pitch
Pitch defines how many characters per inch you want for a monospacedpitch font. Your Star LaserPrinter 8111’s internal monospaced-pitch fonts
have settings of IO.12 or 16.66 characters per inch. Cartridge or downloaded
fonts with monospaced pitches often have other settings for characters per
inch.
To select the pitch you want for the primary font, send this command:
<ES0 (s it H
where for n you put in how many characters per inch you want. For example,
<ES0 (s 12 H will pack twelve characters into each inch.
The corresponding pitch command for the secondary font is:
<ES0 )s n H
You can use a different command instead of these for general character pitch
setting. This command, since it doesn’t have parentheses, covers both the
primary and secondary fonts. It looks like this:
<ESC> &k n S
For n you enter a pitch code from the following table:
CHARACTERS PER INCH
10 cpi (pica)
16.66 cpi (condensed)
PITCH CODE n
0 (zero)
2
74
Page 83
Font height
The height of the characters you print is measured in point sizes. The
LaserJet III emulation provides fonts in 6,7,8.5, 10, 12, 14, 16, 18,24 and
36 point sizes. If the font height you specifically ask for is not available, the
printer will select the font with the size closest to your request.
To select font height for the primary font use the following command. For
n enter the font height in points that you want:
<ESC> (s n V
To select font height for the secondary font, send this command:
<ESC> )s n V
Style
Style defines whether your text is printed in italics or upright, the way these
words are. Send this command to select the style you want for the primary
font:
<ESC> (s n S
in which for n you enter 0 if you want normal upright text,
or 1 if you want italics.
To select style for the secondary font, just reverse the parenthesis and use the
same n numbers:
<Esc> )s n s
Remember that style is a relatively low-priority attribute. If a particular font
satisfies all higher priority attributes but doesn’t come in the style you want,
you’ll get that font without your style.
Stroke weight
The weight of a font defines how lightly or boldly it prints
With LaserJet III emulation you can be more flexible about stroke weight
than with the bold on/off commands of the other emulations. The following
command gives you a range of 15 degrees of boldness, though not many fonts
exploit that range.
Send this command to select a primary font with your desired stroke weight:
&SC> (s n B
in which you replace n with a number from -7 (meaning light) to +7 (very
bold). You need the negative sign to get the lighter weights. A weight of 0
75
Page 84
(zero) produces medium print.
To select the stroke weight for the secondary font, use the same numbers with
this command:
cESC>)snB
I
so probably don’t need to know this. But it’s possible to print bold without
even having a bold font in the printer. You just print the text you want in bold
An incidental note: You will likely use optional fonts to give you boldface,
I
two times, with the overprint offset by 4 decipoints.
So you can use the command <ESC> &a n H to back up, you just need to
know the width in decipoints of what you want to overprint. In a mono-
spaced-pitch font like Courier that’s easy: just keep track of how many
characters you print. In a proportional font you’d keep track of the decipoints
by using a character-width table. After backing up 4 decipoints less than the
total text width you just print your text again.
Typeface
The last attribute you can give to characters is their typeface. The design of
I
[
c
I
characters is what font designers often think of as the main determinant for
a font. But when you select a laser printer font, typeface sits at the bottom of
the list.
To assign the particular face you want for your primary font, send this
command:
<ESC> (s n T
For n enter one of the font code numbers from this table:
10
Presentation 11
Line Draw 12
PC Line 13
OCR
Bar Code
14
15
To assign a character face to the secondary font, just flip the parenthesis and
use the same n numbers:
<ESC> )s n T
Example: Font attributes
Let’s put the last half dozen font attributes together in an example. Say we
want to select a nice font- a small Line Printer- for the footnotes in a report
we’ve finished. Let’s make it our secondary font, since the body of our report
is done in the primary font.
We’ll go with the defaults for orientation and symbol set. But let’s be specific
about the other attributes, and let’s remember to put them in priority order.
We decide on a monospaced of 16.66 characters per inch and a height of just
seven points (footnotes should look smaller than our regular text). To keep
it readable, we opt for the ordinary upright style and medium weight in the
Line Printer typeface. Our sequence of individual commands would look like
this:
<ES0 )s OP
<ES0 )s 16.668
<ESC> )s 7V
<Esc> )s OS
<ESC> )s OB
<ESC> )s OT
Since these font attributes all start with the same )s command-category
prefix, let’s put them all together in one command:
<ES0 )s Op 16.66h 7v OS Ob OT
The BASIC statement we could send to select our desired font would look
like this:
77
Page 86
100 LPRINT CHR$(27);“)sOp16.66h7vOsObOTn
And assuming we have such a font in our printer, ve’d get a
font that looks like this sentence for our footnotes.
Underline
Underlining is printing feature, not a font attribute.
You can underline in two ways: as a print feature, or with the _ underline
character. If you backspace and use the underline character, however, you
often find the underline doesn’t come out the same length as your text.
The underline command works better. When you turn on the underline
feature this way, the printer will underline all subsequent printable characters, including spaces.
Send this command to turn on the underlining mode:
<ESC> &d n D
in which for n you put
0 (zero) to get fixed underline,
or 3 to get floating underline.
And send this command to turn off the underline mode:
.&SC> &d @
How to print Escape sequences and control codes
You use both Escape sequences and control codes to print. So how do you
print Escape sequences and control codes?
But you actually can print commands, and in two different ways. You would
do this when you want to see everything exactly as it is sent to the printerfor example, to debug a string of text and commands that doesn’t print the
way you think it should.
The Transparent print command prints the string of data that follows it
without paying attention to any embedded Escape sequences or control
codes. Transparent print even prints Carriage Return codes without zapping
the print position back to the left margin.
To use Transparent print, just put this command immediately in front of your
print data:
76
Page 87
i
L
<ESC>&pnX
For n you specify the number of bytes of data you want to print.
Display Functions, like the Transparent print command, prints Escape sequences and control codes without actually executing them. But Display
Functions pays attention to Carriage Return codes, so text looks more like the
way it normally prints. Display Functions also prints commands as blanks,
not as symbols.
L
L --
L
L
L
-.
L.
Display Functions actually involves two Escape sequences, one to turn it on
and another to turn it off. To turn on Display Functions, send this command
just before the data you want displayed:
<ES0 Y
And to turn off Display Functions, send this command at the end of the
displayed print data:
CESCP z
That Escape Z sequence itself prints as a blank followed by a Z.
Font control
The Font Control command has two main functions: defining a font’s status,
and deleting fonts.
You can make a font either permanent or temporary with the Font Control
command. Thishelps you control which fonts you delete, as permanent fonts
do not get deleted when you reset the system. The permanent or temporary
status you give to a font will apply only to the font you last specified, using
one of the font ID commands described above.
.-
When your printer’s memory gets stuffed with fonts, you can also use this
command to delete some of them. You can only delete fonts you’ve
downloaded, as internal and cartridge fonts are never deleted. No text will get
lost when you delete a font, even when that font is on an unprinted page in
the printer’s memory.
_-
To control fonts you send this command:
cESC>*cnF
For n enter one of the numbers from this table of functions:
79
Page 88
FUNCTION
n
Delete all temporary and permanent fonts 0 (zero)
Delete all temporary fonts (another way to delete
1 (one>
all temporary fonts is to send a reset command)
Delete just the font with the most recently specified ID 2
Delete just the last character of the font you have 3
downloaded
Make the current font ID temporary
4
Make the current font ID permanent 5
Make a temporary copy of the current font 6
A bit of explanation about that last function 6: When you give a font ID to
any font you first need a temporary copy of that font in memory. That copy
is already there for downloaded fonts. But you will need function 6 to create
a temporary copy of an internal or cartridge font.
Here’s how to assign ID numbers to an internal or cartridge font. You first
select the font, then send the Font ID command to give it an ID number, and
finally copy the font into memory with Font Control function 6. If you want
that copy to stay in RAM when you reset the printer, you conclude by sending
Font Control function 5.
Example: Con trolling fonts
Let’s see how those last few commands work, translated into BASIC.
Pretend you want to make a short test with your current font (it doesn’t matter
what it is): you wanttoprint what’sinASCI1 table positions 128through 130.
There’s nothing there in your normal Roman-8 symbol set, but some other
sets keep control codes or international characters there.
Assuming you like what you see printed from those ASCII positions, you
then want to make that current font permanent. Finally, you also want to
dump all the temporary fonts from printer memory to make room for some
graphics you’ll be printing.
Let’s start with a reset and an underlined heading for your test print:
100 LPRINT CHR$(27);"E";
110 LPRINT CHR$(27);"&dOD";
120 LPRINT "Underlined heading for test print
Line 100 is just the <ESO E reset command. Lines 110 and 130 turn on and
off the underline feature.
Line 140 turns on transparent printing, which forces printing even for
normally unprintable control codes. The three bytes you want to print are in
line 150. To see what’s there, you send a form feed command in line 160.
And finally, line 170uses the font control command to make the current font
--.
permanent and then delete all temporary fonts.
_
Example: Assigning font numbers
Now let’s do a program in BASIC. First we’ll assign font numbers to the
Courier and Line Printer resident fonts and to a cartridge font, IBM PC
Courier. Then we’ll print samples of each font.
Line 100 and 110 calls the internal Courier font and line 120 makes it the
primary font. Line 130 gives it font ID number 1, and line 140 makes it
~mporary.
Lines 150 through 190 do the same thing for the Line Printer font, and lines
200 through 240 for the cartridge font. Notice that the cartridge font has the
IBM symbol set code 1OU.
Lines 250 through 300 print out samples of the three fonts. Finally, line 3 10
resets the default to our internal Courier font, and line 320 performs the final
form feed to print the page.
USING YOUR OWN FONTS
Font design is tedious
A warning: font design is an an. Don’t expect to turn out professionallooking fonts in a few hours.
Sometimes, though, you have to build your own typeface, even if you don’t
work with a company in the font-selling business. You may, for example,
want to print your own customized company logo. It means building up
characters within a cell or grid, perhaps 50 dots high and 35 wide- lots of
dots.
Because defining yourowntypeface is so tedious, make sure you’ve checked
out as many downloadable fonts as you can find from font development
companies.
The next handiest way to do the job is to ask around, maybe where you bought
your LaserPrinter 8111, to see if you can get one of the font-creating or fontediting utility programs now on the market. FonGenIV+ is one. Keep an eye
out, too, for new word processing tools that might save you the trouble of
painstakingly figuring out details like kerning.
Even with aids like these, building a custom font is an intricate process. It
calls for the creation of a family of up to 200 characters sharing a common
design and proportional scheme, and that’s just for one type size. No mean
feat.
82
-
Page 91
. . .
-
L
L
i. -
--
i
How to download your own fonts
Characters that you define and store yourself are called “user-defined”
characters. Let’s assume you already know what text is to be in your custom
font, and have designed its typeface, weight, width and style. Once you’ve
created your own characters, you’ll need to download them to your laser
printer.
The process of downloading a font you’ve designed yourself is somewhat
detailed. To download your font, you follow the following steps:
1)
2)
3)
4)
3
1) Assigning a font ID to your font
To assign an ID to your font, you send this command (described above under
“Assigning font ID numbers”) with an ID number for n between 0 and 32767:
assign a font ID number to your font,
download a font header,
identify the position of each character to be downloaded,
send a character descriptor and bit map for each character,
specify whether the file is to be permanent or temporary.
L.
i
-
L
<ESC> *c it D
Before sending that command though, check whether the ID number is
already allocated to another font. If it is, that existing font will be deleted with
the next command.
2) Downloading a header for your font
Even if the printer doesn’t have enough memory to create your font, it will
delete any existing font with the same ID number when you download the
header for your font.
A font’s header is the list of its attributes, which your printer uses to select
that font. Each font header, 26 bytes long, is stored at the front of the font.
You send a font header command to your printer just before you download
the font’s characters.
The header command looks like this:
<ES0 )s n W
and must be followed immediately by the data describing the font’s at-
tributes. The n value is the actual number of bytes of description data, almost
always 26. Note: unlike other LaserJet III commands, you must enter the
ASCII symbols 2 and 6 here, not the number 26.
Aside from the actual command at the front, the test looks like gobbledygook? But there’s 26 bytes there, each one an ASCII character, each one
specifying a particular font attribute. (The enclosed items with brackets are
single ASCII characters that happen to be control codes.)
Each byte in the header is a number, which you send as whatever symbol
happens to be stored at that numeric position in the ASCII table. Coding some
of these numbers is tricky, however, and we recommend you ask your Star
Micronics dealer to help you build your font header. To get you started, the
table below shows what each of those bytes means:
BYTE MEANING
o-1
header length
2 blank
3
4-5
6-7
8
9
10
11
font size
blank
baseline position for characters
blank
cell width
blank
cell height
12 orientation
13
spacing
14-15 symbol set
16-17 pitch
18-19 line spacing
20-22 blank
23
style
24 stroke weight
25
typeface
3) Positioning each character in your font
Before you download each character you have to tell the printer where in its
font table to put it. You indicate where by sending this command:
<ESC> *c n E
Fo; n you put the decimal number, between 0 and 255, of the position in the
font table where you want your character stored.
84
Page 93
__
Your printer’s font table is just like the ASCII table. Before you send each
character, say g , you have to say where you want to put it. In the ASCII table,
g is at decimal position 103. So you send this command:
<ES0 *c 103 E
And immediately after it you send the bits that make up the character g.
-
4) Describing each character in your font
The next step is to describe each of your characters, “mapping” where you
want each dot to go. Send this command before each character:
- .For n you enter the number of bytes you’ll be sending after this command,
to describe and map your character. Sixteen bytes am needed for the
description; the bit-map takes as many bytes as you’ve put into each
character cell- perhaps two or three hundred bytes.
As with the font header, each byte in the character description is a number,
sent as the symbol at that position in the ASCII table. Coding character
descriptions is tricky too, so again we recommend you ask your Star
Micronics dealer for help. The table below shows what the bytes in the
character description mean:
-“~ 3
-.-
-
<Esc> (s n w
BYTE MEANING
0
1
description length
blank
2 always 14
always 1
4 orientation
5
6-7
8-9
blank
left offset (blank space to left of character)
top offset (blank space above character)
10-l 1 character width
12- 13 - character height
14-15 print position travel (proportional spacing only)
--
-.
The bit map of the character is just the pattern of dots in the character, starting
at the top left of its cell. You work your way across the cell and down to the
bottom right, giving each dot a value of 0 if it’s not to be printed and 1 if it
is. Then you group those dots as 8-bit bytes.
85
Page 94
5) Permanent or temporary?
The last step in downloading your own font is to make the font permanent or
temporary, using the Font Control command described earlier. The command &SC> *c 4 F will allow the font to be erased when you reset the
printer. But the command <ESC>*c 5 F will keep your font available even
after you reset the printer.
RASTER GRAPHICS
The Star LaserPrinter 8111 offers raster graphics (sometimes called “bitmapped graphics”), which specify each dot in a graphics pattern.
Be aware, though, that adding graphic elements always slows up printing
with laser printers.
Starting raster graphics
You follow these four steps when you use raster graphics, in the order shown:
1)
2)
3)
4)
You must define the resolution of your raster graphics before you use the
Start Raster Graphics command. To define the resolution you need in your
graphics, send this command:
Define what resolution you need.
Issue the command to start graphics.
Send the commands to transfer raster graphics.
Send the command to end graphics.
<ES0 *t n R
If the value of n is greater than 150, the resolution of the final graphics image
will be 300 dots per inch (dpi); if n is from 101 to 150, the resolution will be
150 dpi; if n is from 76 to 100, the resolution will be 100 dpi; and if n is 75
or less, the resolution will be 75 dpi. The default resolution is 75 dots per inch.
After graphics have started, the printer will ignore any resolution command
until it receives the command to end graphics.
Raster graphics start printing either at the left page edge or the current print
position. To start raster graphics you send this command:
<ESC> *r n A
You can put in either 0 (zero) or 1 (one) for the n value. If you enter 0, the
margin for graphics will be set at the left most printable edge of the page (not
86
Page 95
the same as the left margin for text). But if you enter 1, the margin for graphics
will be set at the column of the current print position, and your image will
appear only to the right of that graphics margin.
A programming hint: move your print position in dot increments whenever
-..~
you’re dealing with graphics. It’s easier than trying to calculate columnwidths or decipoints.
. .._
The Raster Height command specifies the height in pixels of the next raster
graphic (between the start graphics and stop graphics commands).
-.
<ESC>*r n T
h._
The value of n must be non-negative; if necessary, it is truncated to the value
of (logical page length) - (y coordinate of cursor). This command causes all
. . .
raster rows after the specified height to be clipped (disregarded), even if n =
0. It forced the cursor position to advance vertically by n TOWS, even if less
-._
than n rows are transferred. The area maps to either opaque or transparent
depending on the source transparency mode.
-.
.-
The Raster Width command specifies the width in pixels of the next raster
graphic.
<ESC>*r n S
*_.
The value of n must be non-negative; if necessary it is truncated to the value
of (logical page width) - ( x coordinate of cursor). It will clip all raster rows
longer than the specified width, even if n = 0. It will pad any row shorter than
the specified width with zeros. The area maps to either opaque or transparent
depending on the source transparency mode.
The default value is the width or length of the logical page, depending on the
orientation. The command is ignored when received between start and end
raster graphics commands or if n is negative.
The Raster Y Offset command advances the vertical position and is ignored
-_
when not in the raster mode.
<ESC>*b n Y
If n is negative or if the new position would exceed the current raster height
. .
or the page limit, it is ignored.
The Set Compression Mode command selects the compression mode used
for downloading raster data until the mode is changed or the printer is reset
87
Page 96
and is ignored when received between start and end raster graphics commands.
<ESC>*b n M
Set n to 0 for the unencoded compression mode (the default value), 1 for the
run-length encoding compression mode, 2 for the tagged image file format,
and 3 for the delta row compression mode.
In the unencoded compression mode, each bit is interpreted as a single dot,
with the first dot in the row, the most significant bit of the first byte.
Run-length encoded data must be received in byte pairs; the first byte if the
repetition count and the second byte is the pattern used [repetition count] +
1 times. In this mode, a row with an odd number of bytes if ignored but the
cursor advances to the next row.
The tagged image file format (TIFF) compression mode is combination of
these two. Data is received in byte “runs”. If the first byte of a run is negative,
-n, withO<n<128,thentherunhasonlytwobytesandthesecondbyteisused
n-t1 times. If the first byte is ~128, the run consists of the following [first
byte]+1 bytes and these am interpreted in the unencoded compression mode.
If the first byte is 128, the command is ignored.
In the delta row compression mode, a row is described by its difference from
the current “seed row”. The initial seed row is set to all zeros by the start raster
graphics command. Once a new tow has been built, it becomes the seed row;
the second row is rest to all zeros by advancing the raster vertical position.
The difference from the seed row is described by a command byte with the
first 3 bits specifying the number of bytes (up to 8) to be replaced and the
other 5 bits specifying the offset from the last untreated byte, with optional
additional offset bytes if the previous offset had the maximum value, up to
8 replacement bytes.
-
--
Sending and ending raster graphics
Graphics printing is independent of text margin boundaries, including the
perforation skip region. It is only limited by the printable area and the page
length.
To transfer raster graphics you send this command at the beginning of each
line of raster data:
<ESC> *b n W
88
Page 97
i L
i
For n you enter the number of bytes of graphics data to follow on this line.
The data must follow immediately after the W in this command.
Data bytes are interpreted as one line of raster graphics data (one data row).
Each byte is made up of eight bits. The bits of raster graphics data (l’s and
O’s) you send to the printer describe single dots to be printed: a 1 indicates
you want a dot printed, and a 0 indicates you do not want a dot printed.
Use the following command to end raster graphics:
L
<ES0 *r B
After ending graphics you can then send text to merge with it.
PATTERN GRAPHICS
The Star LaserPrinter 8111 also printspattern graphics, which prints lines and
patterned blocks.
Print shops call lines of any thickness rules. A printed line in fact is a
L
I
L
i
rectangular area with one “skinny” dimension, from one to many dots thick
We will use the word “rules” too, to avoid confusion with the lines used to
measure pages.
You follow these three steps when you use rule and pattern graphics:
1) Define the dimensions you need.
2) Choose the graphics pattern you want to fill in those dimensions.
3) Print the pattern.
Remember to send the following rule or pattern commands in
that order.
Defhing rule or pattern dimensions
Defining the dimensions of the area you want to fill just means indicating the
i
L
L..
L
L
horizontal and vertical size of the pattern, or the rule’s length and thickness.
You can indicate dimensions in either dots or decipoints (tenths of a point).
At 300 dots or 720 decipoints to the inch, decipoint measurements am more
accurate. The printer converts decipoint values into dots, using 2.4 decipoints to the dot. It rounds up fractions to the next integer. So 1225
decipoints would work out to 510.4 dots, and the printer rounds this up to 5 11
dots.
89
Page 98
Your dimension commands specify an area to the right and down from the
current print position. If you define an area larger than the page, your printer
will accept the command. It will, however, cut off your pattern or rule at the
boundaries of the page’s printable area.
When the printer finishes its print “map” of your rule or pattern, the print
position automatically returns to the spot from which you started. That
means, for instance, that you can make a lightly shaded rectangle and then
start printing text right over it. This kind of box can be useful for setting off
particular information from the main body of your text.
Horizontally, you can specify the rule length or horizontal pattern size in dots
with this command:
<ES0 *c n A
in which for n you enter how many dots across the page you want the rule or
pattern to be.
Alternatively, to specify the horizontal dimension for a rule or pattern in
decipoints, you can print this command:
<ESC> *c n H
in which n is the horizontal rule or pattern size in decipoints.
Vertically, you can indicate the size of your rule or pattern in dots with this
command:
<ESC> *c n B
in which n is the number of dots defining the thickness of the rule or the depth
of the pattern
Alternatively, to show the vertical dimension in decipoints, you send this
command:
<ESC> *c n V
in which n is the number of decipoints in the rule’s thickness or the pattern’s
vertical length.
Choosing and printing a rule or pattern
You need both of the next five commands to choose and print the particular
pattern you want to fill your defined area. These commands work together.
With the Print Pattern command (which actually comes second) you specify
90
Page 99
c
i
i’
,I,
:
:..,
:
-
-
whether you want to fill your rectangular area with a solid black rule, a finely
dotted gray-scale pattern, or apredefined linear pattern. And with the Specify
Pattern command you can indicate which particular dotted or linear pattern
you want. You always send the Specify Pattern command before the Print
Pattern command, even if you want a solid black rule.
To indicate the particular pattern you want, send the following command.
The general meaning of the n value you enter actually depends on the
command you put after this:
<ES0 *c n G
I.
-
-
If you want a solid black rule it doesn’t matter what you put in for n, as the
printer ignores it.
If you want a l-scale dotted pattern, for n you enter here a percentage number
from 1 to 100 indicating the density with which you want the box filled, from
light to solid. Your n percentage will correspond to one of the eight gray-
scale densities in the chart below.
l- 2%
3 - 10%
I-I trl
-__
..-
-.-
-..
-_.
11 - 20 % 21 - 35 %
36 - 55 %
56 - 80 Yo
-_
-^.
I.
_.
81 - 99 O/,
100 %
91
Page 100
If you want a linear pattern, for n you enter here a pattern number between
1 and 6 inclusive, identifying one of the linear patterns below.
#6
You always send the following Print Pattern command after a Specify
Pattern command. This Print Pattern command identifies whether the area
you have defined is to be filled with a rule, dotted gray-scale pattern, or linear
pattern:
,<ESC>*cnP
For n enter a value from the following table. (If you select a linear pattern
here, but a dotted pattern in the previous Specify Pattern command, the
printer will ignore this Print Pattern command.)
n VALUE PATTERN
0 (zero)
1
solid black
solid (opaque) white
2 shaded fill (as selected with cESC>*c n G)
3 cross-hatched fill (as selected with <ESC>*c n G)
5 current pattern fill (as selected with <ESC>*v n T)
92
Loading...
+ hidden pages
You need points to download manuals.
1 point = 1 manual.
You can buy points or you can get point for every manual you upload.


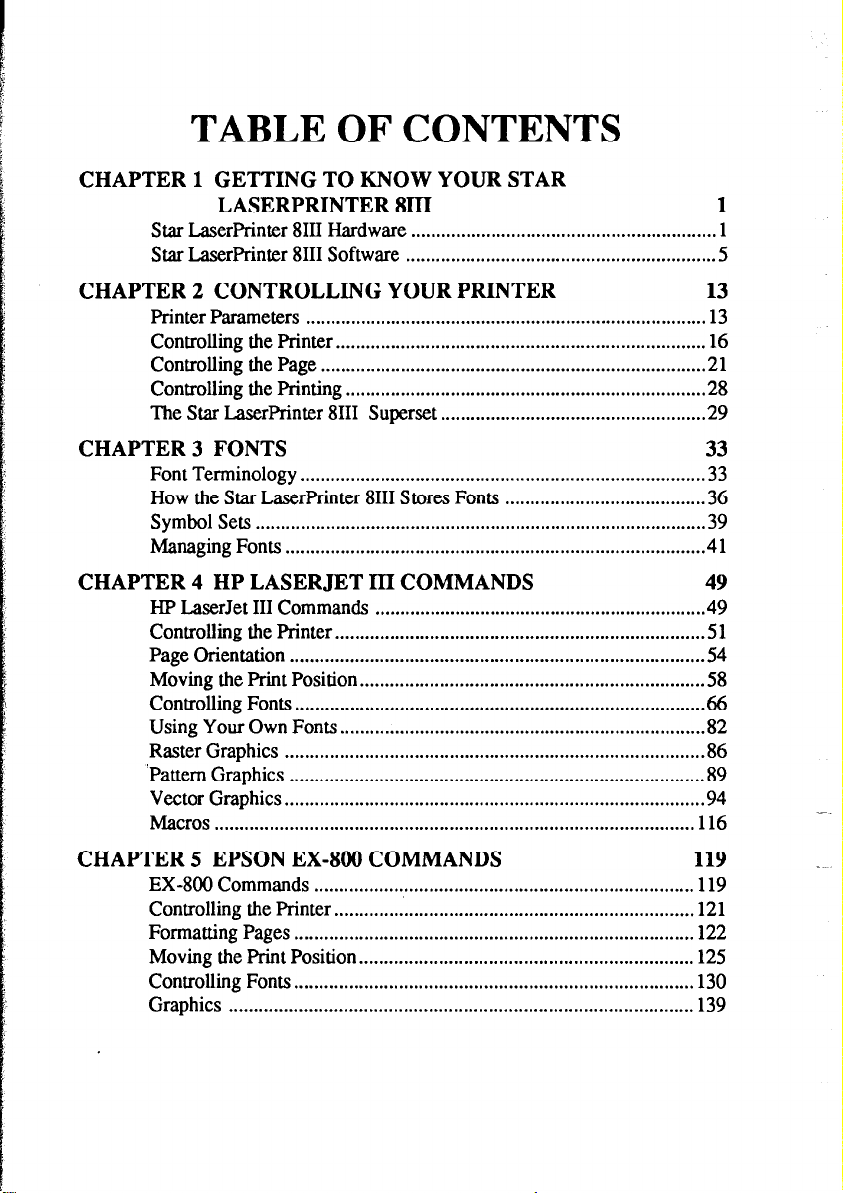


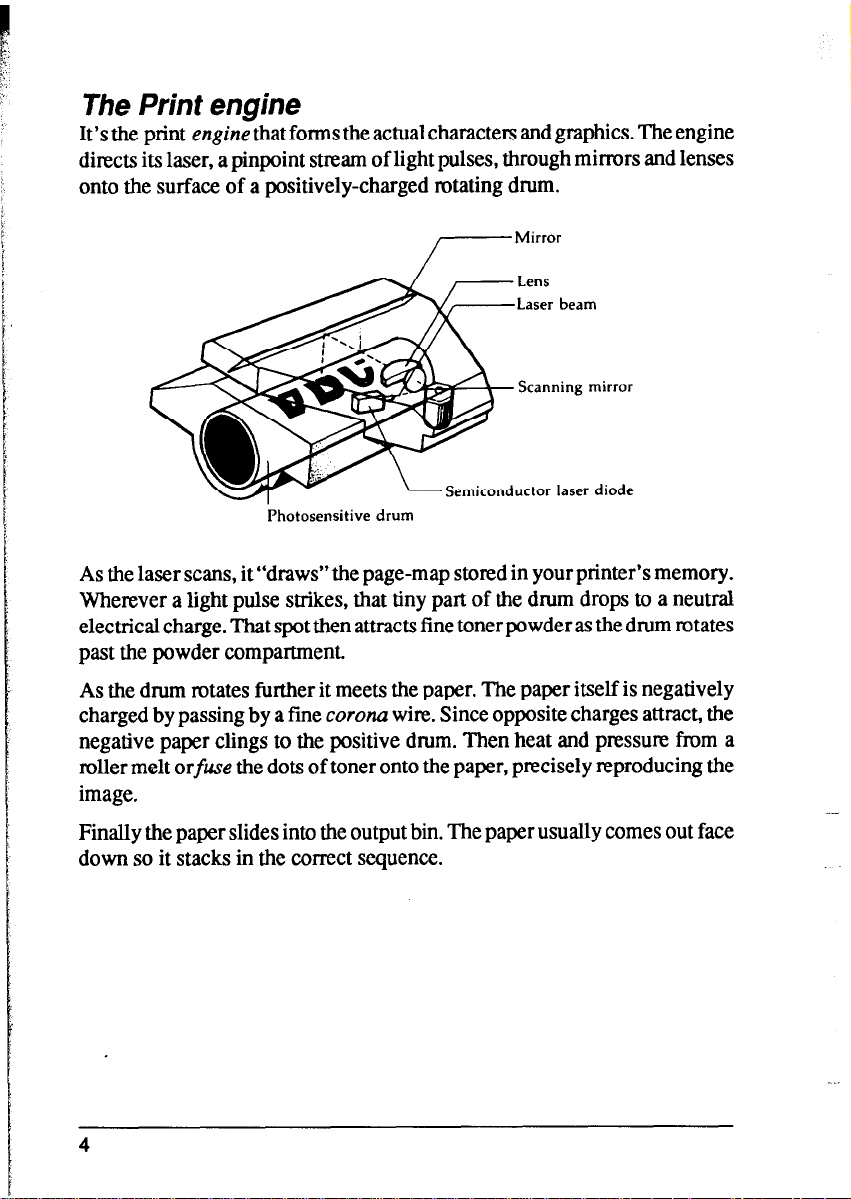
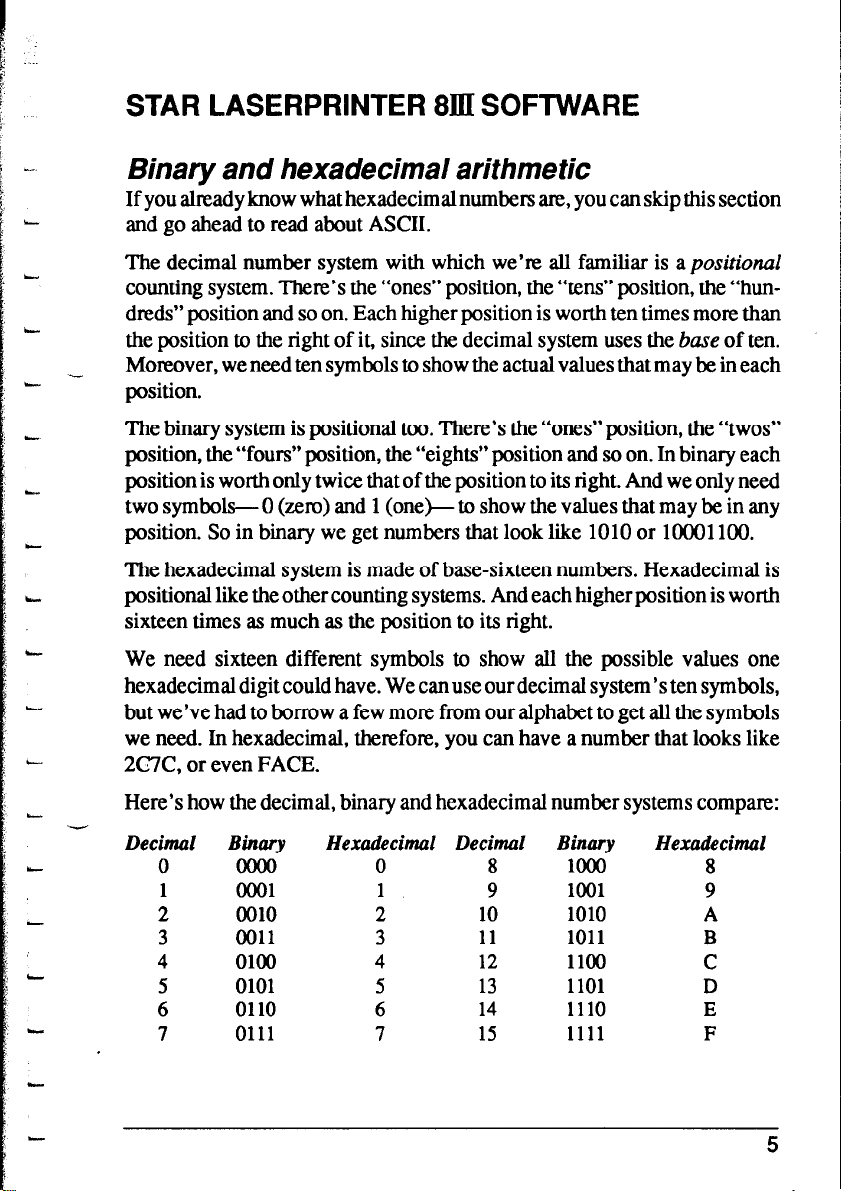
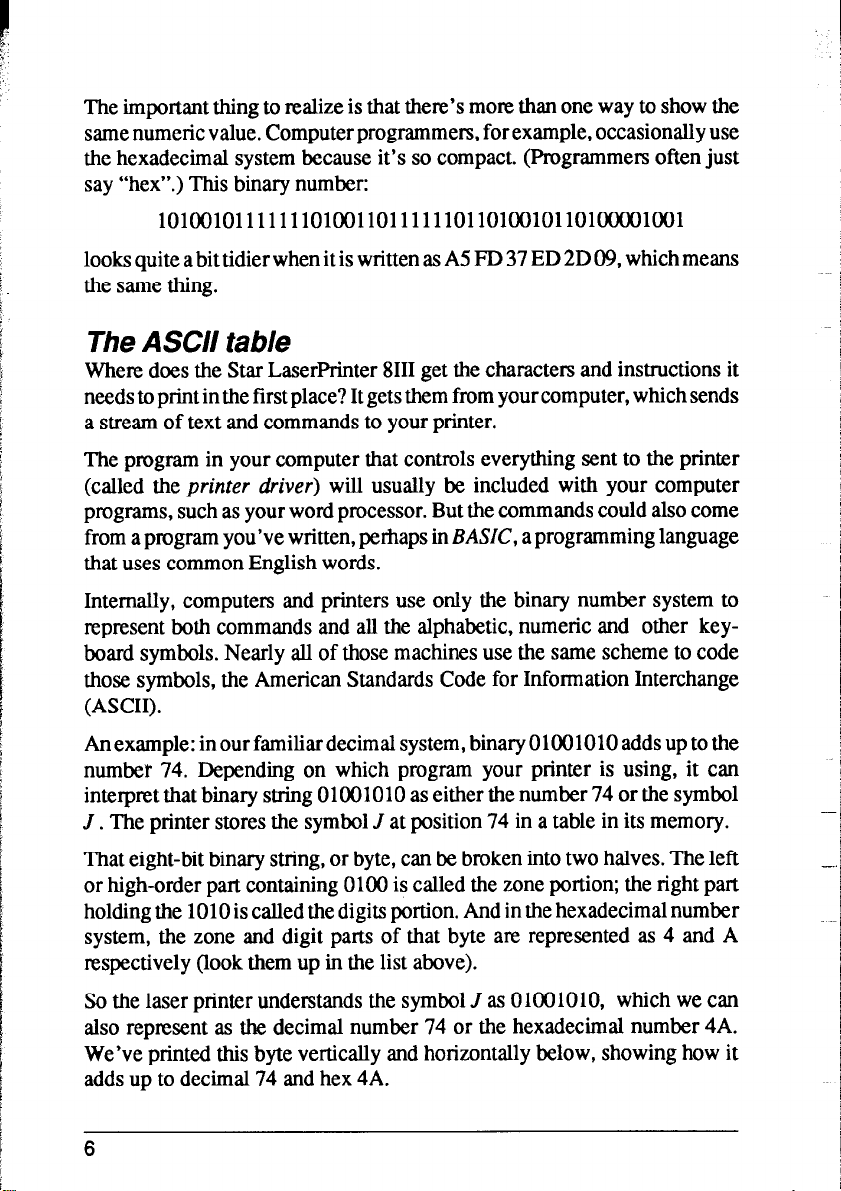
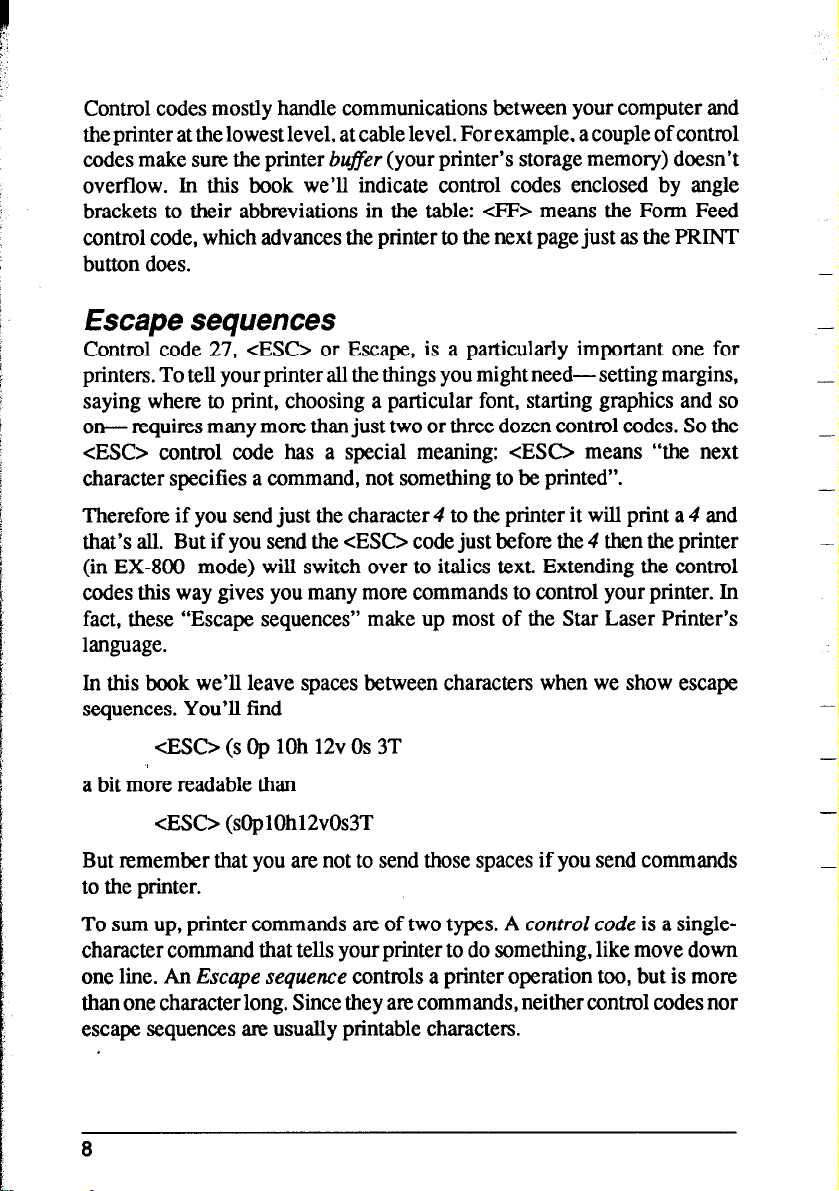
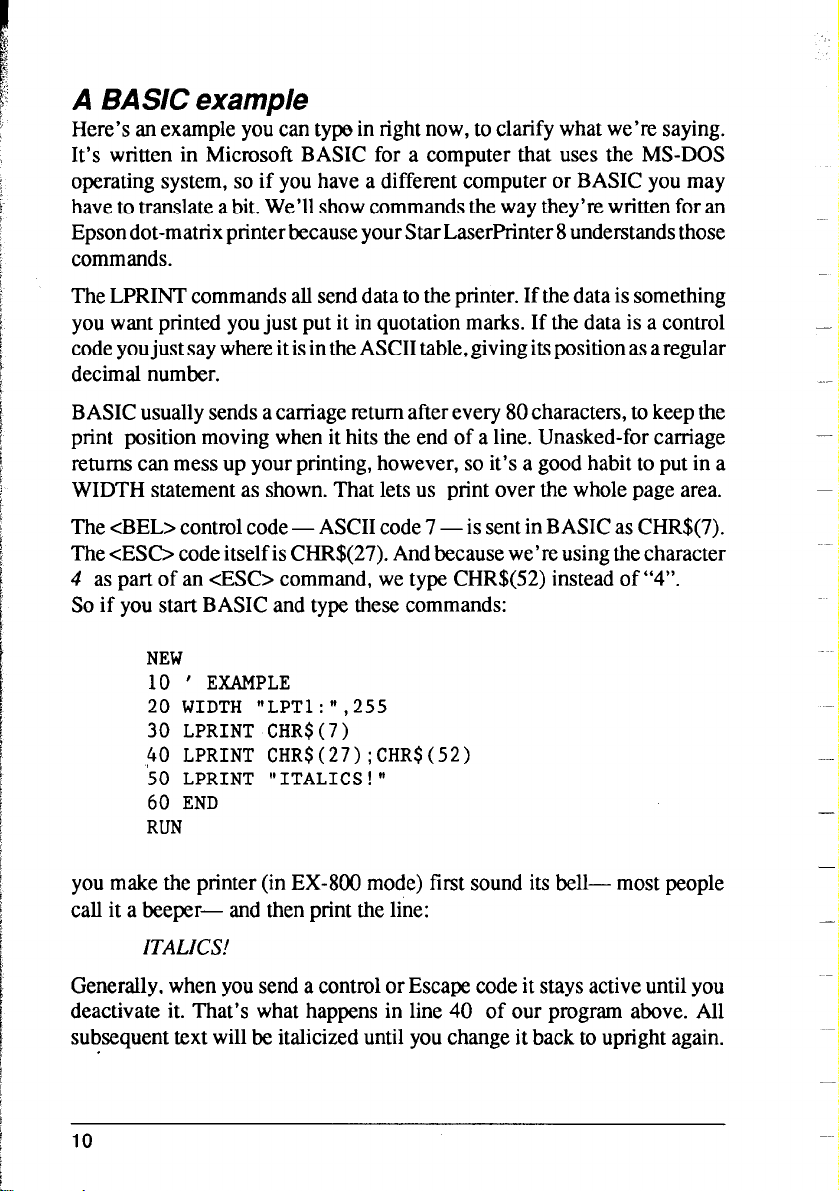
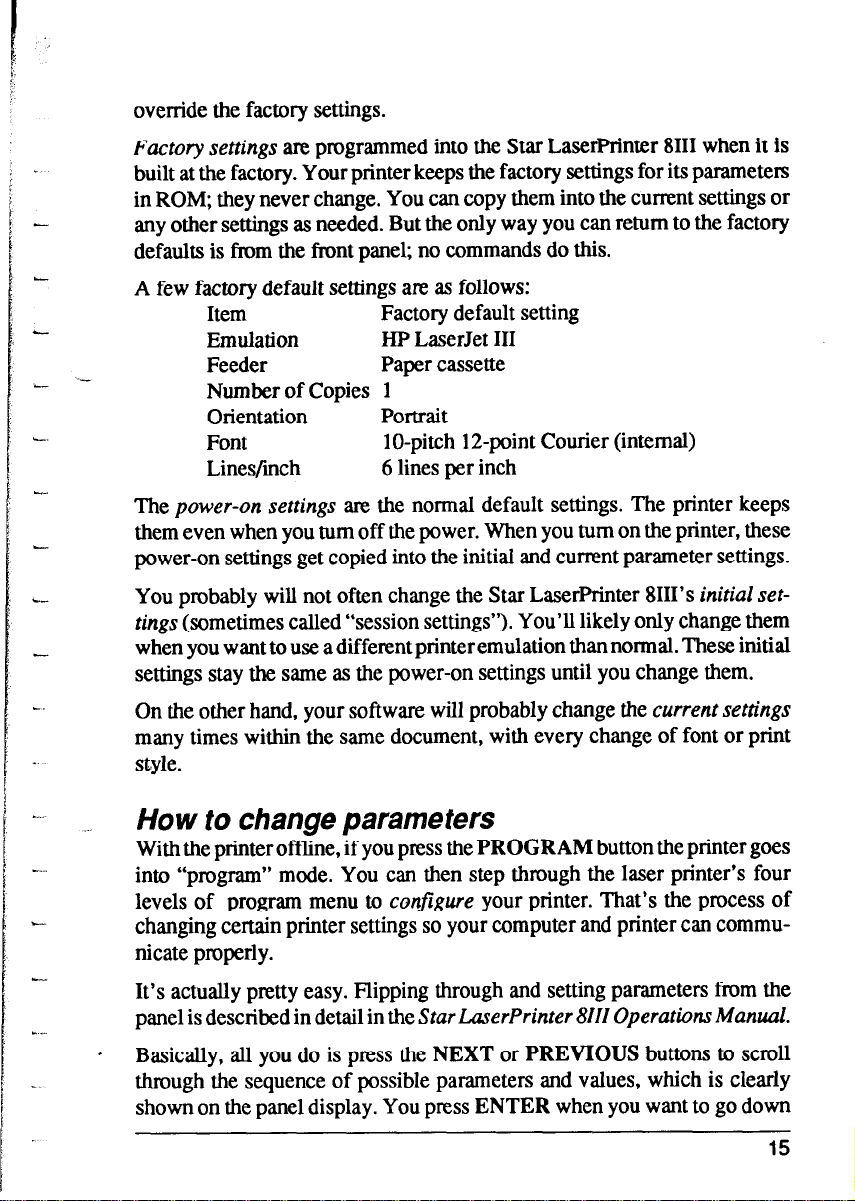


 Loading...