

Star
Manufacturing
International Inc.
10 Sunnen Dr.
St. Louis, MO 63143
Phone: (314) 781-2777
FAX: (314) 781-3636
2M-Z2153 Rev. A 8/24/99
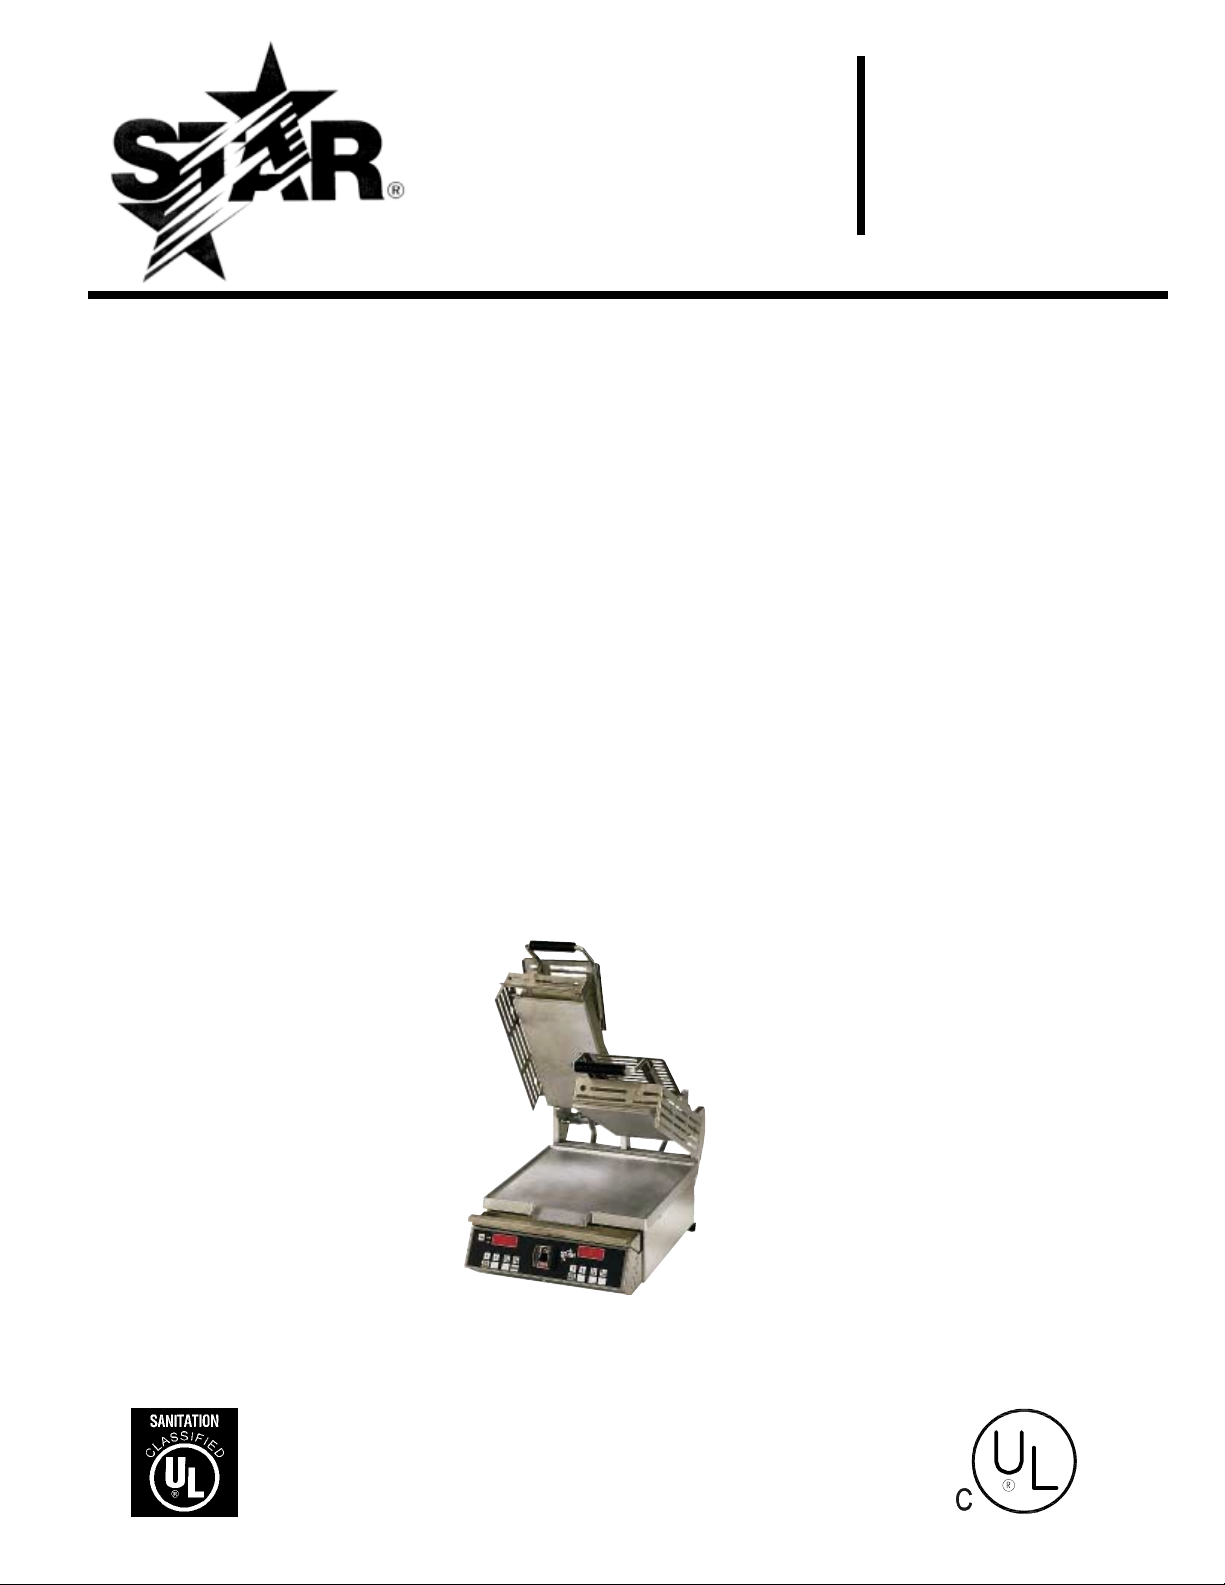
SPLIT LID TABLE
TOP CLAM
SHELL TOASTER
Installation and
Operating
Instructions
MODEL
GR138TB2 120V

GENERAL INSTALLATION DATA
CAUTION
OPERATING INSTRUCTIONS
Make sure unit is plugged into 20AMP
receptacle and is on a dedicated 120V
A.C. line.
This equipment is designed and sold for
commercial use only by personnel
trained and experienced in its operation
and is not sold for consumer use in and
around the home nor for use directly by
the general public in food service
locations.
INSTALLATION
1. Plug unit into dedicated 120V A.C.
line with 20AMP receptacle.
2, DO NOT plug into 220V line. Doing
so will ruin the unit and void
the warranty.
3. Each machine has been properly
wired and inspected at the
factory for operation on the
voltage and type of current specified on
the nameplate.
CAUTION
DO NOT CONNECT TO ANY OTHER
TYPE OF CURRENT OR THE
MACHINE WILL BE SERIOUSLY
DAMAGED.
4. Level the unit using the adjustable
feet in front of the unit
(approximately 1/2" adjustment).
5. Place grease catcher cup under spout.
6. DO NOT operate without top burn
guard in place.
1. Turn unit on by placing switch in "ON"
position. The "Heat On" light,
program number and display will flash
indicating unit is heating. When the
preset temperature isreached, the
heating light, display and program
light indicator will stop flashing
followed by 3 beeps. (Initial startup
heating time is approximately 30
minutes)
2. Place product on the bottom cooking
surface of the unit and close the lids.
3. Press program button and let
displayed time count down to "0" at
which time unit will beep. To turn off
the beeper, press program button
again.
4. Raise lids until it engages into first
detent and remove food. Using
spatula, scrape residue into grease
catcher cup.
Note: Metal utensils may be used,
however, using nonmetal utensils will
prolong the life of the cooking surface.
5. Turn the unit off when not in use.
DO NOT ADJUST TIME AND
TEMPERATURE
The unit time and temperature is preset
by the factory to the specific customer
requirements for flatbread and
quesadillas. If adjustments are required
for additional food products, please refer
to the time or temperature programming
section in this manual.
INITIAL STARTUP
Before using the unit for the first time,
clean and heat for approximately 30
minutes.
TEMPERATURE/TIMER
CONTROLLER OPERATION
SPECIFICATIONS
Startup:
1. The preset time will flash until preset
temperature is reached.
2. When the control reaches preset
temperature, time display, heat on
indicator and program indicator will stop
flashing and the alarm will beep three
1
times.

Temperature:
1. To view the actual temperature, press
and hold "Temp Button". Display will
read "Lo F" if temperature is below
273°F and "Hi F" if temperature is
above 573°F.
To Program Time and Temperature:
1. Press and hold "Temp" (actual
temperaturedisplays).
2. While holding "TEMP", press and hold
any program button on the Left PC
board for 1 second, the LED above
program lights and display reads
"_ _ _ _". Enter the four - digit
security code sequence, 4, 3, 2, 1.
Starting with the first digit, the center
horizontal bar will light on each digit
as the security code is entered. The
security code will not show on
display. Once the correct sequence
has been entered, the preset time will
be displayed and the LED for that
program will begin to flash.
3. Set the time with the "+ or -" buttons.
4. Press the "TEMP" button to save the
time.
5. The preset temperature will now be
displayed.
6. Set the desired temperature for this
program using the "+ or -" buttons.
7. Press the "TEMP" button to save
temperature and to exit
programming mode for this
program.
The LED will stop to flash
but will remain lit.
8. Press any other program button
within 15 seconds to continue
programming without re-entering the
security code.
3. While programming a program (LED is
flashing), if no input is received for 15
seconds, the unit will revert to normal
operation and the security code must
be re-entered.
Note: Temperature settings are done
with the Left PC board only. The time
settings programmed on the Left PC
board will also be programmed onto the
Right PC board. See below to make
changes to the Right PC board only.
Each programming change must be
saved by pressing the "TEMP" button!
Right PC board (Timer only):
1. To Change the time on Right PC
board, press and hold the "TEMP"
button on the Left PCboard and press
and hold any program button on the
Right PC board for one second. The
LED above the program button will
light and the Right Display will read
"_ _ _ _". Enter the four-digit security
code sequence, 4, 3, 2, 1.
Starting with the first digit, the center
horizontal bar will light on each digit
as the security code is entered. The
security code will not show on
display. Once the correct sequence
has been entered, the preset time
will be displayed and the LED for that
program will begin to flash.
2. Set the time with the "+ or -" buttons.
3. Press the "TEMP" button to save the
time.
4. The LED will stop to flash but will
remain lit.
5. Press any other program button
within 15 seconds to continue
programming withoutre-entering the
security code.
6. While programming a program (LED is
flashing), if no input is received for 15
seconds, the unit will revert to normal
operation and the security code must
be re-entered.
Operation:
1. Pressing any program button (1-4) will
start the timer countdown and display
the preset time remaining. The LED
for the appropriate program will be lit
during countdown and remain lit until
another program is selected.
2. When the display reaches "00:00", the
buzzer will sound and the digits will
flash.
3. Press the program button to silence
the buzzer and return the readout to
programmed time.
4. The Right and Left boards will operate
independent of each other. Both
timers can be in operation at the same
time. The "00:00" display will show
which side is timed out.
2
 Loading...