

Star Manufacturing FS1RS-120V, FS1RS Installation Manual
FAST
STEAMER
MODEL
FS1RS-120V
Installation and
Operation
Instructions
2M-Z11318 Rev. - 12/20/2007
FS1RS
1

2
These symbols are intended to alert the user to the presence of
important operating and maintenance instructions in the manual
accompanying the appliance.
RETAIN THIS MANUAL FOR FUTURE REFERENCE
NOTICE
Using any part other than genuine Star factory supplied parts relieves the
manufacturer of all liability.
Star reserves the right to change specifi cations and product design without
notice. Such revisions do not entitle the buyer to corresponding changes,
improvements, additions or replacements for previously purchased
equipment.
Due to periodic changes in designs, methods, procedures, policies and
regulations, the specifi cations contained in this sheet are subject to change
without notice. While Star Manufacturing exercises good faith efforts to provide
information that is accurate, we are not responsible for errors or omissions
in information provided or conclusions reached as a result of using the
specifi cations. By using the information provided, the user assumes all risks in
connection with such use.
MAINTENANCE AND REPAIRS
Contact your local authorized service agent for service or required maintenance. Please record the model
number, serial number, voltage and purchase date in the area below and have it ready when you call to
ensure faster service.
SAFETY SYMBOL
Model No.
Serial No.
Voltage
Purchase Date
Business 8:00 am to 4:30 p.m. Central Standard Time
Hours:
Telephone: (800) 807-9054 Local (314) 781-2777
Fax: (800) 396-2677 Local (314) 781-2714
E-mail Parts@star-mfg.com
Service@star-mfg.com
Warranty@star-mfg.com
Website: www.star-mfg.com
The Star Service Help Desk
Authorized Service Agent
Reference the listing provided with the unit
or
for an updated listing go to:
Website: www.star-mfg.com
E-mail Service@star-mfg.com
Telephone: (800) 807-9054 Local (314) 781-2777
Mailing Address: Star Manufacturing International Inc.
10 Sunnen Drive
St. Louis, MO 63143
U.S.A
2
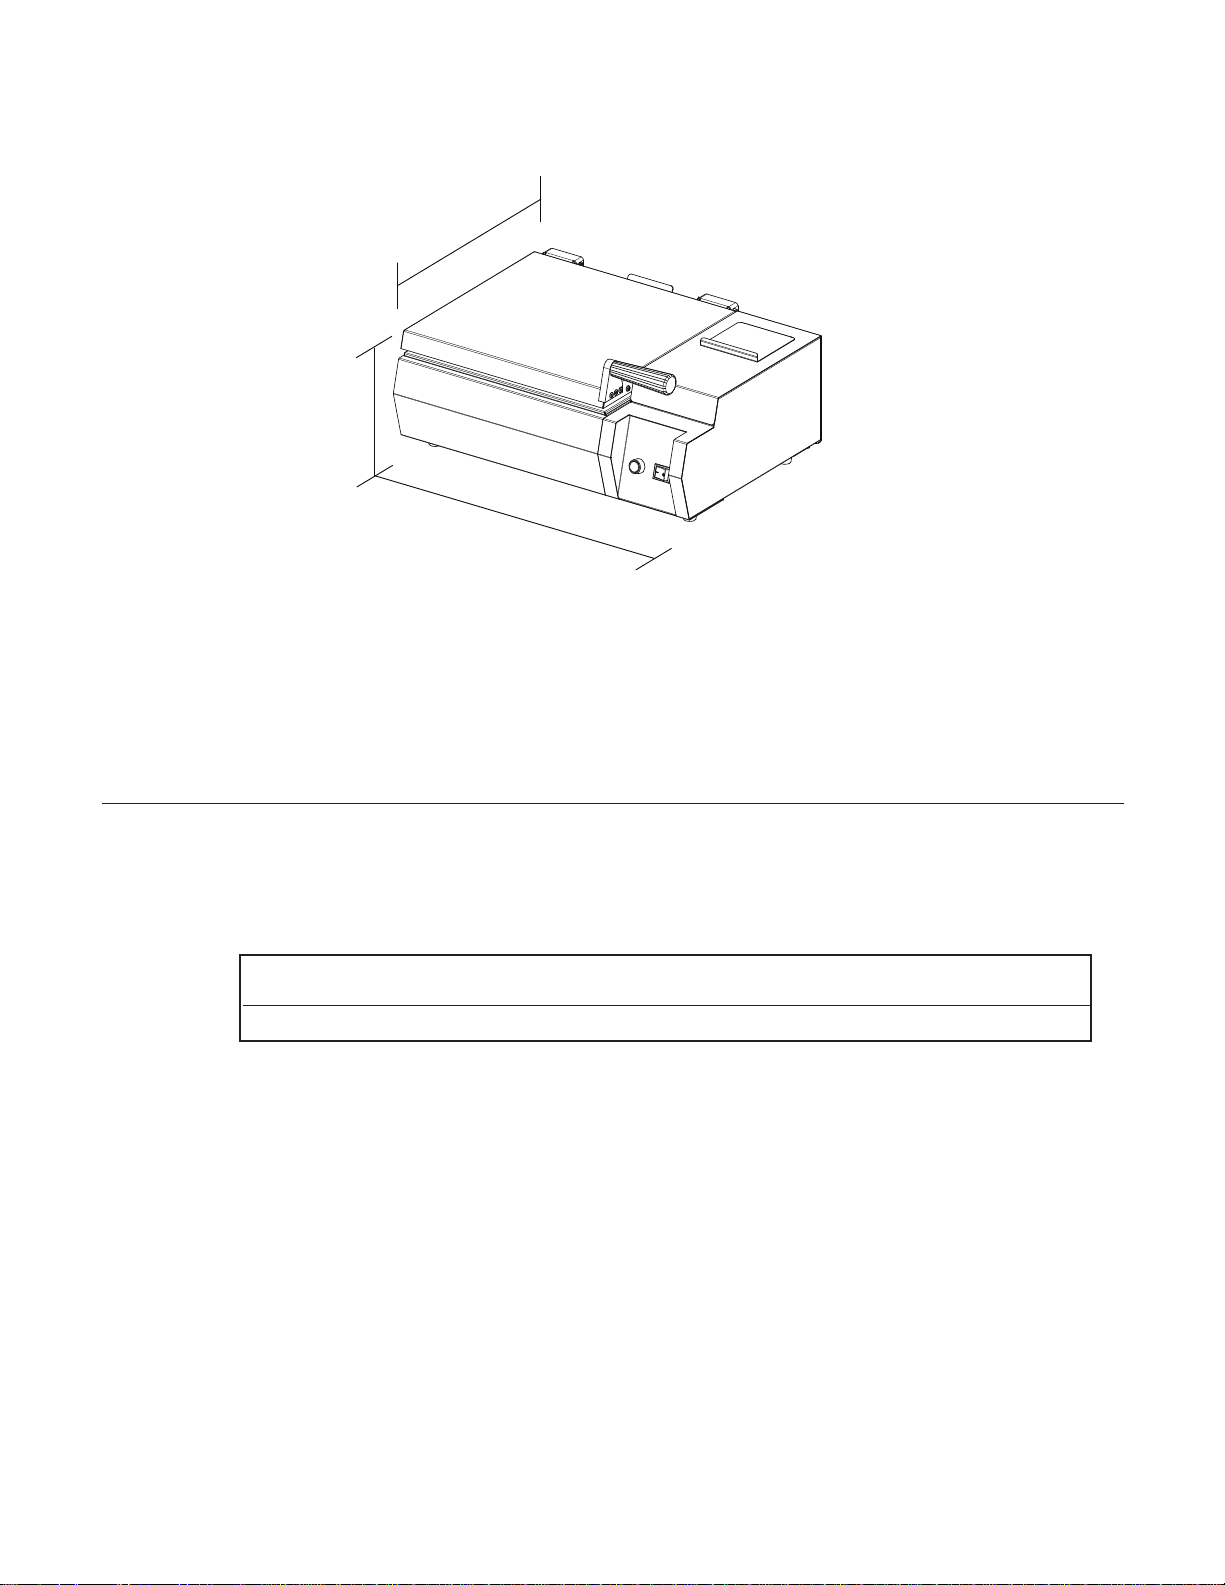
SPECIFICATIONS
A
C
B
IL1425
FAST STEAMERS SPECIFICATIONS
TOP LOADING
Model "A" Width "B" Height "C" Depth Approx. Capacity (inches) Direct (D)
No. Inches/CM Inches/CM Inches/CM Shp Weight W_x_D_x_H Reservoir (R)
Pan Size
FS1RS 18.8in / 47.8cm 10.5in / 26.7cm 17.2in / 43.7cm 48lbs / 21.8kg 1/2 R
ELECTRICAL SPECIFICATIONS
TopLoading Certication
Model No. Voltage Wattage Amps Nema Plug UL CUL
FS1RS 120V 1,800 15.0 5-15P X -
3

GENERAL INFORMATION
CAUTION
This equipment is designed and sold for commercial use only by personnel trained and
experienced in its operation and is not sold for consumer use in and around the home nor
for use directly by the general public in food service locations.
Before using your new equipment read and understand all the instructions & labels
associated with the unit prior to putting it into operation. Make sure all people associated
with its use understand the units operation & safety before they use the unit.
All shipping containers should be checked for freight damage both visible and concealed.
This unit has been tested and carefully packaged to insure delivery of your unit in perfect
condition. If equipment is received in damaged condition, either apparent or concealed, a
claim must be made with the delivering carrier.
Concealed damage or loss - if damage or loss is not apparent until after equipment is
unpacked, a request for inspection of concealed damage must be made with carrier within
15 days. Be certain to retain all contents plus external and internal packaging materials for
inspection. The carrier will make an inspection and will supply necessary claim forms.
These models are equipped for the voltage and wattage indicated on the nameplate. These
units are designed to operate on alternating current (A.C.), two wire single phase service only
and are equipped with an approved lead in cord set with a three prong grounding type plug.
DO NOT CONNECT TO DIRECT CURRENT (D.C.).
UNPACKING
Carefully remove the steamer from the shipping and packing & protective material. Remove
all removable parts and clean with hot water and mild detergent. Wipe the unit using damp
cloth. Never hose down the unit with water, this steamer has
Unit should also contain:
•
Operations manual & Authorized Service Agent Listing Packet
Purchasers Responsibility
•
To see that the electric services for the unit are installed on site in accordance with the
manufacturer's specications and municipal codes.
4

INSTALLATION
ELECTRICAL CONNECTION
For your protection, we recommend that a qualied electrician install this appliance.
The electrician should be familiar with electrical installations and your local electrical requirements.
Proper connections and power supply are essential for efcient performance. The supply circuit
should be properly fused as required by local electrical code.
WARNING
Before making any electrical connection be sure to read data plate which is located on the
rear of the unit.
Electrical Grounding Instructions
This unit is equipped with a 3-prong (grounded) plug for your protection against shock hazard
and must be plugged directly into a properly grounded 3-prong receptacle.
CAUTION
DO NOT CUT OR REMOVE THIS PLUG OR GROUNDED PRONG FROM THE PLUG.
CONNECT/PLUG UNIT INTO DEDICATED A.C. LINE ONLY SPECIFIED ON THE DATA
PLATE OF THE UNIT.
WATER SUPPLY
These units come equipped with a 12 cup water tank with tank drain and supply pump. It is
vital that all water supply lines be thoroughly ushed with clean water before being connected
to the steamer.
The Superior Fast-Steamer has a water injection system, to ensure your new equipment works at
its premium, we recommend that a water softener is used in areas where hard water is present.
Contact your local water equipment system provider to assist you in determining your specic
water
quality, or contact Superior Technical support for assistance, 1-800-807-9054.
Reservoir Water Units
1. With unit in nal position, open reservoir cover.
2. Check and make sure the reservoir is free of debris and material that may interfere
with operation.
3. Pour tap water into reservoir unit the water level is 1/4" from the top.
4. Slide door closed.
5. Check water level during daily operation and ll when needed.
PRESET TIME
If adjustments are required, please refer to the time programming section in this manual.
°F/°C CONVERSION
To change the temperature display from °F to °C or from °C to °F, hold the TEMP button
while the unit is turned off. While holding the TEMP button, turn the unit on. The display
will be the changed temperature mode. To change back, repeat the procedure.
5
 Loading...