

Starkey Hearing Rechargeable RIC Operations Manual

Rechargeable
Smartphone Compatible
and Universal Connectivity
Standard
Products
OPERATIONS MANUAL
Rechargeable RIC (Receiver-In-Canal)
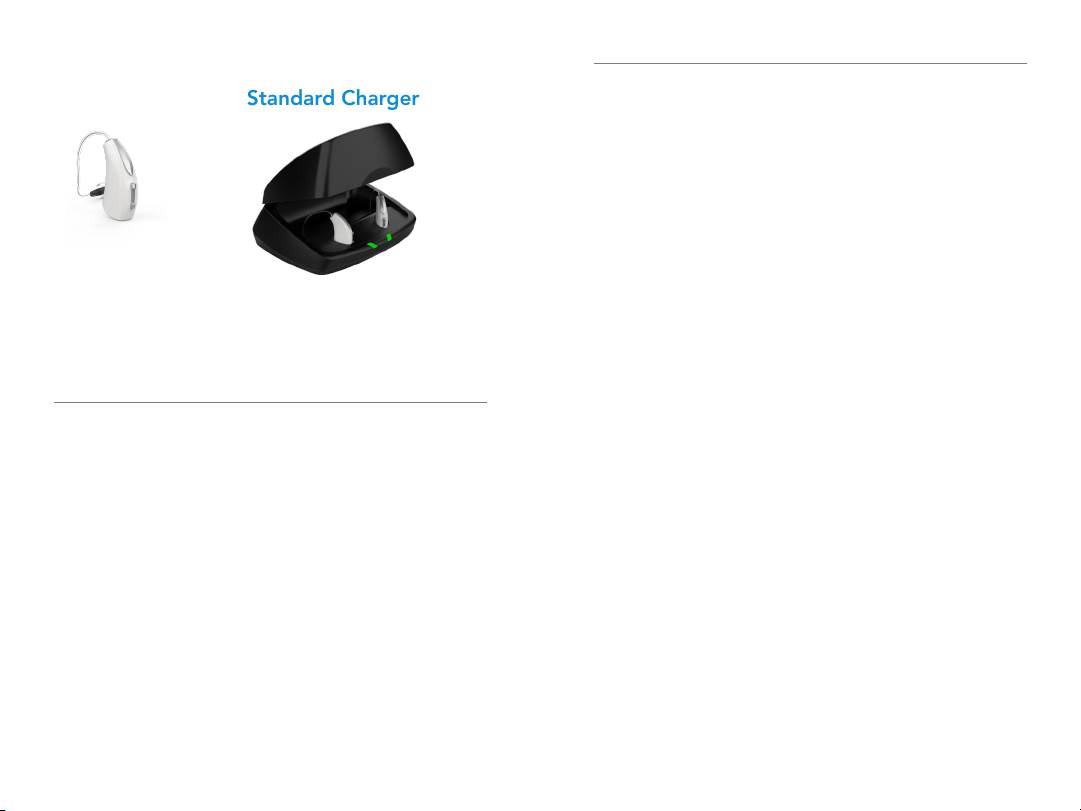
Table of Contents
Hearing Aid Standard Charger
Table of Contents
Overview
Rocker Switch RIC � � � � � � � � � � � � � � � � � � � � � � � � � � � � � � � 4
Charger � � � � � � � � � � � � � � � � � � � � � � � � � � � � � � � � � � � � � � � 6
Preparation
Charging Your Hearing Aids � � � � � � � � � � � � � � � � � � � � � � � 8
Charger On-Board Battery LEDs � � � � � � � � � � � � � � � � � � � 10
Insertion and Removal � � � � � � � � � � � � � � � � � � � � � � � � � � � �11
Operation
Power On & Off � � � � � � � � � � � � � � � � � � � � � � � � � � � � � � � � 13
Auto On/Off � � � � � � � � � � � � � � � � � � � � � � � � � � � � � � � � � � 13
Edge Mode � � � � � � � � � � � � � � � � � � � � � � � � � � � � � � � � � � � 14
User Controls � � � � � � � � � � � � � � � � � � � � � � � � � � � � � � � � � � 14
Volume Control � � � � � � � � � � � � � � � � � � � � � � � � � � � � � � � � 15
Volume Control Indicators � � � � � � � � � � � � � � � � � � � � � � � � 16
Battery Indicators � � � � � � � � � � � � � � � � � � � � � � � � � � � � � � �16
Memory Change � � � � � � � � � � � � � � � � � � � � � � � � � � � � � � � 17
Mute � � � � � � � � � � � � � � � � � � � � � � � � � � � � � � � � � � � � � � � � 17
BiCROS Balance Control � � � � � � � � � � � � � � � � � � � � � 18
Multiflex Tinnitus Level Control � � � � � � � � � � � � � � � � 18
Body and Brain Tracking � � � � � � � � � � � � � � � � � � � � � 18
Directional Settings � � � � � � � � � � � � � � � � � � � � � � � � � 18
Telephone Use � � � � � � � � � � � � � � � � � � � � � � � � � � � � � 19
CROS/BiCROS Technology � � � � � � � � � � � � � � � � � � � � � � � 22
Multiflex Tinnitus Technology � � � � � � � � � � � � � � � � � � � � 24
Fall Alert
Introduction � � � � � � � � � � � � � � � � � � � � � � � � � � � � � � � 26
Auto Alert � � � � � � � � � � � � � � � � � � � � � � � � � � � � � � � � 26
Manual Alert � � � � � � � � � � � � � � � � � � � � � � � � � � � � � � 26
Alert Cancellation � � � � � � � � � � � � � � � � � � � � � � � � � � 27
Contacts � � � � � � � � � � � � � � � � � � � � � � � � � � � � � � � � � 27
Auto Alert Sensitivity � � � � � � � � � � � � � � � � � � � � � � � � 28
Indicators � � � � � � � � � � � � � � � � � � � � � � � � � � � � � � � � � 29
Adjustment
Pairing with an iOS Device � � � � � � � � � � � � � � � � � � � 30
Mobile Phone Use � � � � � � � � � � � � � � � � � � � � � � � � � � 32
Pairing with an Android Device � � � � � � � � � � � � � � � � 32
Accessories � � � � � � � � � � � � � � � � � � � � � � � � � � � � � � � � � � � 33
Hearing Aid Care
Hearing Aid Care � � � � � � � � � � � � � � � � � � � � � � � � � � � 34
Charger Care � � � � � � � � � � � � � � � � � � � � � � � � � � � � � � 36
Service and Repair � � � � � � � � � � � � � � � � � � � � � � � � � � 37
Troubleshooting Guides � � � � � � � � � � � � � � � � � � � � � 38
Tips for Better Communication � � � � � � � � � � � � � � � � � � � 41
Regulatory Information
Safety Information � � � � � � � � � � � � � � � � � � � � � � � � � � 43
FDA Information � � � � � � � � � � � � � � � � � � � � � � � � � � � 45
FCC Information � � � � � � � � � � � � � � � � � � � � � � � � � � � 50

Features, Controls and Identification
1� Hearing aid
2� Cable
3� Receiver
4� Microphones
5� Rocker switch (user control)
6� Location of left/right side hearing aid indicator
RED is for right ear, BLUE is for left ear
7� Retention lock
8� Location of manufacturer’s name and model name
9� Location of left/right side receiver indicator
10� Charging contacts
11� Location of serial number
12� Instant fit earbud
13� Custom earmold (optional)
14� RIC custom power earmold (optional)
12
Rocker Switch RIC Overview | 5 4 | Rocker Switch RIC Overview
4
5
6
2
1
8
3
13
14
11
10
7
9

Features, Controls and Identification
1� Desiccant puck holder
2� Cleaning brush
3� Earbud/earmold reservoir
4� Charging ports
5� Hearing aid charging LEDs
6� On-board battery LEDs
7� MicroUSB port
Charger Overview | 7 6 | Charger Overview
1
2
3
5
6
7
4
Preparation | 9 8 | Preparation
Charging Your Hearing Aids
• Place your hearing aids in the charger with
the earbuds resting inside the case
• Your hearing aids will turn off automatically
and begin to charge
• Your hearing aids will automatically power on
when removed from the charger
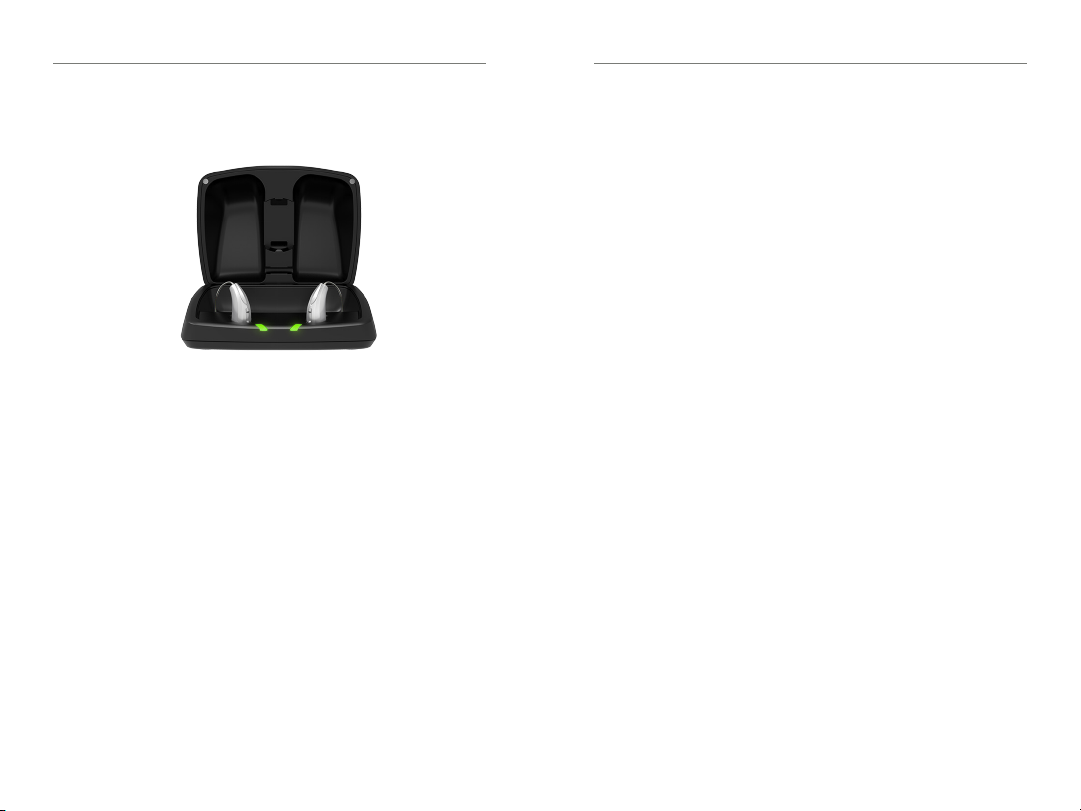
• Note: The LEDs corresponding to each hearing aid:
– Glowing Green = Charging
– Solid Green = Fully Charged *
– Blinking Red = Fault State – Remove from charger,
wait until LED turns off and re-insert aids� If Fault
State continues, call your hearing professional�
• Charging occurs with the lid open or closed
• Your hearing aids will be completely charged in
under 3 ½ hours
• It is safe to keep them in the charger after they
are fully charged and any time that you are not
wearing them
• If you will not be wearing your hearing aids for an
extended period of time (i�e� weeks) remove the
plug from the charger and the hearing aids from
the charging ports� You will need to manually
power the hearing aids off by pressing the rocker
switch for three seconds� You may store them in
the reservoir
• When charging without the charger cord the
LEDs will turn off when the hearing aids are
fully charged
• To refresh LEDs when the charger is not plugged
in, remove a hearing aid from the charging port
for three seconds and then replace it in the
charger (refresh lasts 10 seconds only – then LEDs
will turn off again)
• The desiccant puck will be effective for 3–6
months depending on moisture in the hearing
aids and humidity� The color will fade from blue
to white, indicating a need for replacement�
* If you are charging without cord, the LEDs will turn off when charged, to save battery.

Preparation | 11 10 | Preparation
Charger On-Board
Battery LEDs
• When charger is
plugged in and fully
charged = 4 solid LEDs
will appear
• When charging without
the cord the LEDs will turn off after 10 seconds
• To refresh LEDs, remove a hearing aid from
the charging port for three seconds and then
replace it in the charger (refresh lasts 10
seconds only – then LEDs will turn off again)
– 4 Solid > 75%
– 3 Solid < 75%
– 2 Solid < 50%
– 1 Solid < 25%
– 1 Blinking = Charge Low
• While charging the on-board battery with
the provided cord, the 4 LEDs will be:
– Glowing while charging
– Solid when charged
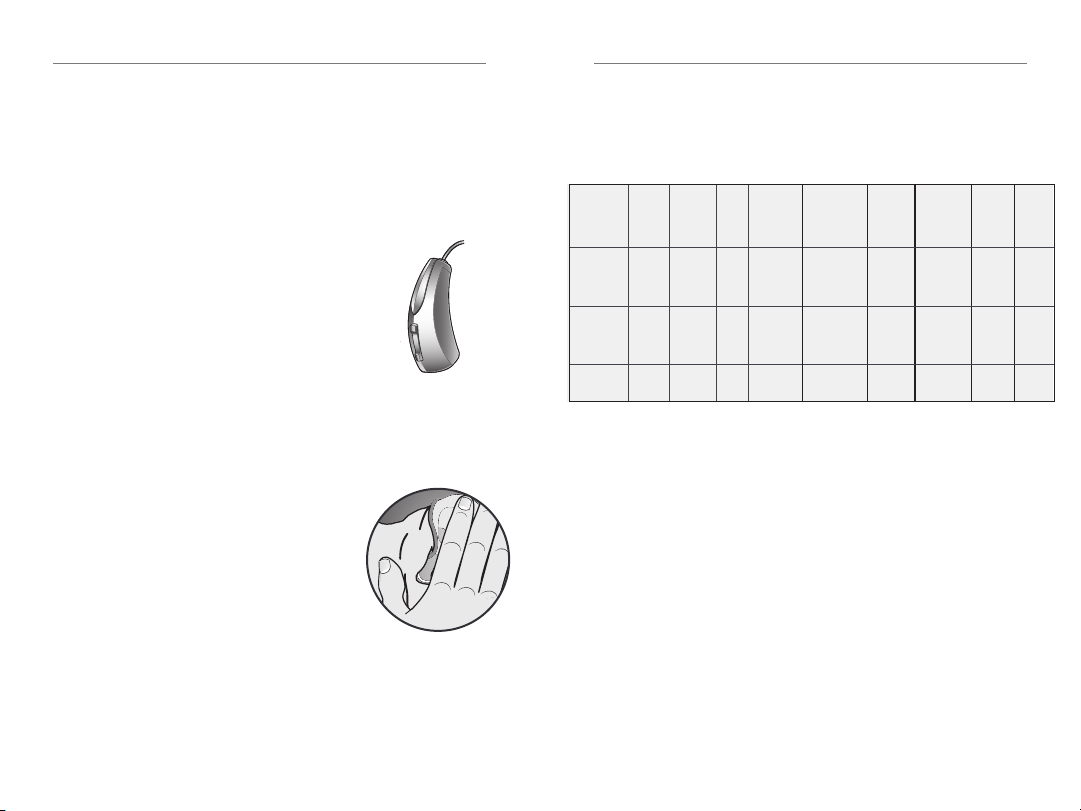
Insertion and Removal
To insert the earbud or
earmold:
1� Hold the cable at the bend in
front of the receiver with your
thumb and forefinger� Gently
insert the receiver into your
ear canal�
2� Wrap the hearing aid over
the top of your ear, carefully
placing it behind your ear�
3� Place the retention lock inside
the bowl of your ear�
To remove the earbud or
earmold:
• Remove the retention lock
from the bowl of your ear�
• Remove the hearing aid from
behind your ear�
• Grasp the receiver with your
thumb and forefinger� Gently
pull out of your ear canal�
Do not pull with the hearing aid
case, as this may damage the
connection�
1
2
3

Operation | 13 12 | Preparation
Helpful Hints
• Minor irritation and/or inflammation may occur
as your ear becomes accustomed to having an
object in it; if so, please contact your hearing
professional� There are several different sizes of
earbuds and custom earmolds that may be more
comfortable�
• If an actual allergic reaction occurs, alternative
earmold materials are available; contact your
hearing professional�
• Severe swelling, discharge from the ear, excessive
wax or other unusual conditions warrant immediate
consultation with a physician�
Power On & Off
ON - The hearing aids will power on automatically after
removing them from the charger� There is a delay
that allows you time to insert your hearing aid into
your ear�
ON - If the hearing aid is manually powered off, pressing
the top of the rocker switch will power it on� The
delay still exists, to give you time to insert the
hearing aid into your ear�
OFF - The hearing aids will power off automatically when
placed in the charging port� Charging will proceed�
OFF - The hearing aids can be powered off manually by
pressing either the top or bottom rocker switch for
three seconds�
Auto On/Off
Your hearing aid may support the ability to automatically
go into a low-powered state to conserve battery*� This
control can be configured by your hearing professional
or via the Thrive Hearing Control app� Place your hearing
aid on a flat, stable surface (e�g� a table) with your
earmold or earbud facing upwards and it will go into a
low-powered state after about 15 minutes� To resume
normal hearing aid function, pick up your hearing aid
and place it in your ear� Your hearing aid will detect this
motion and switch back on again� You may hear a tone
indicating that your hearing aid is powered on�
*Going into a low-powered state helps conserve battery consumption when used with
rechargeable hearing aids that are charged on a daily basis.
Operation | 15 14 | Operation
User Controls
Your hearing aid’s user control may have been
customized by your hearing professional� Ask your
hearing professional how the user control on your
hearing aid is set�
Available User Control Functionality
The user control on your hearing aid can
respond differently depending on how
long you activate (press) the button� Your
hearing aid is capable of having one
function assigned to a short press (press
and release) and one function assigned
to a long press (pressandhold)� The options selected
on the next page indicate how your particular user
controls areconfigured�
Tap Gesture
Your hearing aid may support an
additional user control� This control
can be configured by your hearing
professional to start/stop streamed
audio from a 2�4 GHz accessory by
tapping your eartwice�
Edge Mode
Edge Mode works to identify and create a temporary,
real-time adjustment tailored for challenging
environments� No app or smartphone required� Upon
activation, your devices use an environmental scan
to bring comfort and clarity� For more information,
consult with your Hearing Professional�
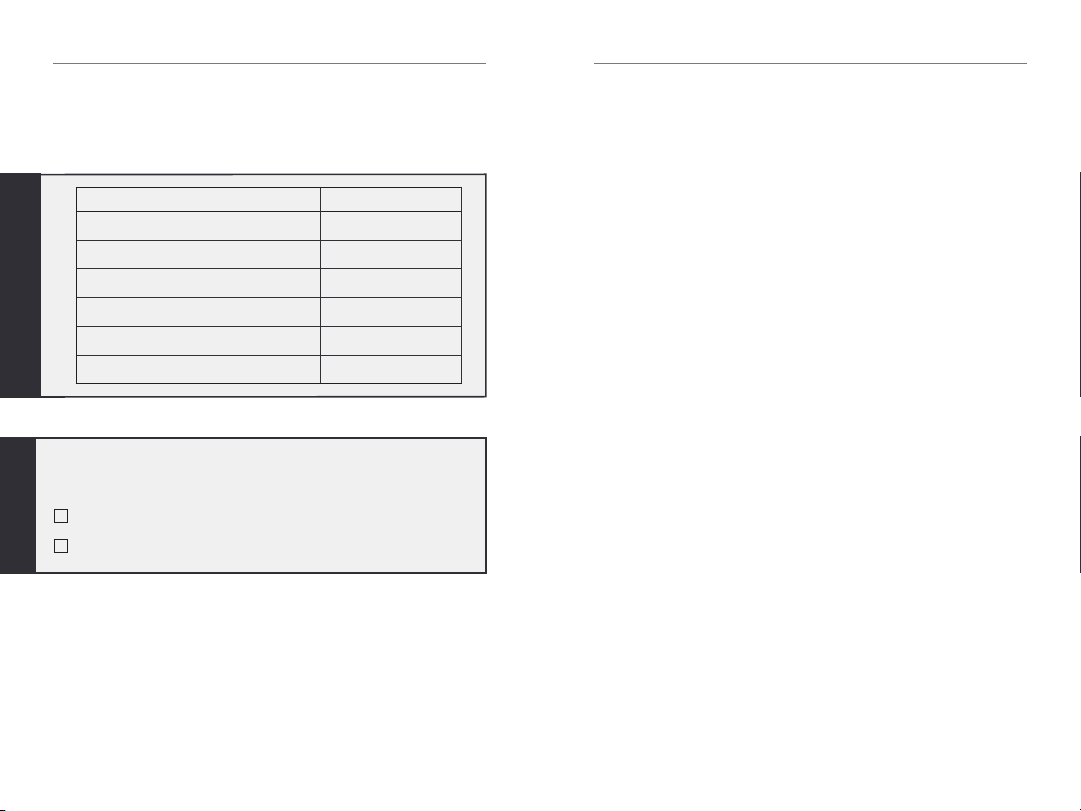
Assigned User Control Settings
Multiflex
Tinnitus
Level
Start/Stop
Accessory
Streaming
Balance
Control
Accessory
Volume
Short
Press
(Press and
Release)
Long
Press
(Press and
Hold)
Tap
Gesture*
Volume
Control
Memory
Change
Mute
*Hearing aid may support
Volume Control
Power On Volume Level
Your hearing aid has been set to a specific volume
level (VolumeHome) determined by your hearing
professional� If sounds are generally too loud or too
soft, please contact your hearing professional for
advice and adjustment�
Rocker Switch Volume Control
If your rocker switch is configured to control volume,
pressing the top part of the switch increases the
volume while pressing the lower portion of the switch
decreases volume�
Manual
Alert
Edge
Mode
Operation | 17 16 | Operation
Volume Control Indicators
Your hearing professional may enable audible
indicators, which highlight the current volume position�
Volume Level
Volume Max 5 Beeps •••••
Volume Step(s)
Volume Home
(Power on volume level)
Volume Step(s)
Volume Min Single Beep •
Tone
Short Tone –
3 Beeps •••
Short Tone –
My hearing aid is configured with the following
control:
Press and Release Volume Control
Press and Hold Volume Control
Battery Indicators
An indicator will sound when the battery voltage is
low� You have approximately 30 minutes* of battery
life remaining� An indicator may also sound just before
the battery stops working�
*Actual time between low battery indicator and shut down will vary depending
on enviornmental noise levels and your use of the product.
Memory Change
Your hearing professional may create multiple
memories within your hearing aid� These additional
memories can be accessed by activating the user
control on your hearing aid�
If your user control is configured for memory
changes, each time you activate the user control, the
memory of your hearing aid will increment through
the available memories�
Memory Indicators
Your hearing professional may enable an audible
indicator, which is presented while making a memory
change� The indicator defaults to a voice identifying
which memory your hearing aid is in�
Mute
If your hearing aid is configured with mute
functionality, a long press and hold of the user
control will mute your hearing aid� If enabled by
your hearing professional, you may hear an indicator
prior to the hearing aid muting� To unmute your
hearing aid, press the button again and audio will
be restored�
 Loading...