

Staritech TX-1 Series, TX-100, TX-110 User Manual

Beijing Star Instrument Technology Co., Ltd
Web: www .star-itech.com Email: support@star-itech.com
TX-1XX Series Printer User Guide
2013-5-1 V1.0.0
1......................................................................................................................................2
1.1 Disclaimer..................................................................................................2
2......................................................................................................................................3
2.1 Product Introduction ..................................................................................3
2.2 Overview....................................................................................................4
3......................................................................................................................................4
3.1 Introduction to Operation...........................................................................4
3.2 Installation of the Rechargeable Batteries .................................................6
3.3 Connecting Balance to Printer...................................................................7
3.4 Installing Ink Ribbon Cartridge.................................................................7
3.5 Replacing Ink Ribbon Cartridge................................................................8
3.6 Installing the Printer Paper.........................................................................8
4......................................................................................................................................9
4.1 Select Language.........................................................................................9
4.2 Setting Date and Time..............................................................................10
4.3 Settings.....................................................................................................11
5....................................................................................................................................14
5.1 Installing the software on PC...................................................................14
5.2 Driver Installation (using Wi ndow XP as example) ................................14
5.3 TX-1XX Label & Sample name Editor...................................................17
5.4 Editing Sample Name..............................................................................17
5.5 Editing Label............................................................................................18
6....................................................................................................................................18
6.1 Print sample name....................................................................................18
6.2 Print Lot number......................................................................................19
6.3 Lot Number Auto-Increment....................................................................19
7....................................................................................................................................20
7.1 Firmware Update .....................................................................................20
7.2 Data Interface...........................................................................................21
8....................................................................................................................................23
8.1 Questions and Answers............................................................................23
8.2 Maintenance.............................................................................................23
8.3 Physical Dimensions................................................................................24
Page 1 of 24

Beijing Star Instrument Technology Co., Ltd
Web: www .star-itech.com Email: support@star-itech.com
1
1.1 Disclaimer
All trademarks mentioned in this manual belong to the holder of
them.
We had collated this manual very carefully, but cannot guarantee
that the contents of this manual is correct without any shortcomings,
so we are not liable for losses which may be caused to users due to
the manual. Meanwhile, there will be continuous upgrade of the
products as well as the manual so we had the rights to modify the
manual without any notice.
None of the electronic products can achieve absolute reliability so
we do not suggest the customers to apply this in such a way which
may harm their lives and properties.
Page 2 of 24
Beijing Star Instrument Technology Co., Ltd
Web: www .star-itech.com Email: support@star-itech.com
2
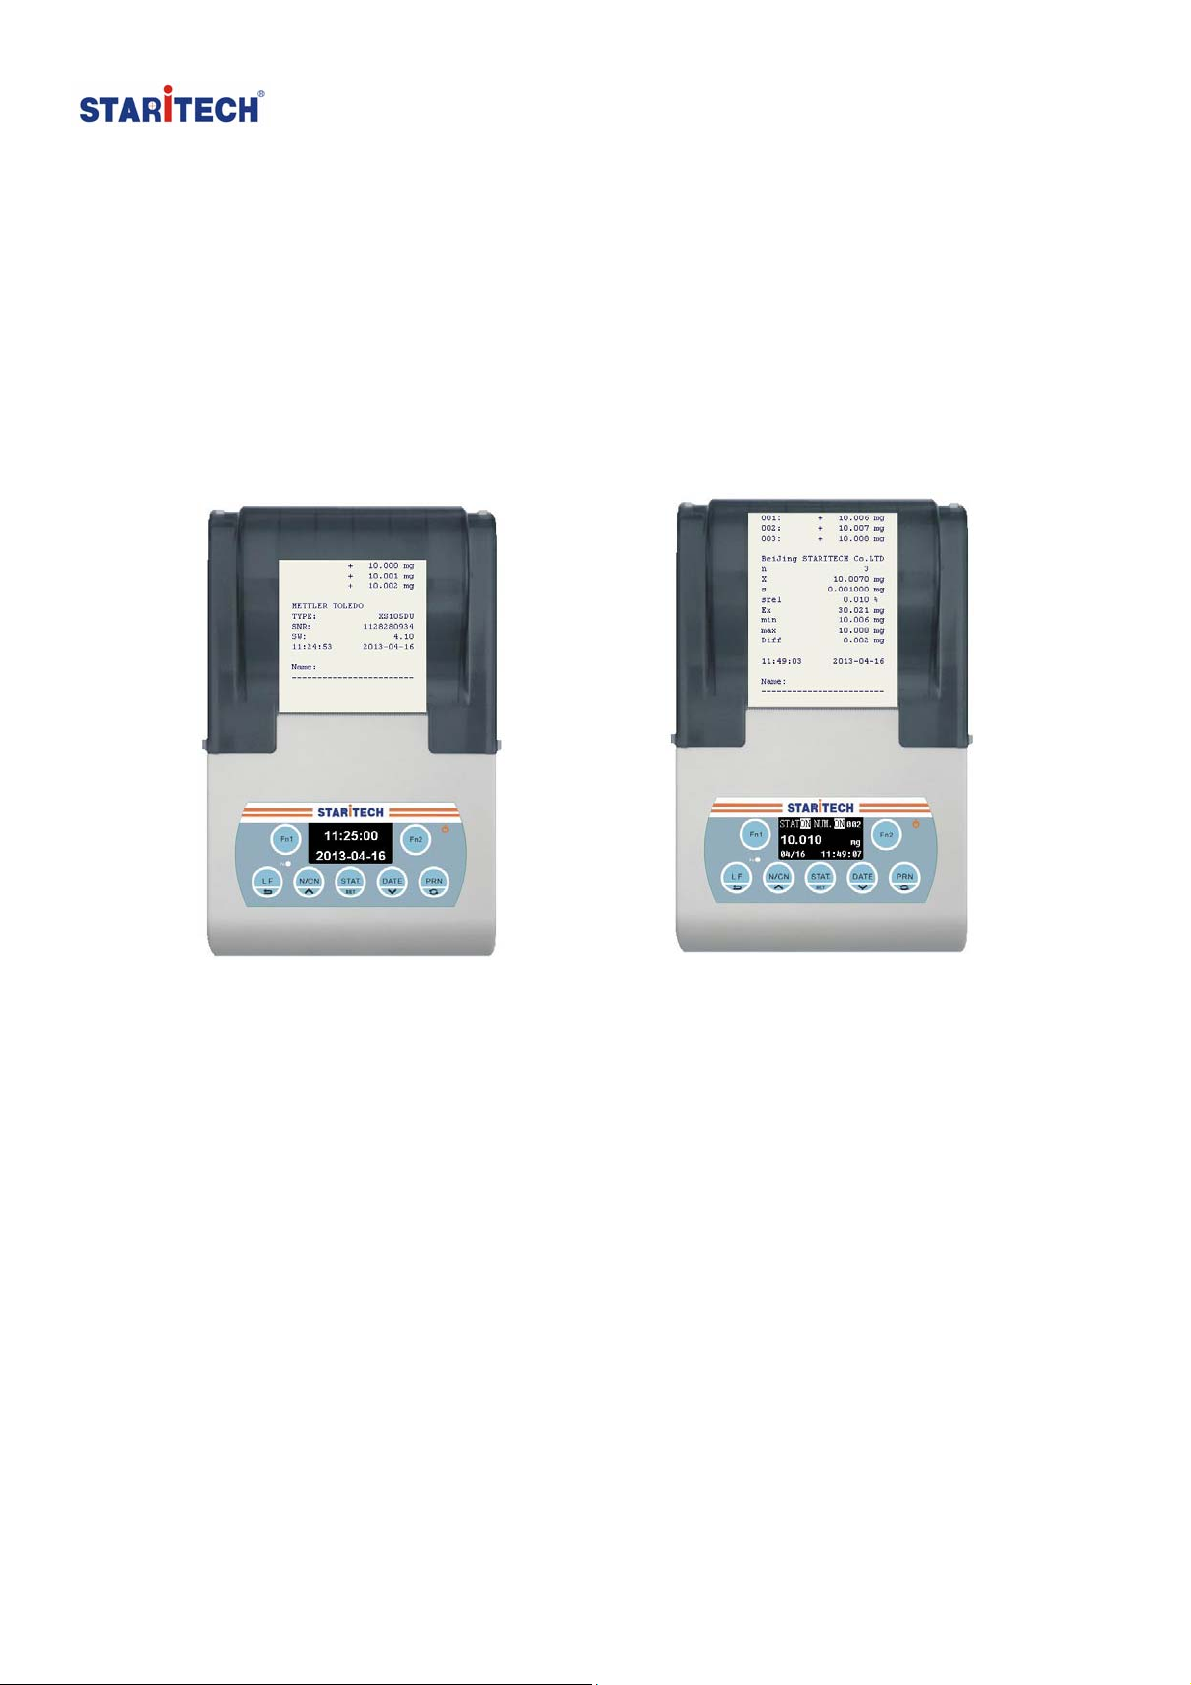
2.1 Product Introduction
The TX-1XX series balance printer, with a streamlined appearance and an
outstanding cost-efficiency, completely meets the quality requirements of the
chemical and pharmaceutical industries and GLP, GMP standard certifications.
From the most basic printing needs to the variety of applications, the TX-1XX
series balance printer provides users with a flexible choice.
TX-100(Basic Edition) TX-110(Standard Edition)
Specifications:
Printing method: Impact dot
Inking: Ink ribbon (EPSON ERC-22 or ERC-09)
Printing format: 24 digits / line (5 × 7 dot matrix)
Printing speed: 2.7 lines / sec. (approx.)
Character size: 1.7mm (W) × 2.6mm (H) ASCII
Paper: Regular paper 57.5mm width
Printer mechanism durability: 1.5 million lines
Operation temperature range: 5-45°C
Input voltage: DC 12V (1.5A)
Interface: RS-232C
Gross weight (with packaging): 1300g approx.
Page 3 of 24

Beijing Star Instrument Technology Co., Ltd
Web: www .star-itech.com Email: support@star-itech.com
Features:
• Fully compliant with the requirements of GLP/ GMP
• Built in clock, print Weighing Data with Time & Date
• User-defined identifier
• 128x64 OLED display
• Statistical Evaluation
• Numbering Function
• Sample Name insertion and printing
• Lot Number insertion and printing
• Lot Number Auto-Increment
• Weighing Data Recorder
• Weighing Data Curve
2.2 Overview
3
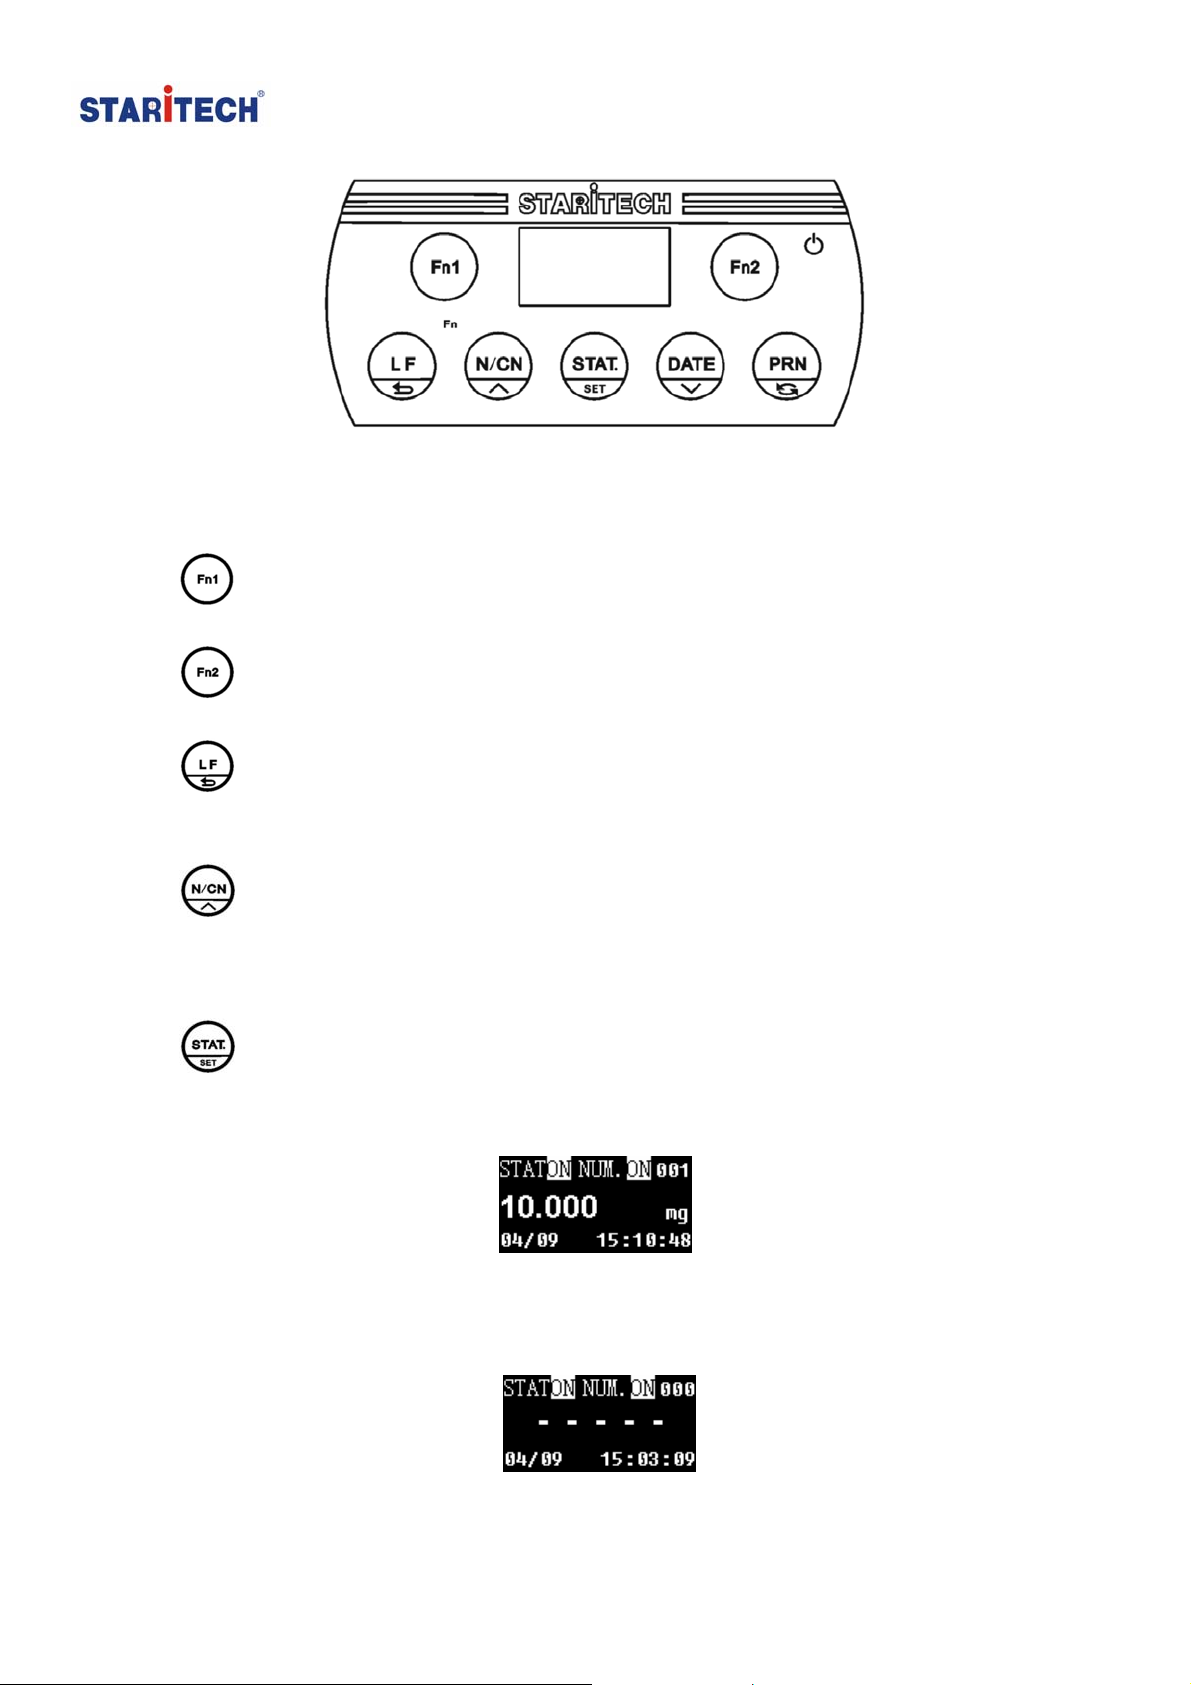
3.1 Introduction to Operation
Page 4 of 24
Beijing Star Instrument Technology Co., Ltd
Web: www .star-itech.com Email: support@star-itech.com
: Soft key 1, usually it is for inserting the sample name. In setting mode, it
changes the cursor position to the left side.
: Soft key 2, usually it is for inserting the Lot No. In setting mode, it
changes the cursor position to the right side.
: Press the key once to feed the printer by one line, press the key and
hold to continuously feed until released. In the setting mode, press the key to
go back to previous menu.
: Numbering Function key. Press this key to toggle the switch ON and
OFF. Press the key and hold for about 2 seconds then the numbering of the
samples will start from the beginning (001) again. In the setting mode, press
the key to go back to previous menu item or increase parameter settings.
: Statistical Evaluation of the Data: If statistics function is activated
(display screen shows “STAT ON”), the weighing data will be written into the
statistic memory and will be shown on the screen. Refer to the figure below.
Press this key to print the statistics reports according to the settings and the
statistics memory will be cleared. The displayer will show “-----“. Refer to the
figure below.
Page 5 of 24
Beijing Star Instrument Technology Co., Ltd
Web: www .star-itech.com Email: support@star-itech.com
While the statistics memory is not empty, press this key and hold for about 2
seconds to cancel the statistics and clear the memory without printing the
report.
While the statistic memory is empty, press this key and hold for about 2
seconds to temporarily switch the statistics ON or OFF. If you do not need the
statistics then you can turn it OFF in the settings.
: Print time & date. You can print time & date anywhere you like by
pressing this key. Press this key and hold for about 2 seconds to set the time &
date. In the setting mode, press this key to go to next menu item or decrease
parameter settings.
: Print key. Press this key to request weighing data from the balance.
Press this key and hold for about 2 seconds to enter the setting mode, in the
setting mode, press this key to switch between uppercase and lowercase
letters.
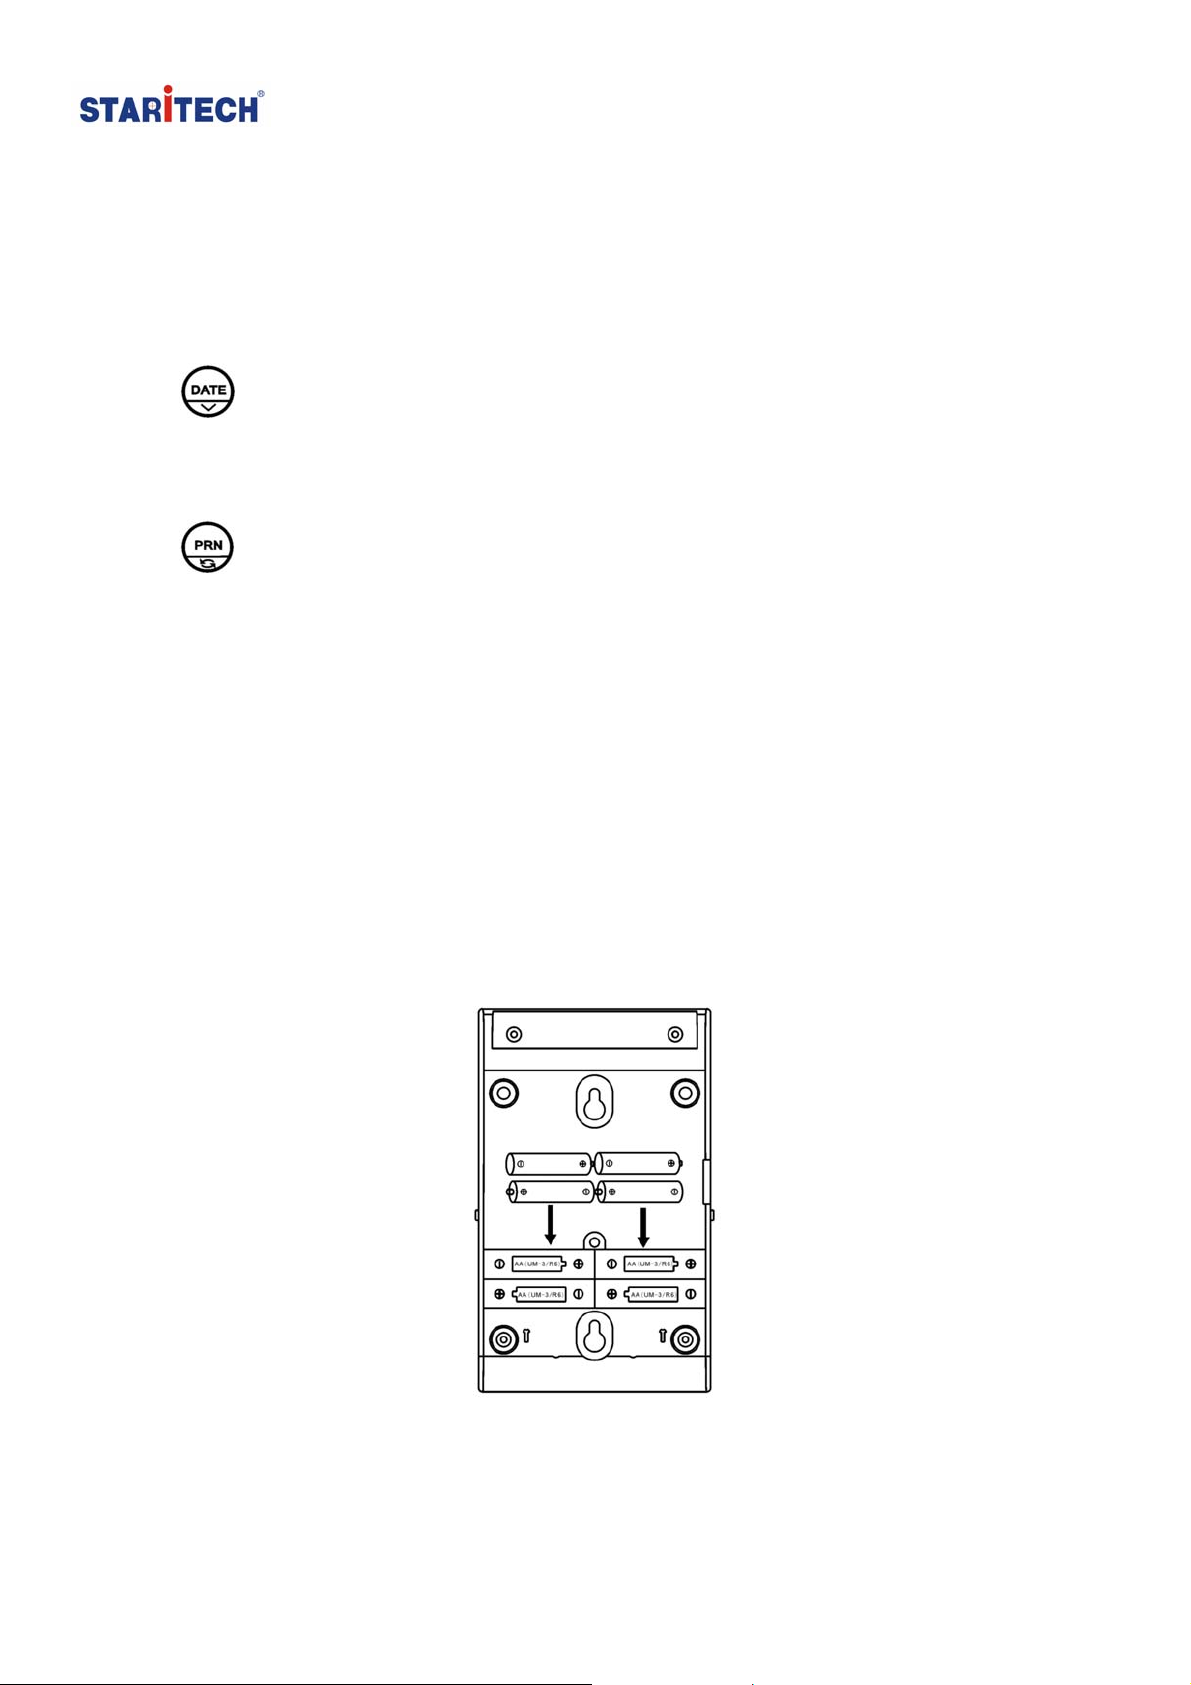
3.2 Installation of the Rechargeable Batteries
Note: The batteries are not required when the printer is fed with the AC adapter supply.
Disconnect the AC adapter, turn off the switch, remove the battery cover then
insert the batteries in correct directions.
Insert 4 pieces of the rechargeable batteries then put the cover back and
tighten with the screws. The figure below is for your reference.
Page 6 of 24
Beijing Star Instrument Technology Co., Ltd
Web: www .star-itech.com Email: support@star-itech.com
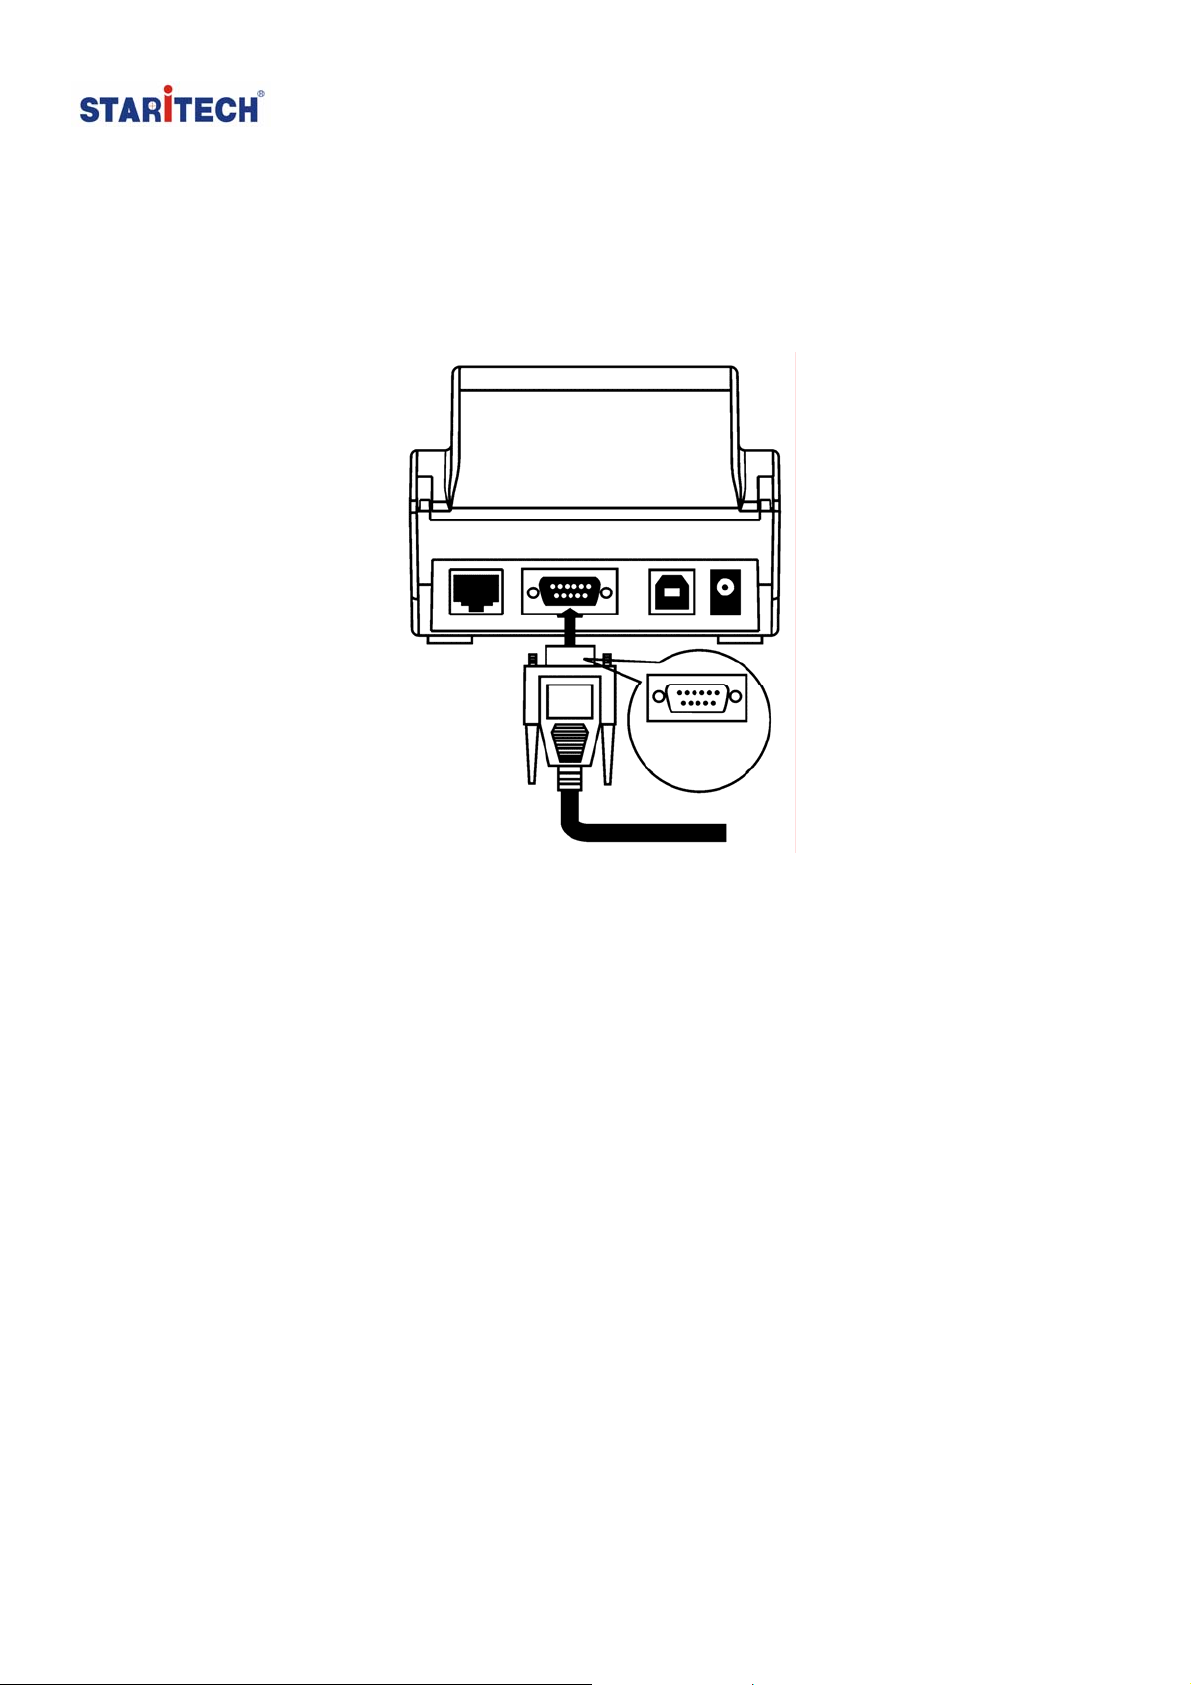
3.3 Connecting Balance to Printer
1. Disconnect the power supply before connecting the printer to the
balance with the data cable. The cable has a unique direction, please
connect them correctly. Please refer to the figure below.
2. Plug in the AC adapter socket then connect the other end to the printer
power jack.
3. Turn on the balance and the printer.
3.4 Installing Ink Ribbon Cartridge
Place the printer facing towards you, first, put the Ink ribbon cartridge on the
gear shaft on the left side of the mechanism, uplift the right side slightly, if the
left side of the Ink ribbon cartridge does not reach the bottom, press the knob
of the ink ribbon cartridge and rotate it slowly towards the direction shown by
the arrow. Once the left side reaches the bottom then press the right side hard
to reach the bottom too. Check if the Ink ribbon cartridge is installed correctly.
Rotate the knob if the ribbon is bent or outside of the Ink ribbon cartridge, press
the LF key to flatten and tighten the ribbon and to feed the paper into the ink
ribbon cassette. Place the front cover back and the installation is completed.
Page 7 of 24
Beijing Star Instrument Technology Co., Ltd
Web: www .star-itech.com Email: support@star-itech.com
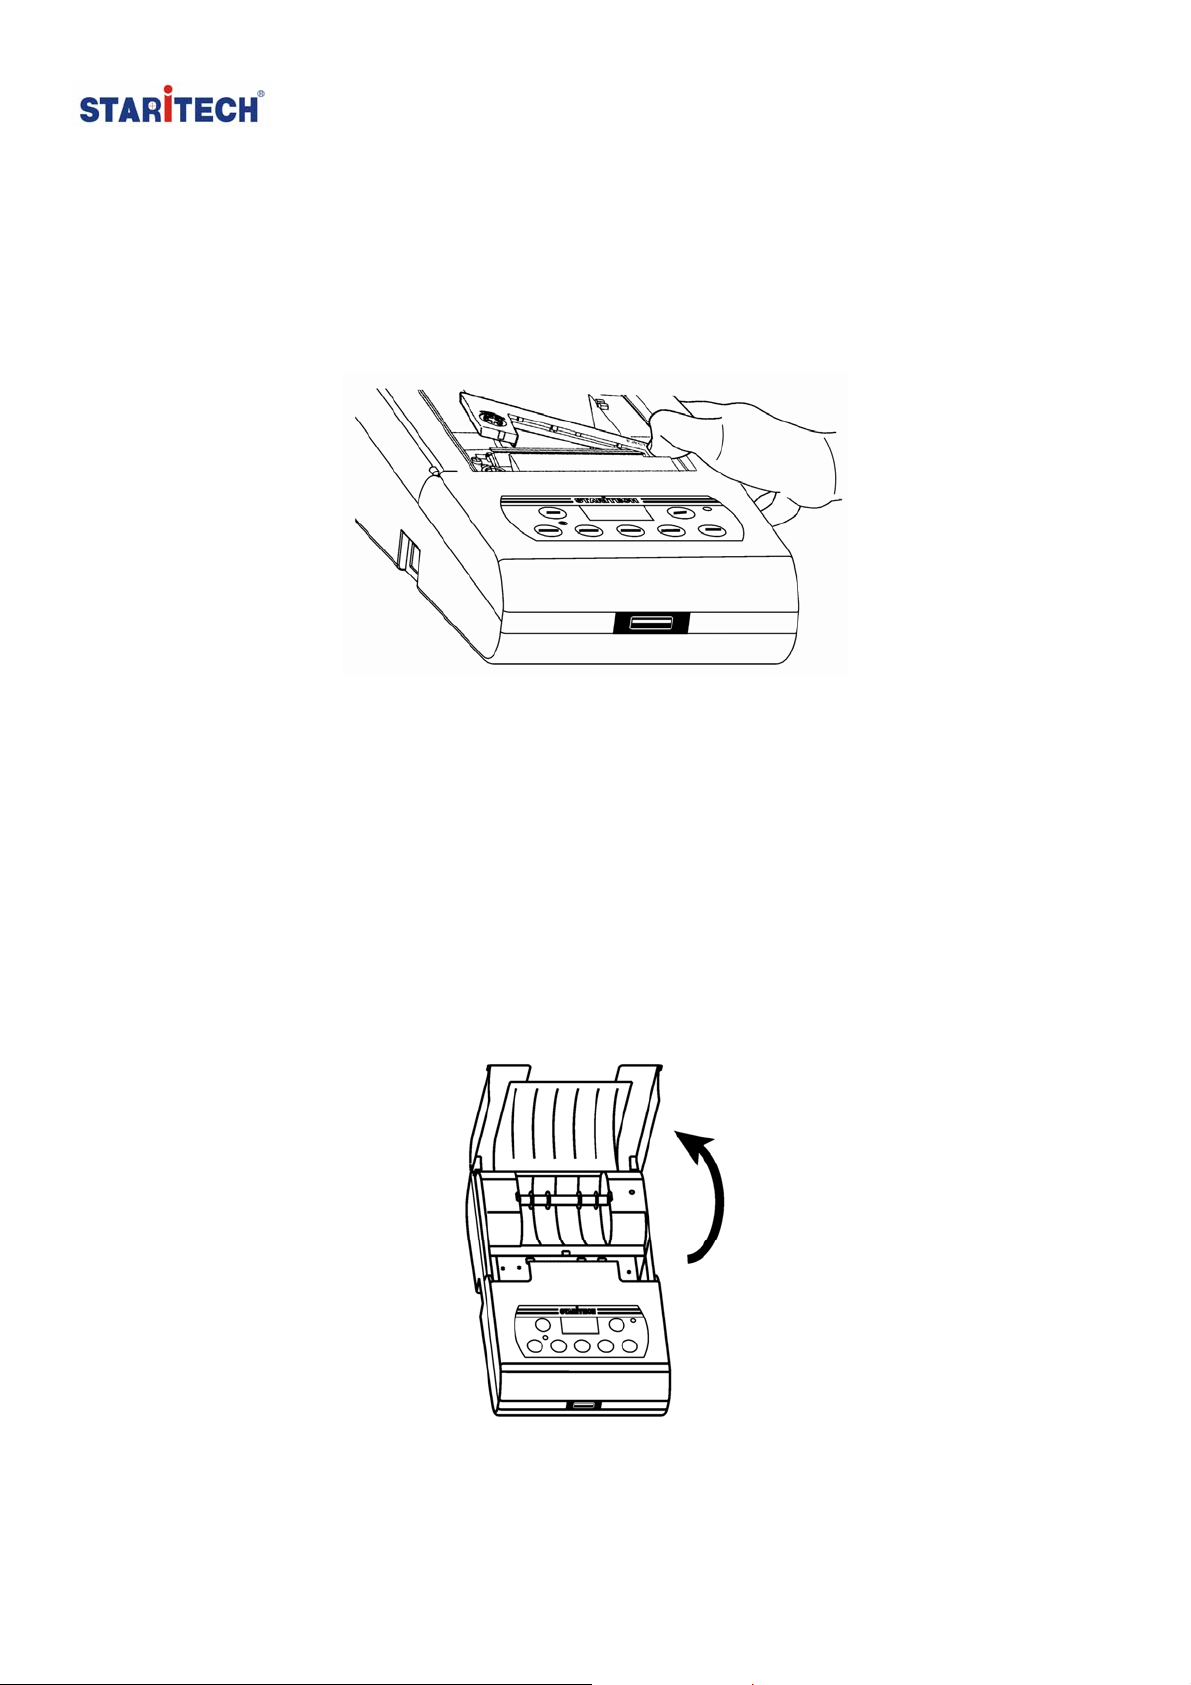
3.5 Replacing Ink Ribbon Cartridge
Replace ink ribbon cartridge when the print becomes unclear and faint. Open
paper cover then take out the ink ribbon cartridge by pressing at the right end
marked with “Push” as shown in the figure below.
Then insert the new cartridge from straight above.
Tips: To avoid the problem of not printing the letters, we suggest you to install
the Ink ribbon cartridge first before installing the printing paper.
3.6 Installing the Printer Paper
1. Lift the paper cover.
2. Insert the printer paper shaft into the center of the paper roll as shown in
the figure below
Page 8 of 24
 Loading...