

StarEv Roadster-2+2, Roadster-6+2, Roadster-4+2 Owner's Manual
Owner’s Manual and Service Guide
Roadster-2+2, Roadster-4+2, Roadster-6+2
August 2014

Table of Contents
Specifications 2
Operation
Vehicle layout 3
Dashboard 3
Switches 4
Pedals 5
Charging 5
Cigarette lighter 5
User information 6
Driver information 6
Driving
Operation procedure 7
Safety 7
Driving on hilly terrain 7
Parking safety tips 8
Before initial use 8
Maintenance
Battery maintenance 9
Charging the battery group 11
Brake system maintenance 12
Steering system maintenance 12
Motor maintenance 12
Lubrication maintenance 12
Maintenance schedule 13
Troubleshooting 14
After-sale service 16
Monthly maintenance record 17
Electrical diagrams 18
1

Vehicle Specifications
Passengers
4 6 8
Battery group
48 V, 8 x 6V, Trojan
T105
48 V, 8 x 6V, Trojan
T105
48 V, 8 x 6V, Trojan
T105
Motor
7HP, AC
7HP, AC
7HP, AC
Controller
Curtis 450A 1236
Curtis 450A 1236
Curtis 450A 1236
Top speed (mph)
19.5 (20-25 LSV)
19.5 (20-25 LSV)
19.5 (20-25 LSV)
Load capacity (lbs)
800
1080
1800
Dimensions (in)
140 x 53 x 46
156 x 53 x 50
187 x 56 x 50
Weight including
battery (lbs)
1205
1580
1300
Ground Clearance (in)
5.9
5.9
5.9
Turing Radius (ft)
14
17
19
Wheelbase (in)
67
95
125
Climbing capacity
25%
25%
25%
Front suspension
Leaf spring and shock
Leaf spring and shock
Leaf spring and shock
Steering system
Rack and pinion
Rack and pinion
Rack and pinion
Brake system
Rear drum
4-wheel hydraulic
4-wheel hydraulic
Tire size
225 / 55 / 12 DOT
225 / 55 / 12 DOT
225 / 55 / 12 DOT
Tire pressure (psi)
30
30
30
Wheel type
12 inch aluminum
12 inch aluminum
12 inch aluminum
2+2 Roadster 4+2 Roadster 6+2 Roadster
2
Operation
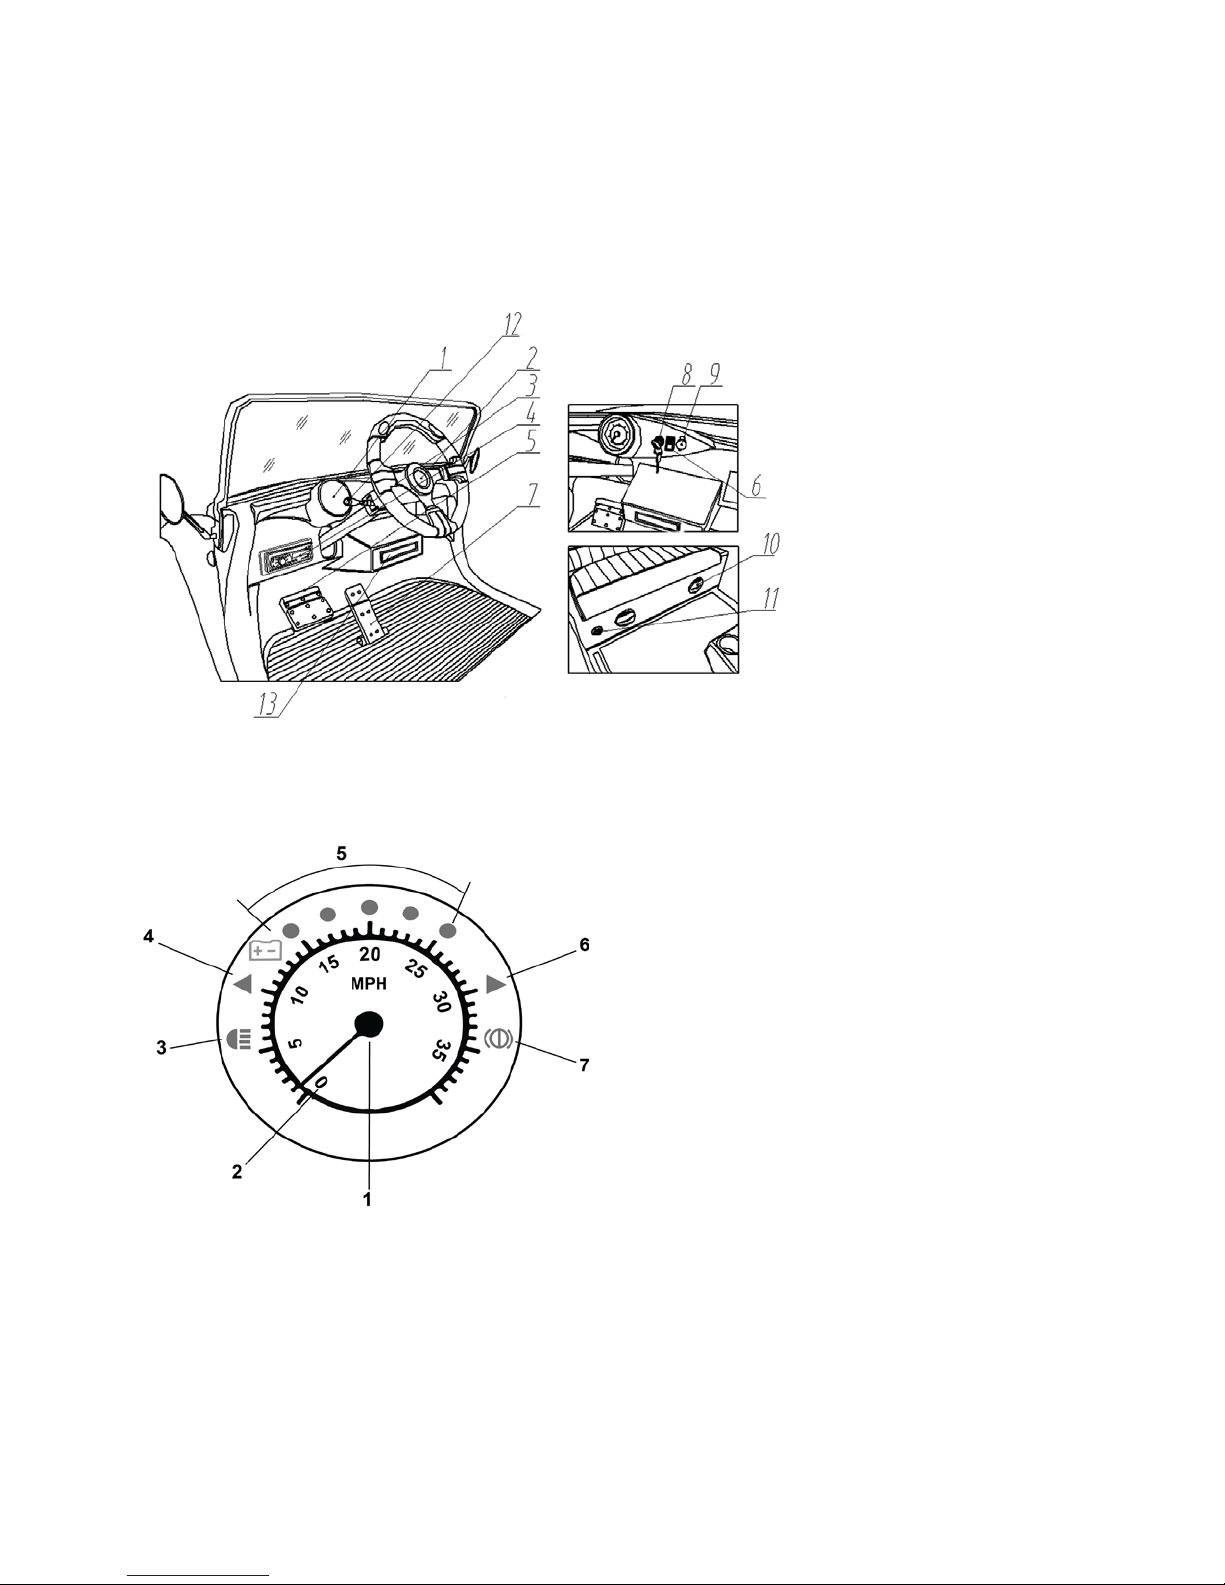
Vehicle Layout
Dashboard
1| Dashboard
2| Steering wheel
3| Combination switches
4| CD player (optional)
5| Brake pedal
6| Forward/reverse switch
7| Accelerator pedal
8| Key switch
9| Cigarette lighter
10| Speakers (optional)
11| Charger socket
12| Turn signal lever, horn
and light switch
13| Cup holders
1| Speed gauge mounting point
2| Speedometer
3| Lights on indicator
4| Left turn signal indicator
5| Power display
6| Right turn signal indicator
7| Brake light
Notes:
• Low battery voltage alarm light: Red when battery voltage is low.
• Turn signal: The turn signal lever has a button on the end. Push in to sound horn; pull lever
back to turn on lights.
• High beam: The indicator will light up yellow when high beams are on.
3

Switches
Key switch
Normal off position: key can only be removed in this position
All power systems are on when in this position.
WARNING: Do not take out the key when the vehicle is running. Do not leave key in ignition
to avoid theft or accidental operation by a child.
Forward/Reverse switch
The switch has three positions. The vehicle goes forward when FWD is pressed down and backward
when REV is pressed down. When the switch is centered, vehicle is in the neutral position.
WARNING: Do not shift between forward and reverse when vehicle is running or damage to
the transmission and/or motor can occur.
Turn signal
Push lever up to illuminate right turn signal; push down to illuminate left turn signal.
Headlight switch
Pull turn signal lever into back position to turn lights on. Push back forward for lights to be in off
position.
Horn
Press down the horn button on the end of the turn signal lever to engage horn.
4
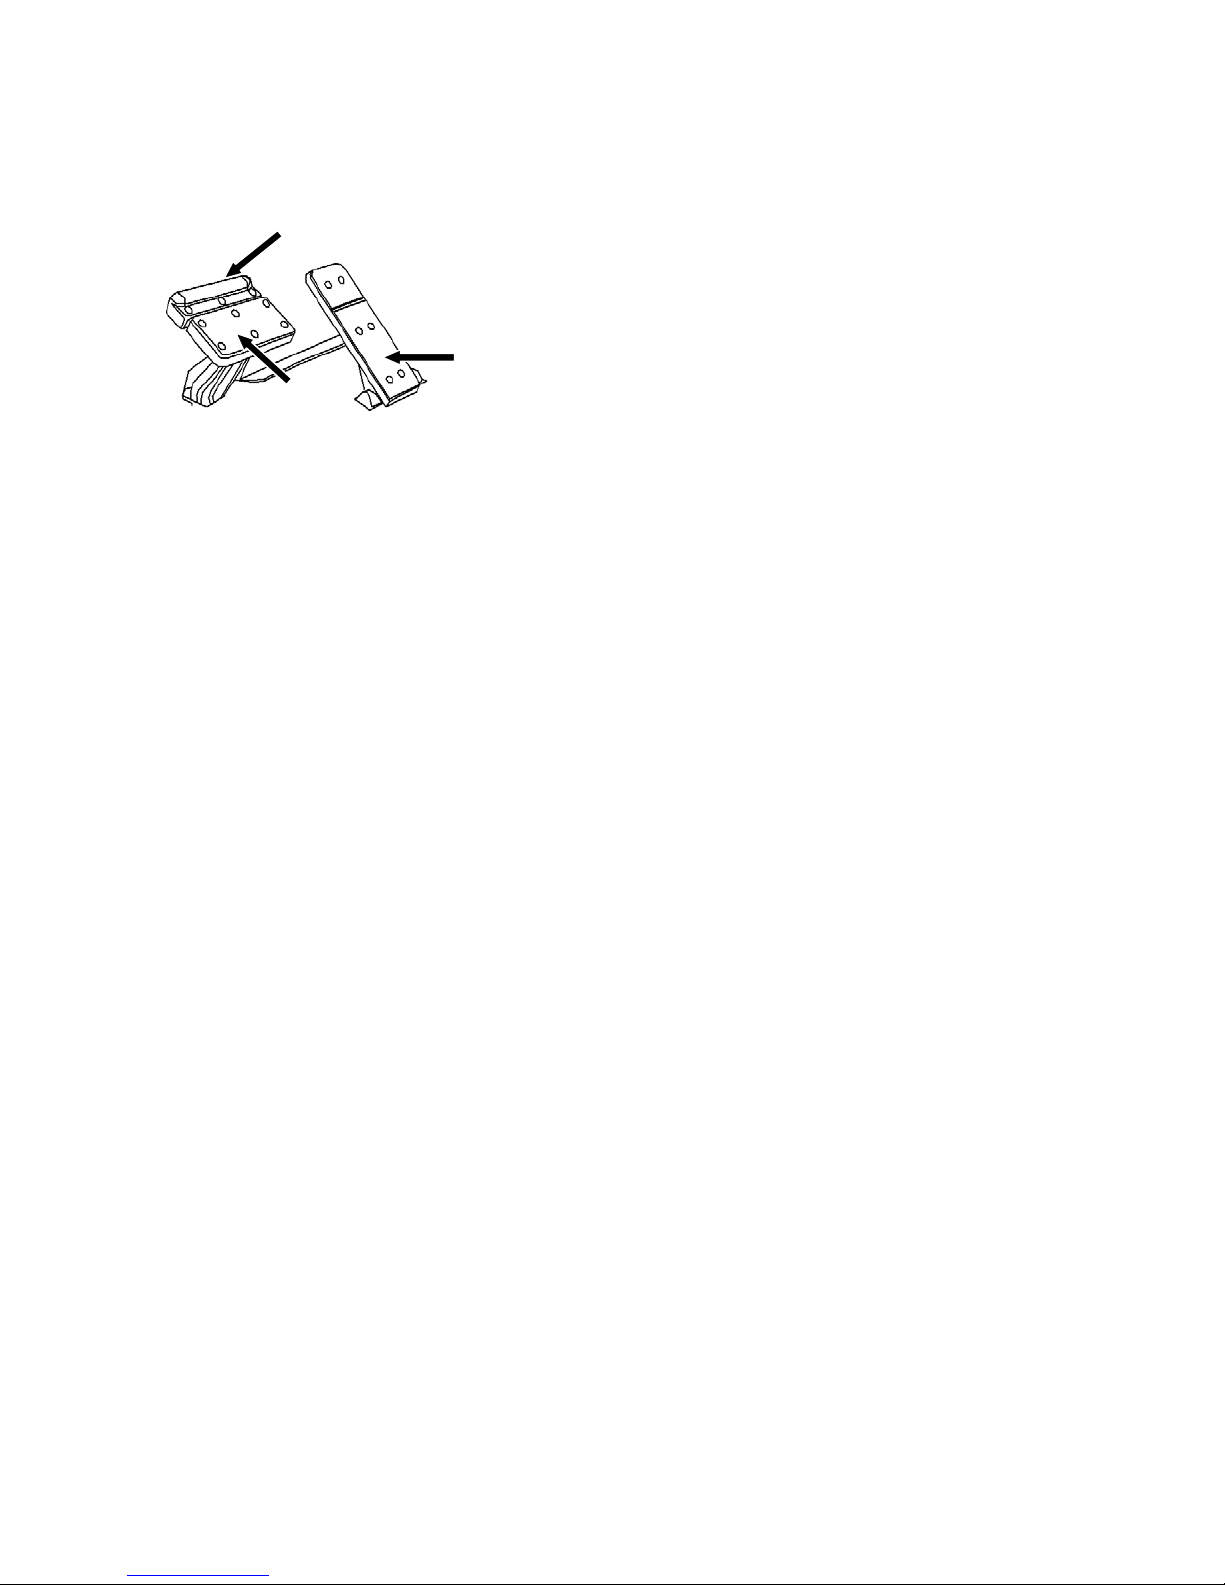
Pedals
Parking brake
Brake pedal
Accelerator
Parking brake
The parking brake will click and lock in the down position to indicate that the parking brake is
engaged. Lightly push on the accelerator pedal to release the parking brake.
Braking
Depress the brake pedal to brake.
Accelerating
Press the pedal and control speed by force applied to the pedal.
WARNING: Before leaving the cart, put the Forward/Reverse switch in the neutral. Before
moving forward or reverse the parking brake should be released to prevent serious damage
to the brake system and related parts.
Charging, Charger Socket
Plug the larger round plug end into the vehicle charge port. Plug the power cord end into a standard
outlet (110 V) to begin the recharging cycle. See charging section (p. 11).
Cigarette lighter
Plug in any 12 V DC accessories into outlet. Ideal for use of MP3, phone chargers, mini fans and
other accessories.
5
 Loading...