

StarCeiling123 Custom Star Panel Installation Manual
Custom Star Panel Installation Guide
StarCeiling123’s Custom Star Panel Installation Guide explains in detail how to create an affordable ($350 –
400) custom Fiber Optic Star Ceiling. The directions are geared for a specific size (4 x 8) but you can easily
modify the plans to meet the needs of your project. Once you get started you will find working with fiber to
be relatively easy and you will be well on your way to becoming a pro!!!
Use COUPON CODE BUILDASTARCEILING to receive $10.00 off any order over $50.00 from StarCeiling123
You can find all the necessary fiber optic supplies and much more on our web site - www.starceiling123.com
Please email chris@starceiling123.com or call (866) 620-5176 with any questions you may have. We are
happy to help you get started and have the best prices around.
Copyright © 2006

Material List
1. Illuminator (light source) – Illuminators come in two main types, LED and Halogen. LED runs a little cooler and is
better suited for enclosed areas. Halogen illuminators have bulbs that can be changed and the ones we sell can
produce white or colored light. All of our illuminators can produce a twinkling effect. The main difference
between our selections of illuminators is the amount of fiber they can hold, if they have a steady on feature, if
they are remote controllable, and the ability to produce various colors. You can purchase individual illuminators
or get everything you need in a Star Ceiling Kit (recommended).
Recommended Illuminator(s)/Star Ceiling Kit(s):
Cool Sky 500 Strand Illuminator
Dual Port LED Illuminator w/ Remote Control
288 LED Star Ceiling Kit w/ Remote Control *** Best buy and performance for the money
200 Strand LED Illuminator Kit w/ Remote Control
CLICK HERE to see our entire selection of Illuminators
CLICK HERE to see our entire selection of Star Ceiling Kits
2. End Glow Fiber optic strands – Star ceilings seem to look best with 0.75mm, 1.0mm, or 1.5mm end glow fiber
optics. Our best seller is the StarPak 48 which contains 3 different sized fiber optics in a 48 strand bundle. The
StarPak 48 is included in our 288 LED Star Ceiling Kit w/ Remote Control. It’s the quickest way to give the look of
different sized stars. We also sell other various sized jacketed strands (EG8, EG12, EG25, EG50) and Fiber Optic
Spools. EG8 has 8 strands of fiber; EG12 has 12 strands, etc. There really isn’t a right or wrong size and it
generally works out fairly close in price. It all depends on the preference of the installer. As stated in the
previous section, Star Ceiling Kits already contain end glow fiber optics. With the exception of fiber spools, end
glow fiber is sold by the linear foot and our Fiber Optic Calculator is very helpful in determining the amount of
fiber required for your project.
Recommended End Glow Fiber Optics/Star Ceiling Kit(s):
Fiber Optic Strands Bundle - StarPak 48
288 LED Star Ceiling Kit w/ Remote Control *** Best buy and performance for the money
200 Strand LED Illuminator Kit w/ Remote Control
CLICK HERE to see our entire selection of End Glow Fiber Optic Strands
3. Rigid insulation – 4 X 8 sheet. There are a couple different types of this. The ¾ in. thick insulation (shiny on one
side) works the best. It’s a little more rigid than the pink or blue sheets. Can be found at any major hardware
store in the insulation section.
4. Wood to strengthen the rigid insulation – Pine – ¾” X 3 X 8 (4 pieces). A slight variation in the width is fine. I’d
go with at least 2”. This will go around the perimeter and down the middle to add strength.
5. Black velvet – 45” X 8’. Can be found at any fabric store. Make sure you get at least the amount specified it will
not completely cover the panel.
6. Wood for the frame and lip
a. Pine – ¾” X 4’ X 8’ (3 pieces). This will create the frame for the drop ceiling. Actual width of the pine is
about 3 ½”.
b. Pine – ¼” X 1 ½ X 8’ (3 pieces). This will attach to the underside of the box and act as a lip to hold the
unit in place.
7. Crown molding (optional) - ~5 ½” X 8’ (3 pieces). This will be used to dress it up in the end. I prefer the
decorative dental crown molding. Can be found at any major hardware store in the trim section.
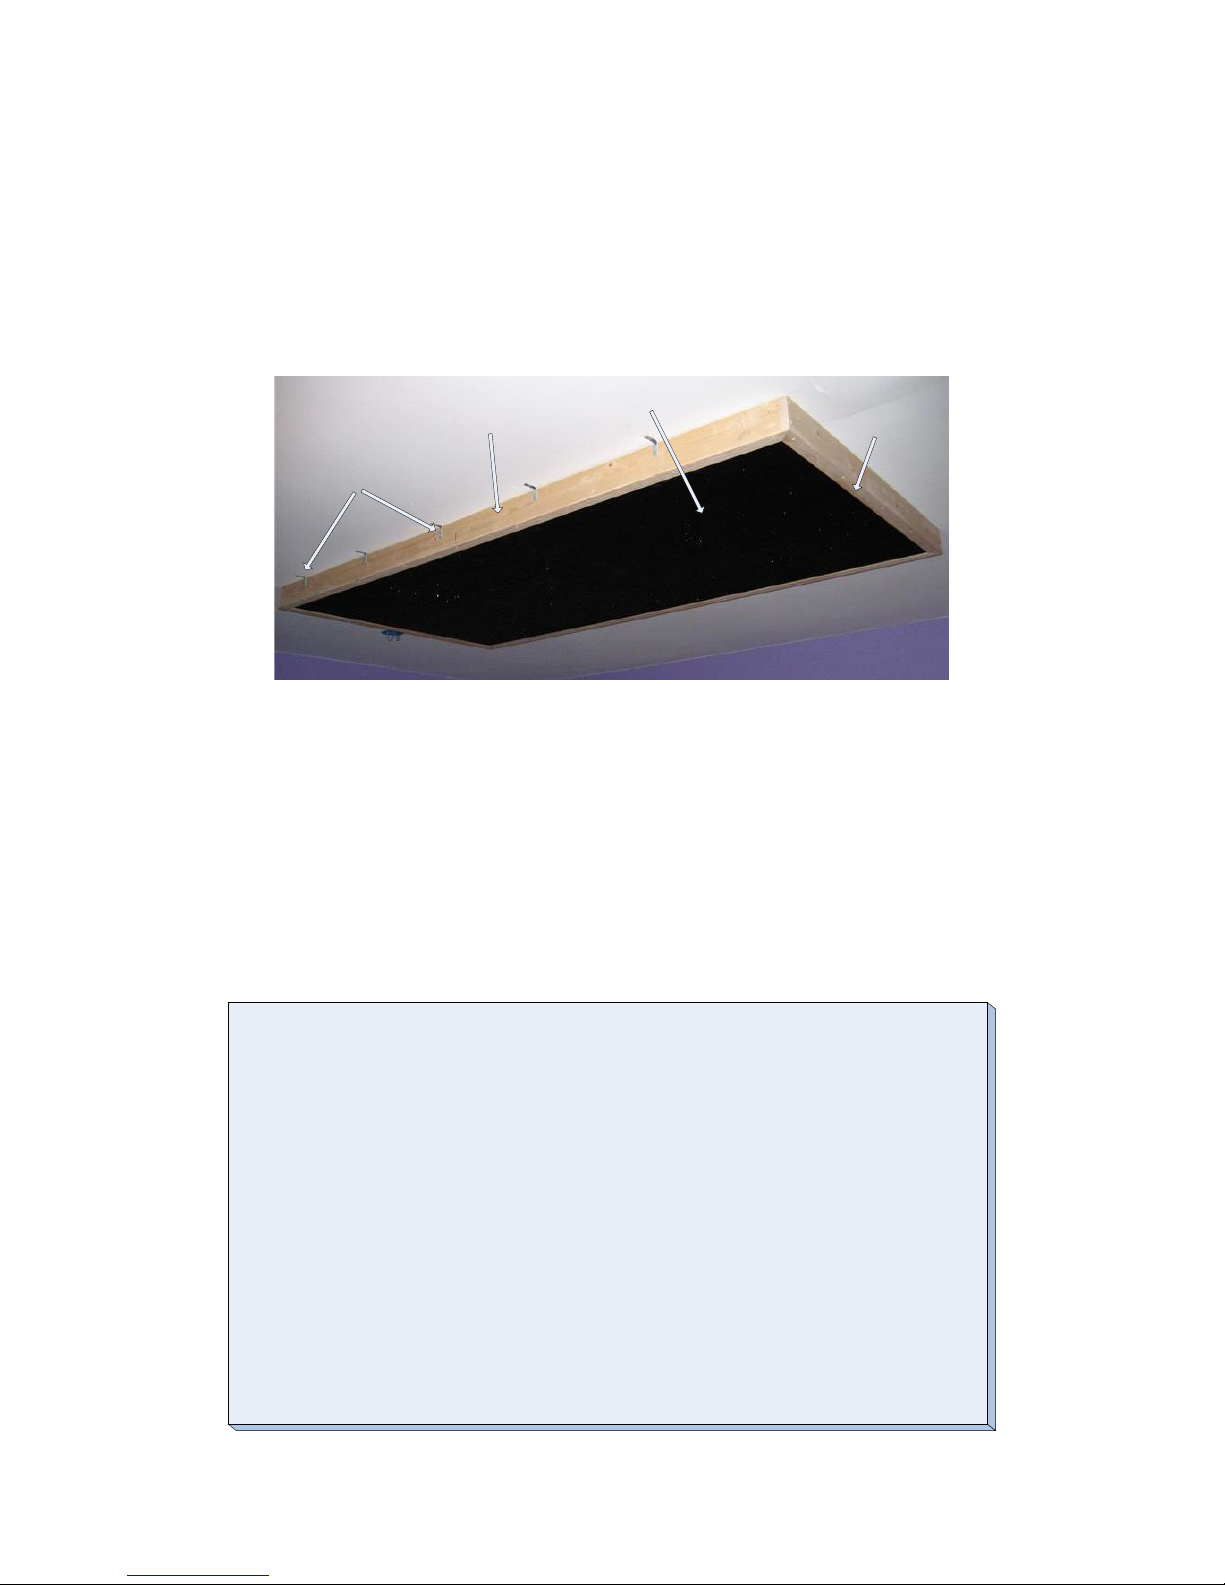
L bracket (s)
Wood frame
Wood lip
Black velvet
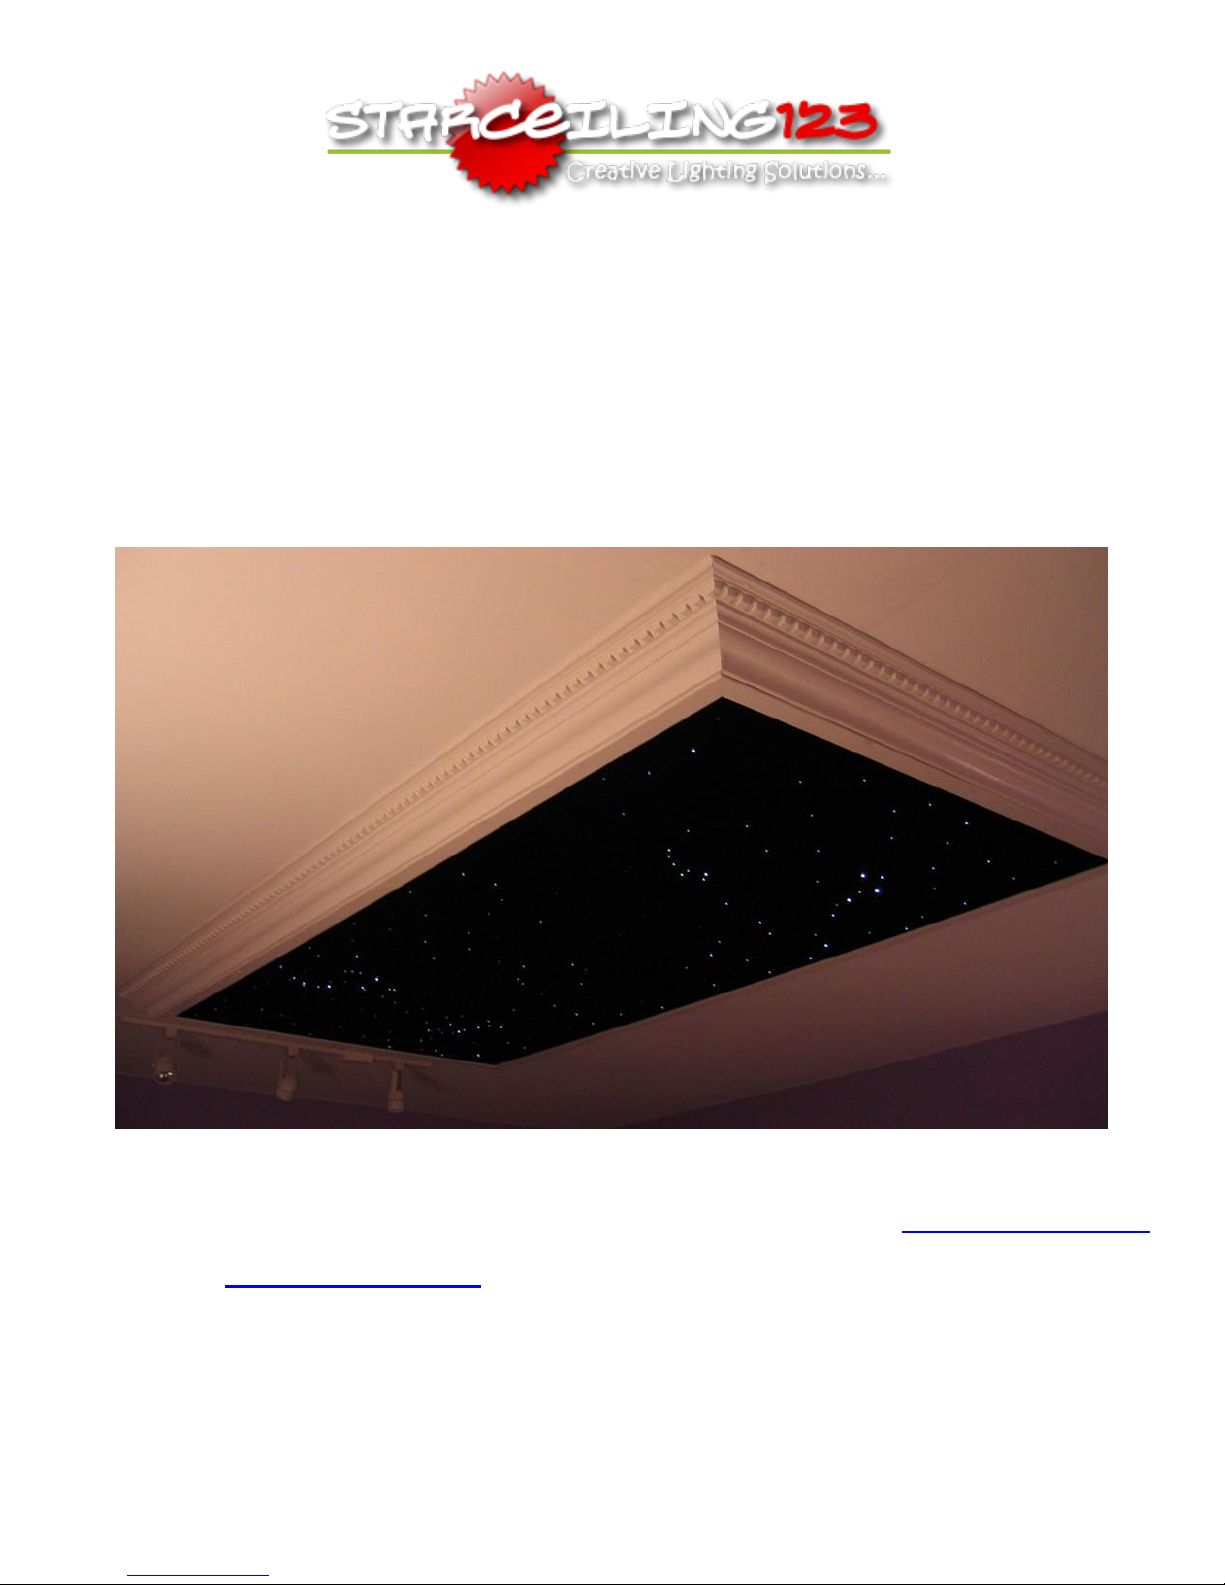
Picture without the crown molding
84"
40"
8. Metal brackets, screws, and nails
a. T & L brackets – 2 T’s and 4 L’s. Used to connect the pieces of the wood strengthening the rigid
insulation. Get enough wood screws to secure them.
b. L brackets – 10 – Used to secure the wood frame to the ceiling.
c. Screws
d. Finish nails
Material List (cont’d)
Installation
1. Cut the rigid insulation to the correct size – 84” X 40”. A utility knife and a straight edge works great.
 Loading...