

Page 1
SHALLOW WELL JET PUMP QUICK REFERENCE GUIDE
SEE INSTRUCTION MANUAL FOR
COMPLETE DETAILS
1/2 and 3/4 HP
Models with
built-in ejector
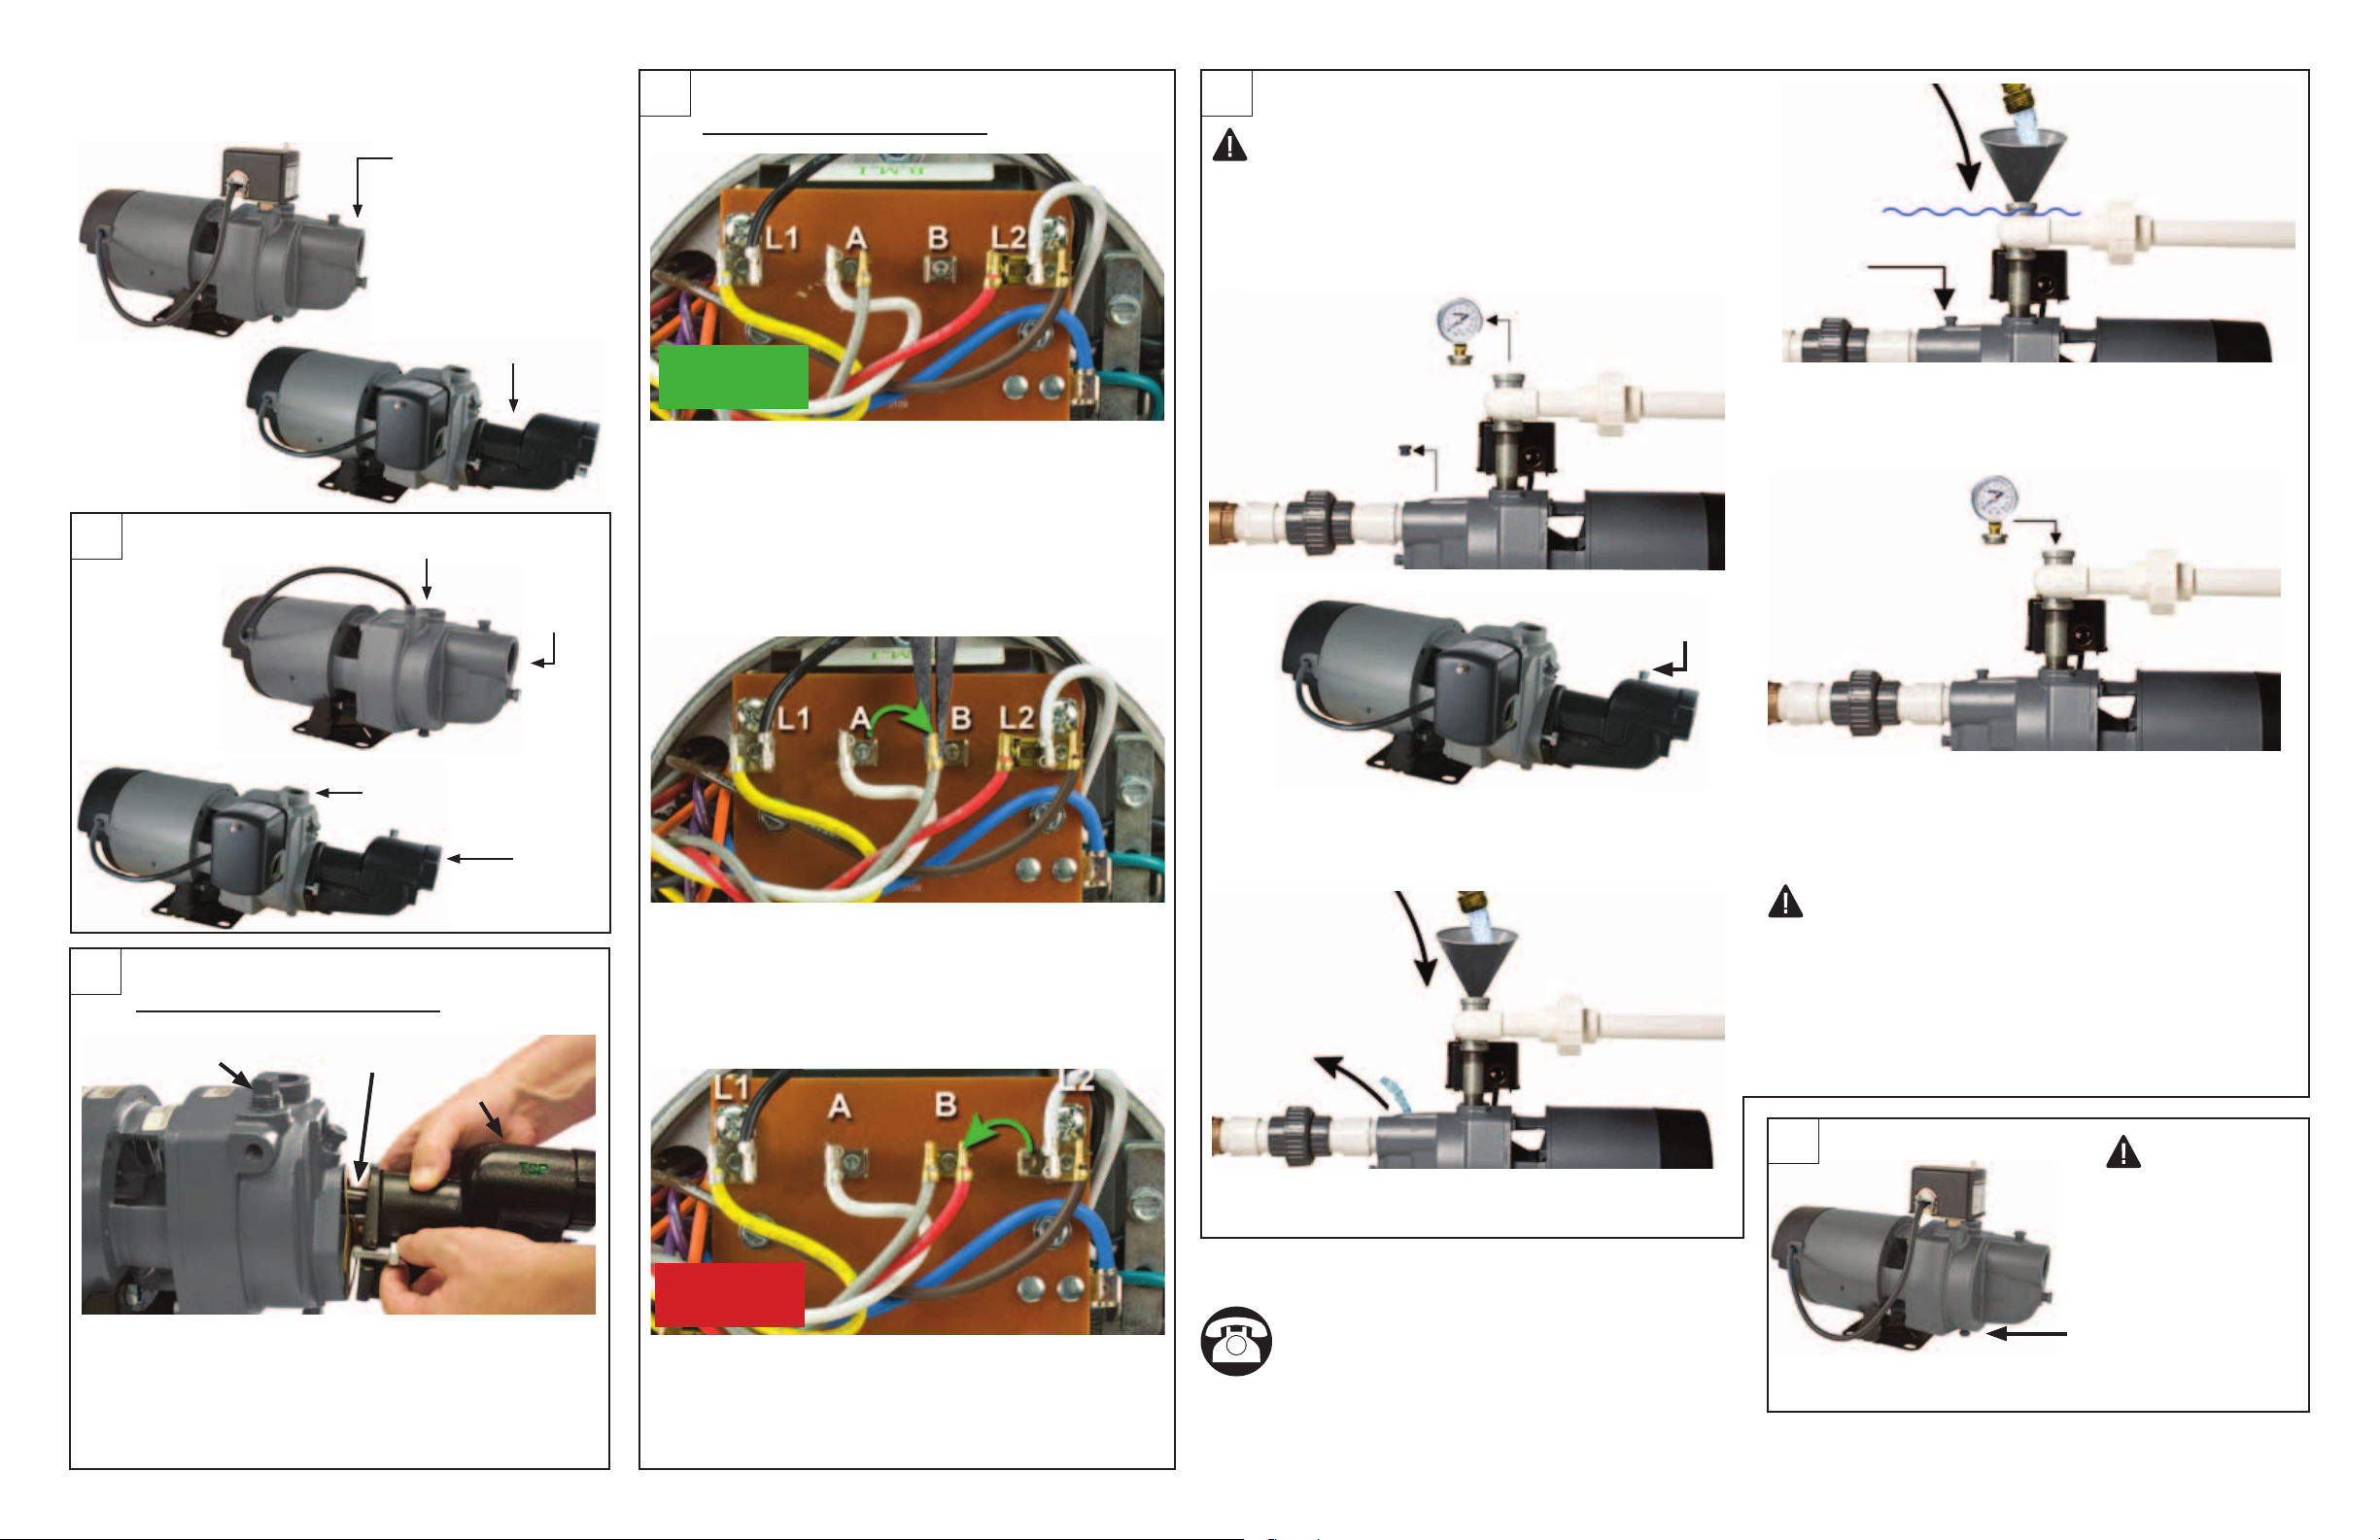
PIPE SIZES
1
1/2 and 3/4 HP
Models Only
3/4 in. Discharge
1 and 1-1/2 HP
Models with
separate,
bolt-on ejector
1-1/4 in.
Suction
ELECTRICAL CONNECTIONS
3 4
To change from 115V to 230V
115V
1. The motor of this pump is dual voltage and can
run on either 115V or 230V. In general, 230V is
more economical to run, and requires a smaller
wire size. 1/2 and 3/4 HP pumps are pre-set in
the factory to run at 115V. (Fig. 1)
2. For 230V service, change the following wires
on the terminal board:
PUMP PRIMING & STARTUP - PRIMING
CAUTION: All pumps must be primed (lling
the cavity with water) before they are rst operated.
This may take several gallons of water, as the
suction line will be lled in addition to the pump
cavity.
Priming plug
with pressure
gauge
Air relief plug
1/2 & 3/4 HP
Air relief plug
1 & 1-1/2 HP
Water
level in
pump
cavity
3. Replace air relief plug and continue adding
water to pump cavity until water reaches the
top of the priming plug. (Fig. 3)
1 and 1-1/2 HP
Models Only
1 in. Discharge
1-1/4 in.
Suction
INSTALLATION
2
1 and 1-1/2 HP Models Only
Priming Port
Attach ejector to face of pump with two (2) bolts
and gasket provided. Venturi tube on the ejector
inserts into the top tapping of the face of the pump
NOTE: 1/2 HP and 3/4 HP models have a
built-in ejector.
Venturi Tube
Ejector
a. Using a pair of needle nose pliers, pull the
gray wire with the female ag connector
from the “A” terminal spade post. Place it
to the right on the “B” terminal space post.
(Fig. 2a)
230V
b. Pull the red wire with the female ag
connector from the “L2” terminal. Place it to
the left on the “B” terminal space post.
(Fig. 2b)
1. Remove the 1/2 in. priming plug with pressure
gauge and air relief plug. (1/2 & 3/4 HP Fig. 1a)
(1 & 1-1/2 HP Fig. 1b)
2. Slowly ll pump cavity until water comes out of
air relief hole on top of the pump. (Fig. 2)
Questions? Call
1-800-742-5044
BEFORE
Returning Product
4. Thread in priming plug and then open optional
ball valve if installed (see page 5) by turning
handle to line up with the pipe. (Fig. 4)
5. Turn on breaker to start pump
IMPORTANT: If the pump hums instead of
pumping or turns off repeatedly, shut pump off
immediately.
Check voltage. Make sure your incoming voltage
matches the pump wiring voltage. See wiring guide in
the instructions.
5
PREVENT PUMP DAMAGE!
Remove plug in freezing weather.
WINTERIZING
CAUTION:
Drain the entire
system if there is
danger of freezing.
A drain plug is
provided at the
bottom of the
pump case for this
purpose.
023538 A
Copyright © 2011 Star Water Systems. All rights reserved.
 Loading...