

Star SJ05 1/2 HP, SJ10 1 HP, SJ07 3/4 HP Quick Reference Manual
For use with a pressure tank. Do not use for irrigation applications.
Air release valve
MODEL SJ05 1/2 HP, SJ07 3/4 HP,
SJ10 1 HP
Deepwell 2 Pipe
CONVERTIBLE JET
PUMP
QUICK REFERENCE GUIDE.
SEE INSTRUCTION MANUAL FOR
COMPLETE DETAILS.
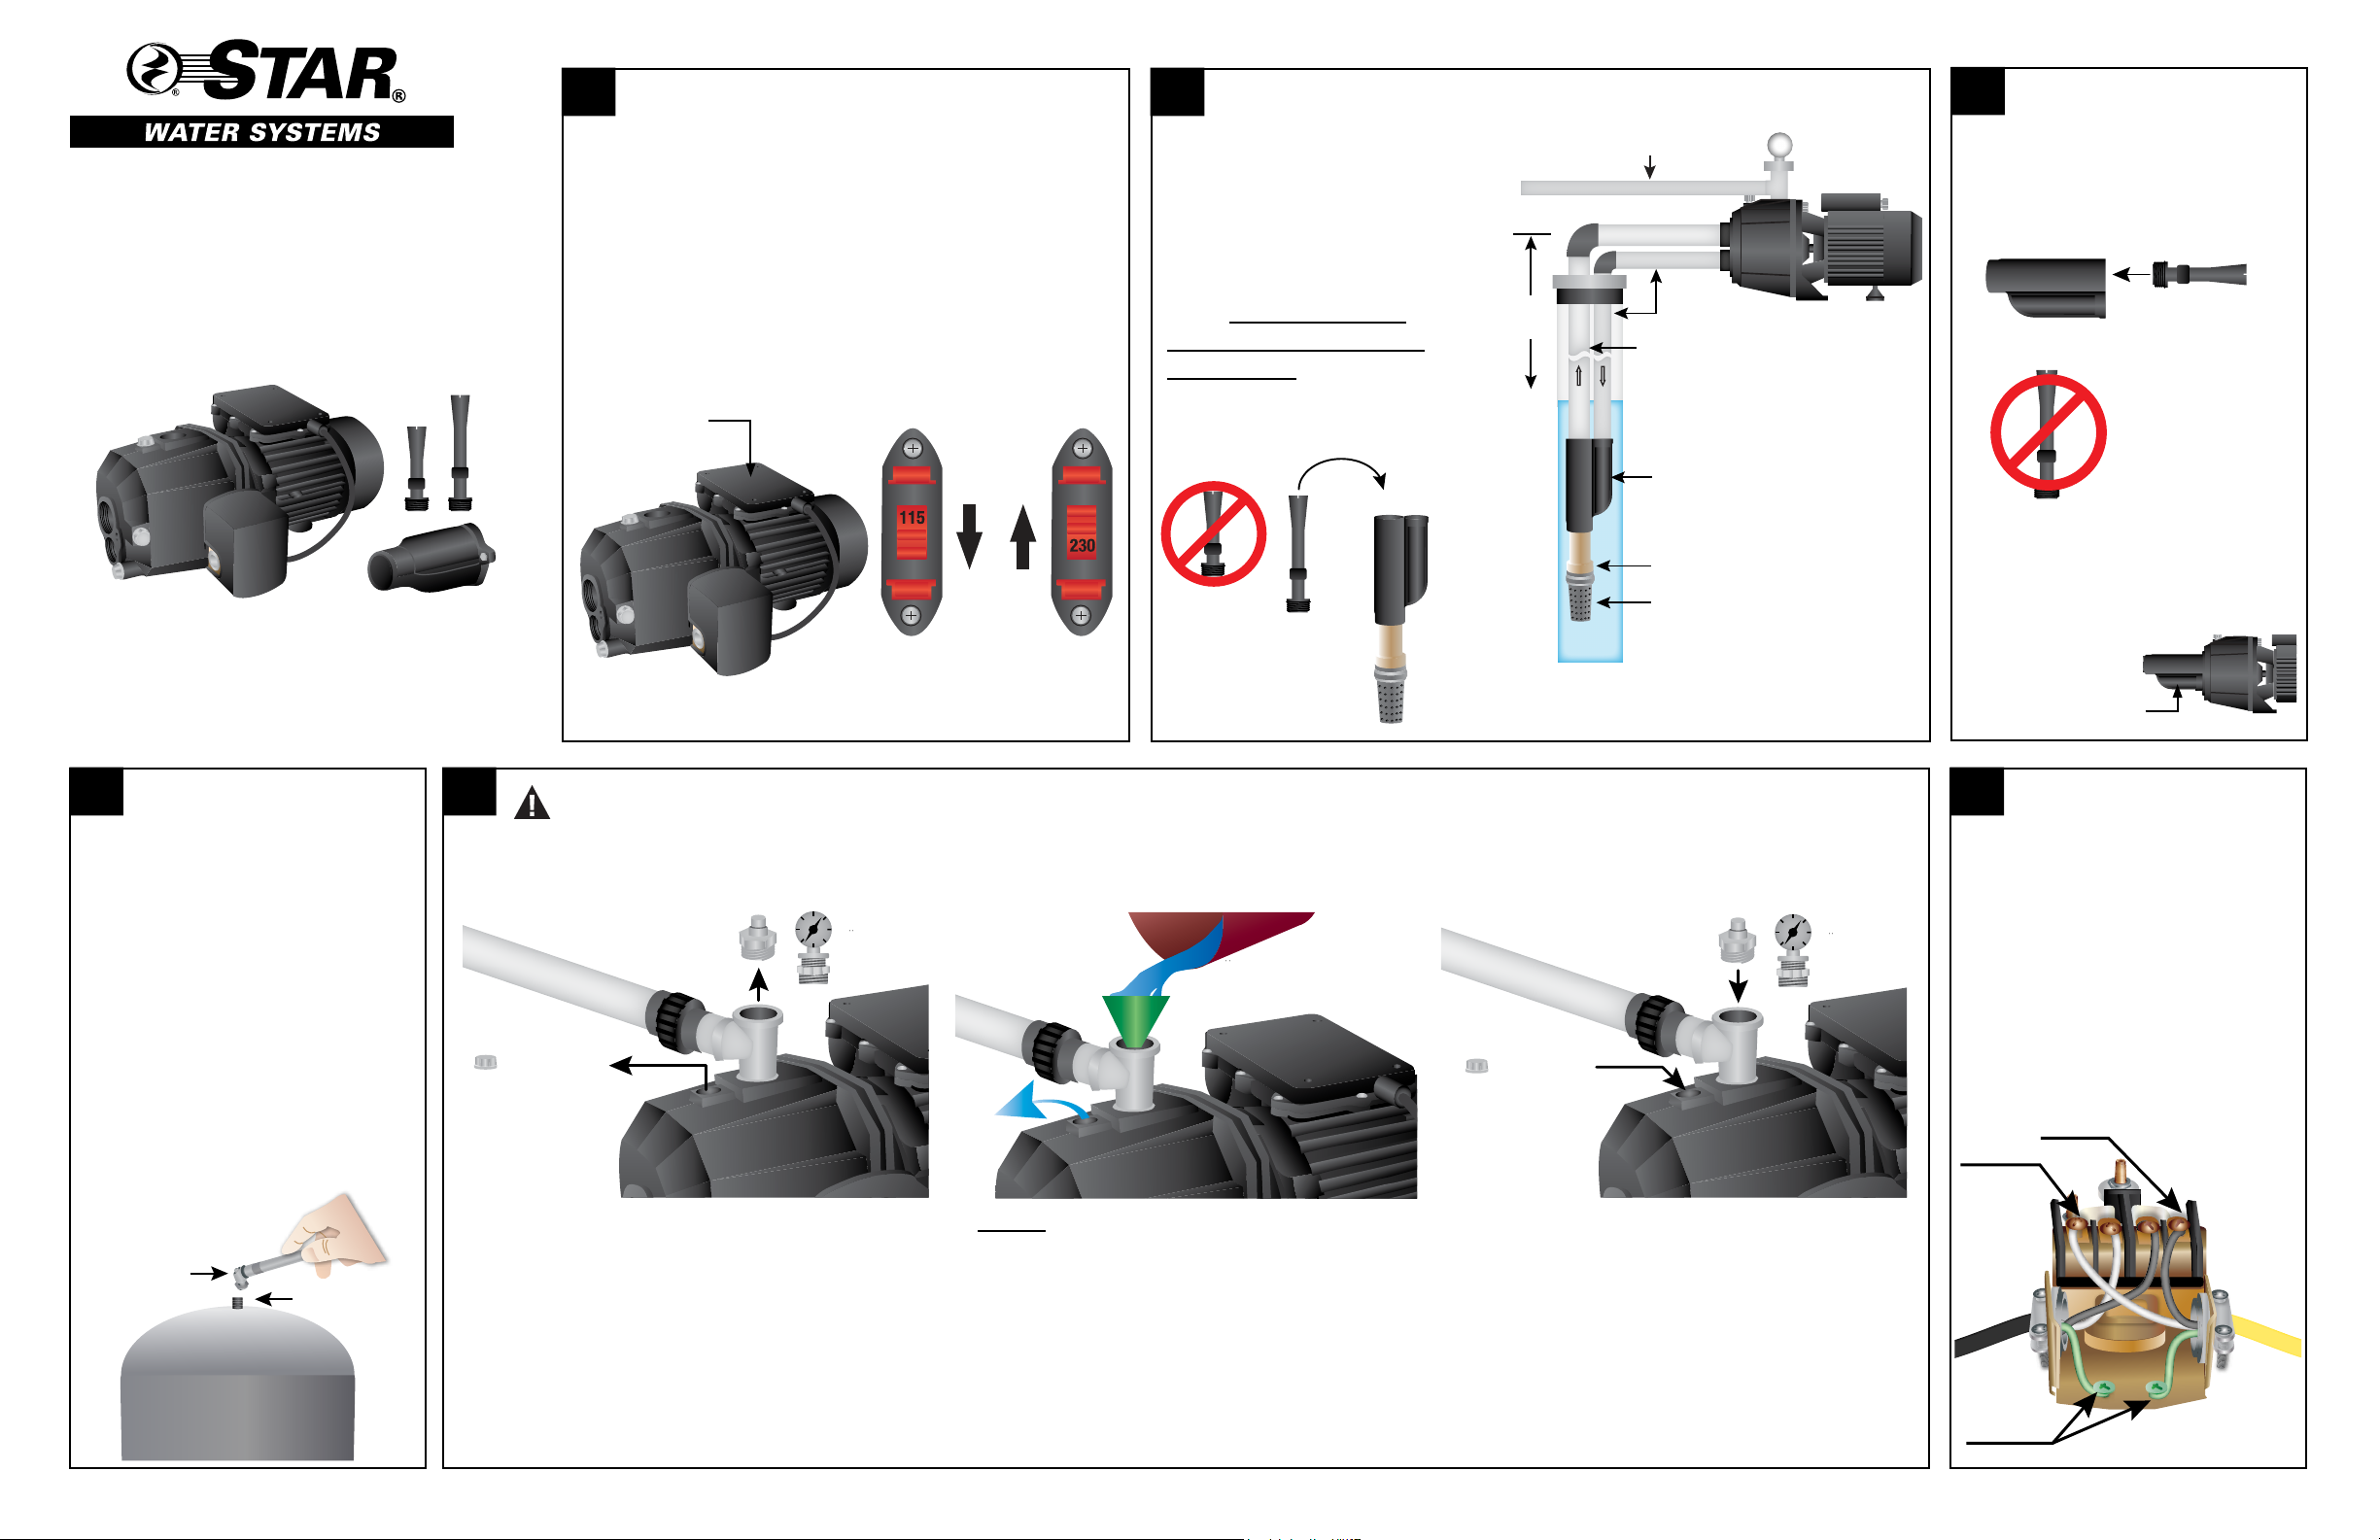
CAUTION: Make certain that the power
1
source matches the pump requirements. Pump
has a dual voltage motor and can run on either
115 V or 230 V.
Pump is pre-set at the factory to run
on 230 V.
To change pump voltage, remove the square
voltage switch cover at the top of pump and
move the voltage switch as shown.
Switch cover
Voltage Switch
115 V
Setting
230 V
Setting
2a
The provided ejector kit must
be used with this pump.
IMPORTANT: For deep
well applications, use long
venturi tube in ejector
body. Do not use short
venturi tube in deep well
applications.
Ejector must be installed
in well as shown.
Two Pipe Deep Well Installations Only
Water Level
Short
Long
To Tank
Suction Lift
40 ft.
Max.
1 in.
Discharge Pipe
1 in.
Pressure Pipe
1-1/4 in.
Suction Pipe
1-1/4 to 1 in. Male Adapter
1-1/4 in. Foot Valve
2b
IMPORTANT: Use short venturi
tube in ejector body for shallow
well applications. Do not use
long venturi tube.
Single Pipe Shallow Well
Installations Only
Short
Long
For single pipe shallow well
installations, bolt ejector to
front of pump. See instructions
for more
information.
Ejector
CHECK TANK PRESSURE
1. Completely drain all water
from tank by turning off pump
and opening a faucet until
water stops.
2. Use a pressure gauge to ensure
it’s set to 18 psi.
a. Use a tire pump to adjust the
psi to 18 psi
b. If water leaks from the air
release valve, replace the
pressure tank.
Pressure
gauge
Set to
18 psi
4
CAUTION: All pumps must be primed by lling the cavity with water before they are rst operated. This will take several gallons of
water, as the suction line must be lled in addition to the cavity of pump. Depending on the length of suction pipe, many gallons may be
needed to ll the entire system.
Pressure Gauge or
Discharge tee plug
Vent plug
a. Remove pressure gauge or discharge
tee plug (not included) from the top of the
discharge tee (not included). Remove the
vent plug in front of the discharge tee.
b. Slowly ll the discharge tee with water
until water overows the vent plug
opening. NOTE: Before turning on
pump, loosely replace vent plug and open
several outlets or faucets to allow water
ow during priming.
c. Check to be sure water in the cavity
Pressure Gauge or
Discharge tee plug
Vent plug
of pump stays constant. If water level
goes down, it could indicate a leak in
the foot valve, check valve or suction
pipe. If water remains constant, wrap the
pressure gauge or discharge tee plug and
vent plug threads with thread tape and
thread into pump. Tighten with wrench
(not included).
53
Connect the two wires from
the power supply to the two
open terminals on the pressure
switch. Connect the green
ground wire from the power
supply to the open green
ground screw in the pressure
switch.
Open
Terminals
Wire
from
motor
Ground
Screws
Wire from
power
supply
Printed in China
SW0901 B
 Loading...