

Star GX10IS, GX10ISG, GX14ISG, GX20IGS, GX14IG Installation And Operation Instructions Manual
...
TWO SIDED
GRILLS
MODEL
GX10IG, IS, ISG
GX14IG, IS, ISG
GX20IG, IS, IGS
Installation and
Operation
Instructions
2M-Z7971 Rev. G 8/16/07
GX10IG
1

SAFETY SYMBOL
Using any part other than genuine Star factory supplied parts relieves the
manufacturer of all liability.
Star reserves the right to change specifi cations and product design without
notice. Such revisions do not entitle the buyer to corresponding changes,
improvements, additions or replacements for previously purchased
equipment.
Due to periodic changes in designs, methods, procedures, policies and
regulations, the specifi cations contained in this sheet are subject to change
without notice. While Star Manufacturing exercises good faith efforts to provide
information that is accurate, we are not responsible for errors or omissions
in information provided or conclusions reached as a result of using the
specifi cations. By using the information provided, the user assumes all risks in
connection with such use.
These symbols are intended to alert the user to the presence of
important operating and maintenance instructions in the manual
accompanying the appliance.
RETAIN THIS MANUAL FOR FUTURE REFERENCE
NOTICE
MAINTENANCE AND REPAIRS
Contact your local authorized service agent for service or required maintenance. Please record the model
number, serial number, voltage and purchase date in the area below and have it ready when you call to
ensure faster service.
Model No.
Serial No.
Voltage
Purchase Date
Authorized Service Agent
Reference the listing provided with the unit
or
for an updated listing go to:
Website: www.star-mfg.com
E-mail Service@star-mfg.com
Telephone: (800) 807-9054 Local (314) 781-2777
The Star Service Help Desk
Business 8:00 am to 4:30 p.m. Central Standard Time
Hours:
Telephone: (800) 807-9054 Local (314) 781-2777
Fax: (800) 396-2677 Local (314) 781-2714
E-mail Parts@star-mfg.com
Service@star-mfg.com
Warranty@star-mfg.com
Website: www.star-mfg.com
Mailing Address: Star Manufacturing International Inc.
10 Sunnen Drive
St. Louis, MO 63143
U.S.A
2
2

GENERAL INSTALLATION DATA
CAUTION
This equipment is designed and sold for
commercial use only by personnel trained and
experienced in its operation and is not sold for
consumer use in and around the home nor for
use directly by the general public in food service
locations.
All shipping containers should be checked for
freight damage both visible and concealed. This
unit has been tested and carefully packaged to
insure delivery of your unit in perfect condition.
If equipment is received in damaged condition,
either apparent or concealed, a claim must be
made with the delivering carrier.
Concealed damage or loss - if damage or loss is
not apparent until after equipment is unpacked, a
request for inspection of concealed damage must
be made with carrier within 15 days. Be certain
to retain all contents plus external and internal
packaging materials for inspection. The carrier
will make an inspection and will supply necessary
claim forms.
ELECTRICAL CONNECTION
CAUTION
Before making any electrical connection be sure
to read data plate which is located at the bottom
of the unit.
ELECTRICAL GROUNDING
INSTRUCTIONS
This unit is equipped with a 3-prong (grounding)
plug for your protection against shock hazard and
must be plugged directly into a properly grounded
3-prong receptacle.
CAUTION
DO NOT CUT OR REMOVE THIS PLUG OR
GROUNDING PRONG FROM THE PLUG.
CAUTION
CONNECT/PLUG UNIT INTO DEDICATED
A.C. LINE ONLY SPECIFIED ON THE DATA
PLATE OF THE UNIT.
VENTILATION AND CLEARANCES
The installation of any components such as
a vent hood, grease extractors, and/or fi re
extinguishing systems, must conform to their
applicable nationally recognized installation
standards and/or local building codes.
3

ELECTRICAL SPECIFICATIONS
Model Voltage Rated Wattage Amps Plug
GX10IG 120V 1,400 11.7 NEMA 5-15P
GX10IG 230V 1,650 7.2 BS 1363A (16amp)
GX10IG 208/240V 1,350 / 1,800 6.5 / 7.5 NEMA 6-15P
GX10IS 120V 1,400 11.7 NEMA 5-15P
GX10IS 230V 1,650 7.2 BS 1363A (16amp)
GX10IS 208/240V 1,350 / 1,800 6.5 / 7.5 NEMA 6-15P
GX10ISG 120V 1,400 11.7 NEMA 5-15P
GX10ISG 230V 1,650 7.2 BS 1363A (16amp)
GX14IG 120V 1,800 15 NEMA 5-15P
GX14IG 230V 2,570 11.2 BS 1363A (16 amp)
GX14IG 208/240V 2,100 / 2,800 10.1 / 11.7 NEMA 6-15P
GX14IS 120V 1,800 15 NEMA 5-15P
GX14IS 230V 2,570 11.2 BS 1363A (16 amp)
GX14IS 208/240V 2,100 / 2,800 10.1 / 11.7 NEMA 6-15P
GX14ISG 120V 1,800 15 NEMA 5-15P
GX14ISG 230V 2,570 11.2 BS 1363A (16 amp)
GX20IG 208/240V 2,700 / 3,600 13 / 15 NEMA 6-20P
GX20IG 230V 3,300 14.4 BS 1363A (16 amp)
GX20IGS 208/240V 2,700 / 3,600 13 / 15 NEMA 6-20P
GX20IGS 230V 3,300 14.4 BS 1363A (16 amp)
GX20IS 208/240V 2,700 / 3,600 13 / 15 NEMA 6-20P
GX20IS 230V 3,300 14.4 BS 1363A (16 amp)
CAUTION
CONNECT/PLUG UNIT INTO DEDICATED
A.C. LINE ONLY SPECIFIED ON THE DATA
PLATE OF THE UNIT.
INITIAL START UP
Level unit using the adjustable feet under the unit
(approximately 1/2" adjustment).
Before using the unit for the fi rst time, wipe
down the exterior and grilling area with a damp
cloth. Take to a well ventilated area and heat for
approximately 30 minutes. The grill may emit a
small amount of smoke as the cooking surfaces
reaches 450°F. Do not be alarmed, as the smoke
is caused by oils associated with the manufacturing
process and will stop when the burn off is complete.
Brush off any debris from the grilling surface.
SEASONING THE COOKING SURFACES
The cooking surfaces must be "seasoned" in order
to reduce product sticking. To season, bring grill
to 300°F, until completed. Brush upper and lower
cooking surfaces with a a salt free liquid vegitable
oil. If using an aerosol agent, fi rst apply into a cup
and then brush onto cooking surface. Let sit for 20
minutes, and then wipe clean using a warm damp
cloth. Repeat if required.
SETTING THE TEMPERATURE
The thermostat control knob is used to set the
temperature to your requirements. The maximum
set point is 450°F (232°C), the minimum set point
is 175°F (79°C). See Knob Settings.
DAILY OPERATION
Check the power cord to insure that it is plugged
into a proper outlet.
Check that the thermostat control is turned on.
The Pilot Light will come on when the thermostat
control goes past the 175°F.
Set the thermostat control knob to desired
temperature.
Always allow 20 minutes of preheat time before
loading the unit with product. Failure to allow
suffi cient preheat time will result in unsatisfactory
cooking of the fi rst load.
4
OPERATING HINTS AND SAFETY
Disconnect power to the unit with the switch at the
end of each day of operation.
Do not leave the unit in operation without an
attendant.
Turn thermostat down to 200°F (93°C) during idle
periods. It will take only a few minutes to regain
operating temperature.
Use spatula to push excess grease into grease cup
after each load of food is cooked. This will reduce
smoking of hot grease and carbonizing.
Do not leave the unit at high temperature when not
in use or during idle periods. This will cause food
particles and grease fi lm to carbonize.
"Season" cooking surfaces with non-salted
vegetable oil to reduce product sticking.
MONTHLY LUBRICATION/INSPECTION
Apply two (2) drops of non-toxic mineral or
vegetable oil to hinge bracket at the rear.
Check the bolts, screws and nuts, tighten if
necessary.
CLEANING
While holding top lid with one hand, apply only
cleaners which are safe for aluminum and iron
surfaces. Wipe with clean sponge or towel
until unit is clean.
1. If particles adhere to the cooking surface
during the day, scrape them off with a spatula
or stiff brush.
NOTE: It is best not to let food cook on to the grill,
as build up of food on the grill will increase sticking
and smoking. In addition, carbon may build up on
the grill surface and reduce the cooking effi ciency.
2. At the end of the day, wipe down all surfaces
with a warm, damp cloth, use a mild detergent
on all non-cooking areas and then dry entire
unit.
3. Remove and empty to clean grease catcher
cup as required using mild detergent and
water.
CLEANING CARBON BUILDUP
1. When carbon build up occurs, use a carbon
removal agent to clean cooking surface. When
this process is completed, you must re-season
the grill (See Seasoning Grill).
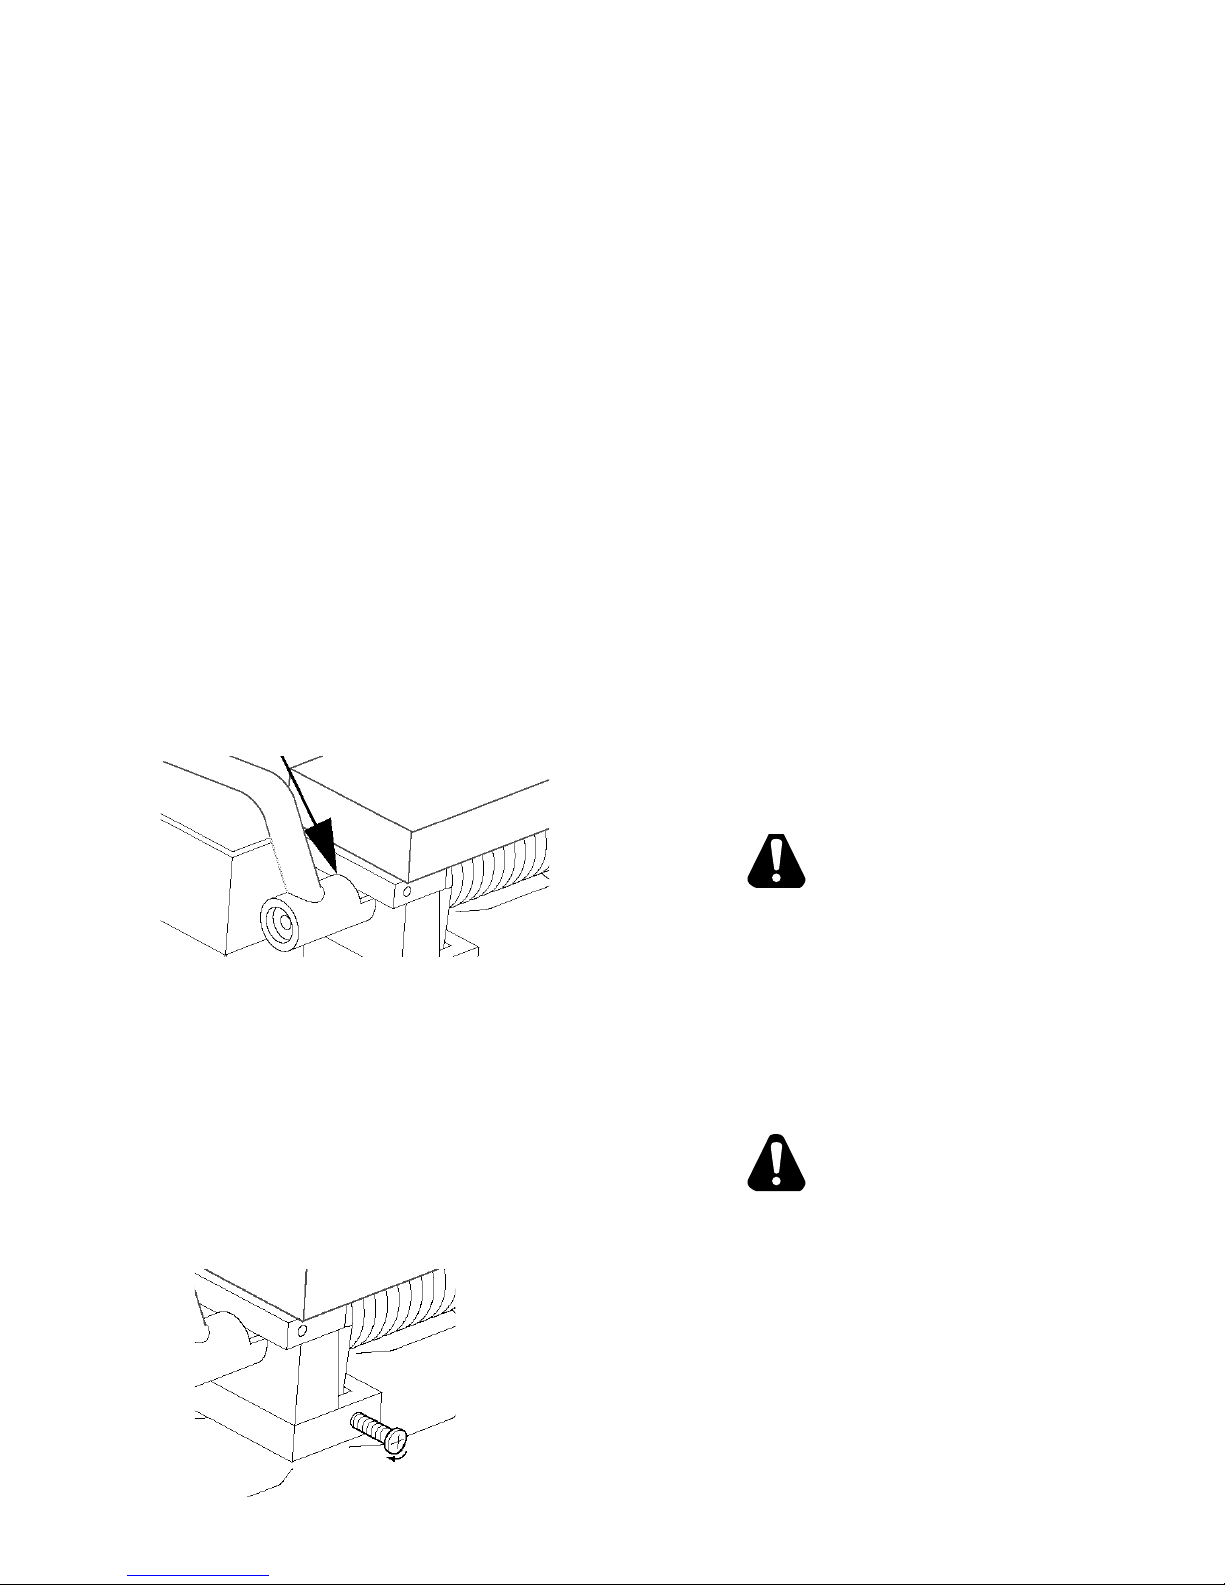
Oiling the Hinge
TOP HOUSING MAINTENANCE
The Spring setting which holds the top housing
in the up position is set at the factory and should
provide many years of use without the need of
adjusting. After a extended period of time the
top housing may not maintain its original setting,
therefore the spring tension can be adjusted by
tightening and loosening the Retainer bolts on the
back of the unit.
2. Acidic cleaners are NOT recommended as a
cleaning agent.
CAUTION
DO NOT IMMERSE OR LET THE UNIT
STAND IN WATER.
DO NOT HOSE DOWN THE UNIT OR THE
TABLE/COUNTER IF THE UNIT IS ON THE
TABLE/COUNTER.
KEEP AWAY FROM RUNNING WATER.
CAUTION
DO NOT USE SHARP OBJECTS TO
REMOVE CARBON BUILD-UP.
BEFORE CLEANING MAKE SURE POWER
IS TURNED OFF, UNIT IS UNPLUGGED AND
IS NOT TOO HOT.
Tightening the top housing
5
 Loading...