

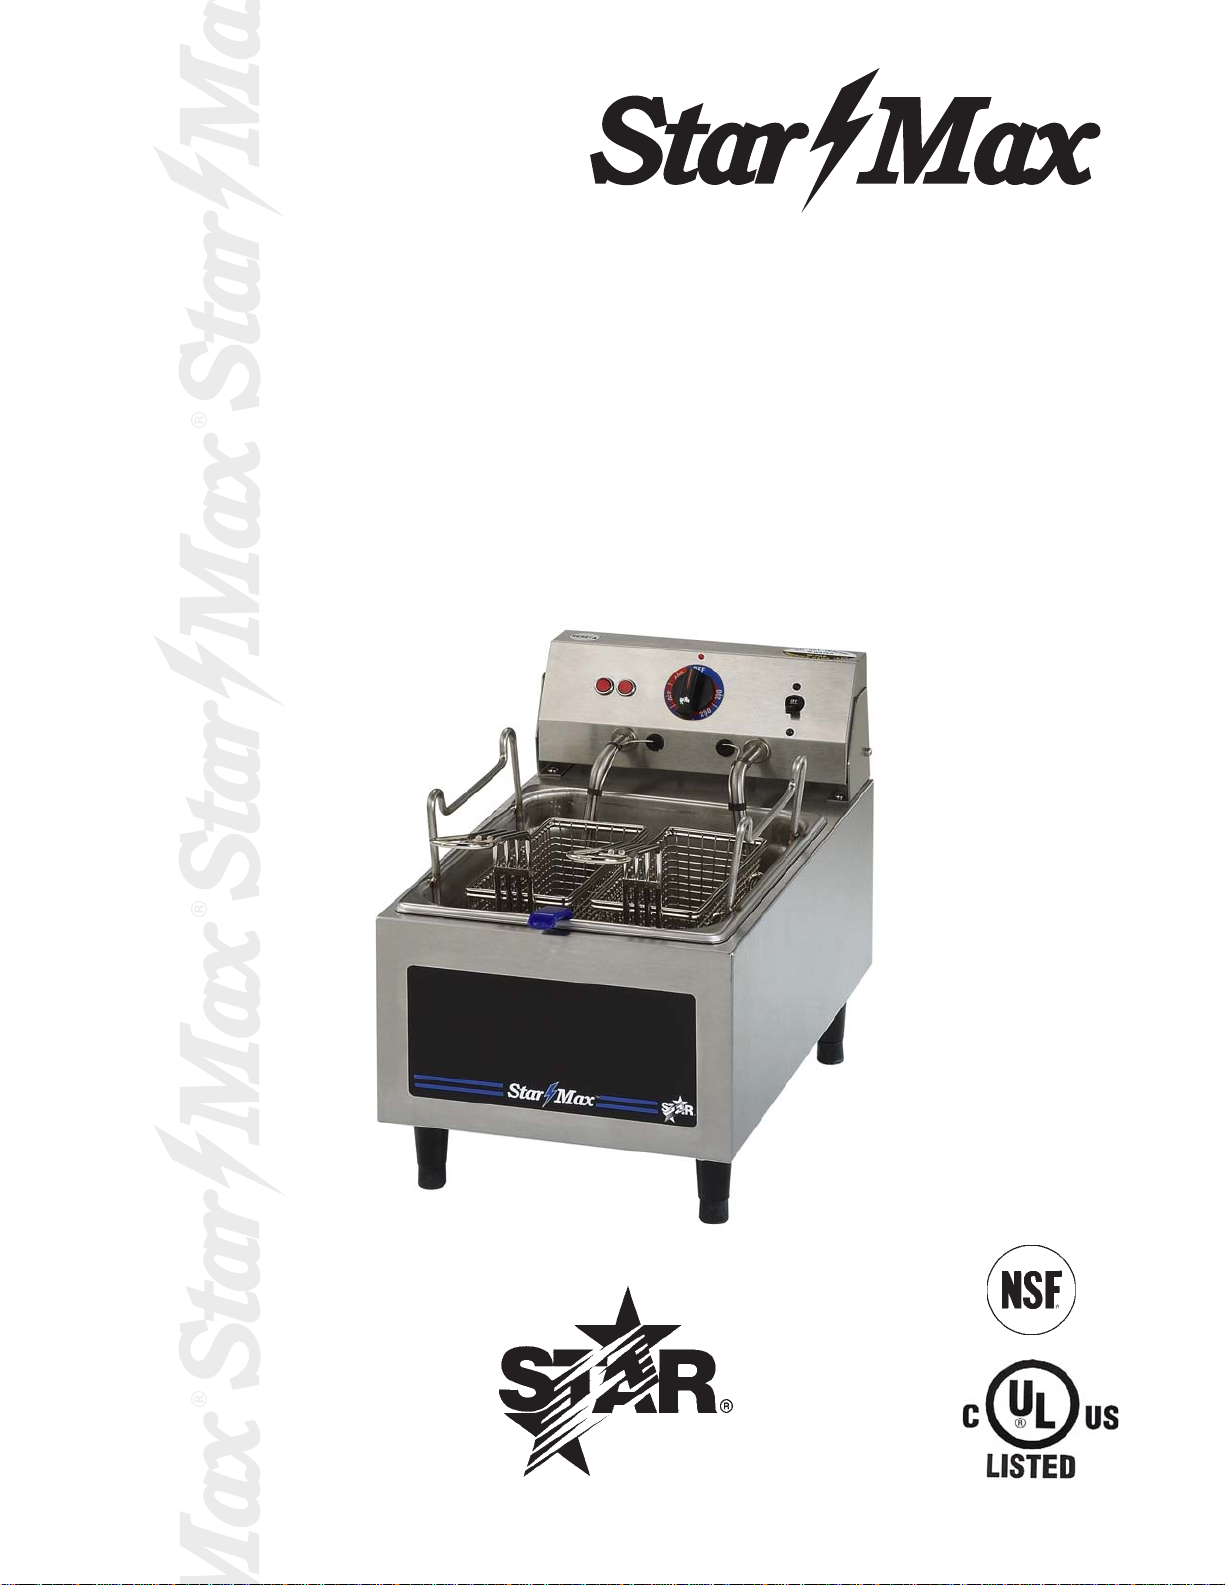
Star 510FD Parts List
®
®
®®®
DEEP FAT
FRYER
MODEL
510FD SERIES
Installation and
Operation
Instructions
2M-Y9203 Rev. G 9/30/11
510FD
1
These symbols are intended to alert the user to the presence of
important operating and maintenance instructions in the manual
accompanying the appliance.
RETAIN THIS MANUAL FOR FUTURE REFERENCE
NOTICE
Using any part other than genuine Star factory supplied parts relieves the
manufacturer of all liability.
Star reserves the right to change specications and product design without
notice. Such revisions do not entitle the buyer to corresponding changes,
improvements, additions or replacements for previously purchased
equipment.
Due to periodic changes in designs, methods, procedures, policies and
regulations, the specications contained in this sheet are subject to change
without notice. While Star International Holdings Inc., Company exercises
good faith efforts to provide information that is accurate, we are not
responsible for errors or omissions in information provided or conclusions
reached as a result of using the specications. By using the information
provided, the user assumes all risks in connection with such use.
MAINTENANCE AND REPAIRS
Contact your local authorized service agent for service or required maintenance.
Please record the model number, serial number, voltage and purchase date in the area below and have it ready when
you call to ensure a faster service.
SAFETY SYMBOL
Model No.
Serial No.
Voltage
Purchase Date
Business
8:00 am to 4:30 p.m. Central Standard Time
Hours:
Telephone: (314) 684-6303
Fax: (314) 781-2714
E-mail Parts@star-mfg.com
Service@star-mfg.com
Warranty@star-mfg.com
Website: www.star-mfg.com
Service Help Desk
Authorized Service Agent Listing
Reference the listing provided with the unit
or
for an updated listing go to:
Website: www.star-mfg.com
E-mail Service@star-mfg.com
Mailing Address: Star International Holdings Inc., Company
10 Sunnen Drive
St. Louis, MO 63143
U.S.A
2
CAUTION
SPECIFICATIONS
510FD
Type: 10 lb. ELECTRIC FRYER
120V, 1,800 watts, 15 amp, 5-15P NEMA Plug
Approximate weight: installed - 20 lbs (9 kg), shipping - 25 lbs (11.3 kg)
Dimensions: 11" - Width, 17 5/8" - Depth, 14 1/4" - Height
(28 cm - Width, 34.7 cm - Depth, 36.1 cm - Height)
This equipment is designed and sold for commercial use only by personnel trained and
experienced in its operation and is not sold for consumer use in and around the home
nor for use directly by the general public in food service locations.
Before using your new equipment, read and understand all the instructions & labels
associated with the unit prior to putting it into operation. Make sure all people
associated with its use understand the units operation & safety before they use the unit.
All shipping containers should be checked for freight damage both visible and
concealed. This unit has been tested and carefully packaged to insure delivery of your
unit in perfect condition. If equipment is received in damaged condition, either apparent
or concealed, a claim must be made with the delivering carrier.
Concealed damage or loss - if damage or loss is not apparent until after equipment is
unpacked, a request for inspection of concealed damage must be made with carrier
within 15 days. Be certain to retain all contents plus external and internal packaging
materials for inspection. The carrier will make an inspection and will supply necessary
claim forms.
WARNING
INSTALLATION
These fryers are equipped for the voltage and wattage indicated on the nameplate
mounted to the element housing and are designed for use on alternating current
(AC) only.
DO NOT CONNECT TO DIRECT CURRENT (DC).
PLACE THE LAMINATED WARNING SIGN SUPPLIED WITH THE FRYER IN AN
AREA VISIBLE TO THE FRYER OPERATOR.
GENERAL OPERATING INSTRUCTIONS
These fryers are designed to a 10 lb. maximum capacity of fat.
Follow these simple steps for setting up the fryer:
1. Be sure the switch is in the OFF position. Plug the cord into a suitable receptacle. The
receptacle should match the plug.
2. Adding Fat: Replace kettle and swing the element down, making fryer ready for use.
Add fat. A fat level line on the rear of the kettle will guide you in determining the minimum
cold fat level (the fryer has a 10 lb. capacity). A higher fat level can be used when frying
bulky foods, such as chicken or sh cakes. The fat level should be chosen carefully
so that the foaming action of the fat does not spill out of the kettle. If solid shortening
is used, pack carefully around the element.
3. Controls:
a. ON/OFF Two-Pole Switch - Located on the front control panel is a two-pole
switch which turns power on or off. An indicator light (top) is located on the control
housing.
3
b. Thermostat Control - Located on the control housing, this control allows you to select
the desired frying temperature. A signal light (bottom) indicates when the element
is on. When the light goes off, the desired temperature has been reached.
c. HI-Limit Thermostat - Should fat temperatures reach 450°, this control will shut off
the power. Both lights on the control panel will go out. The fat temperature must
cool to 400° F and the manual reset button located on the back panel of the control
housing must be pressed to restore operation. Should HI-Limit control activate
twice in succession, the primary thermostat should be checked for malfunction by
a qualied service technician.
4. Frying: After fat has been added, turn the switch on and set the thermostat at 200°F.
After the fat has melted, turn the thermostat to the desired setting. Included in this
instruction manual is a frying chart and some helpful hints on fat use. After the selected
fat temperature has been reached, slowly lower 1/3 lled basket into the fat. Do not
overload basket, as this causes foods to be improperly fried.
NOTE: Baskets should be allowed to drain after frying cycle. The kettle handles serve
as basket holders.
HOT FAT IS POTENTIALLY DANGEROUS. DO NOT COME IN DIRECT CONTACT
WITH HOT FAT.
CAUTION
CAUTION
5. Idling: During idle periods turn thermostat control to approximately 200°. The fast
recovery fryers can be brought up to frying temperature in a matter of minutes. Lowering
the temperature during idle periods saves fuel costs and prolongs fat life.
6. Draining kettle: Turn switch to "OFF". Raise element to the rst stop and allow to drain.
Raise the element to the vertical position and siphon the oil out of the kettle. DO NOT
ATTEMPT TO REMOVE THE KETTLE FILLED WITH HOT OIL. If you do not have a
siphon, order one from your dealer or dip the oil out and strain into a container. After
oil has been removed, remove the kettle and clean.
7. Cleaning the exterior: The exterior surfaces can be cleaned by regularly wiping with a
soft cloth. Any discoloration can be removed with a non-abrasive cleaner.
GENERAL MAINTENANCE TIPS
1. DO NOT re empty kettle or with fat or oil beneath the minimum level indicator.
2. DO NOT fry foods in excess of 385°F (196°C).
3. DO NOT overll your fry kettle.
4. DO NOT allow burned crumbs to accumulate.
5. DO melt solid fat or shortening before lling fryer.
6. DO keep kettle lled to capacity at all time.
7. DO use correct fry fats and shortening, and follow temperature recommendations.
8. DO lter fat and clean fry kettle daily.
DO NOT OPERATE UNIT WITHOUT FAT. CHECK FAT LEVEL FREQUENTLY.
DO NOT IMMERSE IN WATER AT ANY TIME.
CAUTION
INAPPROPRIATE USE DUE TO A LACK OF COMMON SENSE MAY RESULT
IN PRODUCT DAMAGE OR PERSONAL INJURY.
MAINTENANCE AND REPAIRS
Contact the factory or one of its representatives or a local service company for service or
maintenance if required.
4
 Loading...