

Stanley Audio Blue Nebula User Manual
Blue Nebula User Guide, Firmware Revision 4 Page | 1
USER MANUAL
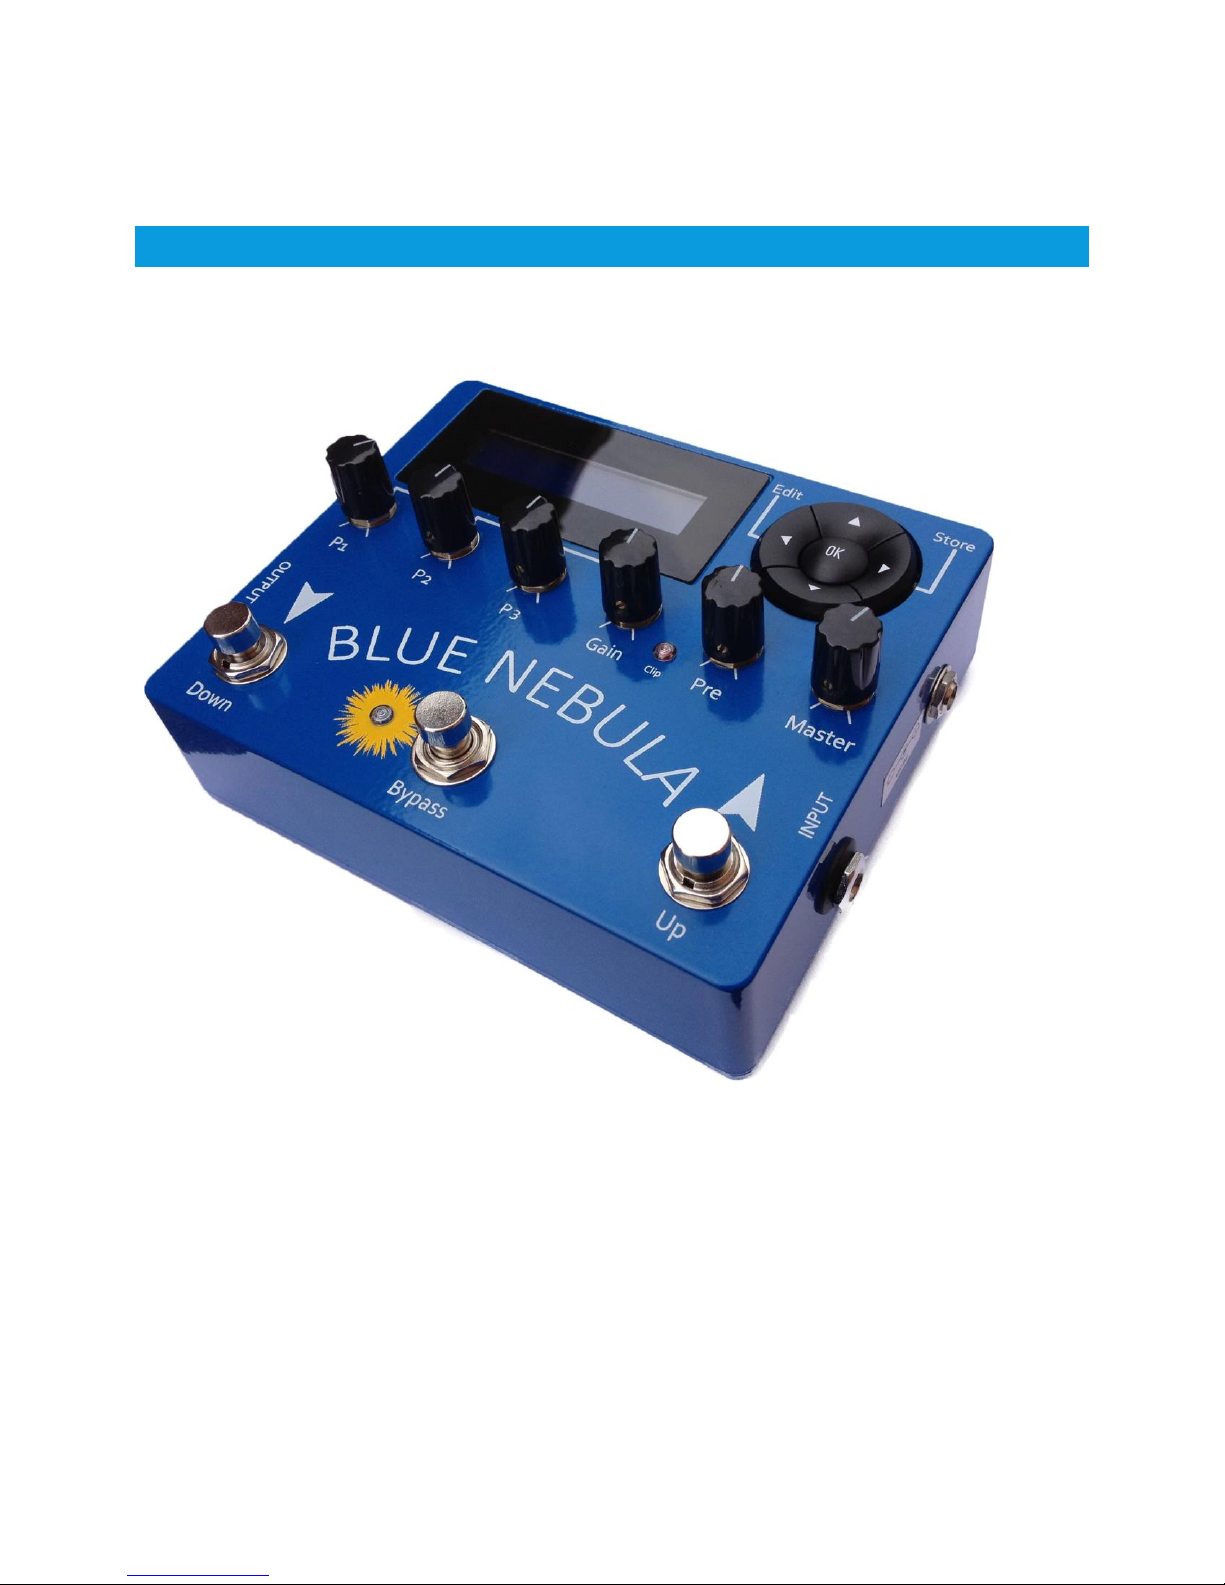
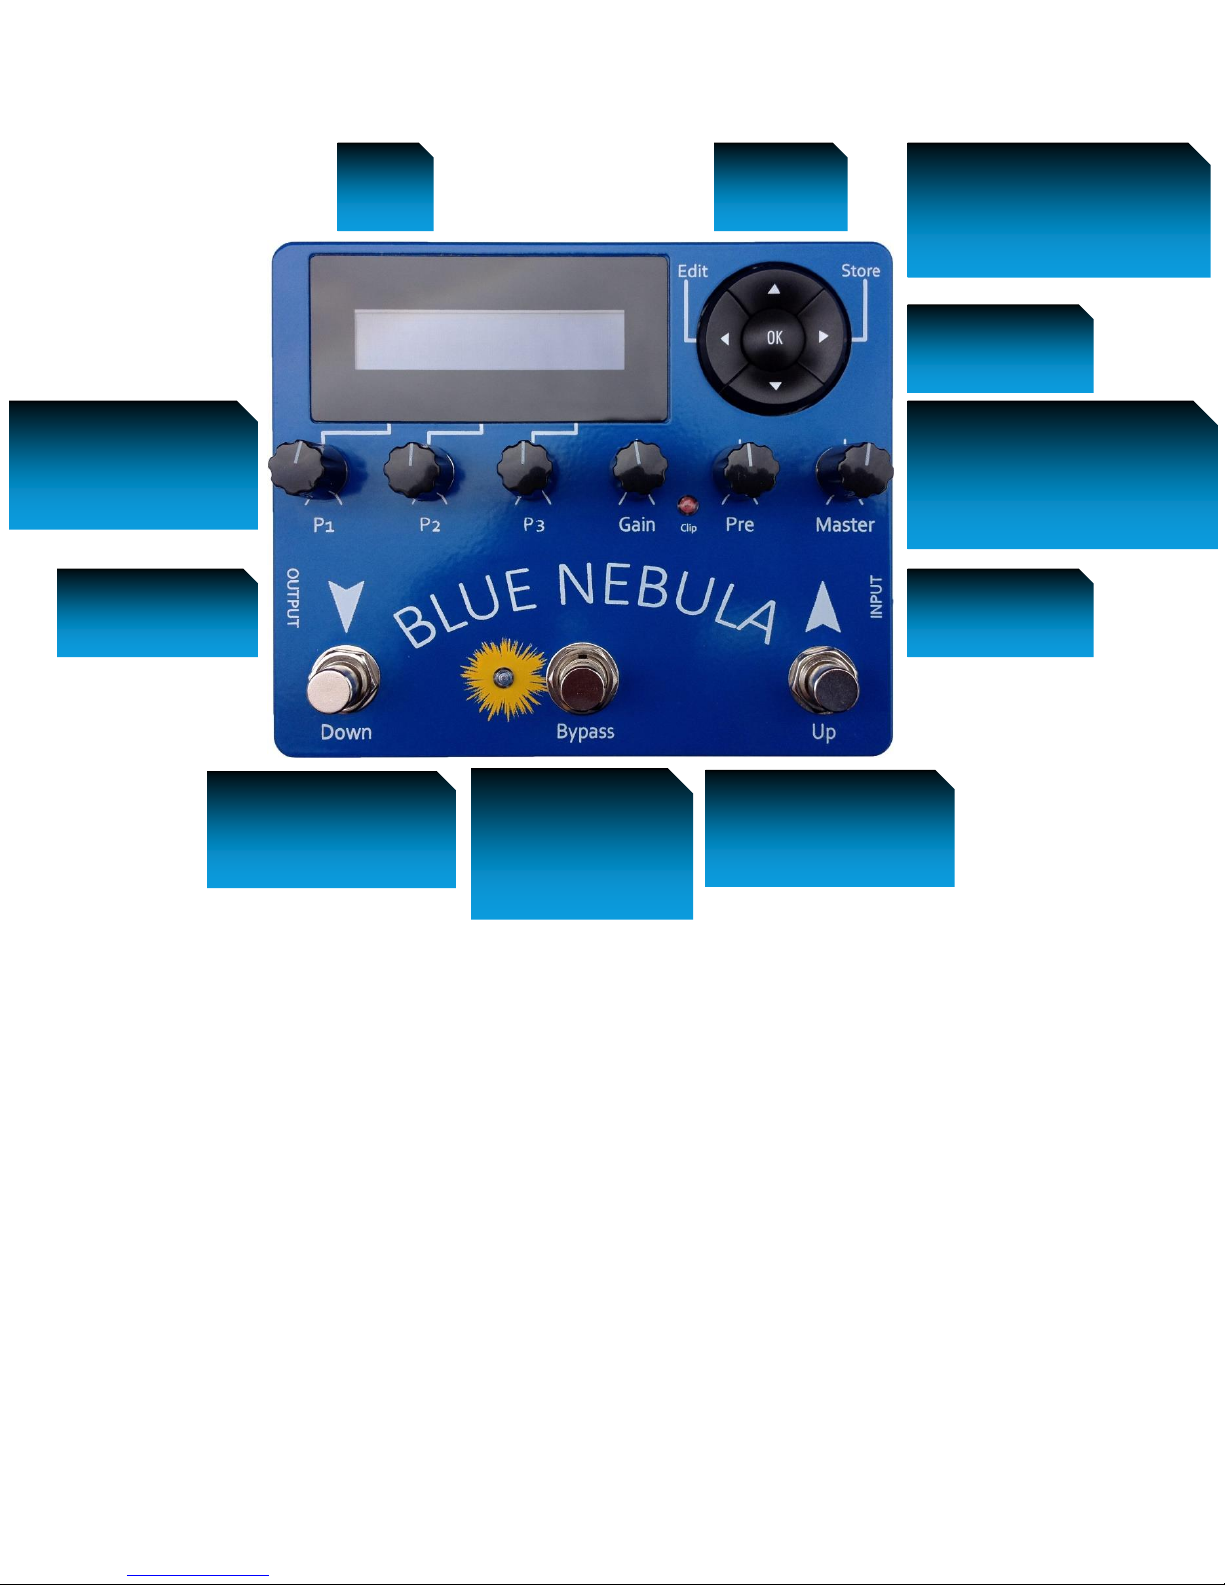
BLUE NEBULA TAPE ECHO AND GUITAR FX PEDAL
Blue Nebula User Guide, Firmware Revision 4 Page | 2
NAVIGATION BUTTONS
OK = SELECT/MANUAL
TRUE BYPASS
FOOTSWITCH +
EFFECT ON LED
INPUT JACK
OUTPUT JACK
PARAMETER
ADJUST: P1, P2, P3
PREAMP GAIN, CLIP LED,
PREAMP LEVEL, EFFECT
OUTPUT LEVEL
12V DC JACK
MIDI IN
USB
‘PREVIOUS PATCH’
FOOTSWITCH
‘NEXT PATCH’
FOOTSWITCH
Blue Nebula User Guide, Firmware Revision 4 Page | 3
GE TTING STARTED
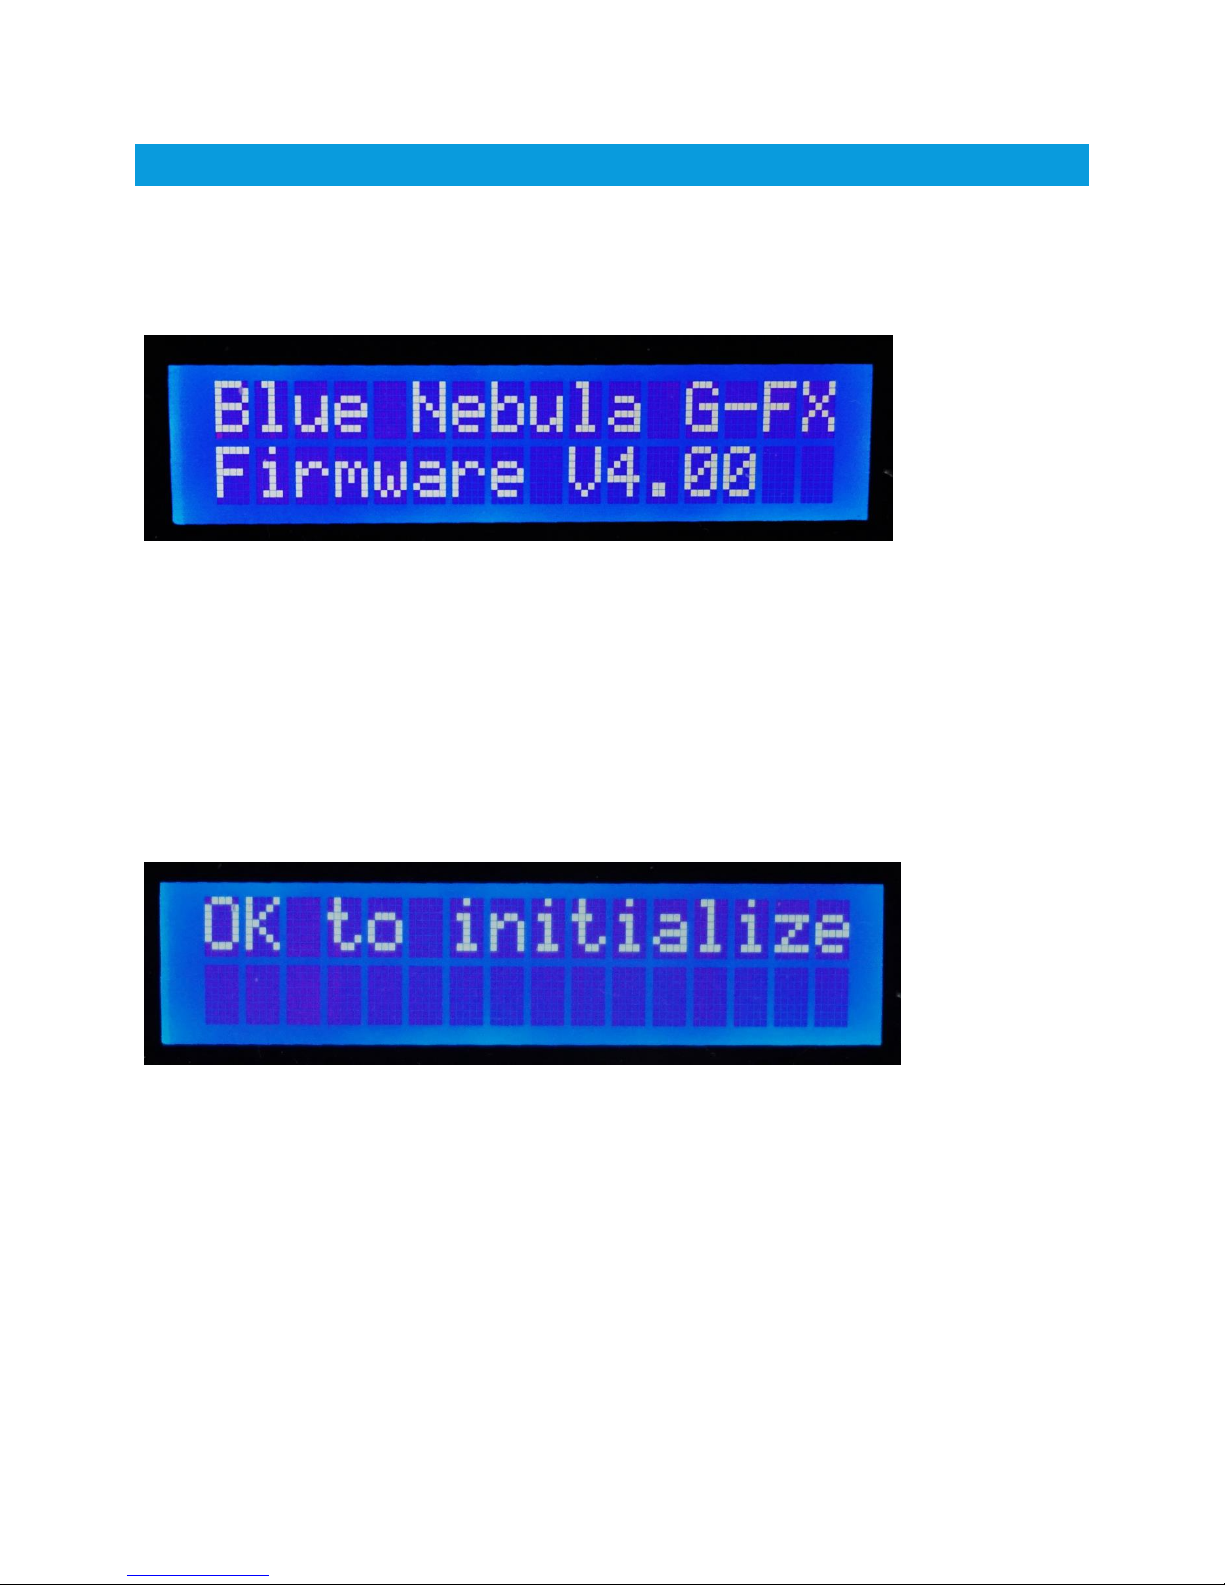
Connect the DC IN jack on the right-hand side of the pedal to a suitable 12V DC CENTRE POSITIVE
power supply. Within a couple of seconds, the Blue Nebula will display a Welcome message which gives
the Firmware version currently installed. Firmware updates can be made via the USB port using the
Librarian App.
When you power up your Blue Nebula there are several options you can use to adjust how the pedal
works. While the Welcome message, shown above, is displayed on the LCD you can press one of the
Navigation buttons as follows:
Store: Initializes the memory so it’s ready to accept your User Patches. It clears the User Patch
memory and copies the 22 factory pre-sets into the first 22 User Patches (0-21). WARNING – this
erases/overwrites all the User Patches so if you have already created some patches that you wish to
keep make sure you have backed them up onto your computer using the Librarian app.
To prevent accidentally wiping your patches, the Blue Nebula will prompt you with “OK to initialize”
If you really do wish to initialize the User patch memory press the OK button, otherwise press any other
button to abort the operation.
Edit: This allows you to calibrate the P2 knob so it displays the correct ‘Head’ settings for some of the
vintage echo machines that the Blue Nebula emulates. Just follow the prompts on the LCD.
OK: This allows you to set the MIDI channel (1-16) that the Blue Nebula uses to receive MIDI messages
on its MIDI IN connector. Use the UP and DOWN navigation buttons to select the required MIDI
channel and press Store to set it.
UP: This allows you to set the repeat rate of the UP and DOWN patch change switches. The factory
default is 120ms which provides a reasonable scroll speed but allows single clicks of the patch change

Blue Nebula User Guide, Firmware Revision 4 Page | 4
footswitches to change one patch at a time without accidentally skipping over a patch. Use UP and
DOWN to alter the time in increments of 10ms (a longer time gives a slower repeat rate) and press
Store when you’re done.
MANUAL MODE
If you hit the OK button the Blue Nebula will go into MANUAL MODE. This allows you to use the Blue
Nebula as a manual stomp box effect and you can select any of the 16 effects by using the UP and
DOWN buttons with the current effect name shown on the top line of the LCD. You can adjust the
effect parameters in real-time by using the P1, P2 and P3 knobs. The function of each parameter knob
varies depending on the effect you have selected and will be shown on the bottom line of the LCD:
To exit MANUAL MODE, press the Edit button.
TWEAKING THE MIX
Depending on the acoustic properties of the venue in which you are playing, there may be times when
you wish to fine-tune the relative levels of the echo with the dry signal – in a large room with reflective
surfaces the natural reverberation of the room may require a lower amount of echo. Rather than having
to go in and edit each patch to adjust the ‘Mix’ you can simply press the Store button. This will display
an asterisk (*) at the right-hand end of the bottom line on the LCD:
The P1 knob will now be ‘live’ allowing you to tweak the dry/echo mix. When in this mode the setting of
the P1 knob temporarily overrides the value stored in the patch. NB: YOU CANNOT CHANGE
PATCHES WHILE IN THIS MODE.
To exit back to normal mode, press the Edit button and the P1 value in the patch will be restored.

Blue Nebula User Guide, Firmware Revision 4 Page | 5
Tip: In the Echomatic II Classic emulation P1 controls the combined echo level of Heads 1, 2 and 3, not the
overall Dry/Wet mix. This means you can adjust the H123 level but the H4 level will still be taken from the
value stored in the patch.
EDITING A USER PATCH
Blue Nebula can store a total of 128 User Patches, numbered from 0 to 127. Each patch can be given a
name (up to 16 characters) and can use any of the 16 available effects. Each effect has three parameters
which can be set using the parameter knobs P1, P2 and P3 and these settings are stored in the patch.
To edit a User Patch hit the Edit button and the LCD will show the effect currently being used by the
patch:
You can change this if you wish by this using the UP and DOWN buttons to select any of the 16 effects
available in the Blue Nebula. With the required effect displayed hit the OK button to select it and the
top line of the display will now show the names of the effect’s parameters with the current values of the
three parameter adjust knobs P1, P2 and P3 on the bottom line:
The ^ and characters that you may see beside each number indicates if the parameter knob value is
currently lower (^) or higher () than the value currently stored with the patch. Think of the arrow as an
indicator telling you to increase (^) or decrease () the control setting to match. You can ignore these
 Loading...