

Page 1
cod. 93300 - BP
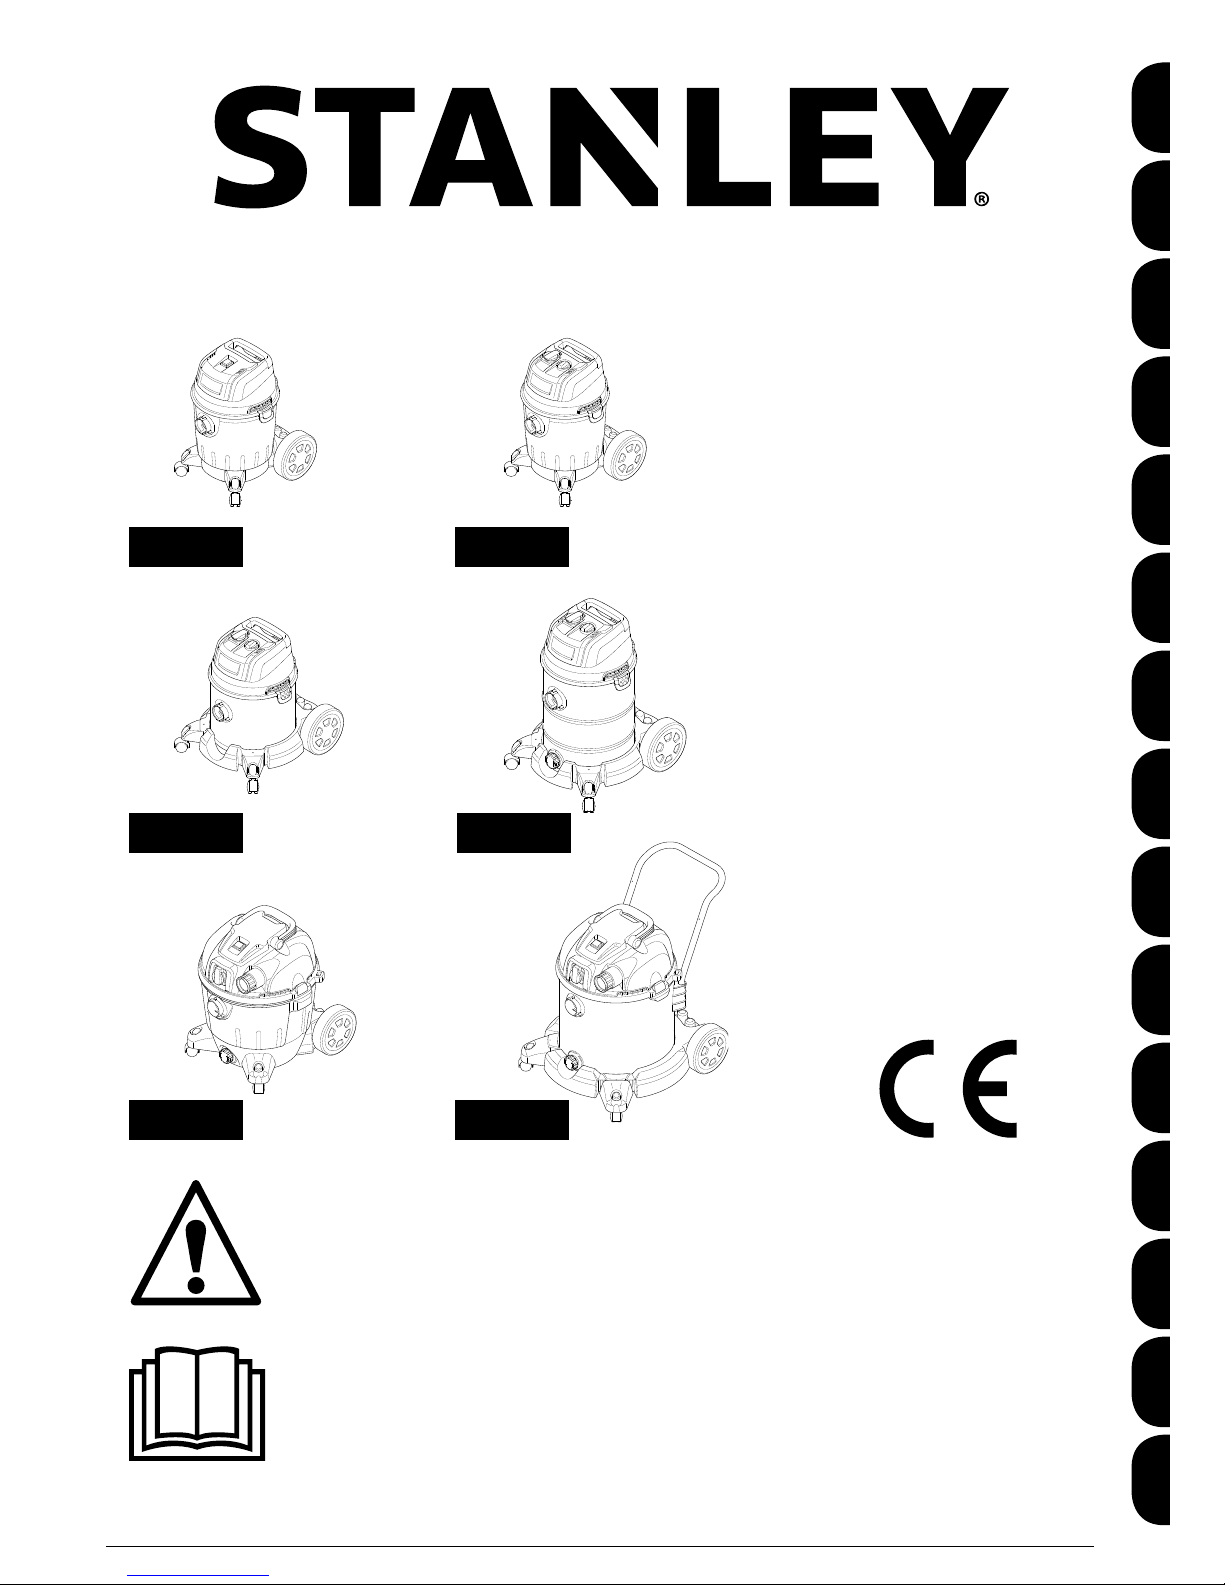
SXVC20PE - SXVC20PTE
SXVC20XTE
SXVC30XTDE
SXVC35PTDE
SXVC50XTDE
SXVC20PE
SXVC20XTE
SXVC35PTDE
SXVC30XTDE
SXVC50XTDE
ENITDEELESFIFRHRHUNLNOPLPTROSL
stanleytools.com
SXVC20PTE
Page 2

EN
Please read these instructions carefully before use. Please retain these instructions for future reference. In case of problems or
difficulties, please contact the consumer helpline:
www.2helpu.com Page: 7-14
IT
Leggere attentamente queste istruzioni prima dell’uso. Conservare queste istruzioni per future consultazioni. In caso di problemi o
difficoltà, contattate l’helpline consumatori:
www.2helpu.com Pagina: 15-22
DE
Lesen Sie bitte diese Bedienungsanleitung vor Gebrauch aufmerksam durch. Bewahren Sie diese Bedienungsanleitung sorgfältig auf,
damit Sie sie auch später zu Rate ziehen können. Wenden Sie sich im Falle von Problemen bitte an die Verbraucher-Hotline:
www.2helpu.com Seite: 23-31
EL
Διαβάστε προσεκτικά αυτές τις οδηγίες πριν από τη χρήση. Φυλάξτε αυτές τις οδηγίες για μελλοντικές αναφορές. Σε περίπτωση
προβλημάτων ή δυσκολιών, επικοινωνήστε με τη γραμμή helpline υποστήριξης καταναλωτών:
www.2helpu.com Σελίδα: 32-40
ES
Leer atentamente estas instrucciones antes de usar el equipo. Guardar estas instrucciones para poder consultarlas en el futuro.
En caso de problemas o dificultades, ponerse en contacto con el servicio de asistencia al cliente:
www.2helpu.com Página: 41-48
FI
Lue ohjeet huolellisesti ennen käyttöä. Säilytä ohjeet huolellisesti tulevaa käyttöä varten. Jos kohtaat ongelmia, ota yhteys kuluttajien
helpline-palveluun:
www.2helpu.com Sivu: 49-56
FR
Lire attentivement ces instructions avant emploi. Conserver ces instructions pour toute consultation à venir. En cas de problèmes ou
de difficultés, contacter l’assistance consommateur :
www.2helpu.com Page : 57-65
HR
Molimo vas da prije uporabe pažljivo pročitate ovaj priručnik. Sačuvajte ove upute za buduće korištenje. Ako naiđete na kakve
probleme ili poteškoće, molimo vas da se obratite službi za podršku korisnicima:
www.2helpu.com Stranica: 66-73
HU
A készülék használatba vétele előtt gondosan olvassa el az útmutatót. A későbbi hivatkozások érdekében őrizze meg az útmutatót.
Kérdés vagy probléma esetén forduljon ügyfélszolgálatunkhoz:
www.2helpu.com 74-81. oldal
NL
Lees deze gebruiksaanwijzing vóór het gebruik aandachtig door. Bewaar deze gebruiksaanwijzing voor latere raadpleging.
Contacteer bij problemen of moeilijkheden de hulplijn voor de gebruikers:
www.2helpu.com Pagina: 82-90
NO
Les disse instruksjonene nøye før bruk. Ta vare på instruksjonene for senere bruk. Ved problemer eller vanskeligheter, kontakt
kundeservice:
www.2helpu.com Side: 91-98
PL
Przed użyciem należy uważnie przeczytać niniejszą instrukcję obsługi. Instrukcję należy zachować na przyszłość.
W razie jakichkolwiek problemów lub trudności można skontaktować się z działem pomocy technicznej pod adresem:
www.2helpu.com Strona: 99-107
PT
Leia atentamente estas instruções antes de utilizar o aparelho. Conserve estas instruções para consultas futuras. Em caso de
problemas ou dificuldades, contacte a helpline de atendimento aos consumidores:
www.2helpu.com Página: 108-115
RO
Vă rugăm să citiţi cu atenţie aceste instrucţiuni înainte de utilizare. Vă rugăm să păstraţi aceste instrucţiuni pentru consultarea pe
viitor. În caz de probleme sau dificultăţi, vă rugăm să contactaţi linia de asistenţă a clienţilor:
www.2helpu.com Pagina: 116-124
SL
Pred uporabo pazljivo preberite ta navodila. Ta navodila shranite za prihodnjo uporabo. Če naletite na težave, se obrnite na službo za
pomoč kupcem:
www.2helpu.com Stran: 125-132
Page 3
3
1
A12
E3
D1-D2-D3-D4
B10
B11
B8
B7
A8a
A8b
A7
B5
B13
A3
A5
B1
B2
A10
A1
A2
A4a
A6
A9
A11
B3
B9
SXVC20PE
SXVC20PTE
SXVC20XTE
SXVC30XTDE
SXVC35PTDE
SXVC50XTDE
A12
C1
A1
SXVC20PTE
SXVC20XTE
B4
B4
E1
SXVC35PTDE
A1
C1
A3
B6
B12
B5
B5
B5
B9
B4
A4b
A1
C1
A3
B5
SXVC30XTDE
A12
A1C1
B4
B5
SXVC50XTDE
A13
B17
Page 4
4
2
3
A4b
A6
B1
B2
A8a
A10
A13
SXVC50XTDE
A8b
A8b
Page 5
5
5
6
7
4
B5
B3
B5
B5
B8
B9
B13
B5
B6
A7
B5
C1
A2
B4
B3
B3
A
A
B3
B3
A3
A2
A
A
Page 6
6
8
9
511
13 14
512
10
B5
B5
A2
B6
B3
B5
B9
B8
B7
C1
A2
O
I
B3
B5
B5
B8
B5
A3
A7 A7
A12
B4
B3
B3
B5
B5
A2
B3
B5
B9
B8
B7
B13
B10
B11
SXVC30XTDE
SXVC35PTDE
SXVC50XTDE
A1A1
Page 7
7
(Original instructions)
EN © 2016 English
Dear Customer,
Please read these original instructions
before using the appliance for the rst
time, comply with the information they
provide and keep them in a safe place
for future use or to be handed on to any
subsequent owners.
1 SAFETY INSTRUCTIONS
1.1 The appliance you have purchased
is a technologically advanced
product designed by one of the
leading European manufacturers.
This appliance is intended for use
as a multi-purpose vacuum cleaner,
in compliance with the descriptions
and safety precautions contained in
these instructions.This information is
provided to enable you to get the
best from your appliance; please
read it carefully and always comply
with its recommendations. During
connection, use and servicing
of the appliance, take all possible
precautions to protect your own
safety and that of the people in the
immediate vicinity. Read the safety
regulations carefully and comply with
them on all occasions; failure to do
so may put health and safety at risk
or cause expensive damage.
2 SAFETY SIGNS
2.1
Comply with the instructions provided
by the safety signs fitted to the
appliance and to those contained in
this manual.
The appliance and manual only
feature the symbols relevant to the
model purchased. Check that the
symbols and signs affixed to the
appliance are always present and
legible; otherwise, fit replacements
in the original positions. (Contact the
Service Centre).
Warning - danger!
Please read these instructions
carefully before use.
Symbol E3 (if the symbol
appears in fig. 1)
- Indicates that
this appliance is designed for
household use only and must not be
utilised for industrial or commercial
purposes.
0
Switch “OFF” position
I Switch “ON” position
Automatic vacuuming setting
II
Automatic vacuuming setting
Page 8
8
(Original instructions)
EN © 2016 English
EN © 2016 English
This product is rated in
insulation class II. This means
that it has reinforced or double
insulation (only if the symbol appears
on the appliance).
This produce is rated in
insulation class I. This means
that it is equipped with a protective
earthing conductor (only if the symbol
appears on the appliance).
The product complies with the
relevant European directives.
Symbol E1 - Recycling the
appliance. Make the old appliance
unusable immediately.
Unplug the appliance.
Cut the power cable.
Do not dispose of electrical equipment
together with household waste.
According to the provisions of Directive
2012/19/EC concerning waste
electrical and electronic equipment
(WEEE), electrical component must
be collected separately and recycled
in an environment-friendly manner.
For further information, contact the
relevant local authority department
or your dealer.
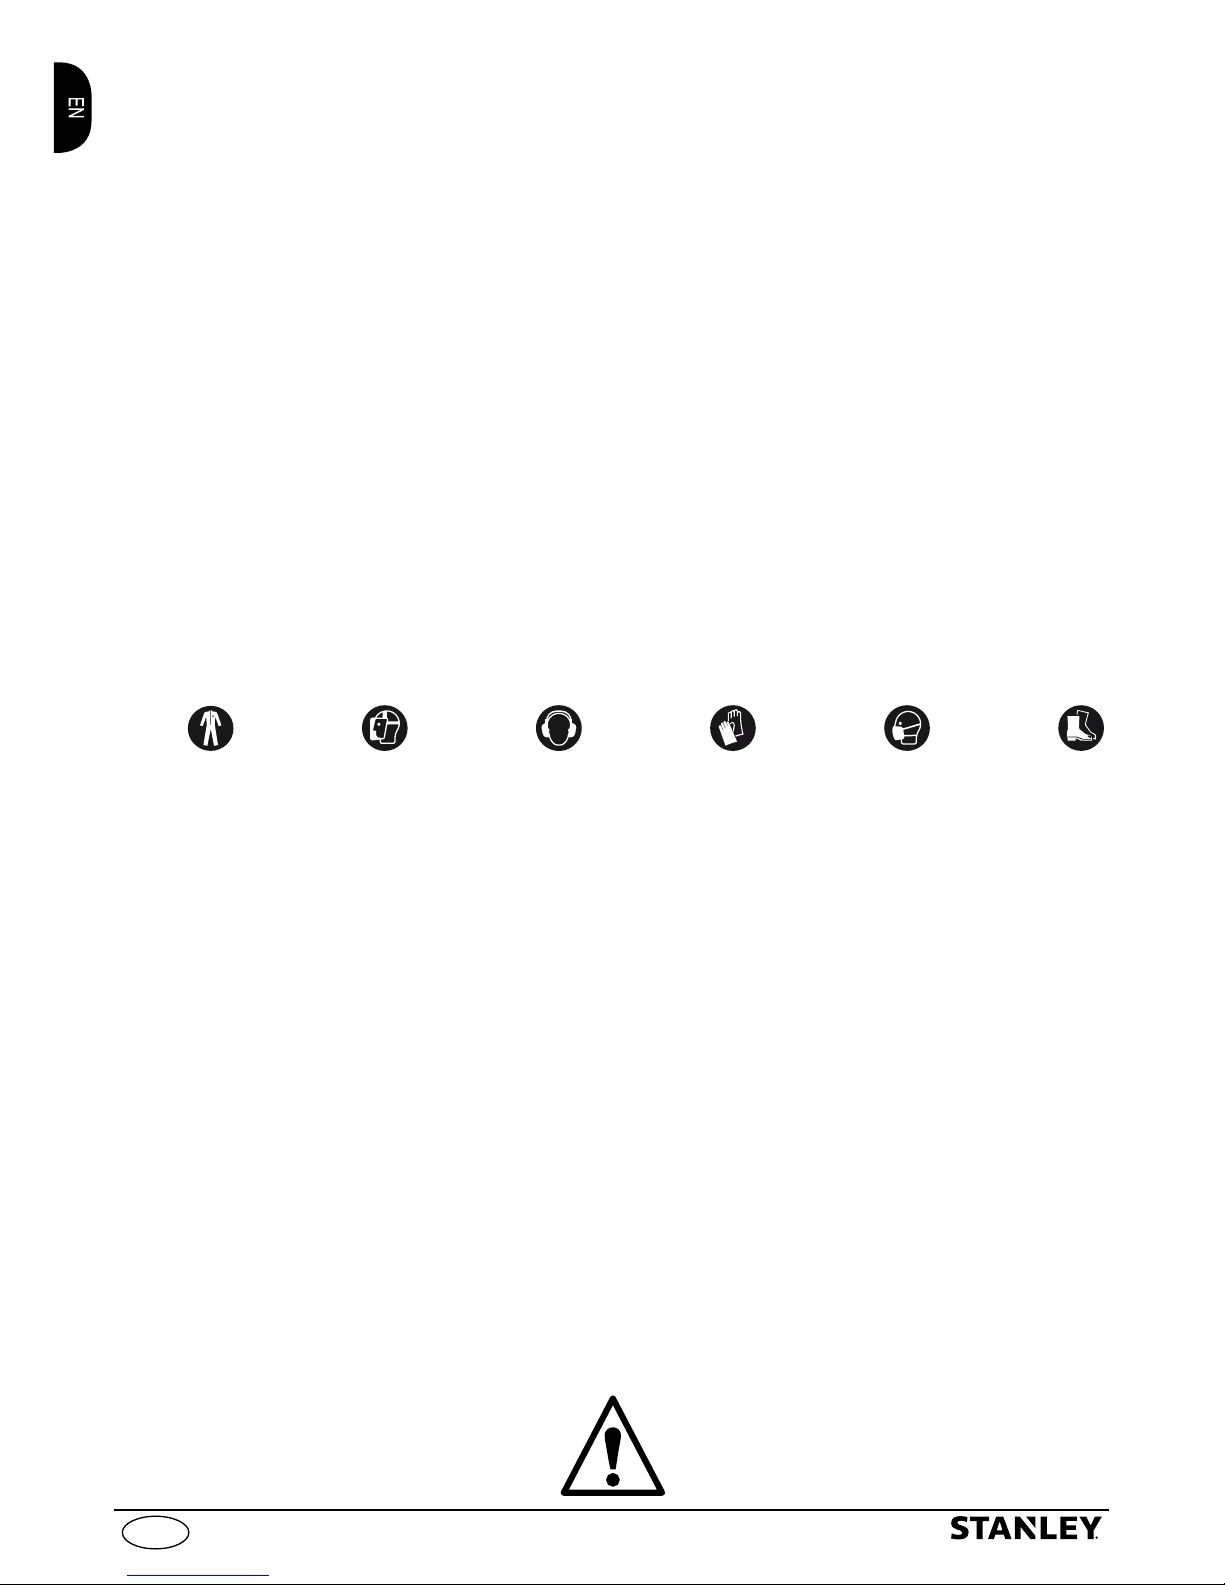
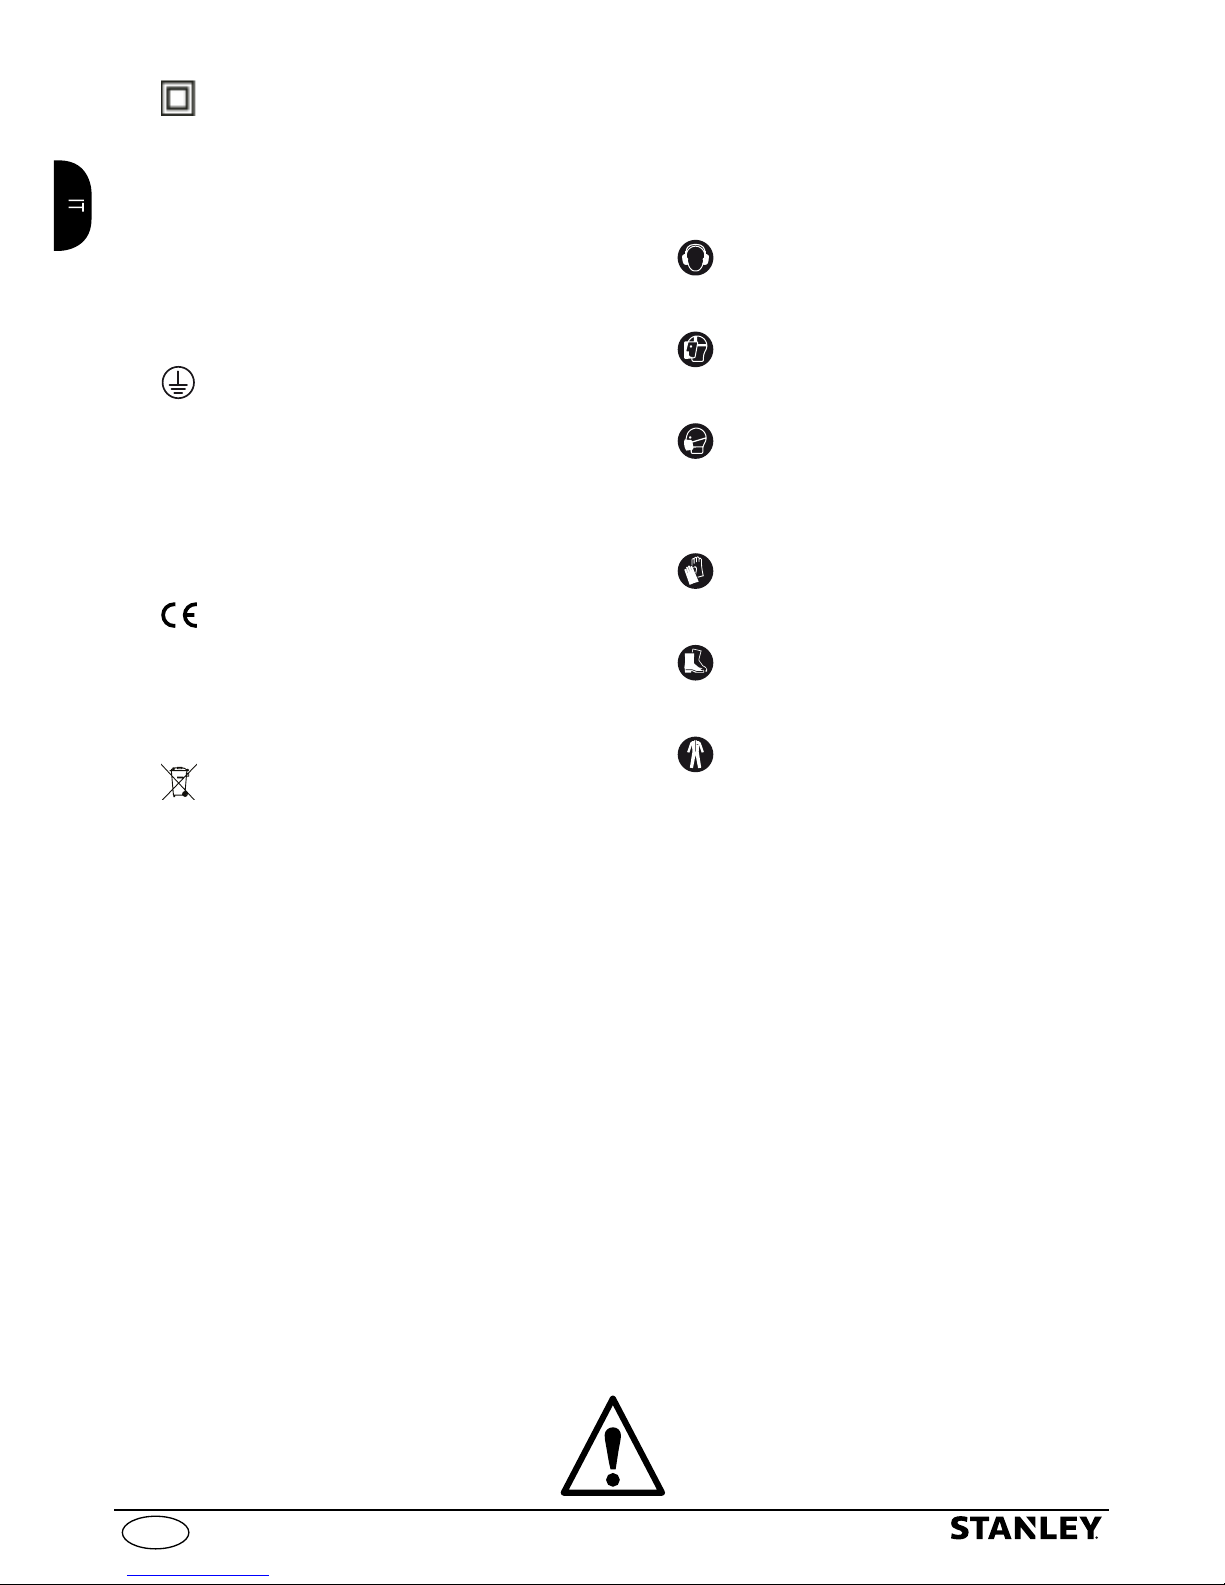
Wear ear defenders.
Wear a protective mask.
Wear respiratory protection.
Wear protective gloves.
Wear safety footwear.
Wear safety clothing.
Page 9
9
(Original instructions)
EN © 2016 English
3 SAFETY RULES/RESIDUAL RISKS
3.1 SAFETY “DO NOTS”
3.1.1
Warning. DO nOT
allow the appliance to be used by children less than 8 years of age or persons
with impaired physical, sensory or mental capabilities, or who do not have the necessary experience
and knowledge, unless they are suitably supervised and have been instructed in the safe use of the
appliance and the risks involved.
.
3.1.2
Warning.
Children MUST NOT use the appliance as a toy. Supervise children to ensure that this
does not occur.
3.1.3 Cleaning and user maintenance must NOT be carried out by children or incompetent persons unless
properly supervised.
3.1.4 Keep the packaging lm out of reach of children. Suffocation hazard!
3.1.5
Warning.
The appliance MUST NOT be operated by children or anyone who has not read and
understood the instructions.
3.1.6
Warning.
NEVER use the appliance with flammable or toxic liquids, or liquids with characteristics
incompatible with its proper operation. Use of the appliance in a potentially flammable or explosive
atmosphere is forbidden.
3.1.7
Warning.
Some substances may combine with the air sucked in to form explosive vapours and
mixtures. NEVER suck in the following substances:
- Explosive or ammable gases, liquids or dust (reactive dust).
- Powdered reactive metals (e.g. aluminium, magnesium or zinc) together with strong alkaline and
acid detergents.
- Pure acid and alkaline solutions.
- Organic substances (e.g. petrol, paint thinners, acetone or diesel fuel).
These substances may also corrode the materials from which the appliance is made.
3.1.8 Switch off the appliance after each use and before all cleaning/maintenance.
3.1.9 Fire hazard. NEVER suck up burning or red hot materials.
3.1.10
Warning.
NEVER use the appliance outdoors in the rain.
3.1.11
Warning.
DO NOT touch the plug and/or socket with wet hands.
3.1.12
Warning.
NEVER use the appliance if the power cable is damaged. If the power cable is damaged,
it must be replaced by the manufacturer, one of its authorised Service Centres or similarly qualified
persons in order to avoid a safety hazard.
Page 10
10
(Original instructions)
EN © 2016 English
EN © 2016 English
3.1.13
Warning.
Check that the appliance is fitted with its data plate; contact your dealer if it is missing.
Appliances without data plate must NOT be used, since they cannot be identified and are potentially
hazardous.
3.1.14
Warning.
NEVER move the appliance by pulling on the POWER CABLE.
3.1.15
Warning.
The use of non-original accessories and any other accessories not specifically intended
for the model in question is prohibited. All modifications to the appliance are prohibited. Any
modifications made to the appliance shall render the Declaration of Conformity null and void and
relieve the manufacturer of all liability under civil and criminal law.
3.2 SAFETY “MUSTS”
3.2.1
Warning.
All electrical conductors MUST BE PROTECTED from jets or splashes of water.
3.2.2
Warning.
The electric supply connection must be made by a qualified electrician and comply with
IEC 60364-1.Either a residual current device that will cut off the power supply if the leakage current
to earth exceeds 30 mA for 30 ms or a ground fault interrupt device must be installed.
3.2.3
Warning.
DURING start-up, the appliance may generate interference on the electrical system.
3.2.4
Warning.
Use only approved electrical extension leads with suitable conductor cross-section.
3.2.5
Warning.
Always turn off the switch when leaving the appliance unattended.
3.2.6
Warning.
The air flow may cause parts to rebound: wear all the protective clothing and equipment
(PPE) needed to ensure the operator’s safety.
3.2.7
Warning.
Switch the appliance off and disconnect it from the power source before any assembly,
maintenance, storage and transport operations.
3.2.8
Warning.
Maintenance and/or repair of electrical components MUST be carried out by qualified staff.
3.2.9
Warning.
Before each use, and periodically, CHECK that screws are tight and all appliance
components are in good condition; inspect for broken or worn parts.
3.2.10
Warning.
To ensure the appliance’s safety, only use the manufacturer’s genuine parts, or other parts
which carry its approval.
3.2.11
Warning.
Unsuitable extension cords can be dangerous. If an extension cable is used, it must be
suitable for outdoor use, and the connection must be kept dry and off the ground. Use of a power
cable reel which keeps the socket at least 60 mm above the ground is strongly recommended.
Page 11

11
(Original instructions)
EN © 2016 English
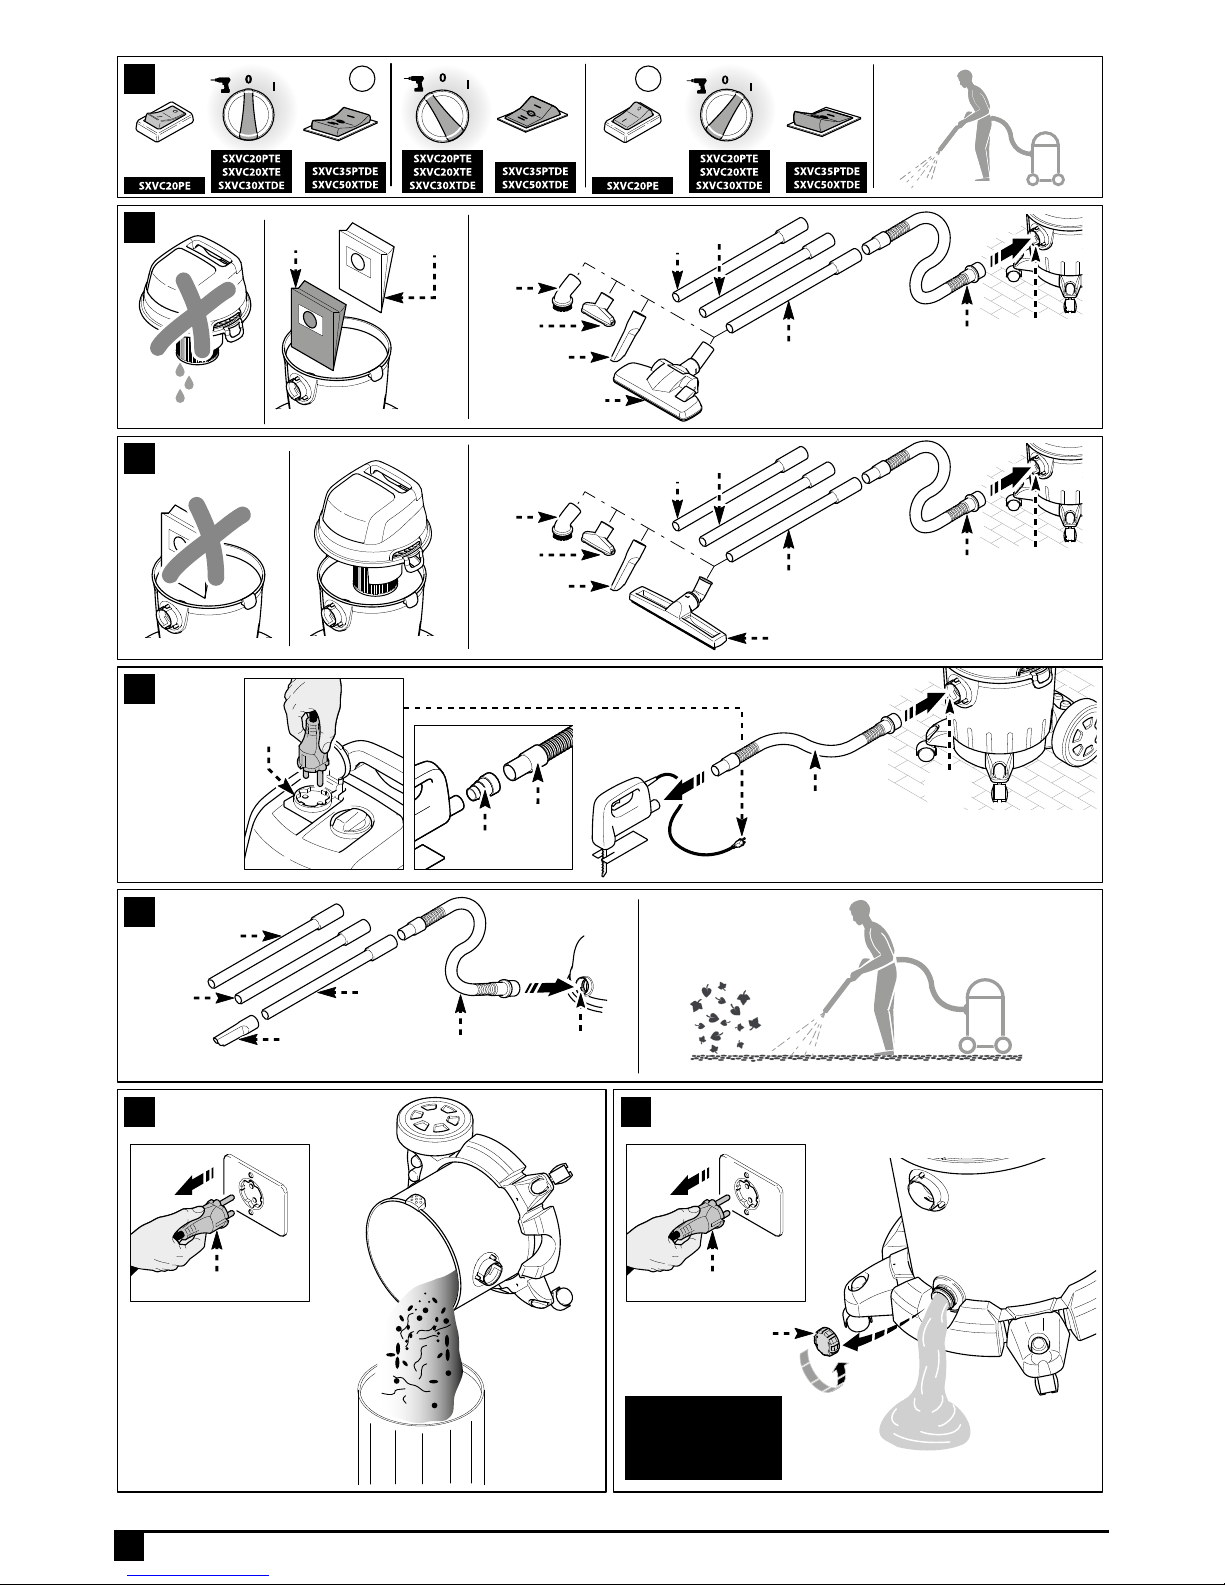
4 GENERAL INFORMATION (PAGE 3)
4.1 Use of the manual
This manual forms an integral part of the appliance and should be kept
for future reference. Please read it carefully before installing/using the
unit. If the appliance is sold, the seller must pass on this manual to the
new owner along with the appliance.
4.2 Delivery
The appliance is delivered partially assembled in a cardboard box.
The supply package is illustrated in fig.1.
4.2.1 Documentation supplied with the appliance
D1 Use and maintenance manual
D2 Safety instructions
D3 Declaration of conformity
D4 Warranty regulations
4.3 Disposing of packaging
The packaging materials are not environmental pollutants but must still
be recycled or disposed of in compliance with the relevant legislation
in the country of use.
5 TECHNICAL INFORMATION (PAGE 3)
5.1 Intended use
The appliance is intended for use as a multi-purpose vacuum
cleaner, in compliance with the descriptions and safety
precautions contained in these instructions.
This appliance is designed for household use only and must
not be utilised for industrial or commercial purposes.
The appliance conforms to the IEC 60335-1 and IEC 60335-2-2
standards.
5.2 Operator
The symbol shown in fig. 1 identifies the appliance’s intended operator
(professional or non-professional)
5.3 Main components:
A1 Starter device
A2 Suction connection
A3 Blower connection
A4a Handle
A4b Metal handle (where featured)
A5 Power cable stowing hook (where featured)
A6 Catches
A7 Power cable with plug
A8a Front castor wheels
A8b Rear wheels
A9 Vacuum cleaner tank
A10 Cover with motor
A11 Accessories holder (where featured)
A12 Liquid drain plug (where featured)
A13 Rear wheel axle (where featured)
C1 Power tool socket (where featured)
5.3.1 Accessories (see fig. 1 for details of models - supply
package is as shown on the cardboard box)
B1
Filter holder
B2
Cartridge filter
B3
Hose
B4
Adaptor for power tools
B5
Tube
B6
Floor brush
B7
Carpet - upholstery brush
B8
Crevice nozzle
B9
Round brush
B10
Fabric filter bag (Optional).
B11
Paper filter bag
B12
Tube hook
B13
Combined floor brush
5.4 Safety devices
- Starter device (A1)
The starter device prevents accidental use of the appliance.
6 INSTALLATION (PAGE 4-5)
Warning - danger!
All installation and assembly operations must be performed with the appliance
disconnected from the mains power supply.
The assembly sequence is illustrated on page 4.
6.1 Assembly
When unpacking, check for any missing accessories or damage to the
contents. If damage caused in transit is found, notify your dealer at
once.
Lift the cover with the motor (A10) off the appliance, releasing the
catches (A6) and take out the accessories supplied, checking that the
lter (B2) is tted correctly.
See fig. 2
The assembly sequence is illustrated one pages 4-5.
6.2
Fitting the rear wheels and front castor wheels
Turn the vacuum cleaner tank (A9), with the cover off, upside down
on a firm horizontal surface. Fit the castor wheel hubs (A8a) into
the holes provided and press fully down to secure the wheels in the
correct position.
Fit the axle (A13) correctly, turning it until the aligner holes mate with
the locator pins. Fit the retainers supplied in the bag (B17) and fix them
in place with the screws provided. Fit the wheel (A8b) and the washer
and secure with the split pin, taking care to insert it fully and open it
out so that it fits flush against the cross-section of the axle. Then fit
the wheel guard and repeat the procedure for the other wheel (A8b).
Fit the metal handle (A4b) as shown in the diagram.
See fig. 3
6.3 Fitting the accessories
Connect the hose (B3) to the suction (A2) or the blower connection
(A3) depending on the type of operation required.
See fig. 4
Then complete the sequence with the accessories required for the
type of cleaning job planned. Use the tubes (B5) and the brushes
(B6-B7-B8-B9) depending on the type of cleaning and the surface
to be cleaned. The brushes (B6-B7-B8-B9-B13) can be fitted straight
onto the hose (B3).
See fig. 5
6.4 Electrical connection
Warning - danger!
Check that the electricity supply voltage and frequency (V/Hz)
correspond to those specified on the data plate See fig.6
6.4.1 Use of extension cables
Use cables and plugs with "IPX4" protection level.
The cross-section of the extension cable should be
proportionate to its length; the longer it is, the greater its
cross-section should be.
6.5
Power tool socket (where featured)
Connect the hose (B3) to the power tool’s suction connection. If the
two connections are not compatible, use the adaptor for power tools
(B4) (where featured) cutting off the surplus.
Operate the power tool using the additional socket (C1) (For models
with this feature)
See fig. 7
Page 12
12
(Original instructions)
EN © 2016 English
EN © 2016 English
7 INFORMATION ON USE OF THE APPLIANCE (PAGE 6)
7.1 Controls
- Starter device (A1).
See fig. 8.
Set the starter device switch on (ON/I).
If there is a pilot light on the starter device, it should light up.
Set the starter device switch on (OFF/0) to stop the appliance.
If there is a pilot light on the starter device, it should go out.
Warning - danger!
During operation the appliance must be positioned as shown on a
firm, stable surface. See fig. 8.
7.2 Start-up
7.2.1 Dry suction.
See fig. 9.
Only work with the lters (B2 - B11) dry! Before using them,
check the lters for damage and replace them if necessary.
To suck up dry dirt, adjust the oor brush as appropriate and
t the corresponding accessories (use brush B13).
When sucking up dry dirt, if necessary an additional
lter bag, which may be in paper (B11) or in fabric (B10)
(optional), may be used.
Filter bag guidelines:
- The level to which the lter bag is lled depends on the
type of dirt being collected.
- For ne dust, sand, etc., replace the lter bag often.
- A worn lter bag may burst, so it should be replaced in
good time!
Warning - danger!
Only suck in cold ash.
7.2.2 Sucking in liquids
See fig.10.
Warning - danger!
If foam forms or liquid overows, switch the appliance off at
once or disconnect the mains plug! Do not use a lter bag
(either paper or fabric)!
Warning
When the tank is full, a oat switch shuts off the suction inlet
and the motor starts to race. Switch the appliance off at once
and empty the tank.
To suck up damp or dry dirt, adjust the oor brush as appropriate
and t the corresponding accessories (use brush B6).
7.2.3 Working with power tools.
See fig 11.
The assembly sequence is illustrated in fig.11.
Switch on the appliance (automatic vacuuming switch turned
left to
or 2 button switch on II) and start working.
Warning: As soon as the power tool switches on, the suction
fan starts up after a 0.5 second delay.
When the power tool is switched off, the suction fan keeps
running for about a further 6 seconds to suck up the dirt left
in the suction hose.
7.2.4 Blower function.
See fig 12.
For cleaning inaccessible points or where suction is not
possible, such as removing leaves from gravel.
Fit the suction hose to the connection provided. The blower
function is now active.
For more effective blowing, use of the crevice nozzle B8 is
recommended.
7.3 Stopping operation (Pauses)
Switch off the appliance. See fig. 8.
Connect the oor brush in the stowed position.
7.4 Finishing work
Switch off the appliance. See fig. 8.
Disconnect the plug.
7.5 Empty the tank
For dry dirt and dust: remove the nozzle from the appliance and empty
the tank. See fig 13.
For liquids: use the drain screw if featured (see fig. 14), or proceed
as above.
8 MAINTENANCE (PAGE 135)
Warning - danger!
All installation and assembly operations must be performed with the appliance
disconnected from the mains power supply.
The assembly sequence is illustrated on page 135.
Always switch the appliance off and disconnect the plug before any servicing
or maintenance work. Repairs and work on electrical systems may only be
carried out by the authorised service centre.
Warning - danger!
Never use abrasive detergents, glass detergents or universal detergents!
Never immerse the cover
with motor (A10)
in water. Clean the appliance
and plastic accessories with a standard synthetic material detergent. Rinse
the tank and accessories with water if necessary and dry them before reuse.
8.1 Cleaning the cartridge filter (B2). See fig 15.
Open the vacuum-cleaner by releasing the catches (A6).
Turn the cover with motor (A10) upside down and remove the
cartridge lter (B2).
Rinse carefully under running water and leave to dry. Do not
reassemble until dry.
8.2 Replacing the paper filter bag (B11). See fig 17.
Open the vacuum-cleaner by releasing the catches (A6).
Remove the full lter bag (B11), throw it away and t a new one.
8.3 Cleaning the fabric filter bag (B10) (Optional). See fig 16.
Open the vacuum-cleaner by releasing the catches (A6).
Remove the lter bag (B10). Empty the lter bag, rinse carefully
under running water and leave to dry. Do not reassemble until
dry.
9 END-OF-SEASON STORAGE (PAGE 135)
Warning - danger!
All installation and assembly operations must be performed with the appliance
disconnected from the mains power supply.
After finishing work, clean the appliance and then put it and the accessories
away as shown in
fig.18.
Store the appliance in a dry place.
Page 13
13
(Original instructions)
EN © 2016 English
10
TROUBLESHOOTING
Problems Probable causes Remedies
The appliance does not switch on
No electrical power
Check that the plug is firmly in the socket and that the mains
voltage supply is present (*)
Problems with the electric-electronic circuit Contact the Service Centre
The appliance does not suck in
material, or sucks only weakly
Accessories fouled Check and clean the nozzles, extensions or hoses
Filters dirty Clean the filters
Bags full Empty / change bags
Tank full Empty the tank
Power tool does not start (where power
tool socket is featured)
Power tool plug not fitted into vacuum cleaner socket correctly Fit the plug properly
Switch off or turned to I Turn switch to power tool/II position
Dust comes out of appliance
Filter not fitted Fit the filter
Filter damaged Replace the worn filter with a new one
Hose or connections damaged Replace damaged parts
Bad smells from appliance when in
operation
Filters dirty Replace filters
(*) If the motor stops and does not restart during operation contact the Authorised Service Centre.
EC Declaration of conformity
We, Annovi Reverberi S.p.A, of Bomporto (Modena), Italy, declare that the following Stanley appliance(s):
Designation of appliance: Wet&dry vacuum cleaner
Model No.: SXVC20PE SXVC20PTE SXVC20XTE SXVC30XTDE SXVC35PTDE SXVC50XTDE
Rated power: 1.2 kW 1.2 kW 1.4 kW 1.6 kW 1.6 kW 1.6 kW
is (are) compliant with the following European directives:
2006/95/EC – Directive to be replaced by 2014/35/EU from April 20, 2016,
2004/108/EC – Directive to be replaced by 2014/30/EU from April 20, 2016, 2011/65/EU, 2005/32/EC, 2012/19/EU.
and was (were) produced in compliance with the following norms or standardised documents:
EN 60335-1; EN 60335-2-2; EN 55014-1; EN 55014-2; EN 61000-3-2; EN 61000-3-3; EN 62233; EN 50581; Reg.1275/2008.
Name and address of the person responsible for issuing the technical file: Stefano Reverberi / AR Managing Director
Via ML King, 3 - 41122 Modena, Italy
Date: 10.02.2016
MODENA (I)
Stefano Reverberi Managing Director
Page 14
14
(Original instructions)
EN © 2016 English
EN © 2016 English
WARRANTY
The validity of the warranty is in accordance with the relevant legislation in the country where the product is sold (unless otherwise stated by the producer).
The warranty covers materials, construction and conformity defects during the warranty period, during which time the manufacturer will replace defective parts
and repair the product if not excessively worn, or replace it.
The warranty does not cover components subject to normal wear and tear (lters, bags, or accessories such as the hose, brushes, wheels, etc.);
The warranty does not cover defects caused by or arising from:
- improper use, misuse, negligence,
- professional use or hire, if the product was sold for domestic use,
- failure to comply with the maintenance instructions provided in this manual,
- repair by unauthorised staff or centres,
- use of non-genuine parts or accessories,
- damage caused by transport, by dirt or foreign bodies, accidents,
- storage or warehousing problems.
Proof of purchase must be submitted to obtain warranty cover.
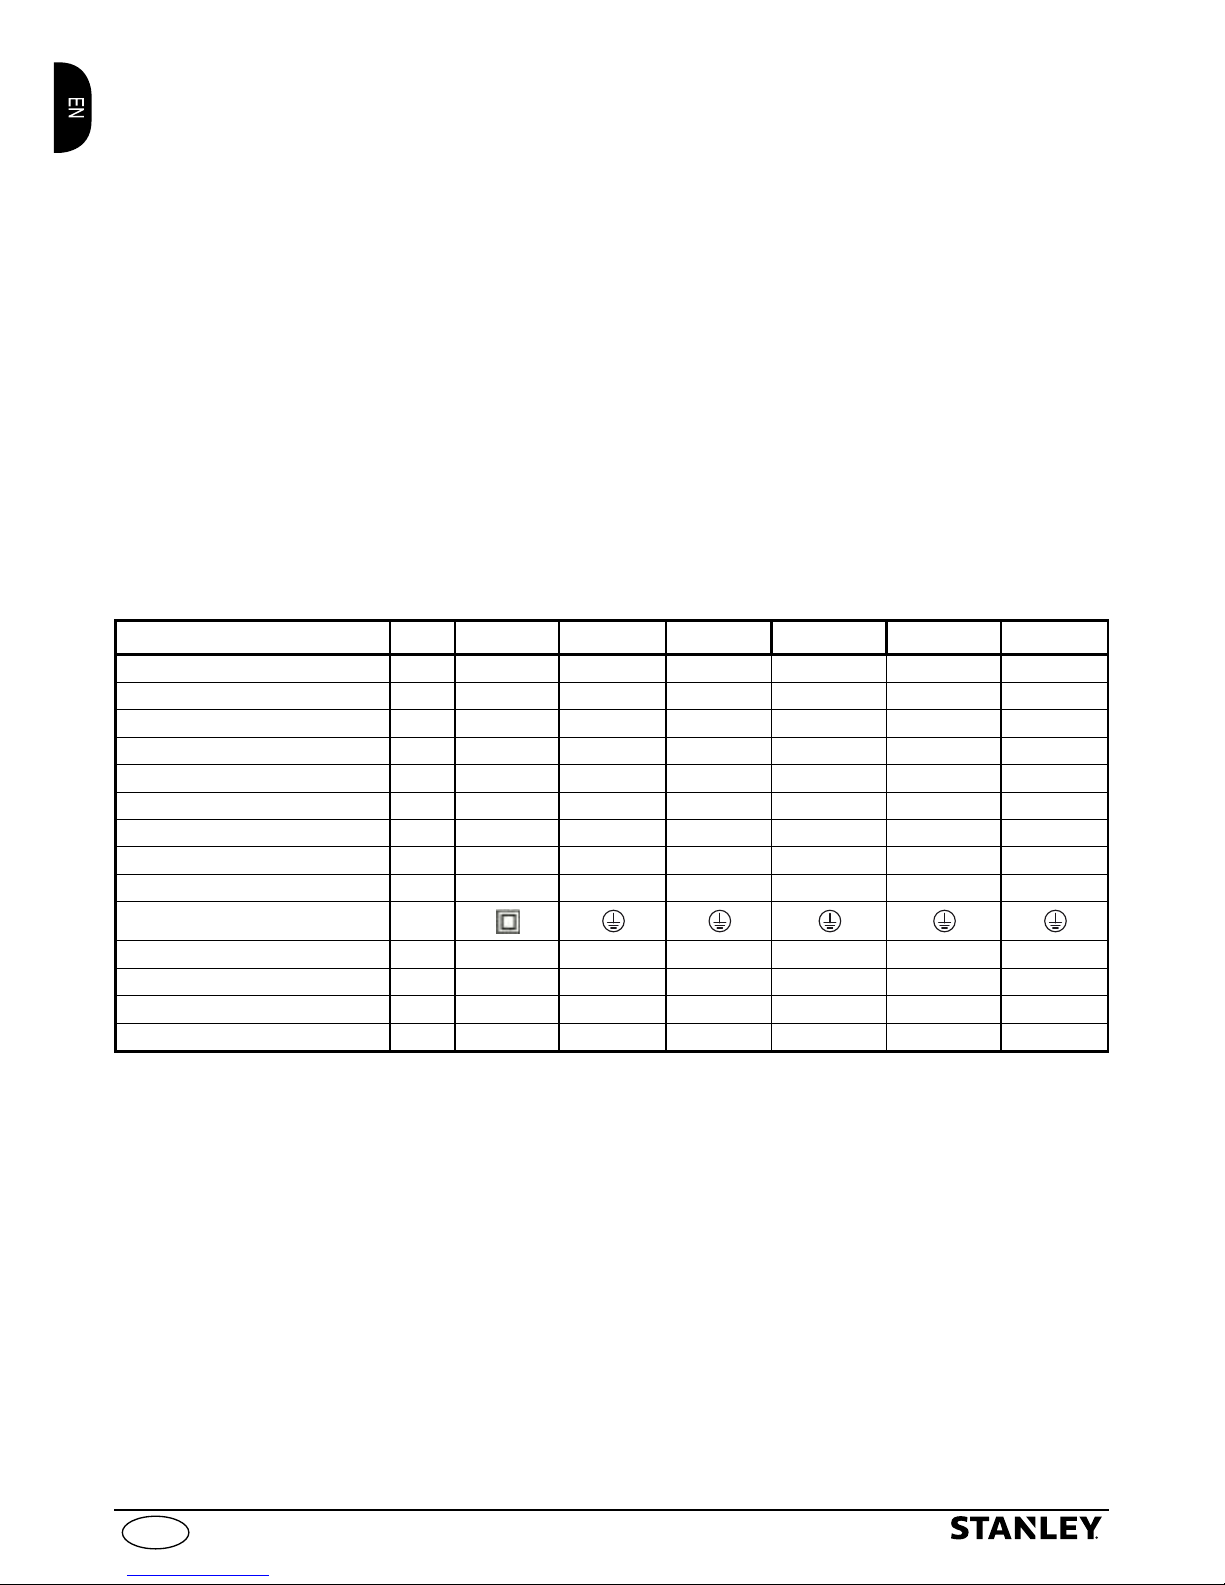
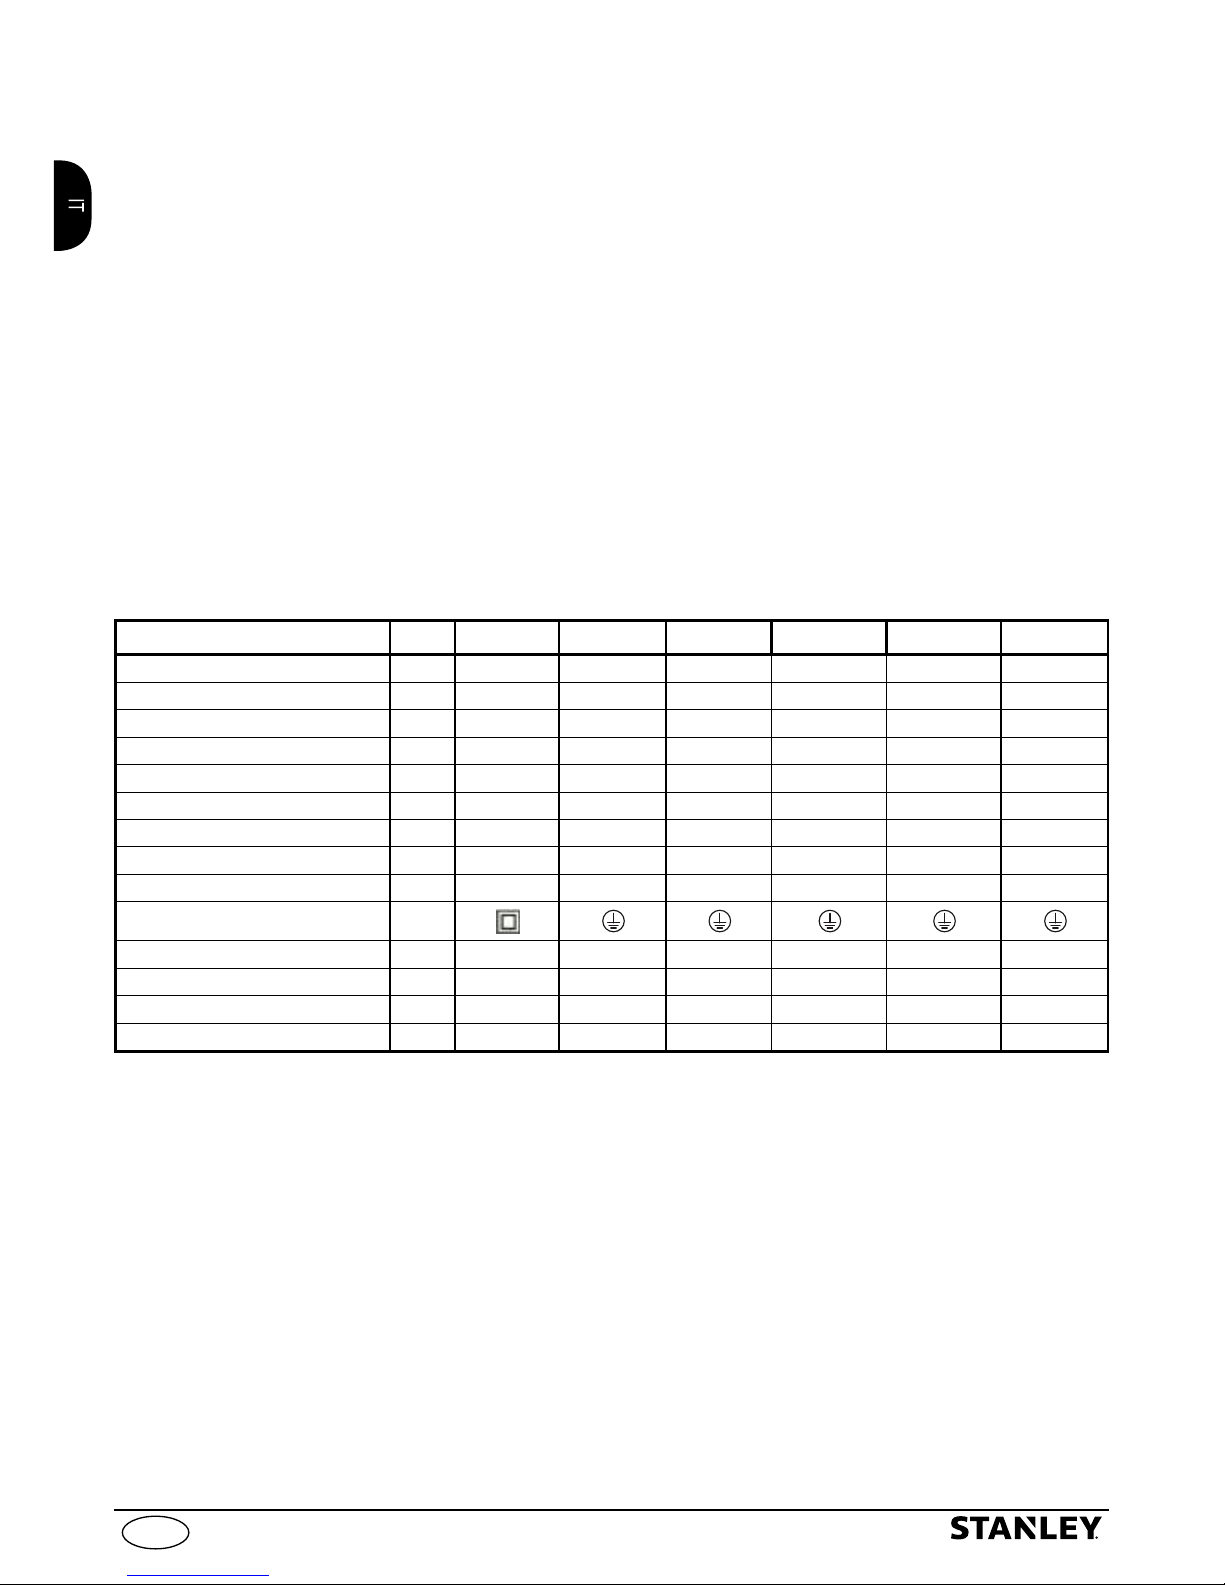
Technical Data Unit
SXVC20PE SXVC20PTE SXVC20XTE SXVC30XTDE SXVC35PTDE SXVC50XTDE
Voltage
V/Hz
220-240 V ~ 5
0/60 Hz
220-240 V ~ 5
0/60 Hz
220-240 V ~ 5
0/60 Hz
220-240 V ~ 5
0/60 Hz
220-240 V ~ 5
0/60 Hz
220-240 V ~ 5
0/60 Hz
Power
kW
1.2 1.2 1.4 1.6 1.6 1.6
Tank capacity
l
20 20 20 30 35 50
Maximum suction pressure
kPa
17 17 18 19 19 19
Maximum vacuum
mbar 170 170 180 190 190 190
Maximum air ow
l/s
28 28 33 37 39 41
No. of motors
-
1 1 1
1 1
1
Accessory Ø
mm
35 35 35 35 35 40
Power cable
m
5 5 5 5 5 5
Protection class
-
Motor insulation
Class F F F F F F
Motor protection
-
IPX4 IPX4 IPX4 IPX4 IPX4 IPX4
Net weight
kg
7,9 8,4 9,2 9,6 11,5 14,9
Gross weight
kg
9,4 9,9 11,4 12,5 14,3 18,75
Subject to technical modication!
Page 15
15
(Istruzioni originali)
IT © 2016 Italiano
Gentile cliente,
Prima di utilizzare l’apparecchio per la
prima volta, leggere le presenti istruzioni
originali, seguirle e conservarle per
un uso futuro o in caso di rivendita
dell’apparecchio.
1 ISTRUZIONI PER LA SICUREZZA
1.1 L’apparecchio da Voi acquistato è un
prodotto ad alto contenuto tecnologico
realizzato da una delle più esperte
ditte europee. Questo apparecchio,
in conformità alle descrizioni e
alle avvertenze di sicurezza date
in queste istruzioni per l’uso, è
destinato per essere utilizzato come
aspiratore multiuso. Per ottenere il
meglio delle prestazioni, abbiamo
compilato queste righe da leggere
attentamente ed osservare ad ogni
utilizzo. In fase di allacciamento, uso
e manutenzione dell'apparecchio
adottare tutte le precauzioni
possibili per salvaguardare la
propria incolumità e quella delle
persone nelle immediate vicinanze.
Leggere attentamente e rispettare le
prescrizioni di sicurezza poiché se
trascurate possono mettere a rischio
la salute e la sicurezza delle persone
o provocare danni economici.
2 SEGNALAZIONI DI INFORMAZIONE
2.1
Rispettare le segnalazioni dettate
dalle targhe e dai simboli applicati
sull'apparecchio e su queste istruzioni.
Sono presenti sull'apparecchio e sul
libretto solo i simboli opportuni per
l'apparecchio acquistato. Verificare
che simboli e targhe applicati
sull'apparecchio siano sempre integri
e leggibili; in caso contrario, sostituirli
applicandoli nella posizione originale
(Rivolgersi al Centro Assistenza).
Attenzione - Pericolo
Leggere attentamente queste
istruzioni prima dell’uso.
Icona E3 (se il simbolo è
presente in fig. 1)
- Indica che
questo apparecchio è concepito per il
solo uso domestico e non deve
essere adibito ad uso commerciale o
industriale.
0
Posizione interruttore spento
I Posizione interruttore acceso
Posizione interruttore automatico
II
Posizione interruttore automatico
Page 16
16
(Istruzioni originali)
IT © 2016 Italiano
IT © 2016 Italiano
Questo prodotto è in classe di
isolamento II. Ciò significa che
è equipaggiato con un isolamento
rinforzato o con un doppio isolamento
(solo se il simbolo è presente
sull'apparecchio).
Questo prodotto è in classe di
isolamento I. Ciò significa che è
equipaggiato di un conduttore di
protezione di messa a terra (solo se il
simbolo è presente sull'apparecchio).
Questo prodotto è conforme con
le direttive Europee applicabili in
materia.
Icona E1 - Riciclo
dell'apparecchio. Rendere
immediatamente inutilizzabile
l'apparecchio a fine vita.
Staccare la spina dall'alimentazione
elettrica.
Tagliare il cavo elettrico.
Non smaltire apparecchi elettrici
insieme ai rifiuti domestici. Secondo
quanto specificato nella direttiva
WEEE 2012/19/CE sugli apparecchi
elettrici ed elettronici a fine vita, i
componenti elettrici devono essere
raccolti separatamente e riciclati
in maniera ecologica. Per ulteriori
informazioni, contattare gli uffici
competenti o il rivenditore di zona.
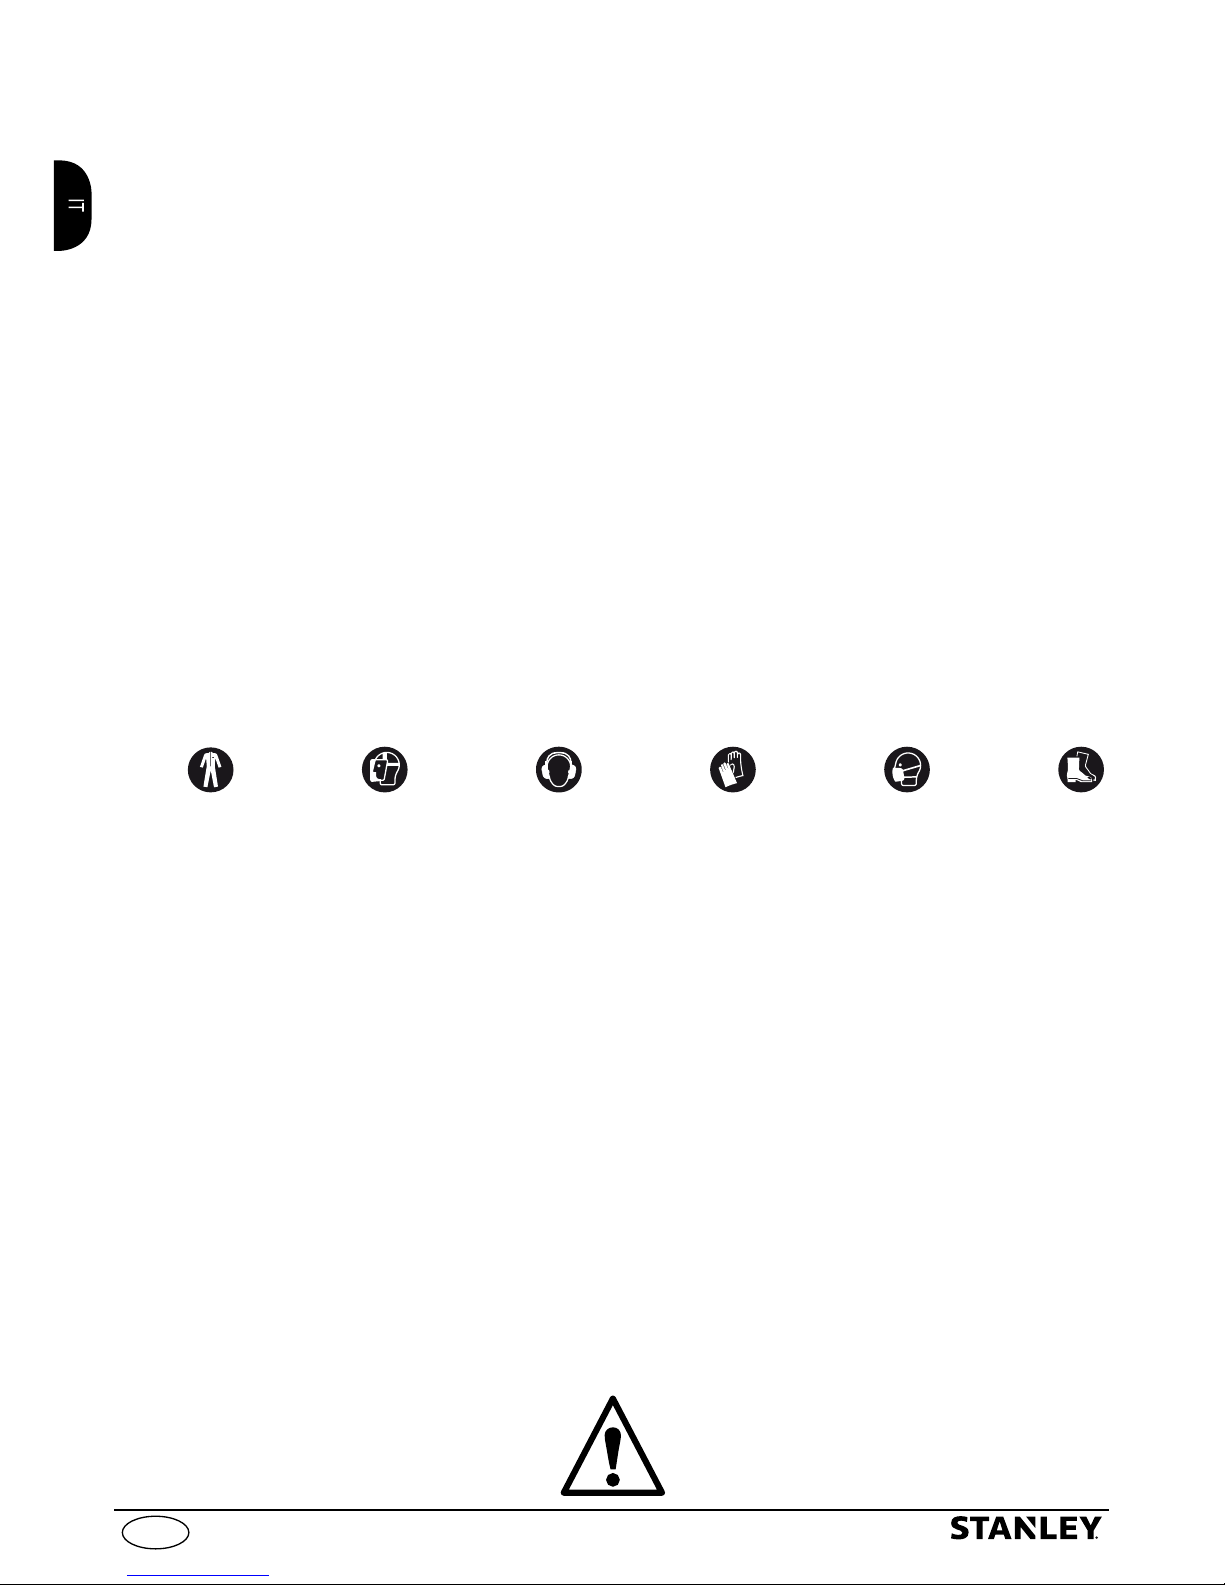
Utilizzare cuffie di protezione.
Utilizzare maschera di protezione.
Utilizzare dispositivi di protezione
dell’apparato respiratorio.
Utilizzare guanti protettivi.
Utilizzare scarpe antiinfortunistiche.
Utilizzare abbigliamento di
protezione.
Page 17
17
(Istruzioni originali)
IT © 2016 Italiano
3 PRESCRIZIONI DI SICUREZZA/RISCHI RESIDUI
3.1 AVVERTENZE: NON FARE
3.1.1
aTTenziOne. nOn
permettere l’uso dell'apparecchio a bambini di età inferiore ad 8 anni e a persone
con limitate capacità fisiche, sensoriali o mentali o con poca esperienza e/o conoscenza, a meno
che non vengano debitamente sorvegliati e abbiano ricevuto istruzioni su come usare l’apparecchio
in sicurezza e indicazioni relative ai pericoli da esso derivanti.
.
3.1.2
aTTenziOne.
I bambini NON devono usare l'apparecchio come giocattolo. Sorvegliare i bambini per
assicurarsi che questo non accada..
3.1.3 La pulitura e la manutenzione utente NON devono essere eseguiti da bambini o da incapaci senza
sorveglianza.
3.1.4 Tenere le pellicole di imballaggio fuori dalla portata dei bambini. Rischio di asssia!
3.1.5
aTTenziOne.
L'apparecchio NON può essere azionato da coloro che non abbiano letto e compreso
le istruzioni.
3.1.6
aTTenziOne.
NON utilizzare l'apparecchio con fluidi infiammabili, tossici o aventi caratteristiche non
compatibili con il corretto funzionamento dell'apparecchio stesso. È vietato utilizzare l'apparecchio
in atmosfera potenzialmente infiammabile od esplosiva.
3.1.7
aTTenziOne.
Determinate sostanze possono formare insieme all’aria di aspirazione vapori e miscele
esplosivi. NON aspirare mai le seguenti sostanze:
– Gas esplosivi o inammabili, liquidi e polveri (polveri reattive).
– Polveri di metallo reattive (ad es. alluminio, magnesio, zinco) insieme a detergenti fortemente
alcalini ed acidi.
– Acidi e soluzioni alcaline allo stato puro.
– Soluzioni organiche (ad es. benzina, diluenti per vernici, acetone o gasolio).
Queste sostanze possono inoltre corrodere i materiali dell’apparecchio.
3.1.8 Disattivare l’apparecchio dopo ogni impiego e prima di ogni pulizia/manutenzione.
3.1.9 Pericolo d’incendio. NON aspirare oggetti brucianti o ardenti.
3.1.10
aTTenziOne.
NON utilizzare l'apparecchio all’aperto in caso di pioggia.
3.1.11
aTTenziOne.
NON toccare la spina e/o la presa con le mani bagnate.
3.1.12
aTTenziOne.
NON utilizzare l'apparecchio col cavo elettrico danneggiato. Se il cavo elettrico è
danneggiato, deve essere sostituito dal produttore, da un suo Centro Assistenza o da persone
ugualmente qualificate, per evitare pericoli per la sicurezza.
Page 18
18
(Istruzioni originali)
IT © 2016 Italiano
IT © 2016 Italiano
3.1.13
aTTenziOne.
Controllare che l'apparecchio sia provvisto della targhetta caratteristiche, se sprovvisto
avvertire il rivenditore. Gli apparecchi sprovvisti di targhetta NON devono essere usati, essendo
anonimi e potenzialmente pericolosi.
3.1.14
aTTenziOne.
NON spostare l'apparecchio tirando il CAVO ELETTRICO.
3.1.15
aTTenziOne.
È vietato utilizzare accessori non originali e non specifici per il modello. È vietato
eseguire modifiche all'apparecchio; l’esecuzione di modifiche fa decadere la Dichiarazione di
Conformità ed esonera il costruttore da responsabilità civili e penali.
3.2 AVVERTENZE: DA FARE
3.2.1
aTTenziOne.
Tutte le parti conduttrici di corrente DEVONO ESSERE PROTETTE contro getti o
spruzzi d’acqua.
3.2.2
aTTenziOne.
Il collegamento elettrico dovrà essere eseguito da un elettricista qualificato in conformità
alla norma IEC 60364-1. Si raccomanda di prevedere un interruttore differenziale che interrompa
l’alimentazione elettrica alla presente macchina se la corrente di dispersione verso terra supera i
30 mA per 30 ms, oppure un dispositivo di controllo del circuito di terra.
3.2.3
aTTenziOne.
DURANTE la fase di avviamento, l'apparecchio può generare disturbi in rete.
3.2.4
aTTenziOne.
Utilizzare solo prolunghe elettriche autorizzate e con sezione di conduzione appropriata.
3.2.5
aTTenziOne.
Disinserire sempre l’interruttore quando si lascia l'apparecchio incustodito.
3.2.6
aTTenziOne.
Il flusso d'aria può causare il rimbalzo di parti, usare tutti quegli indumenti e protezioni
(PPE) che consentano la messa in sicurezza e l’incolumità dell’operatore.
3.2.7
aTTenziOne.
Spegnere l'apparecchio e scollegarlo dalla sorgente di alimentazione prima di effettuare
operazioni di montaggio, pulizia, regolazione, manutenzione, stoccaggio e trasporto.
3.2.8
aTTenziOne.
La manutenzione e/o la riparazione dei componenti elettrici DEVE essere effettuata da
personale qualificato.
3.2.9
aTTenziOne.
CONTROLLARE prima di ogni utilizzo e periodicamente il serraggio delle viti ed il buon
stato delle parti componenti l'apparecchio, guardare se ci sono parti rotte od usurate.
3.2.10
aTTenziOne.
Per garantire la sicurezza dell'apparecchio, utilizzare soltanto ricambi originali del
fabbricante o approvati dal medesimo.
3.2.11
aTTenziOne.
I cavi di prolunga inadeguati possono risultare pericolosi. Se s’impiega un cavo di
prolunga, scegliere un tipo idoneo per l’uso all’aperto e accertarsi che il collegamento resti asciutto
e distante dal terreno. Si raccomanda di utilizzare a tale scopo un avvolgicavo, che mantenga la
presa ad almeno 60 mm di distanza dal terreno.
Page 19
19
(Istruzioni originali)
IT © 2016 Italiano
4 INFORMAZIONI GENERALI (PAGINA 3)
4.1 Uso del manuale
Il presente manuale è parte integrante dell'apparecchio; conservare
per future consultazioni. Leggere attentamente prima dell’installazione/
uso. In caso di passaggi di proprietà il cedente ha l’obbligo di
consegnare il manuale al nuovo proprietario.
4.2 Consegna
L'apparecchio è consegnato all’interno di un imballo di cartone,
parzialmente smontato.
Per la composizione della fornitura vedere fig.1.
4.2.1 Documentazione a corredo
D1 Manuale di uso e manutenzione
D2 Istruzioni per la sicurezza
D3 Dichiarazione di conformità
D4 Regole garanzia
4.3 Smaltimento degli imballi
I materiali costituenti l’imballo non sono inquinanti per l’ambiente,
tuttavia devono essere riciclati o smaltiti secondo la normativa vigente
nel paese di utilizzo.
5 INFORMAZIONI TECNICHE (PAGINA 3)
5.1 Uso previsto
L’apparecchio, in conformità alle descrizioni e alle avvertenze
di sicurezza date in queste istruzioni per l’uso, è destinato ad
essere utilizzato come aspiratore multiuso.
Questo apparecchio è concepito per il solo uso domestico e
non deve essere adibito ad uso commerciale o industriale.
L'apparecchio è conforme alla norma IEC 60335-1 e IEC 60335-2-2.
5.2 Operatore
Per identificare l’operatore addetto all’uso dell'apparecchio (professionale
o non professionale) vedere l’icona rappresentata in fig. 1.
5.3 Parti principali:
A1 Dispositivo d' avviamento
A2 Raccordo di aspirazione
A3 Raccordo di soffiatura
A4a Manico
A4b Manico metallico (dove previsto)
A5 Gancio portacavo (dove previsto)
A6 Ganci di chiusura
A7 Cavo elettrico con spina
A8a Ruotine pivottanti anteriori
A8b Ruote posteriori
A9 Contenitore
A10 Coperchio con motore
A11 Porta accessori (dove previsto)
A12 Tappo svuotamento liquidi (dove previsto)
A13 Assale per ruote posteriori (dove previsto)
C1 Presa aggiuntiva per elettroutensile (dove previsto)
5.3.1 Accessori (vedere fig. 1 con indicazioni dei modelli - la
fornitura prevede quanto illustrato sull'imballo di cartone)
B1
Portafiltro
B2
Filtro cartuccia
B3
Tubo flessibile
B4
Adattatore elettroutensile
B5
Tubo rigido
B6
Spazzola per pavimenti
B7
Spazzola per tappeti poltrone
B8
Bocchetta per fessure
B9
Spazzola tonda
B10
Sacchetto filtro in tessuto
(Optional)
B11
Sacchetto filtro in carta
B12
Gancio ferma tubo
B13
Spazzola combinata per
pavimenti
5.4 Dispositivi di sicurezza
- Dispositivo di avviamento (A1)
Il dispositivo di avviamento evita l’uso accidentale dell'apparecchio.
6 INSTALLAZIONE (PAGINA 4-5)
Attenzione - pericolo!
Tutte le operazioni d’installazione e montaggio devono essere effettuate con
l'apparecchio scollegato dalla rete elettrica.
Per la sequenza di montaggio vedere pag.4.
6.1 Montaggio
Durante il disimballaggio controllare l’eventuale mancanza di accessori
o la presenza di danni del contenuto. Nel caso in cui si riscontrino danni
dovuti al trasporto, informare immediatamente il proprio rivenditore.
Alzare il coperchio con motore (A10) dell'apparecchio, aprendo i ganci
di chiusura (A6) ed estrarre gli accessori forniti, vericando che il ltro
(B2) sia montato correttamente.
Vedere fig.2
Per la sequenza di montaggio vedere pag.4-5.
6.2
Montaggio delle ruote posteriori e ruotine pivottanti anteriori
Capovolgere il contenitore (A9) senza coperchio su di un piano
orizzontale solido. Infilare i mozzi delle ruotine pivottanti (A8a)
negli appositi fori e premere a fondo fino alla battuta, per il corretto
posizionamento e fissaggio delle ruotine.
Posizionare l'assale (A13) nella posizione corretta ruotandolo
affinché i fori di centraggio si accoppino con i centraggi. Posizionare
correttamente i fermi contenuti nel sacchetto (B17) e fermarli con le
apposite viti. Infilare la ruota (A8b), la rondella e fermare il tutto con
la copiglia avendo cura di infilarla profondamente e aprirla facendola
aderire perfettamente alla sezione dell'assale. Posizionare poi il
copriruota e ripetere l'operazione per l'altra ruota (A8b).
Montare il manico in metallo (A4b) come mostrato in figura.
Vedere fig.3
6.3 Montaggio degli accessori
Infilare il tubo flessibile (B3) nel raccordo di aspirazione (A2) o di
soffiatura (A3) a seconda del tipo di operazione desiderata.
Vedere fig.4
Completare poi la sequenza con gli accessori necessari per il tipo di
pulizia che dovete effettuare. Utilizzando i tubi rigidi (B5) e le spazzole
(B6-B7-B8-B9) a seconda del tipo di pulizia e di superficie da pulire.
Si possono montare le spazzole (B6-B7-B8-B9-B13) direttamente sul
tubo flessibile (B3).
Vedere fig.5
6.4 Collegamento elettrico
Attenzione - pericolo!
Verificare che la rete elettrica corrisponda al voltaggio e alla frequenza
(V/Hz) riportata sulla targa di identificazione Vedere fig.6
6.4.1 Utilizzo dei cavi di prolunga
Utilizzare cavi e spine con grado di protezione “IPX4”.
La sezione dei cavi di prolunga deve essere proporzionata
alla sua lunghezza; più è lunga, maggiore deve essere la
sezione.
6.5
Presa aggiuntiva per elettroutensile (dove previsto)
Infilare il tubo flessibile (B3) nel raccordo di aspirazione
dell'elettroutensile. Nel caso in cui questi non siano compatibili
utilizzare l'apposito adattatore elettroutensile (B4) (dove previsto),
tagliandone le parti in eccesso.
Alimentare l'elettroutensile utilizzando la presa aggiuntiva (C1) (Per i
modelli che ne sono equipaggiati).
Vedere fig.7
Page 20
20
(Istruzioni originali)
IT © 2016 Italiano
IT © 2016 Italiano
7 INFORMAZIONI D'USO (PAGINA 6)
7.1 Comandi
- Dispositivo di avviamento (A1).
Vedere fig.8
.
Mettere il dispositivo di avviamento in pos. (ON/I).
Se il dispositivo di avviamento è dotato di spia, questa si deve accendere.
Mettere il dispositivo di avviamento in pos. (OFF/0) per arrestare il
funzionamento dell'apparecchio.
Se il dispositivo di avviamento è dotato di spia, questa si deve spegnere.
Attenzione - pericolo!
L'apparecchio deve funzionare appoggiato su di un piano sicuro e
stabile, posizionato come indicato. Vedere fig.8.
7.2 Avviamento
7.2.1 Aspirazione a secco.
Vedere fig.9.
Lavorare solo con ltri (B2 - B11) asciutti! Prima di utilizzarli,
vericare se i ltri presentano danneggiamenti e sostituirli
se necessario. Per l’aspirazione di sporco secco, osservare
la corretta regolazione della spazzola per pavimenti e
collegare accessori corrispondenti (usare la spazzola B13).
Per l’aspirazione di sporco secco, all’occorrenza può
essere utilizzato aggiuntivamente un sacchetto ltro che
può essere in carta (B11) od in tessuto (B10) (Optional).
Indicazioni riguardo al sacchetto ltro:
– Il livello di riempimento del sacchetto ltro dipende dallo
sporco che viene aspirato.
– Nel caso di polveri ni, sabbia, ecc. sostituire spesso il
sacchetto ltro.
– Il sacchetto ltro usurato può scoppiare, pertanto va
sostituito in tempo!
Attenzione - pericolo!
Aspirare ceneri fredde.
7.2.2 Aspirazione liquidi
Vedere. fig.10.
Attenzione - pericolo!
In caso di formazione di schiuma o fuoriuscita di liquido,
spegnere immediatamente l’apparecchio o staccare la
spina di rete! Non utilizzare il sacchetto ltro (né in carta
né in tessuto) !
Attenzione
Se il contenitore è pieno, un galleggiante chiude l’apertura
di aspirazione e l’apparecchio gira con maggiore velocità.
Spegnere subito l’apparecchio e svuotare il contenitore.
Per l’aspirazione di umidità o bagnato, osservare la corretta
regolazione della spazzola per pavimenti e collegare
accessori corrispondenti (Usare la spazzola B6).
7.2.3 Lavori con utensili elettrici.
Vedere fig 11.
Per la sequenza di montaggio vedere fig.11.
Accendere l’apparecchio (interruttore girevole a SX in
posizione
o interruttore a 2 pulsanti in posizione II)
e procedere con il lavoro.
Avviso: Non appena l’utensile elettrico si accende, la turbina
di aspirazione parte con un ritardo di 0,5 secondi.
Quando l’utensile elettrico viene spento, la turbina di
aspirazione continua a funzionare per altri 6 secondi circa
per consentire di aspirare lo sporco residuo nel tubo di
aspirazione.
7.2.4 Funzione di sofatura.
Vedere fig 12.
Pulizia di punti difcilmente accessibili o in cui l’aspirazione
non è possibile, ad es. foglie dal letto di ghiaia.
Inserire il tubo essibile di aspirazione nell’apposito attacco.
In questo modo la funzione di sofaggio è attivata.
Per una maggiore efcacia dell'effetto sofante si consiglia
di usare la bocchetta per fessure B8.
7.3 Interrompere il funzionamento (Sosta)
Spegnere l’apparecchio. Vedere. fig.8.
Agganciare la spazzola per pavimenti nella posizione di parcheggio.
7.4 Fine lavoro
Spegnere l’apparecchio. Vedere. fig.8.
Staccare la spina.
7.5 Svuotare il contenitore
Per sporco secco e polveri: rimuovere la testa dell’apparecchio e
svuotare il serbatoio. Vedere. fig.13.
Per liquidi: usare la vite di scarico ove presente (vedere. fig.14.),
oppure procedere come sopra.
8 MANUTENZIONE (PAGINA 135)
Attenzione - pericolo!
Tutte le operazioni d’installazione e montaggio devono essere effettuate con
l'apparecchio scollegato dalla rete elettrica.
Per la sequenza di montaggio vedere pag.135.
Prima di ogni intervento di cura e di manutenzione, spegnere l’apparecchio e
staccare la spina. Lavori di riparazione e lavori sugli impianti elettrici possono
essere effettuati solo dal servizio clienti autorizzato.
Attenzione - pericolo!
Non usare detergenti abrasivi, detergenti per il vetro o detergenti universali!
Non immergere mai il coperchio
con motore (A10)
in acqua. Pulire
l’apparecchio e gli accessori in plastica con un normale detergente per
materiale sintetico. Sciacquare all’occorrenza il contenitore e gli accessori
con acqua ed asciugarli prima del loro riutilizzo.
8.1 Pulizia il filtro cartuccia (B2). Vedere fig.15
Aprire l'aspiratore agendo sui ganci (A6). Rovesciare il
coperchio con motore (A10) e smontare il ltro cartuccia (B2).
Sciacquare con cura sotto acqua corrente e lasciare asciugare.
Rimontarlo da asciutto.
8.2 Sostituzione sacchetto filtro di carta (B11). Vedere fig.17
Aprire l'aspiratore agendo sui ganci (A6). Smontare il sacchetto
ltro (B11) pieno, gettarlo e rimontarne uno nuovo.
8.3 Pulizia sacchetto filtro in tessuto (B10) (Optional). Vedere fig.16
Aprire l'aspiratore agendo sui ganci (A6). Smontare il
sacchetto ltro (B10). Svuotare il sacchetto ltro, sciacquare
con cura sotto acqua corrente e lasciare asciugare. Rimontarlo
da asciutto.
9 RIMESSAGGIO (PAGINA 135)
Attenzione - pericolo!
Tutte le operazioni d’installazione e montaggio devono essere effettuate con
l'apparecchio scollegato dalla rete elettrica.
A lavori ultimati, dopo aver pulito l'apparecchio, riporre lo stesso e gli
accessori cone indicato in
fig.18.
Conservare l’apparecchio in luoghi asciutti.
Page 21
21
(Istruzioni originali)
IT © 2016 Italiano
10
INFORMAZIONI SUI GUASTI
Inconvenienti Probabili cause Rimedi
L'apparecchio non si accende
Mancanza di tensione
Verificare la presenza di tensione nella rete e controllare che la
spina sia inserita correttamente (*)
Problemi al circuito elettrico-elettronico Rivolgersi al Centro Assistenza
L'apparecchio non aspira oppure aspira
debolmente
Accessori otturati Verificare e pulire bocchette prolunghe o tubi
Filtri sporchi Pulire i filtri
Sacchetti pieni Svuotare / sostituire i sacchetti
Contenitore pieno Svuotare il contenitore
L'elettroutensile non si mette in
funzione (dove prevista presa
elettroutensile)
Inserimento non corretto della spina elettroutensile alla presa
sull'aspiratore
Inserire correttamente la spina
L'interruttore è spento od in posizione I Posizionare interruttore in posizione utensile/ II
Fuoriesce polvere
Il filtro non è stato montato Montare il filtro
Il filtro è danneggiato Sostituire il filtro usato con uno nuovo
Il tubo od i suoi attacchi sono danneggiati Sostituire le parti danneggiate
Durante il funzionamento l'apparecchio
emana cattivi odori
Filtri/sacchetti sporchi Sostituire filtri/sacchetti
(*) Se durante il funzionamento il motore si ferma e non riparte contattare il Centro Assistenza.
Dichiarazione di conformità CE
Noi di Annovi Reverberi S.p.A., Bomporto (Mo), Italia, dichiariamo che la(e) seguente(i) macchina(e) Stanley:
Denominazione dell'apparecchio: Aspiratore per polveri e liquidi
N. modello: SXVC20PE SXVC20PTE SXVC20XTE SXVC30XTDE SXVC35PTDE SXVC50XTDE
Potenza assorbita: 1,2 kW 1,2 kW 1,4 kW 1,6 kW 1,6 kW 1,6 kW
è(sono) conforme(i) alle seguenti direttive europee:
2006/95/CE - Direttiva che sarà sostituita dalla 2014/35/UE a partire dal 20 aprile 2016,
2004/108/CE - Direttiva che sarà sostituita dalla 2014/30/UE a partire dal 20 aprile 2016, 2011/65/EU, 2005/32/CE, 2012/19/EU.
ed è(sono) prodotta(e) nel rispetto delle seguenti norme o dei seguenti documenti standardizzati:
EN 60335-1; EN 60335-2-2; EN 55014-1; EN 55014-2; EN 61000-3-2; EN 61000-3-3; EN 62233; EN 50581; Reg.1275/2008.
Nome e indirizzo della persona incaricata di rilasciare il fascicolo tecnico: Stefano ReverberII / AR Managing Director
Via ML King, 3 - 41122 Modena, Italia
Data : 10.02.2016
MODENA (I)
Stefano Reverberi Managing Director
Page 22
22
(Istruzioni originali)
IT © 2016 Italiano
IT © 2016 Italiano
GARANZIA
La validità della garanzia è regolamentata dalle normative vigenti nel paese in cui il prodotto viene commercializzato (salvo diverse indicazioni del produttore).
Se il prodotto risulta difettoso per qualità del materiale, della costruzione o per mancata conformità durante il periodo di validità della garanzia il fabbricante
garantisce la sostituzione delle parti difettose, provvede alla riparazione dei prodotti se ragionevolmente usurati oppure alla loro sostituzione.
La garanzia non copre componenti soggetti a normale usura (ltri, sacchetti, accessori come tubi rigidi, tubo lessibile, spazzole, ruote, ecc.);
La garanzia non copre difetti causati da o risultati da:
- uso scorretto, uso non ammesso, negligenza,
- noleggio o uso professionale qualora il prodotto sia stato venduto per uso domestico,
- mancata osservazione delle norme di manutenzione previste nell’apposito libretto,
- riparazioni eseguite da personale o centri non autorizzati,
- impiego di ricambi o accessori non originali,
- danni causati dal trasporto, da oggetti o sostanze estranee, sinistro,
- problemi di immagazzinaggio o stoccaggio.
Per attivare la garanzia è necessario esibire la prova d’acquisto.
Dati Tecnici Unità
SXVC20PE SXVC20PTE SXVC20XTE SXVC30XTDE SXVC35PTDE SXVC50XTDE
Tensione
V/Hz
220-240 V ~ 5
0/60 Hz
220-240 V ~ 5
0/60 Hz
220-240 V ~ 5
0/60 Hz
220-240 V ~ 5
0/60 Hz
220-240 V ~ 5
0/60 Hz
220-240 V ~ 5
0/60 Hz
Potenza
kW
1,2 1,2 1,4 1,6 1,6 1,6
Capacità contenitore
l
20 20 20 30 35 50
Pressione aspirazione massima
kPa
17 17 18 19 19 19
Depressione massima
mbar 170 170 180 190 190 190
Aria aspirata massima
l/s
28 28 33 37 39 41
N° motori
-
1 1 1
1 1
1
Ø accessori
mm
35 35 35 35 35 40
Cavo alimentazione
m
5 5 5 5 5 5
Classe Protezione
-
Isolamento Motore
Classe F F F F F F
Protezione Motore
-
IPX4 IPX4 IPX4 IPX4 IPX4 IPX4
Peso netto
kg
7,9 8,4 9,2 9,6 11,5 14,9
Peso lordo
kg
9,4 9,9 11,4 12,5 14,3 18,75
Con riserva di modiche tecniche!
Page 23
23
(Übersetzung der Originalanleitung)
DE © 2016 Deutsch
Sehr geehrte Kundin, sehr geehrter
Kunde,
lesen Sie vor der ersten Benutzung Ihres
Gerätes diese Bedienungsanleitung,
handeln Sie danach und bewahren Sie
sie für den späteren Gebrauch oder für
Nachbesitzer auf.
1 SICHERHEITSANWEISUNGEN
1.1
Sie haben ein Gerät mit einem hohen
technologischen Gehalt erworben,
das von einem der erfahrensten
europäischen Hersteller entwickelt
wurde. Dieses Gerät ist entsprechend
der in dieser Bedienungsanleitung
gegebenen Beschreibungen und
den Sicherheitshinweisen zur
Verwendung als Mehrzwecksauger
bestimmt. Lesen Sie die vorliegende
Bedienungsanleitung aufmerksam
durch und befolgen Sie bei jedem
Gebrauch des Geräts alle in ihr
enthaltenen Anweisungen, um alle
Leistungsmerkmale des Geräts
nutzen zu können. Beim Anschließen,
beim Gebrauch und bei der Wartung
des Geräts sind alle erforderlichen
Vorsichtsmaßnahmen zu treffen, um
die eigene Sicherheit und die der
in unmittelbarer Nähe befindlichen
Personen zu gewährleisten. Lesen Sie
die Sicherheitsvorschriften aufmerksam
durch und beachten Sie sie genau, da
andernfalls die Gefahr von Personenund Sachschäden besteht.
2
SCHILDER UND SICHERHEITSZEICHEN
2.1
Die Schilder und Sicherheitszeichen
beachten, die am Gerät angebracht
und in dieser Bedienungsanleitung
abgebildet sind.
Es sind nur die Sicherheitszeichen
am Gerät angebracht bzw. in der
Bedienungsanleitung abgebildet,
die für seinen sicheren Gebrauch
zweckdienlich sind. Darauf achten,
dass die am Gerät angebrachten
Schilder und Sicherheitszeichen
stets unversehrt und gut lesbar
sind. Andernfalls sind sie durch
neue Schilder bzw. Zeichen zu
ersetzen, die an den ursprünglichen
Stellen anzubringen sind (ein
Kundendienstzentrum kontaktieren).
Achtung - Gefahr
Diese Bedienungsanleitung
vor Gebrauch aufmerksam
durchlesen.
Symbol E3 (falls das Symbol in
Abb. 1 abgebildet ist)
- Es weist
darauf hin, dass dieses Gerät nur für
den Gebrauch im Haushalt und nicht
im Gewerbe konzipiert ist.
0
AUS-Stellung des Geräteschalters
I EIN-Stellung des Geräteschalters
Ein/Ausschaltautomatik
II
Ein/Ausschaltautomatik
Page 24
24
(Übersetzung der Originalanleitung)
DE © 2016 Deutsch
DE © 2016 Deutsch
Dieses Gerät hat die
Schutzklasse II. Das heißt, dass
es eine verstärkte und doppelte
Isolierung hat (nur wenn das
entsprechende Zeichen am Gerät
angebracht ist).
Dieses Gerät hat die
Schutzklasse I. Das heißt, dass
es mit einem Schutzleiter versehen
ist (nur wenn das entsprechende
Zeichen am Gerät angebracht ist).
Dieses Gerät entspricht den
einschlägigen europäischen
Richtlinien.
Symbol E1 - Recycling des
Geräts. Das Gerät muss am Ende
seines Lebenszyklus unverzüglich
unbrauchbar gemacht werden.
Den Netzstecker aus der Steckdose
ziehen.
Das Netzkabel durchtrennen.
Elektrogeräte dürfen nicht mit dem
Hausmüll entsorgt werden. Nach
den Bestimmungen der WEEERichtlinie 2002/96/EG über Elektround Elektronik-Altgeräte müssen
die elektrischen Bauteile getrennt
gesammelt und dem umweltgerechten
Recycling zugeführt werden. Weitere
Informationen erhält man bei den
zuständigen Behörden oder beim
Gebietshändler.
Gehörschutz benutzen.
Gesichtsschutz benutzen.
Atemschutz benutzen.
Handschutz benutzen.
Fußschutz benutzen.
Schutzkleidung benutzen.
Page 25
25
(Übersetzung der Originalanleitung)
DE © 2016 Deutsch
3 SICHERHEITSVORSCHRIFTEN/RESTRISIKEN
3.1 WARNHINWEISE: VERBOTE
3.1.1
achTung.
Kindern unter 8 Jahren und Personen mit eingeschränkten körperlichen, sensorischen
oder geistigen Fähigkeiten bzw. mangelnder Erfahrung und Kenntnis dürfen das Gerät NUR UNTER
AUFSICHT und erst dann benutzen, nachdem sie in seinen sicheren Gebrauch eingewiesen wurden
und die mit seinem Gebrauch verbundenen Gefahren nachweislich verstanden haben.
3.1.2
achTung.
Kindern darf NICHT erlaubt werden, das Gerät als Spielzeug zu verwenden. Kinder sollten
beaufsichtigt werden, um sicherzustellen, dass dies nicht geschieht..
3.1.3 Reinigung und Pege des Geräts dürfen von Kindern und Personen mit eingeschränkten geistigen
Fähigkeiten NUR UNTER AUFSICHT ausgeführt werden.
3.1.4 Die Verpackungsfolien dürfen nicht in die Reichweite von Kindern gelangen. Erstickungsgefahr!
3.1.5
achTung.
Das Gerät darf NICHT von Personen verwendet werden, die die Bedienungsanleitung
nicht gelesen und verstanden haben.
3.1.6
achTung. Das geräT
NICHT mit entzündbaren, giftigen bzw. mit solchen Flüssigkeiten betreiben,
die seinen ordnungsgemäßen Betrieb beeinträchtigen könnten. Es ist verboten, das Gerät in
entzündlicher oder explosiver Atmosphäre zu betreiben.
3.1.7
achTung.
Bestimmte Stoffe können zusammen mit der angesaugten Luft explosive Dämpfe und
Gemische bilden. NIEMALS die folgenden Stoffe aufsaugen:
– Explosive oder entzündliche Gase, Flüssigkeiten und Stäube (reaktive Stäube).
– Reaktive Metallstäube (z.B. Aluminium, Magnesium oder Zink) in Verbindung mit stark alkalischen
oder sauren Reinigungsmitteln.
– Reine Säuren und Laugen.
– Organische Lösungsmittel (z.B. Benzin, Farbverdünner, Aceton oder Heizöl).
Diese Stoffe können überdies die Materialien des Geräts angreifen.
3.1.8 Das Gerät nach jedem Gebrauch und vor der Ausführung von Reinigungs- und Wartungsarbeiten
ausschalten.
3.1.9 Brandgefahr. Keine brennenden oder glimmenden Gegenstände aufsaugen.
3.1.10
achTung.
Das Gerät NICHT bei Regen im Freien betreiben.
3.1.11
achTung.
Den Stecker bzw. die Steckdose NIEMALS mit nassen Händen anfassen.
Page 26
26
(Übersetzung der Originalanleitung)
DE © 2016 Deutsch
DE © 2016 Deutsch
3.1.12
achTung.
Das Gerät NICHT in Betrieb nehmen, wenn sein Netzkabel beschädigt ist. Wenn das
Netzkabel beschädigt ist, muss man es vom Hersteller, einem autorisierten Kundendienstzentrum
oder einem Fachmann austauschen lassen, damit der sichere Betrieb des Geräts gewährleistet
bleibt.
3.1.13
achTung.
Kontrollieren, ob das Typenschild am Gerät angebracht ist. Andernfalls den Händler
hiervon unterrichten. Geräte ohne Typenschild dürfen NICHT in Betrieb genommen werden, da
sie als nicht vorschriftsmäßig gekennzeichnete Geräte eine potenzielle Gefahrenquelle darstellen.
3.1.14
achTung.
Das Gerät NICHT am NETZKABEL ziehen.
3.1.15
achTung.
Es ist verboten, anderes als das für das jeweilige Modell bestimmte Originalzubehör
zu verwenden. Es ist verboten, am Gerät irgendwelche Änderungen vorzunehmen. Unbefugte
Änderungen führen zum Erlöschen der Konformitätserklärung und befreien den Hersteller von jeder
zivil- und strafrechtlichen Verantwortung.
3.2 WARNHINWEISE: GEBOTE
3.2.1
achTung.
Sämtliche stromführenden Teile SIND gegen Strahl- und Spritzwasser ZU SCHÜTZEN.
3.2.2
achTung.
Der elektrische Anschluss muss von einem Fachmann in Einklang mit der Norm IEC 60364-1
ausgeführt werden. Es sollte ein FI-Schalter installiert werden, der die Stromversorgung unterbricht,
wenn der Fehlerstrom gegen Erde 30 mA für die Dauer von 30 ms überschreitet. Alternativ kann ein
Gerät zur Schutzleiterüberwachung installiert werden.
3.2.3
achTung.
BEIM ANLAUF kann das Gerät Netzstörungen verursachen.
3.2.4
achTung.
Ausschließlich vorschriftsmäßige Verlängerungskabel mit einem angemessenen
Querschnitt verwenden.
3.2.5
achTung.
Stets den Geräteschalter ausschalten, wenn das Gerät unbeaufsichtigt gelassen wird.
3.2.6
achTung.
Durch den Luftstrom können Teile zurückprallen. Daher muss die Bedienungsperson die
zu ihrem Schutz erforderliche Schutzkleidung und Schutzausrüstung (PSA) tragen.
3.2.7
achTung.
Das Gerät vor der Ausführung von Arbeiten zur Montage, Reinigung, Einstellung, Wartung,
Lagerung und zum Transport ausschalten und vom Stromnetz trennen.
3.2.8
achTung.
Die Wartung bzw. Reparatur der elektrischen Bauteile DARF NUR DURCH
FACHPERSONAL erfolgen.
Page 27

27
(Übersetzung der Originalanleitung)
DE © 2016 Deutsch
3.2.9
achTung.
Vor jedem Gebrauch sowie in regelmäßigen Zeitabständen den Festsitz der Schrauben
und Muttern kontrollieren und die Komponenten des Geräts auf Bruch bzw. Verschleiß überprüfen.
3.2.10
achTung.
Zur Gewährleistung der Sicherheit des Geräts ausschließlich Originalersatzteile des
Herstellers oder vom Hersteller zugelassene Ersatzteile verwenden.
3.2.11
achTung.
Ungeeignete Verlängerungskabel können zur Entstehung von Gefahren führen. Nur für
die Verwendung im Freien geeignete Verlängerungskabel verwenden und sicherstellen, dass die
Kupplung vom Boden angehoben und gegen Feuchtigkeit geschützt ist. Es wird empfohlen, eine
Kabeltrommel zu verwenden, die gewährleistet, dass sich die Steckdose mindestens 60 mm über
dem Boden befindet.
Page 28
28
(Übersetzung der Originalanleitung)
DE © 2016 Deutsch
DE © 2016 Deutsch
4 ALLGEMEINE INFORMATIONEN (SEITE 3)
4.1 Gebrauch der Bedienungsanleitung
Die vorliegende Bedienungsanleitung ist ein wesentlicher
Bestandteil des Geräts und muss sorgfältig aufbewahrt werden,
damit sie auch später jederzeit zu Rate gezogen werden kann.
Die Bedienungsanleitung vor der Installation und dem Gebrauch
aufmerksam durchlesen. Der Eigentümer ist verpflichtet, die
Bedienungsanleitung im Falle der Veräußerung des Geräts dem
neuen Eigentümer zu übergeben.
4.2 Lieferung
Das Gerät wird teilweise zerlegt in einen Karton verpackt geliefert.
Der Lieferumfang ist in Abb. 1 dargestellt.
4.2.1 Beiliegende Dokumentation
D1 Bedienungs- und Wartungsanleitung
D2 Sicherheitsanweisungen
D3 Konformitätserklärung
D4 Garantiebedingungen
4.3 Entsorgung der Verpackung
Die Verpackungsmaterialien sind nicht umweltschädlich, müssen
jedoch in jedem Fall in Einklang mit den im Verwendungsland
geltenden Bestimmungen entsorgt bzw. recycelt werden.
5 TECHNISCHE INFORMATIONEN (SEITE 3)
5.1 Vorgesehener Gebrauch
Das Gerät ist entsprechend der in dieser Bedienungsanleitung
gegebenen Beschreibungen und den Sicherheitshinweisen zur
Verwendung als Mehrzwecksauger bestimmt.
Das Gerät ist nur für den Gebrauch im Haushalt bestimmt und
darf nicht im Gewerbe eingesetzt werden.
Das Gerät entspricht den Normen IEC 60335-1 und IEC 60335-2-2.
5.2 Bedienungsperson
Die Anforderungen an die Bedienungsperson hängen davon ab, ob
das Gerät für den gewerblichen oder den nicht gewerblichen Gebrauch
bestimmt ist. Siehe hierzu das entsprechende Symbol in Abb. 1.
5.3 Wichtigste Teile:
A1 Geräteschalter
A2 Sauganschluss
A3 Blasanschluss
A4a Griff
A4b Metallgriff (falls vorgesehen)
A5 Kabelhalter (falls vorgesehen)
A6 Clip-Verschlüsse
A7 Netzkabel mit Stecker
A8a Vordere Lenkrollen
A8b Hinterräder
A9 Behälter
A10 Gerätekopf
A11 Zubehöraufbewahrung (falls vorgesehen)
A12 Ablassschraube zum Ablassen des Schmutzwassers
(falls vorgesehen)
A13 Achse für die Hinterräder (falls vorgesehen)
C1 Steckdose für Elektrowerkzeuge (falls vorgesehen)
5.3.1 Zubehör (siehe Abb. 1 mit Angabe der Modelle - Der Lieferumfang
entspricht den Abbildungen auf dem Verpackungskarton)
B1
Filterhalter
B2
Patronenfilter
B3
Schlauch
B4
Adapter für
Elektrowerkzeug
B5
Rohr
B6
Bodendüse
B7
Teppich- und Polsterdüse
B8
Fugendüse
B9
Rundbürste
B10
Stofffilterbeutel (optional)
B11
Papierfilterbeutel
B12
Rohrhalter
B13
Kombibodendüse
5.4 Sicherheitsvorrichtungen
- Geräteschalter (A1)
Der Geräteschalter verhindert den unbeabsichtigten Betrieb des
Geräts.
6 INSTALLATION (SEITEN 4-5)
Achtung - Gefahr!
Das Gerät muss zur Ausführung aller Installations- und Montagearbeiten vom
Stromnetz getrennt sein.
Für die Reihenfolge der Montagearbeiten siehe S. 4.
6.1 Montage
Beim Auspacken den Inhalt der Verpackung auf fehlendes Zubehör
oder Beschädigungen prüfen. Im Falle von Transportschäden
unverzüglich den Händler hiervon in Kenntnis setzen.
Die Clip-Verschlüsse (A6) öffnen und den Gerätekopf (A10) anheben,
um das Zubehör herausnehmen zu können. Hierbei kontrollieren, ob
der Filter (B2) richtig eingesetzt ist.
Siehe Abb. 2
Für die Reihenfolge der Montagearbeiten siehe S. 4-5.
6.2
Montage der Hinterräder und der vorderen Lenkrollen
Den Behälter (A9) ohne Gerätekopf umdrehen und auf eine stabile
waagrechte Unterlage stellen. Die Zapfen der Lenkrollen (A8) in die
hierfür vorgesehenen Öffnungen einführen und bis zum Anschlag
niederdrücken, damit sie richtig und fest sitzen.
Zum richtigen Einsetzen der Achse (A13) muss man sie so drehen,
dass die Zentrierstifte in die Zentrierbohrungen eingeführt werden
können. Die im Zubehörbeutel (B17) enthaltenen Feststeller richtig
anordnen und mit den zugehörigen Schrauben festschrauben. Das
Rad (A8b) und den Ring aufstecken und mit dem Splint sichern.
Hierbei den Splint ganz einführen und dann seine Schenkel so
auseinanderbiegen, dass sie vollständig an der Außenfläche der
Achse anliegen. Anschließend die Radkappe anbringen und in
derselben Weise mit dem anderen Rad (A8b) verfahren.
Den Metallgriff (A4b) wie in der Abbildung gezeigt anbringen.
Siehe Abb. 3
6.3 Montage des Zubehörs
Den Schlauch (B3) je nach der auszuführenden Arbeit in den
Sauganschluss (A2) bzw. den Blasanschluss (A3) einstecken.
Siehe Abb. 4
Dann das weitere Zubehör montieren, das zur auszuführenden
Reinigung erforderlich ist. Die Rohre (B5) und Düsen/Bürsten (B6-B7-
B8-B9) verwenden, die sich für die auszuführende Reinigung und
die zu reinigende Oberfläche am besten eignen. Die Düsen/Bürsten
(B6-B7-B8-B9-B13) können direkt am Schlauch (B3) angebracht
werden.
Siehe Abb. 5
Page 29

29
(Übersetzung der Originalanleitung)
DE © 2016 Deutsch
6.4 Elektrischer Anschluss
Achtung - Gefahr!
Sicherstellen, dass Netzspannung und -frequenz den Angaben auf
dem Typenschild (V-Hz) entsprechen (siehe Abb. 6).
6.4.1 Gebrauch von Verlängerungskabeln
Kabel und Stecker mit Schutzart IPX4 verwenden.
Der Querschnitt des Verlängerungskabels muss proportional
zu seiner Länge sein. Je länger es ist, umso größer muss
der Querschnitt sein.
6.5
Steckdose für Elektrowerkzeuge (falls vorgesehen)
Den Schlauch (B3) in den Sauganschluss des Elektrowerkzeugs
einführen. Falls sie nicht zusammenpassen, den hierfür vorgesehenen
Adapter für Elektrowerkzeug (B4) (falls vorgesehen) verwenden. Den
zu langen Teil abschneiden.
Für die Stromversorgung des Elektrowerkzeugs die Steckdose (C1)
verwenden (falls vorgesehen).
Siehe Abb. 7
7 INFORMATIONEN ZUM GEBRAUCH (SEITE 6)
7.1 Bedieneinrichtungen
- Geräteschalter (A1).
Siehe Abb. 8
.
Den Geräteschalter in die Schaltstellung (ON/I) schalten.
Wenn der Geräteschalter über eine Kontrolllampe verfügt, muss diese
Kontrolllampe aufleuchten.
Den Geräteschalter in die Schaltstellung (OFF/0) schalten, um das Gerät
auszuschalten.
Wenn der Geräteschalter über eine Kontrolllampe verfügt, muss diese
Kontrolllampe dann erlöschen.
Achtung - Gefahr!
Das Gerät muss für den Betrieb wie angegeben auf einem sicheren
und festen Untergrund stehen. Siehe Abb. 8.
7.2 Einschalten
7.2.1 Trockensaugen.
Siehe Abb. 9.
Nur mit trockenen Filtern (B2 - B11) arbeiten! Die Filter
vor Gebrauch auf Beschädigungen prüfen und bei Bedarf
austauschen. Zum Aufsaugen von trockenem Schmutz
auf die richtige Einstellung der Bodendüse achten und
das entsprechende Zubehör anschließen (die Düse B13
verwenden).
Zum Aufsaugen von trockenem Schutz kann bei Bedarf
zusätzlich ein Filterbeutel aus Papier (B11) oder Stoff (B10)
(optional) eingesetzt werden.
Hinweise zum Filterbeutel:
– Der Füllgrad des Filterbeutels ist abhängig vom
aufgesaugten Schmutz.
– Bei Feinstaub, Sand usw. sollte der Filterbeutel häuger
ausgetauscht werden.
– Ein abgenutzter Filterbeutel kann platzen und sollte daher
rechtzeitig ausgewechselt werden!
Achtung - Gefahr!
Nur kalte Asche aufsaugen.
7.2.2 Nasssaugen
Siehe Abb. 10.
Achtung - Gefahr!
Bei Schaumbildung oder Flüssigkeitsaustritt das Gerät
unverzüglich ausschalten oder den Netzstecker abziehen!
Keinen Filterbeutel verwenden (weder aus Papier noch aus
Stoff)!
Achtung
Ist der Behälter voll, schließt ein Schwimmer die
Saugöffnung und das Gerät läuft mit erhöhter Drehzahl. Das
Gerät dann sofort ausschalten und den Behälter entleeren.
Zum Aufsaugen von Feuchtigkeit bzw. Nässe auf die richtige
Einstellung der Bodendüse achten und das entsprechende
Zubehör anschließen (die Düse B6 verwenden).
7.2.3 Arbeiten mit Elektrowerkzeugen.
Siehe Abb. 11.
Für die Reihenfolge der Montagearbeiten siehe Abb. 11.
Das Gerät einschalten (Drehschalter nach links in
die Schaltstellung
oder Taster II des Ein-Aus-
Druckschalters), um mit der Arbeit zu beginnen.
Hinweis: Wenn das Elektrowerkzeug eingeschaltet wird, läuft
die Saugturbine mit einer Verzögerung von 0,5 Sekunden an.
Wird das Elektrowerkzeug wieder ausgeschaltet, läuft
die Saugturbine noch ca. 6 Sekunden nach, um den
Restschmutz im Saugschlauch einzusaugen.
7.2.4 Blasfunktion.
Siehe Abb. 12.
Zum Reinigen von schwer erreichbaren Stellen oder wo das
Saugen nicht möglich ist, z.B Laub aus dem Kiesbeet.
Den Schlauch in den Blasanschluss einstecken. Die
Blasfunktion ist damit aktiviert.
Die größte Blaswirkung erzielt man mit der Fugendüse B8.
7.3 Betrieb unterbrechen (Arbeitspause)
Das Gerät ausschalten. Siehe Abb. 8.
Die Bodendüse in die Parkposition einhängen.
7.4 Betrieb beenden
Das Gerät ausschalten. Siehe Abb. 8.
Den Netzstecker abziehen.
7.5 Den Behälter entleeren.
Bei trockenem Schmutz und Stäuben: Den Gerätekopf abnehmen und
den Behälter entleeren. Siehe Abb. 13.
Bei Flüssigkeiten: Die Ablassschraube verwenden, falls das Gerät
darüber verfügt (siehe Abb. 14.), oder wie oben beschrieben verfahren.
8 PFLEGE UND WARTUNG (SEITE 135)
Achtung - Gefahr!
Das Gerät muss zur Ausführung aller Installations- und Montagearbeiten vom
Stromnetz getrennt sein.
Für die Reihenfolge der Montagearbeiten siehe S. 135.
Vor allen Pege– und Wartungsarbeiten das Gerät ausschalten und den
Netzstecker abziehen. Reparaturarbeiten und Arbeiten an elektrischen
Bauteilen dürfen nur vom autorisierten Kundendienst durchgeführt werden.
Achtung - Gefahr!
Keine Scheuermittel, Glas- oder Allzweckreiniger verwenden! Den Gerätekopf
(A10)
keinesfalls in Wasser eintauchen.. Das Gerät und die Zubehörteile
aus Kunststoff mit einem handelsüblichen Kunststoffreiniger säubern.
Den Behälter und das Zubehör bei Bedarf mit Wasser spülen und vor der
Wiederverwendung trocknen.
8.1 Reinigung des Patronenfilters (B2). Siehe Abb. 15
Die Clip-Verschlüsse (A6) lösen, um den Sauger zu öffnen.
Den Gerätekopf (A10) umdrehen und den Patronenlter (B2)
herausnehmen.
Den Filter unter ießendem Wasser gründlich spülen und trocknen
lassen. Wenn er trocken ist, kann er wieder eingesetzt werden.
Page 30
30
(Übersetzung der Originalanleitung)
DE © 2016 Deutsch
DE © 2016 Deutsch
10
INFORMATIONEN ZU BETRIEBSSTÖRUNGEN
Störungen Wahrscheinliche Ursachen Abhilfe
Das Gerät lässt sich nicht einschalten.
Versorgungsspannung fehlt.
Kontrollieren, ob die Netzspannung vorhanden ist und ob der
Netzstecker richtig in die Steckdose eingesteckt ist. (*)
Probleme bei der elektrischen-elektronischen Schaltung Ein Kundendienstzentrum kontaktieren.
Gerät saugt nicht oder nur mit geringer
Saugleistung.
Zubehör verstopft.
Düsen, Verlängerungen und Rohre kontrollieren und bei Bedarf
säubern.
Filter verschmutzt. Filter reinigen.
Filterbeutel voll. Filterbeutel entleeren bzw. auswechseln.
Behälter voll. Behälter entleeren.
Das Elektrowerkzeug schaltet
sich nicht ein (bei Geräten mit der
entsprechenden Steckdose).
Der Netzstecker des Elektrowerkzeugs ist nicht richtig in die
Steckdose des Saugers eingesteckt.
Den Netzstecker richtig einstecken
Der Schalter ist ausgeschaltet oder in Schaltstellung I. Den Schalter in die Schaltstellung Elektrowerkzeug/II schalten.
Aus dem Gerät tritt Staub aus.
Der Filter wurde nicht eingesetzt. Den Filter einsetzen.
Der Filter ist beschädigt. Den alten Filter durch einen neuen ersetzen.
Das Rohr oder seine Anschlüsse sind beschädigt. Die beschädigten Teile auswechseln.
Beim Betrieb treten unangenehme
Gerüche aus dem Gerät aus.
Filter/Filterbeutel verschmutzt. Filter/Filterbeutel auswechseln.
(*) Wenn sich der Motor während des Betriebs ausschaltet und nicht wieder einschaltet, den technischen Kundendienst kontaktieren.
CE-Konformitätserklärung
Die Firma Annovi Reverberi S.p.A., Bomporto (Mo), Italien, erklärt, dass das/die folgende/n Gerät/e Stanley:
Bezeichnung des Geräts: Nass- und Trockensauger
Modellnr.: SXVC20PE SXVC20PTE SXVC20XTE SXVC30XTDE SXVC35PTDE SXVC50XTDE
Leistungsaufnahme: 1,2 kW 1,2 kW 1,4 kW 1,6 kW 1,6 kW 1,6 kW
den folgenden europäischen Richtlinien entspricht/entsprechen:
2006/95/EG - Die Richtlinie wird ab dem 20. April 2016 durch die Richtlinie 2014/35/EU ersetzt.,
2004/108/EG - Die Richtlinie wird ab dem 20. April 2016 durch die Richtlinie 2014/30/EU ersetzt., 2011/65/EU, 2005/32/EG, 2012/19/EU.
und gemäß den folgenden Normen oder vereinheitlichten Dokumenten hergestellt wurde/n:
EN 60335-1; EN 60335-2-2; EN 55014-1; EN 55014-2; EN 61000-3-2; EN 61000-3-3; EN 62233; EN 50581; Reg.1275/2008.
Name und Anschrift der für die Zusammenstellung der technischen Unterlagen bevollmächtigten Person: Stefano ReverberII / AR Managing Director
Via ML King, 3 - 41122 Modena, Italien
Datum: 10.02.2016
MODENA (I)
Stefano Reverberi Managing Director
8.2 Auswechseln des Papierfilterbeutels (B11). Siehe Abb. 17
Die Clip-Verschlüsse (A6) lösen, um den Sauger zu öffnen.
Den vollen Filterbeutel (B11) herausnehmen und entsorgen
und dann einen neuen Filterbeutel einsetzen.
8.3 Reinigung des Stofffilterbeutels (B10)(optional). Siehe Abb. 16
Die Clip-Verschlüsse (A6) lösen, um den Sauger zu öffnen.
Den Filterbeutel (B10) herausnehmen. Den Filterbeutel
entleeren, unter ießendem Wasser gründlich spülen
und trocknen lassen. Wenn er trocken ist, kann er wieder
eingesetzt werden.
9 LAGERUNG (SEITE 135)
Achtung - Gefahr!
Das Gerät muss zur Ausführung aller Installations- und Montagearbeiten vom
Stromnetz getrennt sein.
Das Gerät nach beendeter Arbeit reinigen und wie in
Abb. 18
gezeigt mit
dem Zubehör lagern.
Das Gerät an einem trockenen Ort lagern.
Page 31

31
(Übersetzung der Originalanleitung)
DE © 2016 Deutsch
GARANTIE
Die Gültigkeit der Garantie wird von den Bestimmungen in dem Land geregelt, in dem das Produkt in Verkehr gebracht wird (vorbehaltlich anderer Angaben
des Herstellers).
Wenn sich das Produkt innerhalb des Gültigkeitszeitraums der Garantie wegen eines Material- oder Herstellungsfehlers oder nicht gegebener Konformität
als mangelhaft erweist, garantiert der Hersteller den Austausch der defekten Teile und veranlasst die Reparatur der Produkte, falls sich ihr Verschleiß in
zumutbaren Grenzen hält, bzw. ihren Austausch.
Von der Garantie ausgeschlossen sind alle Teile, die dem normalen Verschleiß unterliegen (Filter, Filterbeutel, Zubehör wie Rohr, Schlauch, Bürsten, Düsen,
Rollen, Räder usw.).
Von der Garantie ausgeschossen sind Defekte aufgrund oder infolge von:
- unsachgemäßem Gebrauch, unzulässigem Gebrauch, mangelnder Sorgfalt;
- Vermietung oder gewerblicher Einsatz, falls das Produkt für den Gebrauch im Haushalt verkauft wurde;
- Missachtung der in der entsprechenden Anleitung enthaltenen Wartungsvorschriften;
- Reparaturen, die von unbefugten Personen oder Werkstätten ausgeführt wurden;
- Verwendung von nicht originalen Ersatz- oder Zubehörteilen;
- Schäden, die durch einen Unfall, den Transport, Fremdkörper oder Fremdstoffe verursacht wurden;
- Problemen bei der Lagerung oder Aufbewahrung.
Um die Garantie in Anspruch nehmen zu können, muss der Kaufbeleg vorgelegt werden.
Technische Daten Einheit
SXVC20PE SXVC20PTE SXVC20XTE SXVC30XTDE SXVC35PTDE SXVC50XTDE
Spannung
V/Hz
220-240 V ~ 5
0/60 Hz
220-240 V ~ 5
0/60 Hz
220-240 V ~ 5
0/60 Hz
220-240 V ~ 5
0/60 Hz
220-240 V ~ 5
0/60 Hz
220-240 V ~ 5
0/60 Hz
Leistung
kW
1,2 1,2 1,4 1,6 1,6 1,6
Behältervolumen
l
20 20 20 30 35 50
Max. Saugdruck
kPa
17 17 18 19 19 19
Max. Unterdruck
mbar 170 170 180 190 190 190
Max. Luftmenge
l/s
28 28 33 37 39 41
Anz. Motoren
-
1 1 1
1 1
1
Ø Zubehör
mm
35 35 35 35 35 40
Netzkabel
m
5 5 5 5 5 5
Schutzklasse
-
Isolationsklasse Motor
Klasse F F F F F F
Schutzart Motor
-
IPX4 IPX4 IPX4 IPX4 IPX4 IPX4
Nettogewicht
kg
7,9 8,4 9,2 9,6 11,5 14,9
Bruttogewicht
kg
9,4 9,9 11,4 12,5 14,3 18,75
Technische Änderungen vorbehalten!
Page 32

32
(Μετάφραση των γνήσιων οδηγιών)
EL © 2016 Ελληνικά
EL © 2016 Ελληνικά
Αγαπητέ πελάτη,
Πριν χρησιμοποιήσετε τη συσκευή
για πρώτη φορά, διαβάστε τις γνήσιες
οδηγίες, ακολουθήστε τις και φυλάξτε τις
για μελλοντική χρήση ή σε περίπτωση
μεταπώλησης της συσκευής.
1 ΟΔΗΓΙΕΣ ΓΙΑ ΤΗΝ ΑΣΦΑΛΕΙΑ
1.1 Η συσκευή που αγοράσατε είναι ένα
προϊόν υψηλής τεχνολογίας το οποίο
κατασκευάστηκε από μία από τις
πιο έμπειρες ευρωπαϊκές εταιρίες. Η
συσκευή αυτή, είναι συμβατή με τις
περιγραφές και τις προειδοποιήσεις
για την ασφάλεια που δίδονται
με τις παρούσες οδηγίες χρήσης
και προορίζεται ως πολυχρηστική
ηλεκτρική σκούπα αναρρόφησης.
Για την επίτευξη της καλύτερης
απόδοσης, συντάξαμε τα παρακάτω
τα οποία πρέπει να διαβάσετε με
προσοχή και να τηρήσετε με κάθε
χρήση. Κατά τη σύνδεση, χρήση
και συντήρηση της συσκευής λάβετε
όλες τις δυνατές προφυλάξεις για τη
διασφάλιση της ακεραιότητάς σας
και όσων βρίσκονται κοντά. Διαβάστε
με προσοχή και ακολουθήστε τις
προδιαγραφές ασφαλείας καθώς εάν
δεν τηρηθούν μπορούν να θέσουν σε
κίνδυνο την υγεία και την ασφάλεια
των ατόμων ή να προκαλέσουν
οικονομικές ζημιές.
2 ΕΝΔΕΙΞΕΙΣ ΠΛΗΡΟΦΟΡΙΩΝ
2.1
Τηρείτε τις ενδείξεις που αναφέρονται
στις πινακίδες και στα σύμβολα που
υπάρχουν επάνω στη συσκευή και
στις παρούσες οδηγίες.
Στη συσκευή και στο βιβλίο υπάρχουν
μόνο τα σύμβολα που αφορούν τη
συσκευή που αγοράσατε. Να ελέγχετε
ότι τα σύμβολα και οι πινακίδες
που υπάρχουν στη συσκευή είναι
πάντα ακέραια και ευανάγνωστα· σε
αντίθετη περίπτωση αντικαταστήστε
τα με άλλα τοποθετώντας τα στην
ίδια θέση (Απευθυνθείτε στο Κέντρο
Υποστήριξης).
Προσοχή - Κίνδυνος
Διαβάστε προσεκτικά αυτές
τις οδηγίες πριν από τη
χρήση.
Εικόνα E3 (εάν το σύμβολο
υπάρχει στην εικ. 1)
- Δείχνει ότι
η συσκευή αυτή προορίζεται μόνο
για οικιακή χρήση και δεν πρέπει να
χρησιμοποιείται για εμπορική ή
βιομηχανική χρήση.
0
Θέση διακόπτη σβηστό
I Θέση διακόπτη αναμμένο
Θέση διακόπτη αυτόματο
II
Θέση διακόπτη αυτόματο
Page 33

33
(Μετάφραση των γνήσιων οδηγιών)
EL © 2016 Ελληνικά
Το προϊόν αυτό ανήκει στην
κλάση μόνωσης II. Αυτό
σημαίνει ότι είναι εξοπλισμένο με
ενισχυμένη μόνωση ή με διπλή
μόνωση (μόνον εάν το σύμβολο
υπάρχει επάνω στη συσκευή).
Το προϊόν αυτό ανήκει στην
κλάση μόνωσης I. Αυτό
σημαίνει ότι είναι εξοπλισμένο με
αγωγό προστασίας γείωσης (μόνον
εάν το σύμβολο υπάρχει επάνω στη
συσκευή).
Το προϊόν αυτό είναι συμβατό
με τις σχετικές εφαρμοστέες
ευρωπαϊκές οδηγίες.
Εικόνα E1 - Ανακύκλωση της
συσκευής. Αχρηστεύστε αμέσως τη
συσκευή στο τέλος του κύκλου ζωής
της.
Βγάλτε το φις από την ηλεκτρική
τροφοδοσία.
Κόψτε το ηλεκτρικό καλώδιο.
Μην απορρίπτετε τις ηλεκτρικές
συσκευές μαζί με τα οικιακά
απόβλητα. Σύμφωνα με τα όσα
ορίζονται στην οδηγία ΑΗΕΕ
2012/19/ΕΚ σχετικά με τις ηλεκτρικές
και ηλεκτρονικές συσκευές στο τέλος
του κύκλου ζωής τους, τα ηλεκτρικά
εξαρτήματα πρέπει να συλλέγονται
χωριστά και να ανακυκλώνονται με
οικολογικό τρόπο. Για περαιτέρω
πληροφορίες, επικοινωνήστε με τις
αρμόδιες υπηρεσίες ή το κατάστημα
πώλησης της περιοχής σας.
Χρησιμοποιείτε ακουστικά
προστασίας.
Χρησιμοποιείτε μάσκα προστασίας.
Χρησιμοποιείτε μέσα προστασίας
του αναπνευστικού συστήματος.
Χρησιμοποιείτε γάντια προστασίας.
Χρησιμοποιείτε υποδήματα
πρόληψης ατυχημάτων.
Χρησιμοποιείτε ρούχα προστασίας.
Page 34

34
(Μετάφραση των γνήσιων οδηγιών)
EL © 2016 Ελληνικά
EL © 2016 Ελληνικά
3 ΠΡΟΔΙΑΓΡΑΦΕΣ ΑΣΦΑΛΕΙΑΣ/ΥΠΟΛΕΙΠΟΜΕΝΟΙ ΚΙΝΔΥΝΟΙ
3.1 ΠΡΟΕΙΔΟΠΟΙΗΣΕΙΣ: ΤΙ ΔΕΝ ΠΡΕΠΕΙ ΝΑ ΚΑΝΕΤΕ
3.1.1
Προσοχή. ΜήΝ
επιτρέπετε τη χρήση της συσκευής σε παιδιά ηλικίας κάτω των 8 ετών και σε άτομα
με περιορισμένες φυσικές, αισθητήριες ή νοητικές ικανότητες ή με μικρή εμπειρία και/ή γνώση,
εκτός εάν επιβλέπονται κατάλληλα και έχουν λάβει οδηγίες σχετικά με την ασφαλή χρήση της
συσκευής και ενδείξεις που αφορούν τους κινδύνους που προκαλούνται από αυτήν.
.
3.1.2
Προσοχή.
Τα παιδιά ΔΕΝ πρέπει να χρησιμοποιούν τη συσκευή σαν παιχνίδι. Να επιβλέπετε τα
παιδιά για να βεβαιωθείτε ότι δεν θα συμβεί αυτό.
3.1.3 Το καθάρισμα και η συντήρηση από το χρήστη ΔΕΝ πρέπει να εκτελούνται από παιδιά ή από
ανίκανα άτομα χωρίς επίβλεψη.
3.1.4 Να κρατάτε τις ταινίες συσκευασίας μακριά από τα παιδιά. Κίνδυνος ασφυξίας!
3.1.5
Προσοχή.
Η συσκευή ΔΕΝ πρέπει να τίθεται σε λειτουργία από όσους δεν έχουν διαβάσει και
κατανοήσει τις οδηγίες.
3.1.6
Προσοχή.
ΜΗΝ χρησιμοποιείτε τη συσκευή με εύφλεκτα, τοξικά υγρά ή τα οποία έχουν
χαρακτηριστικά μη συμβατά με τη σωστή λειτουργία της ίδιας της συσκευής. Απαγορεύεται η
χρήση της συσκευής σε δυνητικά εύφλεκτη ή εκρηκτική ατμόσφαιρα.
3.1.7
Προσοχή.
Ορισμένες ουσίες μπορούν να προκαλέσουν μαζί με τον αέρα αναρρόφησης εκρηκτικούς
ατμούς και μίγματα. ΜΗΝ αναρροφάτε ποτέ τις παρακάτω ουσίες:
– Εκρηκτικά ή εύφλεκτα αέρια, υγρά και σκόνες (αντιδραστικές σκόνες).
– Αντιδραστικές σκόνες μετάλλου (π.χ. αλουμίνιο, μαγνήσιο, ψευδάργυρος) μαζί με πολύ αλκαλικά
και όξινα απορρυπαντικά.
– Οξέα και αλκαλικά διαλύματα σε αμιγή κατάσταση.
– Οργανικά διαλύματα (π.χ. βενζίνη, διαλυτικά για βερνίκια, ακετόνη ή πετρέλαιο).
Αυτές οι ουσίες μπορούν επίσης να διαβρώσουν τα υλικά της συσκευής.
3.1.8 Απενεργοποιήστε τη συσκευή μετά από κάθε χρήση και πριν από κάθε καθαρισμό/συντήρηση.
3.1.9 Κίνδυνος πυρκαγιάς. ΜΗΝ αναρροφάτε αντικείμενα που καίγονται ή είναι καυτά.
3.1.10
Προσοχή.
ΜΗΝ χρησιμοποιείτε τη συσκευή σε εξωτερικούς χώρους σε περίπτωση βροχής.
3.1.11
Προσοχή.
ΜΗΝ αγγίζετε το φις και/ή την πρίζα με βρεγμένα χέρια.
Page 35

35
(Μετάφραση των γνήσιων οδηγιών)
EL © 2016 Ελληνικά
3.1.12
Προσοχή.
ΜΗΝ χρησιμοποιείτε τη συσκευή με κατεστραμμένο το ηλεκτρικό καλώδιο.
Εάν το ηλεκτρικό καλώδιο καταστραφεί, πρέπει να αντικατασταθεί από τον παραγωγό, από ένα
Κέντρο Υποστήριξης ή από άτομα που είναι ειδικευμένα προς αποφυγή κινδύνων για την ασφάλεια.
3.1.13
Προσοχή.
Ελέγχετε εάν η συσκευή διαθέτει την πινακίδα με τα χαρακτηριστικά, σε αντίθετη
περίπτωση ειδοποιήστε το κατάστημα πώλησης. Οι συσκευές που δεν διαθέτουν πινακίδα ΔΕΝ
πρέπει να χρησιμοποιούνται, δεδομένου ότι είναι ανώνυμες και πιθανώς επικίνδυνες.
3.1.14
Προσοχή.
ΜΗΝ μετακινείτε τη συσκευή τραβώντας το ΗΛΕΚΤΡΙΚΟ ΚΑΛΩΔΙΟ.
3.1.15
Προσοχή.
Απαγορεύεται η χρήση μη γνήσιων εξαρτημάτων ή μη ειδικών για το μοντέλο αυτό.
Απαγορεύεται να επιφέρετε τροποποιήσεις στη συσκευή· η εκτέλεση τροποποιήσεων ακυρώνει
τη Δήλωση Συμμόρφωσης και απαλλάσσει τον κατασκευαστή από αστικές και ποινικές ευθύνες.
3.2 ΠΡΟΕΙΔΟΠΟΙΗΣΕΙΣ: ΤΙ ΠΡΕΠΕΙ ΝΑ ΚΑΝΕΤΕ
3.2.1
Προσοχή.
Όλα τα εξαρτήματα που είναι αγωγοί ηλεκτρικού ρεύματος ΠΡΕΠΕΙ ΝΑ ΠΡΟΣΤΑΤΕΥΟΝΤΑΙ
από πίδακες ή πιτσιλιές νερού.
3.2.2
Προσοχή.
Η ηλεκτρική σύνδεση θα πρέπει να εκτελεστεί από έναν εξειδικευμένο ηλεκτρολόγο
σύμφωνα με το πρότυπο IEC 60364-1. Συνιστάται να προβλέψετε ένα διαφορικό διακόπτη που
διακόπτει την ηλεκτρική τροφοδοσία στην παρούσα συσκευή εάν το ρεύμα διαρροής προς τη
γείωση υπερβαίνει τα 30 mA για 30 ms, ή ένα μέσο ελέγχου του κυκλώματος γείωσης.
3.2.3
Προσοχή.
ΚΑΤΑ τη φάση εκκίνησης, η συσκευή μπορεί να προκαλέσει διαταραχές στο δίκτυο.
3.2.4
Προσοχή.
Χρησιμοποιήστε μόνο εξουσιοδοτημένες ηλεκτρικές προεκτάσεις και με κατάλληλη
διατομή αγωγιμότητας.
3.2.5
Προσοχή.
Να αποσυνδέετε πάντα τον διακόπτη όταν αφήνετε τη συσκευή αφύλακτη.
3.2.6
Προσοχή.
Η ροή αέρα μπορεί να προκαλέσει την αναπήδηση εξαρτημάτων, γι’ αυτό πρέπει να
φοράτε όλα τα ρούχα και τις προστασίες που είναι κατάλληλες (PPE) για την ασφάλεια και την
ακεραιότητα του χειριστή.
3.2.7
Προσοχή.
Σβήστε τη συσκευή και αποσυνδέστε την από την πηγή τροφοδοσίας πριν κάνετε
εργασίες τοποθέτησης, καθαρισμού, ρύθμισης, συντήρησης, αποθήκευσης και μεταφοράς.
3.2.8
Προσοχή.
Η συντήρηση και/ή επισκευή των ηλεκτρικών τμημάτων ΠΡΕΠΕΙ να εκτελείται από
ειδικευμένο προσωπικό.
Page 36

36
(Μετάφραση των γνήσιων οδηγιών)
EL © 2016 Ελληνικά
EL © 2016 Ελληνικά
3.2.9
Προσοχή.
ΕΛΕΓΧΕΤΕ πριν από κάθε χρήση και σε τακτά διαστήματα το σφίξιμο των βιδών και την
καλή κατάσταση των τμημάτων της συσκευής, καθώς και αν υπάρχουν τμήματα σπασμένα ή τα
οποία παρουσιάζουν φθορές.
3.2.10
Προσοχή.
Για να εξασφαλιστεί η ασφάλεια της συσκευής, χρησιμοποιείτε μόνο γνήσια ανταλλακτικά
του κατασκευαστή ή εγκεκριμένα από τον ίδιο.
3.2.11
Προσοχή.
Τα ακατάλληλα καλώδια προέκτασης μπορούν να καταστούν επικίνδυνα.
Εάν χρησιμοποιείτε καλώδιο προέκτασης, επιλέξτε έναν κατάλληλο τύπο για τη χρήση σε
εξωτερικούς χώρους και βεβαιωθείτε ότι η σύνδεση παραμένει στεγνή και σε απόσταση από το
έδαφος. Συνιστάται για το σκοπό αυτό η χρήση μιας περιέλιξης καλωδίου, που να διατηρεί την
πρίζα σε απόσταση τουλάχιστον 60 mm από το έδαφος.
Page 37

37
(Μετάφραση των γνήσιων οδηγιών)
EL © 2016 Ελληνικά
4 ΓΕΝΙΚΕΣ ΠΛΗΡΟΦΟΡΙΕΣ (ΣΕΛΙΔΑ 3)
4.1 Χρήση του εγχειριδίου
Το παρόν εγχειρίδιο αποτελεί τμήμα της συσκευής, φυλάξτε το
για μελλοντική αναφορά. Διαβάστε προσεκτικά πριν από την
εγκατάσταση/χρήση. Σε περίπτωση μεταβίβασης της ιδιοκτησίας
αυτός που παραχωρεί τη συσκευή είναι υποχρεωμένος να παραδώσει
το εγχειρίδιο στο νέο ιδιοκτήτη.
4.2 Παράδοση
Η συσκευή παραδίδεται στο εσωτερικό μιας συσκευασίας από
χαρτόνι, αποσυναρμολογημένη εν μέρει.
Η σύνθεση του εξοπλισμού απεικονίζεται στην εικ.1.
4.2.1 Συνοδευτικά έντυπα
D1 Εγχειρίδιο χρήσης και συντήρησης
D2 Οδηγίες για την ασφάλεια
D3 Δήλωση συμμόρφωσης
D4 Κανόνες εγγύησης
4.3 Διάθεση συσκευασίας
Τα υλικά από τα οποία αποτελείται η συσκευασία δεν μολύνουν το
περιβάλλον, ωστόσο πρέπει να ανακυκλώνονται ή να διατίθενται
σύμφωνα με τους ισχύοντες κανονισμούς στη χώρα όπου
χρησιμοποιείται.
5 ΤΕΧΝΙΚΕΣ ΠΛΗΡΟΦΟΡΙΕΣ (ΣΕΛΙΔΑ 3)
5.1 Προβλεπόμενη χρήση
Η συσκευή αυτή, είναι συμβατή με τις περιγραφές και τις
προειδοποιήσεις για την ασφάλεια που δίδονται με τις
παρούσες οδηγίες χρήσης και προορίζεται ως πολυχρηστική
ηλεκτρική σκούπα αναρρόφησης.
Η συσκευή αυτή προορίζεται μόνο για οικιακή χρήση και δεν
πρέπει να χρησιμοποιείται για εμπορική ή βιομηχανική χρήση.
Η συσκευή είναι συμβατή με το πρότυπο IEC 60335-1 και
IEC 60335-2-2.
5.2 Χειριστής
Για τον προσδιορισμό του αρμόδιου χειριστή για την χρήση της
συσκευής (επαγγελματική ή μη επαγγελματική) δείτε την εικόνα που
απεικονίζεται στην εικ. 1.
5.3 Κύρια μέρη:
A1 Διάταξη εκκίνησης
A2 Ρακόρ αναρρόφησης
A3 Ρακόρ φυσήματος
A4a Μάνικα
A4b Μεταλλική μάνικα (όπου προβλέπεται)
A5 Άγκιστρο τοποθέτησης καλωδίου (όπου προβλέπεται)
A6 Άγκιστρα κλεισίματος
A7 Ηλεκτρικό καλώδιο με φις
A8a Μπροστινές περιστρεφόμενες ρόδες
A8b Πίσω ρόδες
A9 Κάδος
A10 Καπάκι με κινητήρα
A11 Θέση τοποθέτησης εξαρτημάτων (όπου προβλέπεται)
A12 Πώμα εκκένωσης υγρών (όπου προβλέπεται)
A13 Άξονας για πίσω ρόδες (όπου προβλέπεται)
C1 Πρόσθετη πρίζα για ηλεκτρικό εργαλείο (όπου προβλέπεται)
5.3.1 Εξαρτήματα (βλέπε εικ. 1 με ενδείξεις των μοντέλων - ο
εξοπλισμός προβλέπει αυτά που αναφέρονται στη συσκευασία
από χαρτόνι)
B1
Φορέας φίλτρου
B2
Φίλτρο φυσίγγιο
B3
Εύκαμπτος σωλήνας
B4
Προσαρμογέας για
ηλεκτρικό εργαλείο
B5
Άκαμπτος σωλήνας
B6
Βούρτσα για πατώματα
B7
Βούρτσα για χαλιά πολυθρόνες
B8
Στόμιο για σχισμές
B9
Στρογγυλή βούρτσα
B10
Υφασμάτινη σακούλα
φίλτρου (Προαιρετικό)
B11
Χάρτινη σακούλα φίλτρου
B12
Άγκιστρο συγκράτησης
σωλήνα
B13
Συνδυασμένη βούρτσα για
πατώματα
5.4 Διατάξεις ασφαλείας
- Διάταξη εκκίνησης (A1)
Η διάταξη εκκίνησης αποτρέπει την τυχαία χρήση της συσκευής.
6 ΕΓΚΑΤΑΣΤΑΣΗ (ΣΕΛΙΔΑ 4-5)
Προσοχή - κίνδυνος!
Όλες οι εργασίες εγκατάστασης και συναρμολόγησης πρέπει να γίνονται με
τη συσκευή αποσυνδεμένη από το ηλεκτρικό δίκτυο.
Για τη σειρα συναρμολόγησης δείτε σελ.4.
6.1 Συναρμολόγηση
Κατά την αφαίρεση από τη συσκευασία ελέγξτε εάν ενδεχομένως
λείπουν εξαρτήματα ή εάν υπάρχουν ζημιές στο περιεχόμενο. Σε
περίπτωση που διαπιστωθούν ζημιές που οφείλονται στη μεταφορά,
πληροφορήστε αμέσως το κατάστημα πώλησης.
Σηκώστε το καπάκι με κινητήρα (A10) της συσκευής, ανοίγοντας τα
άγκιστρα κλεισίματος (A6) και βγάλτε τα εξαρτήματα που παρέχονται,
ελέγχοντας ότι το φίλτρο (Β2) είναι σωστά τοποθετημένο.
Βλέπε εικ.2
Για τη σειρά συναρμολόγησης δείτε σελ.4-5.
6.2
Συναρμολόγηση των πίσω ροδών και των μπροστινών
περιστρεφόμενων ροδών
Αναποδογυρίστε τον κάδο (Α9) χωρίς καπάκι επάνω σε ένα οριζόντιο
στερεό επίπεδο. Εισάγετε τις πλήμνες των περιστρεφόμενων ροδών
(Α8a) στις ειδικές οπές και πατήστε μέχρι κάτω, για τη σωστή
τοποθέτηση και στερέωση των ροδών.
Τοποθετήστε τον άξονα (A13) στη σωστή θέση γυρίζοντάς τον
μέχρι οι οπές κεντραρίσματος να συζευχθούν με τα κεντραρίσματα.
Τοποθετήστε σωστά τα εξαρτήματα συγκράτησης που περιέχονται στο
σακουλάκι (B17) και στερεώστε τα με τις ειδικές βίδες. Εισάγετε τη ρόδα
(A8b), τη ροδέλα και στερεώστε το όλο με την κοπίλια φροντίζοντας
να την εισάγετε βαθιά και να την ανοίξετε κάνοντάς την να εφαρμόσει
τέλεια στη διατομή του άξονα. Τοποθετήστε στη συνέχεια το καπάκι της
ρόδας και επαναλάβατε την ενέργεια με την άλλη ρόδα (A8b).
Συναρμολογήστε την μεταλλική μάνικα (A4b) όπως φαίνεται στην
εικόνα.
Βλέπε εικ.3
6.3 Συναρμολόγηση των εξαρτημάτων
Εισάγετε τον εύκαμπτο σωλήνα (Β3) στο ρακόρ αναρρόφησης (A2)
ή φυσήματος (Α3) ανάλογα με τον τύπο ενέργειας που επιθυμείτε.
Βλέπε εικ.4
Ολοκληρώστε στη συνέχεια τη σειρά με τα απαραίτητα εξαρτήματα
για τον τύπο καθαρισμού που πρέπει να κάνετε. Χρησιμοποιώντας
τους άκαμπτους σωλήνες (B5) και τις βούρτσες (B6-B7-B8-B9)
ανάλογα με τον τύπο καθαρισμού και επιφάνειας που θέλετε να
καθαρίσετε. Μπορείτε να τοποθετήσετε τις βούρτσες (B6-B7-B8B9-B13) απ' ευθείας στον εύκαμπτο σωλήνα (B3).
Βλέπε εικ.5
Page 38

38
(Μετάφραση των γνήσιων οδηγιών)
EL © 2016 Ελληνικά
EL © 2016 Ελληνικά
6.4 Ηλεκτρική σύνδεση
Προσοχή - κίνδυνος!
Βεβαιωθείτε ότι το ηλεκτρικό δίκτυο αντιστοιχεί στο βολτάζ και τη
συχνότητα (V/Hz) που αναφέρεται στην πινακίδα αναγνώρισης
Βλέπε εικ.6
6.4.1 Χρήση των καλωδίων προέκτασης
Χρησιμοποιήστε καλώδια και φις με βαθμό προστασίας
“IPX4”.
Η διατομή των καλωδίων προέκτασης πρέπει να είναι
ανάλογη με το μήκος· όσο μεγαλύτερο είναι το μήκος, τόσο
μεγαλύτερη πρέπει να είναι η διατομή.
6.5
Πρόσθετη πρίζα για ηλεκτρικό εργαλείο (όπου προβλέπεται)
Εισάγετε τον εύκαμπτο σωλήνα (B3) στο ρακόρ αναρρόφησης
του ηλεκτρικού εργαλείου. Σε περίπτωση που δεν είναι συμβατά
χρησιμοποιήστε τον ειδικό προσαρμογέα για ηλεκτρικό εργαλείο (B4)
(όπου προβλέπεται), κόβοντας τα μέρη που πλεονάζουν.
Τροφοδοτήστε το ηλεκτρικό εργαλείο χρησιμοποιώντας την πρόσθετη
πρίζα (C1) (Για τα μοντέλα που είναι εξοπλισμένα).
Βλέπε εικ.7
7 ΠΛΗΡΟΦΟΡΙΕΣ ΓΙΑ ΤΗ ΧΡΗΣΗ (ΣΕΛΙΔΑ 6)
7.1 Χειριστήρια
- Διάταξη εκκίνησης (A1).
Βλέπε εικ.8
.
Βάλτε τη διάταξη εκκίνησης στη θέση (ON/I).
Εάν η διάταξη εκκίνησης διαθέτει λυχνία, αυτή πρέπει να ανάψει.
Βάλτε τη διάταξη εκκίνησης στη θέση (OFF/0) για να σταματήσετε τη
λειτουργία της συσκευής.
Εάν η διάταξη εκκίνησης διαθέτει λυχνία, αυτή πρέπει να σβήσει.
Προσοχή - κίνδυνος!
Η συσκευή πρέπει να λειτουργεί τοποθετημένη σε μία ασφαλή και
σταθερή επίπεδη επιφάνεια, όπως υποδεικνύεται. Βλέπε εικ.8.
7.2 Εκκίνηση
7.2.1 Αναρρόφηση ξηρών.
Βλέπε εικ.9.
Δουλέψτε μόνο με στεγνά φίλτρα (B2 - B11)! Πριν να τα
χρησιμοποιήσετε, ελέγξτε εάν τα φίλτρα παρουσιάζουν
φθορές και αντικαταστήστε τα, εάν είναι απαραίτητο. Για
την αναρρόφηση ξηρής βρωμιάς, ακολουθήστε την σωστή
ρύθμιση της βούρτσας για πατώματα και συνδέστε τα
αντίστοιχα εξαρτήματα (χρησιμοποιήστε τη βούρτσα Β13).
Για την αναρρόφηση ξηρής βρωμιάς, εάν χρειαστεί μπορεί να
χρησιμοποιηθεί πρόσθετα μία σακούλα φίλτρου που μπορεί
να είναι από χαρτί (Β11) ή από ύφασμα (Β10) (Προαιρετικό).
Ενδείξεις σχετικά με τη σακούλα φίλτρου:
– Το επίπεδο πλήρωσης της σακούλας φίλτρου εξαρτάται από
τη βρωμιά που απορροφάται.
– Σε περίπτωση λεπτών σκονών, άμμου, κλπ. να
αντικαθιστάτε συχνά τη σακούλα φίλτρου.
– Η φθαρμένη σακούλα φίλτρου μπορεί να σκάσει, γι' αυτό
πρέπει να την αντικαταστήσετε εγκαίρως!
Προσοχή - κίνδυνος!
Απορροφήστε κρύες στάχτες.
7.2.2 Αναρρόφηση υγρών
Βλέπε εικ.10.
Προσοχή - κίνδυνος!
Σε περίπτωση σχηματισμού αφρού ή απώλειας υγρού,
σβήστε αμέσως τη συσκευή ή βγάλτε το φις από το ρεύμα!
Μην χρησιμοποιείτε τη σακούλα φίλτρου (ούτε χάρτινη
ούτε υφασμάτινη)!
Προσοχή
Εάν είναι γεμάτος ο κάδος, ένα φλοτέρ κλείνει το άνοιγμα
αναρρόφησης και η συσκευή λειτουργεί με μεγαλύτερη ταχύτητα.
Σβήστε αμέσως τη συσκευή και αδειάστε τον κάδο.
Για την αναρρόφηση υγρασίας ή βρεγμένου υλικού, ακολουθήστε
τη σωστή ρύθμιση της βούρτσας για πατώματα και συνδέστε τα
αντίστοιχα εξαρτήματα (χρησιμοποιήστε τη βούρτσα Β6).
7.2.3 Εργασίες με ηλεκτρικά εργαλεία.
Βλέπε εικ. 11.
Για τη σειρά συναρμολόγησης δείτε εικ.11.
Ανάψτε τη συσκευή (στρεπτός διακόπτης ΑΡ στη θέση
ή
διακόπτης 2 πλήκτρων στη θέση II) και προχωρήστε με την εργασία.
Προειδοποίηση: Μόλις ανάψει το ηλεκτρικό εργαλείο, η τουρμπίνα
αναρρόφησης ξεκινά με καθυστέρηση 0,5 δευτερόλεπτα.
Όταν σβήσει το ηλεκτρικό εργαλείο, η τουρμπίνα αναρρόφησης
συνεχίζει να λειτουργεί για ακόμη 6 περίπου δευτερόλεπτα ώστε
να είναι δυνατή η αναρρόφηση της υπολειπόμενης βρωμιάς στο
σωλήνα αναρρόφησης.
7.2.4 Λειτουργία φυσήματος.
Βλέπε εικ. 12.
Καθαρισμός σημείων με δύσκολη πρόσβαση ή στα οποία δεν
είναι δυνατή η αναρρόφηση, π.χ. φύλλα από στρώμα χαλικιών.
Εισάγετε τον εύκαμπτο σωλήνα αναρρόφησης στην ειδική
σύνδεση. Με αυτόν τον τρόπο η λειτουργία φυσήματος
ενεργοποιείται.
Για μεγαλύτερη αποτελεσματικότητα του φυσήματος συνιστάται
να χρησιμοποιείτε το στόμιο για σχισμές Β8.
7.3 Διακοπή της λειτουργίας (Παύση)
Σβήστε τη συσκευή. Βλέπε εικ.8.
Τοποθετήστε τη βούρτσα για πατώματα στη θέση στάσης.
7.4 Τέλος εργασίας
Σβήστε τη συσκευή. Βλέπε εικ.8.
Βγάλτε το φις.
7.5 Εκκένωση του κάδου
Για ξηρή βρωμιά και σκόνες: βγάλτε την κεφαλή της συσκευής και
αδειάστε τον κάδο. Βλέπε εικ.13.
Για υγρά: χρησιμοποιήστε τη βίδα εκροής όπου υπάρχει (βλέπε
εικ.14.), ή προχωρήστε όπως προαναφέρεται.
8 ΣΥΝΤΗΡΗΣΗ (ΣΕΛΙΔΑ 135)
Προσοχή - κίνδυνος!
Όλες οι εργασίες εγκατάστασης και συναρμολόγησης πρέπει να γίνονται με τη
συσκευή αποσυνδεμένη από το ηλεκτρικό δίκτυο.
Για τη σειρά συναρμολόγησης δείτε σελ.135.
Πριν από κάθε επέμβαση φροντίδας και συντήρησης, να σβήνετε τη συσκευή
και να βγάζετε το φις. Εργασίες επισκευής και εργασίες στα ηλεκτρικά
συστήματα μπορούν να γίνονται μόνο από το εξουσιοδοτημένο σέρβις
πελατών.
Προσοχή - κίνδυνος!
Μην χρησιμοποιείτε διαβρωτικά απορρυπαντικά, απορρυπαντικά για τζάμια
ή απορρυπαντικά γενικής χρήσης! Μην βυθίζετε ποτέ το καπάκι
με κινητήρα
(A10)
στο νερό. Να καθαρίζετε τη συσκευή και τα πλαστικά εξαρτήματα
με ένα κανονικό απορρυπαντικό για συνθετικό υλικό. Να ξεβγάζετε, εάν
χρειαστεί, τον κάδο και τα εξαρτήματα με νερό και να τα στεγνώνετε πριν τα
ξαναχρησιμοποιήσετε.
Page 39

39
(Μετάφραση των γνήσιων οδηγιών)
EL © 2016 Ελληνικά
8.1 Καθαρισμός φίλτρου φυσιγγίου (B2). Βλέπε εικ.15
Ανοίξτε την ηλεκτρική σκούπα αναρρόφησης χρησιμοποιώντας
τα άγκιστρα (Α6). Αναποδογυρίστε το καπάκι με κινητήρα
(A10) και αφαιρέστε το φίλτρο φυσίγγιο (B2).
Ξεβγάλτε με προσοχή κάτω από νερό που τρέχει και αφήστε
να στεγνώσει. Τοποθετήστε το και πάλι, αφού στεγνώσει.
8.2 Αντικατάσταση χάρτινης σακούλας φίλτρου (B11).
Βλέπε εικ.17
Ανοίξτε την ηλεκτρική σκούπα αναρρόφησης χρησιμοποιώντας
τα άγκιστρα (Α6). Αποσυναρμολογήστε τη γεμάτη σακούλα
φίλτρου (B11), πετάξτε την και τοποθετήστε μία καινούργια.
8.3 Καθαρισμός υφασμάτινης σακούλας φίλτρου (B10)
(Προαιρετικό). Βλέπε εικ.16
Ανοίξτε την ηλεκτρική σκούπα αναρρόφησης χρησιμοποιώντας
τα άγκιστρα (Α6). Αφαιρέστε τη σακούλα φίλτρου (B10).
Αδειάστε τη σακούλα φίλτρου, ξεβγάλτε με προσοχή κάτω
από νερό που τρέχει και αφήστε να στεγνώσει. Τοποθετήστε
την και πάλι, αφού στεγνώσει.
9 ΦΥΛΑΞΗ (ΣΕΛΙΔΑ 135)
Προσοχή - κίνδυνος!
Όλες οι εργασίες εγκατάστασης και συναρμολόγησης πρέπει να γίνονται με
τη συσκευή αποσυνδεμένη από το ηλεκτρικό δίκτυο.
Αφού τελειώσετε τις εργασίες, καθαρίστε τη συσκευή και φυλάξτε την μαζί με
τα εξαρτήματά της όπως υποδεικνύεται στην
εικ.18.
Φυλάξτε τη συσκευή σε στεγνά μέρη.
Δήλωση συμμόρφωσης ΕΚ
Εμείς η Annovi Reverberi S.p.A., Bomporto (Μόντενα), Ιταλία, δηλώνουμε ότι η(οι) ακόλουθη(ες) μηχανή(ές) Stanley:
Ονομασία της συσκευής: Ηλεκτρική σκούπα αναρρόφησης σκόνης και υγρών
Αρ. μοντέλου: SXVC20PE SXVC20PTE SXVC20XTE SXVC30XTDE SXVC35PTDE SXVC50XTDE
Ισχύς αναρρόφησης: 1,2 kW 1,2 kW 1,4 kW 1,6 kW 1,6 kW 1,6 kW
είναι συμβατή(ές) με τις ακόλουθες ευρωπαϊκές οδηγίες:
2006/95/EK - Η Οδηγία θα αντικατασταθεί από την 2014/35/ΕΕ από τις 20 Απριλίου 2016,
2004/108/ΕΚ - Η Οδηγία θα αντικατασταθεί από την 2014/30/ΕΕ από τις 20 Απριλίου 2016, 2011/65/ΕΕ, 2005/32/ΕK, 2012/19/EE.
και παράγεται(ονται) σύμφωνα με τα ακόλουθα πρότυπα ή τα ακόλουθα τυποποιημένα έγγραφα:
EN 60335-1, ΕN 60335-2-2, EN 55014-1, EN 55014-2, EN 61000-3-2, EN 61000-3-3, EN 62233, EN 50581, Reg.1275/2008.
Όνομα και διεύθυνση του υπεύθυνου για τη χορήγηση του τεχνκού φακέλου: Stefano Reverberi / AR Managing Director
Via ML King, 3 - 41122 Mόντενα, Ιταλία
Ημερομηνία : 10.02.2016
ΜΟΝΤΕΝΑ (I)
Stefano Reverberi Managing Director
10
ΠΛΗΡΟΦΟΡΙΕΣ ΣΧΕΤΙΚΑ ΜΕ ΤΙΣ ΒΛΑΒΕΣ
Προβλήματα Πιθανές αιτίες Λύσεις
Η συσκευή δεν ανάβει
Απουσία τάσης
Ελέγξτε την παρουσία τάσης στο δίκτυο και ελέγξτε ότι το φις έχει
τοποθετηθεί σωστά (*)
Προβλήματα στο ηλεκτρικό-ηλεκτρονικό κύκλωμα Απευθυνθείτε στο Κέντρο Υποστήριξης
Η συσκευή δεν απορροφά ή
απορροφά αδύναμα
Φραγμένα εξαρτήματα Ελέγξτε και καθαρίστε στόμια προεκτάσεων ή σωλήνες
Βρώμικα φίλτρα Καθαρίστε τα φίλτρα
Γεμάτες σακούλες Αδειάστε / αντικαταστήστε τις σακούλες
Γεμάτος κάδος Αδειάστε τον κάδο
Το ηλεκτρικό εργαλείο δεν τίθεται σε
λειτουργία (όπου προβλέπεται πρίζα
για ηλεκτρικό εργαλείο)
Μη σωστή εισαγωγή του φις ηλεκτρικού εργαλείου στην πρίζα
της ηλεκτρικής σκούπας αναρρόφησης
Εισάγετε σωστά το φις
Ο διακόπτης είναι σβηστός ή στη θέση I Τοποθετήστε το διακόπτη στη θέση εργαλείου/ II
Βγαίνει σκόνη
Το φίλτρο δεν έχει συναρμολογηθεί Συναρμολογήστε το φίλτρο
Το φίλτρο είναι κατεστραμμένο Αντικαταστήστε το μεταχειρισμένο φίλτρο με ένα καινούργιο
Ο σωλήνας ή οι συνδέσεις του είναι κατεστραμμένοι Αντικαταστήστε τα κατεστραμμένα μέρη
Κατά τη λειτουργία της η συσκευή
αφήνει κακοσμία
Βρώμικα φίλτρα/σακούλες Αντικαταστήστε φίλτρα/σακούλες
(*) Εάν κατά τη διάρκεια της λειτουργίας ο κινητήρας σταματήσει και δεν ξεκινήσει και πάλι επικοινωνήστε με το Κέντρο Υποστήριξης.
Page 40

40
(Μετάφραση των γνήσιων οδηγιών)
EL © 2016 Ελληνικά
EL © 2016 Ελληνικά
ΕΓΓΥΗΣΗ
Η ισχύς της εγγύησης ρυθμίζεται σύμφωνα με τους κανονισμούς που ισχύουν στη χώρα στην οποία διακινείται η εμπορία του προϊόντος (εκτός εάν οριστεί
διαφορετικά από τον παραγωγό).
Εάν το προϊόν είναι ελαττωματικό λόγω της ποιότητας των υλικών, λόγω κατασκευής ή λόγω μη συμμόρφωσης κατά την περίοδο ισχύος της εγγύησης
ο κατασκευαστής εγγυάται την αντικατάσταση των ελαττωματικών μερών, προνοεί για την επισκευή των προϊόντων εάν η φθορά είναι λογική ή για την
αντικατάστασή τους.
Η εγγύηση δεν καλύπτει εξαρτήματα τα οποία υπόκεινται σε συνήθη φθορά (φίλτρα, σακούλες, εξαρτήματα όπως άκαμπτοι σωλήνες, εύκαμπτος σωλήνας,
βούρτσες, ρόδες, κλπ.)·
Η εγγύηση δεν καλύπτει ελαττώματα τα οποία προκαλούνται από ή προκύπτουν από:
- ανάρμοστη χρήση, μη επιτρεπτή χρήση, αμέλεια,
- ενοικίαση ή επαγγελματική χρήση εφόσον το προϊόν έχει πωληθεί για οικιακή χρήση,
- μη τήρηση των κανόνων συντήρησης που προβλέπονται στο σχετικό βιβλίο,
- επισκευές που έχουν εκτελεστεί από μη εξουσιοδοτημένο προσωπικό ή κέντρα υποστήριξης,
- χρήση μη γνήσιων ανταλλακτικών ή εξαρτημάτων,
- ζημιές προκαλούμενες από την μεταφορά, από ξένα αντικείμενα ή ουσίες, ατύχημα,
- προβλήματα αποθήκευσης ή αποθεματοποίησης.
Για την ενεργοποίηση της εγγύησης είναι απαραίτητη η επίδειξη της απόδειξης αγοράς.
Τεχνικά Στοιχεία Μονάδες
SXVC20PE SXVC20PTE SXVC20XTE SXVC30XTDE SXVC35PTDE SXVC50XTDE
Τάση
V/Hz
220-240 V ~ 5
0/60 Hz
220-240 V ~ 5
0/60 Hz
220-240 V ~ 5
0/60 Hz
220-240 V ~ 5
0/60 Hz
220-240 V ~ 5
0/60 Hz
220-240 V ~ 5
0/60 Hz
Ισχύς
kW
1.2 1.2 1.4 1.6 1.6 1.6
Χωρητικότητα κάδου
l
20 20 20 30 35 50
Μέγιστη πίεση αναρρόφησης
kPa
17 17 18 19 19 19
Μέγιστη υποπίεση
mbar 170 170 180 190 190 190
Μέγιστος αναρροφώμενος αέρας
l/s
28 28 33 37 39 41
Αρ. κινητήρων
-
1 1 1
1 1
1
Ø εξαρτημάτων
mm
35 35 35 35 35 40
Καλώδιο τροφοδοσίας
m
5 5 5 5 5 5
Κλάση Προστασίας
-
Μόνωση Κινητήρα
Κλάση F F F F F F
Προστασία Κινητήρα
-
IPX4 IPX4 IPX4 IPX4 IPX4 IPX4
Καθαρό βάρος
kg
7,9 8,4 9,2 9,6 11,5 14,9
Μικτό βάρος
kg
9,4 9,9 11,4 12,5 14,3 18,75
Με την επιφύλαξη τεχνικών τροποποιήσεων!
Page 41

41
(Traducción de las instrucciones originales)
ES © 2016 Español
Estimado cliente:
Antes de utilizar este aparato por primera
vez, lea este manual, siga las instrucciones
proporcionadas en él y guárdelo en un
lugar seguro para poder consultarlo en el
futuro o entregarlo al siguiente propietario
en caso de vender el aparato.
1 INSTRUCCIONES SOBRE SEGURIDAD
1.1 El aparato que ha adquirido es un
producto tecnológicamente muy
avanzado, realizado por uno de los
fabricantes europeos más expertos
del sector. De conformidad con las
descripciones y las advertencias
de seguridad incluidas en estas
instrucciones de uso, este aparato está
destinado a usarse como aspirador
multiusos. Hemos redactado este
documento para que usted pueda
sacarle el máximo rendimiento al
producto: léalo atentamente y siga
las instrucciones cada vez que lo
utilice. Durante la conexión, el uso y
el mantenimiento del aparato, tome
todas las precauciones posibles para
proteger su propia integridad física
y la de cualquier otra persona que
se encuentre en las inmediaciones.
Es fundamental leer atentamente y
respetar las normas de seguridad,
ya que su inobservancia puede crear
riesgos para la salud y seguridad
de las personas o provocar daños
económicos.
2 SEÑALES DE INFORMACIÓN
2.1
Respetar las disposiciones indicadas
en las señales, las placas y los
símbolos aplicados al aparato e
incluidas en estas instrucciones.
Tanto en el aparato como en este
manual de instrucciones aparecen
solo los símbolos correspondientes
al aparato comprado. Verificar que
las placas y los símbolos aplicados
al aparato siempre estén íntegros y
que sean perfectamente legibles; de
no ser así, sustituirlos sin modificar
su posición original (ponerse en
contacto con el centro de asistencia).
Atención: ¡peligro!
Leer atentamente estas
instrucciones antes de usar
el equipo.
Icono E3 (si el símbolo está
presente en la fig. 1). Indica
que este aparato ha sido diseñado
únicamente para uso doméstico y no
debe emplearse en usos comerciales
o industriales.
0
Posición de interruptor apagado
I Posición de interruptor encendido
Posición de interruptor automático
II Posición de interruptor automático
Page 42

42
(Traducción de las instrucciones originales)
ES © 2016 Español
ES © 2016 Español
Este producto lleva aislamiento
de Clase II, lo que significa que
está equipado con un aislamiento
reforzado o doble (solo si el símbolo
está presente en el aparato).
Este producto lleva aislamiento
de Clase I, lo que significa que
está equipado con un conductor de
protección de puesta a tierra (solo si el
símbolo está presente en el aparato).
Este producto cumple con las
directivas europeas aplicables
en la materia.
Icono E1 - Reciclaje del aparato.
Inutilizar el aparato inmediatamente al
final de su vida útil.
Desconectar el enchufe de la toma de
alimentación eléctrica.
Cortar el cable eléctrico.
No eliminar los aparatos eléctricos
junto con los residuos domésticos.
De acuerdo con lo especificado en
la Directiva «RAEE» 2012/19/CE
sobre el final del ciclo de vida de
los aparatos eléctricos y electrónicos,
los componentes eléctricos deben
recogerse de modo separado y
reciclarse de forma respetuosa con
el medio ambiente. Para mayor
información, ponerse en contacto con
las oficinas competentes o con el
distribuidor de zona.
Llevar auriculares de protección.
Llevar máscara de protección.
Llevar equipos de protección
respiratoria.
Llevar guantes de protección.
Llevar calzado de seguridad.
Llevar ropa de protección.
Page 43

43
(Traducción de las instrucciones originales)
ES © 2016 Español
3 NORMAS DE SEGURIDAD / RIESGOS RESIDUALES
3.1 ADVERTENCIAS: OPERACIONES QUE NO DEBEN EFECTUARSE
3.1.1
aTención. nO
se debe permitir el uso del aparato a niños menores de 8 años ni a personas con
capacidades psicofísicas o sensoriales reducidas, o que tengan poca experiencia y/o pocos
conocimientos sobre el aparato, a menos que estén debidamente supervisados y se les haya
explicado cómo usarlo de forma segura y cuáles son los riesgos que conlleva
.
3.1.2
aTención.
Los niños NO deben usar el aparato como juguete. Supervisarlos para evitar que esto
ocurra.
3.1.3 Los niños y las personas discapacitadas NO deben realizar la limpieza y el mantenimiento habitual
del aparato si no cuentan con la supervisión adecuada.
3.1.4 Mantener los plásticos de embalaje fuera del alcance de los niños. ¡Riesgo de asxia!
3.1.5
aTención.
El aparato NO puede ser accionado por personas que no hayan leído y comprendido las
instrucciones.
3.1.6
aTención.
NO utilizar el aparato con líquidos inflamables, tóxicos o cuyas características sean
incompatibles con el correcto funcionamiento de dicho aparato. Está prohibido utilizar el aparato en
atmósferas potencialmente inflamables o explosivas.
3.1.7
aTención.
Ciertas sustancias pueden formar vapores y mezclas explosivas al entrar en contacto con
el aire aspirado. NO aspirar nunca las siguientes sustancias:
– gases explosivos o inamables, líquidos y polvos (polvos reactivos);
– polvos de metal reactivos (p. ej., aluminio, magnesio, zinc) junto a detergentes con un elevado
contenido alcalino o ácido;
– ácidos y soluciones alcalinas en estado puro;
– soluciones orgánicas (p. ej., gasolina, diluyentes para pintura, acetona o gasóleo).
Estas sustancias, además, pueden corroer los materiales del aparato.
3.1.8 Desactivar el aparato después de cada uso y antes de cada limpieza/operación de mantenimiento.
3.1.9 Peligro de incendio. NO aspirar objetos incandescentes o ardientes.
3.1.10
aTención.
NO utilizar el aparato al aire libre en caso de lluvia.
3.1.11
aTención.
NO tocar el enchufe ni la toma eléctrica con las manos mojadas.
3.1.12
aTención.
NO utilizar el aparato si el cable eléctrico está dañado. Si el cable eléctrico está dañado,
deberá ser sustituido por el fabricante o uno de sus centros de asistencia autorizados, o bien por
una persona debidamente cualificada, a fin de evitar riesgos para la seguridad.
Page 44

44
(Traducción de las instrucciones originales)
ES © 2016 Español
ES © 2016 Español
3.1.13
aTención.
Comprobar que el aparato lleve la placa de datos; en caso contrario, informar al
distribuidor. Los aparatos desprovistos de placa NO deben utilizarse, ya que se desconocen sus
datos y características y, por tanto, son potencialmente peligrosos.
3.1.14
aTención.
NO desplazar el aparato tirando del CABLE ELÉCTRICO.
3.1.15
aTención.
Está prohibido utilizar accesorios no originales o no específicos para el modelo.
Está prohibido modificar el aparato; la realización de modificaciones invalida la declaración de
conformidad y exime al fabricante de responsabilidades civiles y penales.
3.2 ADVERTENCIAS: OPERACIONES QUE DEBEN EFECTUARSE
3.2.1
aTención.
Todos los componentes conductores de corriente DEBEN ESTAR PROTEGIDOS contra
chorros y salpicaduras de agua.
3.2.2
aTención.
La conexión eléctrica deberá ser realizada por un electricista cualificado de conformidad
con lo dispuesto por la norma IEC 60364-1.Se recomienda instalar un interruptor diferencial que
interrumpa la alimentación eléctrica de la máquina si la corriente de dispersión a tierra supera los
30 mA durante 30 ms, o bien un dispositivo de control del circuito de tierra.
3.2.3
aTención.
DURANTE la fase de arranque, el aparato puede crear interferencias en la red.
3.2.4
aTención.
Utilizar solo cables alargadores autorizados y con un conductor de sección apropiada.
3.2.5
aTención.
Desconectar siempre el interruptor cuando se va a dejar el aparato sin supervisión.
3.2.6
aTención.
El flujo de aire puede provocar el rebote de piezas. Usar todas las prendas y protecciones
(EPI) necesarias para garantizar la seguridad y la integridad física del operador.
3.2.7
aTención.
Apagar el aparato y desconectarlo de la fuente de alimentación antes de realizar
operaciones de montaje, limpieza, ajuste, mantenimiento, almacenamiento y transporte.
3.2.8
aTención.
El mantenimiento y la reparación de componentes eléctricos DEBEN ser efectuados por
personal cualificado.
3.2.9
aTención.
Antes de cada uso y periódicamente, COMPROBAR el apriete de los tornillos y el buen
estado de los componentes del aparato. Comprobar si hay piezas rotas o desgastadas.
3.2.10
aTención.
Para garantizar la seguridad del aparato, utilizar solo recambios originales o aprobados
por el fabricante.
3.2.11
aTención.
Los cables alargadores inadecuados pueden ser fuente de peligro. Si se emplea un
cable alargador, elegir un tipo adecuado para el uso al aire libre y asegurarse de que la conexión
permanezca seca y alejada del terreno. Para tal fin, se recomienda utilizar un enrollador de cable
que mantenga la toma como mínimo a 60 mm del suelo.
Page 45

45
(Traducción de las instrucciones originales)
ES © 2016 Español
4 INFORMACIÓN GENERAL (PÁGINA 3)
4.1 Uso del manual
El presente manual es parte integrante del aparato y debe guardarse
para poder consultarlo en el futuro. Leerlo atentamente antes de la
instalación y el uso. En caso de cambio de propiedad, el vendedor
tiene la obligación de entregar este manual al nuevo propietario.
4.2 Entrega
El aparato se entrega parcialmente desmontado dentro de un
embalaje de cartón.
La fig. 1 muestra las piezas que componen la entrega.
4.2.1 Documentación adjunta
D1 Manual de uso y mantenimiento
D2 Instrucciones sobre seguridad
D3 Declaración de conformidad
D4 Normas de garantía
4.3 Eliminación/reciclaje de los embalajes
Los materiales que forman el embalaje no son contaminantes para
el medio ambiente; sin embargo, se deben reciclar o eliminar de
conformidad con las normas vigentes en el país de uso.
5 INFORMACIÓN TÉCNICA (PÁGINA 3)
5.1 Uso previsto
De conformidad con las descripciones y las advertencias de
seguridad incluidas en estas instrucciones de uso, el aparato
está destinado a usarse como aspirador multiusos.
Este aparato ha sido diseñado únicamente para uso doméstico
y no debe emplearse en usos comerciales o industriales.
El aparato cumple con lo establecido por las normas IEC 60335-1 e
IEC 60335-2-2.
5.2 Operador
Para identificar al tipo de operador encargado de utilizar el aparato
(profesional o no profesional), consultar el icono que aparece en la fig. 1.
5.3 Elementos principales
A1 Dispositivo de arranque
A2 Racor de aspiración
A3 Racor de soplado
A4a Asa
A4b Mango metálico (si está previsto)
A5 Gancho portacables (si está previsto)
A6 Ganchos de cierre
A7 Cable eléctrico con enchufe
A8a Ruedas giratorias delanteras
A8b Ruedas traseras
A9 Depósito del aspirador
A10 Cubierta con motor
A11 Portaccesorios (si está previsto)
A12 Tapón de drenaje de líquidos (si está previsto)
A13 Eje para ruedas traseras (si está previsto)
C1 Toma adicional para herramienta eléctrica (si está prevista)
5.3.1 Accesorios (véase la indicación de los modelos en la fig. 1; la
entrega incluye los artículos indicados en el cartón de embalaje)
B1
Portafiltro
B2
Cartucho filtrante
B3
Tubo flexible
B4
Adaptador para
herramienta eléctrica
B5
Tubo rígido
B6
Cepillo para suelo
B7
Cepillo para alfombras
- sillones
B8
Boquilla de ranuras
B9
Cepillo redondo
B10
Bolsa de filtro textil
(optativa)
B11
Bolsa de filtro de papel
B12
Gancho para tubo
B13
Cepillo combinado para
suelo
5.4 Dispositivos de seguridad
- Dispositivo de arranque (A1).
El dispositivo de arranque impide el accionamiento accidental del
aparato.
6 INSTALACIÓN (PÁGINAS 4-5)
Atención: ¡peligro!
Todas las operaciones de instalación y montaje se deben realizar con el
aparato desconectado de la red eléctrica.
Consultar la secuencia de montaje en la pág. 4.
6.1 Montaje
Durante el desembalaje, comprobar si faltan accesorios y si el
contenido está dañado. Si se detectan daños debidos al transporte,
informar inmediatamente al distribuidor.
Levantar la cubierta con motor (A10) del aparato: abrir los ganchos de
cierre (A6) y extraer los accesorios suministrados. Comprobar que el
ltro (B2) esté montado correctamente.
Véase la fig. 2
Consultar la secuencia de montaje en las pp. 4-5.
6.2
Montaje de las ruedas traseras y las ruedas giratorias delanteras
Poner el depósito del aspirador (A9) boca abajo, sin la cubierta, en una
superficie horizontal sólida. Introducir los cubos de las ruedas giratorias
(A8a) en los orificios correspondientes y empujar a fondo para colocarlas
y fijarlas en la posición correcta.
Colocar el eje (A13) en la posición correcta, girándolo de forma que los
orificios de centrado encajen con los centradores. Colocar correctamente
los fiadores incluidos en la bolsita (B17) y fijarlos con los tornillos
correspondientes. Introducir la rueda (A8b), la arandela y fijarlo todo
con el pasador de horquilla, con cuidado de introducirlo en profundidad
y de abrirlo de manera que se adhiera perfectamente a la sección del
eje. Colocar el tapacubos y repetir la operación en la otra rueda (A8b).
Montar el mango metálico (A4b) como se indica en la figura.
Véase la fig. 3
6.3 Montaje de los accesorios
Introducir el tubo flexible (B3) en el racor de aspiración (A2) o de
soplado (A3), según el tipo de operación que se desea realizar.
Véase la fig. 4
Completar la secuencia con los accesorios necesarios para el tipo
de limpieza que se va a realizar. Utilizar los tubos rígidos (B5) y los
cepillos (B6-B7-B8-B9) según el tipo de limpieza y la superficie que
se va a limpiar. Es posible montar los cepillos (B6-B7-B8-B9-B13)
directamente en el tubo flexible (B3).
Véase la fig. 5
6.4 Conexión eléctrica
Atención: ¡peligro!
Comprobar que la red eléctrica presente el mismo voltaje y frecuencia
(V/Hz) que se indica en la placa de identificación. Véase la fig.6
6.4.1 Uso de cables alargadores
Utilizar cables y enchufes con grado de protección «IPX4».
La sección de los cables alargadores debe ser proporcional
a su longitud, es decir, cuanto más largo sea el cable, mayor
debe ser la sección.
6.5
Toma adicional para herramienta eléctrica (si está prevista)
Introducir el tubo flexible (B3) en el racor de aspiración de la
herramienta eléctrica. Si no son compatibles, utilizar el adaptador
de la herramienta eléctrica correspondiente (B4) (si está previsto),
cortando la parte sobrante.
Suministrar corriente a la herramienta eléctrica por medio de la toma
adicional (C1) (en los modelos que disponen de ella).
Véase la fig. 7
Page 46

46
(Traducción de las instrucciones originales)
ES © 2016 Español
ES © 2016 Español
7 INFORMACIÓN SOBRE EL USO (PÁGINA 6)
7.1 Mandos
- Dispositivo de arranque (A1).
Véase la fig. 8
Poner el dispositivo de arranque en la pos. (ON/I).
Si el dispositivo de arranque está dotado de un piloto, éste debe
iluminarse.
Poner el dispositivo de arranque en la pos. (OFF/0) para detener el
funcionamiento del aparato.
Si el dispositivo de arranque está dotado de un piloto, éste debe apagarse.
Atención: ¡peligro!
El aparato debe funcionar apoyado sobre una superficie segura y
estable, colocado como se indica. Véase la fig. 8
7.2 Arranque
7.2.1 Aspiración en seco.
Véase la fig. 9
¡Trabajar solamente con los ltros (B2 - B11) secos!
Antes de utilizarlos, comprobar si están dañados y
cambiarlos si es necesario. Para aspirar suciedad seca,
ajustar correctamente el cepillo para suelo y conectar los
accesorios correspondientes (usar el cepillo B13).
Para aspirar suciedad seca, si es necesario se puede
utilizar una bolsa de ltro adicional, que puede ser de papel
(B11) o textil (B10) (optativa).
Indicaciones acerca de la bolsa de ltro:
– El nivel de llenado de la bolsa de ltro depende de la
suciedad que se aspira.
– En caso de aspirar polvo no, arena, etc., habrá que
sustituir la bolsa de ltro con frecuencia.
– Si la bolsa de ltro se desgasta, puede estallar, por lo que
se debe sustituir con la frecuencia oportuna.
Atención: ¡peligro!
Aspirar solo ceniza que esté fría.
7.2.2 Aspiración de líquidos.
Véase la fig. 10
Atención: ¡peligro!
Si se forma espuma o hay pérdidas de líquido, ¡apagar
inmediatamente el aparato y desenchufarlo de la toma de
corriente! No utilizar la bolsa de ltro (ni textil ni de papel).
Atención
Si el depósito está lleno, un otador cierra la boca de
aspiración y el aparato funciona a mayor velocidad. Apagar
inmediatamente el aparato y vaciar el depósito.
Para aspirar suciedad húmeda o mojada, ajustar
correctamente el cepillo para suelo y conectar los
accesorios correspondientes (usar el cepillo B6).
7.2.3
Trabajo con herramientas eléctricas.Véase la fig. 11
Consultar la secuencia de montaje en la fig. 11.
Encender el aparato (interruptor giratorio hacia la izquierda,
en la posición
o interruptor de 2 pulsadores en la
posición II) y empezar a trabajar.
Aviso: Cuando se enciende la herramienta eléctrica, la
turbina de aspiración arranca con 0,5 segundos de retraso.
Cuando se apaga la herramienta eléctrica, la turbina de
aspiración sigue funcionando durante unos 6 segundos
para aspirar toda la suciedad que quede en el tubo de
aspiración.
7.2.4 Función de soplado.
Véase la fig. 12
Se utiliza para limpiar puntos de difícil acceso o zonas en las
que no es posible aspirar (p. ej., hojas caídas sobre un lecho
de gravilla).
Introducir el tubo exible de aspiración en la conexión
correspondiente. De esta forma se activa la función de soplado.
Para mejorar la ecacia del efecto de soplado, es aconsejable
utilizar la boquilla de ranuras (B8).
7.3 Interrupción del funcionamiento (parada)
Apagar el aparato. Véase la fig. 8
Enganchar el cepillo para suelo en la posición de estacionamiento.
7.4 Final del trabajo
Apagar el aparato. Véase la fig. 8
Desenchufar el enchufe.
7.5 Vaciado del depósito
En caso de suciedad seca y polvo: retirar el cabezal del aparato y
vaciar el depósito. Véase la fig. 13
En caso de líquidos: utilizar el tapón roscado de drenaje si está
presente (véase la fig. 14) o bien seguir las instrucciones anteriores.
8 MANTENIMIENTO (PÁGINA 135)
Atención: ¡peligro!
Todas las operaciones de instalación y montaje se deben realizar con el
aparato desconectado de la red eléctrica.
Consultar la secuencia de montaje en la pág. 135.
Antes de realizar operaciones de limpieza y mantenimiento, apagar el aparato
y desenchufar el enchufe. Las reparaciones y las intervenciones en el sistema
eléctrico solo las puede realizar el servicio autorizado de asistencia al cliente.
Atención: ¡peligro!
¡No usar detergentes abrasivos, limpiacristales o detergentes universales! No
sumergir nunca la cubierta
con motor (A10)
en agua. Limpiar el aparato
y los accesorios de plástico con un detergente normal para materiales
sintéticos. Si es necesario, enjuagar el depósito y los accesorios con agua y
secarlos antes de volver a usarlos.
8.1 Limpieza del cartucho filtrante (B2). Véase la fig. 15
Abrir el aspirador mediante los ganchos (A6). Poner la cubierta
con motor (A10) boca abajo y desmontar el cartucho ltrante (B2).
Enjuagarlo a fondo bajo el agua corriente y dejar que se seque.
Volver a montarlo una vez que esté seco.
8.2
Sustitución de la bolsa de filtro de papel (B11). Véase la fig. 17
Abrir el aspirador mediante los ganchos (A6). Desmontar la
bolsa de ltro (B11) llena, tirarla y montar una nueva.
8.3
Limpieza de la bolsa de filtro textil (B10) (optativa). Véase la fig. 16
Abrir el aspirador mediante los ganchos (A6). Desmontar la
bolsa de ltro (B10). Vaciar la bolsa de ltro, enjuagarla a
fondo bajo el agua corriente y dejar que se seque. Volver a
montarla una vez que esté seca.
9 ALMACENAMIENTO (PÁGINA 135)
Atención: ¡peligro!
Todas las operaciones de instalación y montaje se deben realizar con el
aparato desconectado de la red eléctrica.
Una vez terminado el trabajo y tras limpiar el aparato, guardarlo junto con los
accesorios como se indica en la
fig. 18.
Guardar el aparato en un lugar seco.
Page 47

47
(Traducción de las instrucciones originales)
ES © 2016 Español
10
INFORMACIÓN SOBRE AVERÍAS
Problemas Causas probables Soluciones
El aparato no se enciende
Ausencia de tensión
Verificar que haya tensión de red y comprobar que el enchufe esté
correctamente introducido (*)
Problemas en el circuito eléctrico/electrónico Ponerse en contacto con el centro de asistencia
El aparato no aspira o bien aspira con
poca fuerza
Accesorios obstruidos Comprobar y limpiar las boquillas, los alargadores y los tubos
Filtros sucios Limpiar los filtros
Bolsas llenas Vaciar/cambiar las bolsas
Depósito lleno Vaciar el depósito
La herramienta eléctrica no se pone en
marcha (si está prevista la toma para
herramienta eléctrica)
Enchufe de la herramienta eléctrica introducido de forma
incorrecta en la toma del aspirador
Introducir correctamente el enchufe
Interruptor apagado o en la posición I Poner el interruptor en la posición de herramienta eléctrica/II
Sale polvo
No se ha montado el filtro Montar el filtro
El filtro está dañado Cambiar el filtro por uno nuevo
El tubo o sus conexiones están dañados Cambiar las piezas dañadas
Durante el funcionamiento, el aparato
produce mal olor
Filtros/bolsas de filtro sucios Cambiar los filtros/bolsas de filtro
(*) Si, durante el funcionamiento, el motor se para y no vuelve a arrancar, ponerse en contacto con el servicio de asistencia técnica.
Declaración de conformidad CE
Annovi Reverberi S.p.A., Bomporto (Módena), Italia, declara que la(s) siguiente(s) máquina(s) Stanley:
Denominación del aparato: Aspirador para polvo y líquidos
N.º de modelo: SXVC20PE SXVC20PTE SXVC20XTE SXVC30XTDE SXVC35PTDE SXVC50XTDE
Potencia absorbida: 1,2 kW 1,2 kW 1,4 kW 1,6 kW 1,6 kW 1,6 kW
cumple(n) con lo dispuesto por las siguientes directivas europeas:
2006/95/CE - Directiva que será sustituida por la 2014/35/UE a partir del 20 de abril de 2016,
2004/108/CE - Directiva que será sustituida por la 2014/30/UE a partir del 20 de abril de 2016, 2011/65/UE, 2005/32/CE, 2012/19/UE.
y ha(n) sido fabricada(s) en cumplimiento de las siguientes normas o los siguientes documentos normalizados:
EN 60335-1; EN 60335-2-2; EN 55014-1; EN 55014-2; EN 61000-3-2; EN 61000-3-3; EN 62233; EN 50581, Reg.1275/2008.
Nombre y dirección de la persona encargada de expedir el expediente técnico: Stefano Reverberi / AR Managing Director
Via ML King, 3 - 41122 Módena, Italia
Fecha: 10.02.2016
MÓDENA (I)
Stefano Reverberi Managing Director
Page 48

48
(Traducción de las instrucciones originales)
ES © 2016 Español
ES © 2016 Español
GARANTÍA
La validez de la garantía está sujeta a las normas vigentes en el país en el que se comercializa el producto (salvo si el fabricante indica otra cosa).
Si el producto presenta defectos de calidad del material, de la fabricación o falta de conformidad durante el período de validez de la garantía, el fabricante
garantiza la sustitución de los componentes defectuosos y se encarga de reparar los productos si presentan un desgaste razonable, o bien los sustituye.
La garantía no cubre los componentes sujetos a desgaste normal (ltros, bolsas, accesorios tales como los tubos rígidos, el tubo exible, los cepillos, las
ruedas, etc.).
La garantía no cubre los defectos causados por o que deriven de:
- uso incorrecto, uso no permitido, negligencia;
- alquiler o uso profesional si el producto se ha vendido para uso doméstico;
- inobservancia de las normas de mantenimiento incluidas en el manual correspondiente;
- reparaciones realizadas por personal o centros no autorizados;
- uso de recambios o accesorios no originales;
- daños causados durante el transporte, por sustancias u objetos extraños, accidente;
- problemas de almacenamiento o conservación.
Para activar la garantía, es necesario mostrar el comprobante de compra.
Datos técnicos Unidad
SXVC20PE SXVC20PTE SXVC20XTE SXVC30XTDE SXVC35PTDE SXVC50XTDE
Tensión
V/Hz
220-240 V ~ 5
0/60 Hz
220-240 V ~ 5
0/60 Hz
220-240 V ~ 5
0/60 Hz
220-240 V ~ 5
0/60 Hz
220-240 V ~ 5
0/60 Hz
220-240 V ~ 5
0/60 Hz
Potencia
kW
1,2 1,2 1,4 1,6 1,6 1,6
Capacidad del depósito
l
20 20 20 30 35 50
Presión máxima de aspiración
kPa
17 17 18 19 19 19
Depresión máxima
mbar 170 170 180 190 190 190
Aire aspirado máximo
l/s
28 28 33 37 39 41
N.° de motores
-
1 1 1
1 1
1
Ø de accesorios
mm
35 35 35 35 35 40
Cable de alimentación
m
5 5 5 5 5 5
Clase de protección
-
Aislamiento del motor
Clase F F F F F F
Protección del motor
-
IPX4 IPX4 IPX4 IPX4 IPX4 IPX4
Peso neto
kg
7,9 8,4 9,2 9,6 11,5 14,9
Peso bruto
kg
9,4 9,9 11,4 12,5 14,3 18,75
¡Reservada la posibilidad de hacer modicaciones técnicas!
Page 49

49
(Alkuperäisten ohjeiden käännös)
FI © 2016 Suomi
Hyvä asiakas,
lue nämä ohjeet ennen laitteen
ensimmäistä käyttöä, noudata niitä ja
säilytä ne tulevaa tarvetta varten tai
luovuttaaksesi ne uudelle omistajalle, jos
myyt laitteen.
1 TURVAOHJEET
1.1 Hankkimasi laite on
huipputeknologinen tuote, jonka
on valmistanut yksi Euroopan
asiantuntevimmista yrityksistä. Tämä
laite on tarkoitettu käytettäväksi
monitoimi-imurina käyttöohjeissa
annettujen selostusten ja
turvallisuusvaroitusten mukaisesti.
Olemme laatineet nämä ohjeet,
jotta kykenet hyödyntämään laitteen
suorituskykyä täydellisesti. Lue ne
huolellisesti ja noudata niitä jokaisella
käyttökerralla. Käytä kaikkia
mahdollisia varotoimia laitteen
liitännän, käytön ja huollon aikana
oman ja lähellä olevien henkilöiden
turvallisuuden takaamiseksi. Lue
turvallisuusmääräykset huolellisesti
ja noudata niitä. Noudattamatta
jättämisen seurauksena saattaa
olla terveys- ja turvallisuusriskejä ja
taloudellisia menetyksiä.
2 TIEDOTUKSET
2.1
Noudata laitteessa ja näissä ohjeissa
olevien tarrojen ja symbolien ohjeita.
Laitteessa ja oppaassa on ainoastaan
symbolit, jotka koskevat hankittua
laitetta. Tarkista, että laitteeseen
kiinnitetyt symbolit ja tarrat ovat aina
ehjiä ja lukukelpoisia. Vaihda ne
muussa tapauksessa uusiin ja kiinnitä
alkuperäiseen kohtaan (ota yhteyttä
huoltopalveluun).
Huomio - vaara!
Lue ohjeet huolellisesti
ennen käyttöä.
Symboli E3 (jos symboli on
kuvassa 1)
- Osoittaa, että laite
on tarkoitettu ainoastaan
kotitalouskäyttöön eikä sovellu
kaupalliseen tai teolliseen käyttöön.
0
Katkaisimen sammutusasento
I Katkaisimen käynnistysasento
Automaattikatkaisimen asento
II
Automaattikatkaisimen asento
Page 50

50
(Alkuperäisten ohjeiden käännös)
FI © 2016 Suomi
FI © 2016 Suomi
Tämän laitteen eristysluokka
on II. Se tarkoittaa, että laite on
varustettu vahvistetulla tai
kaksoiseristyksellä (ainoastaan jos
symboli on laitteessa).
Tämän laitteen eristysluokka
on I. Se tarkoittaa, että laite on
varustettu maadoitusjohtimella
(ainoastaan jos symboli on laitteessa).
Tämä laite on soveltuvien
eurooppalaisten direktiivien
mukainen.
Symboli E1 - Laitteen kierrätys.
Kun laitteen käyttöikä päättyy, tee
siitä välittömästi käyttökelvoton.
Irrota pistotulppa pistorasiasta.
Katkaise sähköjohto.
Älä hävitä sähkölaitteita
kotitalousjätteiden seassa. Sähkö-
ja elektroniikkalaiteromua koskevan
SER-direktiivin 2012/19/EU
mukaisesti sähkökomponentit tulee
erilliskerätä ja kierrättää ekologisesti.
Pyydä lisätietoja asianmukaisesta
virastosta tai alueen jälleenmyyjältä.
Käytä kuulosuojaimia.
Käytä kasvonsuojainta.
Käytä hengityssuojaimia.
Käytä suojakäsineitä.
Käytä turvajalkineita.
Käytä suojavaatetusta.
Page 51

51
(Alkuperäisten ohjeiden käännös)
FI © 2016 Suomi
3 TURVALLISUUSMÄÄRÄYKSET/MUUT VAARAT
3.1 VAROITUKSIA: KIELLETYT TOIMENPITEET
3.1.1
huOmiO. äLä
anna alle 8-vuotiaiden lasten tai toimintarajoitteisten tai kokemattomien henkilöiden
käyttää laitetta, ellei heitä valvota tai heille ole annettu riittäviä ohjeita laitteen turvalliseen käyttöön
sekä tietoja käytöstä aiheutuvista riskeistä.
.
3.1.2
huOmiO.
Lapset EIVÄT saa leikkiä laitteella. Valvo lapsia estääksesi sen.
3.1.3 Lapset tai toimintarajoitteiset henkilöt EIVÄT saa suorittaa käyttäjälle kuuluvaa puhdistusta tai
huoltoa ilman valvontaa.
3.1.4 Pidä pakkausmuovit lasten ulottumattomissa. Tukehtumisvaara!
3.1.5
huOmiO.
Laitteen käyttö on KIELLETTYÄ henkilöiltä, jotka eivät ole lukeneet sen ohjeita huolellisesti.
3.1.6
huOmiO.
ÄLÄ käytä laitteessa syttyviä, myrkyllisiä tai ominaisuuksiltaan laitteen toiminnalle
yhteensopimattomia nesteitä. Älä käytä laitetta potentiaalisesti syttyvässä tai räjähdysvaarallisessa
tilassa.
3.1.7
huOmiO.
Määrätyt aineet saattavat muodostaa imuilman kanssa reagoidessaan räjähtäviä höyryjä ja
yhdisteitä. ÄLÄ koskaan imuroi seuraavia aineita:
– räjähtävät tai syttyvät kaasut, nesteet ja jauheet (reaktiiviset jauheet)
– reaktiiviset metallijauheet (esim. alumiini, magnesium, sinkki) yhdessä erittäin emäksisten tai
happamien pesuaineiden kanssa
– puhtaat hapot ja emäksiset liuokset
– orgaaniset liuokset (esim. bensiini, maalin ohenteet, asetoni tai dieselöljy).
Nämä aineet voivat lisäksi syövyttää laitteen materiaaleja.
3.1.8 Kytke laite pois jokaisen käytön jälkeen ja ennen puhdistuksia/huoltoja.
3.1.9 Palovaara. ÄLÄ imuroi palavia tai hehkuvia materiaaleja.
3.1.10
huOmiO.
ÄLÄ käytä laitetta ulkona sateella.
3.1.11
huOmiO.
ÄLÄ koske pistotulppaa ja/tai pistorasiaa märillä käsillä.
3.1.12
huOmiO.
ÄLÄ käytä laitetta, jos sen sähköjohto on vaurioitunut. Jos sähköjohto vaurioituu, sen saa
vaihtaa ainoastaan valmistaja, huoltopalvelu tai ammattihenkilö, jotta vaaratilanteet vältetään.
Page 52

52
(Alkuperäisten ohjeiden käännös)
FI © 2016 Suomi
FI © 2016 Suomi
3.1.13
huOmiO.
Tarkista, että laitteessa on konekilpi. Ilmoita jälleenmyyjälle, jos se puuttuu. Ellei laitteessa
ole konekilpeä, sitä EI saa käyttää. Sen ominaisuuksia ei tunneta ja se saattaa olla vaarallinen.
3.1.14
huOmiO.
ÄLÄ siirrä laitetta SÄHKÖJOHDOSTA vetämällä.
3.1.15
huOmiO.
Älä käytä ei-alkuperäisiä tai eri mallille tarkoitettuja varusteita. Älä muuta laitetta;
muutokset mitätöivät vaatimustenmukaisuusvakuutuksen ja vapauttavat valmistajan siviili- ja
rikosoikeudellisesta vastuusta.
3.2 VAROITUKSIA: SUORITETTAVAT TOIMENPITEET
3.2.1
huOmiO.
Kaikki sähköä johtavat osat TULEE SUOJATA vesisuihkuilta ja -roiskeilta.
3.2.2
huOmiO.
Ammattitaitoisen sähköasentajan tulee suorittaa sähköliitäntä standardin IEC 60364-1
mukaan. Asenna vikavirtakytkin, joka katkaisee koneen sähkön maavuotovirran ollessa yli 30 mA
30 ms ajan, tai maadoituspiirin valvontalaite.
3.2.3
huOmiO.
KÄYNNISTYSVAIHEESSA laite saattaa aiheuttaa verkkohäiriöitä.
3.2.4
huOmiO.
Käytä ainoastaan valtuutettuja jatkojohtoja, joiden poikkipinta-ala on asianmukainen.
3.2.5
huOmiO.
Kytke katkaisin aina pois jättäessäsi laitteen ilman valvontaa.
3.2.6
huOmiO.
Ilmavirta saattaa aiheuttaa osien kimpoamisen. Käytä asianmukaisia suojavaatteita ja
henkilönsuojaimia (PPE).
3.2.7
huOmiO.
Sammuta laite ja katkaise sen sähkö ennen asennusta, puhdistusta, säätöä, huoltoa,
varastointia ja kuljetusta.
3.2.8
huOmiO.
AINOASTAAN ammattihenkilö saa huoltaa ja/tai korjata sähköisiä osia.
3.2.9
huOmiO.
TARKISTA ruuvien kireys ja laitteen osien käyttökunto ennen jokaista käyttöä ja määräajoin.
Varmista, ettei laitteessa ole rikkoutuneita tai kuluneita osia.
3.2.10
huOmiO.
Käytä ainoastaan valmistajan toimittamia tai hyväksymiä alkuperäisiä varaosia, jotta laitteen
käyttö on turvallista.
3.2.11
huOmiO.
Sopimattomat jatkojohdot saattavat olla vaarallisia. Jos käytät jatkojohtoa, valitse
ulkokäyttöön sopiva tyyppi ja varmista, että liitäntä pysyy kuivana ja etäällä maasta. Käytä
johtokelaa, joka pitää pistorasian vähintään 60 mm:n korkeudella maasta.
Page 53

53
(Alkuperäisten ohjeiden käännös)
FI © 2016 Suomi
4 YLEISET OHJEET (SIVU 3)
4.1 Käyttöoppaan käyttö
Tämä opas kuuluu tärkeänä osana laitteen varusteisiin. Säilytä
se huolellisesti tulevaa käyttöä varten. Lue se huolellisesti ennen
asennusta ja käyttöä. Luovuta opas uudelle omistajalle, jos myyt
painepesurin.
4.2 Toimitus
Laite toimitetaan osittain purettuna pahvilaatikossa.
Katso pakkauksen sisältö kuvasta 1.
4.2.1 Ohessa toimitetut asiakirjat
D1 Käyttö- ja huolto-opas
D2 Turvaohjeet
D3 Vaatimustenmukaisuusvakuutus
D4 Takuusäännöt
4.3 Pakkausten hävitys
Pakkauksen materiaalit ovat ympäristöystävällisiä. Kierrätä tai hävitä
ne käyttömaassa voimassa olevien määräysten mukaan.
5 TEKNISET TIEDOT (SIVU 3)
5.1 Käyttötarkoitus
Laite on tarkoitettu käytettäväksi monitoimi-imurina
käyttöohjeissa annettujen selostusten ja turvallisuusvaroitusten
mukaisesti.
Tämä laite on tarkoitettu ainoastaan kotitalouskäyttöön eikä se
sovellu kaupalliseen tai teolliseen käyttöön.
Laite on standardien IEC 60335-1 ja IEC 60335-2-2 mukainen.
5.2 Käyttäjä
Laitteen käyttäjä (ammattimainen tai ei-ammattimainen) on osoitettu
kuvan 1 symbolilla.
5.3 Pääosat:
A1 Käynnistyskatkaisin
A2 Imuliitäntä
A3 Puhallusliitäntä
A4a Kahva
A4b Metallikahva (mallista riippuen)
A5 Sähköjohdon säilytyskoukku (mallista riippuen)
A6 Sulkimet
A7 Sähköjohto ja pistotulppa
A8a Kääntyvät etupyörät
A8b Takapyörät
A9 Imurin säiliö
A10 Kansi ja moottori
A11 Varustelokero (mallista riippuen)
A12 Nesteiden tyhjennystulppa (mallista riippuen)
A13 Takapyörien akseli (mallista riippuen)
C1 Lisätyökalupistoke (mallista riippuen)
5.3.1 Varusteet (katso mallien viitteet sisältävää kuvaa 1 toimituksen sisältö vastaa pahvilaatikon selostusta)
B1
Suodattimenpidin
B2
Patruunasuodatin
B3
Letku
B4
Sähkötyökalun sovitin
B5
Putki
B6
Lattiaharja
B7
Matto- ja sohvaharja
B8
Rakosuutin
B9
Pyöreä harja
B10
Kankainen suodatinpussi
(lisävaruste)
B11
Paperinen suodatinpussi
B12
Letkun kiinnitin
B13
Yhdistetty lattiaharja
5.4 Suojalaitteet
- Käynnistyskatkaisin (A1)
Käynnistyskatkaisin estää laitteen tahattoman käytön.
6 ASENNUS (SIVUT 4-5)
Huomio - vaara!
Kaikki asennus- ja kokoonpanotoimenpiteet tulee suorittaa laitteen virta
katkaistuna.
Katso kokoonpanojärjestys sivulta 4.
6.1 Kokoonpano
Kun purat laitteen pakkauksesta, tarkista ettei varusteita puutu ja ettei
pakkauksen sisältö ole vaurioitunut. Jos havaitset kuljetusvaurioita,
ilmoita niistä välittömästi jälleenmyyjälle.
Nosta laitteen moottorilla varustettu kansi (A10) avaamalla sulkimet
(A6) ja ota toimitetut varusteet ulos. Tarkista, että suodatin (B2) on
asennettu oikein.
Katso kuva 2.
Katso kokoonpanojärjestys sivuilta 4–5.
6.2
Takapyörien ja kääntyvien etupyörien asennus
Käännä imurin säiliö (A9) ilman kantta ympäri tasaisella ja tukevalla
alustalla. Aseta kääntyvien pyörien navat (A8a) niille tarkoitettuihin
aukkoihin ja paina pohjaan asti, jotta pyörät kiinnittyvät oikeaan
asentoon.
Aseta akseli (A13) oikeaan asentoon kääntämällä sitä, kunnes
keskitysreiät osuvat keskitystappeihin. Aseta pussissa (B17) olevat
pysäyttimet asianmukaisesti paikoilleen ja kiinnitä ne ruuveilla. Aseta
pyörä (A8b) ja aluslaatta ja kiinnitä kokonaisuus sokalla. Varmista,
että työnnät sokan syvälle ja avaa se, niin että se on täysin akselin
poikkipintaa vasten. Aseta pyörän suojus paikalleen ja suorita samat
toimenpiteet toiselle pyörälle (A8b).
Asenna metallikahva (A4b) kuvan mukaan.
Katso kuva 3.
6.3 Varusteiden asennus
Aseta letku (B3) imu- (A2) tai puhallusliitäntään (A3) käyttötavasta
riippuen.
Katso kuva 4.
Asenna tämän jälkeen loput varusteet, joita tarvitaan suoritettavaan
puhdistukseen. Käytä putkia (B5) ja harjoja (B6-B7-B8-B9)
puhdistustyypin ja puhdistettavan pinnan mukaan. Harjat (B6-B7-B8B9-B13) voidaan asentaa suoraan letkuun (B3).
Katso kuva 5.
6.4 Sähkökytkentä
Huomio - vaara!
Tarkista, että verkkojännite ja -taajuus vastaavat konekilvessä
annettuja arvoja (V/Hz). Katso kuva 6.
6.4.1 Jatkojohtojen käyttö
Käytä IPX4-suoja-asteen jatkojohtoja ja pistotulppia.
Jatkojohdon johtimien poikkipinta-alan tulee olla
verrannollinen sen pituuteen; mitä pidempi jatkojohto, sitä
suurempi poikkipinta-ala.
6.5
Lisätyökalupistoke (mallista riippuen)
Aseta letku (B3) laitteen imuliitäntään. Elleivät ne ole yhteensopivia,
käytä sähkötyökalun sovitinta (B4) (mallista riippuen) katkaisemalla
ylimääräiset osat.
Anna virtaa sähkötyökalulle käyttämällä lisäpistoketta (C1)
(Mallit, joihin asennettu).
Katso kuva 7.
Page 54

54
(Alkuperäisten ohjeiden käännös)
FI © 2016 Suomi
FI © 2016 Suomi
7 KÄYTTÖ (SIVU 6)
7.1 Ohjauslaitteet
- Käynnistyskatkaisin (A1).
Katso kuva 8
.
Aseta käynnistyskatkaisin asentoon (ON/I).
Jos käynnistyskatkaisimessa on merkkivalo, sen tulee syttyä.
Aseta käynnistyskatkaisin asentoon (OFF/0) pysäyttääksesi laitteen.
Jos käynnistyskatkaisimessa on merkkivalo, sen tulee sammua.
Huomio - vaara!
Laitteen on käytön aikana oltava tasaisella ja tukevalla tasolla
ohjeiden mukaisessa asennossa. Katso kuva 8.
7.2 Käynnistys
7.2.1 Kuivaimurointi.
Katso kuva 9.
Työskentele ainoastaan suodattimet (B1 - B11) kuivina!
Varmista ennen suodattimien käyttöä, etteivät ne ole
vaurioituneet. Vaihda ne tarvittaessa. Kun imuroit kuivaa
likaa, säädä lattiaharja asianmukaisesti ja liitä tarvittavat
varusteet (käytä harjaa B13).
Kun imuroit kuivaa likaa, voit tarvittaessa käyttää lisäksi
myös suodatinpussia, joka voi olla paperinen (B11) tai
kankainen (B10) (lisävaruste).
Suodatinpussia koskevat ohjeet
– Suodatinpussin täyttötaso riippuu imuroitavasta liasta.
– Jos imuroit hienoa pölyä, hiekkaa tms., vaihda suodatinpussi
usein.
– Kulunut suodatinpussi voi räjähtää, joten se tulee vaihtaa
ajoissa!
Huomio - vaara!
Imuroi tuhka jäähtyneenä.
7.2.2 Nesteiden imurointi.
Katso kuva 10.
Huomio - vaara!
Jos havaitset vaahtoa tai nestettä valuu säiliöstä, sammuta
laite välittömästi tai irrota pistotulppa pistorasiasta! Älä
käytä suodatinpussia (paperista tai kankaista)!
Huomio
Jos säiliö täyttyy, uimuri sulkee imuaukon ja laite toimii
suuremmalla nopeudella. Sammuta laite välittömästi ja
tyhjennä säiliö.
Kun imuroit kosteaa tai märkää likaa, säädä lattiaharja
asianmukaisesti ja liitä tarvittavat varusteet (käytä harjaa B6).
7.2.3 Työskentely sähkötyökaluilla.
Katso kuva 11.
Katso kokoonpanojärjestys kuvasta 11.
Käynnistä laite (vasemmalla oleva käännettävä katkaisin
asentoon
tai 2-asentoinen katkaisin asentoon II) ja
aloita työskentely.
Varoitus: Imuturbiini käynnistyy 0,5 sekunnin viiveellä
sähkötyökalun käynnistymisestä.
Kun sähkötyökalu sammutetaan, imuturbiini jatkaa
toimintaansa noin 6 sekuntia mahdollistaakseen jäämälian
imuroinnin imuletkusta.
7.2.4 Puhallustoiminto.
Katso kuva 12.
Vaikeasti saavutettavien tai imurointiin sopimattomien kohtien
puhdistus (esim. lehdet sorapinnalta).
Aseta imuletku asianmukaiseen liittimeen. Puhallustoiminto
otetaan käyttöön.
Jotta puhallustoiminto on tehokkaampi, käytä rakosuutinta B8.
7.3 Toiminnan keskeytys (tauko)
Sammuta laite. Katso kuva 8.
Kiinnitä lattiaharja pysäköintiasentoon.
7.4 Työn loputtua
Sammuta laite. Katso kuva 8.
Irrota pistotulppa.
7.5 Tyhjennä säiliö.
Kuiva lika ja pöly: irrota laitteen kansi ja tyhjennä säiliö. Katso kuva 13.
Nesteet: käytä mallista riippuen tyhjennystulppaa (katso kuva 14) tai
toimi kuten edellä.
8 HUOLTO (SIVU 135)
Huomio - vaara!
Kaikki asennus- ja kokoonpanotoimenpiteet tulee suorittaa laitteen virta
katkaistuna.
Katso kokoonpanojärjestys sivulta 135.
Sammuta laite ja irrota pistotulppa pistorasiasta ennen puhdistus- ja
huoltotöitä. Ainoastaan valtuutettu huoltopalvelu saa tehdä korjauksia ja
huoltaa sähköjärjestelmiä.
Huomio - vaara!
Älä käytä hankaavia tai lasille tai yleiskäyttöön tarkoitettuja puhdistusaineita!
Älä koskaan upota
moottorilla (A10)
varustettua kantta veteen. Puhdista
laite ja muovivarusteet tavallisella, synteettiselle materiaalille tarkoitetulla
puhdistusaineella. Huuhtele säiliö ja varusteet tarvittaessa vedellä ja kuivaa
ennen seuraavaa käyttöä.
8.1 Patruunasuodattimen (B2) puhdistus. Katso kuva 15.
Avaa imuri sulkimista (A6). Käännä moottorilla varustettu kansi
(A10) ympäri ja irrota patruunasuodatin (B2).
Huuhtele huolellisesti juoksevan veden alla ja anna kuivua.
Asenna takaisin kuivuneena.
8.2 Paperisen suodatinpussin (B11) vaihto. Katso kuva 17.
Avaa imuri sulkimista (A6). Irrota täysi suodatinpussi (B11),
heitä se pois ja asenna tilalle uusi.
8.3 Kankaisen suodatinpussin (B10) (lisävaruste) puhdistus.
Katso kuva 16.
Avaa imuri sulkimista (A6). Irrota suodatinpussi (B10).
Tyhjennä suodatinpussi, huuhtele huolellisesti juoksevalla
vedellä ja anna kuivua. Asenna takaisin kuivuneena.
9 SÄILYTYS (SIVU 135)
Huomio - vaara!
Kaikki asennus- ja kokoonpanotoimenpiteet tulee suorittaa laitteen virta
katkaistuna.
Kun työt on tehty ja laite puhdistettu, säilytä se ja varusteet kuten kuvassa 18.
Säilytä laite kuivassa paikassa.
Page 55

55
(Alkuperäisten ohjeiden käännös)
FI © 2016 Suomi
10
VIANETSINTÄ
Vika Mahdollinen syy Korjaus
Laite ei käynnisty.
Sähkövirta puuttuu.
Tarkista, että pistotulppa on kunnolla pistorasiassa ja että siihen
tulee virtaa (*).
Sähkö- ja elektronisen piirin häiriöt Ota yhteyttä huoltopalveluun.
Laite ei ime tai imee heikosti.
Varusteet tukossa Tarkista ja puhdista jatkosuuttimet tai putket.
Likaiset suodattimet Puhdista suodattimet.
Pussit täynnä Tyhjennä / vaihda pussit.
Säiliö täynnä Tyhjennä säiliö.
Sähkötyökalu ei käynnisty
(jos mallissa on työkalupistoke).
Sähkötyökalun pistotulppa on kytketty virheellisesti imurin
pistorasiaan.
Kytke pistotulppa oikein.
Katkaisin on sammutettu tai asennossa I. Aseta katkaisin työkaluasentoon II.
Pölyä tulee ulos.
Suodatinta ei ole asennettu. Asenna suodatin.
Suodatin on vaurioitunut. Vaihda käytetty suodatin uuteen.
Letku tai sen liitososat ovat vaurioituneet. Vaihda vaurioituneet osat.
Laite haisee epämiellyttävältä
toiminnan aikana.
Likaiset suodattimet/pussit Vaihda suodattimet/pussit.
(*) Jos moottori sammuu toiminnan aikana eikä käynnisty uudelleen, ota yhteyttä huoltopalveluun.
CE-vaatimustenmukaisuusvakuutus
Me Annovi Reverberi S.p.A. -yrityksestä, Bomporto (Mo), Italia, vakuutamme että seuraava(t) Stanley-laite(teet):
Laitteen nimike: Pöly- ja nesteimuri
Mallinro: SXVC20PE SXVC20PTE SXVC20XTE SXVC30XTDE SXVC35PTDE SXVC50XTDE
Tehonkulutus: 1,2 kW 1,2 kW 1,4 kW 1,6 kW 1,6 kW 1,6 kW
on(ovat) seuraavien direktiivien mukainen(mukaisia):
2006/95/EY - Direktiivi, jonka korvaa direktiivi 2014/35/EU 20. huhtikuuta 2016 alkaen,
2004/108/EY - Direktiivi, jonka korvaa direktiivi 2014/30/EU 20. huhtikuuta 2016 alkaen, 2011/65/EU, 2005/32/EY, 2012/19/EU.
ja valmistettu seuraavien standardien tai standardoitujen asiakirjojen mukaan:
EN 60335-1, EN 60335-2-2, EN 55014-1, EN 55014-2, EN 61000-3-2, EN 61000-3-3, EN 62233 ja EN 50581, Reg.1275/2008.
Sen henkilön nimi ja osoite, joka on valtuutettu kokoamaan teknisen eritelmän: Stefano Reverberi / AR Toimitusjohtaja
Via M.L. King 3 - 41122 Modena, Italia
Pvm: 10.02.2016
MODENA (I)
Stefano Reverberi Toimitusjohtaja
Page 56

56
(Alkuperäisten ohjeiden käännös)
FI © 2016 Suomi
FI © 2016 Suomi
TAKUU
Takuun voimassaoloaika määrätään tuotteen myyntimaassa voimassa olevissa määräyksissä (ellei valmistaja toisin ilmoita).
Valmistajan takuu kattaa materiaali- ja valmistusviat ja vaatimuksista poikkeavuuden takuun voimassaoloaikana. Siihen sisältyy viallisten osien vaihto ja
kohtuullisesti kuluneiden tuotteiden korjaus tai vaihto.
Takuu ei kata normaalisti kuluvia osia (suodattimet, pussit, varusteet kuten putket, letku, harjat, pyörät jne.).
Takuu ei kata vikoja, jotka johtuvat seuraavista syistä:
- virheellinen tai kielletty käyttö, laiminlyönti
- vuokraus tai ammattikäyttö, jos tuote on tarkoitettu kotitalouskäyttöön
- oppaassa annettujen huoltomääräysten noudattamatta jättäminen
- valtuuttamattomien henkilöiden tai huoltopalvelujen suorittamat korjaukset
- ei-alkuperäisten varaosien tai varusteiden käyttö
- kuljetuksen tai ylimääräisten esineiden/aineiden aiheuttamat vauriot, onnettomuus
- varastointiin liittyvät ongelmat.
Takuun voimaan saattamiseksi tulee esittää ostotodistus.
Tekniset tiedot Mittayksikkö
SXVC20PE SXVC20PTE SXVC20XTE SXVC30XTDE SXVC35PTDE SXVC50XTDE
Jännite
V/Hz
220–240 V ~ 5
0/60 Hz
220–240 V ~ 5
0/60 Hz
220–240 V ~ 5
0/60 Hz
220–240 V ~ 5
0/60 Hz
220–240 V ~ 5
0/60 Hz
220–240 V ~ 5
0/60 Hz
Teho
kW
1,2 1,2 1,4 1,6 1,6 1,6
Keräyssäiliön säiliö
L
20 20 20 30 35 50
Maksimi-imupaine
kPa
17 17 18 19 19 19
Maksimialipaine
mbar 170 170 180 190 190 190
Imetty maksimi-ilma
L/s
28 28 33 37 39 41
Moottorien määrä
-
1 1 1
1 1
1
varusteiden Ø
mm
35 35 35 35 35 40
Sähköjohto
m
5 5 5 5 5 5
Suoja-aste
-
Moottorin eristys
Luokka F F F F F F
Moottorin suojaus
-
IPX4 IPX4 IPX4 IPX4 IPX4 IPX4
Nettopaino
kg
7,9 8,4 9,2 9,6 11,5 14,9
Bruttopaino
kg
9,4 9,9 11,4 12,5 14,3 18,75
Pidätämme oikeuden teknisiin muutoksiin!
Page 57

57
(Traduction des instructions originales)
FR © 2016 Français
Cher/Chère client/e,
Avant la toute première utilisation de
l'appareil, nous vous invitons à lire les
instructions originales, à les suivre et à
les conserver pour toute consultation ou
vente future.
1 CONSIGNES DE SÉCURITÉ
1.1 L'appareil que vous avez acheté
est un produit à fort contenu
technologique, fabriqué par l'un des
plus grands spécialistes européens.
Conformément aux descriptions et aux
consignes de sécurité gurant dans
ce manuel, cet appareil a été conçu
pour être utilisé comme aspirateur
multifonctions. Nous vous invitons à
lire attentivement et à observer ces
quelques lignes pour optimiser ses
performances. Pour le raccordement,
l'utilisation et la maintenance de
l'appareil, veuillez prendre toutes
les précautions nécessaires à votre
sécurité et à celle des personnes à
proximité. Veuillez lire et observer
scrupuleusement les consignes de
sécurité pour ne compromettre ni la
santé ni la sécurité des personnes,
et pour éviter tout dégât matériel.
2 ICÔNES ET SYMBOLES
2.1
Respecter les pictogrammes de
sécurité et les symboles figurant sur
l'appareil et dans ce manuel.
Seuls les symboles concernant
l'appareil acheté sont reproduits sur
l'appareil et dans le manuel. S'assurer
que les symboles et les pictogrammes
de sécurité sur l'appareil sont lisibles
et en bon état. Dans le cas contraire,
les remplacer en respectant la
position d'origine (contacter le Centre
d'assistance).
Attention - Danger !
Lire attentivement ces
instructions avant emploi.
Icône E3 (si le symbole est
représenté sur la fig. 1)
- Elle
indique quel'appareil a été conçu
pour un usage domestique
uniquement, et il ne doit pas être
employé pour un usage commercial
ou industriel.
0 Position « arrêt » de l'interrupteur
I Position « marche » de l'interrupteur
Position « automatique » de l'interrupteur
II Position « automatique » de l'interrupteur
Page 58

58
(Traduction des instructions originales)
FR © 2016 Français
FR © 2016 Français
Classe de protection électrique II.
L'appareil comporte une isolation
renforcée ou double (uniquement si le
symbole figure sur l'appareil).
Classe de protection électrique I.
L'appareil comporte un conducteur
de protection extérieur (borne de terre)
(uniquement si le symbole figure sur
l'appareil).
Ce produit observe les directives
européennes en vigueur.
Icône E1 - Recyclage de
l'appareil. Rendre immédiatement
l'appareil en fin de vie inutilisable.
Débrancher l'appareil de l'alimentation
électrique.
Couper le câble électrique.
Ne pas jeter les appareils électriques
avec les déchets ménagers. Comme
spécifié dans la directive WEEE
2012/19/CE sur les équipements
électriques et électroniques en fin
de vie, les composants électriques
doivent être collectés séparément et
recyclés d'une manière respectueuse
de l'environnement.
Pour plus d'informations,
communiquer avec les services
compétents ou votre revendeur local.
Porter un casque de protection.
Porter un masque de protection.
Porter un appareil de protection
respiratoire.
Porter des gants de protection.
Porter des chaussures de sécurité.
Porter une tenue de protection.
Page 59

59
(Traduction des instructions originales)
FR © 2016 Français
3 CONSIGNES DE SÉCURITÉ/RISQUES RÉSIDUELS
3.1 AVERTISSEMENTS : À NE PAS FAIRE
3.1.1
aTTenTiOn. ne Pas
permettre l'utilisation de l'appareil à des enfants de moins de 8 ans et des
personnes porteuses de limites physiques, sensorielles ou mentales, ou manquant d'expérience
et/ou de connaissances, sauf si elles sont correctement surveillés et ont reçu des instructions sur
la façon d'utiliser l'appareil en toute sécurité, ainsi que des informations sur les dangers qui en
découlent.
.
3.1.2
aTTenTiOn.
Les enfants NE DOIVENT PAS jouer avec l'appareil. Surveiller les enfants pour que ceci
ne se produise pas.
3.1.3 Les enfants ou les personnes touchées par une incapacité, sans surveillance, NE DOIVENT PAS
effectuer le nettoyage ou la maintenance de l'appareil.
3.1.4 Ne pas laisser le matériel d'emballage à la portée des enfants. Risque d'asphyxie !
3.1.5
aTTenTiOn.
L'appareil NE DOIT PAS être confié à une personne n'ayant pas lu et compris les
instructions.
3.1.6
aTTenTiOn.
NE PAS utiliser l'appareil avec des produits inflammables ou toxiques, ou avec tout
liquide dont les caractéristiques sont incompatibles avec son mode d'opération. Il est interdit de faire
fonctionner l'appareil en atmosphère explosible ou potentiellement inflammable.
3.1.7
aTTenTiOn.
Certaines substances peuvent former des mélanges vapeur-air explosifs. NE JAMAIS
aspirer les substances suivantes :
- Gaz explosifs ou inammables, liquides et poussières (poussières réactives).
- Poussières métalliques réactives (par ex. aluminium, magnésium, zinc) avec des détergents
fortement alcalins et acides.
- Acides et solutions alcalines à l'état pur.
- Solutions organiques (par ex. essence, diluants pour vernis, acétone ou gasoil).
Ces substances peuvent aussi attaquer les matériaux de l'appareil.
3.1.8 Débrancher l'appareil après chaque application et avant chaque nettoyage/maintenance.
3.1.9 Risque d'incendie. NE PAS aspirer d'objets en ammes, brûlants ou fumants.
3.1.10
aTTenTiOn.
NE PAS utiliser l'appareil à l'extérieur par temps de pluie.
3.1.11
aTTenTiOn.
NE PAS toucher la prise mâle et/ou la prise de courant avec les mains mouillées.
Page 60

60
(Traduction des instructions originales)
FR © 2016 Français
FR © 2016 Français
3.1.12
aTTenTiOn.
NE PAS utiliser l'appareil si le câble électrique est endommagé. Si le câble électrique
est abîmé, le faire remplacer par le fabricant, par un Centre d'assistance ou par une personne de
qualification similaire pour éviter un danger.
3.1.13
aTTenTiOn.
S'assurer que l'appareil comporte une plaquette signalétique. Si celle-ci est manquante,
contacter le revendeur. Les appareils sans plaque NE doivent PAS être utilisés, car ils sont
anonymes et potentiellement dangereux.
3.1.14
aTTenTiOn.
NE PAS tirer sur le CÂBLE ÉLECTRIQUE pour déplacer l'appareil.
3.1.15
aTTenTiOn.
Il est interdit d'utiliser des accessoires qui ne sont ni d'origine ni spécifiques pour le
modèle, et il est interdit d'apporter une modification quelconque à l'appareil. Toute modification
entraîne l'invalidation de la déclaration de conformité et décharge le fabricant de toute responsabilité
civile et pénale.
3.2 AVERTISSEMENTS : À FAIRE
3.2.1
aTTenTiOn.
Toutes les pièces conductrices de courant DOIVENT ÊTRE PROTÉGÉES contre les jets
ou éclaboussures d'eau.
3.2.2
aTTenTiOn.
Conformément à la norme CEI 60364-1, faire appel à un électricien qualifié pour les
branchements électriques de l'appareil. Il est recommandé d'installer un disjoncteur différentiel qui
coupe l'alimentation électrique de l'appareil si le courant de fuite à la terre excède 30 mA pendant
30 ms, ou un dispositif qui garantit la mise à la terre.
3.2.3
aTTenTiOn.
LORS du démarrage, l'appareil peut créer des interférences avec l'alimentation
électrique.
3.2.4
aTTenTiOn.
Utiliser uniquement les rallonges électriques autorisées de section appropriée.
3.2.5
aTTenTiOn.
Déconnecter toujours l'appareil de l'alimentation électrique avant de le laisser sans
surveillance.
3.2.6
aTTenTiOn.
Le débit d'air peut faire rebondir les objets. Porter tous les équipements de protection
individuelle (EPI) nécessaires pour travailler en sécurité.
3.2.7
aTTenTiOn.
Éteindre et débrancher l'appareil avant de le ranger, de le transporter et d'effectuer toute
opération de montage, de nettoyage, de réglage et de maintenance.
Page 61

61
(Traduction des instructions originales)
FR © 2016 Français
3.2.8
aTTenTiOn.
Toute opération de maintenance et/ou de réparation des composants électriques DOIT
être effectuée par un personnel qualifié.
3.2.9
aTTenTiOn.
Avant chaque utilisation et de manière régulière, VÉRIFIER que les vis sont bien serrées
et que toutes les pièces de l'appareil sont en bon état. S'assurer qu'aucune pièce n'est usée ou
cassée.
3.2.10
aTTenTiOn.
Utiliser uniquement des pièces de rechange d'origine fournies ou approuvées par le
fabricant pour éviter que l'appareil ne devienne dangereux.
3.2.11
aTTenTiOn.
Utiliser une rallonge inadaptée peut être dangereux. Dans le cas où une rallonge est
nécessaire, en choisir une faite pour l'utilisation à l'extérieur et s'assurer que le raccordement reste
sec et à une certaine distance du terrain. C'est pourquoi il est recommandé d'utiliser un enrouleur
de rallonge permettant de garder la prise à au moins 60 mm au-dessus du sol.
Page 62

62
(Traduction des instructions originales)
FR © 2016 Français
FR © 2016 Français
4 GÉNÉRALITÉS (PAGE 3)
4.1 Utilisation du manuel
Ce manuel fait partie intégrante de l'appareil et doit être conservé pour
pouvoir être consulté en cas de besoin. Le lire attentivement avant
l'installation/utilisation. En cas de cession, l'ancien propriétaire doit
remettre le manuel au nouveau propriétaire.
4.2 Emballage
L'appareil est livré partiellement démonté, dans un emballage en
carton.
Son contenu est représenté sur la fig.1.
4.2.1 Documentation fournie
D1 Manuel d'utilisation et d'entretien
D2 Consignes de sécurité
D3 Déclaration de conformité
D4 Règles de garantie
4.3 Élimination de l'emballage
Les matériaux de l'emballage ne sont pas dangereux pour
l'environnement. Cependant, ils doivent être recyclés ou éliminés
conformément aux normes en vigueur dans le pays d'utilisation.
5 INFORMATIONS TECHNIQUES (PAGE 3)
5.1 Domaine d'utilisation
Conformément aux descriptions et aux consignes de sécurité
gurant dans ce manuel, l'appareil a été conçu pour être utilisé
comme aspirateur multifonctions.
Cet appareil a été conçu pour un usage domestique
uniquement, et il ne doit pas être employé pour un usage
commercial ou industriel.
L'appareil est conforme aux normes CEI 60335-1 et CEI 60335-2-2.
5.2 Opérateur
Pour identifier l'opérateur chargé de l'usage de l'appareil (professionnel
ou non professionnel), voir l'icône représentée sur la fig.1.
5.3 Pièces principales :
A1 Dispositif de mise en marche
A2 Raccord d'aspiration
A3 Raccord de soufflage
A4a Poignée
A4b Poignée métallique (si prévue)
A5 Crochet pour le rangement du câble (si prévu)
A6 Crochets de verrouillage
A7 Câble électrique avec fiche
A8a Roulettes pivotantes avant
A8b Roues arrière
A9 Cuve aspirateur
A10 Couvercle avec moteur
A11 Porte-accessoires (si prévu)
A12 Bouchon de vidange (si prévu)
A13 Essieu de roues arrière (si prévu)
C1 Prise de courant supplémentaire pour accessoire électrique
(si prévu)
5.3.1 Accessoires (voir la figure 1 avec des indications sur
les modèles - La fourniture est conforme aux illustrations sur
l'emballage en carton)
B1
Porte-filtre
B2
Filtre cartouche
B3
Flexible
B4
Adaptateur accessoire
électrique
B5
Tuyau rigide
B6
Suceur sol
B7
Suceur tapis de sol et
fauteuils
B8
Suceur pour fentes
B9
Brosse ronde
B10
Sac filtrant en tissu
(Option)
B11
Sac filtrant en papier
B12
Crochet de verrouillage
du tube
B13
Suceur sol combiné
5.4 Dispositifs de sécurité
- Dispositif de mise en marche (A1)
Le dispositif de mise en marche évite que l'appareil soit actionné
accidentellement.
6 INSTALLATION (PAGES 4-5)
Attention - danger !
Éteindre et débrancher l'appareil avant toute opération d'installation et de
montage.
Pour la séquence de montage, voir page 4.
6.1 Montage
Pendant le déballage, contrôler qu'aucun accessoire ne manque et
que le contenu est intact. En cas de dommages occasionnés par le
transport, informer immédiatement le revendeur.
Ouvrir les crochets de verrouillage (A6), puis lever le couvercle du
moteur (A10) et retirer les accessoires. Vérier que le ltre (B2) est
monté correctement.
Voir fig. 2
Pour la séquence de montage, voir les pages 4-5
6.2
Montage des roues arrière et roulettes pivotantes avant
Retourner la cuve de l'aspirateur (A9), sans couvercle, sur une surface
horizontale stable. Insérer les moyeux des roulettes (A8a) dans les
trous prévus à cet effet, puis appuyer à fond jusqu'à entendre le déclic
pour fixer les roulettes.
Positionner l'essieu (A13) dans la position correcte en le faisant
tourner de telle sorte que les trous de centrage s'accouplent avec
les centrages. Positionner correctement les clips contenus dans
le sac (B17) et les fixer avec les vis appropriées. Insérer la roue
(A8b), la rondelle, et fixer le tout avec la goupille en veillant à l'enfiler
profondément et l'ouvrir afin qu'elle adhère parfaitement à la section
de l'essieu. Placer le couvercle de roue, puis répéter l'opération pour
l'autre roue (A8b).
Monter la poignée en métal (A4b) comme indiqué sur la figure.
Voir fig. 3
6.3 Montage des accessoires
Emmancher le flexible (B3) dans le raccord d'aspiration (A2) ou de
soufflage (A3) selon le travail à effectuer.
Voir fig. 4
Monter ensuite les accessoires nécessaires à l'opération de nettoyage.
Utiliser les tubes rigides (B5) et les brosses (B6-B7-B8-B9) selon
l'opération de nettoyage et la surface à nettoyer. Les brosses (B6-B7B8-B9-B13) peuvent être montées directement sur le flexible (B3).
Voir fig. 5
Page 63

63
(Traduction des instructions originales)
FR © 2016 Français
6.4 Branchement électrique
Attention - danger !
Vérifier que la tension et la fréquence (V-Hz) du secteur correspondent
à la tension et à la fréquence de la plaque signalétique. Voir fig.6
6.4.1 Utilisation des câbles de rallonge
Les câbles et les prises mâles doivent avoir un indice de
protection « IPX4 ».
La section d'une rallonge doit être proportionnée à sa
longueur. Plus elle est longue, plus la section doit être grande.
6.5
Prise de courant supplémentaire pour accessoire électrique (si prévu)
Emmancher le flexible (B3) dans le raccord d'aspiration de l'accessoire
électrique. Dans le cas où ceux-ci ne sont pas compatibles utiliser
l'adaptateur de l'accessoire électrique (B4) (le cas échéant), en
coupant l'excédent.
Utiliser la prise de courant supplémentaire (C1) pour l'accessoire
électrique (pour les modèles qui en sont équipés).
Voir fig. 7
7 UTILISATION (PAGE 6)
7.1 Commandes
- Dispositif de mise en marche (A1).
Voir fig. 8
Mettre le dispositif de mise en marche en pos. (ON/I).
Si le dispositif de mise en marche comporte un voyant, celui-ci doit s'allumer.
Mettre le dispositif de mise en marche en pos. (OFF/0) pour arrêter le
fonctionnement de l'appareil.
Si le dispositif de mise en marche comporte un voyant, celui-ci doit s'éteindre.
Attention - danger !
L'appareil doit fonctionner sur une surface plane et stable, dans la
position indiquée. Voir fig. 8
7.2 Mise en marche
7.2.1 Aspiration à sec.
Voir fig. 9
Utiliser l'appareil avec des ltres (B2 - B11) secs
uniquement ! Avant d'utiliser les ltres, s'assurer qu'ils ne
sont pas abîmés. Le cas échéant, les remplacer. Pour
aspirer la saleté sèche, bien régler le suceur sol, puis
emmancher les accessoires correspondants (utiliser la
brosse B13).
Pour aspirer la saleté sèche, le cas échéant, utiliser un sac
ltrant en papier (B11) ou en tissu (B10) (option).
Instructions sur le sac ltrant :
– Le niveau de remplissage du sac ltrant dépend de la
saleté aspirée.
– En cas de poussières nes, sable, etc., remplacer
souvent le sac ltrant.
- Un sac ltrant trop usé peut éclater. Par conséquent, le
remplacer à temps !
Attention - Danger !
Aspirer les cendres froides.
7.2.2 Aspiration des liquides
Voir fig. 10
Attention - Danger !
Si l'appareil produit de la mousse ou a une fuite de liquide,
l'éteindre immédiatement et le débrancher du secteur ! Ne
pas utiliser le sac ltrant (ni en papier ni en tissu) !
Attention
Si la cuve est pleine, un otteur ferme l'orice d'aspiration
et le régime de l'appareil augmente. Éteindre l'appareil
immédiatement et vider la cuve.
Pour aspirer un sol humide ou mouillé, bien régler le suceur
sol, puis emmancher les accessoires correspondants
(utiliser la brosse B6).
7.2.3 Fonctionnement avec accessoires électriques.
Voir fig. 11.
Pour la séquence de montage, voir fig.11.
Allumer l'appareil (interrupteur rotatif à GAUCHE sur la
position
ou interrupteur à 2 boutons sur la position II)
et procéder à son utilisation.
Avertissement : dès que l'accessoire électrique s'allume, la
turbine d'aspiration démarre après 0,5 seconde.
Quand l'accessoire électrique est éteint, la turbine
d'aspiration continue à fonctionner pendant 6 secondes
environ pour aspirer la saleté résiduelle dans le tuyau
d'aspiration.
7.2.4 Fonction soufeur.
Voir fig. 12.
Nettoyage des endroits difcilement accessibles ou
impossibles à aspirer, par ex. des feuilles sur graviers.
Emmancher le exible d'aspiration dans son raccord. La
fonction soufeur est ainsi activée.
Pour optimiser l'efcacité de la fonction soufeur, utiliser le
suceur pour fentes B8.
7.3 Interruption de fonctionnement (pause)
Éteindre l'appareil. Voir fig. 8
Accrocher le suceur sol en position parking.
7.4 Fin de l'utilisation
Éteindre l'appareil. Voir fig. 8
Débrancher l'appareil du secteur.
7.5 Vidage de la cuve
Pour la saleté sèche et les poussières : démonter l'embout de
l'appareil, puis vider la cuve. Voir fig. 13
Pour les liquides : utiliser le bouchon de vidange là où il est prévu
(voir fig.14.), ou procéder comme indiqué ci-dessus.
8 MAINTENANCE (PAGE 135)
Attention - danger !
Éteindre et débrancher l'appareil avant toute opération d'installation et de
montage.
Pour la séquence de montage, voir page 135.
Avant chaque opération d'entretien et de maintenance, éteindre l'appareil et
le débrancher du secteur. Seul le service client agréé est autorisé à faire des
réparations et des interventions sur les circuits électriques.
Attention - danger !
Ne pas utiliser des détergents abrasifs, des nettoyants pour vitres ou des
détergents universels ! Ne jamais plonger le couvercle
avec moteur (A10)
dans l'eau. Nettoyer l'appareil et les accessoires en plastique avec un
détergent ordinaire pour matières synthétiques. Le cas échéant, rincer à l'eau
la cuve et les accessoires, puis les essuyer avant utilisation.
8.1 Nettoyage filtre cartouche (B2). Voir fig. 15
Déverrouiller les crochets pour ouvrir l'aspirateur (A6).
Retourner le couvercle avec moteur (A10) et démonter le ltre
cartouche (B2).
Rincer avec soin sous l'eau courante, puis laisser sécher.
Remonter une fois sec.
Page 64

64
(Traduction des instructions originales)
FR © 2016 Français
FR © 2016 Français
8.2 Remplacement sac filtrant en papier (B11). Voir fig. 17
Déverrouiller les crochets pour ouvrir l'aspirateur (A6).
Démonter le sac ltrant (B11) saturé, le jeter et en monter un
neuf.
8.3 Nettoyage sac filtrant en tissu (option) Voir fig. 16
Déverrouiller les crochets pour ouvrir l'aspirateur (A6).
Démonter le sac ltrant (B10). Vider le sac ltrant, rincer avec
soin sous l'eau courante, puis laisser sécher. Remonter une
fois sec.
9 REMISAGE (PAGE 135)
Attention - danger !
Éteindre et débrancher l'appareil avant toute opération d'installation et de
montage.
Après utilisation et nettoyage de l'appareil, ranger l'appareil et ses accessoires
comme indiqué sur la
fig.18.
Conserver l'appareil dans un endroit sec.
Déclaration de conformité CE
Nous, Annovi Reverberi S.p.A., Bomporto (Modène), Italie, déclarons que l'/les appareil/s Stanley désigné/s ci-dessous :
Nom de l'appareil : Aspirateur eau et poussières
N° modèle : SXVC20PE SXVC20PTE SXVC20XTE SXVC30XTDE SXVC35PTDE SXVC50XTDE
Puissance absorbée : 1,2 kW 1,2 kW 1,4 kW 1,6 kW 1,6 kW 1,6 kW
est/sont conforme(s) aux directives européennes suivantes :
2006/95/EC - Directive remplacée par la 2014/35/UE à partir du 20 avril 2016,
2004/108/CE - Directive remplacée par la 2014/30/UE à partir du 20 avril 2016, 2011/65/EU, 2005/32/CE, 2012/19/EU.
et est/sont produit(s) dans le respect des normes ou des référentiels ci-après :
EN 60335-1; EN 60335-2-2; EN 55014-1; EN 55014-2; EN 61000-3-2; EN 61000-3-3; EN 62233; EN 50581; Reg.1275/2008.
Nom et adresse de la personne chargée de constituer le dossier technique : Stefano Reverberi / AR Managing Director
Via ML King, 3 - 41122 Modène, Italie
Date : 10.02.2016
MODÈNE (I)
Stefano Reverberi Managing Director
10
DÉPANNAGE
Problèmes Causes possibles Solutions
L'appareil ne s'allume pas
Manque de tension
Vérifier la présence de tension dans le réseau et contrôler que la
prise mâle est bien introduite dans la prise (*)
Problèmes sur le circuit électrique-électronique S'adresser au Centre d'assistance
L'appareil n'aspire pas ou aspire peu
Accessoires bouchés Contrôler et nettoyer les suceurs, rallonges ou tubes
Filtres sales Nettoyer les filtres
Sacs pleins Vider / Remplacer les sacs
Cuve pleine Vider la cuve
L'accessoire électrique ne démarre pas
(lorsque la prise accessoire électrique
est prévue)
Insertion incorrecte de la fiche de l'accessoire électrique à la
prise de l'aspirateur
Insérer correctement la fiche
L'interrupteur est éteint ou en position I Placer l'interrupteur en position accessoire électrique/II
Sortie de poussière
Le filtre n'est pas monté Monter le filtre
Le filtre est endommagé Remplacer l'ancien filtre par un nouveau
Le tuyau ou ses raccords sont endommagés Remplacer les pièces endommagées
Pendant le fonctionnement, l'appareil
émet une mauvaise odeur
Filtres/sacs sales Remplacer les filtres/sacs
(*) Si le moteur s'arrête soudainement pendant le fonctionnement et ne repart pas, contacter le Centre d'assistance.
Page 65

65
(Traduction des instructions originales)
FR © 2016 Français
GARANTIE
La validité de la garantie est régie par la législation en vigueur dans le pays dans lequel le produit est commercialisé (sauf indication contraire du fabricant).
Si le produit est défectueux par suite d'un défaut de matériel, d'un vice de construction ou pour non-conformité pendant la période de validité de la garantie,
le fabricant assure le remplacement des pièces reconnues défectueuses, ainsi que la réparation des produits s'ils sont raisonnablement usés ou leur
remplacement.
La garantie ne couvre pas les pièces d'usure (ltres, sacs, accessoires tels que des tuyaux rigides ou exibles, brosses, roues, etc.) ;
La garantie ne couvre pas les défauts causés par :
- utilisation anormale, utilisation non admise ou négligence ;
- location ou utilisation professionnelle si le nettoyeur est à usage domestique ;
- inobservation des normes de maintenance prévues dans le manuel ;
- réparations effectuées par un personnel ou par des centres de réparation non agréés ;
- utilisation de pièces de rechange ou d'accessoires qui ne sont pas d'origine ;
- dommages causés par le transport, par des objets ou substances étrangères, par un accident ;
- problèmes d'emmagasinage ou de stockage.
La preuve d'achat est nécessaire pour activer la garantie.
Données techniques Unité
SXVC20PE SXVC20PTE SXVC20XTE SXVC30XTDE SXVC35PTDE SXVC50XTDE
Tension
V/Hz
220-240 V ~ 5
0/60 Hz
220-240 V ~ 5
0/60 Hz
220-240 V ~ 5
0/60 Hz
220-240 V ~ 5
0/60 Hz
220-240 V ~ 5
0/60 Hz
220-240 V ~ 5
0/60 Hz
Puissance
kW
1,2 1,2 1,4 1,6 1,6 1,6
Contenance cuve
l
20 20 20 30 35 50
Pression aspiration maximale
kPa
17 17 18 19 19 19
Dépression maximale
mbar 170 170 180 190 190 190
Débit d’air maximum
l/s
28 28 33 37 39 41
Nbre moteurs
-
1 1 1
1 1
1
Ø accessoires
mm
35 35 35 35 35 40
Câble
m
5 5 5 5 5 5
Classe de protection
-
Classe d'isolation du moteur
Classe F F F F F F
Indice de protection du moteur
-
IPX4 IPX4 IPX4 IPX4 IPX4 IPX4
Poids net
kg
7,9 8,4 9,2 9,6 11,5 14,9
Poids total
kg
9,4 9,9 11,4 12,5 14,3 18,75
Sous réserve de modications techniques !
Page 66

66
(Prijevod izvornih uputa)
HR © 2016. Hrvatski
HR © 2016. Hrvatski
Cijenjeni klijente,
Pročitajte ove izvorne upute prije prve
uporabe uređaja. Radite u skladu s
navedenim informacijama i čuvajte ove
upute na sigurnom mjestu za buduću
uporabu i da biste ih mogli predati
sljedećem vlasniku.
1. SIGURNOSNE UPUTE
1.1 Uređaj koji ste kupili tehnički je
napredan proizvod koji je konstruirao
jedan od vodećih europskih
proizvođača. Ovaj uređaj namijenjen
je za uporabu kao višenamjenski
usisivač, u skladu s opisima i
sigurnosnim mjerama opreza iz
ovih uputa. Navedene informacije
omogućuju vam da najbolje iskoristite
prednosti svojeg uređaja; pažljivo
ih pročitajte i poštujte preporuke.
Tijekom povezivanja, uporabe i
servisiranja uređaja poduzmite
sve moguće mjere opreza kako
biste zajamčili osobnu sigurnost i
sigurnost drugih ljudi u neposrednoj
blizini. Pažljivo pročitajte sigurnosne
odredbe i pridržavajte se ih u svim
prilikama; nepoštivanje tih odredbi
može dovesti u opasnost vaše
zdravlje i sigurnost ili prouzročiti
znatnu materijalnu štetu.
2. SIGURNOSNI ZNAKOVI
2.1
Radite u skladu s uputama
navedenima na sigurnosnim
znakovima pričvršćenima na uređaj i
onima navedenima u ovom priručniku.
Uređaj i priručnik sadrže samo one
simbole koji se odnose na kupljeni
model. Vodite računa da simboli
i znakovi na uređaju uvijek budu
pričvršćeni na uređaj i da su čitljivi
i ako se odvoje od uređaja stavite
zamjenske natpise na izvorno mjesto.
(Kontaktirajte servisni centar).
Upozorenje - opasnost!
Prije uporabe pažljivo
pročitajte ove upute.
Simbol E3 (ako simbol izgleda
kao na slici 1.)
- označava da je
ovaj uređaj namijenjen samo za
kućanstvo i da se ne smije rabiti u
industrijske ili komercijalne svrhe.
0
Položaj „OFF“ (Isključen)
I Položaj „ON“ (Uključen)
Automatska postavka usisavanja
II
Automatska postavka usisavanja
Page 67

67
(Prijevod izvornih uputa)
HR © 2016. Hrvatski
Ovaj proizvod ocijenjen je
klasom izolacije II. To znači da
ima pojačanu ili dvostruku izolaciju
(samo ako se simbol nalazi na
uređaju).
Ovaj proizvod ocijenjen je
klasom izolacije I. To znači da
je opremljen zaštitnim vodičem
spojenim s uzemljivačem (samo ako
se simbol nalazi na uređaju).
Proizvod je u skladu sa svim
primjenjivim europskim
direktivama.
Simbol E1 - recikliranje
uređaja. Odmah onesposobite stari
uređaj za daljnju uporabu.
Iskopčajte kabel uređaja.
Prerežite kabel napajanja.
Nemojte bacati električnu opremu
zajedno s komunalnim otpadom.
U skladu s odredbama Direktive
2012/19/EZ o otpadnoj električnoj
i elektroničkoj opremi, električni
dijelovi moraju se prikupiti odvojeno i
reciklirati na ekološki prihvatljiv način.
Za dodatne informacije kontaktirajte
odgovarajući odjel lokalnih tijela ili
vašeg distributera.
Nosite štitnike za uši.
Nosite zaštitnu masku.
Nosite respiratornu zaštitu.
Nosite zaštitne rukavice.
Nosite zaštitnu obuću.
Nosite zaštitnu odjeću.
Page 68

68
(Prijevod izvornih uputa)
HR © 2016. Hrvatski
HR © 2016. Hrvatski
3. SIGURNOSNA PRAVILA/PREOSTALI RIZICI
3.1 SIGURNOSNE “ZABRANE”
3.1.1
uPOzOrenje. nemOjTe
dopustiti da uređaj upotrebljavaju djeca mlađa od osam godina ili osobe
s umanjenim fizičkim, osjetilnim ili mentalnim sposobnostima, odnosno s nedostatkom potrebnog
iskustva i znanja, osim ako su pod odgovarajućim nadzorom ili su upućene u sigurnu uporabu
uređaja te razumiju pripadajuće rizike
.
3.1.2
uPOzOrenje.
Djeca NE SMIJU upotrebljavati uređaj kao igračku. Nadzirite djecu kako biste osigurali
da se to ne dogodi.
3.1.3 Čišćenje i održavanje koje provodi korisnik NE SMIJUobavljati djeca ili nekompetentne osobe, osim
ako nisu pod odgovarajućim nadzorom.
3.1.4 Foliju od pakiranja držite izvan dohvata djece. Opasnost od gušenja!
3.1.5
uPOzOrenje.
Uređajem NE SMIJU rukovati djeca ili osobe koje nisu pročitale i razumjele upute..
3.1.6
uPOzOrenje.
Uređaj nemojte NIKAD rabiti sa zapaljivim ili toksičnim tekućinama ili tekućinama
čije karakteristike nisu kompatibilne s ispravnim radom uređaja. Uporaba uređaja u potencijalno
zapaljivim ili eksplozivnim okruženjima je zabranjena.
3.1.7
uPOzOrenje.
Neke tvari usisane sa zrakom mogu stvarati eksplozivne pare ili mješavine. NIKAD ne
usisavajte sljedeće tvari:
- eksplozivne ili zapaljive plinove, tekućine ili prašinu (reaktivna prašina)
- reaktivne metale u prahu (npr. aluminij, magnezij ili cink) zajedno sa snažnim lužnatim ili kiselim
deterdžentima.
- čiste kisele ili lužnate otopine
- organske tvari (npr. benzin, razrjeđivače boje, aceton ili dizelsko gorivo)
Te tvari mogu uzrokovati koroziju materijala od kojih je uređaj izrađen.
3.1.8 Uređaj isključujte nakon svake uporabe i prije svakog čišćenja/održavanja.
3.1.9 Opasnost od požara. NIKAD ne usisavajte materijale koji gore ili su zažareni.
3.1.10
uPOzOrenje.
Uređaj NIKAD ne rabite na otvorenom tijekom kiše
3.1.11
uPOzOrenje.
NEMOJTE dodirivati utikač i/ili utičnicu vlažnim rukama.
3.1.12
uPOzOrenje.
NIKADA nemojte rabiti uređaj ako je kabel napajanja oštećen. Ako je kabel napajanja
oštećen, mora ga zamijeniti proizvođač, jedan od njegovih servisnih centara ili slično kvalificirane
osobe kako bi se izbjegla opasnost.
Page 69

69
(Prijevod izvornih uputa)
HR © 2016. Hrvatski
3.1.13
uPOzOrenje.
Provjerite nalazi li se na uređaju natpisna pločica; ako nedostaje, obratite se
prodavaču. Uređaji bez natpisne pločice NE smiju se rabiti jer ih nije moguće identificirati pa su
potencijalno opasni.
3.1.14
uPOzOrenje.
Uređaj NIKAD ne povlačite za KABEL NAPAJANJA.
3.1.15
uPOzOrenje.
Zabranjena je uporaba pribora koji nije originalan i svih ostalih dodataka koji nisu
namijenjeni posebno za uporabu s odnosnim modelom. Zabranjeno je provoditi bilo kakve
izmjene na uređaju. Svaka izmjena na uređaju čini Deklaraciju o suglasnosti ništavnom i oslobađa
proizvođača od odgovornosti i prema građanskom i prema kaznenom zakonu
3.2 SIGURNOSNI "IMPERATIVI"
3.2.1
uPOzOrenje.
Svi električni vodiči MORAJU BITI ZAŠTIĆENI od mlazova vode ili prskanja vodom.
3.2.2
uPOzOrenje.
Priključak na električno napajanje treba obaviti osposobljen električar u skladu s normom
IEC 60364-1.Mora se instalirati zaštitni strujni uređaj pri kvarovima prema zemlji ili rezidualni strujni
uređaj koji će prekinuti napajanje u slučaju da jakost struje u vodu za uzemljenje premaši 30 mA u
trajanju od 30 ms.
3.2.3
uPOzOrenje.
TIJEKOM pokretanja uređaj može uzrokovati smetnje na električnom sustavu.
3.2.4
uPOzOrenje.
Koristite samo odobrene produžne kabele odgovarajućeg promjera vodiča.
3.2.5
uPOzOrenje.
Kad ostavljate uređaj bez nadzora uvijek isključite prekidač.
3.2.6
uPOzOrenje.
Protok zraka može uzrokovati odskakivanje dijelova: kako biste osigurali zaštitu
rukovatelja on mora nositi zaštitnu odjeću i opremu za osobnu zaštitu (PPE).
3.2.7
uPOzOrenje.
Prije bilo kakvog rastavljanja, održavanja, skladištenja i transporta isključite uređaj i
odvojite ga od izvora napajanja.
3.2.8
uPOzOrenje.
Održavanje i/ili zamjenu električnih komponenti MORA provoditi kvalificirano osoblje.
3.2.9
uPOzOrenje.
Prije svake uporabe i periodički PROVJERAVAJTE jesu li vijci pritegnuti i jesu li sve
komponente uređaja u dobrom stanju; provjerite postoje li istrošeni dijelovi.
3.2.10
uPOzOrenje.
Kako biste osigurali sigurnost uređaja, koristite samo proizvođačeve originalne dijelove
ili druge dijelove koje je proizvođač odobrio.
3.2.11
uPOzOrenje.
Neodgovarajući produžni kabeli mogu biti opasni. U slučaju uporabe produžnog kabela
treba voditi računa o tomu da bude prikladan za uporabu na otvorenom, a mjesto priključenja mora
biti suho i iznad tla. Uporaba kolotura koji drži utičnicu na najmanje 60 mm iznad tla izričito se
preporučuje.
Page 70

70
(Prijevod izvornih uputa)
HR © 2016. Hrvatski
HR © 2016. Hrvatski
4. OPĆE INFORMACIJE (3. STRANICA)
4.1 Uporaba priručnika
Priručnik čini integralni dio uređaja i mora se čuvati za buduću
uporabu. Prije instalacije/uporabe uređaja pažljivo ga pročitajte. Ako se
uređaj prodaje, prodavatelj mora proslijediti priručnik novom vlasniku
zajedno s uređajem.
4.2 Isporuka
Uređaj se isporučuje djelomično sklopljen u kartonskoj kutiji.
Paket u kojem se uređaj dostavlja prikazan je na slici 1.
4.2.1 Dokumentacija koja se isporučuje s uređajem
D1 Priručnik za uporabu i održavanje
D2 Sigurnosne upute
D3 Izjava o sukladnosti
D4 Jamstvene odredbe
4.3 Odlaganje ambalaže
Materijali korišteni za pakiranje uređaja nisu štetni za okoliš ali se i
dalje moraju reciklirati ili odložiti u skladu s relevantnim propisima u
zemlji u kojoj se uređaj koristi.
5. TEHNIČKI PODACI (3. STRANICA)
5.1 Namjena
Uređaj je namijenjen za uporabu kao višenamjenski usisivač, u
skladu s opisima i sigurnosnim mjerama opreza iz ovih uputa.
Uređaj je namijenjen samo za uporabu u kućanstvu i ne smije
se rabiti u industrijske ili komercijalne svrhe.
Uređaj je u skladu s normama IEC 60335-1 i IEC 60335-2-2.
5.2 Rukovatelj
Simbol prikazan na sl. 1 označava rukovatelja kojem je stroj namijenjen
(profesionalca ili neprofesionalca)
5.3 Glavne komponente:
A1 Pokretač
A2 Priključak usisa
A3 Priključak puhala
A4a Ručka
A4b Metalna ručka (ako postoji)
A5 Kuka za spremanje kabela napajanja (ako postoji)
A6 Zasuni
A7 Kabel napajanja s utikačem
A8a Prednji kotačići
A8b Stražnji kotači
A9 Spremnik usisivača
A10 Poklopac s motorom
A11 Držač dodataka (ako postoji)
A12 Čep otvora za pražnjenje tekućina (ako postoji)
A13 Osovina stražnjeg kotača (ako postoji)
C1 Utičnica alata na električni pogon (ako postoji)
5.3.1 Dodatna oprema (pogledajte sliku 1. za pojedinosti
o modelima – paket u kojem se uređaj dostavlja odgovara
prikazanom na kartonskoj kutiji)
B1
Držač filtra
B2
Filtar uloška
B3
Crijevo
B4
Adapter za alate na
električni pogon
B5
Cijev
B6
Četka za podove
B7
Četka za sagove i
tapecirani namještaj
B8
Uska mlaznica
B9
Okrugla četka
B10
Filtarska vrećica od
tkanine (opcijska)
B11
Papirnata filtarska vrećica
B12
Kuka cijevi
B13
Kombinirana četka za
podove
5.4 Sigurnosni uređaji
- Pokretač (A1)
Pokretač je uređaj koji sprječava nehotičnu uporabu uređaja.
6. INSTALACIJA (4.-5. STRANICA)
Upozorenje - opasnost!
Svi postupci instalacije i sastavljanja moraju se provoditi s uređajem koji je
odvojen od elektroenergetskog izvora napajanja.
Redoslijed sastavljanja prikazan je na 4. stranici.
6.1 Sastavljanje
Prilikom raspakiravanja provjerite nedostaje li kakav pribor i postoje li
oštećeni dijelovi sadržaja. Ako je šteta nastala tijekom prijevoza, odmah
o tome obavijestite prodavača.
Skinite poklopac motora (A10) s uređaja otpuštajući zasune (A6)
i izvadite isporučene dodatke. Provjerite je li ltar (B2) ispravno
postavljen.
Pogledajte sliku 2.
Redoslijed sastavljanja prikazan je na 4.-5. stranici.
6.2
Postavljanje stražnjih kotača i prednjih kotačića
Naglavce okrenite spremnik usisivača (A9) bez poklopca na
tvrdoj horizontalnoj površini. Glavčine kotačića (A8a) postavite u
odgovarajuće otvore i u potpunosti pritisnite prema dolje kako biste
kotačiće pričvrstili u ispravnom položaju.
Ispravno postavite osovinu (A13), i okrećite je dok se otvori
poravnjivača ne upare sa zaticima za učvršćivanje. Postavite držače
isporučene u vrećici (B17) i pričvrstite ih isporučenim vijcima. Postavite
kotač (A8b) i podlošku te pričvrstite rascjepkom. Pritom pripazite
kako biste je umetnuli cijelu i otvorili da bi bila postavljena u ravnini s
promjerom osovine. Zatim postavite zaštitu kotača i ponovite postupak
za drugi kotač (A8b).
Postavite metalnu ručku (A4b) kako je prikazano na slici.
Pogledajte sliku 3.
6.3 Postavljanje pribora
Spojite crijevo (B3) na usis (A2) ili na priključak puhala (A3) ovisno o
željenoj vrsti rada.
Pogledajte sliku 4.
Zatim završite postupak postavljanja pribora potrebnog za vrstu
čišćenja koju planirate obaviti. Upotrijebite cijevi (B5) i četke
(B6-B7-B8-B9) ovisno o vrsti čišćenja i površini koju ćete čistiti.
Četke (B6-B7-B8-B9-B13) možete postaviti izravno na crijevo (B3).
Pogledajte sliku 5.
6.4 Električni priključci
Upozorenje - opasnost!
Provjerite odgovaraju li napon i frekvencija (V/Hz) električnog
napajanja vrijednostima koje su navedene na natpisnoj pločici
Pogledajte sliku 6.
6.4.1 Uporaba produžnih kabela
Upotrijebite samo one produžne kabele s razinom zaštite
„IPX4”.
Promjer produžnog kable treba biti razmjeran njegovoj
duljini, što je kabel dulji promjer treba biti veći.
6.5
Utičnica alata na električni pogon (ako postoji)
Crijevo (B3) spojite na priključak za usis alata na električni pogon.
Ako dva priključka nisu kompatibilna, koristite adapter za alate na
električni pogon (B4) (ako postoje) i isključite suvišni priključak.
Alatom na električni pogon radite pomoću dodatne utičnice (C1)
(za modele s tom značajkom)
Pogledajte sliku 7.
Page 71

71
(Prijevod izvornih uputa)
HR © 2016. Hrvatski
7. PODACI O UPORABI UREĐAJA (6. STRANICA)
7.1 Kontrole
- Pokretač (A1).
Pogledajte sliku 8.
Postavite prekidač pokretača na (ON/I).
Ako postoji glavno svjetlo na uređaju pokretača, trebalo bi se uključiti.
Postavite uređaj prekidača na (OFF/0) kako biste zaustavili uređaj.
Ako postoji glavno svjetlo na uređaju pokretača, trebalo bi se isključiti.
Upozorenje - opasnost!
Tijekom rada uređaj mora biti postavljen na tvrdoj, ravnoj površini.
Pogledajte sliku 8.
7.2 Pokretanje
7.2.1 Suho usisavanje.
Pogledajte sliku 9.
Radite samo sa suhim ltrima (B2 – B11)! Prije nego što
ih upotrijebite, provjerite jesu li ltri oštećeni i po potrebi ih
zamijenite. Za usisavanje suhe prljavštine na odgovarajući
način prilagodite četku za podove i postavite prikladan
pribor (upotrijebite četku B13).
Ako je potrebno, prilikom usisavanja suhe prljavštine
upotrijebite dodatnu ltarsku vrećicu koja može biti od
papira (B11) ili tkanine (B10) (opcijski).
Smjernice za ltarsku vrećicu:
- Razina do koje se ltarska vrećica puni ovisi o vrsti
usisane prljavštine.
- Za nu prašinu, pijesak itd. često mijenjajte ltarsku
vrećicu.
- Istrošena ltarska vrećica može puknuti pa je stoga
morate na vrijeme zamijeniti!
Upozorenje - opasnost!
Usisavajte samo hladni pepeo.
7.2.2 Usisavanje tekućina
Pogledajte sliku 10.
Upozorenje - opasnost!
Ako se stvara pjena ili se tekućina počinje prelijevati,
odmah isključite uređaj ili utikač iz napajanja! Ne rabite
ltarsku vrećicu (papirnatu ili od tkanine)!
Upozorenje
Kada se spremnik napuni, plutajući prekidač isključuje ulaz
usisa, a motor počinje brzo raditi. Odmah isključite uređaj i
ispraznite spremnik.
Za usisavanje vlažne ili suhe prljavštine na odgovarajući
način prilagodite četku za podove i postavite prikladan pribor
(upotrijebite četku B6).
7.2.3.
Rad s alatima na električni pogon. Pogledajte sliku 11.
Slijed sklapanja prikazan je na slici 11.
Uključite uređaj (prekidač za automatsko usisavanje
postavljen je ulijevo na
ili je tipka prekidača 2 na
položaju II) i počnite raditi.
Upozorenje: od trenutka uključivanja alata na električni
pogon ventilator usisa pokreće se s odgodom od 0,5 s.
Kad se alat na električni pogon isključi, ventilator usisa
nastavlja s radom još približno 6 sekundi kako bi usisao
prljavštinu preostalu u usisnom crijevu.
7.2.4 Funkcija puhala.
Pogledajte sliku 12.
Za čišćenje nedostupnih mjesta ili mjesta na kojima
usisavanje nije moguće poput uklanjanja lišća iz šljunka.
Na isporučeni priključak postavite usisno crijevo.
Funkcija puhala sada je aktivna.
Za učinkovitije puhanje preporučuje se uporaba uske
mlaznice B8.
7.3 Zaustavljanje rada (pauziranje)
Isključite uređaj. Pogledajte sliku 8.
Mlaznicu za pod priključite u položenom položaju.
7.4 Završavanje rada
Isključite uređaj. Pogledajte sliku 8.
Isključite utikač.
7.5 Ispraznite spremnik
Za suhu prljavštinu i prašinu: uklonite mlaznicu s uređaja i ispraznite
spremnik. Pogledajte sliku 13.
Za tekućine: upotrijebite vijak odvoda, ako postoji (pogledajte sliku 14.),
ili postupite kako je gore opisano.
8 ODRŽAVANJE (135. STRANICA)
Upozorenje - opasnost!
Svi postupci instalacije i sastavljanja moraju se provoditi s uređajem koji je
odvojen od elektroenergetskog izvora napajanja.
Redoslijed sastavljanja prikazan je na 135. stranici.
Prije provođenja bilo kakvog posla servisiranja ili održavanja uvijek isključite
uređaj i izvadite utikač iz utičnice. Popravke i rad na električnim sustavima
smije provoditi samo ovlašteni servisni centar.
Upozorenje - opasnost!
Nikad ne koristite abrazivne deterdžente, deterdžente za staklo ili univerzalne
deterdžente. Poklopac
motora (A10)
nikad ne uranjajte u vodu. Uređaj i
plastični pribor čistite standardnim deterdžentom za sintetičke materijale.
Spremnik i pribor po potrebi isperite vodom pa ih prije uporabe osušite.
8.1 Čišćenje filtra uloška (B2). Pogledajte sliku 15.
Otpuštanjem zasuna (A6) otvorite usisivač. Poklopac motora (A10)
okrenite naglavce i uklonite ltar uloška (B2).
Pažljivo ih isperite tekućom vodom i pustite da se osuše.
Ne vraćajte ih dok se ne osuše.
8.2
Zamjena papirnate filtarske vrećice (B11). Pogledajte sliku 17.
O
tpuštanjem zasuna (A6) otvorite usisivač. Uklonite napunjenu
ltarsku vrećicu (B11) i bacite je, a zatim postavite novu.
8.3
Čišćenje filtarske vrećice od tkanine (B10) (opcijski).
Pogledajte sliku 16.
Otpuštanjem zasuna (A6) otvorite usisivač. Uklonite ltarsku vrećicu
(B10). Ispraznite ltarsku vrećicu, pažljivo je isperite tekućom
vodom i pustite da se osuši. Ne vraćajte ih dok se ne osuše.
9. SKLADIŠTENJE NA KRAJU SEZONE (135. STRANICA)
Upozorenje - opasnost!
Svi postupci instalacije i sastavljanja moraju se provoditi s uređajem koji je
odvojen od elektroenergetskog izvora napajanja.
Nakon završetka rada uređaj očistite, a zatim ga prema prikazu na
slici 18
s priborom odložite.
Uređaj pohranite na suhom mjestu.
Page 72

72
(Prijevod izvornih uputa)
HR © 2016. Hrvatski
HR © 2016. Hrvatski
10.
RJEŠAVANJE PROBLEMA
Problemi Vjerojatni uzroci Rješenja
Uređaj se ne uključuje
Nema električne energije
Provjerite da je utikač čvrsto utaknut u utičnicu i da je utičnica pod
naponom (*)
Problemi s električno-elektroničkim krugom Kontaktirajte servisni centar
Uređaj ne usisava materijal, ili je
usisavanje slabo
Pribor je zaprljan Provjerite i očistite mlaznice, produžetke ili crijeva
Filtri su prljavi Očistite filtre
Vrećice su pune Ispraznite / zamijenite vrećice
Spremnik je pun Ispraznite spremnik
Alat na električni pogon se ne pokreće
(ako postoji utičnica alata na električni
pogon)
Utikač alata na električni pogon nije ispravno postavljen u
utičnicu usisivača
Ispravno postavite utikač
Isključite ga ili okrenite na položaj I Okrenite prekidač na položaj alata na električni pogon/položaj II
Iz uređaja izlazi prašina
Filtar nije postavljen Postavite filtar
Filtar je oštećen Zamijenite istrošeni filtar novim
Oštećeno crijevo ili priključci Zamijenite oštećene dijelove
Iz uređaja se širi neugodan miris
tijekom rada
Filtri/vrećice su prljavi Zamijenite filtre
(*) Ako se motor zaustavlja i ponovno ne pokreće tijekom rada, obratite se ovlaštenom servisnom centru.
Izjava o sukladnosti s EC standardima
Tvrtka Annovi Reverberi S.p.A, iz Bomportoa (Modena), Italija, izjavljuje da su sljedeći Stanley uređaji:
Namjena uređaja: Usisivač za suho i mokro usisavanje
Model br.: SXVC20PE SXVC20PTE SXVC20XTE SXVC30XTDE SXVC35PTDE SXVC50XTDE
Nazivna snaga: 1,2 kW 1,2 kW 1,4 kW 1,6 kW 1,6 kW 1,6 kW
u skladu sa sljedećim europskim direktivama:
2006/95/EZ - zamijenit će se Direktivom 2014/35/EU od 20. travnja 2016,
2004/108/EZ - zamijenit će se Direktivom 2014/30/EU od 20. travnja 2016, 2011/65/EU i 2005/32/EZ, 2012/19/EU.
i da su proizvedeni u skladu sa sljedećim normama ili standardiziranim dokumentima:
EN 60335-1; EN 60335-2-2; EN 55014-1; EN 55014-2; EN 61000-3-2; EN 61000-3-3; EN 62233; EN 50581; Reg.1275/2008.
Ime i adresa osobe odgovorne za izdavanje tehničke datoteke: Stefano Reverberi / AR Glavni direktor
Via ML King, 3 - 41122 Modena, Italija
Datum: 10.02.2016.
MODENA (I)
Stefano Reverberi Glavni direktor
Page 73
73
(Prijevod izvornih uputa)
HR © 2016. Hrvatski
JAMSTVO
Valjanost jamstva u skladu je s odgovarajućim zakonodavstvom u zemlji u kojoj se proizvod prodaje (osim ako proizvođač ne navede drukčije).
Jamstvo se odnosi na materijale, izradu i kvarove povezane s usklađenošću tijekom jamstvenog razdoblja, u kojem će proizvođač zamijeniti pokvarene dijelove
i popraviti proizvod ako nije pretjerano istrošen, odnosno zamijeniti uređaj.
Jamstvo se ne odnosi na dijelove podložne uobičajenom trošenju i habanju (ltre, vrećice ili pomoćni pribor kao što su crijevo, četkice, kotači, itd.);
Jamstvo se ne odnosi na kvarove prouzročene ili nastale uslijed:
- neispravna uporaba, zlouporaba, nemar,
- profesionalna uporaba ili najam, ako je proizvod prodan za uporabu u kućanstvu,
- nepridržavanja uputa o održavanju navedenih u ovom priručniku,
- servisiranja u neovlaštenim centrima ili od neovlaštenih osoba,
- uporabe neoriginalnih dijelova ili pribora,
- štete prouzročene prijevozom, prljavštinom ili stranim objektima, nezgodama
- poteškoća pri pohrani i skladištenju.
Da biste aktivirali jamstvo morate predočiti potvrdu o kupnji.
Tehnički podaci Jedinica
SXVC20PE SXVC20PTE SXVC20XTE SXVC30XTDE SXVC35PTDE SXVC50XTDE
Napon
V/Hz
220-240 V ~ 5
0/60 Hz
220-240 V ~ 5
0/60 Hz
220-240 V ~ 5
0/60 Hz
220-240 V ~ 5
0/60 Hz
220-240 V ~ 5
0/60 Hz
220-240 V ~ 5
0/60 Hz
Snaga
kW
1,2 1,2 1,4 1,6 1,6 1,6
Kapacitet spremnika
l
20 20 20 30 35 50
Maksimalni tlak usisa
kPa
17 17 18 19 19 19
Maksimalni usis
mbar 170 170 180 190 190 190
Maksimalni protok zraka
l/s
28 28 33 37 39 41
Br. motora
-
1 1 1
1 1
1
Ø pribora
mm
35 35 35 35 35 40
Kabel napajanja
m
5 5 5 5 5 5
Klasa zaštite
-
Izolacija motora
Klasa F F F F F F
Zaštita motora
-
IPX4 IPX4 IPX4 IPX4 IPX4 IPX4
Neto težina
kg
7,9 8,4 9,2 9,6 11,5 14,9
Bruto težina
kg
9,4 9,9 11,4 12,5 14,3 18,75
Podložno tehničkim izmjenama!
Page 74

74
(Az eredeti használati útmutató fordítása)
HU © 2016 Magyar
HU © 2016 Magyar
Kedves vásárlónk!
Kérjük, hogy a készülék első használatát
megelőzően olvassa el ezt az eredeti
használati útmutatót, kövesse az
abban található utasításokat, és őrizze
meg azt biztos helyen, hogy később
is használhassa, vagy továbbadhassa
a készülék esetleges következő
tulajdonosának.
1. BIZTONSÁGI UTASÍTÁSOK
1.1 Az Ön által vásárolt készülék
Európa egyik vezető gyártója által
tervezett, fejlett technológiájú
termék. A készüléket multifunkciós
porszívóként, a jelen útmutatóban
található előírásoknak és biztonsági
óvintézkedéseknek megfelelően
történő használatra szolgál.A
lehető legjobb teljesítmény elérése
érdekében gondosan olvassa el ezt a
füzetet, és a használat során kövesse
a benne szereplő utasításokat. A
készülék csatlakoztatása, használata
és szervizelése során a saját és
a közvetlen közelében tartózkodók
biztonsága érdekében tegyen meg
minden lehetséges óvintézkedést.
Gondosan olvassa el és mindig tartsa
be a biztonsági előírásokat; ennek
elmulasztása személyi sérülést vagy
komoly anyagi kárt okozhat.
2. BIZTONSÁGI JELÖLÉSEK
2.1
Tartsa be a készüléken feltüntetett
biztonsági jelölésekben és jelen
útmutatóban található utasításokat.
A készülék és a kézikönyv csak a
megvásárolt típusra vonatkozó
szimbólumokkal van ellátva.
Ellenőrizze, hogy a készüléken
elhelyezett szimbólumok és jelek
megvannak-e és jól láthatóak-e;
hiányuk esetén eredeti helyükön
pótolja azokat. (Forduljon a
márkaszervizhez).
Figyelem – veszély!
Használat előtt figyelmesen
olvassa el ezt az útmutatót.
E3 szimbólum (ha a szimbólum
látható az 1. ábrán)
Azt jelzi,
hogy a készülék kizárólag háztartási
használatra készült, ipari vagy
kereskedelmi célokra nem
alkalmazható.
0 Kapcsoló „KI” állása
I Kapcsoló „BE” állása
Automatikus porszívózási beállítások
II Automatikus porszívózási beállítások
Page 75

75
(Az eredeti használati útmutató fordítása)
HU © 2016 Magyar
A termék a II. érintésvédelmi
osztályba tartozik. Ez azt
jelenti, hogy megerősített vagy kettős
szigeteléssel rendelkezik (csak ha ez
a szimbólum szerepel a készüléken).
A termék az I. érintésvédelmi
osztályba tartozik. Ez azt
jelenti, hogy földelő védővezetékkel
rendelkezik (csak ha ez a szimbólum
szerepel a készüléken).
A termék megfelel a vonatkozó
európai irányelveknek.
E1 szimbólum – A készülék
újrahasznosítása. Tegye azonnal
használhatatlanná az elavult
készüléket.
Húzza ki a készülék hálózati
csatlakozóját.
Vágja el a hálózati kábelt.
Ne ártalmatlanítsa az elektromos
berendezést a háztartási hulladékkal
együtt. Az elektromos és elektronikus
berendezések hulladékairól
szóló 2012/19/EK irányelv
rendelkezéseinek megfelelően az
elektromos alkatrészeket külön kell
gyűjteni és környezetbarát módon
kell újrahasznosítani.
Ezzel kapcsolatos további
tájékoztatásért forduljon a helyi
hatóság illetékes osztályához vagy
kereskedőjéhez.
Viseljen hallásvédő eszközt.
Viseljen védőmaszkot.
Viseljen légzésvédő eszközt.
Viseljen védőkesztyűt.
Viseljen biztonsági lábbelit.
Viseljen biztonsági ruházatot.
Page 76

76
(Az eredeti használati útmutató fordítása)
HU © 2016 Magyar
HU © 2016 Magyar
3. BIZTONSÁGI ELŐÍRÁSOK / JÁRULÉKOS KOCKÁZATOK
3.1 BIZTONSÁGI TILTÁSOK
3.1.1
FigyeLmezTeTés. ne hagyja,
hogy a készüléket 8 évnél fiatalabb gyermekek, továbbá csökkent
fizikai, érzékszervi vagy szellemi képességű, illetve kellő tapasztalattal és ismerettel nem rendelkező
személyek használják, kivéve ha ezek a személyek megfelelő felügyelet alatt vannak és megismerték a
készülék biztonságos használatát, illetve a használattal járó kockázatokat.
.
3.1.2
FigyeLmezTeTés.
Gyermekeknek TILOS a készülékkel játszani. Felügyelje őket annak érdekében, hogy
ez ne történhessen meg.
3.1.3
A tisztítást és a felhasználói karbantartást NEM végezhetik gyermekek vagy hozzá nem értő személyek,
kivéve megfelelő felügyelet mellett.
3.1.4
A csomagolófóliát ne hagyja gyermekek számára elérhető helyen. Fulladásveszély!
3.1.5
FigyeLmezTeTés.
A készüléket NEM használhatják gyermekek, illetve olyan személyek, akik nem
olvasták el és nem értették meg a jelen útmutatót.
3.1.6
FigyeLmezTeTés.
SOHA NE használja a készüléket gyúlékony vagy mérgező folyadékhoz, illetve
bármilyen olyan folyadékhoz, amelynek egyes tulajdonságai nem teszik lehetővé a berendezés helyes
használatát. A készüléket tilos gyúlékony vagy robbanásveszélyes környezetben használni.
3.1.7
FigyeLmezTeTés.
Egyes anyagok a beszívott levegővel keveredve robbanásveszélyes gőzöket vagy
elegyeket hozhatnak létre. SOHA NE szívja fel a következő anyagokat:
– robbanékony vagy éghető gázok, folyadékok vagy por (reaktív por),
– reaktív fémpor (pl. alumínium, magnézium vagy cink) erősen lúgos vagy savas tisztítószerekkel együtt,
– hígítatlan savas vagy lúgos oldatok,
– szerves anyagok (pl. benzin, festékhígító, aceton vagy gázolaj).
Ezek továbbá korrodálhatják is azokat az anyagokat, amelyekből a berendezés készült.
3.1.8
Minden használat után és minden tisztítás/karbantartás előtt kapcsolja ki a készüléket.
3.1.9
Gyulladásveszély! SOHA ne használja égő vagy izzó anyagok felszívására.
3.1.10
FigyeLmezTeTés.
SOHA NE használja a készüléket a szabadban, esős időben.
3.1.11
FigyeLmezTeTés.
NE érintse meg a hálózati csatlakozódugót vagy a csatlakozóaljzatot nedves kézzel.
3.1.12
FigyeLmezTeTés.
SOHA ne használja a készüléket, ha a hálózati kábel megsérült. A biztonsági kockázatok
elkerülése érdekében a hálózati kábelt sérülés esetén a gyártónak, valamely márkaszervizének, vagy
egy szakképzett személynek kell kicserélnie.
3.1.13
FigyeLmezTeTés.
Ellenőrizze, hogy a berendezésen rögzítve van-e az adattábla. Ha nincs, vegye
fel a kapcsolatot az értékesítővel. Az adattábla nélküli berendezések használata TILOS, mivel
beazonosíthatatlanok, és használatuk veszélyes lehet.
Page 77

77
(Az eredeti használati útmutató fordítása)
HU © 2016 Magyar
3.1.14
FigyeLmezTeTés.
SOHA ne mozgassa a berendezést a HÁLÓZATI KÁBELNÉL húzva.
3.1.15
FigyeLmezTeTés.
Tilos nem eredeti tartozékokat vagy olyan tartozékokat használni, amelyek nem
kifejezetten az adott típushoz készültek. A berendezésen tilos bármilyen változtatást végezni. A
berendezés megváltoztatásával a megfelelőségi nyilatkozat érvényét veszti, és a gyártó mentesül
minden polgár- és büntetőjogi felelősség alól.
3.2 BIZTONSÁGI KÖVETELMÉNYEK
3.2.1
FigyeLmezTeTés.
Minden elektromos vezetéket VÉDENI KELL a vízsugártól és a ráfröccsenő víztől.
3.2.2
FigyeLmezTeTés.
Az elektromos tápcsatlakozást szakképzett villanyszerelőnek kell elvégeznie az
IEC 60364-1 szabványnak megfelelően. Amennyiben a földelésre jutó kapacitív áram 30 ms időtartamig
meghaladja a 30 mA értéket, a berendezést áramellátás- vagy földzárlat-megszakító áramvédő
kapcsolóval kell ellátni.
3.2.3
FigyeLmezTeTés.
Indítás KÖZBEN a berendezés zavart okozhat az elektromos hálózati rendszerben.
3.2.4
FigyeLmezTeTés.
Kizárólag megfelelő keresztmetszettel és minőségi tanúsítvánnyal rendelkező
elektromos hosszabbítók használata engedélyezett.
3.2.5
FigyeLmezTeTés.
A berendezést mindig kapcsolja ki, ha őrizetlenül hagyja.
3.2.6
FigyeLmezTeTés.
A levegőáramlás következtében bizonyos elemek visszapattanhatnak. Biztonsága
érdekében viseljen megfelelő egyéni védőruházatot és védőeszközöket (PPE).
3.2.7
FigyeLmezTeTés.
A készüléket összeszerelés, karbantartás, tárolás és szállítás előtt mindig kapcsolja ki
és csatlakoztassa le az energiaforrásról.
3.2.8
FigyeLmezTeTés.
Az elektromos alkatrészek karbantartását és/vagy javítását KIZÁRÓLAG szakképzett
személyzet végezheti.
3.2.9
FigyeLmezTeTés.
Minden használat előtt, valamint rendszeres időközönként ellenőrizze, hogy a csavarok
meg vannak-e húzva, és hogy a készülék minden részegysége jó állapotban van-e. Vizsgálja át a
készüléket, hogy nincsenek-e benne törött vagy kopott alkatrészek.
3.2.10
FigyeLmezTeTés.
A készülék biztonságos működése érdekében csak a gyártó eredeti pótalkatrészeit
vagy az általa jóváhagyott más pótalkatrészeket használja.
3.2.11
FigyeLmezTeTés.
A nem megfelelő hosszabbítóvezetékek veszélyesek lehetnek. Ügyeljen arra, hogy a
hosszabbítóvezeték kültéri használatra alkalmas legyen, a csatlakozást pedig tartsa szárazon és ne a
földön. Használjon kábeldobos hosszabbítót, amely a csatlakozót legalább 60 mm-rel a talajszint felett
tartja.
Page 78

78
(Az eredeti használati útmutató fordítása)
HU © 2016 Magyar
HU © 2016 Magyar
4. ÁLTALÁNOS INFORMÁCIÓK (3. OLDAL)
4.1 Az útmutató használata
Jelen útmutató a készülék fontos tartozéka és a későbbi hivatkozás
érdekében őrizze meg. A készülék telepítése/használata előtt
gondosan olvassa el az útmutatót. Ha eladja a készüléket, a
készülékkel együtt ezt az útmutatót is adja át az új tulajdonosnak.
4.2 Szállítás
A készülék szállítása részben összeszerelve, kartondobozban történik.
A csomagolás tartalmát az 1. ábra mutatja be.
4.2.1 A készülékhez mellékelt dokumentáció
D1 Használati és karbantartási útmutató
D2 Biztonsági utasítások
D3 Megfelelőségi nyilatkozat
D4 Jótállási szabályok
4.3 A csomagolóanyagok ártalmatlanítása
Bár a csomagolóanyagok nem környezetszennyezőek,
újrahasznosításukról vagy ártalmatlanításukról a felhasználás helyén
érvényes jogszabályok betartásával kell gondoskodni.
5. MŰSZAKI INFORMÁCIÓK (3. OLDAL)
5.1 Rendeltetésszerű használat
A készüléket multifunkciós porszívóként történő használatra
tervezték. Mindig kövesse a használati útmutatóban található
leírást, és tartsa be az óvintézkedéseket.
A készülék csak háztartási használatra készült, ipari vagy
kereskedelmi célokra nem alkalmazható.
A készülék megfelel az IEC 60335-1 és az IEC 60335-2-2 szabványok
előírásainak.
5.2 Kezelő
Az 1. ábrán látható szimbólum meghatározza a készülék javasolt
kezelőjét (ipari vagy háztartási felhasználás).
5.3 Főbb részegységek:
A1 Kapcsológomb
A2 Szívótömlő-csatlakozó
A3 Kifúvás csatlakozója
A4a Fogantyú
A4b Fémfogantyú (ha van ilyen)
A5 A hálózati kábel rögzítésére szolgáló tartó (ha van ilyen)
A6 Kallantyúk
A7 Hálózati kábel csatlakozóval
A8a Elülső görgőkerék
A8b Hátsó kerekek
A9 Porszívótartály
A10 A fedél és a motor
A11 Tartozék-tartó (ha van ilyen)
A12 Folyadékleeresztő dugó (ha van ilyen)
A13 Hátsókerék-tengely (ha van ilyen)
C1 Aljzat elektromos szerszámok csatlakoztatásához (ha van ilyen)
5.3.1 Kiegészítők (lásd az 1. ábrát a modellek részleteivel;
a kiegészítő csomag a dobozon látható kiegészítőket tartalmazza)
B1
Szűrőtartó
B2
Kazettás szűrő
B3
Tömlő
B4
Adapter elektromos
szerszámokhoz
B5
Cső
B6
Padlókefe
B7
Kárpit- és huzattisztító kefe
B8
Résfej
B9
Kerek kefe
B10
Szövet szűrőzsák (opcionális)
B11
Papír szűrőzsák
B12
Csőkampó
B13
Kombinált padlótisztító kefe
5.4 Biztonsági eszközök
- Kapcsológomb (A1)
A kapcsológomb megakadályozza a készülék nem szándékos
használatát.
6. ÜZEMBE HELYEZÉS (4-5. OLDAL)
Figyelem – veszély!
Üzembe helyezés vagy összeszerelés előtt csatlakoztassa le a készüléket
a táphálózatról.
Az összeszerelés folyamata a 4. oldalon látható.
6.1 Összeszerelés
Kicsomagoláskor ellenőrizze, hogy nem hiányzik-e valamelyik tartozék, és
nem sérült-e a csomag tartalma. Ha szállításból eredő károkat tapasztal,
haladéktalanul értesítse az értékesítőt.
Oldja ki a kallantyúkat (A6), és emelje le a berendezésről a fedelet, amely a
motort is tartalmazza (A10). Vegye ki a készülékkel szállított tartozékokat,
és közben ellenőrizze, hogy a szűrő (B2) megfelelően rögzítve van-e.
Lásd a 2. ábrát.
Az összeszerelés folyamata a 4-5. oldalon látható.
6.2
A hátsó kerekek és az elülső görgőkerekek felszerelése
Helyezze a porszívótartályt (A9) a fedél nélkül, fejjel lefelé egy szilárd,
vízszintes felületre. Illessze be a görgőkerékagyakat (A8a) a tartály
alján lévő lyukakba, és nyomja be teljesen a kerekek megfelelő
helyzetben való rögzítéséhez.
Illessze be a tengelyt (A13), és forgassa addig, hogy a jelzőcsapok a
menesztőlyukakba kerüljenek. Illessze be a zsákban (B17) található
tartóelemeket, és rögzítse azokat a mellékelt csavarokkal. Szerelje fel
a kereket (A8b) és az alátétet, majd rögzítse a sasszeggel; utóbbit tolja
be teljesen és nyissa ki annyira, hogy a tengely keresztmetszetével
egy síkban legyen. Ezután szerelje fel a kerékvédőt, majd ismételje
meg a műveletet a másik kerékkel (A8b).
Rögzítse a fémfogantyút (A4b) az ábrán látható módon.
Lásd a 3. ábrát.
6.3 A tartozékok rögzítése
Csatlakoztassa a tömlőt (B3) a kívánt művelettől függően a
szívócsatlakozóhoz (A2) vagy a fúvócsatlakozóhoz (A3).
Lásd a 4. ábrát.
Ezután fejezze be a műveletsort a tervezett tisztítási munkához
szükséges alkatrészek felszerelésével. Használja a tisztítás típusának
és a tisztítandó felületnek megfelelő csöveket (B5) és keféket (B6-B7B8-B9). A kefék (B6-B7-B8-B9-B13) közvetlenül a tömlőre (B3)
csatlakoztathatók.
Lásd az 5. ábrát.
6.4 Elektromos csatlakozás
Figyelem – veszély!
Ellenőrizze, hogy a hálózati feszültség (V) és frekvencia (Hz)
megegyezik-e a készülék adattábláján szereplő adatokkal lásd 6. ábra.
6.4.1 Hosszabbítóvezetékek használata
Csak IPX4 védettségű kábelt és csatlakozódugót használjon.
A hosszabbítóvezeték keresztmetszete legyen arányos
a hosszával – minél hosszabb a kábel, annál nagyobb
keresztmetszet szükséges.
6.5
Aljzat elektromos szerszámok csatlakoztatásához (ha van ilyen)
Csatlakoztassa a tömlőt (B3) az elektromos szerszám
szívócsatlakozójához. Ha a két csatlakozó nem illeszkedik egymáshoz,
akkor használja az elektromos szerszám adapterét (B4) (ha van ilyen),
a fölösleges részt pedig vágja le.
Az elektromos szerszámot a kiegészítő aljzathoz (C1) csatlakoztatva
tudja működtetni. (Ilyen tartozékokkal rendelkező típusok esetén).
Lásd a 7. ábrát.
Page 79

79
(Az eredeti használati útmutató fordítása)
HU © 2016 Magyar
7. A KÉSZÜLÉK HASZNÁLATA (6. OLDAL)
7.1 Kezelőszervek
- Kapcsológomb (A1).
Lásd a 8. ábrát.
Állítsa a kapcsológombot (BE/I) állásba.
Ha a kapcsológombon van jelzőlámpa, annak világítania kell.
A kapcsológomb (KI/0) állásba kapcsolásakor a készülék leáll.
Ha a kapcsológombon van jelzőlámpa, annak ki kell aludnia.
Figyelem – veszély!
A készüléket működés közben az ábrán látható módon szilárd, stabil
felületre kell helyezni. Lásd a 8. ábrát.
7.2 Indítás
7.2.1 Száraz porszívózás
Lásd a 9. ábrát.
Csak száraz szűrőkkel (B2-B11) dolgozzon! Használat
előtt ellenőrizze, hogy nem sérültek-e a szűrők, és szükség
esetén cserélje ki őket. Száraz szennyeződés felszívásához
a megfelelő módon állítsa be a padlókefét, és csatlakoztassa
a megfelelő tartozékokat (használja a B13 kefét).
Száraz szennyeződések felszívásához szükség esetén
további, papírból (B11) vagy szövetből (B10) (opcionális)
készült szűrőzsák is használható.
Szűrőzsákra vonatkozó útmutatások:
- A szűrőzsák telítettségi szintje attól függ, hogy milyen
szennyeződést távolítunk el.
- Finom por, homok, stb. esetén gyakran kell szűrőzsákot
cserélni.
- Az elhasználódott szűrőzsák szétszakadhat, így azt időben
cserélni kell!
Figyelem – veszély!
Csak hideg hamu felszívására használja.
7.2.2 Nedves porszívózás
Lásd a 10. ábrát
Figyelem – veszély!
A készüléket habképződés vagy folyadék szivárgása
esetén azonnal kapcsolja ki, vagy húzza ki a főcsatlakozót!
Ne használjon szűrőzsákot (se papírból, se szövetből készültet)!
Figyelem!
Ha a tartály megtelt, az úszókapcsoló lezárja a szívónyílást,
és a motor működése felgyorsul. Ilyenkor azonnal kapcsolja
ki a készüléket, és ürítse ki a tartályt.
Nedves vagy száraz szennyeződés felszívásához állítsa
be a megfelelő módon a padlókefét, és csatlakoztassa a
megfelelő tartozékokat (használja a B6 kefét).
7.2.3
Használat elektromos szerszámokkal Lásd a 11. ábrát.
Az összeszerelés folyamata a 11. ábrán látható.
Kapcsolja be a készüléket (fordítsa balra az automatikus porszívás
kapcsolóját
vagy II állásba) és kezdjen el dolgozni.
Figyelmeztetés: az elektromos szerszám bekapcsolása után a
szívóturbina 0,5 másodperces késéssel indul.
Az elektromos szerszám kikapcsolását követően a szívóturbina a
szívótömlőben maradt szennyeződés felszívása érdekében még
mintegy 6 másodpercig továbbforog.
7.2.4 Fúvó funkció
Lásd a 12. ábrát.
Ez a funkció nehezen hozzáférhető helyek tisztítására
alkalmazható, vagy olyan helyeken, ahol nem lehet
porszívózni, pl. ha leveleket szeretne kiszedni a kavicságyból.
Rögzítse a szívótömlőt a kifúvás csatlakozásához.
Ezzel aktiválódott a fúvó funkció.
A hatékonyabb fúvás érdekében B8 résfejet célszerű használni.
7.3 A működés megszakítása (szüneteltetése)
Kapcsolja ki a készüléket. Lásd a 8. ábrát.
Rögzítse a padlófejet tárolási pozícióban.
7.4 A munka befejezése
Kapcsolja ki a készüléket. Lásd a 8. ábrát.
Húzza ki a hálózati csatlakozót.
7.5 Ürítse ki a tartályt.
Száraz szennyeződés és por felszívása esetén: távolítsa el a fejet a
készülékről, és ürítse ki a tartályt. Lásd a 13. ábrát.
Folyadékok esetén: használja a leeresztő csavart (ha van) (lásd a 14.
ábrát), vagy járjon el a fentiekben leírtak szerint.
8. KARBANTARTÁS (135. OLDAL)
Figyelem – veszély!
Üzembe helyezés vagy összeszerelés előtt csatlakoztassa le a készüléket
a táphálózatról.
Az összeszerelés folyamata a 135. oldalon látható.
Javítási és karbantartási munkálatok előtt mindig kapcsolja ki a készüléket, és
húzza ki a hálózati csatlakozót. Elektromos rendszereken javítást vagy egyéb
munkákat csak engedéllyel rendelkező márkaszerviz végezhet.
Figyelem – veszély!
Soha ne használjon súrolószert, üvegtisztítót vagy univerzális tisztítószert!
Soha ne merítse vízbe
a motort is tartalmazó készülékfedelet (A10)
.
A készülék és a műanyagból készült tartozékok tisztításához használjon
általános műanyagtisztító szereket. A tartályt és a tartozékokat szükség
esetén vízzel öblítse át, és a következő használat előtt szárítsa meg.
8.1 A kazettás szűrő tisztítása (B2) Lásd a 15. ábrát
A kallantyúk (A6) kioldásával nyissa fel a porszívót. Fordítsa
fejjel lefelé a motort is tartalmazó készülékfedelet (A10), és
vegye ki a kazettás szűrőt (B2).
Folyó víz alatt gondosan öblítse át a szűrőket, és hagyja
megszáradni őket. Ne helyezze őket vissza addig a
porszívóba, amíg meg nem száradtak.
8.2 A papír szűrőzsák cseréje (B11) Lásd a 17. ábrát
A kallantyúk (A6) kioldásával nyissa fel a porszívót. Vegye ki a
megtelt szűrőzsákot (B11), dobja ki, és helyezzen be egy újat.
8.3 Szövetből készült szűrőzsák tisztítása (B10) (opcionális)
Lásd a 16. ábrát
A kallantyúk (A6) kioldásával nyissa fel a porszívót. Vegye ki a
szűrőzsákot (B10). Ürítse ki a szűrőzsákot, majd folyó víz alatt
gondosan öblítse ki, és hagyja megszáradni. Ne helyezze őket
vissza addig a porszívóba, amíg meg nem száradtak.
9. TÉLI TÁROLÁS (135. OLDAL)
Figyelem – veszély!
Üzembe helyezés vagy összeszerelés előtt csatlakoztassa le a készüléket
a táphálózatról.
A munka végeztével tisztítsa meg a készüléket, majd a készüléket és a
tartozékait a
18. ábrán
látható módon helyezze el.
A készüléket száraz helyen tárolja.
Page 80

80
(Az eredeti használati útmutató fordítása)
HU © 2016 Magyar
HU © 2016 Magyar
10.
HIBAELHÁRÍTÁS
Problémák Lehetséges okok Megoldások
A készülék nem kapcsol be
Nincs tápfeszültség
Ellenőrizze, hogy a hálózati csatlakozó megfelelően van-e
csatlakoztatva az aljzatban, illetve hogy van-e hálózati feszültség (*)
Problémák az elektromos/elektronikus áramkörrel Forduljon a márkaszervizhez
A készülék nem vagy csak nagyon
gyengén szív
Meghibásodott tartozékok
Ellenőrizze és tisztítsa meg a fejeket, a hosszabbító csöveket vagy
a tömlőket
Koszos szűrők Tisztítsa meg a szűrőket
Megteltek a szűrőzsákok Ürítse/cserélje ki a szűrőzsákokat
Tele van a tartály Ürítse ki a tartályt
Az elektromos eszköz nem indul el
(ha van elektromos szerszámokhoz
való aljzat)
Az elektromos szerszám nincs megfelelően csatlakoztatva a
porszívó aljzatához
Csatlakoztassa a dugót megfelelően
A kapcsoló „KI” vagy I állásba van fordítva Fordítsa a kapcsolót elektromos szerszám/II állásba
Por távozik a készülékből
A szűrő nincs behelyezve Helyezze be a szűrőt
A szűrő megsérült Cserélje ki az elhasználódott szűrőt
A tömlő vagy a csatlakozók megsérültek Cserélje ki a sérült alkatrészeket
Rossz szag érezhető a készülék
működése közben
A szűrők/szűrőzsákok elszennyeződtek Cserélje ki a szűrőket
(*) Ha a motor működés közben leáll és nem indul újra, forduljon a márkaszervizhez.
EK-megfelelőségi nyilatkozat
A bomportói (Modena, Olaszország) székhelyű Annovi Reverberi S.p.A. kijelenti, hogy a következő Stanley készülék(ek):
Készülék megnevezése: Nedves & száraz porszívó
Típusszám: SXVC20PE SXVC20PTE SXVC20XTE SXVC30XTDE SXVC35PTDE SXVC50XTDE
Névleges teljesítmény: 1,2 kW 1,2 kW 1,4 kW 1,6 kW 1,6 kW 1,6 kW
megfelel(nek) a következő európai irányelveknek:
A 2006/95/EK irányelv helyett 2016. április 20-tól a 2014/35/EU irányelvet kell alkalmazni,
A 2004/108/EK irányelv helyett 2016. április 20-tól a 2014/30/EU irányelvet kell alkalmazni, 2011/65/EU és 2005/32/EK, 2012/19/EU.
és gyártása(uk) a következő szabványoknak és szabványdokumentumoknak megfelelően történt:
EN 60335-1; EN 60335-2-2; EN 55014-1; EN 55014-2; EN 61000-3-2; EN 61000-3-3; EN 62233; EN 50581; Reg.1275/2008.
A műszaki dokumentáció kiadásáért felelős személy neve és címe: Stefano Reverberi / AR Ügyvezető igazgató
41122 Modena (Olaszország), Via ML King, 3
Kelt: 2016. 02. 10.
MODENA (I)
Stefano Reverberi Ügyvezető igazgató
Page 81

81
(Az eredeti használati útmutató fordítása)
HU © 2016 Magyar
JÓTÁLLÁS
A jótállás a termékértékesítési ország jogszabályi előírásainak megfelelően érvényes (amennyiben a gyártó másként nem rendelkezik).
A jótállás a jótállási időszakban fellépő anyag- és konstrukciós hibákra, valamint a megfelelőséget érintő meghibásodásokra vonatkozik. Ezen az időszakon
belül a gyártó vállalja, hogy kicseréli a meghibásodott alkatrészeket, illetve nem túlzott elhasználódás esetén megjavítja vagy kicseréli a terméket.
A jótállás nem vonatkozik a normál kopásnak és elhasználódásnak kitett alkatrészekre (szűrők, zsákok vagy kiegészítők, például tömlő, kefék, kerekek stb.).
A jótállás nem vonatkozik a következő okokból történt meghibásodásokra:
- nem megfelelő módon, illetve célból történő használat, hanyagság,
- ipari felhasználás vagy bérbeadás, ha a termék háztartási célra lett értékesítve,
- az e használati útmutatóban foglalt karbantartási utasítások be nem tartása,
- arra engedéllyel nem rendelkező személyzet vagy szerviz által végzett javítás,
- nem eredeti alkatrészek vagy tartozékok használata,
- szállítás, szennyeződés, idegen tárgyak vagy baleset által okozott sérülések,
- helytelen tárolásból vagy raktározásból adódó problémák.
A jótállás érvényesítéséhez be kell mutatnia a vásárlást igazoló bizonylatot.
Műszaki adatok Egység
SXVC20PE SXVC20PTE SXVC20XTE SXVC30XTDE SXVC35PTDE SXVC50XTDE
Hálózati feszültség
V/Hz
220-240 V ~ 5
0/60 Hz
220-240 V ~ 5
0/60 Hz
220-240 V ~ 5
0/60 Hz
220-240 V ~ 5
0/60 Hz
220-240 V ~ 5
0/60 Hz
220-240 V ~ 5
0/60 Hz
Teljesítmény
kW
1,2 1,2 1,4 1,6 1,6 1,6
Tartálytérfogat
l
20 20 20 30 35 50
Maximális szívónyomás
kPa
17 17 18 19 19 19
Maximális vákuum
mbar 170 170 180 190 190 190
Maximális légáram
l/s
28 28 33 37 39 41
Motorok száma
-
1 1 1
1 1
1
Tartozékok Ø
mm
35 35 35 35 35 40
Hálózati kábel
m
5 5 5 5 5 5
Védelmi osztály
-
Motorszigetelés
Osztály F F F F F F
Motorvédelem
-
IPX4 IPX4 IPX4 IPX4 IPX4 IPX4
Nettó tömeg
kg
7,9 8,4 9,2 9,6 11,5 14,9
Bruttó tömeg
kg
9,4 9,9 11,4 12,5 14,3 18,75
A műszaki változtatások jogát fenntartjuk!
Page 82

82
(Vertaling van de originele gebruiksaanwijzing)
NL © 2016 Nederlands
NL © 2016 Nederlands
Geachte klant,
Alvorens het apparaat voor de eerste keer
in gebruik te nemen, moet u deze originele
gebruiksaanwijzing lezen, opvolgen en
bewaren voor een toekomstig gebruik of
in geval van een wederverkoop van het
apparaat.
1 VEILIGHEIDSVOORSCHRIFTEN
1.1
Het door u aangeschafte apparaat is
een product van hoog technologisch
niveau, ontwikkeld door één van
de meest deskundige Europese
bedrijven. Dit apparaat is bestemd
voor gebruik als multifunctionele
stofzuiger, conform de beschrijvingen
en veiligheidswaarschuwingen in deze
gebruiksaanwijzing. Om verzekerd
te zijn van de beste resultaten,
hebben we deze voorschriften
opgesteld, die u aandachtig moet
lezen en bij ieder gebruik van het
apparaat moet opvolgen. Tijdens het
aansluiten, gebruik en onderhoud van
het apparaat moet u alle mogelijke
voorzorgsmaatregelen treffen om
uw eigen gezondheid en die van
de personen in de onmiddellijke
nabijheid te waarborgen. De
veiligheidsvoorschriften moeten
aandachtig worden gelezen en
opgevolgd omdat de veronachtzaming
ervan gevaarlijk kan zijn voor de
gezondheid en veiligheid van personen
of tot financiële schade kan leiden.
2 INFORMATIEAANDUIDINGEN
2.1
Houdt u zich aan de informatie
van de plaatjes en de symbolen
op het apparaat en in deze
gebruiksaanwijzing.
Op het apparaat en in de
gebruiksaanwijzing vindt u alleen
symbolen die pertinent zijn voor het
aangeschafte apparaat. Controleer
of de op het apparaat aangebrachte
symbolen en plaatjes altijd intact en
leesbaar zijn; zo niet, dan moet u ze
vervangen met nieuwe exemplaren
op dezelfde plek (wendt u zich tot de
klantenservice).
Let op - Gevaar
Lees deze gebruiksaanwijzing vóór het gebruik
aandachtig door.
Pictogram E3 (indien het
symbool in fig. 1 aanwezig is)
Geeft aan dat dit apparaat alleen
bestemd is voor huishoudelijk gebruik
en niet mag worden gebruikt voor
commerciële of industriële doeleinden.
0
Stand uitgeschakelde schakelaar
I Stand ingeschakelde schakelaar
Stand automatische schakelaar
II
Stand automatische schakelaar
Page 83

83
(Vertaling van de originele gebruiksaanwijzing)
NL © 2016 Nederlands
Dit product heeft een
bescherming van isolatieklasse
II. Dit betekent dat hij is uitgerust met
een versterkte of dubbele isolatie
(alleen wanneer dit symbool op het
apparaat is aangebracht).
Dit product heeft een
bescherming van isolatieklasse
I. Dit betekent dat hij is uitgerust met
een beschermende aardgeleider
(alleen wanneer dit symbool op het
apparaat is aangebracht).
Dit product voldoet aan de
toepasselijke Europese richtlijnen.
Pictogram E1 - Recycling van
het apparaat. Op het eind van de
levensduur van het apparaat moet u
het onmiddellijk onbruikbaar maken.
Trek de stekker uit het stopcontact.
Snijd de voedingskabel door.
Elektrische apparaten mogen niet
samen met het huisvuil worden
verwijderd. In overeenstemming met
de specificaties van richtlijn AEEA
2012/19/EU betreffende afgedankte
elektrische en elektronische
apparatuur, moeten de elektrische
onderdelen gescheiden worden
ingezameld en op ecologische
wijze gerecycled worden. Wendt
u zich voor meer informatie tot de
bevoegde diensten of de plaatselijke
wederverkopers.
Gebruik gehoorbescherming.
Gebruik een veiligheidsmasker.
Gebruik ademhalingsbescherming.
Gebruik veiligheidshandschoenen.
Gebruik veiligheidsschoenen.
Gebruik beschermende kleding.
Page 84

84
(Vertaling van de originele gebruiksaanwijzing)
NL © 2016 Nederlands
NL © 2016 Nederlands
3 VOORSCHRIFTEN VOOR DE VEILIGHEID/OVERIGE RISICO'S
3.1 WAARSCHUWINGEN: WAT U NIET MOET DOEN
3.1.1
LeT OP.
Sta nieT toe dat het apparaat wordt gebruikt door kinderen van minder dan 8 jaar en door
personen met verminderde lichamelijke, zintuiglijke of verstandelijke vermogens of met weinig
ervaring en/of kennis van het apparaat, tenzij onder passend toezicht en na instructies te hebben
ontvangen over het gebruik van het apparaat en de daaraan verbonden gevaren.
.
3.1.2
LeT OP.
Kinderen mogen NIET met het apparaat spelen. Houd kinderen in het oog om er zeker van
te zijn dat dit niet gebeurt.
3.1.3 Het reinigen en onderhoud door de gebruiker mag NIET worden uitgevoerd door kinderen zonder
toezicht.
3.1.4 Houd de verpakkingsfolie buiten het bereik van kinderen. Gevaar van verstikking!
3.1.5
LeT OP.
Het apparaat mag NIET worden gebruikt door personen die de gebruiksaanwijzing niet
hebben gelezen en begrepen.
3.1.6
LeT OP.
Gebruik het apparaat NIET met ontvlambare of giftige vloeistoffen of met eigenschappen
die een correcte werking ervan in de weg staan. Het apparaat mag niet worden gebruikt in een
ontvlambare of explosieve omgeving.
3.1.7
LeT OP.
Bepaalde substanties vormen samen met de aangezogen lucht explosieve dampen en
mengsels. Zuig NOOIT de volgende substanties op:
– Explosieve of ontvlambare gassen, vloeistoffen of poeders (reactieve poeders).
– Reactieve metaalpoeders (bv. aluminium, magnesium, zink) samen met sterk alkalische
reinigingsmiddelen en zuren.
– Zuivere zuren en alkalische oplossingen.
– Organische oplossingen (bv. benzine, oplosmiddelen voor verf, aceton of dieselolie).
Deze substanties kunnen ook de materialen waarmee het apparaat is samengesteld, aantasten.
3.1.8 Schakel het apparaat altijd uit na ieder gebruik en voor de reiniging/het onderhoud.
3.1.9 Brandgevaar. Zuig GEEN brandende of gloeiende voorwerpen op.
3.1.10
LeT OP.
Gebruik het apparaat NIET bij slecht weer buiten.
3.1.11
LeT OP.
Raak de stekker en/of het stopcontact NIET aan met natte handen.
Page 85

85
(Vertaling van de originele gebruiksaanwijzing)
NL © 2016 Nederlands
3.1.12
LeT OP.
Gebruik het apparaat NIET met een beschadigde voedingskabel. Om gevaren voor de
veiligheid te vermijden moet een beschadigde voedingskabel worden vervangen door de fabrikant,
een door hem erkende klantenservice of een gekwalificeerde persoon.
3.1.13
LeT OP.
Controleer op de aanwezigheid van het typeplaatje op het apparaat, waarschuw de dealer
indien dit niet het geval is. Aangezien ze niet te identificeren en potentieel gevaarlijk zijn, mogen
apparaten zonder typeplaatje NIET worden gebruikt.
3.1.14
LeT OP.
Trek NIET aan de VOEDINGSKABEL om het apparaat te verplaatsen.
3.1.15
LeT OP.
Het gebruik van niet-originele en niet specifiek voor dit model bestemde onderdelen is
verboden. Het is verboden om wijzigingen op het apparaat aan te brengen; eventuele wijzigingen
zullen de Verklaring van Overeenstemming doen vervallen en de Fabrikant vrijwaren van civiel- en
strafrechtelijke aansprakelijkheid.
3.2 WAARSCHUWINGEN: WAT U WEL MOET DOEN
3.2.1
LeT OP.
Alle elektriciteitsgeleidende delen MOETEN WORDEN AFGESCHERMD tegen waterstralen
of -spatten.
3.2.2
LeT OP.
De elektrische aansluiting moet worden uitgevoerd door een gekwalificeerd elektromonteur
conform de IEC 60364-1 norm. De montage van een aardlekschakelaar, die de stroomtoevoer naar
de machine zal onderbreken wanneer de lekstroom naar de aarde gedurende 30 ms meer dan
30 mA bedraagt, of van een besturingsinrichting van het aardcircuit, wordt aanbevolen.
3.2.3
LeT OP.
TIJDENS het opstarten van het apparaat kunnen storingen in het lichtnet optreden.
3.2.4
LeT OP.
Gebruik uitsluitend geautoriseerde verlengkabels met een geschikte doorsnede van de
geleidedraden.
3.2.5
LeT OP.
Schakel altijd de hoofdschakelaar uit wanneer u het apparaat onbeheerd achterlaat.
3.2.6
LeT OP.
Als gevolg van de luchtstroom kunnen voorwerpen wegspringen, gebruik daarom alle
beschermende kleding en beveiligingen (PBM) die de veiligheid en gezondheid van de bediener
waarborgen.
3.2.7
LeT OP.
Schakel het apparaat uit en koppel hem los van de stroombron, voordat u de werkzaamheden
voor de montage, reiniging, regeling, onderhoud, opslag en vervoer start.
Page 86

86
(Vertaling van de originele gebruiksaanwijzing)
NL © 2016 Nederlands
NL © 2016 Nederlands
3.2.8
LeT OP.
Het onderhoud en/of de reparatie van de elektrische componenten MOET door gekwalificeerd
personeel worden uitgevoerd.
3.2.9
LeT OP.
CONTROLEER voor ieder gebruik en met regelmatige tussenpozen het vastzitten van
de schroeven en de goede staat van de onderdelen van het apparaat; controleer op kapotte of
versleten onderdelen.
3.2.10
LeT OP.
Gebruik uitsluitend originele vervangingsonderdelen van de fabrikant of door hem
goedgekeurde vervangingsonderdelen, om van de veiligheid van het apparaat verzekerd te zijn.
3.2.11
LeT OP.
Niet geschikte verlengsnoeren kunnen gevaarlijk zijn. Bij gebruik van een verlengsnoer
moet u een type kiezen dat geschikt is voor gebruik buitenshuis en ervoor zorgen dat de verbinding
droog en van de grond blijft. Het wordt aanbevolen om hiervoor een kabelhaspel te gebruiken, die
het stopcontact op ten minste 60 mm van de grond houdt.
Page 87

87
(Vertaling van de originele gebruiksaanwijzing)
NL © 2016 Nederlands
4 ALGEMENE INFORMATIE (PAGINA 3)
4.1 Gebruik van de handleiding
Deze handleiding is een geïntegreerd onderdeel van het apparaat; bewaar
hem voor latere raadpleging. Lees hem vóór de installatie en het gebruik
aandachtig door. Bij overdracht van het apparaat is de oude eigenaar
verplicht om de handleiding aan de nieuwe eigenaar te overhandigen.
4.2 Levering
Het apparaat wordt gedeeltelijk gedemonteerd in een kartonnen doos
geleverd.
Zie voor de samenstelling van de levering fig. 1
4.2.1 Bijgevoegde documentatie
D1 Gebruiks- en onderhoudshandleiding
D2 Veiligheidsvoorschriften
D3 Conformiteitsverklaring
D4 Garantiebepalingen
4.3 Verwerking van het verpakkingsmateriaal
De materialen waaruit de verpakking bestaat vormen geen bedreiging voor
het milieu, maar zullen wel gerecycled of verwerkt moeten worden in
overeenstemming met de geldende wet- en regelgeving in het land van gebruik.
5 TECHNISCHE INFORMATIE (PAGINA 3)
5.1 Beoogd gebruik
Het apparaat is bestemd voor gebruik als multifunctionele stofzuiger,
conform de beschrijvingen en veiligheidswaarschuwingen in deze
gebruiksaanwijzing.
Dit apparaat is alleen bestemd voor huishoudelijk gebruik en niet voor
commerciële of industriële doeleinden.
Het apparaat voldoet aan de normen IEC 60335-1 e IEC 60335-2-2.
5.2 Bediener
Voor de identificatie van de bediener belast met het gebruik van het
(professionele of niet-professionele) apparaat verwijzen wij naar het
pictogram in fig. 1.
5.3 Hoofdbestanddelen:
A1 Startinrichting
A2 Zuigaansluiting
A3 Blaasaansluiting
A4a Handgreep
A4b Metalen handgreep (waar voorzien)
A5 Kabelhaak (waar voorzien)
A6 Sluitclips
A7 Elektriciteitskabel met stekker
A8a Zwenkwieltjes voor
A8b Wieltjes achter
A9 Reservoir stofzuiger
A10 Deksel met motor
A11 Accessoirehouder (waar voorzien)
A12 Afvoerplug vloeistoffen (waar voorzien)
A13 As voor wieltjes achter (waar voorzien)
C1 Extra contactdoos voor elektrisch gereedschap (waar voorzien)
5.3.1 Accessoires (zie fig. 1 met de indicaties van de modellen - de
levering is samengesteld uit de elementen afgebeeld op de doos)
B1
Filterhouder
B2
Filterpatroon
B3
Slang
B4
Adapter voor elektrisch
gereedschap
B5
Buis
B6
Borstel voor vloeren
B7
Borstel voor tapijten - fauteuils
B8
Mondstuk voor spleten
B9
Ronde borstel
B10
Filterzakje van stof
B11
Filterzakje van papier
B12
Buisklem
B13
Combi-borstel voor vloeren
5.4 Beveiligingen
- Startinrichting (A1)
De startinrichting voorkomt het ongewenste starten van het apparaat.
6 INSTALLATIE (PAGINA 4-5)
Let op - gevaar!
Tijdens alle werkzaamheden voor de installatie en montage moet het apparaat
losgekoppeld zijn van het elektriciteitsnet.
Voor de montagevolgorde verwijzen wij naar pag. 4.
6.1 Montage
Controleer tijdens het uitpakken op eventuele ontbrekende accessoires
of beschadigingen van de inhoud. Bij beschadigingen als gevolg van
het transport moet u onmiddellijk uw wederverkoper informeren.
Open de sluitclips (A6) en til het deksel met de motor (A10) van het
apparaat. Verwijder alle geleverde accessoires en controleer of het lter
(B2) goed is gemonteerd.
Zie fig. 2
Voor de montagevolgorde verwijzen wij naar de pag. 4-5.
6.2
Montage van de wieltjes achter en de zwenkwieltjes voor
Keer, op een degelijk horizontaal oppervlak, het stofzuigerreservoir
(A9) zonder deksel, om. Steek de stompjes van de zwenkwieltjes
(A8a) in de daarvoor bestemde gaten en druk ze er voor een correcte
plaatsing en bevestiging helemaal aan.
Plaats de as (A13) in de correcte positie en draai hem tot de
centreringsgaten tegenover de centreringen staan. Plaats de
blokkeringen in het zakje (B17) in de correcte stand en zet ze vast
met de betreffende schroeven. Breng het wieltje (A8b) en het plaatje
aan en blokkeer ze met de splitpen die u helemaal moet aandrukken
en die bij het openen ervan op perfecte wijze op de doorsnede van de
as moet passen. Plaats de wieldop en herhaal deze handeling voor
het andere wiel (A8b).
Monteer de metalen handgreep (A4b) zoals afgebeeld in de figuur.
Zie fig. 3
6.3 Montage van de accessoires
Steek de zuigslang (B3) in de zuigaansluiting (A2) of de
blaasaansluiting (A3), afhankelijk van het gewenste type handeling.
Zie fig. 4
Voltooi vervolgens de montage met de noodzakelijke accessoires voor
het type reiniging dat u gaat doen. Gebruik de buizen (B5) en borstels
(B6-B7-B8-B9) afhankelijk van het type reiniging en het te reinigen
oppervlak. U kunt de borstels (B6-B7-B8-B9-B13) rechtstreeks op de
zuigslang (B3) monteren.
Zie fig. 5
6.4 Elektrische aansluiting
Let op - gevaar!
Controleer of de spanning en frequentie (V/Hz) van het elektriciteitsnet
overeenstemmen met de waarden vermeld op het typeplaatje Zie fig.6
6.4.1 Gebruik van verlengsnoeren
Gebruik snoeren en stekkers met een "IPX4" beschermingsgraad.
De diameter van de verlengkabels moet evenredig zijn aan de
lengte ervan; hoe langer de kabel, des te groter zal de diameter
ervan moeten zijn.
6.5
Extra contactdoos voor elektrisch gereedschap (waar voorzien)
Steek de zuigslang (B3) in de zuigaansluiting van het elektrische
gereedschap. Gebruik de specifieke adapter voor het elektrische
gereedschap (B4) (waar voorzien), wanneer deze niet compatibel
mochten zijn, en snijd de overtollige delen weg.
Gebruik de extra contactdoos (C1) voor de voeding van het elektrische
gereedschap (voor de modellen die hiermee zijn uitgerust).
Zie fig. 7
Page 88

88
(Vertaling van de originele gebruiksaanwijzing)
NL © 2016 Nederlands
NL © 2016 Nederlands
7 GEBRUIKSINFORMATIE (PAGINA 6)
7.1 Bedieningen
- Startinrichting (A1)
Zie fig. 8
.
Zet de startinrichting in de stand (ON/I).
Wanneer de startinrichting is uitgerust met een controlelampje moet deze
gaan branden.
Zet de startinrichting in de stand (OFF/0) om de werking van het apparaat
te stoppen.
Wanneer de startinrichting is uitgerust met een controlelampje, moet
deze uitgaan.
Let op - gevaar!
Het apparaat moet tijdens de werking op een degelijk en stabiel
oppervlak staan, en zijn geplaatst zoals aangegeven. Zie fig. 8.
7.2 Starten
7.2.1 Het opzuigen van droog materiaal.
Zie fig. 9.
Werk alleen met droge lters (B2 - B11)! Controleer vóór
het gebruik of de lters beschadigd zijn en vervang ze
indien noodzakelijk. Voor het opzuigen van droog vuil, moet
u de juiste regeling van de vloerborstel gebruiken en de
bijbehorende accessoires monteren (gebruik de borstel B13).
Voor het opzuigen van droog vuil, kunt u, indien nodig, een
extra lterzakje gebruiken van papier (B11) of van stof (B10)
(optioneel).
Aanwijzingen met betrekking tot het lterzakje:
– Het vulniveau van het lterzakje is afhankelijk van het type
opgezogen vuil.
– Bij jne stof, zand, enz. moet u het lterzakje vaak vervangen.
– Een versleten lterzakje kan ontploffen en moet daarom tijdig
worden vervangen!
Let op - gevaar!
Zuig alleen afgekoelde as op.
7.2.2 Het opzuigen van vloeistoffen
Zie fig.10.
Let op - gevaar!
Bij schuimvorming of het naar buiten stromen van
vloeistoffen moet u het apparaat onmiddellijk uitschakelen
en de stekker uit het stopcontact trekken! Gebruik geen
lterzakjes (noch van papier, noch van stof)!
LET OP
Wanneer het reservoir leeg is zal een vlotter de zuigopening
sluiten en gaat het apparaat sneller draaien. Schakel het
apparaat onmiddellijk uit en maak het reservoir leeg.
Voor het opzuigen van vochtig of vloeibaar materiaal, moet
u de juiste regeling van de vloerborstel gebruiken en de
bijbehorende accessoires monteren (gebruik borstel B6).
7.2.3 Werk met elektrische gereedschappen.
Zie fig. 11.
Voor de montagevolgorde verwijzen wij naar fig. 11.
Schakel het apparaat in (draai de schakelaar naar links in
de stand
) of (schakelaar met 2 drukknoppen in de
stand II) en start het werk.
Waarschuwing: Bij inschakeling van het elektrische
gereedschap, start de zuigturbine met een vertraging van
0,5 seconden.
Na uitschakeling van het elektrische gereedschap blijft de
zuigturbine nog 6 seconden draaien om het resterende vuil
in de zuigbuis op te kunnen zuigen.
7.2.4 Blaasfunctie.
Zie fig. 12.
Voor het reinigen van plekken die moeilijk bereikbaar
zijn of waar opzuigen niet mogelijk is, bv. bladeren van
kiezelstenen.
Steek de zuigslang in de blaasaansluiting. Op deze wijze
wordt de blaasfunctie geactiveerd.
Voor een hogere doeltreffendheid van de blaasfunctie raden
wij het gebruik aan van de borstel voor spleten B8.
7.3 De werking onderbreken (pauze)
Schakel het apparaat uit. Zie fig. 8.
Zet het vloermondstuk in de parkeerstand.
7.4 Einde werk
Schakel het apparaat uit. Zie fig. 8.
Trek de stekker uit het stopcontact.
7.5 Maak het reservoir leeg
Voor droog en poedervormig vuil: verwijder de kop van het apparaat en
maak het reservoir leeg. Zie fig. 13.
Voor vloeistoffen: gebruik de afvoerplug waar voorzien (zie fig. 14.), of
ga te werk als bovenstaand beschreven.
8 ONDERHOUD (PAGINA 135)
Let op - gevaar!
Tijdens alle werkzaamheden voor de installatie en montage moet het
apparaat losgekoppeld zijn van het elektriciteitsnet.
Voor de montagevolgorde verwijzen wij naar pag. 135.
Voor al het schoonmaak- en onderhoudswerk moet u het apparaat uitschakelen
en de stekker uit het stopcontact trekken. Reparatiewerkzaamheden en werk
aan elektrische installaties mogen alleen door de bevoegde klantenservice
worden uitgevoerd.
Let op - gevaar!
Gebruik geen schurende reinigingsmiddelen, reinigingsmiddelen voor glas, of
universele reinigingsmiddelen! Dompel het deksel
met motor (A10)
nooit
onder water. Reinig het apparaat en de accessoires van kunststof met een
normaal schoonmaakmiddel voor kunststof. Spoel, indien nodig, het reservoir
en de accessoires met water en droog ze af voor het hergebruik ervan.
8.1 Reinig het filterpatroon (B2). Zie fig. 15
Open de stofzuiger met de clips (A6). Keer het deksel met
motor om (A10) en demonteer het lterpatroon (B2).
Spoel hem zorgvuldig onder stromend water af en laat hem
opdrogen. Monteer hem terug als hij droog is.
8.2 Vervanging filterzakje van papier (B11). Zie fig. 17
Open de stofzuiger met de clips (A6). Verwijder het volle
lterzakje (B11), gooi hem weg en monteer een nieuw exemplaar.
8.3 Reiniging filterzakje van stof (B10) (optioneel). Zie fig. 16
Open de stofzuiger met de clips (A6). Verwijder het lterzakje (B10).
Maak het zakje leeg, spoel hem zorgvuldig af onder stromend
water en laat hem opdrogen. Monteer hem terug als hij droog is.
9 OPBERGEN (PAGINA 135)
Let op - gevaar!
Tijdens alle werkzaamheden voor de installatie en montage moet het
apparaat losgekoppeld zijn van het elektriciteitsnet.
Op het eind van het werk en na de schoonmaak van het apparaat, moet u het
samen met de accessoires opbergen, zoals aangegeven in
fig. 18.
.
Bewaar het apparaat op een droge plek.
Page 89

89
(Vertaling van de originele gebruiksaanwijzing)
NL © 2016 Nederlands
10
INFORMATIE OVER STORINGEN
Problemen Mogelijke oorzaken Oplossingen
Het apparaat kan niet worden
ingeschakeld
Er is geen spanning
Controleer op de aanwezigheid van spanning op het elektriciteitsnet
en controleer of de stekker goed in het stopcontact zit (*)
Problemen aan het elektrische-elektronische circuit Wendt u zich tot de klantenservice
het apparaat zuigt niet of heel weinig
Verstopte accessoires
Controleer en reinig de mondstukken, verlengstukken, buizen of
slangen
Filters vies Reinig de filters
Zakjes vol Ledig/vervang de zakjes
Reservoir vol Maak het reservoir leeg
Het elektrische gereedschap kan
niet worden ingeschakeld (waar
een stopcontact voor een elektrisch
gereedschap is voorzien)
De stekker van het elektrische gereedschap is verkeerd
aangebracht in het stopcontact op de stofzuiger
Breng de stekker op correcte wijze aan
De schakelaar is uit of staat in de stand I Zet de schakelaar in de stand gereedschap/ II
Er komt stof uit het apparaat
Het filter is niet gemonteerd Monteer het filter
Het filter is beschadigd Vervang het gebruikte filter met een nieuw exemplaar
De buis en de aansluitingen ervan zijn beschadigd Vervang de beschadigde delen
Tijdens het gebruik verspreidt het
apparaat onplezierige luchtjes
De filters/zakjes zijn vies Vervang de filters/zakjes
(*) Wanneer tijdens het gebruik de motor stopt en niet meer start, moet u zich tot de klantenservice wenden.
EG-Conformiteitsverklaring
Wij, van Annovi Reverberi S.p.A., Bomporto (Mo), Italië verklaren dat het/de onderstaand vermelde machine(s) Stanley:
Benaming van het apparaat: Nat- en droogzuiger
Nr. model: SXVC20PE SXVC20PTE SXVC20XTE SXVC30XTDE SXVC35PTDE SXVC50XTDE
Stroomverbruik: 1,2 kW 1,2 kW 1,4 kW 1,6 kW 1,6 kW 1,6 kW
conform is (zijn) aan de volgende Europese richtlijnen:
2006/95/EG - Richtlijn die vanaf 20 april 2016 zal worden vervangen door richtlijn 2014/35/UE,
2004/108/EG - Richtlijn die vanaf 20 april 2016 zal worden vervangen door richtlijn 2014/30/UE, 2011/65/EU, 2005/32/EG, 2012/19/EU.
en gefabriceerd is (zijn) in overeenstemming met de volgende normen of de volgende standaarddocumenten
EN 60335-1; EN 60335-2-2; EN 55014-1; EN 55014-2; EN 61000-3-2; EN 61000-3-3; EN 62233; EN 50581; Reg.1275/2008.
Naam en adres van de persoon belast met de afgifte van de technische documentatie: Stefano Reverberi / AR Algemeen directeur
Via ML King, 3 - 41122 Modena, Italië
Datum: 10.02.2016
MODENA (I)
Stefano Reverberi Algemeen directeur
Page 90

90
(Vertaling van de originele gebruiksaanwijzing)
NL © 2016 Nederlands
NL © 2016 Nederlands
GARANTIE
De geldigheid van de garantie wordt bepaald door de geldende wet- en regelgeving van het land waarin het product wordt verhandeld (behoudens andere
aanwijzingen van de fabrikant).
Bij defecten aan het product als gevolg van de kwaliteit van het materiaal, vanwege constructiefouten of een ontbrekende conformiteit tijdens de
geldigheidsperiode van de garantie, garandeert de fabrikant de vervanging van de defecte onderdelen en zal hij, bij slijtage binnen de norm, zorg dragen voor
de reparatie van de producten of de vervanging ervan.
De garantie is niet van toepassing op componenten onderworpen aan normale slijtage (lters, zakjes, accessoires als buizen, de slang, borstels, wielen, enz.);
De garantie is niet van toepassing op defecten veroorzaakt door, of als gevolg van:
- onjuist gebruik, niet toegestaan gebruik, nalatigheid,
- verhuur of professioneel gebruik, wanneer het product werd verkocht voor huishoudelijk gebruik,
- niet inachtneming van de onderhoudsnormen voorzien in de specieke handleiding,
- reparaties uitgevoerd door niet geautoriseerde personen of centra,
- het gebruik van niet-originele vervangingsonderdelen of accessoires,
- schade veroorzaakt door het transport, door vreemde voorwerpen of substanties, door ongelukken,
- bergings- of opslagproblemen.
Voor de activering van de garantie moet een bewijs van aankoop worden getoond.
Technische gegevens Eenheid
SXVC20PE SXVC20PTE SXVC20XTE SXVC30XTDE SXVC35PTDE SXVC50XTDE
Spanning
V/Hz
220-240 V ~ 5
0/60 Hz
220-240 V ~ 5
0/60 Hz
220-240 V ~ 5
0/60 Hz
220-240 V ~ 5
0/60 Hz
220-240 V ~ 5
0/60 Hz
220-240 V ~ 5
0/60 Hz
Vermogen
kW
1,2 1,2 1,4 1,6 1,6 1,6
Reservoirvolume
l
20 20 20 30 35 50
Maximale zuigdruk
kPa
17 17 18 19 19 19
Maximale depressie
mbar 170 170 180 190 190 190
Maximale opgezogen lucht
l/s
28 28 33 37 39 41
Aantal motoren
-
1 1 1
1 1
1
Ø accessoires
mm
35 35 35 35 35 40
Voedingskabel
m
5 5 5 5 5 5
Beschermingsklasse
-
Motorisolatie
Klasse F F F F F F
Motorbescherming
-
IPX4 IPX4 IPX4 IPX4 IPX4 IPX4
Nettogewicht
kg
7,9 8,4 9,2 9,6 11,5 14,9
Brutogewicht
kg
9,4 9,9 11,4 12,5 14,3 18,75
Technische wijzigingen voorbehouden!
Page 91

91
(Oversettelse av den originale bruksanvisningen)
NO © 2016 Norsk
Kjære kunde,
Vi ber om at du leser den originale
bruksanvisningen før du bruker maskinen
for første gang, handler i samsvar med
informasjonen som gis, og oppbevarer
bruksanvisningen på et trygt sted for
fremtidig bruk eller kan overgi den til
fremtidige eiere.
1 SIKKERHETSFORSKRIFTER
1.1 Maskinen du har kjøpt, er et
høyteknologisk produkt utviklet av
en av Europas ledende produsenter.
Denne maskinen skal brukes som
en allsidig støvsuger, i samsvar med
beskrivelsene og forholdsreglene
i denne bruksanvisningen.Ved å
bruke denne bruksanvisningen får
du mest mulig ut av maskinen. Les
bruksanvisningen nøye og følg
alltid anbefalingene i den. Ta alle
forholdsregler under tilkobling, bruk
og vedlikehold av maskinen for å
beskytte deg selv og andre i nærheten
mot skader. Les sikkerhetsforskriftene
nøye og følg dem alltid. Å unnlate å
overholde dem kan sette helse og
sikkerhet i fare eller føre til dyre
skader.
2 VARSELMERKER
2.1
Følg anvisningene på varselmerkene
som er festet på maskinen og de som
denne bruksanvisningen inneholder.
Maskinen og bruksanvisningen
har kun de symbolene som gjelder
modellen som er kjøpt. Kontroller
at symbolene og merkene som er
festet på maskinen, alltid er til stede
og leselige. Hvis ikke, må de skiftes
ut og festes på de samme stedene.
(Ta kontakt med servicesenteret).
Advarsel – fare!
Les disse instruksjonene
nøye før bruk.
E3-symbolet (hvis symbolet
finnes på fig. 1)
- Viser at
maskinen kun er laget til
husholdningsbruk og ikke skal brukes
til industrielle eller kommersielle
formål.
0 Bryteren i «AV»-posisjon
I Bryteren i «PÅ»-posisjon
Automatisk støvsugingsinnstilling
II Automatisk støvsugingsinnstilling
Page 92

92
(Oversettelse av den originale bruksanvisningen)
NO © 2016 Norsk
NO © 2016 Norsk
Dette produktet er merket som
isolasjonsklasse II. Dette betyr
at det er forsterket eller dobbeltisolert
(kun hvis symbolet vises på
maskinen).
Dette produktet er merket som
isolasjonsklasse I. Dette betyr
at det er utstyrt med en beskyttende
jordleder (kun hvis symbolet vises på
maskinen).
Produktet er i samsvar med de
relevante europeiske direktivene.
Symbol E1 - Resirkulering av
maskinen. Gjør den gamle maskinen
utilgjengelig for bruk øyeblikkelig.
Trekk ut kontakten.
Koble fra strømledningen.
Elektronisk utstyr må ikke avhendes
sammen med husholdningsavfall.
Ifølge bestemmelsene i direktiv
2012/19/EF om elektrisk og elektronisk
avfall (WEEE), må elektroniske
komponenter innsamles separat og
resirkuleres på en miljøvennlig måte.
For mer informasjon, kontakt de
relevante lokale myndighetene eller
forhandleren.
Bruk hørselvern.
Bruk beskyttelsesmaske.
Bruk åndedrettsvern.
Bruk beskyttelseshansker.
Bruk vernesko.
Bruk verneklær.
Page 93

93
(Oversettelse av den originale bruksanvisningen)
NO © 2016 Norsk
3 SIKKERHETSREGLER/RESTERENDE RISIKOER
3.1 SIKKERHETSTILTAK – MÅ UNNGÅS
3.1.1
aDvarseL. iKKe
la maskinen brukes av barn under 8 år, eller personer med nedsatt funksjonsevne,
sensoriske eller mentale evner, eller som ikke har nødvendig erfaring og kunnskap, med mindre de
er under egnet tilsyn og de har blitt opplært i trygg bruk av maskinen og risikoen involvert.
.
3.1.2
aDvarseL.
Barn MÅ IKKE bruke maskinen som et leketøy. Hold tilsyn med barn for å sikre at dette
ikke skjer.
3.1.3 Renhold og brukervedlikehold må IKKE utføres av barn eller inkompetente personer som ikke er
under egnet tilsyn.
3.1.4 Hold emballasje borte fra barn. Kvelningsfare!
3.1.5
aDvarseL.
Maskinen MÅ IKKE brukes av barn eller noen som ikke har lest og forstått instruksjonene.
3.1.6
aDvarseL.
ALDRI bruk maskinen med brannfarlige eller giftige væsker, eller væsker med egenskaper
som ikke er egnet for korrekt bruk av maskinen. Bruk av maskinen i en potensielt brennbar eller
eksplosiv atmosfære er forbudt.
3.1.7
aDvarseL.
Enkelte stoffer kan kombineres med luften som suges inn, og danne eksplosiv damp og
blandinger. ALDRI sug inn følgende stoffer:
- Eksplosive eller brennbare gasser, væsker eller støv (reaktivt støv).
- Pulverisert reaktivt metall (f.eks. aluminium, magnesium eller sink) sammen med sterke basiske og
syreholdige rensemidler.
- Rene syre- og baseløsninger.
- Organiske stoffer (f.eks. bensin, malingstynnere, aceton eller diesel).
Disse stoffene kan også korrodere materialene som maskinen er laget av.
3.1.8 Slå av maskinen etter hver bruk og før alt renhold/vedlikehold.
3.1.9 Brannfare. ALDRI sug opp brennende eller rødglødende materialer.
3.1.10
aDvarseL.
ALDRI bruk maskinen utendørs når det regner.
3.1.11
aDvarseL.
IKKE ta på støpselet og/eller stikkontakten med våte hender.
3.1.12
aDvarseL.
ALDRI bruk maskinen hvis strømledningen er skadet. Hvis strømledningen er skadet, må
den enten skiftes ut av produsenten, et autorisert servicesenter eller annet kvalifisert personale for
å unngå sikkerhetsrisiko.
Page 94

94
(Oversettelse av den originale bruksanvisningen)
NO © 2016 Norsk
NO © 2016 Norsk
3.1.13
aDvarseL.
Kontroller at maskinen er utstyrt med typeskilt. Ta kontakt med leverandøren hvis det
mangler. Maskiner uten typeskilt må IKKE brukes, siden de ikke kan identifiseres og kan være
farlige.
3.1.14
aDvarseL.
ALDRI flytt maskinen ved å dra i STRØMLEDNINGEN.
3.1.15
aDvarseL.
Det er forbudt å bruke tilbehør som ikke er originalt, eller tilbehør som ikke er spesielt
utformet for den aktuelle modellen. Det er forbudt å utføre endringer på maskinen. Eventuelle
endringer på maskinen fører til bortfall av samsvarserklæringen og fritar produsenten for alt sivil- og
strafferettslig ansvar.
3.2 SIKKERHETSTILTAK – MÅ UTFØRES
3.2.1
aDvarseL.
Alle strømførende deler MÅ BESKYTTES mot vannstråler eller vannsprut.
3.2.2
aDvarseL.
Den elektriske tilkoblingen må utføres av en kvalifisert elektriker i samsvar med standarden
IEC 60364-1.Det må installeres enten en reststrømbryter som bryter strømforsyningen hvis
lekkasjestrømmen til jordingen overstiger 30 mA for 30 ms, eller en jordfeilbryter.
3.2.3
aDvarseL.
UNDER oppstart kan maskinen forårsake nettforstyrrelser.
3.2.4
aDvarseL.
Bruk kun godkjente skjøteledninger med et egnet tverrsnitt.
3.2.5
aDvarseL.
Slå alltid av bryteren når maskinen forlates uten tilsyn.
3.2.6
aDvarseL.
Luftstrømmen kan føre til at deler spretter tilbake. Bruk alt personlig verneutstyr (PPE)
som kreves for å sikre brukerens sikkerhet.
3.2.7
aDvarseL.
Slå av maskinen og koble fra strømmen før montering, vedlikehold, oppbevaring og
transport.
3.2.8
aDvarseL.
Vedlikehold og/eller reparasjoner av elektriske komponenter MÅ utføres av kvalifisert
personell.
3.2.9
aDvarseL.
KONTROLLER regelmessig og før hver bruk at skruene er strammet skikkelig, og at alle
maskinkomponentene er i god stand. Se etter om delene er slitte eller defekte.
3.2.10
aDvarseL.
For å kunne garantere sikker drift av maskinen må du kun bruke originale reservedeler
fra produsenten eller andre deler som er godkjente av produsenten.
3.2.11
aDvarseL.
Bruk av feil type skjøteledning kan være farlig. Ved bruk av skjøteledning velger du
en som er egnet til utendørsbruk, og passer på at tilkoblingen holdes tørr og over bakkenivå.
Det anbefales å bruke en kabeltrommel som holder støpselet minst 60 mm over bakkenivå.
Page 95

95
(Oversettelse av den originale bruksanvisningen)
NO © 2016 Norsk
4 GENERELL INFORMASJON (SIDE 3)
4.1 Bruk av bruksanvisningen
Bruksanvisningen er en viktig del av maskinen. Ta vare på den for
senere bruk. Les bruksanvisningen grundig før installasjon og bruk
av enheten. Hvis du selger maskinen, må bruksanvisningen overlates
til den nye eieren.
4.2 Levering
Maskinen leveres delvis demontert i en pappeske.
Pakken som leveres, vises i fig. 1.
4.2.1 Dokumentasjon som leveres med maskinen
D1 Bruks- og vedlikeholdsanvisning
D2 Sikkerhetsinstruksjoner
D3 Samsvarserklæring
D4 Garantibestemmelser
4.3 Avhending av emballasje
Emballasjen er miljøvennlig, men må likevel resirkuleres eller
avhendes i samsvar med gjeldende regelverk i brukslandet.
5 TEKNISK INFORMASJON (SIDE 3)
5.1 Anvendelsesområde
Denne maskinen skal brukes som en allsidig støvsuger, i samsvar med
beskrivelsene og forholdsreglene i denne bruksanvisningen.
Maskinen er kun laget for husholdningsbruk og skal ikke brukes til
industrielle eller kommersielle formål.
Maskinen er i samsvar med standardene IEC 60335-1 og IEC 60335-2-2.
5.2 Operatør
Symbolet som vist i fig. 1 viser brukeren som maskinen er ment for
(profesjonell eller ikke-profesjonell)
5.3 Hovedkomponenter:
A1 Oppstartsenhet
A2 Sugetilkobling
A3 Blåsetilkobling
A4a Håndtak
A4b Metallhåndtak (hvis montert)
A5 Oppsnurringskrok for strømledning (hvis montert)
A6 Fester
A7 Strømledning med støpsel
A8a Fremre trillehjul
A8b Bakre hjul
A9 Støvsugerbeholder
A10 Deksel med motor
A11 Tilbehørholder (hvis montert)
A12 Væskedreneringsplugg (hvis montert)
A13 Bakre hjulaksel (hvis montert)
C1 Elektroverktøykontakt (hvis montert)
5.3.1 Tilbehør (se fig.1 for detaljer om modeller – leveransens
innhold er beskrevet på pappesken)
B1
Filterholder
B2
Filter for kleminnsats
B3
Slange
B4
Adapter for elektroverktøy
B5
Rør
B6
Gulvbørste
B7
Teppe – møbeltrekkbørste
B8
Smalt sugemunnstykke
B9
Rundbørste
B10
Tekstilfilterpose
(valgfritt)
B11
Papirfilterpose
B12
Rørkrok
B13
Kombinert gulvbørste
5.4 Sikkerhetsanordninger
- Oppstartsenhet (A1)
Oppstartsenheten hindrer utilsiktet bruk av maskinen.
6 INSTALLASJON (SIDE 4–5)
Advarsel – fare!
Alt installasjons- og monteringsarbeid må utføres mens maskinen er koblet
fra strømforsyningen.
Monteringsrekkefølgen vises på side 4.
6.1 Montering
Under utpakking må du se etter manglende tilbehør eller skader
på innholdet. Hvis du nner transportskader, må du underrette
forhandleren med én gang.
Løft dekselet med motoren (A10) av maskinen, løsne festene (A6) og
ta ut medfølgende tilbehør, og kontroller at lteret (B2) er riktig montert.
Se fig. 2
Monteringssekvensen er beskrevet på side 4 og 5.
6.2
Tilpassing av bakre og fremre trillehjul
Snu støvsugerbeholderen (A9), med dekselet av, opp ned på en
horisontal overflate. Monter trillehjulnavene (A8a) i hullene som er
tilgjengelig og press hardt ned for å sikre hjulene i riktig posisjon.
Fest akselen (A13) skikkelig, og skru den til justeringshullene er på
linje med tappene. Sett på holderne levert i posen (B17) og fest dem
ved hjelp av de medfølgende skruene. Fest hjulet (A8b) og skiven, og
sikre med låsesplinten. Pass på å sette det helt inn og åpne den ut slik
at den passer tett mot tverrsnittet til akselen. Sett på hjulbeskytteren
og gjenta prosedyren for det andre hjulet (A8b).
Fest metallhåndtaket (A4b) som vist i diagrammet.
Se fig. 3
6.3 Montering av tilbehør
Koble slangen (B3) til sugetilkoblingen (A2) eller blåsetilkoblingen (A3)
avhengig av ønsket driftstype.
Se fig. 4
Fullfør deretter sekvensen med det nødvendige tilbehøret for det
planlagte arbeidet. Bruk rør (B5) og munnstykker (B6-B7-B8-B9)
avhengig av rengjøringstypen og overflaten som skal rengjøres.
Børstene (B6-B7-B8-B9-B13) kan monteres rett på slangen (B3).
Se fig. 5
6.4 Elektrisk tilkobling
Advarsel – fare!
Kontroller at spenningen og frekvensen (V-Hz) til strømtilførselen
samsvarer med det som er angitt på typeskiltet. Se fig. 6
6.4.1 Bruk av skjøteledninger
Bruk ledninger og støpsler med beskyttelsesnivå «IPX4».
Tverrsnittet til skjøteledningen må være proporsjonalt med
lengden, det vil si at jo lenger skjøteledningen er, jo større
må tverrsnittet være.
6.5
Elektroverktøykontakt (hvis montert)
Koble slangen (B3) til elektroverktøyets sugetilkobling. Hvis de to
tilkoblingene ikke er kompatible, bruk så adapteren for elektroverktøy
(B4) (hvor tilgjengelig), og kutt av ekstra materiale.
Betjen verktøyet ved å bruke den ekstra kontakten (C1) (for modeller
med dette tilbehøret).
Se fig. 7
Page 96

96
(Oversettelse av den originale bruksanvisningen)
NO © 2016 Norsk
NO © 2016 Norsk
7 INFORMASJON OM BETJENING AV MASKINEN (SIDE 6)
7.1 Kontroller
- Oppstartsenhet (A1).
Se fig. 8.
Sett bryteren på oppstartsenheten til (ON/I).
Hvis det finnes en pilotflamme på oppstartsenheten, skal den tennes.
Sett bryteren på oppstartsenheten til (OFF/0) for å slå av maskinen.
Hvis det finnes en pilotflamme på oppstartsenheten, skal den slokkes.
Advarsel – fare!
Under drift skal maskinen settes på en fast, stabil overflate. Se fig. 8.
7.2 Oppstart
7.2.1 Tørrsuging.
Se fig. 9.
Fungerer bare tørt med ltrene (B2 - B11)! Før bruk må
ltrene sjekkes for skade og erstattes om nødvendig. For å
suge opp tørt smuss justerer du gulvbørste som nødvendig
og setter på nødvendig tilbehør (bruk børste B13).
Hvis det er nødvendig med en ekstra lterpose under
oppsuging av tørt smuss, kan det brukes en lterpose av
papir (B11) eller tekstil (B10) (valgfritt).
Retningslinjer for lterposer:
- Nivået som lterposen kan fylles til, avhenger av typen
smuss som er oppsamlet.
- For nt støv, sand, osv., må lterposen byttes ut ofte.
- En brukt lterpose kan sprekke, så den bør erstattes i
god tid!
Advarsel – fare!
Sug bare inn kald aske.
7.2.2 Oppsuging av væsker
Se fig. 10.
Advarsel – fare!
Hvis skum oppstår eller væsker yter over, må du slå av
maskinen øyeblikkelig, eller trekke ut hovedstøpselet! Bruk
ikke en lterpose (verken papir eller tekstil)!
Advarsel
Når beholderen er full, vil en ottørbryter stenge av
sugeinnløpet, og motoren vil begynne å ruse. Slå
umiddelbart av maskinen og tøm beholderen.
For å suge vått eller tørt smuss justerer du gulvbørste som
nødvendig og tilpasser nødvendig tilbehør (bruk børste B6).
7.2.3 Arbeid med elektroverktøy.
Se fig 11.
Monteringssekvensen er illustrert på fig.11.
Slå på maskinen (automatisk støvsugingsbryter skrudd mot
venstre til
eller 2-knappbryteren på II) og begynn
arbeidet.
Advarsel: Etter at verktøyet slås på, vil sugeviften starte
etter en 0,5 sekunders forsinkelse.
Når elektroverktøyet slås av, vil sugeviften fortsette å virke i
ytterligere 6 sekunder for å suge opp smuss som sitter igjen
i sugeslangen.
7.2.4 Utblåsningsfunksjon.
Se fig 12.
For renhold av vanskelige områder eller hvor støvsuging er
umulig, som for eksempel fjerning av blader fra grus.
Fest sugeslangen til den medfølgende tilkoblingen.
Utblåsningsfunksjonen er nå aktivert.
For mer effektiv utblåsing anbefales bruk av det smale
sugemunnstykket B8.
7.3 Opphøre drift (pauser)
Slå av maskinen. Se fig. 8.
Sett gulvbørste i oppbevaringsstillingen.
7.4 Fullføre arbeid
Slå av maskinen. Se fig. 8.
Trekk ut støpselet.
7.5 Tøm beholderen
For tørt smuss og støv: Fjern munnstykket fra maskinen og tøm
beholderen. Se fig 13.
For væsker: Bruk dreneringsskruen hvis den fulgte med (se fig. 14),
eller fortsett som nevnt ovenfor.
8 VEDLIKEHOLD (SIDE 135)
Advarsel – fare!
Alt installasjons- og monteringsarbeid må utføres mens maskinen er koblet
fra strømforsyningen.
Monteringsrekkefølgen vises på side 135.
Slå alltid av maskinen og trekk ut støpselet før eventuelt service- eller
vedlikeholdsarbeid. Reparasjoner og arbeid på elektriske systemer skal bare
utføres av autoriserte teknikere.
Advarsel – fare!
Bruk aldri slipende rengjøringsmidler, rengjøringsmidler for glass eller
universalrengjøringsmidler! Senk aldri dekselet
med motoren (A10)
i vann.
Rengjør maskinen og plasttilbehøret med et standard rengjøringsmiddel for
syntetisk materiale. Skyll beholderen og tilbehøret med vann ved behov, og
tørk dem før du bruker dem igjen.
8.1 Renhold av filter for kleminnsats (B2). Se fig 15.
Åpne støvsugeren ved å løsne festene (A6). Snu dekselet med
motoren (A10) opp ned og fjern lteret for kleminnsats (B2).
Skyll nøye under rennende vann, og la det lufttørke. Ikke sett
maskinen sammen igjen før lteret er tørt.
8.2 Bytte papirfilterpose (B11). Se fig 17.
Åpne støvsugeren ved å løsne festene (A6). Fjern den fulle
lterposen (B11), kast den og sett inn en ny.
8.3 Renhold av tekstilfilterpose (B10) (valgfritt). Se fig 16.
Åpne støvsugeren ved å løsne festene (A6). Fjern lterposen
(B10). Tøm lterposen, skyll nøye under rennende vann og la
den lufttørke. Ikke sett maskinen sammen igjen før ltrene er
tørre.
9 OPPBEVARING VED SESONGSLUTT (SIDE 135)
Advarsel – fare!
Alt installasjons- og monteringsarbeid må utføres mens maskinen er koblet
fra strømforsyningen.
Etter avslutning av arbeidet skal maskinen rengjøres og settes bort sammen
med tilbehøret som vist i
fig. 18
.
Oppbevar maskinen på et tørt sted.
Page 97

97
(Oversettelse av den originale bruksanvisningen)
NO © 2016 Norsk
10
FEILSØKING
Problem Mulige årsaker Løsninger
Maskinen slår seg ikke på
Ingen strømforsyning
Sjekk at støpselet sitter riktig i stikkontakten, og at strømmen ikke
er gått (*)
Problemer med den elektrisk-elektroniske kretsen Ta kontakt med servicesenteret
Maskinen suger ikke eller suger
bare svakt
Tilbehør er tilsmusset Kontroller og rengjør munnstykker, forlengelser eller slanger
Skitne filtre Rens filtre
Posen er full Tøm/skift poser
Beholderen er full Tøm beholderen
Elektroverktøyet starter ikke (hvis
elektroverktøystøpsel er montert)
Elektroverktøypluggen er ikke satt inn riktig i støvsugeren Sett inn støpselet riktig
Slått av eller skrudd til I Vri bryteren til elektroverktøy/II-posisjon
Støv kommer ut av maskinen
Filter ikke satt inn Sett inn filter
Filter er skadd Erstatt det gamle filteret med et nytt
Slange eller tilkoblinger er skadet Erstatt ødelagte deler
Vond lukt fra maskin under bruk Filter skitne Erstatt filter
(*) Hvis motoren stopper og ikke vil starte igjen under drift, bes du kontakte et autorisert servicesenter.
EU-samsvarserklæring
Annovi Reverberi S.p.A, i Bomporto (Modena) i Italia, erklærer herved at følgende Black+Decker-maskin(er):
Betegnelse på maskin: Våt-/tørr-støvsuger
Modellnr.: SXVC20PE SXVC20PTE SXVC20XTE SXVC30XTDE SXVC35PTDE SXVC50XTDE
Merkeeffekt: 1,2 kW 1,2 kW 1,4 kW 1,6 kW 1,6 kW 1,6 kW
samsvarer med følgende EU-direktiver:
2006/95/EF - Direktiv som erstattes av direktiv 2014/35/EU fra og med den 20. april 2016,
2004/108/EF - Direktiv som erstattes av direktiv 2014/30/EU fra og med den 20. april 2016, 2011/65/EU, 2005/32/EF og 2012/19/EU.
og ble produsert i samsvar med følgende standarder eller standardiserte dokumenter:
EN 60335-1, EN 60335-2-2, EN 55014-1, EN 55014-2, EN 61000-3-2, EN 61000-3-3, EN 62233 og EN 50581, Reg.1275/2008.
Navn og adresse på personen som er ansvarlig for utstedelsen av den tekniske filen: Stefano Reverberi / AR Daglig leder
Via M.L. King 3 - 41122 Modena, Italia
Dato: 10.02.2016
MODENA (I)
Stefano Reverberi Daglig leder
Page 98

98
(Oversettelse av den originale bruksanvisningen)
NO © 2016 Norsk
NO © 2016 Norsk
GARANTI
Garantiens gyldighet er i samsvar med relevant lovgivning i landet hvor produktet selges (hvis ikke annet er oppgitt av produsenten).
Garantien dekker feil på materialer, konstruksjon og samsvar i løpet av garantiperioden. I løpet av denne perioden vil produsenten erstatte defekte deler og
reparere eller erstatte produktet hvis det ikke er urimelig slitt.
Garantien dekker ikke komponenter utsatt for normal slitasje (lter, poser eller tilbehør som slange, børster, hjul, osv.).
Garantien dekker ikke feil som forårsakes eller er et resultat av:
- feil bruk, misbruk, skjødesløshet,
- profesjonell bruk eller utleie, hvis produktet ble solgt til husholdningsbruk,
- manglende overholdelse av vedlikeholdsinstruksjonene som leveres sammen med denne bruksanvisningen,
- reparasjoner utført av uautoriserte medarbeidere eller servicesentre,
- bruk av ikke-originale deler og tilbehør,
- skader forårsaket av transport, av smuss eller fremmedlegemer, ulykker,
- problemer med lagring eller oppbevaring.
Gyldig kvittering må fremvises for å få dekning av garantien.
Tekniske data Måleenhet
SXVC20PE SXVC20PTE SXVC20XTE SXVC30XTDE SXVC35PTDE SXVC50XTDE
Spenning
V/Hz
220-240 V ~ 5
0/60 Hz
220-240 V ~ 5
0/60 Hz
220-240 V ~ 5
0/60 Hz
220-240 V ~ 5
0/60 Hz
220-240 V ~ 5
0/60 Hz
220-240 V ~ 5
0/60 Hz
Strøm
kW
1,2 1,2 1,4 1,6 1,6 1,6
Beholderkapasitet
l
20 20 20 30 35 50
Maksimalt sugetrykk
kPa
17 17 18 19 19 19
Maksimalt vakuum
mbar 170 170 180 190 190 190
Maksimal luftstrøm
l/s
28 28 33 37 39 41
Antall motorer
-
1 1 1
1 1
1
Tilbehør Ø
mm
35 35 35 35 35 40
Strømledning
m
5 5 5 5 5 5
Beskyttelsesklasse
-
Motorisolering
Klasse F F F F F F
Motorbeskyttelse
-
IPX4 IPX4 IPX4 IPX4 IPX4 IPX4
Nettovekt
kg
7,9 8,4 9,2 9,6 11,5 14,9
Bruttovekt
kg
9,4 9,9 11,4 12,5 14,3 18,75
Med forbehold om tekniske endringer!
Page 99

99
(Tłumaczenie oryginalnej instrukcji)
PL © 2016 Polski
Szanowny Kliencie,
prosimy o zapoznanie się z niniejszą instrukcją przed
przystąpieniem do korzystania z urządzenia po raz
pierwszy, a także o stosowanie się do zawartych
w niej wskazań i przechowywanie jej w bezpiecznym
miejscu, tak aby można było skorzystać z niej
w przyszłości lub przekazać ją kolejnemu
właścicielowi urządzenia.
1 INSTRUKCJE BEZPIECZEŃSTWA
1.1 Zakupione urządzenie jest zaawansowanym
technologicznie produktem zaprojektowanym
przez jednego z czołowych europejskich
producentów. Urządzenie jest przeznaczone do
stosowania jako odkurzacz uniwersalny, zgodnie
z zawartymi w niniejszej instrukcji opisami
i zasadami bezpieczeństwa. Celem zawartych
informacji jest umożliwienie jak najlepszego
wykorzystania urządzenia, zatem należy się
z nimi dokładnie zapoznać i przestrzegać
podanych zaleceń. Podczas użytkowania
i konserwacji urządzenia oraz podłączania
jego elementów należy zachować wszelkie
możliwe środki ostrożności zapewniające
bezpieczeństwo własne, jak i osób znajdujących
się w bezpośrednim otoczeniu urządzenia.
Należy dokładnie zapoznać się ze wszystkimi
zasadami bezpieczeństwa i bezwzględnie ich
przestrzegać. Niezastosowanie się do zaleceń
może być przyczyną urazów lub poważnego
uszkodzenia sprzętu.
2 OZNACZENIA BEZPIECZEŃSTWA
2.1 Należy przestrzegać zaleceń wskazanych przez
oznaczenia bezpieczeństwa umieszczone
na urządzeniu oraz zawarte w niniejszej
instrukcji.
W instrukcji oraz na urządzeniu znajdują się
wyłącznie symbole dotyczące zakupionego
modelu urządzenia. Należy zawsze sprawdzać,
czy symbole i oznaczenia, którymi opatrzono
urządzenie, znajdują się we właściwych
miejscach i są czytelne. W przeciwnym
wypadku należy umieścić symbole zastępcze
w pierwotnym położeniu. (Skontaktować się
z centrum serwisowym).
Ostrzeżenie przed niebezpieczeństwem!
Przed użyciem należy uważnie
przeczytać niniejszą instrukcję
obsługi.
Symbol E3 (jeżeli znajduje się na rys. 1)
oznacza, że urządzenie zostało
zaprojektowane wyłącznie do użytku
domowego i nie wolno z niego korzystać
w celach przemysłowych lub komercyjnych.
0 Przełącznik w położeniu „wyłączony”
I Przełącznik w położeniu „włączony”
Automatyczne ustawienie odkurzacza
II Automatyczne ustawienie odkurzacza
Page 100

100
(Tłumaczenie oryginalnej instrukcji)
PL © 2016 Polski
PL © 2016 Polski
Produkt jest oznaczony II klasą izolacji.
Oznacza to, że izolacja jest wzmocniona
lub podwójna (dotyczy wyłącznie urządzeń
opatrzonych symbolem).
Produkt jest oznaczony I klasą izolacji.
Oznacza to, że jest wyposażony
w ochronny przewód uziemiający (dotyczy
wyłącznie urządzeń opatrzonych symbolem).
Omawiany produkt jest zgodny
z wymaganiami odnośnych dyrektyw
europejskich.
Symbol E1 - Recykling urządzenia.
Stare urządzenie należy doprowadzić do stanu
uniemożliwiającego użytkowanie.
Odłączyć urządzenie od zasilania.
Przeciąć przewód zasilający.
Nie utylizować urządzeń elektrycznych wraz
z odpadami domowymi. Zgodnie z przepisami
dyrektywy 2012/19/WE w sprawie zużytego
sprzętu elektrycznego i elektronicznego
(WEEE) element elektryczny musi być zebrany
selektywnie i utylizowany w sposób przyjazny
dla środowiska. Aby uzyskać więcej informacji,
należy skontaktować się z odpowiednim
organem władz lokalnych lub dystrybutorem.
Stosować środki ochrony słuchu.
Stosować maskę ochronną.
Stosować środki ochrony dróg
oddechowych.
Stosować rękawice ochronne.
Stosować obuwie ochronne.
Stosować odzież ochronną.
 Loading...