

Page 1

STPW1400
English
繁体中文
04
09
Page 2

Read this manual through carefully before installing/using the cleaner, paying special attention to the SAFETY
INSTRUCTIONS
安裝 / 使用清潔機之前,請仔細閱讀本手冊,特別注意「安全指示」
Page 3
2
Fig.1
Fig.2
Fig.3 Fig.4
5
6
7
8
9
10
11
12
13
14
15
16
17
4
3
2
1
Page 4
3
Fig.5
Fig.7
Fig.9
Fig.11
Fig.6
Fig.8
Fig.10
Water outlet
Safe lock
Trigger
OFF
ON
Water output
Fig.12 Fig.13
Page 5
Technical data
Model. No
Rated voltage
Rated input power
Protection class
Degree of protection
Rated pressure
Max. pressure
Rated flow
Max. flow
Rated temperature
Max. inlet pressure
Weight
110V
1400W
II
IPX5
7MPa
10MPa
5.5 l/min
6.5l/min
0-40℃
0.7MPa
5.32 Kg
SYMBOLS USED TO MARK INSTRUCTIONS
Some of the following symbols may be used on this
product. Please study them and learn their meaning
for safe operation.
SYMBOL NAME EXPLANATION
Read
instruction
Before starting up your
high pressure washer
for the first time, this
instruction manual must
be read through carefully.
Save the instructions for
later use.
@
Safety Alert Safety instructions marked
with this symbol must
be observed to prevent
danger to persons.
Safety mark This symbol is used to
mark safety instructions
that must be observed
to prevent damage to
the machine and its
performance
Indication
mark
This symbol indicates
tips and instructions to
simplify work and to
ensure a safe operation.
h
Waste
products
disposal
Waste electrical products
should not be disposed of
with household waste.
Eye
Protection
Always wear safety
goggles or safety glasses
with side shields or a
full face shield when
operating this product.
Class II
Construction
Double-insulated
construction.
keep
Bystanders
Away
To reduce the risk of
injury, user must keep all
bystanders at least 15m
away.
Electric
Shock
Precaution
Remove plug from the
mains immediately if cable
is damaged or cut.
Electrical
shock hazard
Electrical shock hazardt
Machine not suitable for
connection
to the potable water
mains
The following signal words and meanings are
intended to explain the levels of risk
ASSOCIATED WITH THIS PRODUCT
Symptom Signal Meaning
@
Danger Indicates an imminently hazardous
situation which, if not avoided, will
result in death.
@
Warning Indicates a potentially hazardous
situation which, if not avoided, could
result in death or serious injury.
@
Caution Indicates a potentially hazardous
situation which, if not avoided, may
result in minor or moderate injury.
@
Caution (Without Safety Alert Symbol)
Indicates a situation that may result in
property damage.
IMPORTANT SAFETY INSTRUCTIONS
@
WARNING!
This appliance is not intended for use by children
or other persons without assistance or supervision
if their physical, sensory or mental capabilities
prevent them from using it safely. Children should
be supervised to ensure that they do not play with
the appliance.
Before starting up your machine please check it
carefully for any defects. If you find any, do not
start up your machine and contact your distributor.
ESPECIALLY CHECK
The insulation of the power cord should be faultless
and without any cracks. If the power cord is
damaged, an authorized distributor should replace
it.
STPW1400
PRESSURE WASHER
4
ENGLISH
Page 6

5
ENGLISH
@WARNING!
Warning: Do not use this appliance without
reading this instruction sheets.
- The electric supply connection shall be made
by a qualified electrician and comply with
IEC60364-1.
- The Electric supply to this appliance should
include either a residual current device that will
interrupt the supply if the leakage current to
earth exceeds 30 mA for 30 ms or a device that
will interrupt the earth circuit.
- WARNING: This appliance has been designed
for use with the cleaning agent supplied or
recommended by the manufacturer. The use
of other cleaning agents or chemicals may
adversely affect the safety of the appliance.
- WARNING: Do not use the appliance within
range of persons unless they wear protective
clothing.
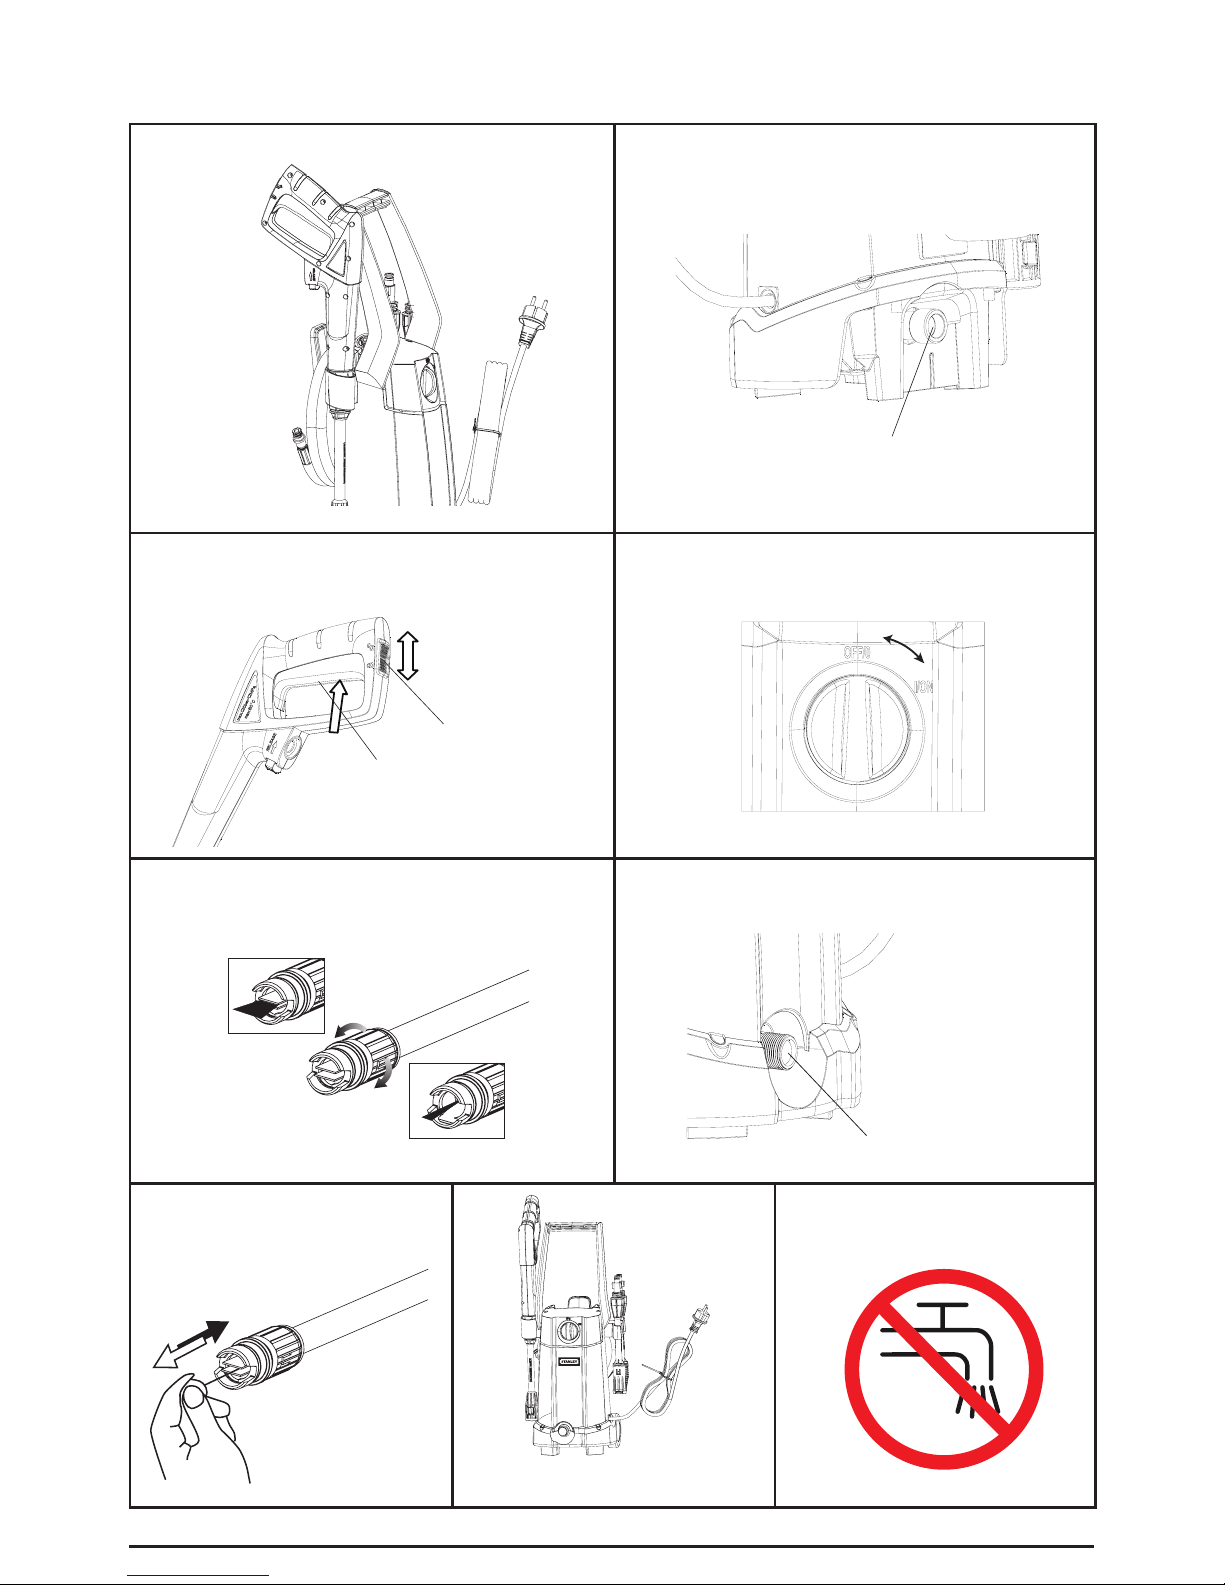
- WARNING: High pressure jets can be
dangerous if subject to misuse. The jet must not
be directed at persons, live electrical equipment
or the appliance itself.
- Do not direct the jet against yourself or others in
order to clean clothes or foot-wear.
- Risk of explosion
- Do not spray flammable liquids.
- Disconnect from the electrical power supply
before carrying out user maintenance .
- High pressure cleaners shall not be used by
children or untrained personnel.
- To ensure appliance safety, use only original
spare parts from the manufacturer or approved
by the manufacturer.
- WARNING: Water that has flown through
backflow preventers is considered to be nonpotable.
- WARNING: The machine shall be disconnected
from its power source during cleaning or
maintenance and when replacing parts for mains
operated machines by removing the plug from
the socket-outlet;
- WARNING: High pressure hoses, fittings
and couplings are important for safety of the
appliance. Use only hoses, fittings and couplings
recommended by the manufacturer.
- Do not use the appliance if a supply cord or
important parts of the appliance are damaged,
e.g. safety devices, high pressure hoses, trigger
gun.
- WARNING: If an extension cord is used,
the plug and socket must be of watertight
construction.
- WARNING: Inadequate extension cords can be
dangerous.
_ This high pressure washer must not be used at
temperatures below 0°C.
@WARNING!
- Cord on drums should always be completely
unwinded to prevent the cord from overheating.
- If an extension cord is used, the plug and socket
must be of watertight construction.
- Inadequate extension cords can be dangerous.
- comply with the below-mentioned
requirements for length and cord dimensions.
1.0 mm² max. 12.5 m
1.5 mm² max. 20 m
2.5mm² max. 30 m
Power cord connections should be kept dry and
off the ground.
If the power cord is damaged, it must be replaced
by the manufacturer or his service agent or similarly
qualified person in order to avoid a hazard.
All keep the machine on a stable and flat surface
during operation, handling, transportation and
storage. Sudden overturn of machine will cause
injury to body.
In the event of accident or breakdown, switch
off the machine immediately. (e.g. contact with
detergent: rinse with an abundance of clean water)
@ ATTENTION!
Through poor conditions of the electrical MAINS,
shortly voltage drops can appear when starting the
EQUIPMENT. This can influence other equipment
(eg. Blinking of a lamp). If the MAINS-IMPEDANCE
Zmax < 0.335 OHM, such disturbances are not
expected. (In case of need, you may contact you
local supply authority for further information.)
WARNING! ELECTRICAL SHOCK HAZARD
Improper connection of the equipment-
grounding conductor can result in a risk
of electrical shock. Check with a qualified
electrician or service person if you are unsure
if an outlet is properly grounded. DO NOT
modify the plug provided with the appliance to
fit an outlet, have a proper outlet installed by a
qualified electrician.
MAINS POWER CONNECTION
The following should be observed when
connecting the high pressure washer
to the electric installation:
- The electric installation shall be made by a
Page 7

6
ENGLISH
certified electrician and comply with IEC-364.
- It is recommended that the electric supply to
this appliance should include either a residual
current device that will interrupt the supply if
the leakage current to earth exceeds 30 mA for
30 ms.
@IMPORTANT!
Only use water without any impurities.
If there is a risk of running sands in the inlet water
(i.e. from your own well), an additional filter should
be mounted.
SAFETY DEVICES
The unloader valve can reduce pressure if it
exceeds pre-set values. The spray gun features
a locking device. When the pawl is activated, the
spray gun cannot be operated.
Thermal sensor:
A thermal sensor protects the motor against
overloading. The machine will restart after a few
minutes when the thermal sensor has cooled.
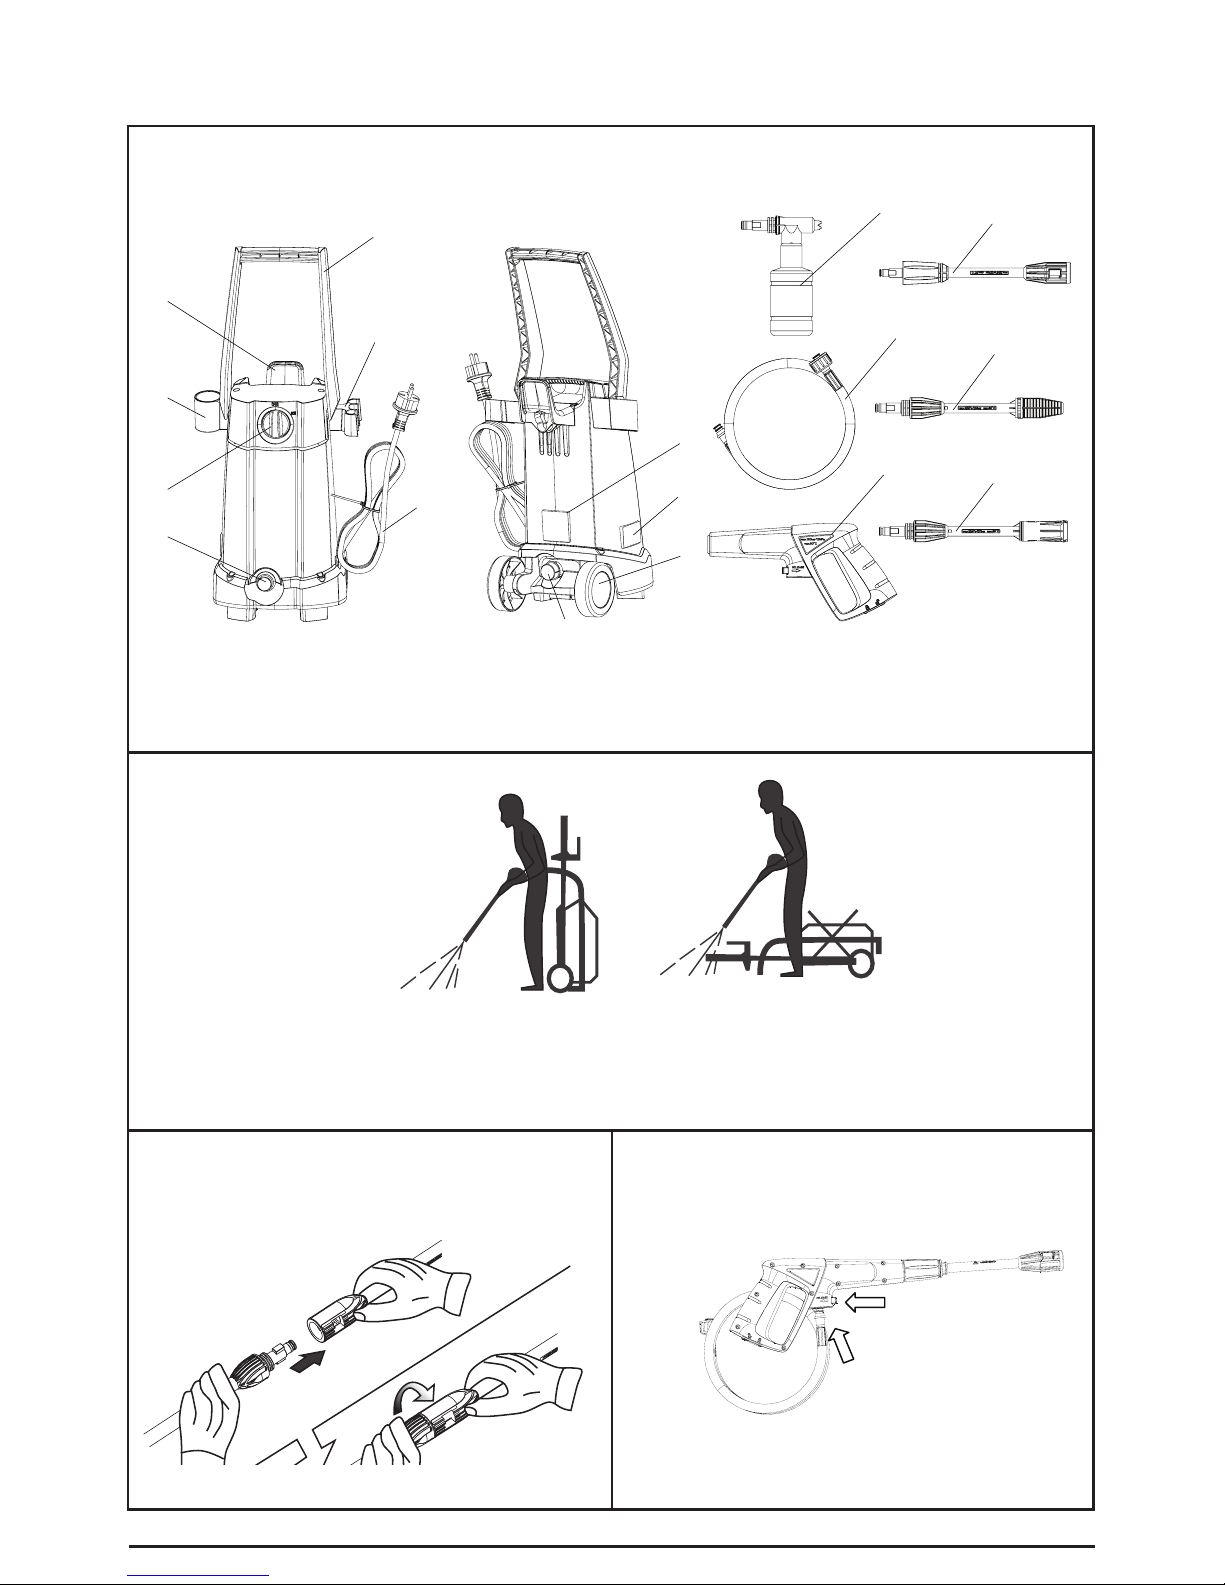
NAME OF PARTS: (FIG. 1)
1.Water outlet
2.On/off switch
3.Gun holder
4.High pressure hose holder
5.Handle
6.Lance holder
7.Power cord
8.Water inlet
9.Wheel
10.Warning label
11.Rating label
12.Detergent bottle
13.Middle lance
14.High pressure hose
15.Turbo lance
16.Gun
17.Lance
PRODUCT DESCRIPTION
PURPOSE
The high pressure cleaner is designed to clean
vehicles, machines, buildings, facades, etc. in
the private sector.
AREAS OF APPLICATION
Never use the machine in potentially explosive
areas under any circumstances!
The operating temperature must be between 0
and +40℃.
The machine consists of an assembly with a
pump, which is encased in a shock absorbing
housing. For an optimal working position the
machine comes with a lance and a non-slip
handle grip, whose shape and configuration
comply with the applicable regulations.
Do not cover or modify the lance or the spray
nozzles in any way.
The high pressure cleaner is designed to be
used with cold or lukewarm (max. 60℃); higher
temperatures can damage the pump.
Do not use water that is dirty, gritty or contains
any chemical products, as these could impair
operation and shorten the life of the machine.
Accessories can be used to carry out work with
foam cleaners, sand spraying.
ASSEMBLY
Position the washer as NEAR as possible to the
water supply.
The washer must be used standing on a secure,
stable, positioned as shown. FIG.2.
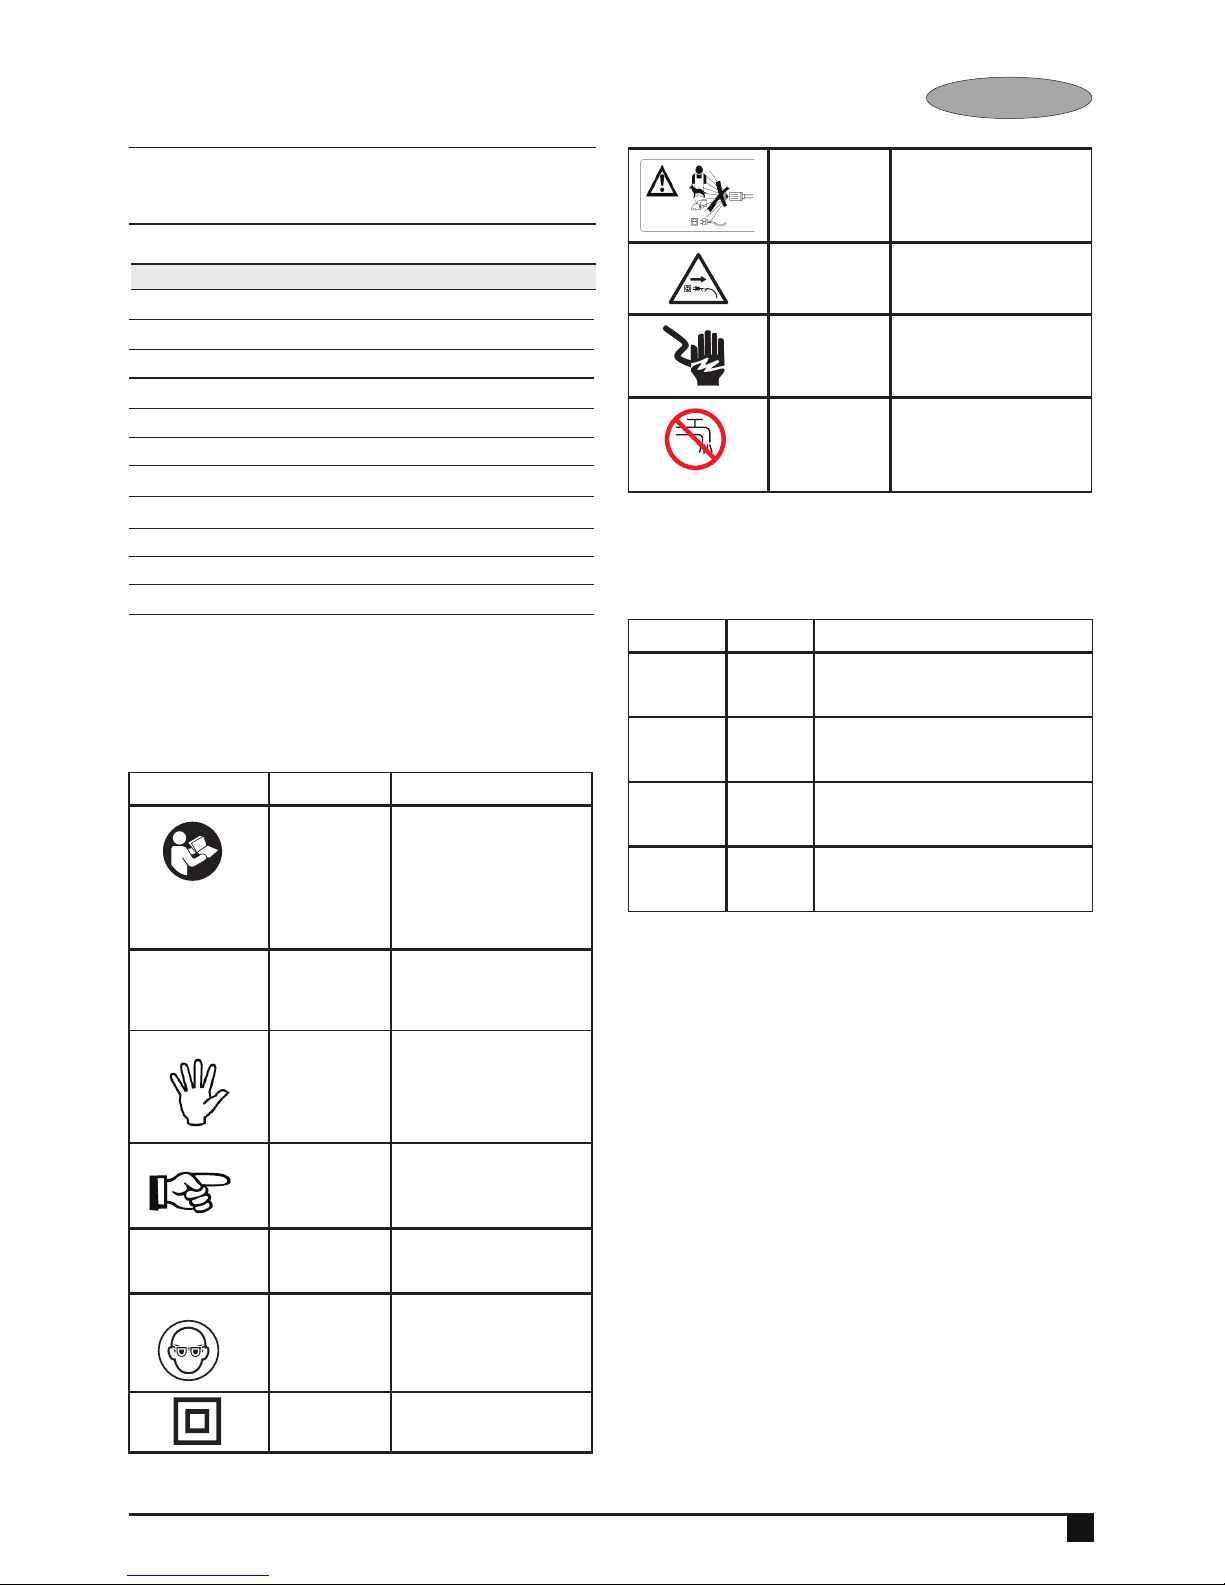
Fit the lance into the gun and rotating it until the
two parts are completely locked FIG. 3
Connect the gun to the high pressure hose
FIG.4
Connect the high pressure hose to the water
outlet on the washer FIG.5.
Connect the water supply hose to female
coupler FIG.6, then connect to the water inlet
of the washer. The supply hose must have an
internal diameter of at least 13mm (1/2 in.) and
must be reinforced. The water supply must be
at least equal to the washer delivery capacity.
NOTE: The machine not suitable for
connection to the potable water main (FIG.
13).
@WARNING! The intake water temperature must
not exceed 40℃. The water supply must not
exceed 0.7 MPa.
@CAUTION! The washer must only be used with
clean water; use of unfiltered water of corrosive
chemicals will damage the washer.
Push the motor switch to “OFF” position FIG.
8.
Check that the electrical supply voltage and
frequency (Volt/Hz) correspond to those
specified on the washer rating plate. If the
power supply if correct, you may now plug in
the washer.
OPERATION
Turn on the water supply tap fully.
Release the safety lock FIG.7, then press the
Page 8

7
ENGLISH
trigger for a few seconds to allow air to escape
and to discharge residual pressure in the hose.
Keeping the trigger pressed, push the switch to
start the motor FIG.8.
When re-starting the motor, always keep the
trigger pressed.
NOTE:
THE MOTOR ONLY RUNS WHEN THE TRIGGER
IS OPERATED.
CORRECT USE OF STANDARD ACCESSORIES
The washer is equipped with the adjustable
nozzle.
Jet adjustment from pencil to fan FIG.9
@WARNING: DO NOT ADJUST THE NOZZLE
WHILE THE TRIGGER IS SQUEEZED.
RECOMMENDED CLEANING PROCEDURE
Dissolve dirt by applying detergent with the fan
jet to the dry surface. On vertical surfaces, work
from the bottom upwards. Leave the detergent
to act for 1 to 2 minutes, but do not allow to dry
out. Apply the high from the surface, working
from the bottom upwards.
Avoid allowing the rinsing water to run on to
unwanted surfaces.
STORAGE (FIG.10 - FIG. 12)
Switch off the washer.
Turn off the water supply tap.
After use, the detergent residuals should be
removed from the tank.
Discharge residual pressure by pressing the
trigger until no more water comes out of the
lance nozzle.
Engage the gun safety lock.
Remove the plug from the socket.
Operate the washer with non-corrosive/ non-
toxic antifreeze before storing for the winter.
@WARNING:BEFORE REUSING, COMPLETELY
FLUSH THE UNIT OUT WITH PLAIN WATER.
ANTI-FREEZE CAN DAMAGE PAINTWORK
SO YOU MUST ENSURE THERE IS NO
ANTI-FREEZE LEFT IN THE SYSTEM BEFORE
USING IT AGAIN.
MAINTENANCE
@CAUTION! Before working on the washer,
disconnect the lug from the power supply
socket
To ensure good performance, check and clean
the suction and detergent filters after every 50
hours of operation FIG. 11.
Clean the nozzle with the tool provided. Remove
the lance from the gun; remove any dirt from
the nozzle hole (FIG. 12) and rinse.
TROUBLE-SHOOTING
Disconnect from the electrical power supply before
carrying out user maintenance or checking its
correct functioning.
To avoid unnecessary disappointments, you should
check the following before contacting the service
organization:
Symptom
Cause Recommended action
Machine
refuses
to start
Machine not
plugged in
Defective socket
Fuse has blown
Defective extension cord
Plug in machine
Try another socket.
Replace fuse. Switch off
other machines.
Try without the extension
cord.
Fluctuating
pressure
Pump sucking air
Valves dirty, worn
out or stuck
Pump seals worn
ou
Check that hoses and connections are airtight.
Clean and replace or refer
to local distributor
Clean and replace or refer
to local distributor
Machine stops
Fuse has blown
Incorrect mains
voltage
Thermal sensor
activated
Nozzle partially
blocked
Replace fuse. Switch off
other machines.
Check that the mains
voltage corresponds to
specification on the model
tag.
Leave the washer for 5
minutes to cool down.
Clean the nozzle
Fuse blows
Fuse too small
Change to an installation
higher than the amp. consumption of the machine.
You may try without the
extension cord.
Machine pul-
sating
Air in inlet hose
Inadequate supply
of mains water
Nozzle partially
blocked
Water filter blocked
Hose kinked
Allow machine to run with
open trigger until regular
working pressure resumes.
Check that the water
supply corresponds to
specifications required
NB! Avoid using long, thin
hoses (min. 1/2”)
Clean the nozzle
Clean the filter
Straighten out hose.
Machine often
starts and stops
by itself
Pump/spray gun is
leaking Centre.
Contact your nearest
Service
Machine starts,
but no water
comes out
Pump/hoses or accessory frozen
No water supply
Water filter blocked
Nozzle blocked
Wait for pump/hoses or
accessory to thaw.
Connect inlet water.
Clean the filter
Clean the nozzle
In case problems other than the above occur,
please contact your local distributor.
Page 9

8
ENGLISH
CIRCUIT DIAGRAM
DISPOSAL
Recycling the washer
Do not dispose of electrical appliances
h
as unsorted municipal waste, use separate
collection facilities.
Contact you local government for information
regarding the collection systems available.
If electrical appliances are disposed of in landfills
or dumps, hazardous substances can leak into
the groundwater and get into the food chain,
damaging your health and well-being.
When replacing old appliances with new ones,
the retailer is legally obligated to take back
your old appliance for disposals at least free of
charge.
SAVE THESE INSTRUCTIONS
Page 10

繁體中文
9
技術資料
型號
額定電壓
額定輸入功率
保護級別
保護等級
額定壓力
最大壓力
額定流量
最大流量
額定溫度
最大入口壓力
重量
110V
1400W
II
IPX5
7MPa
10MPa
5.5 l/min
6.5l/min
0-40℃
0.7MPa
5.32Kg
用於標記指示的符號
本產品上可能使用了以下一些符號。請學習這些
符號並瞭解其對於安全作業的含義。
符號 名稱 說明
閱讀
指示
第一次啟動高壓清洗機之
前,必須仔細閱讀本指示手
冊。妥善保管指示以備將來
使用。
@
安全警告
必須遵守標有此符號的安全
指示以防止對人構成危害。
安全標記
此符號用於標記為防止機器
損壞及其效能而必須遵守的
安全指示
指示標記
此符號指出了用於簡化工作
及確保安全作業的提示與
指示。
h
廢棄產品處置
廢棄電氣產品不得與家庭廢
物一起處置。
護目裝備
操作本產品時,務必佩戴配
有側護罩或全面式護罩的護
目鏡。
II級結構
雙重絕緣結構。
讓圍觀者遠離
若要降低傷害風險,使用者
必須讓所有圍觀者遠離至
少 15m。
觸點預防措施
如果電纜損毀或被切斷,請
從主電源中拔出插頭。
觸電危險
觸電危險
機器不適合連接至飲用水
總管
以下信號詞及含義用於說明風險級別
與本產品相關
症狀 信號 含義
@
危險
表示緊急危險情況,若未能避免,將導
致死亡。
@
警告
表示潛在危險情況,若未能避免,可能
導致死亡或嚴重傷害。
@
小心
表示潛在危險情況,若未能避免,可能
導致輕微或中度傷害。
@
小心
(無安全警告符號)表示可能會導致財
產損失的情況。
重要安全指示
@
警告!
體力、感覺或智力不足的兒童或其他人員必須在
協助或監督下使用本器具,以確保安全使用。必
須監督小孩,確保他們沒有耍玩器具。
啟動機器之前,請仔細檢查機器是否存在任何缺
陷。如發現缺陷,請不要啟動機器,並與您的經
銷商聯絡。
重點檢查
電源線的絕緣應完好且無任何裂縫。如果電源線
損毀,則授權的經銷商應將其更換。
STPW1400
高壓清洗機
Page 11

繁體中文
10
@ 警告!
警告:如未閱讀本指示表,請勿使用本器具。
- 供電連接應由合格的電工完成且符合IEC60364-1
標準。
- 本器具的供電設備應包括將在接地漏電流超過
30毫安的時間持續30毫秒時中斷電源的漏電保
護器或將中斷接地電路的裝置。
- 警告:本器具可與隨附的清潔劑或製造廠商推
薦的清潔劑配合使用。使用其他清潔劑或化學
品可能會對器具的安全產生不利影響。
- 警告:請勿在人的活動範圍內使用本器具,除
非他們已穿防護服。
- 警告:如果誤用,高壓噴射可能會非常危險。不
得對著人、帶電的電氣設備或器具本身噴射。
- 請勿對著自己或其他人噴射來清潔衣物或鞋
襪。
- 爆炸風險
- 請勿噴射易燃液體。
- 進行使用者維護之前,請斷開與電源的連接。
- 兒童或未經培訓的人員不得使用高壓清潔機。
- 為了確保器具安全,請僅使用製造廠商生產或
製造廠商認可的原廠備件。
- 警告:流經迴流防止器的水被視為非飲用水。
- 警告:在清潔或維護期間或在更換電源驅動機
器的部件時,應從插座中拔出插頭,斷開機器
與其電源的連接。
- 警告:高壓軟管、接頭和聯結器對於器具的安
全至關重要。僅使用製造廠商推薦的軟管、接
頭和聯結器。
- 如果器具的電源線或重要部件損毀(如,安全
裝置、高壓軟管、觸發槍),請勿使用器具。
- 警告:如果使用延長電線,則插頭與插座必須
為不透水結構。
- 警告:延長電線不夠可能會非常危險。
- 此高壓清洗機不得在低於0°C的溫度下使用。
@警告!
- 圓筒上的電線應始終完全展開以免電線過熱。
- 如果使用延長電線,則插頭與插座必須為不透
水結構。
- 延長電線不夠可能會非常危險。
- 長度與電線尺寸應符合下述要求。
1.0 mm² 最長12.5 m
1.5 mm² 最長20 m
2.5mm² 最長30m
電源線連接應保持乾燥且脫離地面。
如果電源線損毀,則必須讓製造廠商、維修代理
或類似合格人員更換以避免發生危險。
在作業、處理、運輸與儲存期間,務必將機器置
於平穩表面。突然推倒機器將會導致人身傷害。
如果發生意外或故障,請立即關閉機器。(例
如,接觸到洗滌劑:使用大量乾淨的水沖洗)
@ 注意!
如果主電源的狀況不佳,則在啟動設備時可能會
出現短時間的電壓下降。這可能會影響其他設備
(如,燈具閃爍)。如果主電源阻抗Zmax < 0.335
歐姆,則預計不會出現此類干擾。(如有需要,
您可以聯絡當地的供電機構以取得進一步資訊。)
警告!觸電危險
設備接地導電體連接不當可能會導致觸
電
風險。如果您不確定插座是否正確接
地,請與合格的電工或維修人員進行確認。不
要為了配合插座而改裝器具隨附的插頭,讓合
格的電工安裝合適的插座。
主電源連接
在以下情況下應遵守下列各項:
將高壓清洗機連接至電氣裝置:
- 電氣安裝應由經認證的電工完成且符合
IEC-364標準。
Page 12

繁體中文
11
- 建議本器具的供電設備應包括將在接地漏電流
超過30毫安的時間持續30毫秒時中斷電源的漏
電保護器。
@ 重要資訊!
僅使用不含任何雜質的水。
如果入口的水(如,來自自己的井道)中可能存
在流沙,則應安裝其他過濾器。
安全裝置
如果壓力超過預設值,則調壓閥可降低壓力。噴
槍具有鎖定裝置。棘爪啟動時,噴槍無法使用。
熱感應器:
熱感應器可防止電動機過載。機器將在熱感應器
冷卻幾分鐘後重新啟動。
部件的名稱:(圖1)
1. 出水口
2. 開關
3. 槍托
4. 高壓管掛扣
5. 手柄
6. 槍桿托
7. 電源線
8. 進水口
9. 輪子
10. 警告標貼
11. 銘牌
12. 清潔壺
13. 中連桿
14. 高壓管
15. 蓮花噴頭
16.槍柄
17.槍桿
產品說明
用途
高壓清潔機設計用於清潔私營部門的車輛、機
器、建築及各種表面等。
應用範圍
在任何情況下均不得在可能發生爆炸的區域使
用機器!
作業溫度必須介於0與+40℃之間。
機器由一個含幫浦的組件組成,裝在一個減震
外殼中。為獲得最佳工作位置,機器配有一隻
槍桿和一個防滑手柄,其形狀與配置符合適用
法規。
請勿以任何方式覆蓋或改裝槍桿或噴嘴。
高壓清潔機設計在低溫或微溫(最高60℃)下
使用;較高的溫度可能會損壞幫浦。
請勿使用髒水、或含沙粒或任何化學產品的
水,因為此類水可能會影響作業,縮短機器的
使用壽命。
可以將配件與泡沫清潔劑配合使用,進行噴沙。
裝配
將清洗機儘量靠近供水裝置。
清洗機必須位於一個安全、穩固的位置,如圖
所示(圖2)。
將槍桿裝入噴槍,旋轉槍桿,直至兩個部件完
全鎖定(圖3)
將噴槍連接至高壓軟管(圖4)
將高壓軟管連接至清洗機上的出水口(圖5)。
將供水軟管連接至母型聯結器(圖6),然後連
接至清洗機的入水口。供水軟管的內徑必須至
少為13mm(1/2英吋)且必須加固。供水量必
須至少等於清洗機的輸送容量。
注:機器不適合連接至飲用水總管(圖13)。
@ 警告!進水溫度不得超過40℃。供水壓力不得
超過0.7MPa。
@ 小心!清洗機僅可使用乾淨的水;使用未過
濾、含腐蝕性化學品的水將會損壞清洗機。
將電動機開關撥至「OFF」位置(圖8)。
檢查供電電壓與頻率(V/Hz)是否與清洗機銘牌
上指定的數值一致。如果電源正確,則您即可
插上清洗機的插頭。
Page 13

繁體中文
12
操作
完全開啟供水裝置的水龍頭。
解除安全鎖(圖7),然後按下扳機幾秒鐘,讓
空氣排出並排放軟管中的殘留壓力。
按住扳機,撥動開關以啟動電動機(圖8)。
重新啟動電動機時,務必按住扳機。
注:
電動機僅在扳機啟動的情況下運行。
正確使用標準配件
清洗機配有可調噴嘴。
從鉛筆噴嘴至渦扇噴嘴進行噴射調整(圖9)
@ 警告:扣動扳機時請勿調整噴嘴。
建議的清潔程序
透過渦扇噴射機將洗滌劑噴塗至乾燥表面,溶
解污垢。在垂直表面,從下至上操作。讓洗滌
劑持續作用1至2分鐘,但不要讓其變乾。從表
面的高處開始噴塗,從下至上操作。
避免沖洗用水流至不必要的表面。
儲存(圖10-圖12)
關閉清洗機。
關閉供水裝置的水龍頭。
使用之後,應從桶中清除洗滌劑殘留。
透過按住扳機來排放殘留壓力,直至槍桿噴嘴
中不再流出水。
嚙合噴槍安全鎖。
從插座中拔出插頭。
冬季儲存之前,請使用非腐蝕性/無毒的防凍劑
操作清洗機。
@ 警告:重新使用之前,請使用普通的水徹底沖
洗裝置。防凍劑可能會破壞塗料,因此重新使
用之前,必須確保系統中未殘留任何防凍劑。
維護
@ 小心!使用清洗機之前,請斷開接線片與電源
插座的連接
為了確保獲得良好效能,每操作50小時之後即檢
查並清潔一次吸入和洗滌劑過濾器(圖11)。
使用隨附的工具清潔噴嘴。從噴槍上取下槍桿;
清除噴嘴孔中的污垢(圖12)並進行沖洗。
故障排除
進行使用者維護或檢查其是否正常運作之前,請
斷開與電源的連接。
為避免陷於失望,聯絡維修機構之前,您應檢查
以下各項:
症狀 原因 建議措施
機器拒絕
啟動
機器的插頭未插入
插座存在缺陷
熔斷器已熔斷
延長電線存在缺陷
插上機器的插頭
嘗試其他插座。
更換熔斷器。關閉其他
機器。
嘗試不使用延長電線。
壓力波動
幫浦吸入空氣
閥門髒污、磨損
或卡住
幫浦密封已磨損
檢查軟管與接頭是否密閉。
清潔並更換,或轉介至當
地經銷商
清潔並更換,或轉介至當
地經銷商
機器停止
熔斷器已熔斷
主電源電壓錯誤
熱感應器已啟動
噴嘴部分堵塞
更換熔斷器。關閉其他
機器。
檢查主電源電壓是否與型號
標籤上的規格一致。
讓清洗機冷卻5分鐘。清
潔噴嘴
熔斷器熔斷 熔斷器過小
改用高於機器電流消耗量的
裝置。您可嘗試不使用延
長電線。
機器進行脈動
入口軟管中有空氣
總管供水不足
噴嘴部分堵塞
濾水器堵塞
軟管扭結
允許機器在扳機開啟的情況
下運行,直至恢復正常工
作壓力。
檢查供水是否與所需的規
格一致
NB!避免使用長且細的軟管
(最小1/2”)
清潔噴嘴
清潔過濾器
理順軟管。
機器經常會自行
啟動和停止
幫浦/噴槍是洩漏
中心。
請與您最近的維修中心聯絡
機器已啟動,
但沒有水流出
幫浦/軟管或配件
已凍結
無供水
濾水器堵塞
噴嘴堵塞
等待幫浦/軟管或配件解
凍。
連接入水口。
清潔過濾器
清潔噴嘴
如果出現以上問題之外的問題,請與您當地的經
銷商聯絡。
Page 14

繁體中文
13
處置
回收清洗機
h
請勿將電器作為未分類的城市廢物進行處置,
使用分類收集設施。
請與您當地的政府聯絡以獲得有關可用收集系
統的資訊。
如果在垃圾填埋場或堆填區處置電器,有害物
質可能會洩漏到地下水,進入食物鏈,有損您
的健康與福祉。
使用新器具更換舊器具時,經銷商在法律上有
義務免費回收您的舊器具進行處置。
請保存這些安全指示
進口商: 永安實業股份有限公司
電話: 02-29994633
地址: 新北市三重區中山路286號1F
 Loading...