

Page 1
STHR272
English Page 3
Turkish Page 1
Page 2
ENGLISH
2
(Original instructions)
2
C
BA
D E
1
8
1
2
3
4
5
12
XXXX XX JN
6
8
6
7
7
5
5
3
9
10
11
11
* The picture above may differ slightly to actual unit.
Page 3
3
ENGLISH
(Original instructions)
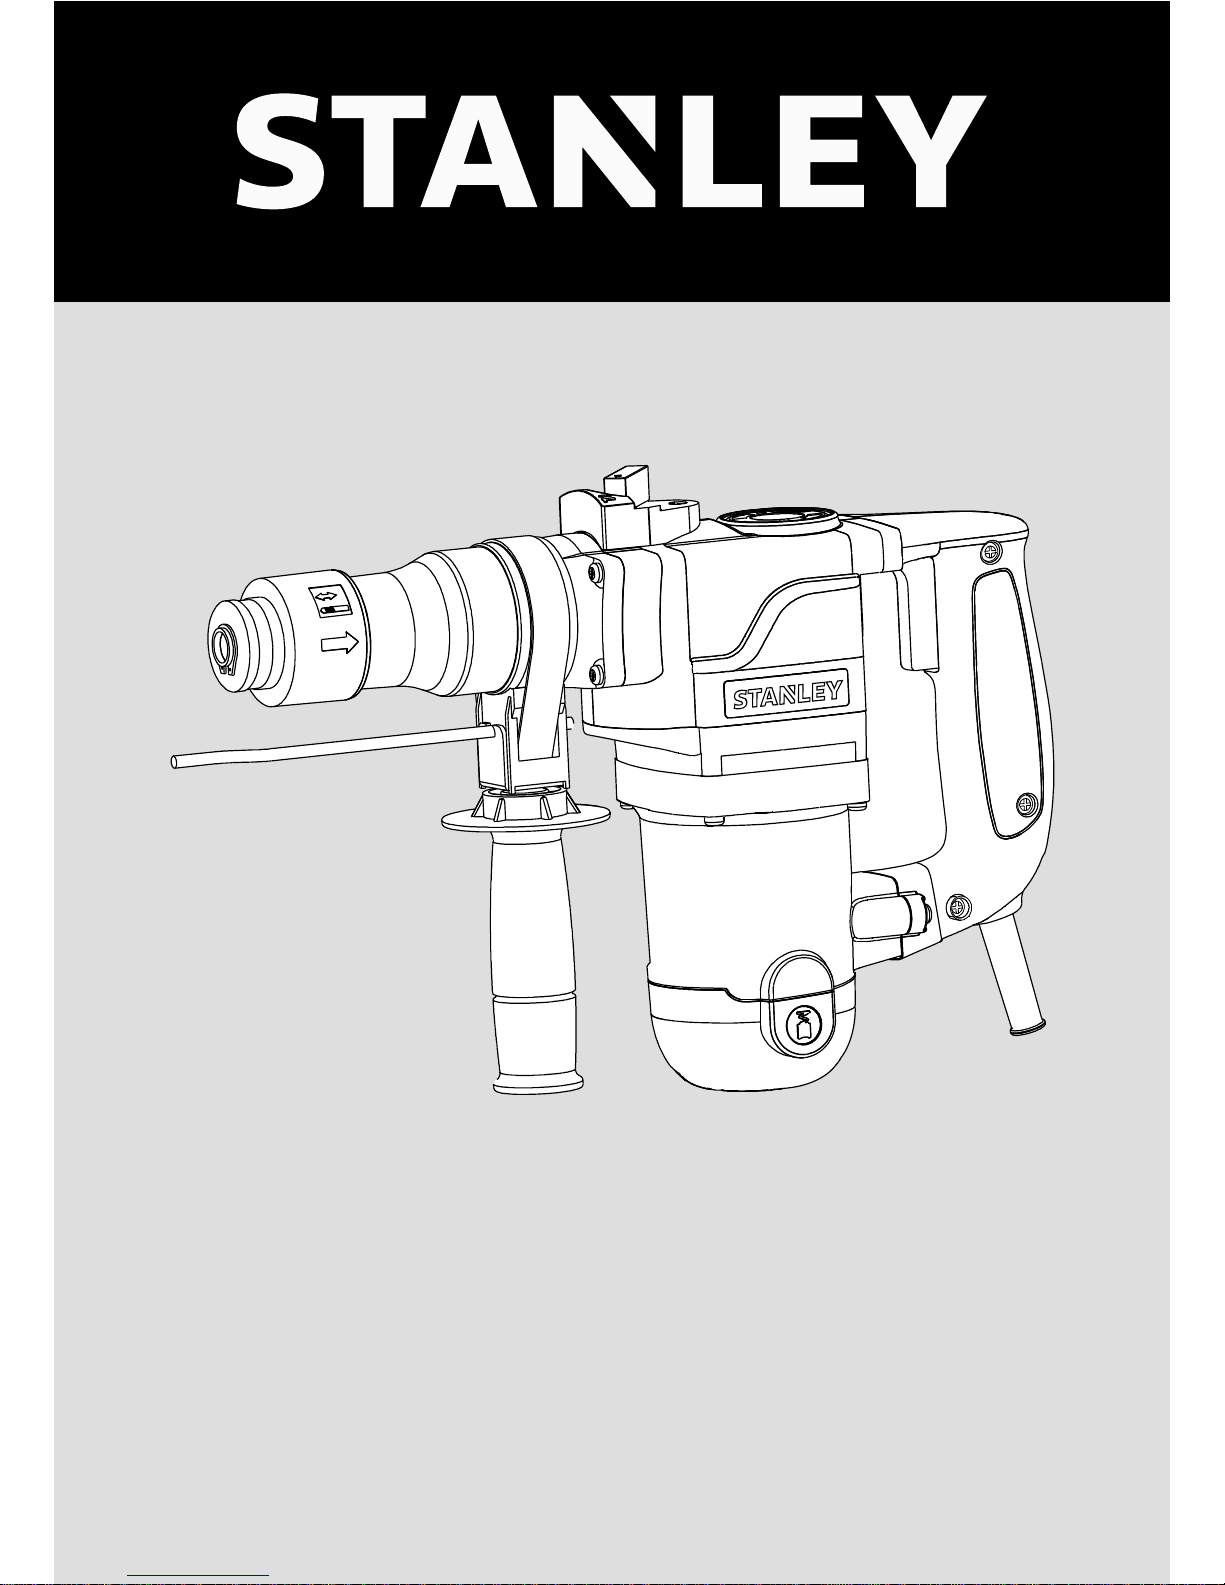
Intended use
Your STANLEY hammer has been designed for drilling in
concrete and masonry as well as for light chiselling
applications.
Safety instructions
General power tool safety warnings
WARNING! Read all safety warnings and all
instructions. Failure to follow the warnings and
instructions listed below may result in electric
shock, fire and/or serious injury.
Save all warnings and instructions for future reference.
The term "power tool" in all of the warnings listed below
refers to your mains operated (corded) power tool or battery
operated (cordless) power tool.
1. Work area safety
a. Keep work area clean and well lit. Cluttered or dark
areas invite accidents.
b. Do not operate power tools in explosive
atmospheres, such as in the presence of flammable
liquids, gases or dust. Power tools create sparks
which may ignite the dust or fumes.
c. Keep children and bystanders away while operating
a power tool. Distractions can cause you to lose
control.
2. Electrical safety
a. Power tool plugs must match the outlet. Never
modify the plug in any way. Do not use any adapter
plugs with earthed (grounded) power tools.
Unmodified plugs and matching outlets will reduce risk
of electric shock.
b. Avoid body contact with earthed or grounded
surfaces such as pipes, radiators, ranges and
refrigerators. There is an increased risk of electric
shock if your body is earthed or grounded.
c. Do not expose power tools to rain or wet conditions.
Water entering a power tool will increase the risk of
electric shock.
d. Do not abuse the cord. Never use the cord for
carrying, pulling or unplugging the power tool. Keep
cord away from heat, oil, sharp edges or moving
parts. Damaged or entangled cords increase the risk of
electric shock.
e. When operating a power tool outdoors, use an
extension cord suitable for outdoor use. Use of a cord
suitable for outdoor use reduces the risk of electric
shock.
f. If operating a power tool in a damp location is
unavoidable, use a residual current device (RCD)
protected supply. Use of an RCD reduces the risk of
electric shock.
3. Personal safety
a. Stay alert, watch what you are doing and use
common sense when operating a power tool. Do not
use a power tool while you are tired or under the
influence of drugs, alcohol or medication. A moment
of inattention while operating power tools may result in
serious personal injury.
b. Use personal protective equipment. Always wear eye
protection. Protective equipment such as dust mask,
non-skid safety shoes, hard hat, or hearing protection
used for appropriate conditions will reduce personal
injuries.
c. Prevent unintentional starting. Ensure the switch is
in the off-position before connecting to power
source and/or battery pack, picking up or carrying
the tool. Carrying power tools with your finger on the
switch or energising power tools that have the switch on
invites accidents.
d. Remove any adjusting key or wrench before turning
the power tool on. A wrench or a key left attached to a
rotating part of the power tool may result in personal
injury.
e. Do not overreach. Keep proper footing and balance
at all times. This enables better control of the power tool
in unexpected situations.
f. Dress properly. Do not wear loose clothing or
jewellery. Keep your hair, clothing and gloves away
from moving parts. Loose clothes, jewellery or long hair
can be caught in moving parts.
Page 4

ENGLISH
4
(Original instructions)
g. If devices are provided for the connection of dust
extraction and collection facilities, ensure these are
connected and properly used. Use of dust collection
can reduce dust-related hazards.
4. Power tool use and care
a. Do not force the power tool. Use the correct power
tool for your application. The correct power tool will do
the job better and safer at the rate for which it was
designed.
b. Do not use the power tool if the switch does not turn
it on and off. Any power tool that cannot be controlled
with the switch is dangerous and must be repaired.
c. Disconnect the plug from the power source and/or
the battery pack from the power tool before making
any adjustments, changing accessories, or storing
power tools. Such preventive safety measures reduce
the risk of starting the power tool accidentally.
d. Store idle power tools out of the reach of children
and do not allow persons unfamiliar with the power
tool or these instructions to operate the power tool.
Power tools are dangerous in the hands of untrained
users.
e. Maintain power tools. Check for misalignment or
binding of moving parts, breakage of parts and any
other condition that may affect the power tools
operation. If damaged, have the power tool repaired
before use. Many accidents are caused by poorly
maintained power tools.
f. Keep cutting tools sharp and clean. Properly
maintained cutting tools with sharp cutting edges are
less likely to bind and are easier to control.
g. Use the power tool, accessories and tool bits etc. in
accordance with these instructions, taking into
account the working conditions and the work to be
performed. Use of the power tool for operations
different from those intended could result in a hazardous
situation.
5. Service
a. Have your power tool serviced by a qualified repair
person using only identical replacement parts. This
will ensure that the safety of the power tool is
maintained.
Hammer safety warnings
• Wear ear protectors. Exposure to noise can cause
hearing loss.
• Use auxiliary handle(s), if supplied with the tool.
Loss of control can cause personal injury.
• Hold power tool by insulated gripping surfaces,
when performing an operation where the cutting
accessory may contact hidden wiring or its own
cord. Cutting accessory contacting a "live" wire may
make exposed metal parts of the power tool "live" and
could give the operator an electric shock.
• Never use a chisel accessory in rotary mode. The
acces-sory will bind in the material and rotate the drill.
• Use clamps or another practical way to secure and
support the workpiece to a stable platform. Holding the
work by hand or against your body leaves it unstable and
may lead to loss of control.
• Before drilling into walls, floors or ceilings, check for the
location of wiring and pipes.
• Avoid touching the tip of a drill bit just after drilling, as it
may be hot.
• The intended use is described in this instruction manual.
The use of any accessory or attachment or performance
of any operation with this tool other than those
recom-mended in this instruction manual may present a
risk of personal injury and/or damage to property.
Safety of others
• This appliance is not intended for use by persons
(including children) with reduced physical, sensory or
mental capabilities, or lack of experience and knowledge,
unless they have been given supervision or instruction
concerning use of the appliance by a person responsible
for their safety.
• Children should be supervised to ensure that they do not
play with the appliance.
Page 5
5
ENGLISH
(Original instructions)
Residual risks
Additional residual risks may arise when using the tool which
may not be included in the enclosed safety warnings. These
risks can arise from misuse, prolonged use etc. Even with
the application of the relevant safety regulations and the
implementation of safety devices, certain residual risks can
not be avoided. These include:
• Injuries caused by touching any rotating/moving parts.
• Injuries caused when changing any parts, blades or
accessories.
• Injuries caused by prolonged use of a tool. When using
any tool for prolonged periods ensure you take regular
breaks.
• Impairment of hearing.
• Health hazards caused by breathing dust developed
when using your tool (example:- working with wood,
especially oak, beech and MDF.)
Label on the tool
Electrical safety
Double insulation measures are taken in this power
tool, so no grounding is needed. Please check
whether the voltage of power supplied is consistent
with the voltage on the nameplate or not.
• If the wire is damaged, it should be replaced by the
manufacturer or a service center authorized by
STANLEY, to avoid danger.
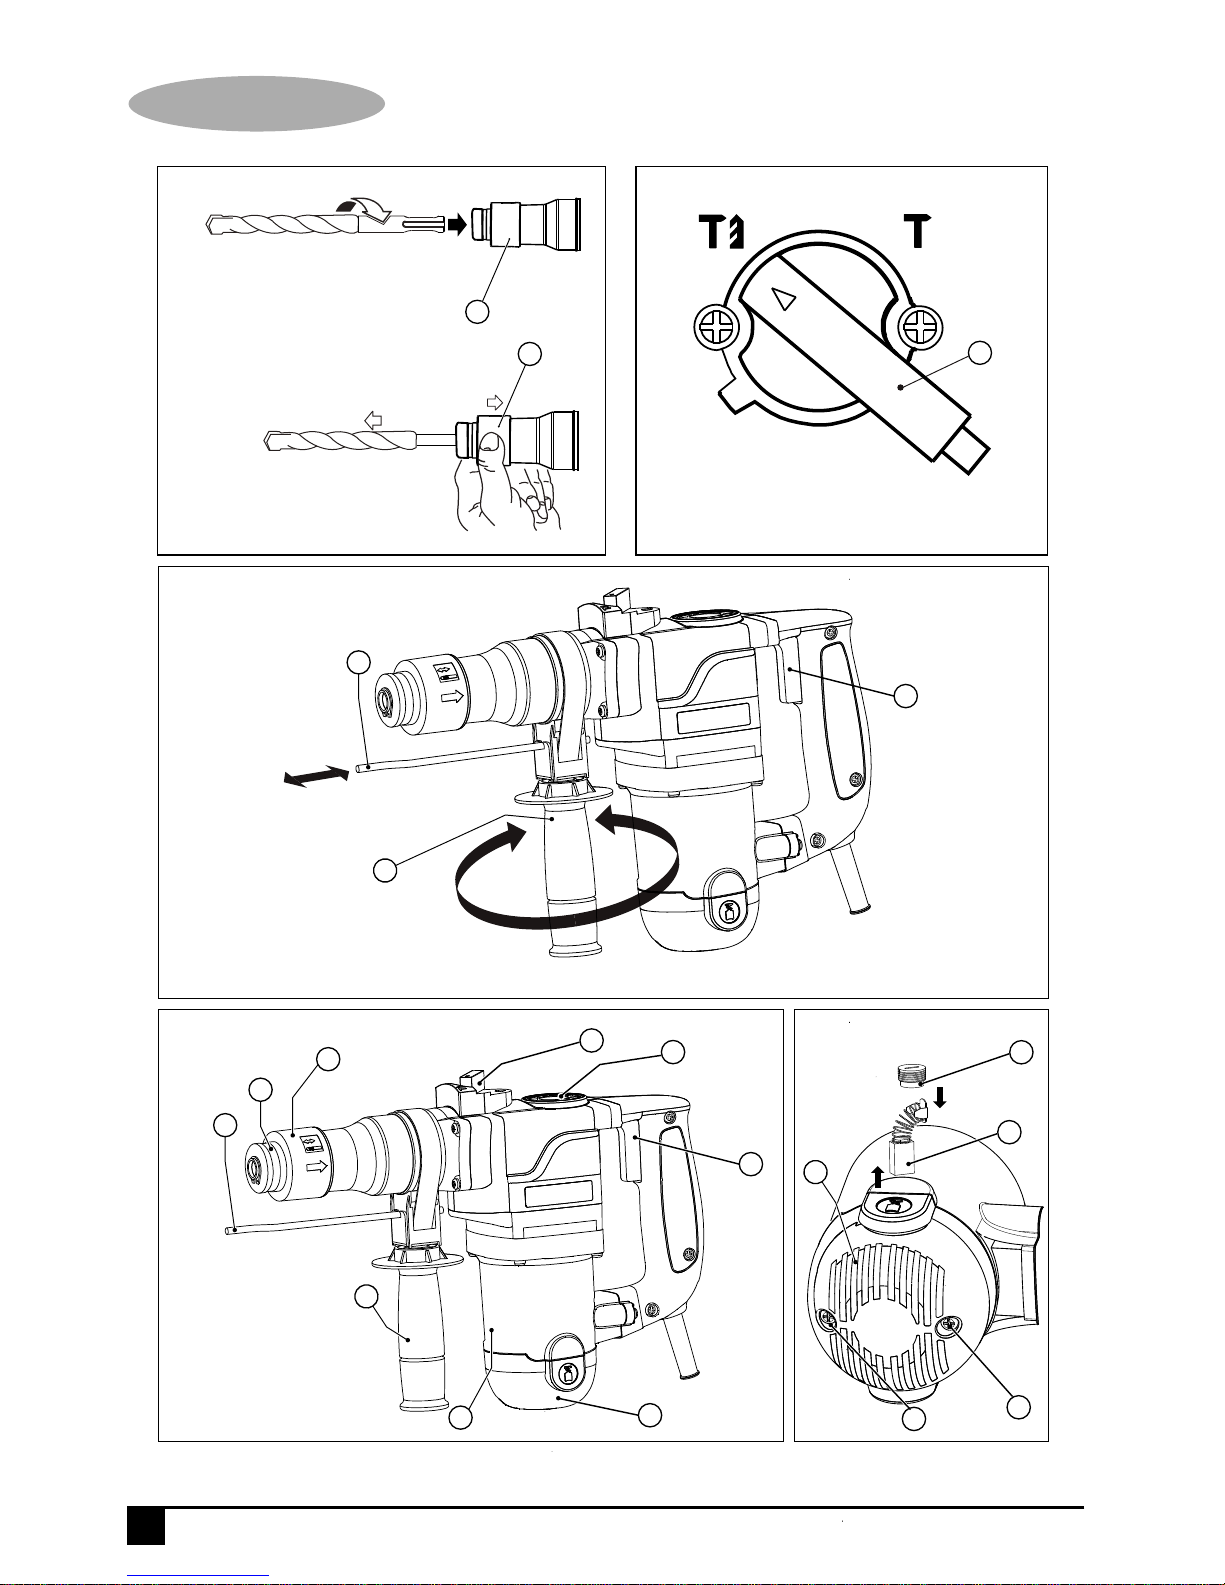
Part name
The power tool includes some or all of the following parts:
1. Switch
2. Oil-injection inlet cap
3. Modes selector
4. Tool chuck (tool holder)
5. sleeve
6. Side handle
7. Depth stop
8. Botton cover
Assembly
Warning! Before assembly, please ensure that the power
tool is powered off and the power plug of the tool is
unplugged from the power source.
Install the side handle
Warning! When holes are drilled in the concrete, bricks and
other surfaces, please grip the side handle to ensure safe
operation.
• The side handle (6) can be rotated to any side, which
can facilitate the use of the power tool in any position.
• Rotate the side handle (6) counterclockwise, to unlock
and release the power tool, rotate it to the desired
position.
• Rotate the side handle clockwise to tighten it adequately.
Fitting an accessory (Fig. A)
• Please clean the drill shank and lubricate the drill bit
before installing it.
• Pull back and hold the slide-sleeve(5), and then screw
the drill bit into the chuck, press it internally until it is
fastened, the drilling bit can be automatically locked in
situ. Pull the drill bit outwards to test whether it has been
adequately locked in the correct position or not.
• Pull back and hold the drill sleeve(5) clamp, you can
remove the drill bit.
Use
Warning! Please use the power tool under normal load; no
overloading is permitted.
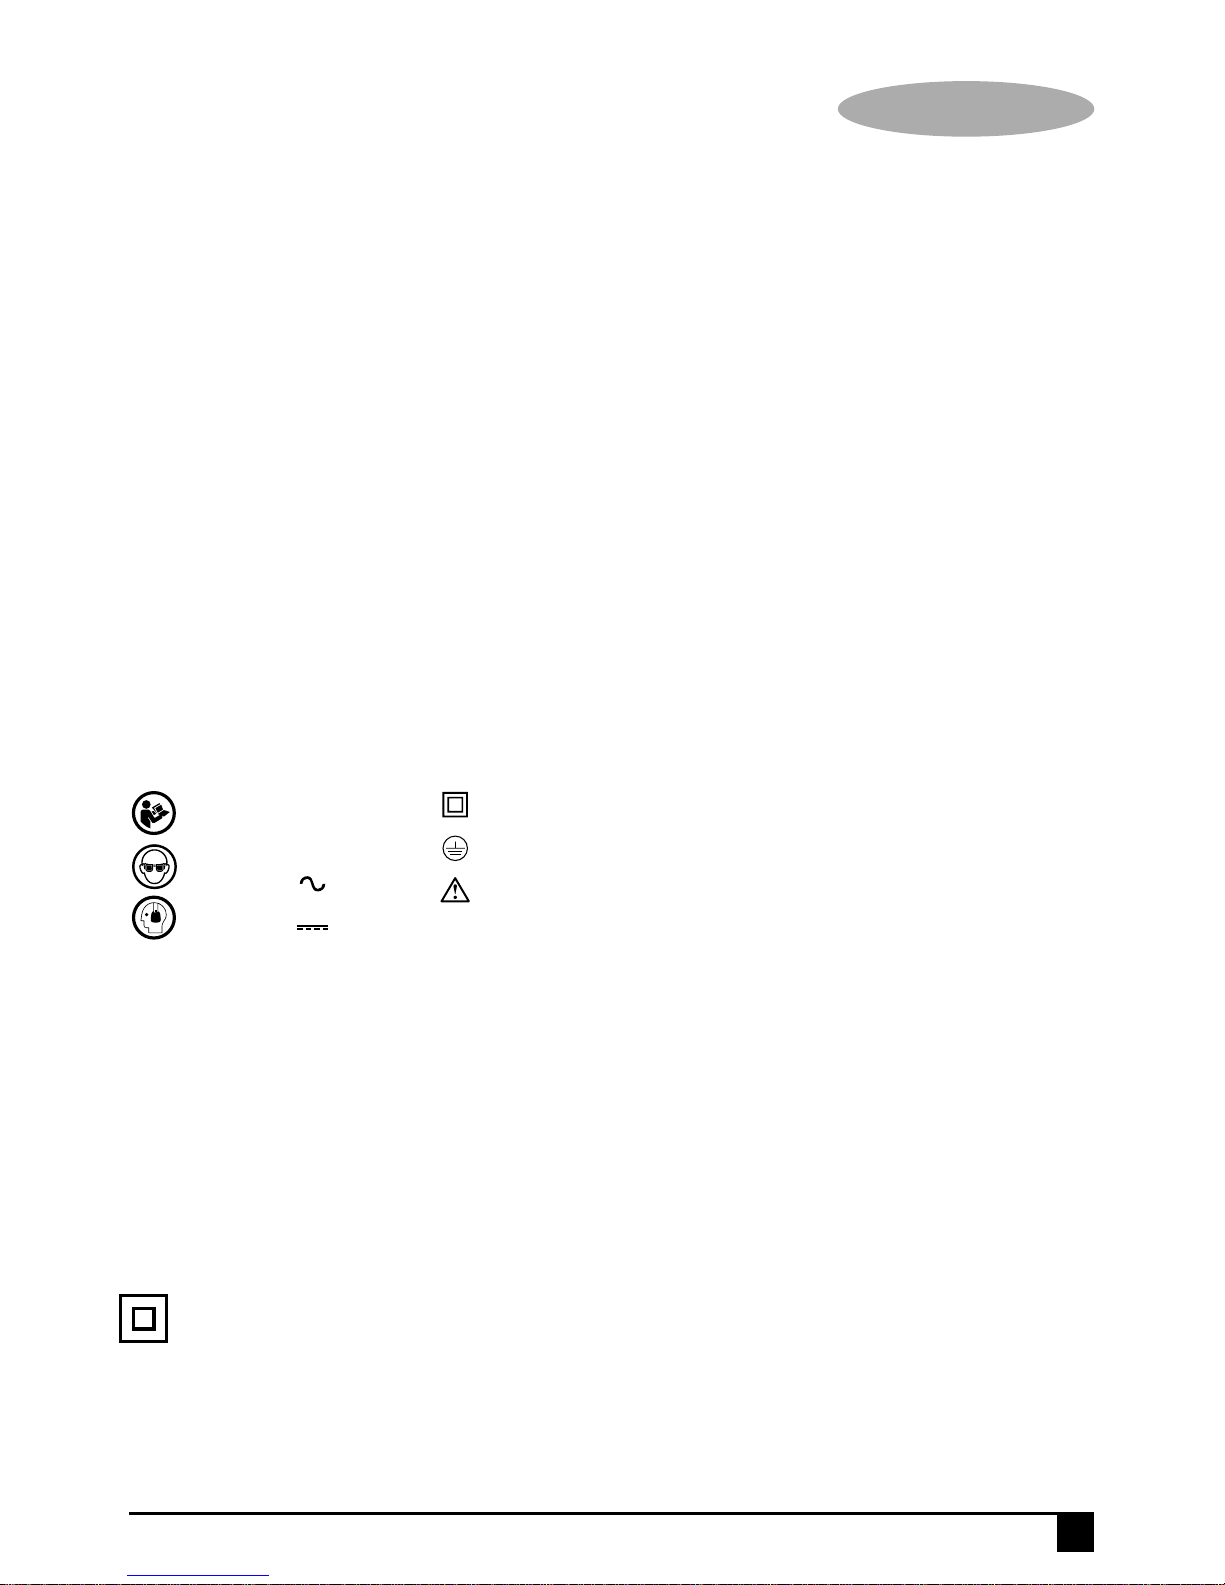
Read
Instructions
Manual
Use Eye
Protection
Use Ear
Protection
V ........ Volts
A ........ Amperes
Hz ....... Hertz
W ........ Watts
min ..... minutes
..... Alternating
Current
..... Direct
Current
n
0
....... No-Load
Speed
...... Class II
Construction
.... Earthing
Terminal
.... Safety Alert
Symbol
.../min.. Revolutions
or Reciprocation per
minute
The label on your tool may include the following symbols:
Position of date barcode
The Date Code, which also includes the year of
manufacture, is printed into the housing.
Example:
2014 XX JN
Year of manufacturing
Page 6

6
ENGLISH
(Original instructions)
Warning! Before drilling holes in the wall, floor or ceiling,
please check the positions of the wire and steel tube.
Chipping/Chiseling (Fig. B)
• When the cutting / stripping / removing operation is
conducted, please put the operation modes selector (3)
to position , the drilling bit, cold chisel and scaling
chisel etc. should be properly used.
Warning! Do not rotate the knob when the power tool is
rotating under the load, otherwise it will be damaged.
Hammer drilling (Fig. B)
• When using the hammer driller to drill holes on the
masonry and concrete surfaces, the operation mode
selector (3) should be set to position .
• The drilling bit should be aligned to the drilling position,
and then press the switch button to achieve the best
effect. Keep the power tool be positioned correctly,
prevent it from deviating the hole.
• When the fragments plug the borehole or powders,
please do not apply further pressure, and make the tool
rotate in an idling state, then gradually take out the
drilling bit from the hole. Repeat the said steps for
several times, the plugged hole can be clean, and then
resume the normal drilling.
Warning! When the drilling bit begins to break down the
reinforced concrete or hit the steel bar inside the concrete,
the power tool may have dangerous reaction force. Please
always keep balance, stable posture and tightly grip the tool,
to prevent from generating the dangerous reaction force.
When the concrete is chiseled, the distance between the two
points of one chiseling shall not be too much away from the
edge, which shall be about 8cm or so, define the distance
through finding the cracking strength of the concrete.
Overload coupling device
If the drilling bit is clamped or hooked up, the driving force
transmitted to the drill shaft will be cut off. A huge force will
occur, so two hands must tightly grip the power tool when it
is in operation, and ensure that the operator is standing in a
stable and fixed position.
Select the depth of holes to be drilled (Fig. C)
A depth gauge is an easy to use ruler to ensure that the
drilling depth is consistent. Unlock the side handle, adjust
the depth gauge according to the required depth, and then
tighten the side handle.
• Unfasten the side handle (6) by turning
counter-clockwise the grip.
• Set the depth stop (7) to the desired position. The
maximum depth of the drilled hole shall equal to the
distance between the tip of drilling bit and the front end
of the depth stop.
• Tighten the side handle by turning the grip clockwise.
Switch on and off
Warning! Before inserting the plug, please confirm whether
the switch can trigger freely or not, whether it can return to
the original position after releasing.
• Press the switch button (1), the power tool can be
started immediately.
• Release the button (1), the tool stops rotating.
Accessories
The performance of an electric tool depends on its
accessories. STANLEY accessories are designed according
to high quality standards, to enhance the performance of
electric tool. The use of these accessories can help you
conveniently operate the tool.
Maintenance
The STANLEY cord / cordless appliance / tools are of
sophisticated design, can be used for a long time, and only
little maintenance is needed. To obtain consistent
satisfactory use, proper maintenance and regular cleaning of
the tools are necessary.
Warning! Before performing any maintenance work on the
cord / cordless electric tools, the following points must be
implemented:
• Switch off the power of the equipment / tools and pull off
the plug;
• If the equipment / tools are equipped with independent
battery pack, please turn off the power and remove the
battery pack from the equipment / tools.
• If the equipment / tools are equipped with an integrated
battery, please run out the battery, before turning off its
power.
Page 7

7
ENGLISH
(Original instructions)
• Before the cleaning, unplug the charger plug from the
power source. In addition, except the regular cleaning on
your charger, no other maintenance is needed.
• Regularly use the soft brush or dry cloth to clean the
ventilation slot of the equipment / tools / charger.
• Regularly use a damp cloth to clean the motor housing.
Please do not use any abrasive cleaning agents or
solvent-based cleansing agents.
• Regularly open the clamping chuck and tap it gently to
remove any internal dust (after installation).
Replace the carbon brushes (Fig. E)
Lubrication
• Regularly replace and check the carbon brushes.
Replace it in time when it is worn to the abrasive
boundary line. Keep the carbon brush clean and make it
freely slide in the brushing range. Two brushes shall be
replaced at the same time.
• Use the cross screwdriver to counterclockwise unscrew
the screws, open the bottom cover(8) with a flat
screwdriver to counterclockwise open the brush
cover(9), you can remove the brush(10)as shown in the
figure E, and put the new brush, and then clockwise
fasten the brush cover(9), finally put the bottom cover(8),
and then use the cross screwdriver to tighten it properly.
• Open the cap of the lube oil-injection inlet(2), check the
lube oil in the gearbox, if the lube oil is dirty or
insufficient, replace or add the adequate amount of lube
oil provided by the company.
Cleaning
Warning! Once the visible dust build-up is found at and/or
around the ventilating ports, immediately flush the dust and
powder within the host shell with clean dry air. To perform
this procedure, wear the approved safety equipment and
dust mask.
Warning! It is strictly forbidden to clean the non-metallic
parts of the tool with the solvents or other irritant chemicals.
These chemicals may weaken the materials of these
components. Use a cloth moistened with a mild soapy water
to clean it. Do not let any substance permeate into the tool
and.do not immerse any part of the tool into a liquid.
Technical data
The vibration emission level given in this information sheet
has been measured in accordance with a standardised test
given in EN 60745 and may be used to compare one tool
with another. It may be used for a preliminary assessment of
exposure.
Warning: The declared vibration emission level
represents the main applications of the tool.
However if the tool is used for different
applications, with different accessories or poorly maintained,
the vibration emission may differ. This may significantly
increase the 1.5exposure level over the total working period.
An estimation of the level of exposure to vibration should
also take into account the times when the tool is switched off
or when it is running but not actually doing the job. This may
significantly reduce the exposure level over the total working
period.
Identify additional safety measures to protect the operator
from the effects of vibration such as: maintain the tool and
the accessories, keep the hands warm, organisation of work
patterns.
Hammer STHR272
Power input W 850
No-load speed /min 700
Impact rate BPM 3400
Impact energy (EPTA) J 4.1
Modes 2
Max capacity
Concrete mm 26
Steel mm -
Wood mm -
Weight kg 5.1
LpA (sound pressure) dB(A) 91, KpA (sound pressure uncertainty) dB(A) 3
LWA (sound power) dB(A) 102 KWA (sound power uncertainty) dB(A) 3
Vibration total values (triax vector sum) determined according to EN 60745:
Vibration emission value a
h
a
h.HG
= m/s² 19.2
Uncertainty K = m/s² 1.5
ah.CHeq= m/s² 17.8
Uncertainty K = m/s² 1.5
Page 8

8
ENGLISH
Protecting the environment
Separate collection. This product must not be
disposed of with normal household waste.
Should you find one day that your STANLEY product needs
replacement, or if it is of no further use to you, do not
dispose of it with household waste. Make this product
available for separate collection.
Separate collection of used products and packaging
allows materials to be recycled and used again.
Re-use of recycled materials helps prevent
environmental pollution and reduces the demand for raw
materials.
Local regulations may provide for separate collection of
electrical products from the household, at municipal waste
sites or by the retailer when you purchase a new product.
STANLEY provides a facility for the collection and recycling
of STANLEY products once they have reached the end of
their working life. To take advantage of this service please
return your product to any authorised repair agent who will
collect them on our behalf.
You can check the location of your nearest authorised repair
agent by contacting your local STANLEY office at the
address indicated in this manual. Alternatively, a list of
authorised STANLEY repair agents and full details of our
after-sales service and contacts are available on the Internet
at: www.2helpU.com
(Original instructions)
STANLEY declares that these products described under
"technical data" are in compliance with:
2006/42/EC, EN 60745-1, EN 60745-2-6
These products also comply with Directive
2014/30/EU and 2011/65/EU. For more information, please
contact STANLEY at the following address or refer to the
back of the manual.
The undersigned is responsible for compilation of the
technical file and makes this declaration on behalf of
STANLEY.
R.Laverick
Engineering Manager
STANLEY , Europe, Egide Walschaertsstraat14-18,
2800 Mechelen, Belgium
01.2015
EC declaration of conformity
MACHINERY DIRECTIVE
STHR272
Page 9

9
ENGLISH
Two years full warranty
If your STANLEY product becomes defective due to faulty
materials or workmanship within 24 months from the date of
purchase, STANLEY Europe guarantees to replace all
defective parts free of charge or – at our discretion – replace
the unit free of charge provided that:
• The product has not been misused and has been used in
accordance with the instruction manual.
• The product has been subject to fair wear and tear;
• Repairs have not been attempted by unauthorised
persons;
• Proof of purchase is produced.
• The STANLEY product is returned complete with all
original components
If you wish to make a claim, contact your seller or check the
location of your nearest authorised STANLEY repair agent in
the STANLEY catalogue or contact your local STANLEY
office at the address indicated in this manual. A list of
authorised STANLEY repair agents and full details of our
after sales service is available on the internet
at:www.stanleytools.com
(Original instructions)
Page 10

10
TÜRKÇE
(Orijinal talimatlar)
2
C
BA
D E
* Yukarıdaki resim gerçek birime biraz farklı olabilir.
1
8
1
2
3
4
5
12
XXXX XX JN
6
8
6
7
7
5
5
3
9
10
11
11
Page 11

11
TÜRKÇE
(Orijinal talimatlar)
Kullanım amacı
STANLEY çekiciniz, beton ve duvar delmenin yanı sıra hafif
keski uygulamaları için tasarlanmıştır.
Güvenlik talimatları
Genel elektrikli alet güvenlik uyarıları
Uyarı! Bütün güvenlik uyarılarını ve tüm
talimatları okuyun. Aşağıda yer alan uyarılar ve
talimatlara uyulmaması elektrik çarpması, yangın
ve/veya ciddi yaralanmalara neden olabilir.
Bütün uyarı ve talimatları ileride bakmak üzere saklayın.
Aşağıda listelenen tüm uyarılarda kullanılan "elektrikli alet"
terimi şebeke elektriği ile (kablolu) veya aküyle (kablosuz)
çalışan elektrikli aleti ifade etmektedir.
1. Çalışma alanının güvenliği
a. Çalışma alanını temiz ve aydınlık tutun. Dağınık ve
karanlık alanlar kazaya davetiye çıkarır.
b. Elektrikli aletleri, yanıcı sıvılar, gazlar ve tozların
bulunduğu yerler gibi yanıcı ortamlarda
çalıştırmayın. Elektrikli aletler, toz veya dumanları
ateşleyebilecek kıvılcımlar çıkarır.
c. Bir elektrikli aleti çalıştırırken çocuklardan ve
etraftaki kişilerden uzak tutun. Dikkatinizi dağıtıcı
şeyler kontrolü kaybetmenize neden olabilir.
2. Elektrik güvenliği
a. Elektrikli aletlerin fişleri prizlere uygun olmalıdır. Fiş
üzerinde kesinliklehiçbir değişiklik yapmayın.
Topraklı (topraklanmış) elektrikli aletlerde hiçbir
adaptor fişi kullanmayın. Değiştirilmemiş fişler ve
uygun prizler elektrik çarpması riskini azaltacaktır.
b. Borular, radyatörler, ocaklar ve buzdolapları gibi
topraklanmış yüzeylerle vücut temasından kaçının.
Vücudunuzun topraklanması halinde yüksek elektrik
çarpma riski vardır.
c. Elektrikli aletleri yağmura maruz bırakmayın veya
ıslatmayın. Elektrikli alete su girmesi, elektrik çarpması
riskini artıracaktır.
d. Kablosuna zarar vermeyin. Elektrikli aleti kesinlikle
kablosundan tutarak taşımayın, çekmeyin veya
prizden çıkarmayın. Kabloyu sıcaktan, yağdan,
keskin kenarlardan veya hareketli parçalardan uzak
tutun. Hasarlı veya dolaşmış kablolar elektrik çarpma
riskini arttırır.
e. Elektrikli aleti açık havada kullanırken, açık hava
kullanımına uygun bir uzatma kablosu kullanın. Açık
havada kullanıma uygun bir kablonun kullanılması
elektrik çarpma riskini azaltır.
f. Eğer bir elektrikli aleti nemli bir bölgede çalıştırması
zorunluysa, bir artık akım aygıtı (RCD) korumalı bir
kaynak kullanın. Bir RCD kullanılması elektrik çarpma
riskini azaltır.
3. Kişisel güvenlik
a. Elektrikli bir alet kullanırken her zaman dikkatli olun,
yaptığınız işe yoğunlaşın ve sağduyulu davranın.
Elektrikli bir aleti yorgunken veya ilaç ya da alkolün
etkisi altındayken kullanmayın. Elektrikli aletleri
kullanırken bir anlık dikkatsizlik ciddi yaralanmalara yol
açabilir.
b. Kişisel koruyucu ekipmanları mutlaka kullanın.
Daima koruyucu gözlük takın. Koşullara uygun toz
maskesi, kaymayan güvenlik ayakkabıları, baret veya
kulaklık gibi koruyucu donanımların kullanılması kişisel
yaralanmaları azaltacaktır.
c. İstem dışı çalıştırılmasını önleyin. Cihazı güç
kaynağına ve/veya aküye bağlamadan, kaldırmadan
veya taşımadan önce düğmenin kapalı konumda
olduğundan emin olun. Aleti, parmağınız düğme
üzerinde bulunacak şekilde taşımak veya açık
konumdaki elektrikli aletleri elektrik şebekesine bağlamak
kazaya davetiye çıkarır.
d. Elektrikli aleti çalıştırmadan önce herhangi bir
ayarlama anahtarını veya vida anahtarını çıkarın.
Elektrikli aletin hareketli parçasına takılı bırakılan bir vida
anahtarı veya anahtar, kişisel yaralanmaya neden
olabilir.
e. Ulaşmakta zorlandığınız yerlerde kullanmayın. Her
zaman sağlam ve dengeli basın. Bu, beklenmedik
durumlarda elektrikli aletin daha iyi kontrol edilmesine
olanak tanır.
f. Uygun şekilde giyinin. Bol giysiler giymeyin ve takı
takmayın. Saçınızı, giysinizi ve eldivenlerinizi
hareketli parçalardan uzak tutun. Bol giysiler, takılar
veya uzun saçlar hareketli parçalara takılabilir.
Page 12

12
TÜRKÇE
(Orijinal talimatlar)
g. Eğer kullandığınız üründe toz emme ve toplama
özellikleri olan ataşmalar varsa bunların bağlı
olduğundan ve doğru şekilde kullanıldığından emin
olun. Bu toz toplama ataşmanların kullanılması tozla
ilgili tehlikeleri azaltabilir.
4. Elektrikli aletlerin kullanımı ve bakımı
a. Elektrikli aleti zorlamayın. Uygulamanız için doğru
elektrikli aleti kullanın. Doğru elektrikli alet, belirlendiği
kapasite ayarında kullanıldığında daha iyi ve güvenli
çalışacaktır.
b. Düğme açmıyor ve kapatmıyorsa elektrikli aleti
kullanmayın. Düğmeyle kontrol edilemeyen tüm
elektrikli aletler tehlikelidir ve tamir edilmesi
gerekmektedir.
c. Herhangi bir ayarlama, aksesuar değişimi veya
elektrikli aletlerin saklanması öncesinde fişi güç
kaynağından çekin. Bu tür önleyici güvenlik tedbirleri
aletin istem dışı çalıştırılması riskini azaltır.
d. Elektrikli aleti, çocukların ulaşamayacağı yerlerde
saklayın ve elektrikli aleti tanımayan veya bu
talimatları bilmeyen kişilerin elektrikli aleti
kullanmasına izin vermeyin. Elektrikli aletler, eğitimsiz
kullanıcıların elinde tehlikelidir.
e. Elektrikli aletlerin bakımını yapın. Hareketli
parçalardaki hizalama hatalarını ve tutuklukları,
parçalardaki kırılmalar ve elektrikli aletin çalışmasını
etkileyebilecek tüm koşulları kontrol edin. Hasarlı
ise, elektrikli aleti kullanmadan önce tamir ettirin.
Kazaların çoğu, elektrikli aletlerin bakımının yeterli
şekilde yapılmamasından kaynaklanır.
f. Kesim aletlerini keskin ve temiz tutun. Bakımı uygun
şekilde yapılmış keskin kesim uçlu kesim aletlerinin
sıkışma ihtimali daha düşüktür ve kontrol edilmesi
kolaydır.
g. Elektrikli aleti, aksesuarlarını ve aletin diğer
parçalarını vs. kullanırken bu talimatlara mutlaka
uyun ve elektrikli alet türü için öngörüldüğü şekilde,
çalışma ortamının koşullarını ve yapılacak işin ne
olduğunu göz önünde bulundurun. Elektrikli aletin
öngörülen işlemler dışındaki işlemler için kullanılması
tehlikeli durumlara neden olabilir.
5 Akünün kullanımı ve bakımı
a. Sadece üretici tarafından belirtilen şarj cihazı ile şarj
edin. Şarj cihazı sadece bir akü paketi için uygundur,
başka akü paketiyle kullanıldığında yangın riski
oluşturabilir.
Çekiç güvenlik uyarıları
• Kulaklık takın. Gürültüye maruz kalmak işitme kaybına
neden olabilir.
• Alet ile verildi ise, yardımcı kolu (kolları) kullanın. Kontrol
kaybı kişisel yaralanmaya neden olabilir.
• Kesme aksesuarlarının gizli kablolara veya kendi
kablosuna temas edebileceği yerlerde çalışma yaparken
elektrikli aleti yalıtımlı kavrama yüzeylerinden tutun.
Kesme aksesuarlarının "akım taşıyan" bir kabloya temas
etmesi durumunda elektrikli aletin metal kısımları da
"akım taşır" hale gelebilir ve kullanıcının çarpılmasına
neden olabilir.
• Bir keski aletini asla dönme modunda kullanmayın.
Aksesuar malzemeye bağlanır ve matkap döner.
• Üzerinde çalıştığınız parçayı sabitlemek ve desteklemek
için kelepçeler veya başka pratik yöntemler kullanın.
Parçayı elle tutmanız veya vücudunuza dayamanız,
dengesiz bırakır ve kontrol kaybına yol açabilir.
• Duvar, zemin veya tavanda delik açmadan önce kablo ve
boruların konumunu kontrol edin.
• Delme işleminin hemen ardından matkap ucuna
dokunmaktan kaçının, sıcak olabilir.
• Kullanım amacı, bu kılavuzda belirtilmiştir.
• Herhangi bir aksesuarın veya bağlantının ya da işlemin,
bu kılavuzda tavsiye edilen şekilden başka bir şekilde
kullanılması şahısların yaralanmalarına ve/veya mal
kaybına yol açabilir.
Diğer kişilerin güvenliği
• Bu alet fiziksel, zihinsel veya algılama gücü azalmış
veya yeterince deneyim ve bilgisi bulunmayan kişiler
(çocuklar dahil) tarafından kullanılmak üzere
üretilmemiştir, bu tür kişiler aleti ancak güvenliklerinden
sorumlu bir kişi tarafından cihazın kullanımıyla ilgili
talimatları verilmesi veya sürekli kontrol altında tutulması
ile kullanabilir.
• Çocuklar, aletle oynamalarını önlemek amacıyla kontrol
altında tutulmalıdır.
Page 13

13
TÜRKÇE
(Orijinal talimatlar)
Diğer riskler
Aleti kullanırken ekteki güvenlik uyarılarına dahil olmayan
bazı başka riskler ortaya çıkabilir. Bu riskler yanlış kullanım,
uzun süreli kullanım vs. ortaya çıkabilirler. Hatta, ilgili
güvenlik düzenlemeleri ve güvenlik cihazlarının
uygulanmasına rağmen, belirli risklerden kaçınılması
mümkün değildir. Bunların dahilin:
• Herhangi bir dönen/hareketli parçanın temas etmesi ile
yaralanmalar.
• Herhangi bir parçayı, bıçak veya aksesuarı değiştirirken
meydana gelen yaralanmalar.
• Aletin uzun süreli kullanılması sonucu ortaya çıkan
yaralanmalar. Herhangi bir aletin uzun süreli
kullanımında düzenli olarak çalışmanıza ara verin.
• Duyma bozukluğu.
• Aleti kullanırken toz soluması sonucu ortaya çıkan sağlık
sorunları (örneğin:- ahşapta çalışma, özellikle meşe,
kayın ve MDF.)
Elektrik güvenliği
Şarj cihazınız çift yalıtımlıdır, bu yüzden topraklama
kablosuna gerek yoktur. Her zaman şebeke
geriliminin aletin üretim etiketinde belirlenmiş
değerlere uyup uymadığını kontrol edin.
• Kablo zarar görmüşse, bir tehlikeyi önlemek için üretici
ya da yetkili STANLEY servis merkezi tarafından
değiştirilmelidir.
Parça adı
Bu alet, aşağıdaki parçalardan bir kısmını ya da tümünü
içermektedir:
1. Güç düğmesi
2. Yağ enjeksiyon giriş kapağı
3. Mod seçici
4. Alet mandren (alet tutucu)
5. kol
6. Yan kol
7. Derinlik durdurucu
8. Botton kapağı
Montaj
Uyarı! Kurulum yapmadan önce, aletin kapalı olduğundan
ve aletin fişinin güç kaynağından çıkartılmış olduğundan
emin olun.
Yan kolun takılması
Uyarı! Beton, tuğla veya diğer yüzeylerde delikler delindiği
zaman, güvenli çalışmak için lütfen yan kolu kavrayın.
• Yan kol (6), herhangi bir tarafa döndürülebilir, elektrikli
aletin herhangi bir pozisyonda kullanımını kolaylaştırır.
• Elektrikli aleti açmak ve serbest bırakmak için, yan kolu
(6) saat yönünün tersine çevirin, istenen konuma
döndürün.
• Yeterli derecede sıkmak için yan kolu saat yönünde
çevirin.
Bir aksesuarın takılması (Şekil A)
• Lütfen matkap şaftını temizleyin ve takmadan önce
matkap ucunu yağlayın.
• Sürgülü-kolu (5) geri çekin ve basılı tutun ve matkap
ucunu mandrenin içine vidalayın, yerine oturana kadar
itin, matkap ucu otomatik olarak yerine kilitlenir. Doğru
pozisyonda yerine oturup oturmadığını anlamak için
matkap ucunu dışarıya doğru çekin.
• Matkap kolu kelepçesini (5) geri çekin ve tutun, matkap
ucunu çıkartabilirsiniz.
Kullanım
Uyarı! Aletin kendi hızında çalışmasına izin verin; aşırı
yüklenilmesine izin verilmez.
V ........ Volt
A ........ Amper
Hz ....... Hertz
W ........ Vat
dak ..... dakika
.....
.....
boş .......
......
....
....
.../min..
Alet üzerindeki etiketler
Alet üzerinde aşağıdaki semboller bulunabilir:
Position of date barcode
The Date Code, which also includes the year of
manufacture, is printed into the housing.
Example:
2014 XX JN
Year of manufacturing
Kullanım
Kılavuzunu
Okuyun
Koruyucu
Gözlük kullanın
Kulaklık
Kullanın
Alternatif
Akım
Direkt
Akım
Yüksüz
Hız
Sınıf II
İnşaat
Topraklama
Terminal
Güvenlik
uyarısı
Sembolü
Dakikada
devir veya
gel git sayısı
Page 14

14
TÜRKÇE
(Orijinal talimatlar)
Uyarı! Duvar, zemin ve tavanda delik delmeden önce kablo
ve boruları kontrol edin.
Yontma/Keskileme (Şekil B)
• Kesme / sıyırma / kaldırma işlemi yapıldığında, lütfen
çalışma modları seçiciyi (3) konumuna getirin , matkap
ucu, soğuk keski ve ölçekleme keski vs. düzgün
kullanılmalıdır.
Uyarı! Elektrikli alet yük altında dönerken düğmeyi
çevirmeyin, aksi takdirde hasar görür.
Çekiç delme (Şekil B)
• Duvar ve beton yüzeylerde delik açmak için çekiç delme
kullanırken, çalışma modu seçici (3) konumuna getirilmiş
olmalıdır .
• En iyi sonucu elde etmek için, matkap ucunu, delme
konumu ile aynı hizaya getirip düğmeye basın. Delikten
sapmayı önlemek için, elektrikli alet doğru
konumlandırılmalıdır.
• Parçalar veya tozlar delgi deliğini tıkadığında, lütfen
daha fazla baskı uygulamayın ve aleti rölanti durumunda
döndürün ve yavaş yavaş matkap ucunu dışarı çekin.
Söz konusu adımları birkaç kez tekrarlayın, tıkanan delik
temizlenebilir ve sonra normal delmeye devam edin.
Uyarı! Matkabın ucu donatılı betona veya beton içindeki
çelik çubuğa vurmaya başladığında, elektrikli alette tehlikeli
bir reaksiyon kuvveti olabilir. Tehlikeli bir reaksiyon kuvveti
oluşmasını önlemek için, lütfen her zaman dengede ve
istikrarlı durun ve aleti sıkıca kavrayın. Beton keskilemede,
bir keskinin iki noktası arasındaki mesafe kenardan çok uzak
olmamalıdır, yaklaşık 8cm veya o kadar olmalıdır, beton
çatlama mukavemeti bulma yoluyla mesafe tanımlanır.
Fazla yük kuplaj cihazı
Matkap ucu kelepçeli veya bağlı ise, matkap miline iletilen
itici güç kesilir. Büyük bir güç ortaya çıkar, bu yüzden işlem
sırasında iki el sıkıca aleti kavramalı ve kullanıcının istikrarlı
ve sabit bir konumda durduğundan emin olunmalı.
Delinecek delik derinliğinin seçilmesi (Şekil C)
Bir derinlik göstergesi, delme derinliğinin tutarlı olmasını
sağlamak adına cetvel kullanmak için kolay bir yoldur. Yan
kolun kilidini açın, derinlik göstergesini gereken derinliğe
göre ayarlayın ve sonra yan kolu sıkın.
• Tutamacı saat yönünün tersine çevirerek, yan kolu
gevşetin (6).
• Derinlik durdurucuyu (7) istenen konuma getirin. Maktap
deliğinin maksimum derinliği, delme ucunun uç kısmı ile
derinlik çubuğunun ön ucu arasındaki mesafeye eşit
olmalıdır.
• Yan kolu sıkılamak için tutamacı saat yönünde çevirin.
Açma ve kapatma
Uyarı! Fişi takmadan önce, anahtarın serbestçe
tetikleyebildiğinden, bırakıldığında orijinal konumuna
dönebildiğinden emin olun.
• Güç düğmesine basın (1), elektrikli alet derhal çalışmaya
başlar.
• Güç düğmesini bırakın (1), alet dönmeyi durdurur.
Aksesuarlar
Elektrikli aletinizin performansı kullanılan aksesuara bağlıdır.
STANLEY aksesuarları, yüksek kalite standartlarına göre
üretilmiş ve aletinizin performansını arttıracak şekilde
tasarlanmıştır. Bu aksesuarları kullanarak, aletinizden en iyi
verimi alacaksınız.
Bakım
STANLEY kablolu / kablosuz cihazları / aletleri, sofistike
tasarımla, sadece az bir bakımla uzun bir süre
kullanılabilecek şekilde üretilmişlerdir. İstikrarlı kullanım
memnuniyeti için, uygun bakım yapmak ve aletleri düzenli
olarak temizlemek gerekir.
Uyarı! Kablolu / kablosuz elektrikli aletleri çalıştırılmadan
önce, aşağıdaki noktaların uygulanması gerekir:
• Ekipmanı / aletleri kapatın ve fişlerini çekin;
• Ekipman / aletler bağımsız aküye sahip iseler, lütfen
gücü kapatın ve aküyü ekipmandan /aletlerden çıkartın.
• Ekipman / aletler, bağımsız aküye sahip iseler, gücü
kapatmadan önce lütfen aküyü bitirin.
Page 15

15
TÜRKÇE
(Orijinal talimatlar)
• Temizlemeden önce, fişi güç kaynağından çekin. Buna
ek olarak, sarj cihazı düzenli temizlik dışında hiçbir
bakım gerektirmemektedir.
• Ekipman / alet / şarj havalandırma deliklerini yumuşak
bir fırça veya kuru bir bezle düzenli olarak silin.
• Motor muhafazasını düzenli olarak nemli bir bezle silin.
Aşındırıcı veya çözücü bazlı temizleyiciler kullanmayın.
• Sıkma mandrenini düzenli olarak açın ve içindeki tozu
dökmek için hafifçe vurun (kurulumdan sonra).
Karbon fırçalarını değiştirme (Şekil E)
Yağlama
• Karbon fırçalarını düzenli olarak kontrol edin ve
yenileyin. Aşındırma sınır çizgisinde aşınmış ise,
zamanında değiştirin. Karbon fırçasını temiz tutun ve
fırçalama aralığında serbest kaymasını sağlayın. İki fırça
aynı anda değiştirilir.
• Çapraz tornavida kullanarak saat yönünün tersine
çevirerek vidaları sökün, alt kapağı açın(8) düz tornavida
ile saatin ters yönünde çevirerek fırça kapağını açın(9),
şekil E’de gösterildiği gibi fırçayı çıkarabilirsiniz(10) ve
yeni fırçayı taktıktan sonra, saat yönünde çevirerek fırça
kapağını(9) takın, son olarak alt kapağı(8) takın ve
düzgün sıkmak için çapraz tornavida kullanın.
• Madeni yağ-enjeksiyon girişi kapağını açın(2), şanzıman
içindeki madeni yağın kirli veya yetersiz olmasına karşın
kontrol edin, firma tarafından sağlanan yağ ile ekleme
yapın veya yağı değiştirin.
Temizleme
Uyarı! Havalandırma deliklerinde ve/veya çevresinde gözle
görünür toz birikmesinde, derhal temiz kuru hava ile ana
muhafaza içindeki tozu ve kiri temizleyin. Bu işlemi
gerçekleştirmek için, onaylanmış güvenlik ekipmanları ve
toz maskesi takın.
Uyarı! Aletin metal olmayan parçalarını çözücüler veya
tahriş edici kimyasal maddeler ile temizlemek kesinlikle
yasaktır. Bu kimyasallar, bu bileşenlerin malzemelerini
zayıflatabilir. Bunları temizlemek için, hafif sabunlu suyla
nemlendirilmiş bir bez kullanın. Herhangi yabancı bir
maddenin aletin içine nüfuz etmesine izin vermeyin ve aletin
herhangi bir parçasını suya batırmayın.
LpA (ses basıncı) dB (A) 91 KpA (ses basıncı belirsizliği) dB (A) 3
L
WA
(akustik güç) dB (A) 102, KWA (ses basıncı belirsizliği) dB (A) 3
Göre toplam titreşim değerleri (üç yönün vektör toplamı) EN 60745:
Titreşim emisyon değeri a
h
a
h.HG
= m/s² 19.2
Belirsizlik (K) m/s² 1.5
ah.CHeq = m/s² 17.8
Belirsizlik K = m/s² 1.5
Çekiç STHR272
Güç girişi W 850
Yüksüz hız /dak 700
Darbe oranı DV 3400
Darbe enerjisi (TDE) J 4,1
Modlar 2
Maksimum kapasite
Beton mm 26
Çelik mm -
Ahşap mm -
Ağırlık kg 5,1
Teknik veriler
Bu bilgi sayfasında verilen titreşim emisyon düzeyi, EN
60745’te sağlanan standart teste uygun olarak ölçülmüştür
ve aletleri birbiriyle karşılaştırmak için kullanılabilir. Ön
maruziyet değerlendirmesi için kullanılabilir.
Uyarı: Beyan edilen titreşim emisyon düzeyi, aletin
ana uygulamalarını yansıtır. Ancak, alet farklı
aksesuarlarla farklı uygulamalar için kullanılırsa veya bakımı
kötü yapılırsa, titreşim emisyonu değişebilir. Bu, toplam
maruziyet düzeyini 1,5 oranında artırabilir.
Tahmini titreşim maruziyeti, aletin kapalı kaldığı veya
çalışmasına karşın iş görmediği zamanları da dikkate
almalıdır. Bu, toplam çalışma süresindeki maruziyet düzeyini
önemli ölçüde azaltabilir.
Kullanıcıyı titreşim etkilerinden korumak için belirtilen ek
güvenlik önlemlerini alın: aletin ve aksesuarın bakımını
yapın, elleri sıcak tutun, çalışma modellerini düzenleyin.
Page 16

16
TÜRKÇE
(Orijinal talimatlar)
Çevrenin korunması
Ayrı toplanmalı. Bu ürün normal ev atıklarıyla birlikte
atılmamalıdır.
Stanley ürünlerinizin değiştirilmesi gerektiğinde ya da artık
kullanmanızı gerektirmeyen bir gün geldiğinde, evsel atıklarla
birlikte atmayın. Bu ürünün ayrı toplanmasını sağlayın.
Kullanılmış ürünlerin ve ambalajların ayrı toplanması
bu maddelerin geri dönüşüme tabii tutularak yeniden
kullanılmasına olanak tanır.
Yeniden kullanım, geri dönüşümlü malzemelerin çevre
kirliliğinin önlenmesine yardımcı olur ve ham madde
ihtiyacını azaltır.
Yerel düzenlemeler, elektrikli ürünlerin evlerden toplanıp
belediye atık tesislerine aktarılmasını veya yeni bir ürün satın
alırken perakende satıcı tarafından toplanmasını sağlayabilir.
Stanley hizmet ömrünün sonuna ulaşan Stanley ürünlerinin
toplanması ve geri dönüşüme sokulması için bir imkan
sunmaktadır. Bu hizmetin avantajlarından faydalanmak için,
lütfen, ürününüzü bizim adımıza teslim alacak herhangi bir
yetkili servise iade edin.
Bu kılavuzda belirtilen adresteki yerel Stanley ofisine
başvurarak size en yakın yetkili tamir servisinin yerini
öğrenebilirsiniz. Alternatif olarak, internet’ten Stanley yetkili
tamir servislerinin listesini ve satış sonrası hizmetlerimizle
ilgili tüm bilgiler ve temas bilgilerine bu adresten
ulaşabilirsiniz: www.2helpU.com
STANLEY, "teknik özellikler" bölümünde açıklanan bu
ürünlerin bu yönergelere uygun olduğunu beyan eder:
2006/42/EC, EN 60745-1, EN 60745-2-6
Bu ürünler aynı zamanda Direktif ile uyumludur 2014/30/EU
and 2011/65/EU. Daha fazla bilgi için, lütfen aşağıdaki
adresten STANLEY ile temasa geçin veya kılavuzun
arkasına bakın.
Bu belge altında imzası bulunan yetkili, teknik dosyanın
derlenmesinden sorumludur ve bu beyanı STANLEY adına
vermiştir.
R.Laverick
Mühendislik Yöneticisi
STANLEY , Europe, Egide Walschaertsstraat14-18,
2800 Mechelen, Belgium
01.2015
AT uygunluk beyanı
MAKİNE DİREKTİFİ
STHR272
Page 17

17
TÜRKÇE
(Orijinal talimatlar)
İki yıl tam garanti
Stanley ürününüz, satın alma tarihinden itibaren 24 ay içinde
hatalı malzeme veya işçilik nedeniyle bozulursa, Stanley
Avrupa tüm arızalı parçaları ücretsiz değiştirmeyi garanti
ediyor veya – takdirimize bağlı olarak – birimlerin ücretsiz
olarak değiştirilme koşulları şunlardır:
• Ürün, yanlış kullanılmamıştır ve kullanım kılavuzuna
uygun olarak kullanılmıştır.
• Ürün, normal aşınma ve yıpranmaya maruz kalmıştır;
• Onarımlar, yetkisiz kişiler tarafından yapılmamıştır;
• Satın alma belgesi, ibraz ediliyor.
• Stanley ürünü tüm orijinal bileşenleri ile tam olarak geri
getiriliyor
Bir talepte bulunmak isterseniz, satıcınızla temasa geçin
veya Stanley kataloğunda size en yakın yetkili Stanley
onarım servisinin yerini kontrol edin veya bu kılavuzda
belirtilen adresteki yerel Stanley ofisine başvurun. Yetkili
Stanley tamir ajanları ve satış sonrası hizmetlerimizle ilgili
tüm detayların bir listesini bu internet adresinde bulabilirsiniz:
www.stanleytools.com
Page 18

Page 19

N418915 01/2015
Page 20

 Loading...