

Stanley ST-16L-DH-ME, ST-12L-DH-ME, ST-20L-DH-ME, ST-40L-DH-ME, ST-30L-DH-ME Instruction Manual
...Page 1
ST-12L-DH-ME / ST-16L-DH-ME / ST-20L-DH-ME
Industrieller Luftentfeuchter mit Standardkapazität ― Light Capacity Industrial
Dehumidier
361000001-13
Page 2
LASSEN SIE DAS HOCHLEISTUNGSLUFTENTFEUCHTER WÄHREND ES MIT STROM VERSORGT WIRD,
NIEMALS UNBEAUFSICHTIGT
GERMAN .................................................................................................1-6, 11, 12
ENGLISH .......................................................................................1-3, 7-10, 11, 12
Bitte Bedienungsanleitung lesen: Wenn dieses Symbol auf einem Produkt
abgebildet ist, lesen Sie bitte die Bedienungsanleitung. — Read The Instruction
manual: When this symbol is marked on a product, it means that the instructon
manual must be read.
© 2015, Pinnacle Products International, Inc.
668 Stony Hill Road #302 Yardley, PA 19067
1
Page 3
LASSEN SIE DAS HOCHLEISTUNGSLUFTENTFEUCHTER WÄHREND ES MIT STROM VERSORGT WIRD,
NIEMALS UNBEAUFSICHTIGT
ST-12L-DH-ME / ST-16L-DH-ME / ST-20L-DH-ME
3
2
5
1
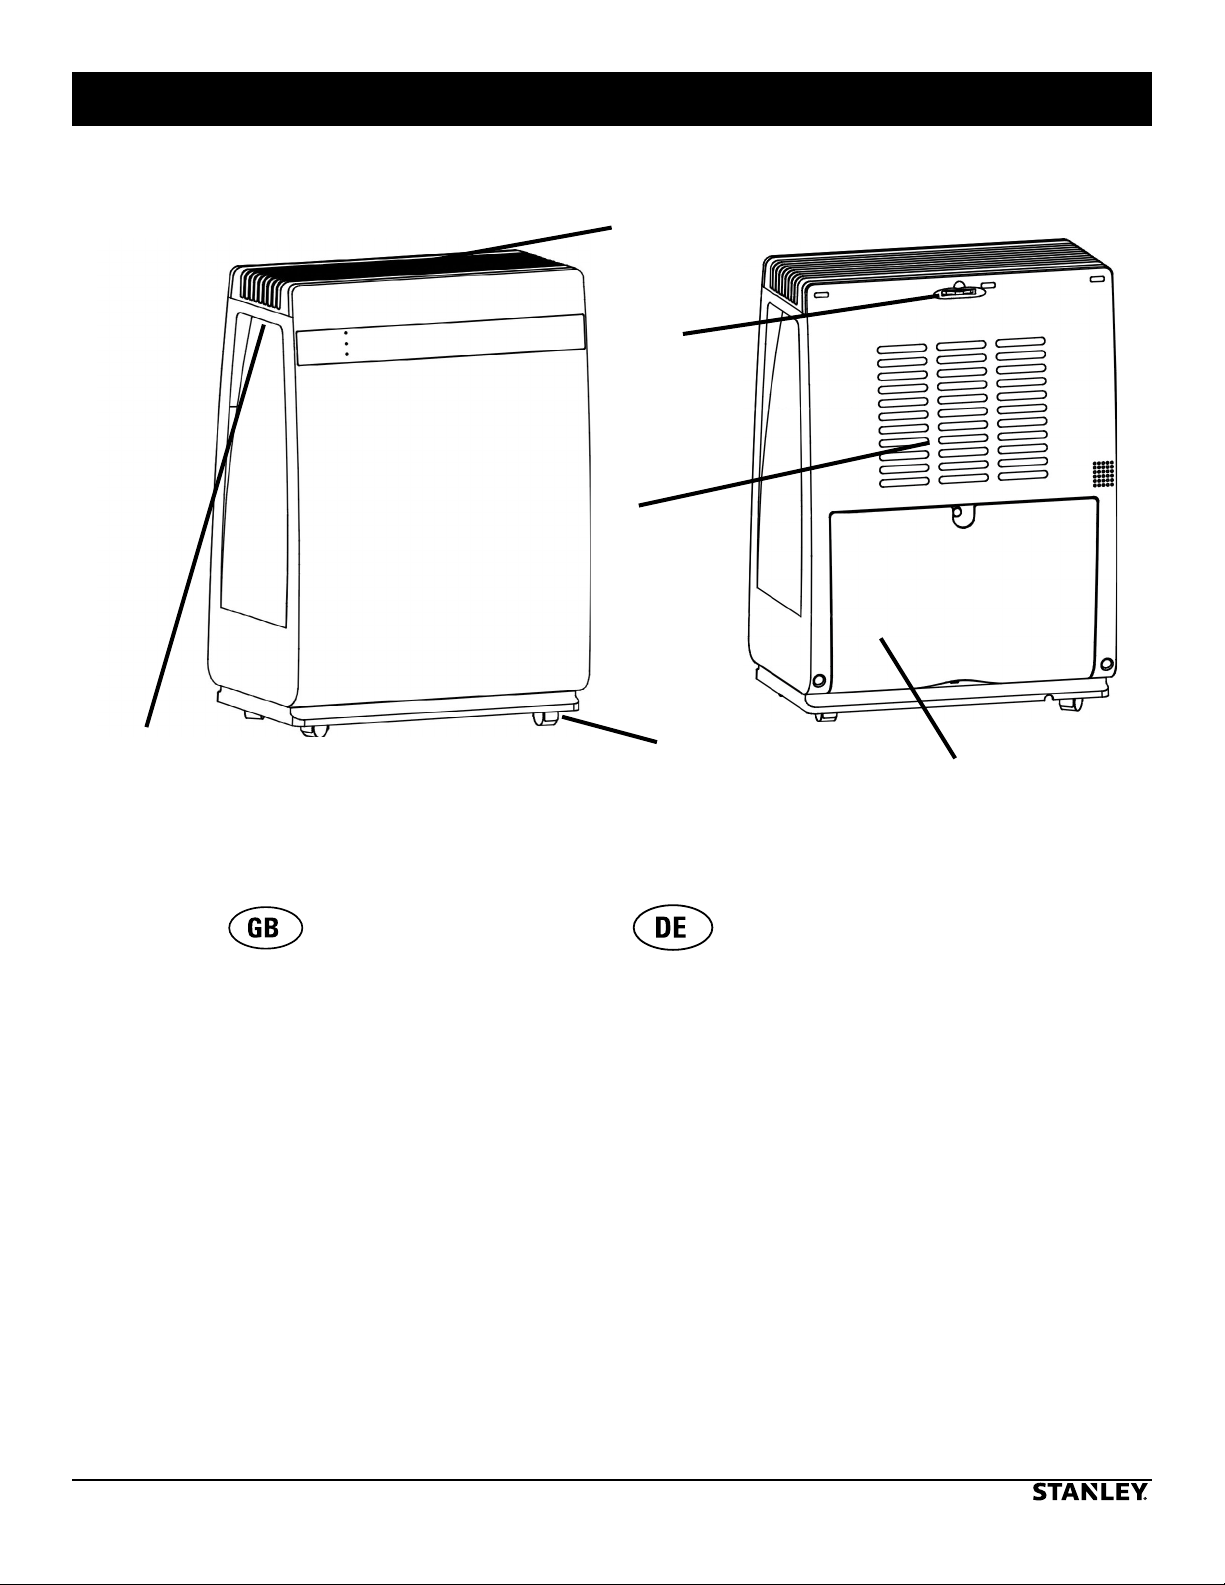
1. Handle
2. Control Knob
3. Top Guard
4. Water Tank
5. Filter Cover
6. Wheel
6
4
1. Handgriff
2. Feuchtigkeitsregler
3. Obere Abdeckung
4. Wasserbehälter
5. Filterdeckel
6. Rad
© 2015, Pinnacle Products International, Inc.
668 Stony Hill Road #302 Yardley, PA 19067
2
Page 4

LASSEN SIE DAS HOCHLEISTUNGSLUFTENTFEUCHTER WÄHREND ES MIT STROM VERSORGT WIRD,
NIEMALS UNBEAUFSICHTIGT
Technische Daten
Änderungen vorbehalten
ST-12L-DH-ME ST-16L-DH-ME ST-20L-DH-ME
Spannung ~ Hz 220-240~50Hz 220-240~50Hz 220-240~50Hz
Watts 260 410 480
Luftstrom (CMH) 126 126 135
Betriebsbereich 5-32 °C 5-32 °C 5-32 °C
Kältemittel R134A / CFC Free R134A / CFC Free R134A / CFC Free
Tankinhalt (L) 2.3 2.3 2.3
Specications
Specications subject to change
ST-12L-DH-ME ST-16L-DH-ME ST-20L-DH-ME
Voltage ~ Hz 220-240~50Hz 220-240~50Hz 220-240~50Hz
Watts 260 410 480
Air Flow (CMH) 126 126 135
Operation Range 5-32 °C 5-32 °C 5-32 °C
Refrigerant R134A / CFC Free R134A / CFC Free R134A / CFC Free
Tank Capacity (L) 2.3 2.3 2.3
© 2015, Pinnacle Products International, Inc.
668 Stony Hill Road #302 Yardley, PA 19067
3
Page 5
LASSEN SIE DAS HOCHLEISTUNGSLUFTENTFEUCHTER WÄHREND ES MIT STROM VERSORGT WIRD,
NIEMALS UNBEAUFSICHTIGT
Sicherheitshinweis
WICHTIG: Lesen und verstehen Sie vor der Inbetriebnahme des Luftentfeuchters alle
Sicherheitshinweise und Anweisungen in diesem Handbuch. Bewahren Sie dieses Handbuch für eine
spätere Verwendung auf.
Setzen Sie das Gerät niemals Regen oder Spritzwasser aus. Tauchen Sie das
Gerät niemals in Wasser! Verwenden Sie das Gerät nicht unter extrem feuchten
Bedingungen.
ELEKTROSCHOCKGEFAHR! GEEIGNETE UNFALLSCHUTZMASSNAHMEN
ERGREIFEN.
GEFAHR EINES STROMSCHLAGS! TRENNEN SIE DAS GERÄT VOR WARTUNGSARBEITEN
VON DER STROMVERSORGUNG.
NIEMALS DEN LUFTENTFEUCHTER ODER DIE LUFTEIN- UND -AUSLÄSSE
ABDECKEN.
INSTALLIEREN SIE DEN LUFTENTFEUCHTER NICHT AUF UNEBENEM
UNTERGRUND.
Um Gefahren durch das unbeabsichtigte Verstellen des Thermowächters zu
verhindern, darf dieses Gerät nicht über ein externes Schaltgerät, z.B. eine
Zeitschaltuhr, versorgt oder an einen Kreislauf angeschlossen werden, der vom Gerät regelmäßig
ein- und ausgeschaltet wird
Kinder ab 8 Jahren, Personen mit eingeschränkten körperlichen, sensorischen und
geistigen Fähigkeiten sowie unerfahrene Personen dürfen dieses Gerät nur unter Aufsicht
bedienen, bzw. wenn sie ausreichend in den sicheren Betrieb des Gerätes eingewiesen wurden und ihnen
die damit verbundenen Risiken bekannt sind. Kinder dürfen nicht mit dem Gerät spielen. Das Gerät darf von
Kindern nicht ohne Aufsicht gereinigt und gewartet werden
Vor der Inbetriebnahme des Luftentfeuchters müssen Sie
wissen, wie Sie den Luftentfeuchter im Notfall abschalten
können.
Verwenden Sie das Gerät NUR mit der auf dem
Typenschild angegebenen Stromversorgung (Spannung
und Frequenz).
AUSSCHLIESSLICH ein für dieses Gerät ausgelegtes
Verlängerungskabel verwenden.
Installieren Sie den Luftentfeuchter NIEMALS in
Bereichen, in denen er direktem Spritzwasser, Regen oder
Tropfwasser ausgesetzt ist.
IMMER darauf achten, dass alle Kabel gegen Kurzschluss
und Überlast geschützt sind.
Trennen Sie den Luftentfeuchter IMMER von der
Stromquelle, wenn er nicht in Gebrauch ist.
Wenn das Stromkabel beschädigt ist, muss es vom
Hersteller, einem Kundendienstmitarbeiter oder einer
ähnlich qualifizierten Person ausgetauscht werden, um
Gefährdungen zu vermeiden.
Ziehen oder tragen Sie den Luftentfeuchter NIEMALS am
Netzkabel.
Stecken Sie NIEMALS Gegenstände irgendwelcher Art
durch die Lüftungsgitter.
Verwenden Sie den Luftentfeuchter NIEMALS mit einem
externen Schaltgerät, z. B. einer Zeitschaltuhr.
Stellen Sie die Temperatur des Luftentfeuchters NIEMALS
höher als die Umgebungstemperatur ein.
Leeren Sie den Auffangbehälter, bevor Sie den
Luftentfeuchter bewegen oder aufbewahren.
Wird der Luftentfeuchter enteist, warten Sie, bis der Zyklus
abgeschlossen ist, bevor Sie ihn von der Stromversorgung
trennen.
Warten Sie 3 Minuten, nachdem Sie das Gerät
abgeschaltet haben, bevor Sie es wieder einschalten, um
eine Beschädigung des Kompressors zu vermeiden.
Wenn der Luftentfeuchter beschädigt ist, darf er nicht
verwendet werden. Der Luftentfeuchter muss von einer
qualifizierten Person oder einem Servicevertreter gewartet
werden.
Der Entfeuchter ist für den Betrieb im Temperaturbereich
von 5 bis 32° C ausgelegt. Ein Betrieb außerhalb dieses
Temperaturbereichs kann das Gerät beschädigen.
Stanley, das STANLEY-Logo, das eingekerbte Rechteck sowie das gelb-schwarze diagonale
Paketdesign sind Markenzeichen von Stanley Black & Decker, Inc. oder ihrer Tochterunternehmen.
© 2015, Pinnacle Products International Inc.
Page 6

LASSEN SIE DAS HOCHLEISTUNGSLUFTENTFEUCHTER WÄHREND ES MIT STROM VERSORGT WIRD,
NIEMALS UNBEAUFSICHTIGT
Betrieb
Starten des Entfeuchters:
1. Vergewissern Sie sich, dass der
Feuchtigkeitsregler auf “OFF” (AUS)
gestellt ist.
2. Schließen Sie den Entfeuchter an eine
geeignete Stromquelle an.
3. Drehen Sie den Feuchtigkeitsregler auf den
gewünschten Feuchtigkeitswert.
Ausschalten des Entfeuchters:
1. Drehen Sie den Feuchtigkeitsregler auf „OFF“
(AUS).
2. Wenn der Entfeuchter für einige Stunden
nicht wieder eingesetzt wird, trennen Sie das
Netzkabel von der Steckdose.
Feuchtigkeitseinstellungen:
1. Feuchtigkeitseinstellungen am Regler:
Einstellung
des Feuchtig-
keitsreglers
1 90%
2 80%
3 70%
4 60%
5 50%
6 40%
7 30%
8 20%
9 10%
Cont. 0%
Ungefähre
Feuchtigkeit-
seinstellung
Abbildung 5
Behälter voll
HINWEIS: Wenn sich der Entfeuchter im
Dauerbetrieb befindet, schaltet er sich nicht aus.
Entfrosten
© 2015, Pinnacle Products International Inc.
Page 7

LASSEN SIE DAS HOCHLEISTUNGSLUFTENTFEUCHTER WÄHREND ES MIT STROM VERSORGT WIRD,
NIEMALS UNBEAUFSICHTIGT
Wartung
Ablauf:
Entleerung in den Wasserbehälter
– Das Kondenswasser läuft in den Wasserbehälter
auf der Rückseite des Luftentfeuchters.
– Wenn der Wasserbehälter voll ist, leuchtet die
Kontrollleuchte des Wasserbehälters auf.
1. Schalten Sie den Luftentfeuchter aus.
2. Entfernen und leeren Sie den
Wasserbehälter.
3. Setzen Sie den Wasserbehälter wieder ein
und schalten Sie den Luftentfeuchter ein.
Abbildung 7
Filterreinigung:
1. Entnehmen Sie den Wasserbehälter vor dem
Entfernen des Filters.
Abbildung 6
Dauerentleerung:
– Der Luftentfeuchter kann mittels eines PVC-
Schlauchs für eine Dauerentleerung umgerüstet
werden.
HINWEIS: Der PVC-Schlauch ist NICHT im
Lieferumfang enthalten.
1. Um den PVC-Schlauch zu installieren,
müssen Sie den Wasserbehälter
entnehmen und den Schlauch in die
Ablauföffnung stecken.
2. Entfernen Sie den Filter, indem Sie die Laschen
am Filter nach unten ziehen.
3. Spülen Sie den Filter nur mit kaltem Wasser aus,
verwenden Sie KEINE Reinigungsmittel oder
Alkohol.
4. Lassen Sie den Filter trocknen, bevor Sie ihn
wieder einsetzen und den Luftentfeuchter
benutzen.
HINWEIS: Reinigen Sie den Filter alle zwei
Wochen.
2. Setzen Sie den Wasserbehälter erneut ein,
falls der Schlauch verrutscht ist.
3. Stellen Sie sicher, dass sich das Ende des
Ablaufschlauchs an einem tiefergelegenen
Punkt als der Luftentfeuchter befindet,
um einen ordnungsgemäßen Ablauf des
Kondenswassers zu gewährleisten.
© 2015, Pinnacle Products International Inc.
Abbildung 8
Page 8

NEVER LEAVE DEHUMIDIFIER UNATTENDED WHILE CONNECTED TO A POWER SOURCE
WARNING
WARNING
CAUTION
CAUTION
WARNING
WARNING
WARNING
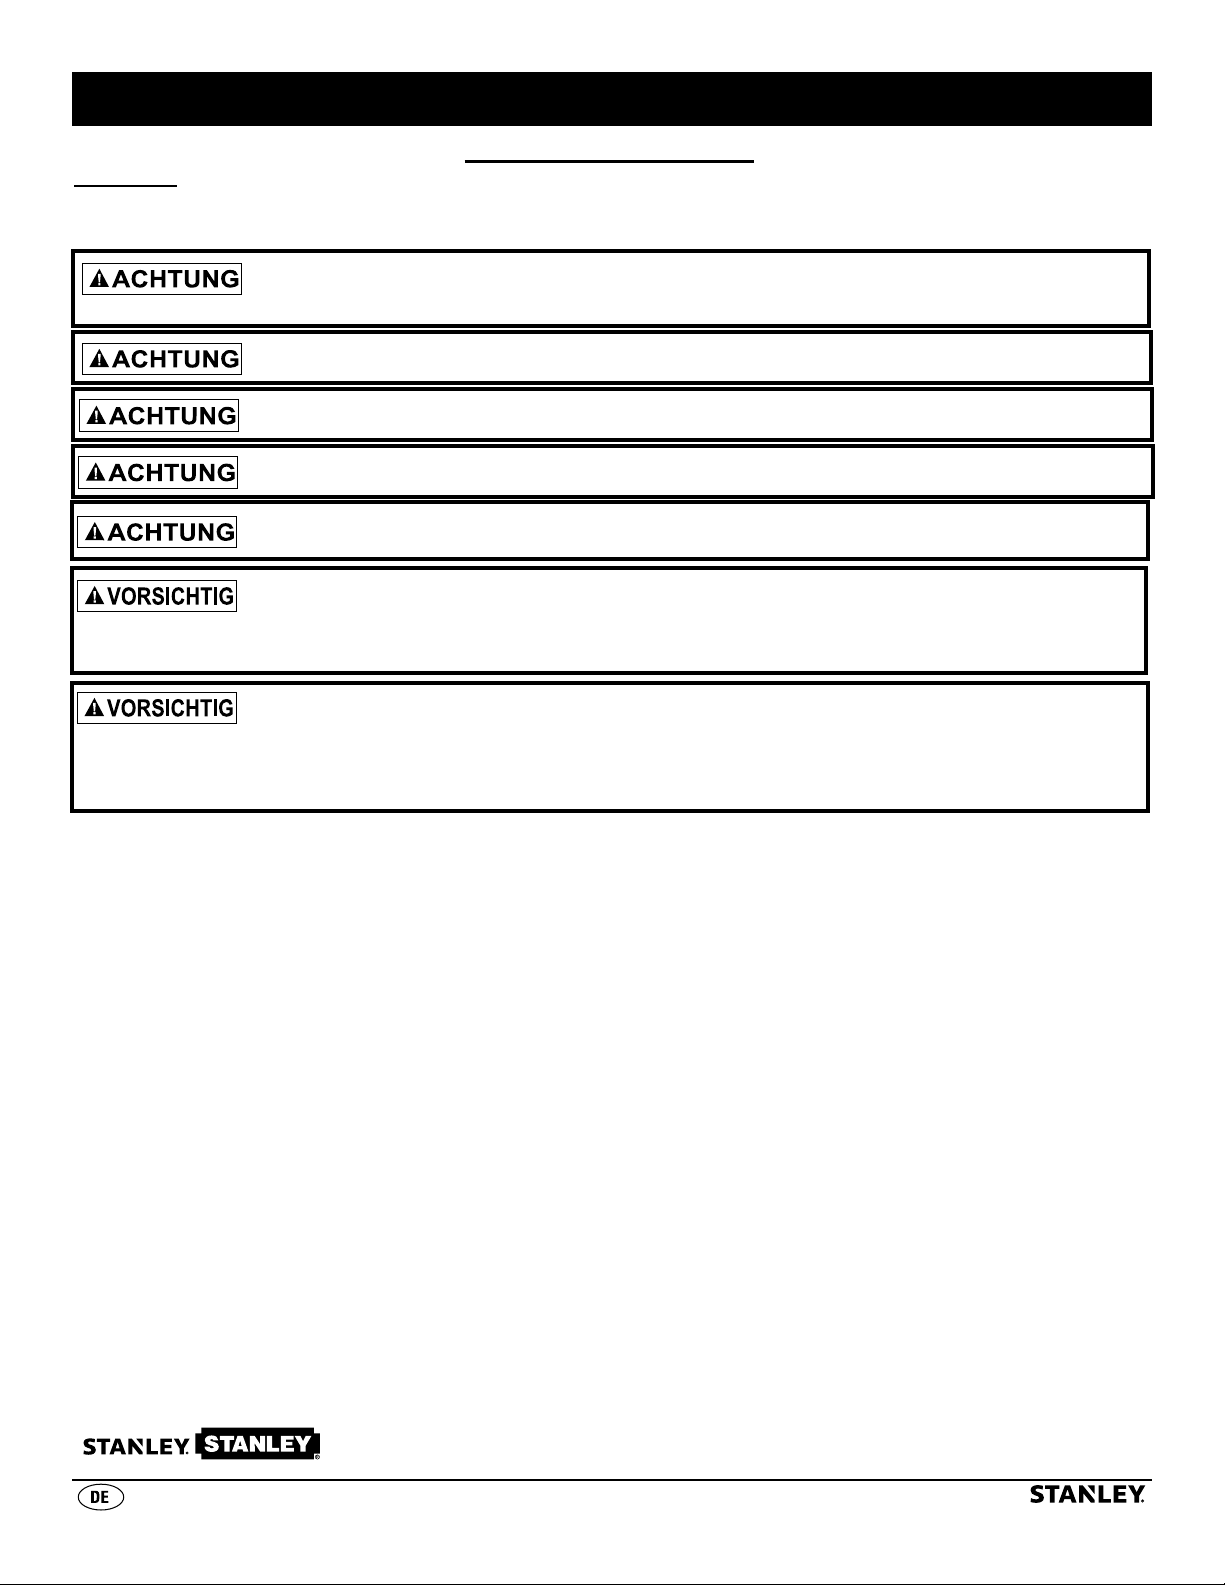
Safety Information
IMPORTANT: Read and understand all of the safety information and instructions in this
manual before operating your dehumidifier. Retain this manual for future reference.
Do Not expose to rain or water spray. Do Not submerge this dehumidifier in
water or use in excessively wet conditions.
RISK OF ELECTRIC SHOCK! TAKE PRECAUTIONS TO PREVENT INJURY.
RISK OF ELECTRIC SHOCK! DISCONNECT FROM POWER BEFORE MAINTENANCE.
DO NOT COVER DEHUMIDIFIER OR OBSTRUCT AIR INLET OR OUTLET.
DO NOT INSTALL DEHUMIDIFIER ON UNEVEN SURFACE.
In order to avoid a hazard due to inadvertent resetting of the thermal cut-out,
this appliance must not be supplied through an external switching device,
such as a timer, or connected to a circuit that is regularly switched on and off by the utility.
This appliance can be used by children aged from 8 years and above and persons
with reduced physical, sensory or mental capabilities or lack of experience and
knowledge if they have been given supervision or instruction concerning use of the appliance
in a safe way and understand the hazards involved. Children shall not play with the appliance.
Cleaning and user maintenance shall not be made by children without supervision.
Before operating dehumidier, be sure that you
know how to switch the dehumidier off in an
emergency.
ALWAYS use only the electrical power (voltage
and frequency) specied on the model plate of
the dehumidier.
ALWAYS use an extension cord properly rated for
this appliance.
ALWAYS install the dehumidier so that it is not
directly exposed to water spray, rain or dripping
water.
ALWAYS ensure that all cords are protected
against short circuit and overload.
ALWAYS disconnect dehumidifier from power
source when not in use.
If the supply cord is damaged, it must be
replaced by the manufacturer, its service agent
or similarly qualified persons in order to avoid a
hazard.
NEVER pull or carry dehumidifier by power cord.
NEVER insert any objects through the fan guard.
NEVER use dehumidifier with an external
switching device, such as a timer.
NEVER set the dehumidifier higher than the
ambient temperature.
Empty tank before storing or moving the unit.
When unit is defrosting, allow cycle to complete
before unplugging the unit.
Wait 3 minutes after shutdown before restarting
to avoid damaging the compressor.
If dehumidifier is damaged, do not use it. The
dehumidifier must be serviced by a qualified person
or service agent.
This Dehumidifier is designed for use
between 5-32°C. Operating outside of those
tempuratures may damage the unit.
STANLEY, The STANLEY Logo, The Notched Rectangle and the Yellow and Black Diagonal Package
Design are all trademarks of Stanley Black & Decker, Inc. or an affiliate thereof.
© 2015, Pinnacle Products International Inc.
4
Page 9

NEVER LEAVE DEHUMIDIFIER UNATTENDED WHILE CONNECTED TO A POWER SOURCE
Operation
Starting the Dehumidifier:
1. Ensure the Humidity Control Knob is turned
to the “OFF” position.
2. Connect the dehumidifier to the proper
electrical power source.
3. Turn the Humidity Control Knob to the
desired humidity setting.
Turning Off The Dehumidifier:
1. Turn the Humidity Control Knob to the “OFF”
position.
2. If the dehumidifier will not be used again
within a few hours, disconnect the power
cord from the electrical outlet.
Humidity Settings:
1. Humidity settings on the Control Knob:
Control Knob
Setting
1 90%
2 80%
3 70%
4 60%
5 50%
6 40%
7 30%
8 20%
9 10%
Cont. 0%
Approximate
Humidity
Setting
Figure 5
NOTE: The Dehumidifier will not turn off when
operating in Continuous Mode.
Tank Full Defrost
© 2015, Pinnacle Products International Inc.
5
Page 10

NEVER LEAVE DEHUMIDIFIER UNATTENDED WHILE CONNECTED TO A POWER SOURCE
Maintenance
Draining:
Water Tank Draining
– The condensed water will drain into the tank
in the rear of the dehumidifier.
– When the tank is full, the tank full indicator
light will illuminate.
1. Turn off the dehumidifier.
2. Remove and empty the water tank
3. Replace the tank and power the
dehumidifier on.
Figure 7
Filter Cleaning:
Figure 6
Continuous Draining
– The dehumidifier can be configured to drain
continuously with a piece of PVC tubing.
NOTE: PVC tubing NOT included with this unit.
1. To install PVC tubing, remove water
tank and plug tubing into drain hole.
2. Replace the water tank in case tubing
becomes dislodged.
3. Be sure to place drain tube at a lower
point than dehumidifier to ensure proper
draining and water flow.
1. Remove the water tank before removing filter.
2. Remove filter by pulling down on filter tabs.
3. Wash filter with cool water only, DO NOT use
cleaning solvents or alcohol.
4. Air dry filter before replacing and using
dehumidifier.
NOTE: Clean filter once every two weeks of
operation.
© 2015, Pinnacle Products International Inc.
Figure 8
7
Page 11

NEVER LEAVE DEHUMIDIFIER UNATTENDED WHILE CONNECTED TO A POWER SOURCE
WARNING
Plug Replacement
WARNING
RISK OF ELECTRIC SHOCK! DISCONNECT FROM POWER BEFORE MAINTENANCE.
NOTE: This section only applies to heaters sold or used in Great Britain.
This appliance is supplied with a BS1363 3 pin
plug tted with a fuse. Should the fuse require
replacement, it must be replaced with a fuse
with the proper amp rating. (see Technical
Specications page 2) and approved to BS1362.
In the event the mains plug has to be removed/
replaced for any reason, please note:
IMPORTANT: The wires in the mains lead are
colored in accordance with the following code:
Blue – Neutral Brown – Live
Green/Yellow – Earth
As the colors of the wires in the mains lead of this
appliance may not correspond with the colored
markings identifying the terminals in your plug,
proceed as follows:
The blue wire must be connected to the terminal
marked with an N or colored black. The brown
wire must be connected to the terminal marked
with an L or colored red. The green/ yellow wire
must be connected to the earthing terminal which
is marked with an E or with the earth symbol.
Never connect live or neutral
wires to the earth terminal of
the plug.
NOTE: If a moulded plug is tted and has to
be removed take great care in disposing of the
plug and severed cable, it must be destroyed to
prevent engaging into a socket.
Figure 9
Plug Replacement Wiring Diagram
GREEN / YELLOW
Earth
BLUE
Neutral
CORD CLAMP
BROWN
Live
FUSE
3 Amps
© 2015, Pinnacle Products International Inc.
8
Page 12

LASSEN SIE DAS HOCHLEISTUNGSLUFTENTFEUCHTER WÄHREND ES MIT STROM VERSORGT WIRD,
NIEMALS UNBEAUFSICHTIGT
Explosionsdarstellung ― Exploded View
ST-12L-DH-ME
3
2
1
10
ST-16L-DH-ME / ST-20L-DH-ME
11
4
5
9
6
7
8
56
4
3
2
1
12
13
11
8
7
9
10
© 2015, Pinnacle Products International, Inc.
668 Stony Hill Road #302 Yardley, PA 19067
17
Page 13

LASSEN SIE DAS HOCHLEISTUNGSLUFTENTFEUCHTER WÄHREND ES MIT STROM VERSORGT WIRD,
NIEMALS UNBEAUFSICHTIGT
Teilelist ― Parts List
# ST-12L-DH-ME ST-16L-DH-ME ST-20L-DH-ME
1 36-008-0001 36-008-0002 36-008-0003
2 36-020-0001 36-020-0002 36-020-0003
3 36-025-0001 36-023-0001 36-023-0005
4 36-024-0001 36-023-0002 36-023-0006
5 36-012-0001 36-025-0012 36-025-0012
6 36-013-0001 36-024-0012 36-024-0012
7 36-003-0001 36-012-0002 36-001-0003
8 36-002-0001 36-013-0002 36-013-0003
9 36-022-0001 36-003-0002 36-003-0003
10 36-030-0001 36-002-0002 36-002-0003
11 36-026-0001 36-022-0002 36-022-0003
12 — 36-030-0002 36-030-0002
13 — 36-026-0002 36-026-0002
© 2015, Pinnacle Products International, Inc.
668 Stony Hill Road #302 Yardley, PA 19067
18
Page 14

STANLEY, The STANLEY Logo, The Notched Rectangle and the Yellow and Black Diagonal Package
Design are all trademarks of Stanley Black & Decker, Inc. or an affiliate thereof.
Pinnacle Products International, Inc.
Yardley, PA USA
www.pinnacleint.com
© 2015 Stanley Black & Decker, Inc.
 Loading...