

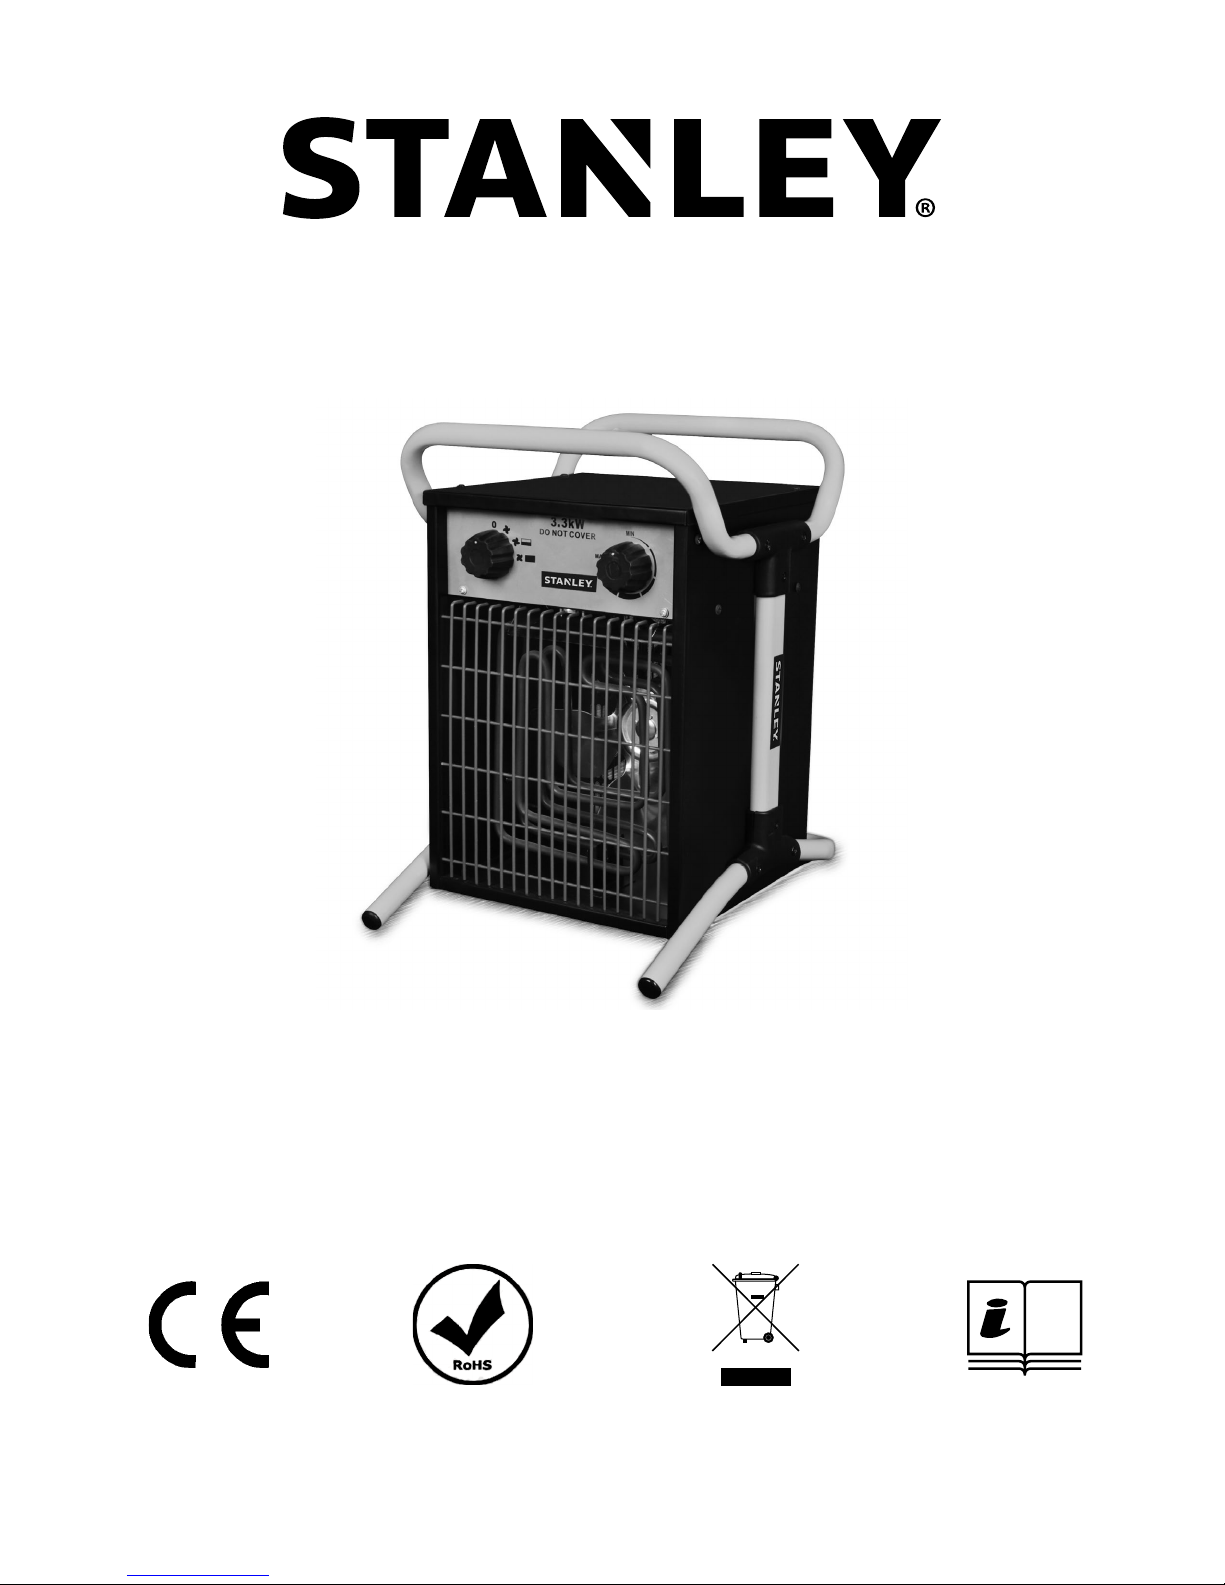
Stanley ST-02-230-E, ST-03-230-E, ST-02-240-E, ST-03-240-E, ST-033-230-E Operating Instructions Manual
...Page 1
0123424532,+6+0123424732,+6+0123524532,+6+0123524732,+6++
01235524532,+6+01235524732,+6+0123827332,+6+0123927332,
!"#$%&'()*+,*-.&'(.+/-)&-'
821000311-14
Page 2
NEVER LEAVE HEATER UNATTENDED WHILE CONNECTED TO A POWER SOURCE
ENGLISH
..........................................................................................................1-11
:-)#+1;-+!"%&'$.&(<"+=)"$)*>+?;-"+&;(%+%@=A<*+(%+=)'B-#+<"+)+C'<#$.&D+(&+=-)"%+&;)&+&;-+
("%&'$.&(<"+=)"$)*+=$%&+A-+'-)#E+
!"+<'#-'+&<+)F<(#+<F-';-)&("GD+#<+"<&+.<F-'+&;-+;-)&-'E+
HI,J0,+:,JK+1/,+LMIIM?!NO+!N01:PQ1!MN0+QJ:,LPIIR++
S,LM:,+P0!NO+1/,+JHHI!JNQ,E
- Children of less than 3 years should be kept away unless continuously supervised. Children aged
from 3 years and less than 8 years shall only switch on/off the appliance provided that it has been
placed or installed in its intended normal operating position and they have been given supervision
or instruction concerning use of the appliance in a safe way and understand the hazards involved.
Children aged from 3 years and less than 8 years shall not plug in, regulate and clean the
appliance or perform user maintenance.
- CAUTION: Some parts of this product can become very hot and cause burns. Particular attention
has to be given where children and vulnerable people are present.
- The heater must not be located immediately below a socket-outlet.
- Do not use the appliance for other than its intended use. For domestic indoor use only.
- Place the appliance on a at, stable, heat-resistant surface. Operating the product in any other
position could cause a hazard.
- There may be trace of odour during the rst few minutes of initial use. This is normal and will
quickly disappear.
- Do not attempt to repair, disassemble or modify the appliance. There are no user-serviceable
parts inside.
© 2015, Pinnacle Products International Inc.
1
Page 3
NEVER LEAVE HEATER UNATTENDED WHILE CONNECTED TO A POWER SOURCE
0123424532,+6+0123424732,+6+0123524532,+6+01235524532,+6+01235524732,+6+
0123827332,+6+0123927332,
4
5
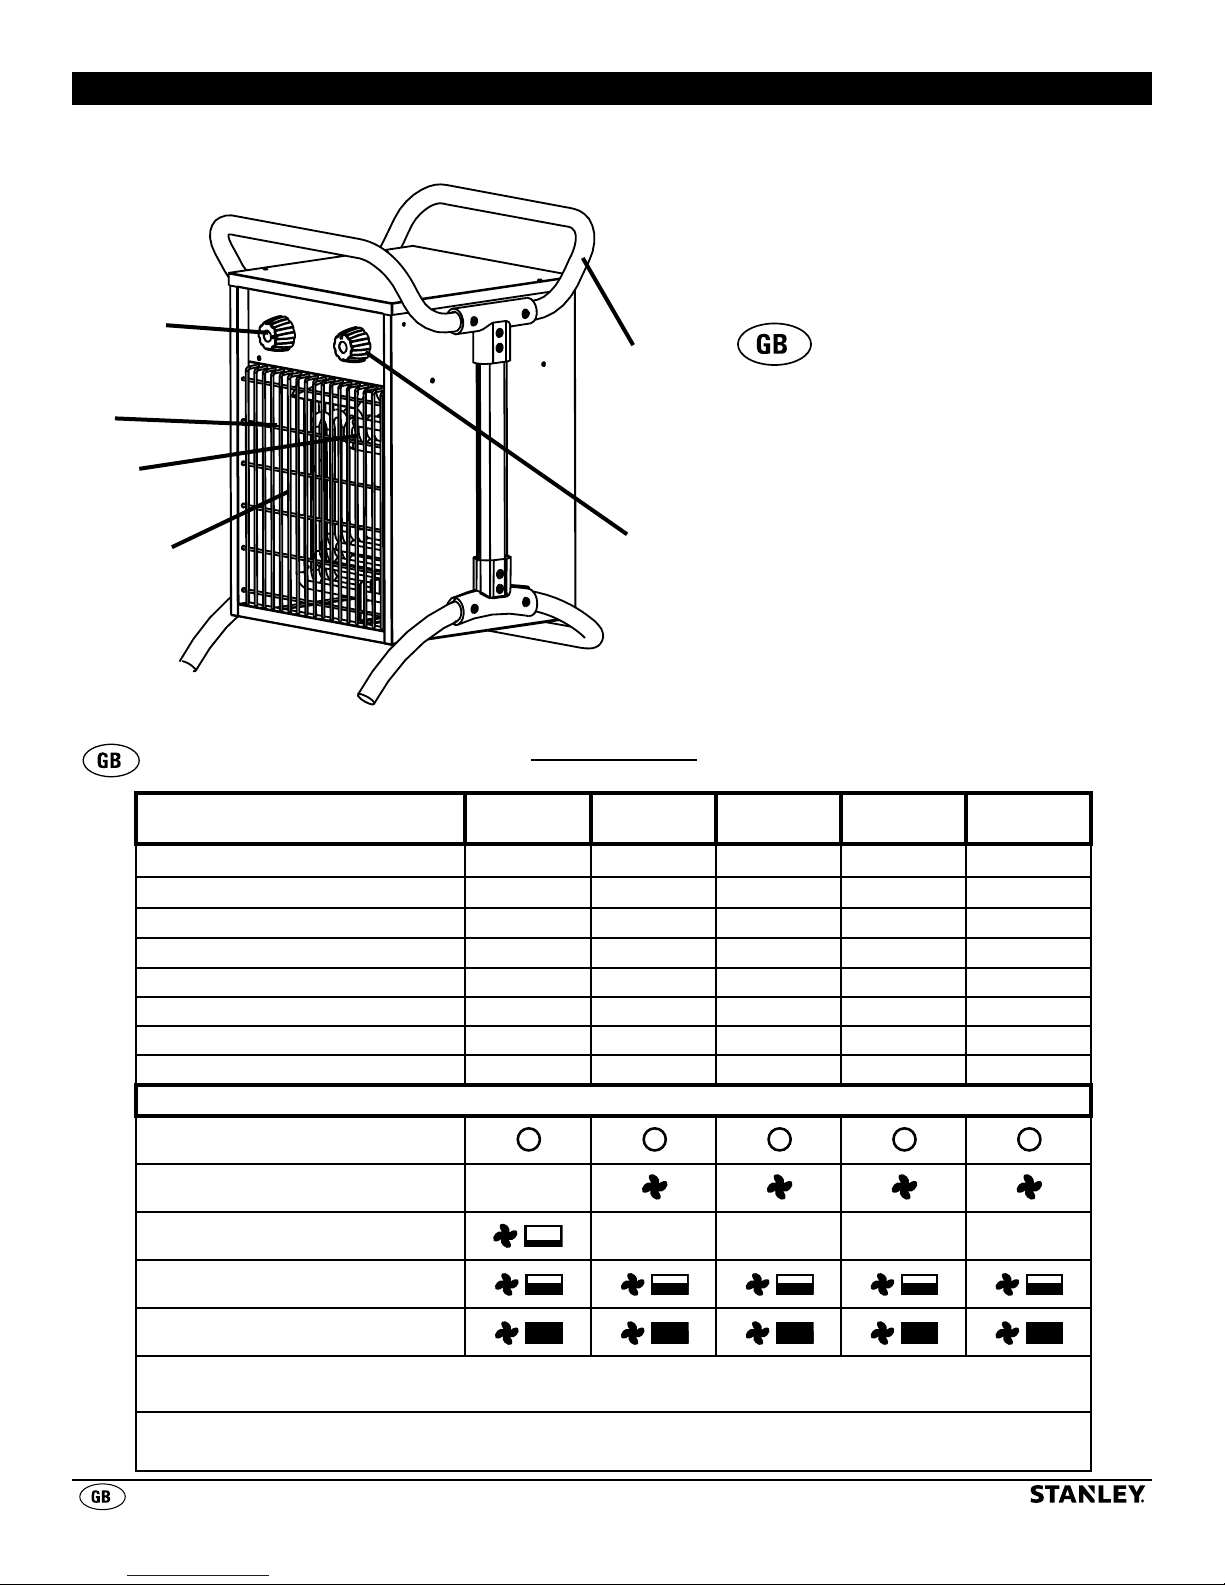
1. Front Guard
2. Fan
3. Heat Coil
3
4. Function Selector
5. Handle
2
1
0H,Q!L!QJ1!MN0
Specications subject to change without notice
0123424532,
0123424732,
THERMAL POWER (kW)
THERMAL POWER (BTU)
AIR FLOW (m
HEATING AREA (m
POWER (Volt / Hz) (ST-230-E) 230~50 230~50 230~50 400~50 400~50
POWER (Volt / Hz) (ST-240-E) 220-240~50 220-240~50 220-240~50 ― ―
HEAT SETTINGS 3 2 2 2 2
INGRESS PROTECTION RATING (IP)
3
/H)
3
) 20 30 33 50 90
2.0 3.0 3.3 5.0 9.0
6,820 10,250 11,250 17,060 30,710
186 540 476 530 708
X4 X4 X4 X4 X4
LPNQ1!MN0+6+0,11!NO0
6
0123524532,
0123524732,
01235524532,
01235524732,
6. Thermostat
0123827332, 0123927332,
Unit is Off
Fan Runs - No Heating
Fan Runs - Quarter Power Heating
Fan Runs - Half Power Heating
Fan Runs - Full Power Heating
NM1,> ST-03-230-E / ST-03-240-E / ST-033-230-E / ST-033-240-E / ST-05-400-E / ST-09-400-E, the fan
will run continuously while the heater is operating.
NM1,> ST-02-230-E / ST-02-240-E, the fan will shut off when desired temperature is reached.
Fan will not run continuously.
© 2015, Pinnacle Products International Inc.
2
Page 4
NEVER LEAVE HEATER UNATTENDED WHILE CONNECTED TO A POWER SOURCE
DANGER
WARNING
WARNING
WARNING
WARNING
0)T-&@+!"T<'=)&(<"
!UHM:1JN1>+:-)#+)"#+$"#-'%&)"#+)**+<T+&;-+%)T-&@+("T<'=)&(<"+)"#+("%&'$.&(<"%+("+&;(%+
=)"$)*+A-T<'-+<C-')&("G+@<$'+;-)&-'E+
:!0V+ML+,WHIM0!MNX+K<+N<&+<C-')&-+&;(%+;-)&-'+Y;-'-+&;-'-+)'-+;)'=T$*D+
-ZC*<%(F-+<'+T*)==)A*-+G)%%-%D+T$=-%+<'+;)[)'#<$%+%$A%&)".-%E
:!0V+ML+L!:,X+K<+N<&+<C-')&-+&;(%+;-)&-'+"-)'+.<=A$%&(A*-+=)&-'()*%E+
,I,Q1:!Q+0/MQV+/J\J:KX+K<+"<&+$%-+&;(%+;-)&-'+("+&;-+(==-#()&-+
%$''<$"#("G%+<T+)+A)&;D+)+%;<Y-'D+<'+)+%Y(==("G+C<<*E
SP:N+/J\J:KX+K<+N<&+&<$.;+&;-+T'<"&+<T+;-)&-'+Y;(*-+(&+(%+<C-')&("GE+1;(%+
;-)&-'+(%+;<&+Y;(*-+<C-')&("GE+
:!0V+ML+!N]P:RX+KM+NM1+UM^,+/,J1,:+?/!I,+!1+!0+MH,:J1!NOE+
CAUTION
!"+<'#-'+&<+)F<(#+)+;)[)'#+#$-+&<+(")#F-'&-"&+'-%-&&("G+<T+&;-+&;-'=)*+.$&2<$&D+
&;(%+)CC*()".-+=$%&+"<&+A-+%$CC*(-#+&;'<$G;+)"+-Z&-'")*+%Y(&.;("G+#-F(.-D+
%$.;+)%+)+&(=-'D+<'+.<""-.&-#+&<+)+.('.$(&+&;)&+(%+'-G$*)'*@+%Y(&.;-#+<"+)"#+<TT+A@+&;-+$&(*(&@E
This appliance can be used by children aged
from 8 years and above and persons with
reduced physical, sensory or mental capabilities
or lack of experience and knowledge if they
NEVER place the heater on a small, uneven or
unstable surface that may cause the heater to fall.
NEVER connect other appliances to the same
electrical outlet as the fan heater.
have been given supervision or instruction
concerning use of the appliance in a safe way
and understand the hazards involved. Children
shall not play with the appliance. Cleaning and
user maintenance shall not be made by children
NEVER operate heater with heater guards removed.
NEVER block hot air outlet while heater is operating.
NEVER cover or obstruct heater.
without supervision.
NEVER use ducting with heater.
Children should be supervised so they do not play
with the appliance.
ALWAYS use only the electrical power (voltage
and frequency) specied on the model plate of
the heater.
ALWAYS use an extension cord properly rated for
this appliance.
ALWAYS ensure that all cords are protected
against short circuit and overload.
NEVER pull or carry heater by the power cord.
NEVER use heater with an external switching
device: such as a timer.
If heater is damaged, do not use it. The heater must
be serviced by a qualified person or service agent.
If the supply cord is damaged, it must be replaced
by the manufacturer, its service agent or similarly
qualified persons in order to avoid a hazard.
ALWAYS keep power cord away from hot air outlet.
ALWAYS disconnect heater from power source
when not in use.
01JNI,RD+1;-+01JNI,R+I<G<D+1;-+N<&.;-#+:-.&)"G*-+)"#+&;-+R-**<Y+)"#+S*).B+K()G<")*+H).B)G-+
K-%(G"+)'-+)**+&')#-=)'B%+<T+0&)"*-@+S*).B+_+K-.B-'D+!".E+<'+)"+)TT(*()&-+&;-'-<TE
© 2015, Pinnacle Products International Inc.
Do not use this heater in the immediate
surroundings of a bath, a shower or a swimming
pool.
The heater must not be located immediately
below a socket outlet.
3
Page 5

NEVER LEAVE HEATER UNATTENDED WHILE CONNECTED TO A POWER SOURCE
J%%-=A*@
4
1
2
3
`
5
6
5
4
5 7
© 2015, Pinnacle Products International Inc.
4
Page 6

NEVER LEAVE HEATER UNATTENDED WHILE CONNECTED TO A POWER SOURCE
J%%-=A*@++a0--+H)G-+7b
1. Slide upper handle brackets onto front handle
and align holes.
2. Slide rear handle into upper handle brackets
and align holes.
3. Slide side support into upper bracket and align
holes.
4. Attach upper brackets to heater using 3 screws
per side.
5. Place heater on one side.
6. Align lower inner bracket with holes in heater
and side support.
7. Attach align holes in Heater leg frame with
lower inner bracket.
8. Align lower outer bracket holes with lower inner
bracket, and attach using screws.
9. Place heater on opposite side, and repeat steps
6-8.
MC-')&(<"
1. Position the fan heater so that it stands upright
on a firm, level surface and at a safe distance
from wet environments and flammable objects.
2. Connect the fan heater to the proper electrical
power.
3. Set the thermostat dial to the maximum
temperature.
4. The fan heater will switch on when the function
selector dial is set to one of the three power
settings.
5. Once the room reaches the desired
temperature, turn the thermostat dial back
until heating element turns off.
J$&<=)&(.+MF-';-)&+0)T-&@+Q<"&'<*
– This heater is equipped with safety internal
heat limiting thermostat and overheat
protection circuit. When a potential overheat
temperature is reached, the system will
automatically shut the heater off
1;-'=<%&)&+!"%&'$.&(<"%
– At first, set the thermostat to “+” and let the
heater operate with full power input. When
the room temperature reaches the required
value, turn the thermostat to the left until it
switches off.
– The thermostat will then switch on and off
automatically to control the room temperature
according to the preset value and keep the
room temperature constant.
– When using the heater for the first time, you
may notice a slight emission of smoke. This
is quite normal and it stops after a short
time. The heating element is made of steel
and was coated with a layer of protective oil
during production. The smoke is caused by
the leftover oil as it is heated.
Q*-)"("G+)"#+U)("&-")".-
– Before cleaning the appliance, disconnect it
from the outlet and let it cool down.
– The enclosure is easy to get dirty. Wipe it
often with a soft sponge. For very dirty parts,
wipe with a sponge dipped in < 50°C water
and mild detergent, then dry the heater
enclosure with a clean cloth. Be careful not to
let the water enter the inside of the appliance
– Clean the coupler, dry and pack it in a plastic
bag.
– In order to protect the enclosure, don’t
splash water onto the heater, and never
use a solvent like gasoline, isoamyl acetate,
toluene, etc. to clean the heater.
– When you store the heater, let it cool down
first and, keep it dry. Then cover it with a
plastic bag, put it in the packing box and
store it in a dry, ventilated place.
© 2015, Pinnacle Products International Inc.
5
Page 7

NEVER LEAVE HEATER UNATTENDED WHILE CONNECTED TO A POWER SOURCE
WARNING
H*$G+:-C*).-=-"&
WARNING
:!0V+ML+,I,Q1:!Q+0/MQVX+K!0QMNN,Q1+L:MU+HM?,:+S,LM:,+UJ!N1,NJNQ,E
NOTE: This section only applies to heaters sold or used in Great Britain.
This appliance is supplied with a BS1363 3 pin
plug tted with a fuse. Should the fuse require
replacement, it must be replaced with a fuse
with the proper amp rating. (see Technical
Specications page 2) and approved to BS1362.
In the event the mains plug has to be removed/
replaced for any reason, please note:
IMPORTANT: The wires in the mains lead are
colored in accordance with the following code:
Blue – Neutral Brown – Live
Green/Yellow – Earth
As the colors of the wires in the mains lead of this
appliance may not correspond with the colored
markings identifying the terminals in your plug,
proceed as follows:
The blue wire must be connected to the terminal
marked with an N or colored black. The brown
wire must be connected to the terminal marked
with an L or colored red. The green/ yellow wire
must be connected to the earthing terminal which
is marked with an E or with the earth symbol.
N-F-'+.<""-.&+*(F-+<'+"-$&')*+
Y('-%+&<+&;-+-)'&;+&-'=(")*+<T+
&;-+C*$GE
NOTE: If a moulded plug is tted and has to
be removed take great care in disposing of the
plug and severed cable, it must be destroyed to
prevent engaging into a socket.
H*$G+:-C*).-=-"&+?('("G+K()G')=
GREEN / YELLOW
Earth
BLUE
Neutral
CORD CLAMP
BROWN
Live
FUSE
13 Amps
© 2015, Pinnacle Products International Inc.
6
Page 8

NEVER LEAVE HEATER UNATTENDED WHILE CONNECTED TO A POWER SOURCE
1'<$A*-%;<<&("G
Problem Cause Solution
Fan stays on when heat shuts
off.
Fan speed stays the same
when changing settings.
Heating element does not glow
red.
Do not feel heat or air ow.
1. Fan runs continuously while
the heater is operating.
1. Fan speed stays constant.
Setting changes amount of
heat output only.
1. Heating element is made of
stainless steel and will not
glow red to produce heat.
1. No power to heater.
2. Desired room temperature
reached.
3. Heater does not heat area
in front of heater, it will
disperse heat throughout
room to heat entire space.
1. Heater is operating correctly.
1. Heater is operating correctly.
1. Heater is operating correctly.
1. Check power connections
/ connect heater to power
supply.
2. Thermostat will shut off once
desired room temperature is
reached. Heater is operating
correctly.
3. Heater is operating correctly.
© 2015, Pinnacle Products International Inc.
7
Page 9

NEVER LEAVE HEATER UNATTENDED WHILE CONNECTED TO A POWER SOURCE
,ZC*<#-#+^(-Y
3
2
45
6
7
8
1
10
H)'&%+I(%&
0123424532,
c
0123424732,
1 82-016-0105 82-016-0105 82-016-0105 82-016-0205 82-016-0205
2 82-017-0205 82-017-0205 82-017-0205 82-017-0205 82-017-0205
3 82-005-0105 82-005-0155 82-005-0155 82-005-0205 82-005-0255
4 82-025-0105 82-025-0105 82-025-0105 82-025-0105 82-025-0105
5 82-015-0365 82-015-0365 82-015-0365 82-015-0365 82-015-0365
6 82-015-0105 82-015-0105 82-015-0105 82-015-0105 82-015-0155
7 82-015-0305 82-015-0315 82-015-0315 82-015-0315 82-015-0355
8 82-015-0375 82-015-0375 82-015-0375 82-015-0375 82-015-0375
9 82-015-0385 82-015-0385 82-015-0385 82-015-0385 82-015-0385
10 82-015-0205 82-015-0205 82-015-0205 82-015-0205 82-015-0255
0123524532,
0123524732,
01235524532,
01235524732,
0123827332, 0123927332,
9
© 2015, Pinnacle Products International Inc.
8
Page 10

NEVER LEAVE HEATER UNATTENDED WHILE CONNECTED TO A POWER SOURCE
KM+NM1+:,1P:N+1/!0+PN!1+1M+1/,+01M:,X
!T+@<$+)'-+;)F("G+C'<A*-=%+Y(&;+@<$'+"-Y+0&)"*-@+/-)&-'D+
H*-)%-+.)**+<$'+1-.;"(.)*+0-'F(.-+)&>
3d78+3ef+f`8d
1-.;"(.()"%+)'-+%&)"#("G+A@+&<+;-*C+@<$+
U<"#)@+g+L'(#)@+T'<=+d)=+g8>53C=E
1<+-ZC-#(&-+@<$'+.)**D+C*-)%-+;)F-+@<$'+U<#-*+N$=A-'+)"#+0-'()*+N$=A-'+)F)(*)A*-
© 2015, Pinnacle Products International Inc.
9
Page 11

NEVER LEAVE HEATER UNATTENDED WHILE CONNECTED TO A POWER SOURCE
____________________________________________________________
____________________________________________________________
____________________________________________________________
____________________________________________________________
____________________________________________________________
____________________________________________________________
____________________________________________________________
____________________________________________________________
____________________________________________________________
____________________________________________________________
____________________________________________________________
____________________________________________________________
____________________________________________________________
____________________________________________________________
____________________________________________________________
____________________________________________________________
____________________________________________________________
____________________________________________________________
____________________________________________________________
____________________________________________________________
____________________________________________________________
____________________________________________________________
____________________________________________________________
____________________________________________________________
____________________________________________________________
____________________________________________________________
____________________________________________________________
____________________________________________________________
____________________________________________________________
____________________________________________________________
____________________________________________________________
____________________________________________________________
____________________________________________________________
____________________________________________________________
____________________________________________________________
© 2015, Pinnacle Products International Inc.
10
Page 12

01JNI,RD+1;-+01JNI,R+I<G<D+1;-+N<&.;-#+:-.&)"G*-+)"#+&;-+R-**<Y+
)"#+S*).B+K()G<")*+H).B)G-+K-%(G"+)'-+)**+&')#-=)'B%+<T+0&)"*-@+
S*).B+_+K-.B-'D+!".E+<'+)"+)TT(*()&-+&;-'-<TE
Pinnacle Products International, Inc.
Yardley, PA USA
www.pinnacleint.com
© 2015 Stanley Black & Decker, Inc.
 Loading...