

Page 1
OISIN SF STOVE
U S E R I N S T R U C T I O N S
Figure 1
REFUELLING
REFUELLINGREFUELLING
REFUELLING
Riddle the fire by connecting the grate operating tool onto the rocker connection located at the bottom front of the
stove, then gently pull and push the rocker arm until all dead ash has fallen through into the ashpan (See Figure 2).
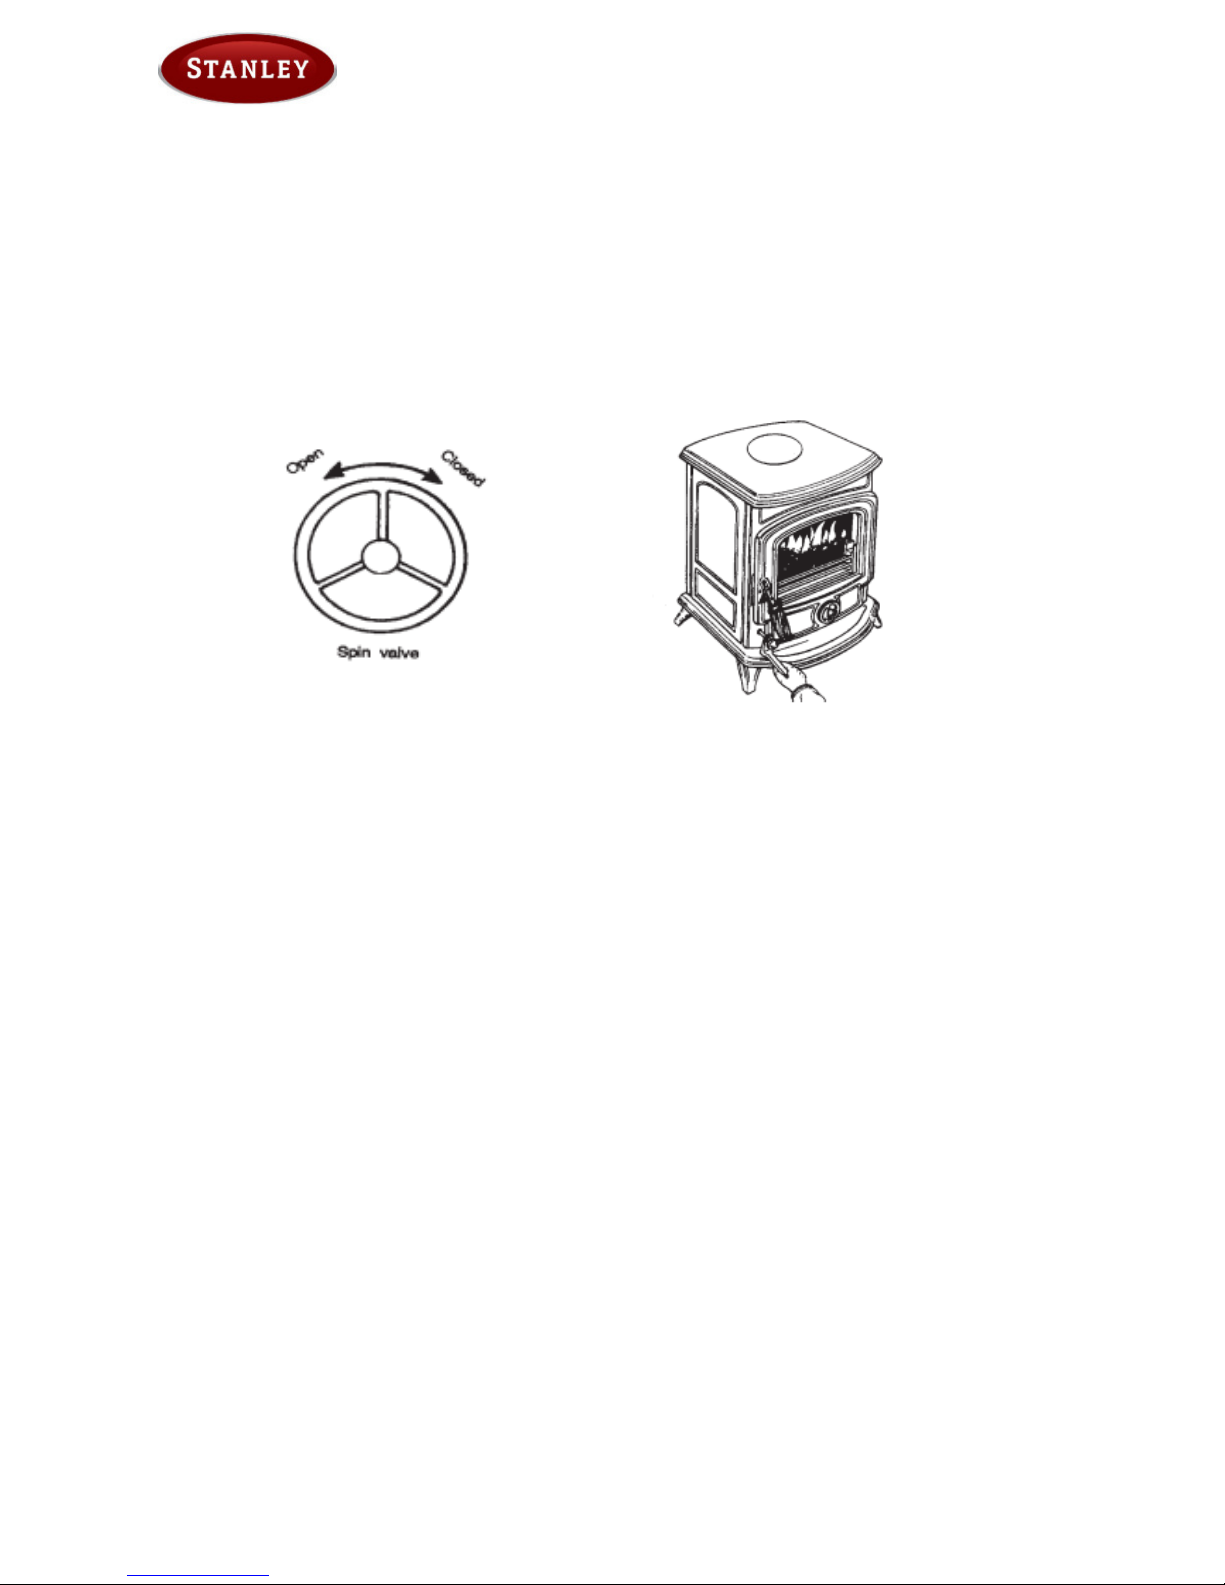
Before opening the door, open the spin valve by turning it anti-clockwise, as this will help to eliminate any smoke or
fly ash resident in the combustion chamber. Add fuel to fire, close fire door and re-set spin valve to required setting.
SLOW BURNING
SLOW BURNINGSLOW BURNING
SLOW BURNING
Slow burning will cause the window glass to blacken and should not be used for a long period. Opening the air controls will increase the heat output and should remove most of the soot deposits from the glass. For low burning setting open the spin valve so that it is between 0.5- 1 mm open. This opening size should be taken as a guideline and
may need to be increased/decreased depending on the draught generated by the chimney to which the stove is connected.
Figure 2
NOTE: THESE INSTRUCTIONS ARE NOT INTENDED TO SUPERSEDE/REPLACE THE USER MANUAL
ACCOMPANYING THE STOVE AND ARE FOR GUIDE PURPOSES ONLY.
LIGHTING THE STOVE
LIGHTING THE STOVELIGHTING THE STOVE
LIGHTING THE STOVE
1. Before lighting the stove, ensure that any build-up in the firebox has been removed and that the ashpan has
been emptied.
2. Open the spin valve by turning it anti-clockwise until fully open (see Figure 1).
3. Lay a few crumpled sheets of paper on the grate a few small sticks, kindling or an approved firelighter add a
small quantity of fuel. Light the fire and close the firebox door.
4. Never use inflammable liquid i.e. gasoline, petrol paraffin etc. to start or freshen up” a fire in this heater.
5. When the fire is well established add fuel to the firebox and adjust the spin valve to the required setting.
Page 2

OISIN SF STOVE
PERIODIC MAINTENANCE
PERIODIC MAINTENANCEPERIODIC MAINTENANCE
PERIODIC MAINTENANCE
Chimney Cleaning
The chimney should be cleaned twice annually or if the stove is not used for a prolonged period during the summer
period, it should be cleaned prior to commencement of usage. The chimney can be cleaned through the stove depending on the flue configuration and the flue liner should be cleaned in accordance with manufacturer’s instructions. Always use a brush with plastic bristles that is the correct size to reach all areas of the flue.
Changing the Rope Seals
The rope seal between the door & the front casting will compress & harden over time and it will be necessary to replace the rope seals on the stove periodically depending on stove usage. It is recommended that the rope seals are
changed at least every two years and a solid fuel service kit is available from your local retailer which will provide the
parts to do same.
GENERAL CLEANING
GENERAL CLEANINGGENERAL CLEANING
GENERAL CLEANING
Glass Cleaning
The stove glass will self-clean when there is sufficient heat generated by the burning fuel i.e. when the unit is operated at the maximum air settings. If a build-up of creosote occurs on the glass it may be due to low draft conditions,
poor quality fuel or operating the stove at the minimum air settings for long periods of time. The glass should be
cleaned when cool and cleaned with a non-abrasive cloth using warm soapy water. For stubborn deposits, a grade 0
steel wool can be used whilst taking care not to scratch the glass with any coal/ash deposits.
Enamel Cleaning
The enamel finish should only be cleaned when cool and to keep the enamel in the best condition observe the following tips:
• Wipe over daily with a soapy damp cloth, followed by a polish with a clean dry duster.
• For stubborn deposits a soap impregnated pad can be carefully used on the vitreous enamel.
• Use only products recommended by the Vitreous Enamel Association, these products carry the Vitramel la-
bel. Astonish & CIF branded products are approved by the Vitreous Enamel Association and a detailed list of
the approved cleaners can be found on their website, www.vea.org.uk/enamel-care-list.
DO NOT USE ABRASIVE PADS OR OVEN
DO NOT USE ABRASIVE PADS OR OVENDO NOT USE ABRASIVE PADS OR OVEN
DO NOT USE ABRASIVE PADS OR OVEN CLEANSERS CONTAINING CITRIC ACID ON ENAMELLED SURFACES. ENSURE
CLEANSERS CONTAINING CITRIC ACID ON ENAMELLED SURFACES. ENSURE CLEANSERS CONTAINING CITRIC ACID ON ENAMELLED SURFACES. ENSURE
CLEANSERS CONTAINING CITRIC ACID ON ENAMELLED SURFACES. ENSURE
THAT THE CLEANSER MANUFACTURERS INSTRUCTIONS ARE ADHERED TO.
THAT THE CLEANSER MANUFACTURERS INSTRUCTIONS ARE ADHERED TO.THAT THE CLEANSER MANUFACTURERS INSTRUCTIONS ARE ADHERED TO.
THAT THE CLEANSER MANUFACTURERS INSTRUCTIONS ARE ADHERED TO.
NOTE:
NOTE:NOTE:
NOTE: Small impact marks on the enamel finish can be repaired using an appropriate enamel touch up (a
touch up bottle is included with the stove packaging) but it should not be used to cover marks greater
than Ø10mm or multiple marks on the same casting/area.
Cleaning a Matt Black/Senotherm Stove
Cleaning should be done when the stove is cold by removing any dust or dirt using a dry cloth. Do not use any water
on the matt black/senotherm finish as this will cause it to rust
M A I N T E N A N C E I N S T R U C T I O N S
MONTHLY MAINTENANCE
MONTHLY MAINTENANCEMONTHLY MAINTENANCE
MONTHLY MAINTENANCE
Cleaning Stove Flue Pathways
To access the flue pathways, the top baffle should be removed from the stove through the fire door opening and
cleaned thoroughly. To remove the top baffle, remove the firebars, and side bricks by lifting them up to allow the bottom of the brick to pass over the retaining rib on the grate. With the side bricks removed, the back brick can then be
removed (it may be necessary to lift the top baffle to allow room to remove the bricks). Remove the two top baffle protection plates by turning them thru 90 degrees so that they are lying flat on the top of the baffle and rotating them
towards the front of the stove to allow for them to be removed from above the baffle & the stove. Pull the baffle forward slightly so that it clears the positioning rib on the back casting. Lift up the baffle on the LHS side whilst sliding it
the left until the RHS of the baffle can pass below the fixing rib on the RHS panel thus allowing the baffle drop into
the firebox and be removed from the stove. If the baffle is distorted & can't be removed as described above, the top
casting can be removed to allow for access to the baffle.
 Loading...