

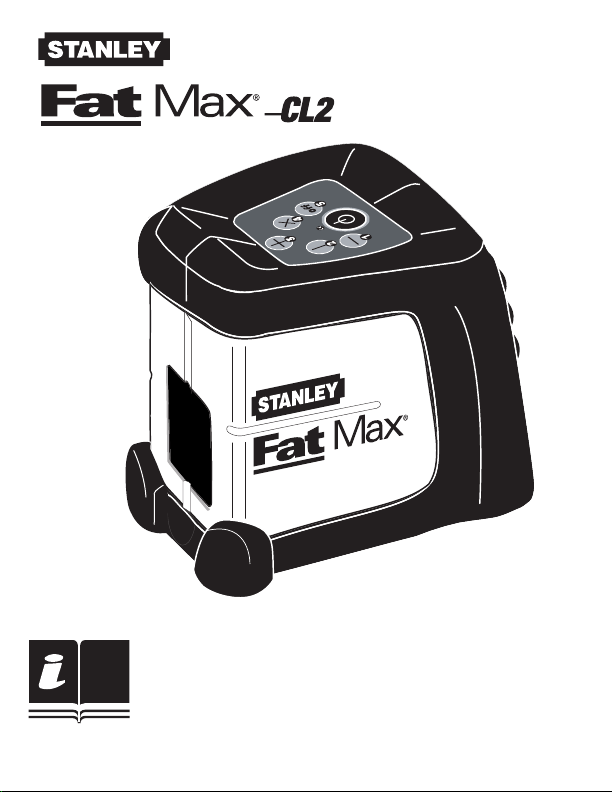
77-153
TM
CROSS LINE LEVEL
77-153
INSTRUCTION MANUAL
MANUEL D’INSTRUCTIONS
MANUAL DE INSTRUCCIONES
2
3
4
1
77-153
1
2
3
4
5
off
off
1 2
3
4 5
Fig. 1
2 • CL2
Fig. 2

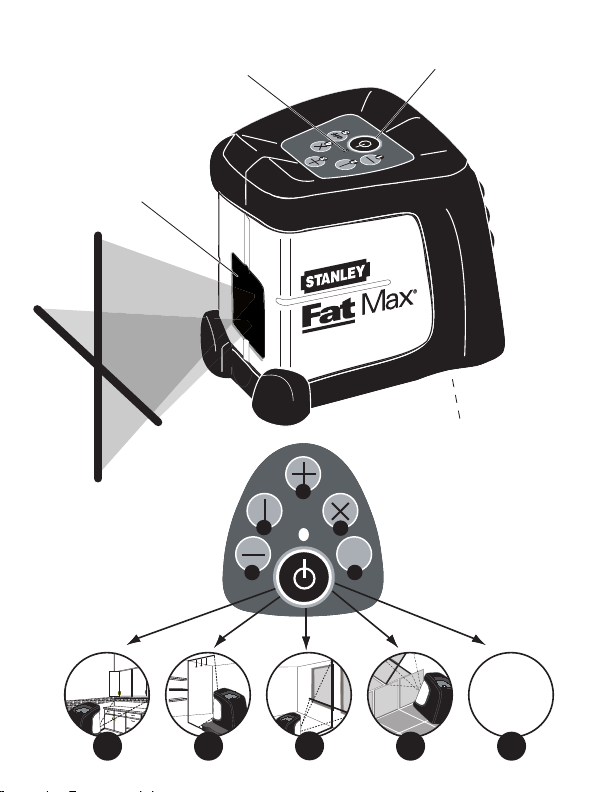
OPERATING CONTROLS
EN
Fig. 1
1 POWER button
2 Laser mode indicator (LED)
3 Laser output window
4 Battery compartment (under rubberized sleeve)
• Heavy Duty magnetically dampened compensator eliminates error by
quickly self-leveling the laser.
• Out-of-leveling range sensor triggers the beams to automatically blinks
when the unit is moved out of its ±4° self-leveling range.
OPERATION
1. Set the unit on a flat, smooth surface. The self-leveling range of the
instrument is within approx. ±4° in any direction.
2. Turn the unit on by pressing the POWER button. The indicator light
should illuminate “green” if the unit is within its leveling range.
If the indicator light illuminates “red” and the laser cross is flashing, the
unit is out of its self-leveling range. Position the unit to a more level
surface.
2a. If the unit appears to be within its self-leveling range and the LED
continues to blink, be sure the unit contains good batteries.
3. If the unit fails to operate after completion of steps 1-2 above, contact
customer service.
4. Turn the unit OFF by pressing the POWER button as it takes to cycle
through the various functions before coming to the OFF position.
CL2 • 3
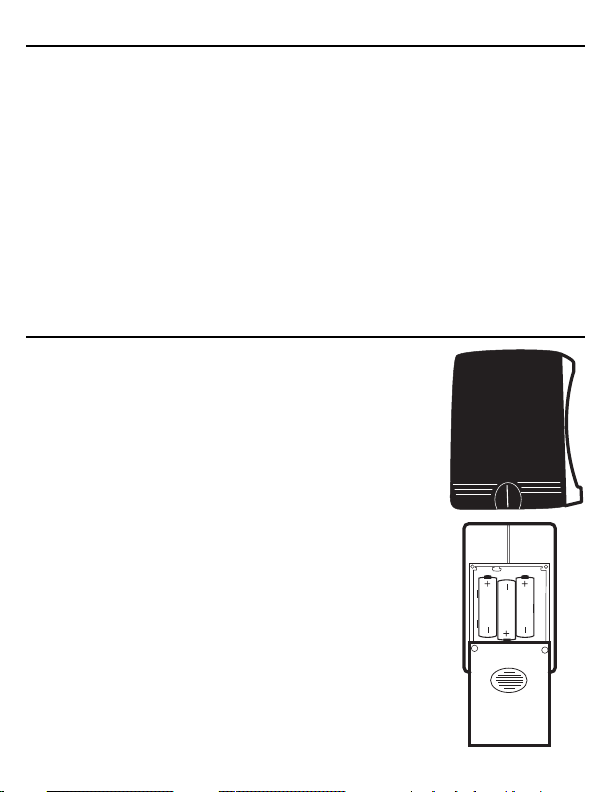
Fig. 2
1. Horizontal
2. Vertical
3. Laser Cross
4. Tilt “Manual Mode”
5. Off
A. LED light illuminates green when unit is ON
B. LED light illuminates red in Manual Mode
C. LED light illuminates red and lasers blink when out of
leveling range
POWER
Your CL2 will provide approx. 25 hours 1 diode on, 20 hours
2 diodes on, of intermittent use with three “AA” cell batteries. If your laser emits dim laser beams, replace the
batteries.
Remove the rubberized sleeve from the housing. Remove
the battery cover from the battery compartment. Insert
the batteries or replace the used
batteries with new ones. Check for correct polarity. (Fig. 3)
Do not use rechargeable batteries!
Extreme temperatures and the use of batteries with differ-
ent levels of charge can reduce the operating time of the
instrument.
Always use batteries with the same power rating and from
the same manufacturer.
For disposal of the used batteries, see the section
“Environmental Protection”.
4 • CL2
Fig. 3

ACCURACY CHECK
As with any level reference instrument, we strongly recommend checking
the instrument’s calibration before initial use; then periodically to ensure
proper reference.
Check the laser CL2 following these steps:
1. Set the instrument up centered between two walls approximately 16-ft
(5m) apart.
2. Press the POWER button.
3. Project the cross onto both walls by rotating the laser 180º and mark the
points where the laser beam hits the wall on each side. (Fig. 4, points
D1&D2)
4. Move the laser to within 2-ft (0.6m) of marked D1 and match point D1
repeating the previous procedure (Point D1). This ensures “HI” is correct.
5. Then turn the unit to the opposite wall and determine the height difference of the marked points on one wall (Fig. 4, points D2 and D3). If the
difference between D2 and D3 is less than 3/32-in (3 mm), the laser is
within its tolerance.
Checking the horizontal line (Fig. 5)
1. Set the instrument up approximately 16-ft (5m) from a wall.
2. Press the POWER button.
3. Mark the point where the laser beams intersect and another point (A)
along the horizontal laser line 8-ft (2.5m) away from the first intersection
point.
4. Rotate the laser so that the point where the laser beams intersect is pro-
jected 5m away from the first intersection point.
5. The deviation of the horizontal laser beam from the point A marked previ-
ously may not be greater than3/32-in (3 mm).
CL2 • 5

CALIBRATION
This unit is factory calibrated and should never need calibration. But if it
needs to be calibrated, it must be done by a factory authorized service center.
SAFETY AND CERTIFICATION
Working safely with this instrument is possible only when the operating and
safety information are read completely and the instructions contained therein are strictly followed.
Do not remove the label on the side of the housing.
The use in combination with other optical instruments, manipulations or use
in other applications other than described here, can lead to dangerous laser
outputs.
Do not stare into the laser beam.
Do not direct the laser beam at other persons. Since the laser beam is of the
focused type, check the beam path over a relatively long distance and take
the necessary precautions.
This laser complies with all applicable portions of title 21 of the Code of
Federal Regulations set by the Dept. of Health, Education, and
Welfare, the Food and Drug Administration, the Center for Devices, and the
Bureau of Radiological Health.
The CL2 has also been tested and complies with the CE certification requirements set forth in the EC regulations 89/336/EEC and EN 61000-6-1 (EN50082-
1), EN 61000-6-3 (EN50081-1) and IEC 60-825-1.
6 • CL2

SPECIFICATIONS
Leveling Accuracy ±1/4-in at 30-ft (+/-6mm at 9m)
Line Length 60-ft at 30-ft (18m at 9m)
Working Range Up to 32-ft (10m), dependent on illumination of area
Fan Angle 90°
Laser Diodes 630-670nm
Laser Class 2M
Power 3 “AA” batteries 1,5 V
Compensator Type Coaxial(Gravity driven and magnetically dampened)
Self-Leveling Range ±4º
Self-leveling Speed </=3 seconds
Out-Of-Level Sensor Yes
Feature “Manual Mode Feature” allows tilting for extreme angles
Weight (with mount) 1.8 lbs. (0.9kg)
Wall/Tripod Mount 1/4” X 20 thread
APPLICATIONS (Fig. 6)
• Floor and wall tiles • Installing closets
• Wallpaper, stencil work • Interior decoration
• Finish carpentry • Masonry work
• Remodeling projects • Wall studs, partitions
• Door and window frames • Cabinets and shelving
• Drop ceilings • Wainscoting and paneling
• Wall fixtures: outlets, • Wall hangings: artwork,
switches, lighting, photos,
collectibles
CL2 • 7

MAINTENANCE AND CARE
The CL2 is not waterproof. Do not allow the unit to get wet. Damage to
internal circuits will result.
Do not leave the CL2 out in direct sunlight or expose it to high temperatures.
The housing and some internal parts are made of plastic and may become
deformed at high temperatures.
Do not store the CL2 in a cold environment. Moisture will form on interior
parts when warming up. The moisture could fog up laser windows and cause
corrosion of internal circuit boards.
When working in dusty locations, some dirt will collect on the laser window.
Remove any moisture or dirt with a soft, dry cloth. Do not use aggressive
cleaning agents or solvents.
Store the CL2 in its case when not in use. Remove batteries before storage
of the instrument.
ENVIRONMENTAL PROTECTION
Recycle raw materials instead of disposing as waste.
The machine, accessories and packaging should be sorted for
environmental-friendly recycling.
Do not throw used batteries into house waste, fire or water but dispose of in
an environmentally friendly manner according to the applicable legal
regulations.
8 • CL2

WARRANTY
One Year Warranty. The Stanley Works warrants the CL2 against defects in
material and workmanship for one year from the date of purchase. Deficient
products will be repaired or replaced at Stanley’s discretion. For warranty
repair information, call
(815) 432-5237
CST/berger, a STANLEY WORK
Stanley’s liability under this warranty is limited to repair or replacement of
the unit. Any attempt to repair the product by other than factory authorized
personnel will void this warranty. Calibration, batteries and maintenance are
the responsibility of the user. Where permitted by law, Stanley is not responsible for incidental or consequential damages. Agents of Stanley cannot
change this warranty. Stanley is not responsible for damage resulting from
wear, abuse, or alteration of this product. The user is expected to follow ALL
operating instructions.
This warranty may provide you with additional rights that vary by state,
province or nation.
CL2 • 9
 Loading...