

CARA NB MK I STOVE
U S E R I N S T R U C T I O N S
LIGHTING THE STOVE
LIGHTING THE STOVELIGHTING THE STOVE
LIGHTING THE STOVE
1. Open the firebox door and remove all debris from the grate & ashpan.
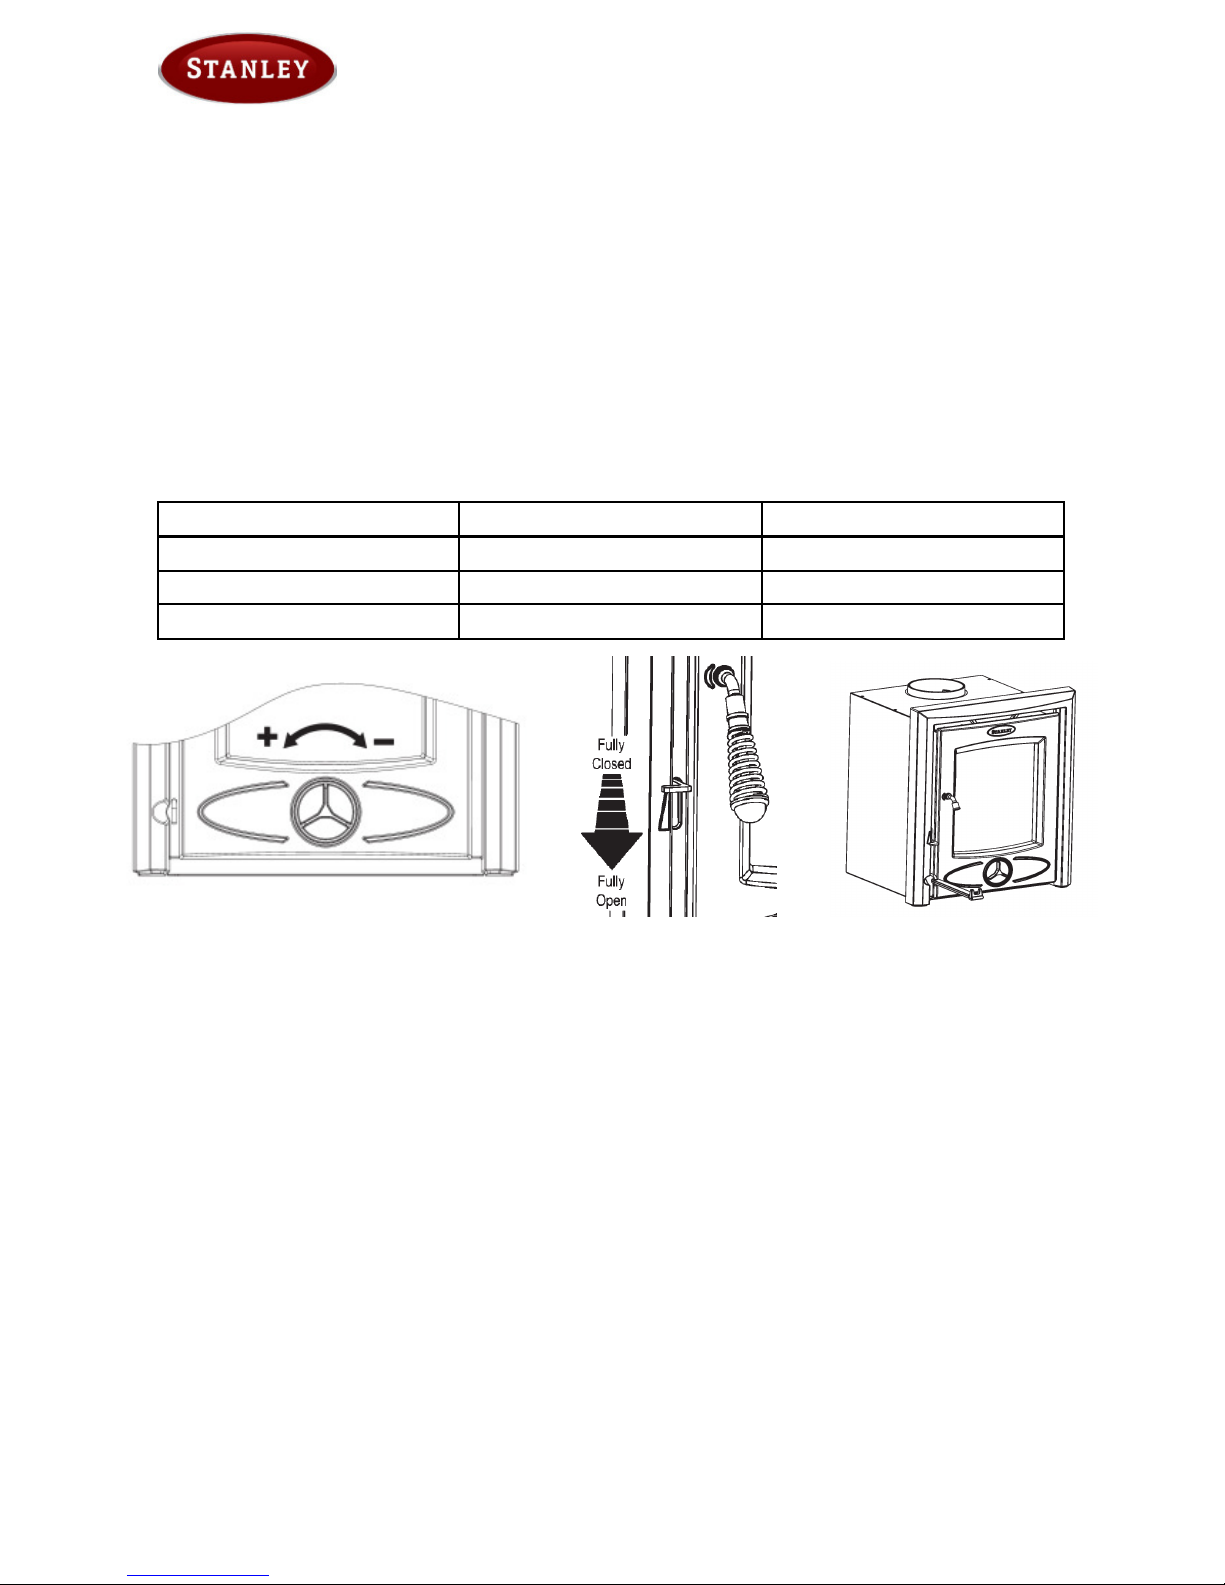
2. Rotate the spin valve on the door fully anti-clockwise to set to maximum opening (see Figure 1).
3. Set the secondary air slider to the required position depending on the fuel being burned i.e. open when burning
wood and closed when burning coal/ anthracite (see Figure 2).
4. Place pieces of paper & kindling on the top of the grate and add a small quantity of fuel. Light the fire and close
the firebox door.
5. When a good fire is established, open the fire door and load the fuel as required.
6. Adjust the spin valve & the secondary air slider as required depending on the fuel type being used & the heat
output required (see Table below). Both controls should be adjusted in conjunction with each other to get the
appropriate burn rate with exact settings on each control depending on the draught conditions of the chimney to
which the unit is connected.
Figure 1
Figure 2
FUEL
FUELFUEL
FUEL SPIN VALVE
SPIN VALVESPIN VALVE
SPIN VALVE SECONDARY AIR
SECONDARY AIRSECONDARY AIR
SECONDARY AIR
Anthracite Adjust for Desired Heat Output Fully Closed
Coal Adjust for Desired Heat Output Fully Closed
Turf/Wood Maximum Opening of 50% Adjust for Desired Heat Output
REFUELLING
REFUELLINGREFUELLING
REFUELLING
NOTE:
NOTE:NOTE:
NOTE: Always use the glove provided to adjust the secondary air slider when the appliance is hot.
Anthracite/Coal: Riddle the fire using the grate operating tool before refuelling. This is done by fitting the operat-
ing tool to the grate pull rod and gently pushing it in & out so has to rotate the moveable grate
(see Figure 3). Before opening the door, open the spin valve fully and then add fuel as required
ensuring not to overfill the fuel higher than the firebars. Close the fire door & reset the spin valve
to the desired setting.
Turf/Wood: It is not necessary to riddle the fire prior to refuelling unless the bed of ash on the grate is affect-
ing the desired burning of the fuel. When burning wood always close the spin valve fully during
the riddling operation. Before opening the door, open the spin valve fully and then add fuel as
required ensuring not to overfill the fuel higher than the firebars. Close the fire door & reset the
spin valve to the desired setting.
SLOW BURNING
SLOW BURNINGSLOW BURNING
SLOW BURNING
Slow burning will cause the window glass to blacken and should not be used for a long period. Opening the air controls will increase the heat output and should remove most of the soot deposits from the glass.
Anthracite/Coal: Close the secondary slider fully and partially open the spin valve as desired.
Turf/Wood: Close the spin valve fully and open the secondary air slide by a few millimetres.
Figure 3
NOTE: THESE INSTRUCTIONS ARE NOT INTENDED TO SUPERSEDE/REPLACE THE USER MANUAL
ACCOMPANYING THE STOVE AND ARE FOR GUIDE PURPOSES ONLY.
CARA NB MK I STOVE
M A I N T E N A N C E I N S T R U C T I O N S
MONTHLY MAINTENANCE
MONTHLY MAINTENANCEMONTHLY MAINTENANCE
MONTHLY MAINTENANCE
1. Cleaning Stove Flue Pathways
To access the flue pathways, the bottom baffle should be removed from the stove through the fire door opening and
cleaned thoroughly. For ease of removing the baffle from the firebox, remove the firebars and refractory bricks. Remove the bottom baffle by lifting up the front of the baffle and pulling the back edge forward, allowing it to drop into
the firebox area (see Figure 4). Turn the baffle at an angle to remove it through the door opening.
Figure 4
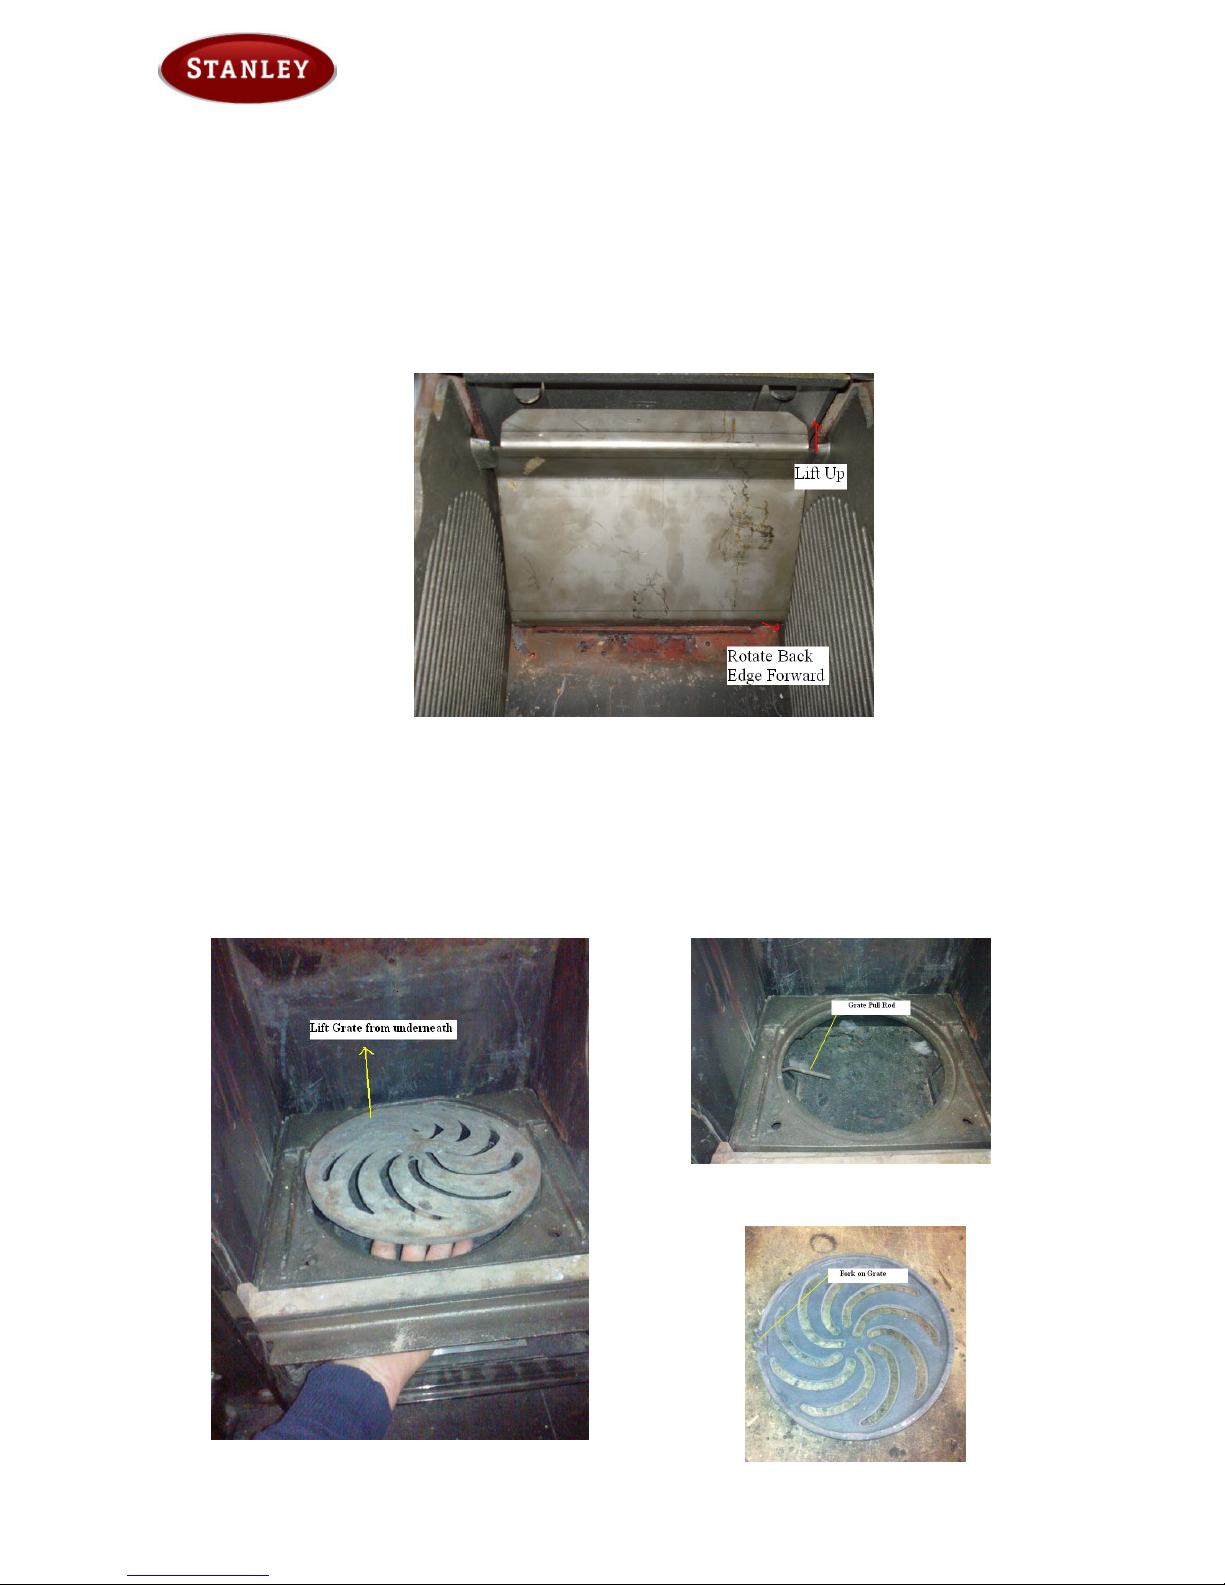
2. Grate Removal & Cleaning
The grate is removed by removing the ashpan and then lifting the grate out of the grate insert from underneath the
grate (see Figure 5). Replace the ashpan and clean all ash from the grate insert & underside of the grate. When replacing the grate, ensure that the fork on the underside of the grate is located over the grate pull rod (see Figure 6 &
7) and pull the grate pull rod to check that the grate is riddling.
Figure 5
Figure 7
Figure 6
 Loading...