

Page 1
NOTE: Your furniture may have different design features than those shown in the drawing.
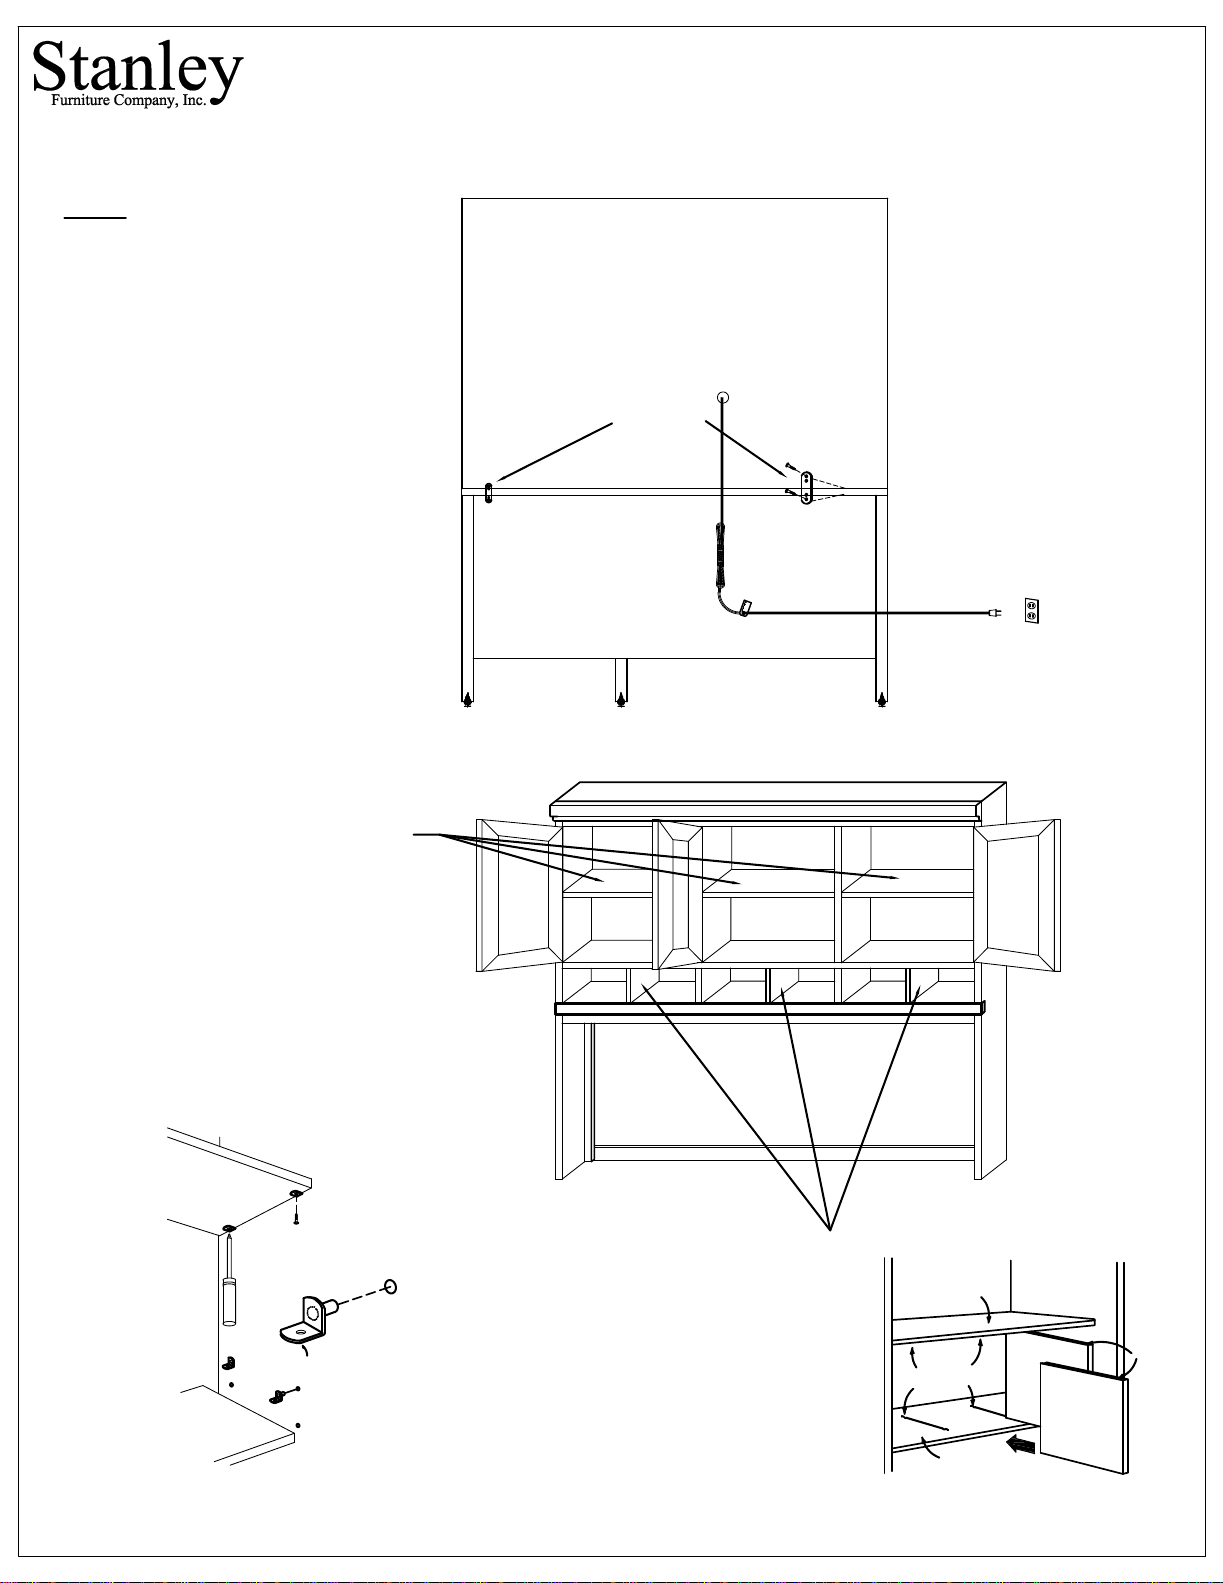
95518-46 HUTCH
A-1254
LEVELING:
LEVEL
the Instructions provided.
RECOMMENDED FOR ASSEMBLY!
the DESK according to
CAUTION:
(2) OR MORE PERSONS
CAREFULLY READ & UNDERSTAND
ALL INSTRUCTIONS BEFORE
PROCEEDING!
BACK SIDE
HUTCH
1. LIFT HUTCH ONTO DESK:
Carefully lift the HUTCH onto the DESK
and align it.
2. ATTACH HUTCH TO DESK:
Align Back of the HUTCH with Back of the
DESK, center and secure with MENDING
PLATES and SCREWS, as shown.
NOTE: If a Power Screwdriver is used,
use a "low torque" setting.
3. ADJUSTABLE SHELVES
To remove ADJUSTABLE SHELVES,
remove SCREWS from SHELF
SUPPORTS, then carefully lift
Shelves up and out of the HUTCH.
BACK SIDE
DESK
MENDING
PLATES
5. CONNECT POWER:
Plug POWER CORDS from
SWITCH into a standard
110V AC outlet ONLY.
110 Volt
AC Outlet
ONLY !
To reposition ADJUSTABLE
SHELVES, insert Stem of SHELF
SUPPORTS into Holes as shown.
Rest the SHELF on the SHELF
SUPPORTS, and reinstall SCREWS.
SCREW
4. REMOVABLE PARTITIONS
SCREWDRIVER
SHELF SUPPORT
To install REMOVABLE PARTITIONS,
locate WIRE SUPPORTS in the Upper and
Lower Shelves. Align Grooves in the Top
and Bottom Edges of the PARTITIONS
with the WIRE SUPPORTS, and carefully
slide the PARTITIONS between the Upper
and Lower WIRE SUPPORTS (as shown
below).
UPPER
SHELF
WIRE
SUPPORTS
LOWER
SHELF
REMOVABLE
PARTITION
GROOVE
 Loading...