

Page 1
NOTE: Your furniture may have different design features than those shown in the drawing.
71218-43 COMPUTER FILE DESK
A-1053
CAREFULLY
SHELF SUPPORT
Cases should be LEVELED for proper
DRAWER
FRONT
DRAWER
SIDE
DRAWER
BACK
HANGING
FOLDER
CLIPS
HANGING
BARS
FILE
File Folder. For best results, make
necessary for proper spacing, to fit a
standard 'Letter' or 'Legal' size Hanging
sure FILE BARS are parallel to each
other.
IMPORTANT!
BAR, as shown in Fig. #4.
4. Slide CLIPS from side to side as
below, and insert end of FILE BAR.
3. Release CLIP, securing end of FILE
CUTOUT
2. Depress CLIP as shown in Fig. #3
ACCESS
CORD
1. Slide CLIPS onto DRAWER SIDES
as shown in Fig. #1 and #2 below.
FILE HANGER INSTALLATION:
INSTRUCTIONS
PROCEEDING!
BEFORE
ALL
Note: If a Power Screwdriver is used, a
"low torque" setting is recommended!
UNDERSTAND
READ
AND
BACK PANEL
RECEPTACLE:
110V AC Outlet ONLY!
Power Cord should
110 Volt AC
be plugged into
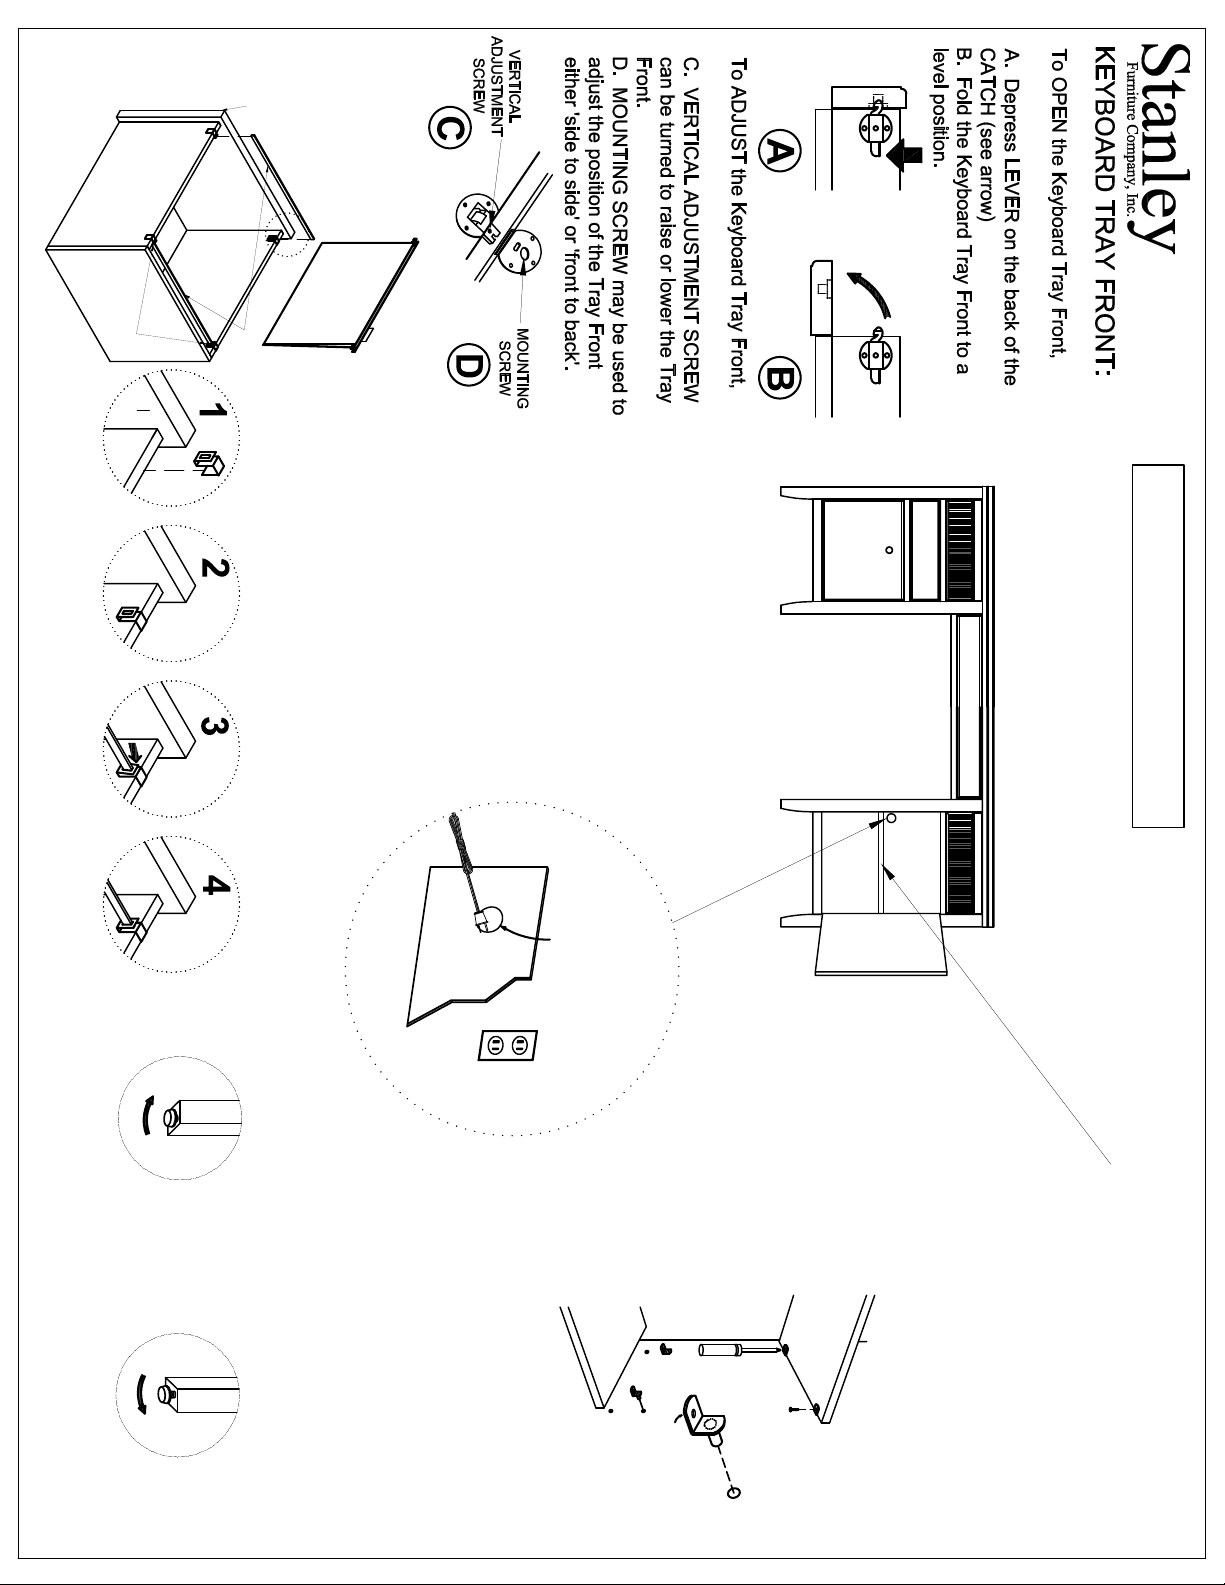
Turn Clockwise to Lower... Turn Counterclockwise to Raise
ONLY!
shown in sketch.
Run Electric Wire
Back Panel as
through Cutout in
Door / Drawer Alignment.
CLOCKWISE to lower case;
COUNTERCLOCKWISE to raise.
drawing. Turn Adjustable Glide
front corners of case, as shown in the
Adjustable Glides are located under
Holes as shown. Rest the SHELF on
SCREWS.
SCREWDRIVER
SCREW
insert Stem of SHELF SUPPORTS into
the SHELF SUPPORTS, and reinstall
To reposition ADJUSTABLE SHELF,
SUPPORTS, then carefully lift Shelf up
and out of the ARMOIRE.
ADJUSTABLE SHELF
remove SCREWS from SHELF
To remove ADJUSTABLE SHELF,
 Loading...