

Page 1
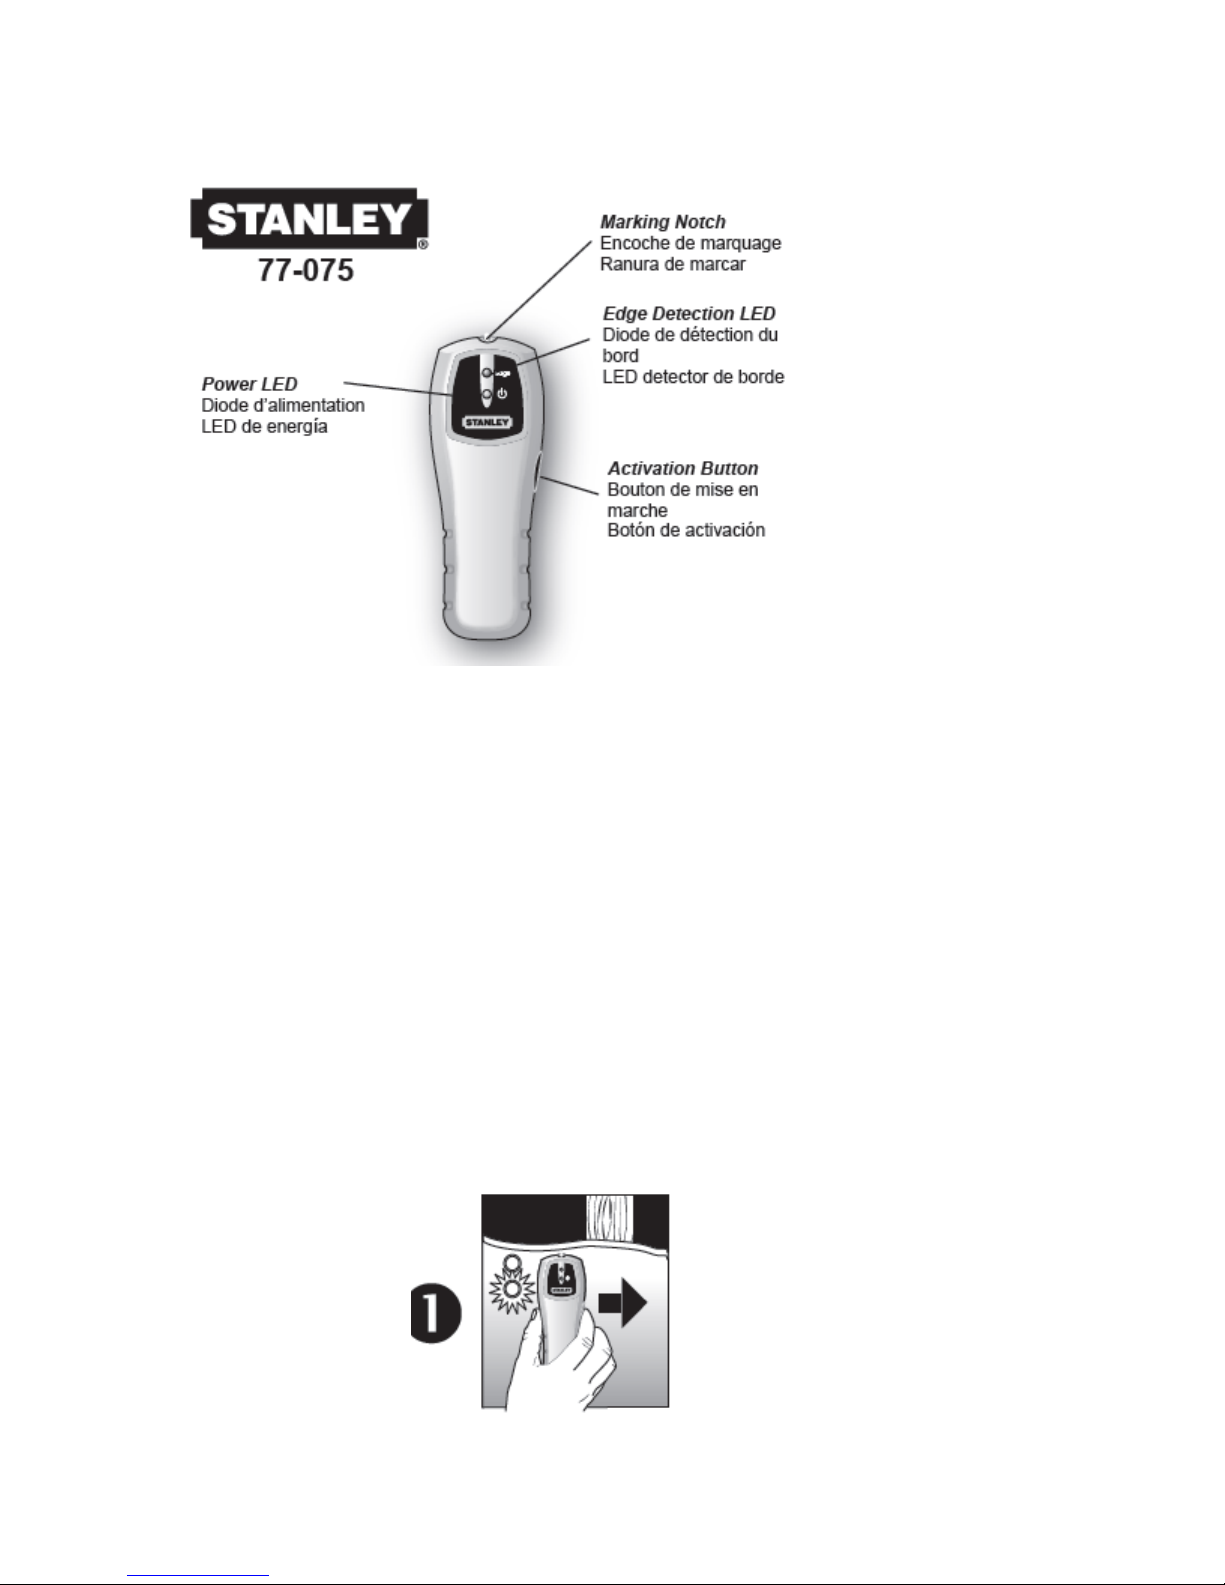
Stanley Stud Sensor 75
The Stud Sensor 75 uses electronic signals to locate the edges of studs or
joists through drywall and plywood up to 3/4". Once the edge of a stud has
been detected, the Stud Sensor 75 displays a red LED and sounds an
audible tone. A pencil notch allows you to easily note the stud edges on the
wall.
OPERATING INSTRUCTIONS
Battery:
Open door on back of unit and connect a 9-volt battery to clip. Put battery
back into case and close back battery door.
Usage:
1. Hold the Stud Sensor 75 flat against the surface, making firm contact.
• Press in and hold the activation button. The green and red LED’s will light.
When the red LED goes off, the unit is calibrated. Keep holding the
activation button during all of the following procedures.
Page 2
Note: While calibrating, the Stud Sensor 75 must not be placed directly
over a stud, dense material such as metal, or over a wet or newly painted
area, or it will not properly calibrate. If the Red LED stays lit, move to a
different location and try again.
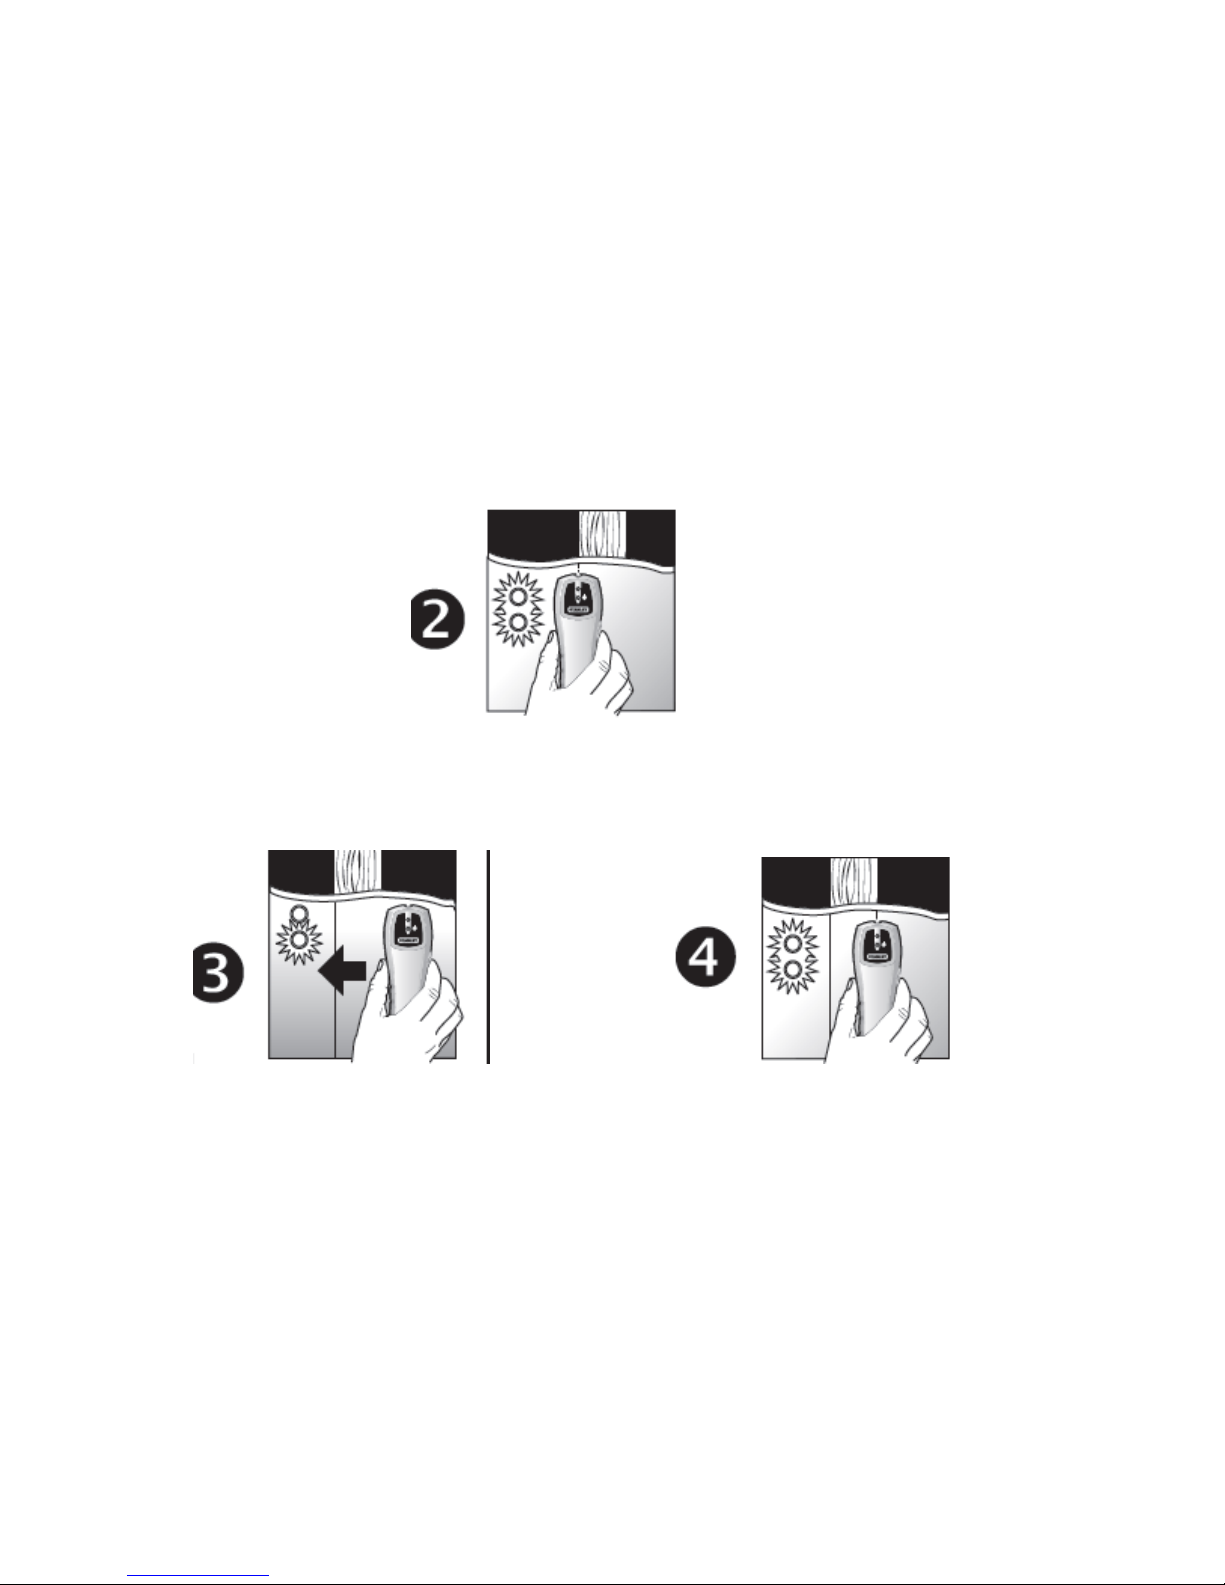
2.
Slide the Stud Sensor 75 slowly across the surface in a straight line. As it
detects a stud edge, the red LED will go on and an audible tone will be
heard.
• Use the handy pencil notch located at the top of the unit to mark the stud
edge
.
3. and 4. Repeat the above steps from the other side of the stud. Coming
from the opposite direction, mark the other edge of the stud. The midpoint
of the two marks indicates the stud center.
Cautions on Operating
The proximity of electrical wiring or pipes to the surface of the wall may
cause the Stud Sensor 75 to detect them as studs. You should always use
caution when nailing, cutting or drilling in walls, ceilings and floors that may
contain these items. Always remember that studs or joists are normally
spaced 16 inches or 24 inches apart and are 1-1/2 inches in width. To
avoid surprises be aware that anything closer together or of a different
width may not be a stud.
Page 3

OPERATING TIPS
Prevent Interference
To ensure best performance from the Stud Sensor 75, keep your free hand
at least 6 inches away from the unit and wall surface while testing or
scanning surfaces.
Conventional Construc t ion
Doors and windows are commonly constructed with additional studs and
headers for added stability. The Stud Sensor 75 detects the edge of these
double studs and solid headers as a single, wide stud.
Surface Differences
Wallpaper – There will be no difference in the function of the Stud Sensor
75 on surfaces covered with wallpaper or fabric unless the coverings used
contain metallic foil or fibers.
Ceilings – When dealing with a rough surface such as a sprayed ceiling,
utilize a piece of cardboard when scanning the surface. Run through the
calibration technique described earlier with the piece of cardboard too, to
assure best performance of the unit. Also, it is particularly important in this
application to remember to keep your free hand away from the unit.
Specifications:
Depth Range- Up to ¾” (19mm) through drywall
Accuracy- Scanning and marking the stud from two sides
Stud center ±1/8" (3mm) for wood
±1/4" (6mm) for met a l
(At 35-55% relative humidity)
Shock Resistance: Up to 3 feet (1m) dropped onto concrete
Water Resistance: Water resistant, but not waterproof
Operating Temperatur e : +20°F to +120°F (-7°C to +49°C)
Storage Temperature: -20°F to +150°F (-29°C to +66°C)
Warranty
The Stanley Works warrants the Stud Sensor 75 against defects in material
and workmanship for one year from the date of purchase. Deficient
products will be repaired or replaced at Stanley’s discretion if sent to:
The Stanley Works
Customer Service
480 Myrtle Street
New Britain, CT 06053
Page 4

Stanley’s liability under this warranty is limited the replacement of the unit.
Any attempt to repair the product by other than factory authorized
personnel will void this warranty. Calibration, batteries and maintenance
are the responsibility of the user. Where permitted by law, Stanley is not
responsible for incidental or consequential damages. Agents of Stanley
cannot change this warranty. Stanley is not responsible for damage
resulting from wear, abuse or alteration of this product. The user is
expected to follow ALL operating instructions. This warranty may provide
you with additional rights that vary by state, province or nation
.
WARNING:
Protect Your Eyes, Wear Safety Goggles.
AVERTISSEMENT:
Protégez vos Portes des lunettes de sécurité.
ADVERTENCIA:
Protejase los ojos. Use gafas de seguridad.
©2009 THE STANLEY WORKS:
Stanley Tools Product Group,
480 Myrtle Street, New Britain, CT 06053 U.S.A.
Tel 1-800-262-2161 Fax 860-643-3756
 Loading...