

Page 1

Snow Blower Owner's Manual
This manual contains important safety instructions forthe gasoline engine powered
snow blower models:36SS, 45SS
READSAFETYWARNINGS AND OPERATING INSTRUCTIONS CAREFULLY.
SAVETHIS MANUAL.
Parts, Service, and Technical Assistance call:
When you call the help-line you will need to have the following information:
Date of Purchase:
Location of Purchase:
Serial # - Snow Blower:
Serial # - Engine:
Need Help?
1-919-550-3259
www.gxioutdoorpower.com
Page 2
36SB,45SS
Copyright@2010 by GXi Outdoor Power,//C. All rights reserved.
No part of this publication can be reproducedor distributed without priorwritten permissionof GXi OutdoorPower,//C Clayton, NC
27520 USA.
STANLEYIsa registered trademark of The StanleyWorks or its affiliates and is used under license by GXiOutdoor Power, l/C, 7868
Highway 70 Business,Clayton, NC27520
GXi OutdoorPower,//C reservesthe right to discontinue or changespecifications or design at any time without notice and without
incurringany obligation whatsoever.
The information and specifications included in this publication were in effect at the time of approvalfor printing.
This manual contains important safety instructions for Snow Blowers
READSAFETYWARNINGSAND OPERATINGINSTRUCTIONSCAREFULLY
SAVETHESEINSTRUCTIONS.
This owner's manual is considered a permanent part ofthe snow blower and should remain
with the snow blower if resold.
Rev: 11/2010
Page 3

STANLEY Product Lines
Brush Mower
• 36" BrushMower.
• 20 hp Kawasakiengine with electric start.
• Dualhydrostatic drivefor maneuverability.
• Convertibledeck-- easily convertsto afinish mower.
• Heavyduty 6 gaugewelded deck.
• Highcapacity deckfor high speedsthrough tall grass.
• Dualbreak-awayblades.
• Model#: 36BS
Zero-Turn Commercial Mowers
• in three models48", 54" and 62".
• Kawasakiengines.
• Electric Start.
• Rollbar,seat belt, largetires, head lights.
• 7.5gallon fuel tank.
• Dual hydrostaticdrive for maneuverability.
• Heavyduty 7 gaugewelded steel deck.
• Model #: 48ZS
• Model#:54ZS
• Model#:62ZS
Commercial Walk Behind Mowers
• 36" and 54" deck.
• 20 HPKawasakiengine with electric start.
• 4.5gallon fuel tank.
• Dual hydrostaticdrive for maneuverability.
• Quickchangeandfloating decktype.
• Ridealongsulky available.
• Model#:36FS
• Model#:54FS
100"Tow Behind Mower
• 20 hp Kawasakielectric start engine.
• Cutsupto 100inches.
• 52in. main deck,two 26 in. wings folds up
• Quickadjust floating deck, notools required.
• Highbladetip speedsfor cleanercut.
• Convertsto a 52" brushmower.
• Tow behind:ATV, UTV,or lawn tractor.
• Model#:lOOTS
Page 4

STANLEY Product Lines
Electric
1450 psi to 1800 psi electric pressure washers
@
20 ft of high pressure hose and 35 ft. cord with GFCI protection
@
Sleek and unique, high quality, stainless steel finish
@
13Amps, 120V
@
Auto=stop shut off system pronongs pump nife
Pressure Washer
Generator Cord Accessories
240V,10/4,heavy duty extension cords with L14-30connectors at each end.
This cord reduces harmful voltage drops experienced when using most
120Vextension cords. Available in 15'and 25' lengths and can becombined to
reach the desired length.
www.gxioutdoorpower.com
Page 5
Contents
Safety Informationand Warnings ..............................................................................
PreparationSafety Precautions ..................................................................................2
Operation Safety Precautions......................................................................................3
Safety Decals..............................................................................................................5
ProductSpecifications ................................................................................................6
Control Panel and Snow Blower Components............................................................7
Missing Parts RequestForm........................................................................................
Assembly Instructions................................................................................................9
Operating Instructions
Starting the Engine............................................................................................12
Operating Instructions........................................................................................13
General Maintenance.........................................................................................15
Maintenance Schedule......................................................................................16
ServiceAdjustments
Adjusting Augers/Impeller Cable.......................................................................17
Adjust/Check Drive Cable ..................................................................................17
Adjusting Shift Rods...........................................................................................17
Adjust/Replacing Drive and Augers/Impeller Belts ...........................................18
Adjusting DischargeChute Deflector .................................................................19
ChangingFrictionWheel ....................................................................................19
Replacing Headlight Bulb...................................................................................19
36SB,45SS
Storage Instructions..................................................................................................20
Troubleshooting.........................................................................................................21
Limited Warranty and Service..................................................................................23
About the Stanley Snow Blower Manual
Congratulations on the purchaseof your new Stanley commercial snow blower. We at GXiOutdoorPower areconfident that this
snow blower will provide excellent performance, outstanding quality, and great durability when operated and maintained as directed
in this manual.
1. This manual contains assembly,operating, safety, adjustment, maintenance, andtroubleshooting instructions. BEFORE
OPERATINGYOURSNOWBLOWER,CAREFULLYREADTHISMANUAL IN ITSENTIRITY.
2. This owner's manual is considered apermanent part of the snow blower. It mustbe available to all operators and/or person
(s)servicing the snow blower. Shouldthe snow blower be resold,this manual must remain with the snow blower.
3. All information, illustrations, and specifications contained in this manual were in effect at the time of the publication. GXi
OutdoorPower reservesthe right to add, delete or modify specifications and/or designs without notice.
4. If you ever havequestions in regards to the operation, maintenanceor safety of your snow blower, please contact GXiParts
& Service,LLCat 1-919-550-3259.
Rev: 11/2010
Page 6
Safety Information and Warnings 36SS,45SS
Safety Information
Emission Control System Information
Tile US and California CleanA_rActs
EPAand Cahfornmregulations require all manufacturers
to furnish written instructions describing the operation
and maintenanceof emmsmncontrol systems The
following instructions and proceduresmust be followed _n
order to keepthe emmsmnsfromyour enginew_thmthe
emmsmnstandards Maintenance, replacement, or repair
of the emmsmncontrol dewcesand systems maybe
performed by anyengine repmrestabhshment or
md_wdual,using parts that are "certified" to EPA
standards
Safety Label Locations
Safety labels are located on your snow blower to warn
you of potentml hazards Readthem carefully If a label
comesoff or becomeshardto read, contact GX_Partsand
Serwce,LLCfor a replacement
Operator Responsibility
It mthe owner's responmb_htythat all operators and
mechamcsmust betrained and readthin manual before
operating the snow blower aswell as beingphysmally
able indewduals They should be instructed about safe
operating andmechanmalprocedures If they can not
read or understand Enghsh,it is the owner's responmb_hty
to explain all safety operating mstructmns The owner or
operator mresponmblefor accidents or injuries occumng
to themselves, other people or property Potential
mmfortunate mmdentscan be prevented bythe owner/
user
Training
1 Read,understand,and follow all mstructmns ontile
machine and manual(s)before attempting to assemble
and operate
2 Operatormust be fam_harw_thall controls, thmr
operations, andhow to stop the engine anddmengage
the controls qumkly
3 Never allowch_ldren to operatethm machine
4 Never allow adults to operate til_s machinew_tilout
proper mstructmn
5 Exercmecautmnto avmd shppmg orfalhng, espemally
when operating the machine m reverse
6 Keeparea of operatmn clear at all t_mes
I wA,N,No
WARNING! Do not useyour STANLEYsnow blower to carry
passengers Keepbystanders,helpers, pets and children at a
safe dmtancefrom the machine wh_le_t_smoperatmn
Inspectthe area where the equipment _sto be usedand
remove all objects suchas rocks,toys, and w_reswhmh can
be thrown bythe machine causing serious injury or death
Snow Blower Inspection
Foryour safety, respecttile snow blower before eacil use
Beforeyou begin your mspectmn, be sure tile following
cond_tmnsare met tile snow blower should be on a level
surface, w_ththe _gn_tmnsw_tchoff, the key removed,and
tile augers dmengaged Also, dmconnecttile spark plug w_res
from the spark plugs and groundthem against the engineto
prevent inadvertent starting
Rev 11!2010
Wear appropriate clothing including hard hat, safety glasses
and hearing protectmn Longhmr, loose clothing or jewelry
mayget tangled m mowng parts
Page 7
Preparation Safety Precautions 36SS,45SS
Preparation--Safety Precautions
1 Inspectthe area where the equipment isto be used
and remove all objects suchas rocks,mats, and
w=rewhich can be thrown bythe mach=necaus=ng
serious injury or death
2 D=sengageall clutches and sh#t to neutral before
start=ngthe eng=ne
3 D=sengageall control levers before start=ngthe
eng=ne
4 Use extens=oncordsand receptacles asspec=f=edby
the manufacturer for all un=tsw=thelectric drive
motors orelectric start=ngmotors
5 Use a grounded three-w=reextens=oncordwhen
us=ngthe electric start opt=on
6 People,pets, and most =mportantlych=ldrenmust
not be nearthe area be=ngcleared Do not operate
the snow blower =ntheir presence
7 Never operate snow blowerw=th damagedguards,
sh=eldsorcovers
8 All usersof the snow blower must be alert and pay
attent=onto safety alerts, symbols, and safety s=gns
9 Be sureto =nspectsnow blower before eachuse
10 Checkthe controls and sh=eldsto make surethat
they are funct_on_nqproperly before operahn# Do
not operate _fany aredamagedor m_ss_ng
11 Neverattempt to makeany adjustments to the snow
blower while tt is running
12 Adjust the collector housing height to clear gravel or
crushed rock surfaces
13 Wear appropriate clothing _nclud_nghard hat, safety
glasses andheanng protection Longhair, loose
clothng or jewelry mayget tangled _nmowng parts
14 Do not operate w_thoutweanng adequate winter
clothing Wear footwear that wdl improve footing
on shppery surfaces
15 Allow snow blower to adjust to outdoor temperature
before starting the engine
Gasoline and other fuels--Safety Precautions
Use extra care when handling gasolzneand other fuels as
they are flammable and vapors can explode
1 Onlyuse gasohneapproved containersfor storage and
keepout of reachfrom children
2 Do notfill fuel tank completely full Overfllhng may
result _nfuel leakage Leavea reasonableamount of
spacefor fuel to expand
3 If fuel essp_lled,donot start the engine Move the snow
blower away from the area, wepeupthe sp_llthoroughly
and waet untd fuel vapors have evaporated before
starting engine
4 Keepthe nozzleencontactweththe nm onthe fuel tank
or container opemng at all t_mes,untelrefueling _s
complete Do not usenozzle lock-opendewce
5 Do notfill gasolenecontainers or equipment ens_dea
vehicle or on atruck/tra_ler bed
6 Always place gasohnecontainerson the ground away
from yourvehicles prior to fllhng
7 Never removegas capor add fuel when engene_s
running or the engine _shot
8 Avoid prolongedbreathing of gasohnevapors
9 Never refuel or dram the machine endoors
10 Keepface away from nozzleand gastank opening
11 Keepgas and other fuels away from skin and eyes If
fuel _ssp_lledon clothing, changeclothing _mmed_ately
12 Never usethe mouthto s_phongas
13 Never refuel the snow blower untd all mowng parts on
the snow blower havestopped
14 Never smokewhen handhngfuels and stay away from
an open flame where fumes can be _gmtedby a spark
15 Gasoline_sharmful orfatal _fswallowed
DANGER: GASOLINE IS HIGHLY FLAMMABLE AND
EXPLOSIVE.Do not add fuel while the engine _srunningor
_shot Keep openflames, sparks, and heat away from the
fuel and store fuel m contaN_ersspecifically designedfor that
purpose ADD FUELOUTDOORS ONLY. IF THE FUELIS
SPILLED,DO NOT START THE ENGINE. Manually pust]
the snow blower away from the sp_lland w_peup
_mmed_ately
Rev 11!2010
Page 8

Operation Safety Precautions 36SS,45SS
Equipment Operation_Safety Precautions.
-- t. Donot operatetheengineina confinedspace..
wheredangerouscarbonmonoxidefumescan
collect:Carbonmonoxideisodorless,tasteless,and
canbe fatal.
2. Neveroperatethe snowblowerwithout good
visibility or light.
3. Exerciseextremecautionwhenoperatingon or
crossinggraveldrives,walks,or roads. Stayalert
for hiddenhazardsor traffic.
4. Neveroperatethe snowblowerwith defective
guardsorshields,orwithoutthe safetydevices
securelymountedin placeandfunctioningproperly.
5. Beawareof dischargeandneverdirectdischargeof
materialtowardpeopleorareaswhere property
damagecanoccur.Keepchildrenandothersaway.
6. Donot changetile governorsettingsor overspeed
theengine.
7. Donot overloadthemachinecapacitybyattempting
to c_earsnow attoofast a rate.
8 Alwaysstop the enginewhenyouleavethesnow
blower, evenforamoment.
9. To helpreducefire hazard,keepthe engineandthe
areaa_oundthe enginefreeof grass,leavesorany
othertype of foreignmaterial.
10, Bewareof anysharpedges_Forsafetyalwayswear
gloveswhenperformingaugers/impeller
maintenanceactivities
11. If lightning isseenorthunderis heardin tile
operatorsvicinity,do notoperatemachine. Instead
findshelter,aslightningmaycauseinjury/death.
t2. After strikinga foreignobject,stopthe engine,
removetile wire fromthe sparkplug,thoroughly
inspectthe snow blowerfor anydamage,andrepair
the damagebeforerestartingandoperatingthe
snowbloweE
13. If machinestartstovibrateor functionabnormally,
stop theengineimmediatelyandcheckfor cause.
Vibrationisgenerallyawarningof trouble.
14. Keephandsandfeet awayfrom augers/impeller.
Thisproductiscapableof amputatinghandsand
feet.
15. Bealertandslow downwhenmakingturns. Also
lookleft, right, andbehindbeforechanging
directioosand-reversinglo be surethereisa clear
path.
-16. Neveroperatesnowblower at hightransportspeeds-
onslipperysurfaces.
17_ Never0peratesnowbtowerunder.theinfluenceof
alcoholanddrugs.. :
!8. Usecarewhenloadingor.unloadingthe machine
intoatrailer or truck.
19. Useca_ewhen approachingblind corners,Shrubs,.
trees,orotherobiectsthat mayobstructvision.
20. Alwaysdisengagepowerto augerswhennot inuse
ortransported.
2I. NeverIistento mLiSiCwith headphones/earphones
while operatingthe snowNoweL
22, Useextremecautionwhenoperatingo_ slopes.
23. Nevertoucha hotengineor muffler.
24. Usecautionwhenoperatingon gravelsurfaces.
25. 0nlyuse attachmentsandaccessoriesthatare
approvedbySTANLEY. -
26. Whenstarting theenginepull the cordslowlyuntil
someresistanceis felt beforeusingful! force.
27. Alwayshavea goodgriponthe handlesandnever
runwhile operatingthe snowblower,
28. Stopthe enginewheneveryouleavethe operating
position,before uncloggingtheaugers/impelleror
dischargechute,and whenmakingany{epairs,.-
adjuslmentsor inspections,
29. Whencleaning,repairingor inspectingthesnow
blower;stop the engineandmakecertainthe
augers/impellerandall movingpartshavestopped.
Disconnectthe sparkplugwire andkeepthewire
awayfromthe plugto preventsomeonefrom
accidentallystartingthe engine. :
Rev 11/2010
Page 9
Operation Safety Precautions 36SS,45SS
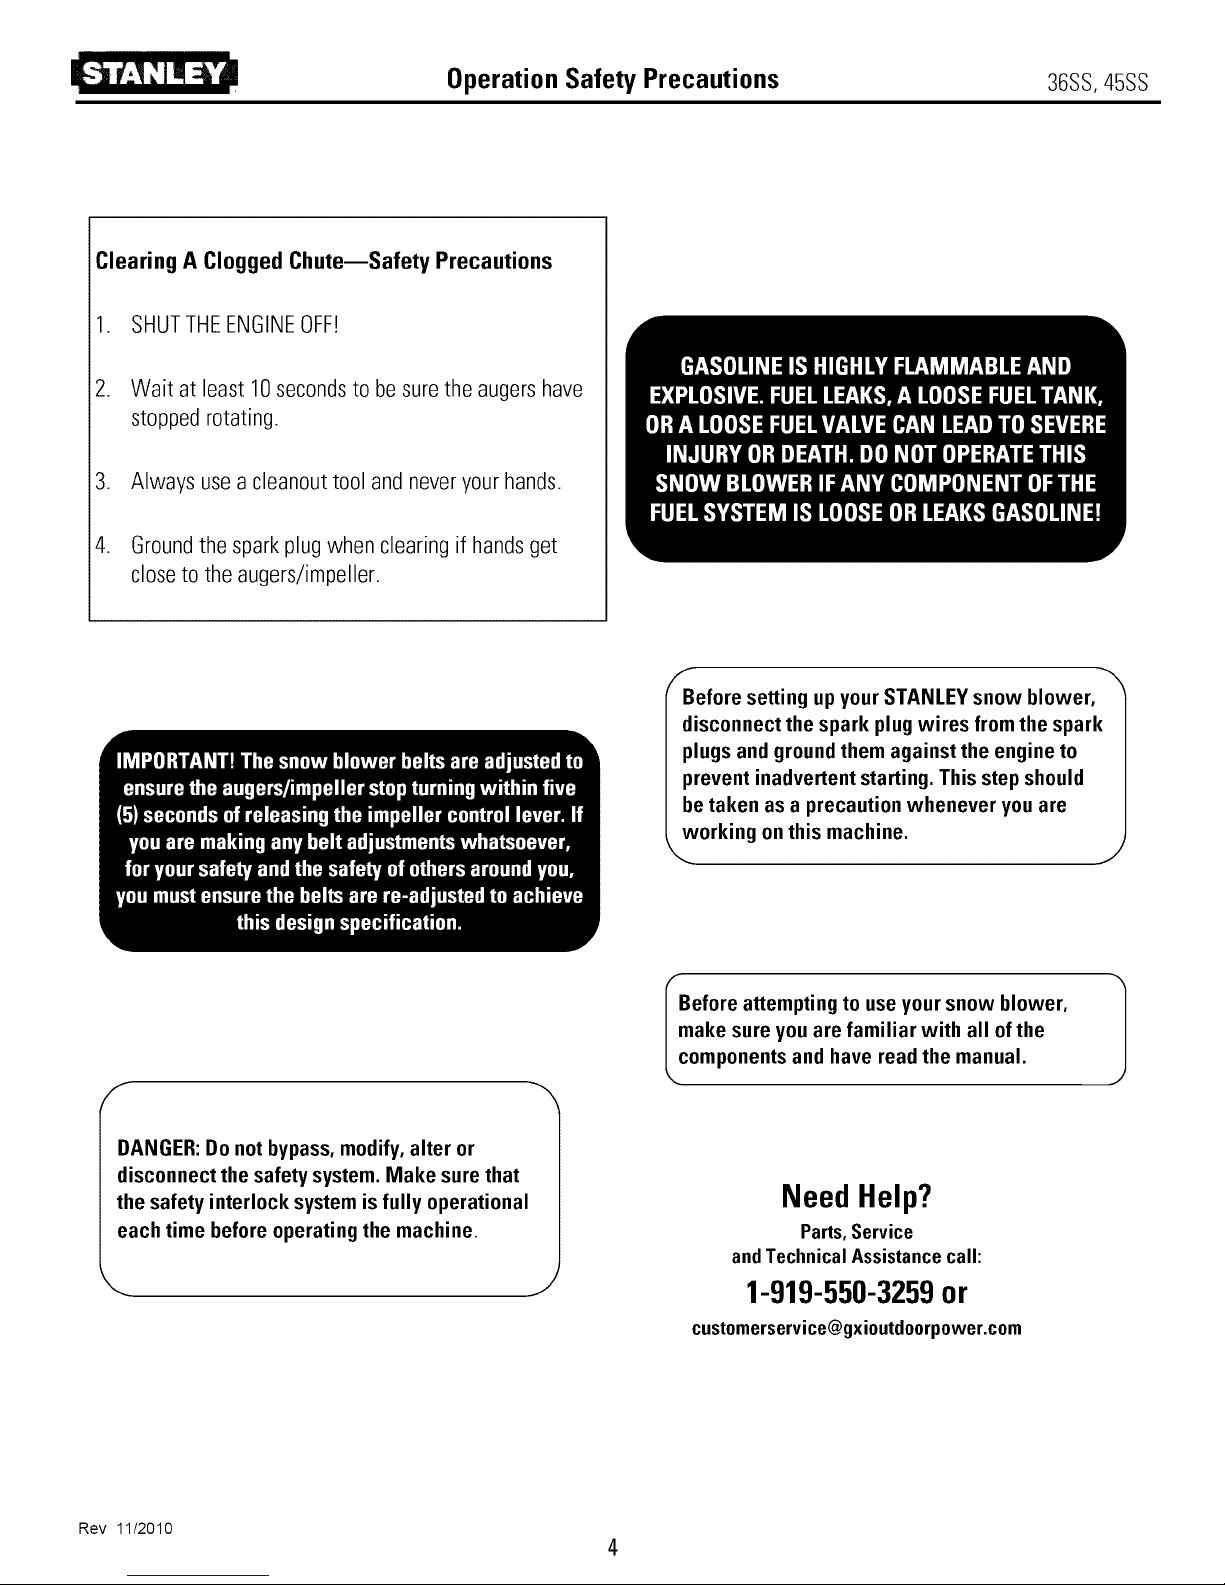
Clearing A Clogged Chute--Safety Precautions
1. SHUTTHEENGINEOFF!
2. Wait at least 10secondsto be surethe augershave
stopped rotating.
3. Always use a cleanout tool and neveryour hands.
4. Groundthe sparkplug when clearing if handsget
closeto the augers/impeller.
f
DANGER:Do not bypass, modify, alter or
disconnect the safety system. Make sure that
the safety interlock system is fully operational
each time before operating the machine.
f
Before setting up your STANLEY snow blower,
disconnect the spark plug wires from the spark
plugs and ground them against the engine to
prevent inadvertent starting. This step should
be taken as a precaution whenever you are
working on this machine.
make sure you are familiar with all ofthe
Before attempting to use your snow blower, |
components and have read the manual.
Need Help?
Parts,Service
andTechnicalAssistancecall:
J
Rev 11!2010
1-919-550-3259 or
customerservice@gxioutdoorpower.com
Page 10

Safety Decals 36SS,45SS
Safety Decal Identification
The labels shown below are located on your snow blower to warn you of potential hazardsand provide you with important safety
information. If these decals becomedifficult to read or are missingfrom the snow blower, pleasecontact GXi Parts& Service,LLCat
1-919-550-3259orwww.gxioutdoorpower.com for a replacement.
Tel 1 1"61:11191£-550 3251
llil Iiii ltlll liiIIIi Ifliltltl_)l,t, I1111I!, If IrlIll_,
Rev: 11/2010
31"S ow BLOWEi
Page 11

Product Specifications 36SS,45SS
Models
Feature 36SS 45SS
ProductType Snow blower Snow blower
Clearing Path 36" 45"
Engine 420cc, 15HP 420cc, 15HP
Engine Start 120V ElectricStart and Recoil 120VElectricStart and Recoil
Speed Control 6 fwd, 2 rev 6 fwd, 2 rev
DeckType All Steel All Steel
Dischargedistance 40' 40'
Impeller 16" 16"
Auger 16" serrated 16" serrated
DischargeChute 6" 6"
Fuel/Capacity Unleadedgasoline Unleadedgasoline
Chutecontrol Crank Crank
Rev: 11!2010
* ProductSpecifications may
changewithout notice.
Page 12

Control Panel and Snow Blower Components 36SS,45SS
Throughoutthis manual, instructions are given on the operation ofyour STANELYsnow blower. We recommendthat while going through
this manual, you haveyour snow blower available for quickand easyaccess in order to orient yourself with the controls, maintenance and
orientation of different parts. Pleasereadthrough the manual before operating.
Control Panel
Belowisadiagramofthecontrolpanel.Pleasetakethetimetofamiliarizeyourselfwiththe snowblowercontrols.
DischargeAngle
Transmission Control
DischargeChuteDirection HeadlightSwitch
Snow Blower Component Identification
(Somecomponents mayappear different than shown, depending on the model.)
Control Panel
Headlight
Handle Bar j
FrictionWheel
(located under)""-_
Belt Cover
Serial # stamped on engine
Adjustable
SkidShoes
Chutedeflectorcable
Muffler--HOT!
DischargeDeflector
DischargeChute
Drift Cutters
Augers/Impeller
Primer --- Safety Key
Rev: 11/2010
Choke
Page 13

Missing PartsRequestForm 36SS,45SS
Pleaseindicate the part that you are missing:
[] Hardwarebag
[] Other
[] Date of purchase
Model#:
[] Serial#:
Name
Address
Phone
Email
Comments:
IMPORTANT:Please include yourreceipt. Without a receipt, your
orderwill be delayed. Youmayalso email us at:
customerservice@gxioutdoorpower.com
Fax: 1-919-550-3277
If emailing, please scan in your proof of purchase.
Rev: 11/2010
Page 14

Assembly Instructions 36SS,45SS
Step 1:Control Panel Handles
1. Align the two holes on each side of the control panel handles
overthe lower handle frame.
2. Insert the bolts through the handlebar holesand frame holes.
Securein placewith hardware provided.
Step 2: Directional Discharge Chute
• Attach the chuteto the snow blower by using thesix (6)
fastenersand lock nuts to securethechute to the
snow blower.
Step 3: Chute Crank
Attach the cable comingfrom the middle of the control
panel byscrewing the cable endonto the cranksection.
Rev: 11!2010
Page 15

Assembly Instructions 36SS,45SS
Step 4: Drive Control
1. Locatethe thin cable on the right side (standing in front of the controls)of the snow blower.
2. Attach the cable to the threaded endunder the drive control handle.
3. Screw clockwise to secure.
Step 5: Augers/Impeller Control
1. Locatethe thin cable on the left side of the snow blower.
2. Attach the cable to the threaded end under the impeller control handle.
3. Screw clockwise to secure.
Rev: 11/2010
10
Page 16

Assembly Instructions 36SS,45SS
Step 6: Drift Cutters (if desired)
1. Thedrift cutters areattached to the main housing in
thestored position.
2. Removethe two bolts on eachdrift cutter.
3. Reattachthe drift cutters in the operating position.
4. Replacebolts and securetightly.
Step 7: Skid Shoes
1. Skidshoesare stored in the hardware bag for shipping.
2. Removefrom hardware bag,and install skid shoesusing the
providedfasteners
3. Insertthe fasteners sothe flat headof the carriage bolt is
toward the outsideof the mainhousing.
CAUTION:Checktheskids to ensurethat the augerdoes not
contactthe pavedor gravel surface. Adjust skids as necessary
to makeup for wear on the snow blower.
1. Checkthe tire pressureto ensurethe tires are properly
inflated.
2. Move skid shoesup and down to the desired position based
onthe surfacetexture.
• If the surface is rougher adjust the skid shoeslower.
• If the surface is smootheradjust the skid shoeshigher.
Firmlytighten the nuts that secureboth skids to the auger
sides.
Step 8: Headlight
1. Attach the upperset of handlebarswith the control panel
mounted.
2. Connectthe headlight cableto the plastic connecterthat
is comingfromthe snow blower.
I DANGER
DANGER: GASOLINE IS HIGHLY FLAMMABLE AND
EXPLOSIVE.Do not addfuel while the engine is running or
is hot. Keepopen flames, sparks, andheat away from the
fuel and store fuel in containers specifically designedfor that
purpose.ADD FUELOUTDOORS ONLY. IF THE FUELIS
SPILLED,DO NOT START THE ENGINE. Manually push
the snow blower away from the spill and wipe up
immediately.
Step 9: Filling Oil and Gasoline
1. Fill the engine with SAE 5W-30 engine oil. Fill the
engine up with about 1.2 to 1.5 quarts of oil. Wipe the
dip stick with a clean cloth, insert the dip stick into the
engine and removeit. Verify the oil is filled upto the top
mark at the end of the dip stick.
2. Cleanthe fuel filter and fill the tank with unleaded gasoline.
Rev: 11!2010
11
Page 17

Starting the Engine 36SS,45SS
I wAoN,No
I
DANGER: Exhaust contains poisonous carbon
monoxide, a colorless and odorless gas. Breathing
exhaust can cause loss of consciousness and may lead
to death. Do not operate the engine in a confined space
where dangerous carbon monoxide fumes can collect.
DANGER
I
WARNING
I
Starting the Engine Using the Recoil Start
Thoroughly inspectthe area where you plan to use the snow
blower. Lookfor items suchasstones, sticks, wire, and other
foreign objects. If struck by the snow blower, these and other
objects maybecome
projectiles that could leadto serious injury or death. Cleararea
of all debris. Keeppeopleand pets at a safe distance.
WARNING! Theelectric starter is designedto
operate on 120volt AC householdcurrent. Use only a
U/-listed, 16gauge extension cord for outdoor usethat is
no longerthan 50 feet (15 meters).
Toprevent damagingelectric starter
wait 1minute between every electric
start attempt and never useelectric
start in the rain.
Starting the Engine using the
Electric Start
1. Use asafe, nondamagedpower
cordto plug into the electric start outlet.
2. Make surethe safety key is fully inserted in order for the
engine to start. Removethe keywhen the snow blower is
not in use.
3. Firmlypushthe primer to force the fuel directly into the
engine's carburetor. Pushtwo to four times dependingon
the temperature (choke morein colder temperatures).
4. Make surethe choke is set in the CHOKEposition.
NOTE:Besureto add fresh unleaded gasoline and fill the
engine with SAE5-W30motor oil (1.2--1.5 quarts} before
starting your snow blower.
1. Make surethe safety key isfully inserted in order for the
engine to start. Removethe keywhen the snow blower is
not in use.
2. Firmlypushthe primer to force the fuel directly into the
engine's carburetor. Pushtwo to four times dependingon
the temperature (choke morein colder temperatures).
3. Make surethe choke is set in the CHOKEposition.
4. Pull the recoilto start the engine.
5, After the engine is started, slowly turn the chokeup one
level at a time asthe engine warms up until it is at the
maximum level or "RUN LEVEL."
Pressthe electric start button.
5.
6.
After the engine is started, slowly turn the chokeup one
level at a time asthe engine warms up until it is at the
maximum level or "RUN LEVEL."
,
Unplugthe extension cordbefore operating the snow
blower.
Safety Key
Choke
Rev: 11/2010
12
Page 18

Operating Instructions 36SS,45SS
Transmission Control
Your snow blower is equipped with an easily
adjustable transmission control, which canbe
adjusted for forward and reversespeed.
Thereare six forward and two reverse speeds.
Tochangethe throttle speed, pull the handle out to the right
and movethe handle to the desired speed.
Engage Transmission Drive
Toengage the transmission drive squeezethe right lever to the
hand grip.
Todisengage, let go of the right lever.
To Stop Engine
Tostop the engine, pull the safety key up until the engine and
augers/impeller stops running. For safety, it is recommendedthat
you removethe keywhen not using the snow blower.
WARNING I
WARNING! Do not operatethe snow blower
with defective guards, shields, or without the
safety devicessecurely in place.
Engage Augers/Impeller Control
To engagethe augers/impeller drive squeezethe left leverto
the handgrip.
To disengagerelease the left lever.
Rev: 11/2010
13
Page 19

Operating Instructions 36SS,45SS
Chute Direction Control
Torotate the chute to the fight rotate the chute control clock-
wise.
Torotate the chute to the left rotate the chute control counter
-clockwise.
Headlights
Toturn on the lights, flip the switch up.
Toturn off the lights, flip the switch down.
Never use your hands to clean a clogged
chute or opening.
Chute Discharge Angle
Thereare five different angles the discharge chute can be
arranged to discharge.
Tochangethe dischargeangle, pull the handle out to the left
and moveto the slot up to discharge snow at a higher angle
and down to discharge snow at a lower angle.
Clean Out Tool
Releaseboth wheel and
impeller drives.
Stopthe engine by
removing the safety key.
Wait for all moving parts to stop.
Use cleanout tool as needed.
I
DANGER
Rev: 11/2010
DANGER! Make certain the engine comes to a com-
plete stop before putting you hands near the augers/
impeller.
14
Page 20

General Maintenance 36SS,45SS
The Importance of Maintenance
Regularmaintenance is essential to ensureyour snow blower
continuesto deliver safe andhigh-quality performance.
Tohelp you properly carefor your snow blower, the following
pages includea recommendedmaintenance schedule,
routine inspection procedures,and simple maintenance
proceduresusing basic handtools. Maintenance isthe
responsibility of the owner and must be performed regularly.
More difficult servicetasks or tasks that require special tools
are best handled by a recommendedservice technician or
other qualified mechanic.
Themaintenance schedule describedon page 16applies to
snow blower usedunder normal operating conditions. If you
operateyour snow blower under severeconditions, such as
sustained prolongeduse or use it in unusually wet, dusty or
rockyconditions, consultyour servicing dealer for
recommendationsapplicable to your individual needsand
use.
Be sureto usegenuine STANLEYSNOWBLOWER
replacement partswhen servicingyour snow blower to
assurethe best quality, safety and performance.
Need Help? Parts, Service and Technical Assistance
Call: 1-919-550-3259 www.gxioutdoorpower.com
I
Check Skid Shoes
Checkthe skids to ensure that the auger does not
contact the pavedor gravel surface.
Adjust skids as necessaryto make up for wear on the snow
blower.
CAUTION: Always wear work gloves when performing
auger maintenance and beware of sharp edges. Be
sure the engine is off, the key removed, and the spark
plug wires are disconnected from the spark plugs to
prevent inadvertent starting.
CAUTION
CAUTION I
I
I
CAUTION! Before making any adjustments and/or servicing
to your STANLEYsnow blower, makesure the snow blower
is ona level surface, with the ignition switch off, the key
removed,and the augers disengaged.Also, disconnect the
spark plug wires from the spark plugs and ground them
against the engine to prevent inadvertent starting.
If you are performing adjustments or maintenance after
operating the snow blower, allow the unit to cool and always
wear protective clothing.
If you are performing adjustments or maintenance after
operating the snow blower, allow the unit to cool and always
wear protective clothing.
Check Oil Level
CHECKENGINEOILBEFOREEACHUSE. Changeoil as
recommendedon page 16 and follow proper proceduresto
checkand change oil.
CAUTION
I
Shear Bolts
Checkshear bolts (as well as other bolts) at frequent intervals
for propertightness to be sure the equipment is in safe work-
ing condition.
Do NOTusestandard bolts to replace shear bolts.
Severedamageor injure could occur.
After Blowing Snow
Allow the machineto run for a few minutes after blowing
snow to prevent freeze-up of the augers/impeller.
Rev: 11/2010
15
Page 21

Item
Procedure
Maintenance Schedule 36SS,45SS
Break-in Every 8 hrs Every 40 hrs Every 100 hrs Every 200 hrs
first 5 hrs) (daily) (weekly) (Bi-weel<ly) (monthly)
Belts
Augers/Impeller
EngineAir Filter
Engine0il
Engine0ilFilter Change
EngineSparkPlug Inspect
FuelLine
Inspect(adjust if
needed)
Inspect
Inspect
Check X
Change
Check
X
20-30 hrs
20-30 hrs
20-30 hrs
Hardware
Snow Blower Main Frame
Safety Interlock System Switches
Tires CheckAir Pressure
Augers/Impeller Brake
Checkfor proper tight-
ness
Removedebrisfrom
underbeltcover
CheckOperationsand
X
X
X
la ri o_,:
Rev: 11/2010
16
Page 22

Service Adjustments
36SS,45SS
Adjusting Augers/Impeller Cable
If tension seemsto betoo looseor too tight the
augers/impeller cablesneedsto bereadjusted.
.
Loosenthe bolt abovewhere the cable screws in
to the left side of the control panel.
.
Looseningthe
bolt enables the
cableto screw
in further,
which makes
theaugers/
impeller handle
tighter.
.
Adjust the bolt andcable to the
necessaryadjustments.
AdjustingDriveCable
If tension seemsto betoo looseor too tight the drive
cablesneedsto bereadjusted.
1. Loosenthe bolt above where the cable screws in
to the right side of the control panel.
2. Looseningthe
bolt enables the
cableto screw in
further, which
makesthe au-
gers/impeller
handletighter.
3. Adjustthe bolt
andcable to the
necessary
adjustments.
Adjusting Shift Rod
Theshift rodwill beat a preset position from the
factory, but after use,or maintenance,the shift rod
mayrequireoccasionaladjustment.
Signsof adjustment need:
1. Theshift handle is movedto the F1position, and
when the engagementhandle is pressed,the unit
does not move.
2. Theshift handleis movedto the R1position, and
when the engagementhandle is pressed,the unit
does not move.
If either of the above occur, it maybe necessaryto
adjust usingthe following procedure:
1. Setthe transmission handleto the spacebetween F1
and R1as shownonthe right.
Loosenthe 2 nuts onthe adjustment turnbuckle.
3. Removethe cover plate from the gearboxhousing
(seepage 19).
4. Adjust the rod byturning the turnbuckle until the
friction wheel aligns with the center of the circular
disk in front of the rubberfriction wheel.
i!!lil
il_i!iil
[Siiii!iii!iii|iii!
!_lliili/!
Rev: 11/2010
17
Page 23

Service Adjustments 36SS, 45SS
Check & Replacing the Transmission Drive Belt
If belt needsto bechangedor altered for any reason,the
belt is located in the front of the snow blower behind the
dischargechuteand in front of the wheels.
1. Removethe coverthat is protecting the Stanly Snow
Blower's belts. Removethe screws and simply lift
upthe cover.
2. Removethe black belt andreplace with a new belt.
3. Attach the coverand all parts as they were when
taken off.
Check & Replacing the Augers/Impeller Belt
Thereare two locatedin the front of the snow blower
behindthe discharge chute and infront of the wheels.
1. Removethe coverthat is protecting the Stanley
SnowBlower's belts. Removethe screws and
simply lift up the cover.
2. Removethe two belt andreplace with new belt or
belts dependingon the belt's condition.
3. Attach the coverand all parts as they were when
taken off.
NOTE:Always changeboth belts at the sametime.
Changingonly one belt canlead to performanceissues.
Also checkfor correct belt tension after changingbelts.
Readjustif necessary.
Rev: 11/2010
18
Page 24

Service Adjustments 36SS, 45SS
Adjusting Discharge Deflector
Thedischargechute is preset at the factory, but may
requireadjustment overtime or during maintenance.
Foradjustments,follow the procedurebelow:
1. Loosenthe two nuts at thechute cable mount onthe
dischargechute.
2. To makethe chuteopen more,adjust nuts so the
cableend movescloser to the dischargedeflector
(upward).
3. To makethe chuteclose more,adjust nuts sothe
cableend movesfurther from the discharge
deflector (downward).
Changing Friction Wheel
If the friction wheel needsto be replaced for any reason:
1. Removethe two bolts to removethe cover
underneaththe control panel between the wheels.
2. Removethe bolt and nut in the hexagonalshaft
carryingthe friction wheel
3. With the bolt and lockingnut removed,the shaft can
beremovedwith the rubberfriction wheel assembly.
4. Replacethe friction wheel andreassemblein
reverseorder.
5. Resettingthe neutral position may benecessary.
Replacing Headlight Bulb
1. Pushthe headlight case up from the
bottom, then gently lift the headlight out.
2. Twist the black roundwire harnesscounter-clockwise
until the bulb is unlocked at the spot.
3. Replacethe bulb and lock the headlight back into place
the sameway it was taken out.
Rev: 11/2010
19
Page 25

Storage Instructions 36SS,45SS
Short Term Storage
• Letengine cool before storing and do not store near
flame, high heat, and possible ignitions from sparks.
• Donot drainfuel indoorsor neara flame.
• Always park machine on levelground.
• Always clean off all flammable material as well as
grime and dirt beforestorage.
• Wash with mild detergent andwater only.
• After washing the machine engage the engine at high
and let the snow blower run for 5 minutes.
• Storesnow blower only on the ground.
• Storethe machine in a cleanand dry environment.
• Always remove the safety key and ground the spark
plug to the engine.
• Always run the snow blower beforestorage to clear up
snow to prevent freeze up.
• Checkall parts to see if they are in working condition.
Extended Storage
• Changeair filter.
• Make sure all fuel is drainedbefore storing.
• Toensureall fuel is drained from the snow blower, turn
the fuel valve off, then runthe snow blower until it runs
out of gas before storage.
• Add a fuel stabilizer to fresh fuel on the last
refueling day.
• Checkthe spark plugscondition and pour two
tablespoons of engine oil in the spark plug holesand
leavethe spark plugs off.
• Coverthe machine when in storage.
• Everythingmentioned in short term
storage shouldalso be applied to extended
storage.
Rev: 11/2010
20
Page 26

Troubleshooting 36SS, 45SS
Problem Possible Causes Solution
Enginewill not start 1. Key in the OFFposition 1. Turn keyto ONposition
2. Insufficient fuel in the tank 2. Add gasoline
3. Air bubble in the fuel line 3. Primeengine or shake bubble out
4. Fuelvalve in OFFposition 4. Turnvalve ON
5. Chokenot ON 5. Turnchoke ON
6. Chokelinkage out of adjustment 6. Referto EngineOwner's Manual
7. Low engineoil 7. Add engine oil
8. Loosespark plug wire 8. Tighten wire or connections
9. Fouledspark plug 9. Cleanor replacethe plug
10. Pluggedor dirty air filter 10. Cleanor replacethe air filter
11. Bad gasoline 11. Drain and replace with fresh gasoline
Engine will not start with 1. Not using proper gauge cord
electric starter 2. Safety key is loose
Enginewill not keep running/ 1. Water in the fuel 1. Drainand replace with fresh fuel
quits 2. Fuelvalve isOFF 2. Turnfuel valve ON
3. Dirty air filter 3. Cleanor replace air filter
4. Low engineoil 4. Add engine oil
Augers donot turn 1. Pinsholding the augers may have 2.
sheared.
Shaft is notturning 1. Pins holding the augers may have
sheared.
2. Checkthe gearbox.
Snow blower always pulls to 1. Skid shoes and / or scrapper blade 1. Adjust skid shoesand / or scrapper blade so the
one side dragging more on one side than the scrapperblade drags uniformly on the surface being
other blown.
1. Use 120V16 gauge cord in good condition.
2. Verify the safety key is fully inserted.
If the pinssheared, replace them as needed after
applying lubricant into the shaft. Call GXiParts &
Serviceat 1-919-550-3259oremail:
customerservice@gxioutdoorpower.comfor parts.
If the pinssheared, replace them asneeded after
applying lubricant into the shaft.
CallGXi Parts & Serviceat 1-919-550-3259or email:
customerservice@gxioutdoorpower.comfor parts.
Rev: 11/2010
21
Page 27

Troubleshooting 36SS, 45SS
Problem Possible Causes Solution
Snow blower will not move 1. Transmission cable out of 1. Readjusttransmission cable
forward or reverse adjustment (too loose)or damaged. If damaged,replace andreadjust.
Cannotmovesnow blower
when the engine isoff
Engineis overheating
1. Transmission handle is pressed into
the engagedposition
2. Transmissioncable out of
adjustment (tootight)
1. Dirt in the fuel line
2. Dirty air filter
3. Low engineoil
4. Fouledspark plug
5. Misuse of the snow blower
1. Releasetransmission handle
2. Readjusttransmission cable
1. Replacefuel filter andflush tank
2. Cleanor replacethe air filter
3. Add engine oil
4. Replacespark plug
5. Walk the snow blower slowly
Rev: 11/2010
22
Page 28

LimitedWarranty & Service 36SS,45SS
Length of Warranty: *(from the date of original retail purchase)
CommercialNoncommercial/
Products Covered by this Warranty
Engine Manufacturer'swarranty Manufacturer'swarranty
Transmission Manufacturer'swarranty Manufacturer'swarranty
Snowblowerdeck/spindles/wheels/pulleys/ 90days 90days
Nonrental
Manufacturer's warranty
Manufacturer's warranty
12months
controls
*LENGTHOFWARRANTY:Batteriessuppliedwith applicableproductsasstandard,originalequipmentare coveredby thiswarrantyfor aperiodof 90daysfrom
the dateof originalretail productpurchase.Consumablepartssuchas oil, sparkplugs,filters, dirtycarburetors,andaugers/impellerarenot coveredbythis
warranty.
ToQualifyforthisWarranty
Theproductmustbepurchasedin the UnitedStatesfromadealerauthorizedby GXiOutdoorPower,LLCto sellthoseproducts.Thiswarrantyappliestofirst retail
purchaser/ownerduringthe applicablewarrantytime period.SAVEYOURPROOFOFPURCHASERECEIPT.
What GXiOutdoor Power Will Repairor Replace underWarranty
GXiwill repairorreplace,at its option,anypartthat isprovento bedefective in materialor workmanship undernormaluseduringthe applicablewarranty
time periodsubjectto the exclusionsstatedherein.Thiswarrantyis voidif the ownerfailsto followthe prescribedmaintenanceandoperatingprocedures
describedinthis manual.Thisspecificallyrefersto ensuringroutinelubricationandoilchangesare made,that fuelstabilizeris usedwhentheproductisstored
andthat the productisnot overloaded.
GXihastherightto recoverwarrantyadministrationcostsfromtheownerif the rootcauseofthe malfunctionis foundto be otherthandefectivematerialor
workmanship.In particular,thiswarrantydoesnotcover:contaminantsin thefuel or oil;damagecausedbynotfollowing theprescribedwarningsandoperating
practices;failure to follow propermaintenanceandstorageprocedures;andphysicaldamagedueto misuse,shipping,handlingorstorage.
Rental
Warrantyrepairswill bemadewithout chargeforpartsandlaborfor thefirst year.
Anythingreplacedunderwarrantybecomesthe propertyof GXi.Partsreplacedunderwarrantywill beconsideredaspart of the originalproductandanywarranty
onthosepartswill expirecoincidentwiththe originalproductwarranty.
ToObtainWarrantyService
Youmusttakethe STANLEYproduct,accessory,replacementpart,apparelor thepowerequipmentonwhich theaccessoryor replacementpart isinstalled,and
proofofpurchase,atyourexpense,to anySTANLEYservicelocationinthe UnitedStates,who isauthorizedto servicethatproduct,duringthe servicelocation's
normalbusinesshours.Ifyouareunableto obtainwarrantyservice,oraredissatisfiedwith the warrantyserviceyoureceive,takethefollowing steps:First,
contactthe managerof the servicecenterinvolved;normallythis will resolvethe problem.However,if you shouldrequirefurtherassistance,write orcall theGXi
PartsandService,LLC.
Exclusions
Thiswarrantydoesnotcover:normalwear,contaminantsinthefuel oroil; damageasa resultof useinanapplicationforwhich theproductwasnotdesigned;
damagecausedbyincorporationoruseof unsuitableattachmentsorparts,unauthorizedalteration,orothermisuseandneglector;damagecausedbyfailureto
followthe prescribedwarnings,operatingpractices,propermaintenanceandstorageprocedures;partsaffectedor damagedbyaccidentand/orcollision;damage
dueto shipping,handling,storageoranycausesotherthandefectsinmaterialorworkmanshipof theproduct.
Disclaimerof ConsequentialDamageandLimitationof ImpliedWarranties
GXidisclaimsanyresponsibilityfor lossoftime or useof the product,transportation,commercialloss,oranyotherincidentalorconsequentialdamage.Any
impliedwarrantiesarelimitedtothe durationofthis written limitedwarranty.
THISWARRANTYISVOIDIFTHEMANUFACTURINGDATEANDTHESERIALNUMBERONTHEEQUIPMENTHASBEENREMOVEDORTHEEQUIPMENTHASBEEN
MODIFIED.
EMISSION CONTROL SYSTEM INFORMATION
TheU.S.and California CleanAir Acts
EPAandCalifornia regulations require all manufacturers to furnish written instructions describing the operation andmaintenance of emissioncontrol systems. Thefollowing
instructions andproceduresmust befollowed in orderto keepthe emissionsfrom your STANLEYenginewithin the emission standards.Maintenance, replacement, or repair
of the emissioncontrol devices and systemsmay be performed by any enginerepair establishment or individual, using parts that are "certified" to EPAstandards.
Theemissioncontrol systems onyour STANLEYenginewere designed,built, andcertified to conformwith EPAregulations. We recommendthe use of genuineSTANLEY
partswhenever you have maintenancedone. Theseoriginal-design replacement parts are manufacturedto the samestandardsas the original parts,so you can beconfident
of their performance.The use of replacement parts that are not of the original designand quality mayimpair the effectiveness of youremission control system. A manufac-
turer of an aftermarket part assumesthe responsibility that the part will not adversely affect emission performance.Themanufactureror re-builder of the part must certify
that use of the partwill not result in a failure of the engine to comply with emission regulations. Emissioncontrols are covered bythis warranty for all uses for a period of 2
years from original retail purchasedate, this coverageextends to subsequent owners of the product with proof of original purchase.Foremissions warranty service call 1-890
-393-9668or e-mail customerservice@gxioutdoorpower.com.
Rev: 11/2010
23
 Loading...