

Page 1

36" BRUSHMOWEROwner's Manual
This manual contains important safety instructions for the gasoline engine powered
brush mower models: 36BS, 36BDS
READ SAFETYWARNINGS AND OPERATING INSTRUCTIONS CAREFULLY.
SAVE THIS MANUAL.
When you call the help-line you will need to have the following information:
Date of Purchase:
Location of Purchase:
Serial# - Mower:
Serial # - Engine:
Serial # - Hydro Trans (L)
Serial # - Hydro Trans (R)
Need Help?
Parts, Service
and Technical Assistance call:
1-919-550-3259
www.mower911.com
Page 2

36BS,36BDS
Copyright@ 2009 by GXi Outdoor Power, LLC.All rights reserved.
No part of this publication can be reproduced or distributed without prior written permission of GXi Outdoor Power, LLC
Clayton, NC 27520 USA.
is a registered trademark of The Stanley Works or its affiliates and
is used under license by GXi Outdoor Power, LLC
GXi Outdoor Power, LLC reserves the right to discontinue or change specifications or design at anytime without notice
and without incurring any obligation whatsoever.
The information and specifications included in this publication were in effect atthe time of approval for printing.
This manual contains important safety instructions for Brush Mowers
READSAFETYWARNINGS AND OPERATINGINSTRUCTIONS CAREFULLY
SAVE THESEINSTRUCTIONS.
This owner's manual is considered a permanent part of the brush mower and should
remain with the brush mower if resold.
Rev:Mar2011 STANLEY®Brush Mowe r
Page 3

Check out our other great products atwww.mower911.com
or visit our web site atwww.mower911.com
36BS,36BDS
Rev:Mar2011 STANLEY®Brush Mower
Page 4

Contents
Safety Information and Warnings .........................................................................1
Operation Safety Precautions ...............................................................................2
Safety Decals ............................................................................................................3
Product Specifications ...........................................................................................4
Control Panel and Brush Mower Components ...................................................5
Assembly Instructions
Step 1:FrontWheel Assembly .......................................................................6
Step 2: Mower Assembly ................................................................................7
Step 3: Wire Harness Assembly and Connections .....................................8
Step 4: Throttle and Choke Cable Connections ...........................................8
Step 5: Fuel Tank Connections .......................................................................9
Step 6: Brake Set-up .........................................................................................9
Operating Instructions
Starting the Engine.........................................................................................10
Operating the Mower .....................................................................................10
Disengaging Hydrostatic Drive Units ...........................................................11
Return to Neutral .............................................................................................11
36BS,36BDS
Cutting Brush ...................................................................................................12
Removing the Blades ......................................................................................13
General Maintenance ...........................................................................................14
Maintenance Schedule ........................................................................................15
Service Adjustments ..............................................................................................16
Lubrication Points ..................................................................................................18
Deck Interchange ...................................................................................................18
Troubleshooting ......................................................................................................19
Limited Warranty and Service .............................................................................21
Aboutthis Manual
Congratulations on the purchase of your new STANLEY commercial mower. We at GXi Outdoor Power are confident that
this mower will provide excellent performance, outstanding quality, and great durability when operated and maintained
as directed in this manual.
1. This manual contains assembly, operating, safety, adjustment, maintenance, and troubleshooting instructions.
BEFOREOPERATING YOUR BRUSH MOWER, CAREFULLYREADTHIS MANUAL IN ITS ENTIRITY.
2. This owner's manual is considered a permanent part of the mower. It must be available to all operators and/or
person(s) servicing the mower. Should the mower be resold, this manual must remain with the mower.
3. All information, illustrations, and specifications contained in this manual were in effect at the time of the
publication. GXi Outdoor Power reserves the right to add, delete or modify specifications and/or designs without
notice.
4. If you ever have questions in regards to the operation, maintenance or safety of your mower, please contact
GXi Parts & Service, LLCat 1-919-550-3259.
Rev:Mar2011 STANLEY®Brush Mowe r
Page 5
Safety Information and Warnings 36BS,36BDS
Safety Information
STANLEY brush mowers are designed to give safe
and dependable service if operated according to
instructions. Read and understand this owner's
manual before operating your brush mower.
Emission Control System Information
The U.S. and California Clean Air Acts
EPA and California regulations require all
manufacturers to furnish written instructions
describing the operation and maintenance of
emission control systems. The following instructions
and procedures must be followed in order to keep
the emissions from your engine within the emission
standards.
Safety Label Locations
Safety labels are located on your mower to warn
you of potential hazards. Read them carefully. If a
label comes off or becomes hard to read, contact
GXi Parts & Service, LLCfor a replacement.
Operator Responsibility
Be sure that anyone who operates the brush mower
receives proper instruction. The operator must know
howto stop the brush mower quickly in case of
emergency, and understand the use of all controls
and components. Children should not operate the
brush mower without parental supervision.
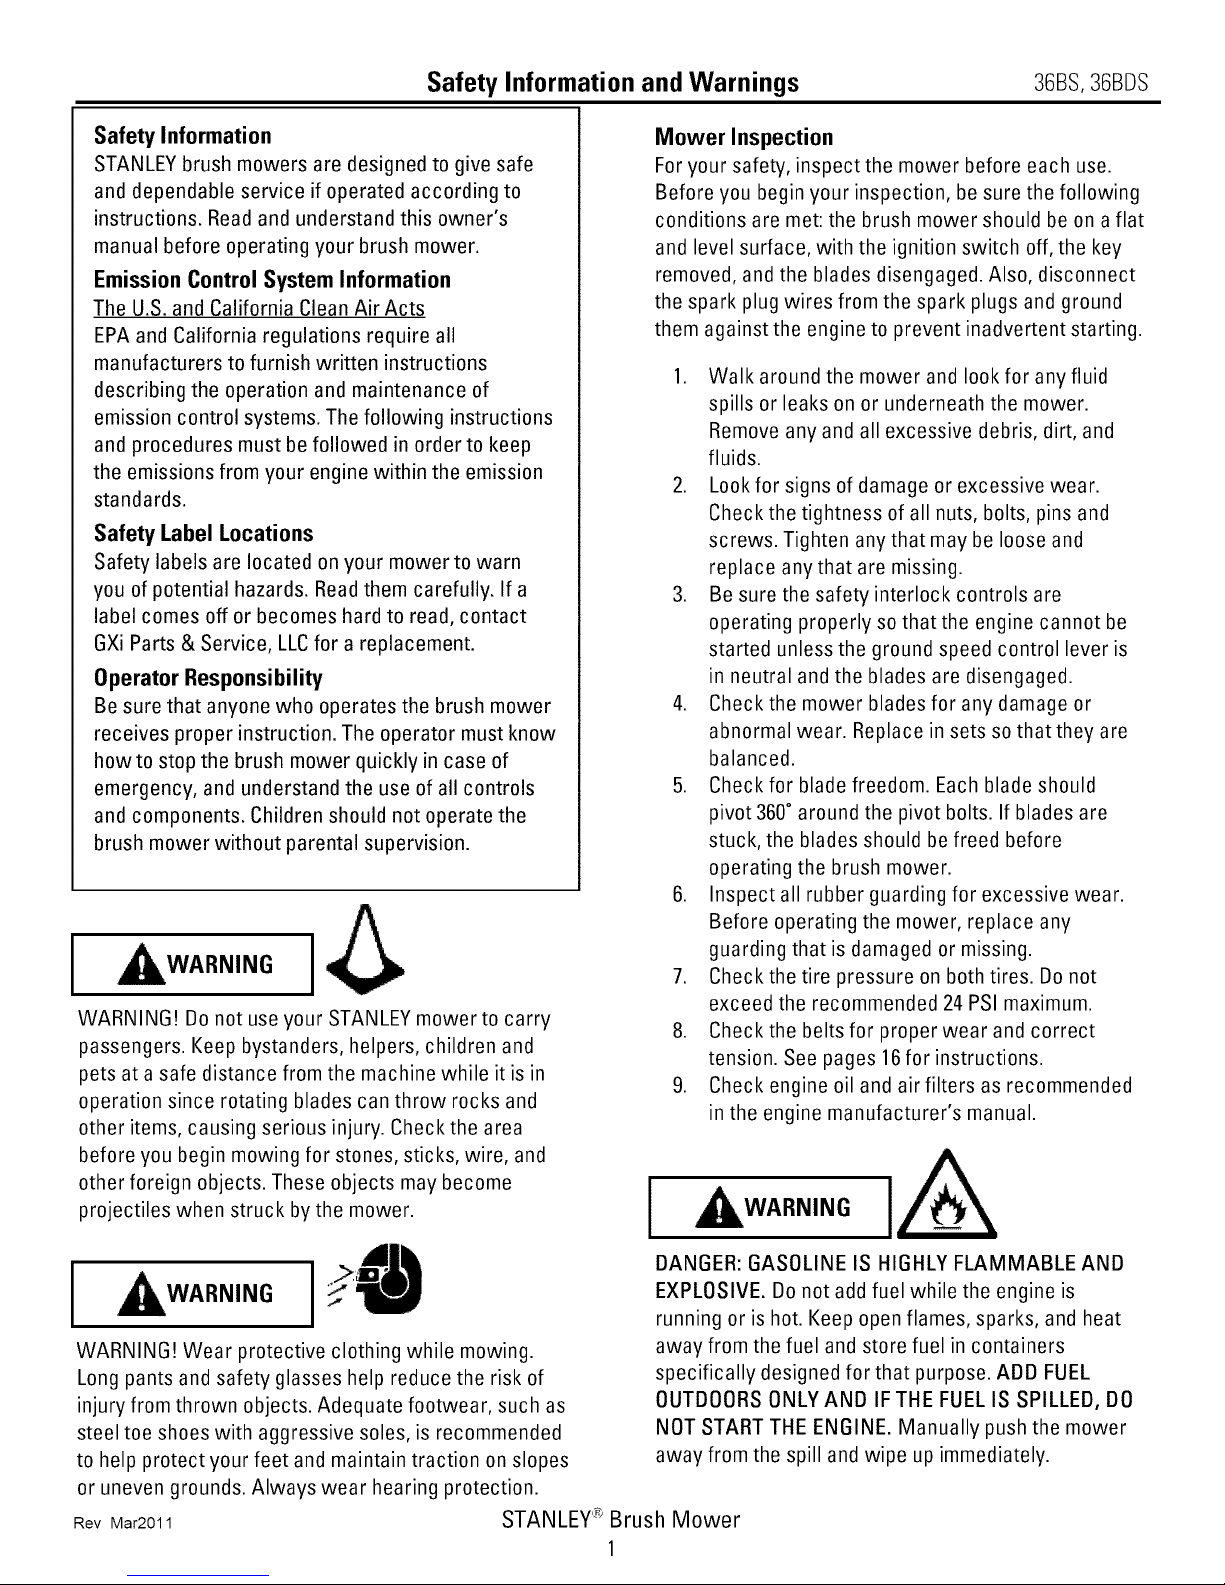
I Aw...,.o
WARNING! Do not use your STANLEY mower to carry
passengers. Keep bystanders, helpers, children and
pets at a safe distance from the machine while it is in
operation since rotating blades can throw rocks and
other items, causing serious injury. Check the area
before you begin mowing for stones, sticks, wire, and
other foreign objects. These objects may become
projectiles when struck by the mower.
Mower Inspection
For your safety, inspect the mower before each use.
Before you begin your inspection, be sure the following
conditions are met: the brush mower should be on a flat
and level surface, with the ignition switch off, the key
removed, and the blades disengaged. Also, disconnect
the spark plug wires from the spark plugs and ground
them against the engine to prevent inadvertent starting.
1. Walk around the mower and look for any fluid
spills or leaks on or underneath the mower.
Remove any and all excessive debris, dirt, and
fluids.
2. Look for signs of damage or excessive wear.
Check the tightness of all nuts, bolts, pins and
screws. Tighten any that may be loose and
replace anythat are missing.
3. Be sure the safety interlock controls are
operating properly so that the engine cannot be
started unless the ground speed control lever is
in neutral and the blades are disengaged.
4. Check the mower blades for any damage or
abnormal wear. Replace in sets so that they are
balanced.
5. Check for blade freedom. Each blade should
pivot 360° around the pivot bolts. If blades are
stuck, the blades should be freed before
operating the brush mower.
6. Inspect all rubber guarding for excessive wear.
Before operating the mower, replace any
guarding that is damaged or missing.
7. Check the tire pressure on both tires. Do not
exceed the recommended 24 PSI maximum.
8. Check the belts for proper wear and correct
tension. See pages 16for instructions.
9. Check engine oil and air filters as recommended
in the engine manufacturer's manual.
,_WARNING I A
I
I I Q
WARNING! Wear protective clothing while mowing.
Long pants and safety glasses help reduce the risk of
injury from thrown objects. Adequate footwear, such as
steel toe shoes with aggressive soles, is recommended
to help protect your feet and maintain traction on slopes
or uneven grounds. Always wear hearing protection.
Rev Mar2011
DANGER: GASOLINE IS HIGHLY FLAMMABLE AND
EXPLOSIVE. Do not add fuel while the engine is
running or is hot. Keep open flames, sparks, and heat
away from the fuel and store fuel in containers
specifically designed for that purpose. ADD FUEL
OUTDOORS ONLY AND IFTHE FUEL IS SPILLED, DO
NOT START THE ENGINE. Manually push the mower
away from the spill and wipe up immediately.
STANLEY'_ Brush Mower
Page 6

Operation Safety Precautions 36BS,36BDS
Equipment Operation--Safety Precautions
1. Do not operate the engine in a confined space
where dangerous carbon monoxide fumes can
collect. Carbon monoxide is odorless,
tasteless, and can be fatal.
2. Mow only in daylight.
3. Make sure the mower is in neutral and the
blades are disengaged before attempting to
start the engine.
4. Be extremely careful when operating the
mower on a slope or when the grass is damp
or wet. Reduced traction could cause sliding.
5. Do not stop or start suddenly when going
uphill. Use extreme caution when changing
directions while operating on aslope.
6. Avoid steeps slopes. Never use riding
attachments on slopes since there is an
increased risk of roll over.
7. Never mow by pulling the mower back towards
you because you might slip.
8. Watch for pedestrian or vehicular traffic when
moving the mower while not in use (i.e.,
loading, unloading or transporting).
9. Never operate the mower with defective guards
or shields, or without the safety devices
securely mounted in place.
10. Never direct discharge of material toward
bystanders nor allow anyone near the mower
during operation.
11. Do not change the governor settings or over
speed the engine.
12. Always stop the engine when you leave the
mower, even for a moment.
13. To help reduce the fire hazard, keep the engine
and the area around the engine free of grass,
leaves or any other type of foreign material.
14. Beware of cutting edges. Always wear gloves
for safety when performing blade maintenance
activities. Beware on multiple blade units since
the rotation of one blade may cause the rotation
of the other blade.
15. Do not operate the mower with the grass chute
deflector in the raised position. Serious injury
could occur.
f
Before setting up your brush mower,
disconnect the spark plug wires from the
spark plugs and ground them against the
engine to prevent inadvertent starting. This
step should be taken as a precaution
whenever you are working on this machine.
isconnect the safety system. Make sure that
he safety interlock system is fully operational
ANGER: Do not bypass, modify, alter or "1
ach time before mowing.
ure you are familiar with all of the
Before attempting to use your mower, make
components and have read the manual.
Need Help?
Parts,Service
andTechnicalAssistancecall:
Rev Mar2011
1-919-550-3259
www.mower911.com
STANLEY_ Brush Mower
2
Page 7
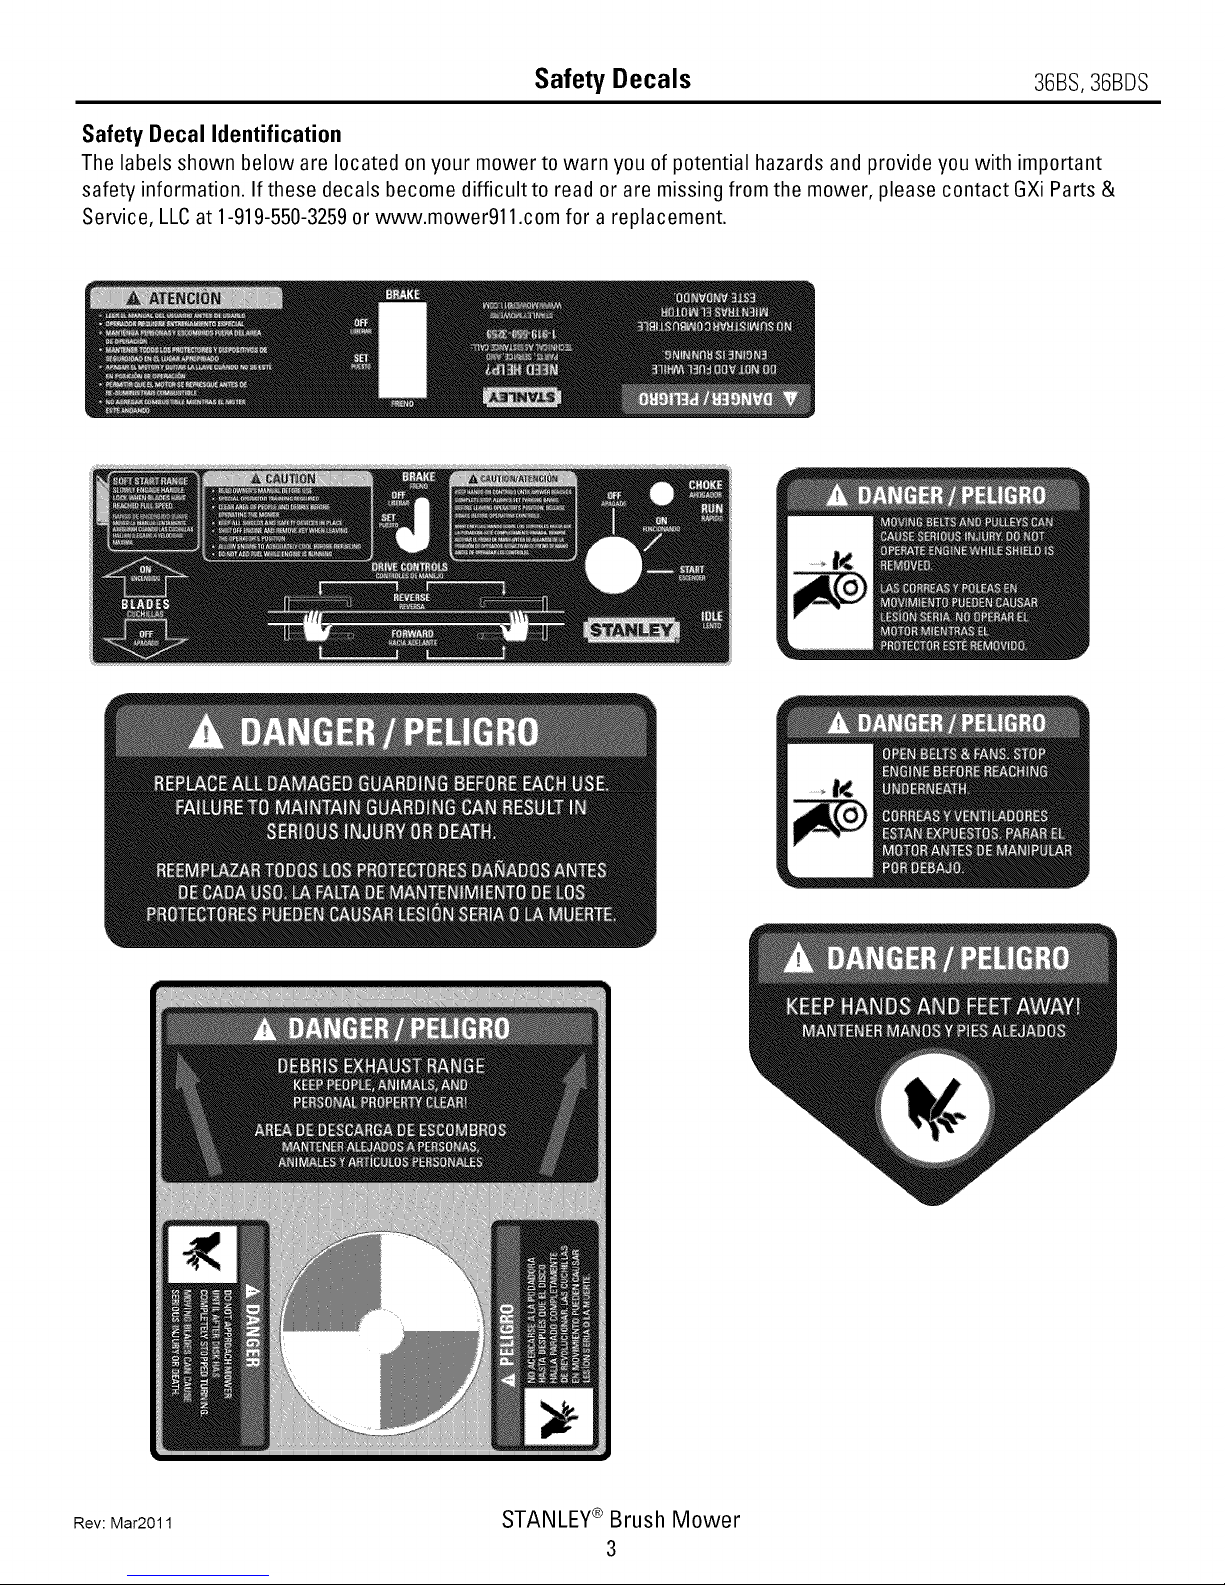
Safety Decals 36BS,36BDS
Safety Decal Identification
The labels shown below are located on your mower to warn you of potential hazards and provide you with important
safety information. If these decals become difficultto read or are missing from the mower, please contact GXi Parts &
Service, LLC at 1-919-550-3259 or www.mower911.com for a replacement.
Rev: Mar2011
STANLEY® Brush Mower
3
Page 8

Product Specifications 36BS,36BDS
Model
Feature 36BS & 36SDB
Product Type Commercial, O-turn
Cutting Width 36-inch
Engine 22 HP Honda
Engine Start Electric
Transmission Type Dual hydrostatic
Transmission Mfg Peerless
Mower Speeds Infinitely variable
Cutting Height 4 inches
Blade Engagement Manual clutch
Blade Tip Speed 18,750ft/min
Blades Dual break away
Control System V-bar E-Z hydro speed control
Fuel/Capacity Gasoline/4.5 gallons.
Rear Drive Tires 16x 6
Front Skid Wheels 2
Brake System Internal hydraulic and mechanical park
Weight Approximately 650 pounds
Height/Length 48 inches x 78inches
Rev: Mar2011
STANLEY®Brush Mower
4
Page 9

Control Panel and Brush Mower Components 36BS,36BDS
Throughout this manual, instructions are given on the operation of your STANLEY mower. We recommend that while
going through this manual, you have your mower available for quick and easy access in order to orient yourself with the
controls, maintenance and orientation of different parts. Please read through the manual before operating.
Control Panel
Below, youwill find a diagram ofthe control panel.Pleasetake the time to familiarize yourself with the mower controls.
Blade Control Lever
Operator Presence Switch
Control
Key Switch
Forward / Reverse Speed Control
BrushMower Feature Identification
(Somefeatures may appeardifferent than shown, depending on the model.)
,_rrr rr r .......
Hydro Brake / Loc
Control Panel
Handle Bar Heig
Adjustment
Muffler (HOT!)
Hour Meter
Operator Presence Switch (OPS)
Blade Control Lever
Fuel Tank
Pulley Guard
Visual Warning Disk
Rear Rubber Guarding
Front Assist Wheels
Rev: Mar2011
Front Discharge Rubber Guard
ou are familiar with all of the components and |
efore attempting to use your mower, make sure|
ave read the manual. J
STANLEY ® Brush Mower
5
Page 10

AssemblyInstructions 36BS,36BDS
Step 1: Front Assist Wheel Assembly
The mower is shipped in a steel shipping rack (see
adjacent photo). Note: Some mowers are shipped with
the front wheels pre-assembled.
A. Remove the rack by removing the front mounting
bolt.
B. Remove packaging materials surrounding the front
skid wheel and remove the bolt. Retain the bolt,
spacer, nut and bushing for future use.
C.
Remove the fastener holding the bolt to the steel
shipping rack. Retain the nut and bolt for future use
in the mower assembly process.
D. Remove the mower from the steel shipping rack.
E.
Slide the front skid wheel into the mount. Position
the wheel with the spacer toward the center of the""""
mower and the wheel as close to the deck edge as
possible.
Secure the wheel in place with the bolt and
hardware that is provided with the wheel.
G.
Follow the same procedure for the second
front skid wheel.
Rev: Mar2011
STANLEY® Brush Mower
6
Page 11

Step 2: Mower Assembly Instructions
A. Attach handle bars using the upper hole
position setting. Using this hole position sets
the handle bars several inches lower. Use the
lower hole position raising the handle bar
location by several inches for comfort, if
necessary. These hole positions can also be
used for adjusting the handle bar location for
operators of different heights and arm lengths.
Select the height that is most comfortable for
you.
B.
Reconnect the four (4) connecting rods from
the control panel to the chassis pivot points as
shown in the picture to the right. The rod
connections are secured with an initial preset
for the upper hole position (lower handle bar
position). If the lower hole position (upper
handle bar position) is used, the rod
connections must be adjusted.
AssemblyInstructions 36BS,36BDS
C.
Should the pivot ends on the connecting rods
be rotated during assembly, minor adjustments
may be required to achieve full travel on each
control handle. The control handles located
directly on top of the handle bars should
have full travel forward and stop
approximately 1/8-inch before the V-plate
strikes the handle bar. This positioning
provides full forward speed and the correct
restricted speed in reverse. Make minor
adjustments to the position of the threaded
connecting rod attachment to achieve this
control positioning.
V-plates
Rev: Mar2011
STANLEY® Brush Mower
7
Page 12

AssemblyInstructions 36BS,36BDS
Step 3: Wire Harness Assembly and Connections
The pre-wired handle bar assembly has a total of four
(4) connections. Routethe wire harness as shown in
the top right photo and make the following
connections indentified by number in the other
photos:
1. Route the smaller, white, 2-pin connector through
a hole in the chassis and connect it to the blade
activation safety switch 2-pin connector.
2. Connect the larger, 5-pin connector to the
connector atthe rear of the engine.
3. Connect the black wire to a ground lug located on
the back or side ofthe engine.
4. If equipped, attach the yellow wire to the bottom
of the starter motor solenoid on the engine, with
the positive (red) battery cable.
Attach the positive (red) and ground (black) battery
terminal wires to the battery to provide power to the
electric starter.
Note: Battery ground should beto the engine block.
Once all connections are made, use the provided
black wire-ties to strap the wire harness into place
permanently to the handle bars and chassis.
Step 4: Throttle and Choke Cable Connections
The throttle and choke are shown inthe adjacent
photo. See instructions for connecting them to the
engine in the Engine Owner's Manual provided.
Rev: Mar2011
STANLEY® Brush Mower
8
Page 13

AssemblyInstructions 36BS,36BDS
Step 5: Fuel Tank Connections
Locate the fuel tank on the fuel tank bracket with the recessed
area pointing toward the rear so any spills drain away from the
engine. Align the fuel valve in the center of the clearance hole.
Place the fuel tank straps into position, wrapping them around the
tank and the bracket.
Once the fuel tank and straps are in place, securely tighten the
straps using the bolts provided. Next, firmly attach the fuel line to
the fuel valve nipple. Tighten all connections to ensure the'
firm and secure so the fuel system is tightly attached.
WARNING I
GASOLINE IS HIGHLY FLAMMABLE AND EXPLOSIVE. FUEL
LEAKS, A LOOSEFUELTANK, ORA LOOSEFUELVALVE CAN LEAD
TO SEVEREINJURY ORDEATH. ENSUREALL CONNECTIONS ARE
SECUREAND INSPECT THOROUGHLY FORANY POTENTIAL
LEAKS IN THE FUELSYSTEM. IFYOU FIND A LOOSECONNECTION
ORA LEAK, MAKE AN IMMEDIATE REPAIR ORASK FOR
ASSITANCE FROM A PROFESSIONAL MECHANIC ORSERVICE
CENTER.
Step 6: Brake Set-up
1. Set the brake bar 3/4-1inch from thetire.
Note: Verify tire pressure.
Do not exceed the
recommended 24 PSI
maximum.
.
With the brake pivot
leaning slightly
forward, install the
washer and pin.
Rev: Mar2011
3. Slide the brake handle to the bottom of the slot then
connectthe brake _tto the brake handle.
. Slide the brake handle to
the Set position to clamp
the brake bar againstthe
tire.
Note: If more or less brake
force is necessary or desired,
repeat the procedure, changing the gap in Step 1.
STANLEY® Brush Mower
9
Page 14

Operating Instructions 36BS,36BDS
Starting the Engine
DANGER [
DANGER: Exhaust contains poisonous carbon
monoxide, a colorless and odorless gas. Breathing
exhaust can cause loss of consciousness and may
lead to death. Do not operate the engine in a
confined space where dangerous carbon monoxide
fumes can collect.
NOTE: Be sure to add fresh unleaded gasoline and fill
the engine with manufacturers recommended motor oil
before starting your mower.
. Make sure the shut off
valve, located at the bottom
ofthetank, isinthe ON
position.
2. Make sure the brake is set.
3. Make sure the blade control lever is in the OFF
position.
4. Pull CHOKEif necessary.
5. Turn the key clockwise to the START position and
allow itto return to the ON position when the
engine starts.
6. When the engine starts to run and the key returns
to the ON position, push CHOKEoff.
Operating the Mower
1. Make sure the brake has been
moved to the OFFPosition.
2. Push down and hold the operator
presence control levers on the
handle bar with both hands.
3. The forward and reverse levers are
spring loaded to the
neutral position.
4. To drive the mower
forward, slide both
hands slightly back on
the handle bar and
gently squeeze the
forward levers toward
the handle bar. The forward speed is directly
proportional to the degree these forward levers are
moved toward the handle bar.
5. To turn the mower left, either release some
pressure onthe left lever (decreasing the speed of
the left wheel), increase the pressure of the right
lever (increasing the speed of the right wheel), or
both. The degree of the turn is directly proportional
to the amount of movement of these levers.
6. To turn the mower right, perform the lever
movements described in step 5 above with the
opposite levers.
7. To stop the forward motion of the mower, release
the forward levers. The spring loaded feature of the
hydrostatic drive returns the levers to the neutral
position and stops the mower.
8. To drive the mower backwards, slide both hands
slightly forward on the handle bar and gently press
the reverse levers toward the handle bar.
9. When in the neutral position, the hydraulic system
prevents the mower from moving easily. However,
on agrade, the mower can move very slowly (with
the engine off or running). Be sure to setthe
manual parking brake any time the mower is left
unattended or is being transported.
10. To physically move the mower when the engine is
NOT running, disengage the hydrostatic drive units.
Rev: Mar2011
STANLEY® Brush Mower
10
Page 15

Operating Instructions 36BS,36BDS
Disengaging Hydrostatic Drive Units
Before physically moving the mower when the engine is
NOT running, the hydrostatic drive units need to be
disengaged into free-wheel mode.
To disengage these hydro units:
1. Remove the hydro tool stored under the hydro unit.
.
Use the hook on the hydro tool to pull the hydro release
pin back and out. Repeat on
the other side. It may be
necessaryto bump the
hydro carrier forward for
easier free wheeling.
CAUTION! Never bump, hit or
push the actual hydros.
To return to operation mode:
1. Slide the hydro tool through
the hydro tensioner. Pull
until the pin sets. Repeat on
the other side. If the pin
partially sets, tap the pin.
2. Replace the hydro tool to
storage under the hydro unit.
Return to Neutral
If the mower creeps or will not stop as desired when
the handles are in neutral position, adjustments are
necessary.
CAUTION: Be sure the engine is OFF before you
open the hydro access panel.
1. Remove the bolts to
access hydro panel.
.
Using an 8ram
wrench, reach through
the bottom of the hydro
panel to the return-to-
neutral set pin bolts.
Loosen bolts on the
side that needs
adjusting.
.
Be sure the brake is inthe OFFposition. In a safe
operator position, start the engine.
4.
With the engine running, slowly move the handle
on the side needing adjustment until that side
comes to a complete stop. If the mower creeps
forward, pull handle in reverse, If the mower
creeps backward, pull the handle forward.
.
When the mower stops moving completely the
hydro is in the neutral position.
.
Turn off the engine.
7.
Slowly tighten the bolts without moving the plate.
8.
With the bolts tightened, move to a safe operator
position and start the engine.
.
If the creep has returned, repeat the process.
Multiple iterations may be required.
Rev: Mar2011
DANGER ]
DANGER! Make certain the engine comes to a
complete stop before putting your hands in the
access panel.
10. Reinstall hydro access panel.
STANLEY® Brush Mower
11
Page 16

Cutting Brush
Operating Instructions 36BS,36BDS
I
WARNING
Thoroughly inspect the area where you plan to use the
mower. Look for items such as stones, sticks, wire, and
other foreign objects. If struck bythe mower, these and
other objects may become projectiles that could lead to
serious injury or death. Clear area of all debris.
Keep people and pets at a safe distance.
DANGER
DANGER! Do not operate the mower with defective
guards, shields, or without the safety devices securely
in place.
1. When the mower is in position on the area to be
mowed, hold the operator presence control down: /
with one hand.
2. With the other hand, SLOWLY push the blade
control lever forward to the ON position.
S
3. Slowly, and evenly, engage the forward and
reverse levers and begin mowing. To stop moving,
ease up on the levers or simply let go of the
controls.
4. To stop the blades, pull the blade control lever back
to the OFFposition.
WARNING--THE BLADES MAY TAKE UPTO 1.5
MINUTES TO STOP TURNING. DO NOT LEAVE THE
OPERATOR'SZONE OFTHE MOWER UNTIL AFTERTHE
VISUALWARNING DISK HAS STOPPED COMPLETELY.
Rev: Mar2011
STANLEY® Brush Mower
12
Page 17

Operating Instructions 36BS,36BDS
Removingthe Blades
I
Beware of the cutting edges on the blades.
The rotation of one blade may cause the other
blade(s) to rotate. Always wear work gloves
NOTE: Some of these steps require two people.
To change, sharpen, or service the blades in any way,
it is not necessary to remove the spindle shaft and
blade carrier. Follow these steps if you are only
removing the blades:
1. Park the mower on a level surface, with the ignition
switch off, the key removed, and the blades
disengaged. Also, disconnect the spark plug wires
from the spark plugs and ground them against the
engine to prevent inadvertent starting. Block the
rear wheels to prevent accidental rollback.
2. Remove the pulley guard and visual warning disk.
3. Remove the blade nut access cover located near
the blade pulley.
4. Using a socket, extension, and pull handle remove
the blade pivot retaining nut.
5. Remove the blade pivot. It may
be necessary to tap the pivot
out of the blade carrier. Note:
If tapping is necessary,
replace the nut on the blade
pivot, without the locking
washers, about half the
thickness of the nut. Place a
block of wood or other flat
surface between the hammer and blade pivot and
nut so the impact is flat. ONLY impact the nut, not
the threads of the pivot.
6. Remove the blades and pivots from underneath the
mower.
7. Perform the desired blade
service. Ifyou are replacing the
blades, replacing the pivots is
also recommended.
8. Replace the carrier protector,
pivots, and blades making certain the
keys are inserted in the pivots as they
were removed. You will need assistance
to start the nuts on the pivot bolts
through the access hole.
Rev: Mar2011
CAUTION
when handling blades.
9. Tighten the blade pivot nuts properly.
10. Refastenthe access hole cover to the deck to
prevent debris from entering underneath the guard.
11. Inspect the work done to the blade system to make
certain everything is properly secured. Note:
Check to be sure blades rotate freely.
12. Replace the mower guard and the visual warning
disk and secure both properly.
13. Startthe engine and blades safely and properly. If
any unusual noises or vibrations are present, SHUT
THE MOWER B0WN IMMEBIATELY.
REPLACETHE BLABE SYSTEM IF ANY PART APPEARS
TO BEW0RN ORBAMA6EB IN ANYWAY. B0 NOT
USETHE MOWER WITH ANY PART OFTHE BLABE
SYSTEM BAMA6EB. BLABES MUST BE REPLACEB IN
PAIRS TO PREVENTVIBRATION.
To disassemble the blade carrier, spindle shaft, and
spindle, follow steps 1through 6 to remove the blades
and then proceed with the following additional steps:
1. Inserta pipe or rod through the access hole and
the blade carrier hole.
2. Loosen the spindle shaft retaining nut on the top of
the pulley. Have an assistant hold the pipe or rod
upright while loosening the bolt. B0 NOT allowthe
rod to tilt and become jammed from the blade
carrier turning motion.
3. Raise the front end of the mower using a jack and
secure the mower with jack-stands.
4. Remove the spindle shaft retaining nut. You will
need to hold the shaft on the bottom side.
CAUTION: The blade carrier is heavy. When the nut
is removed the blade carrier can slide out of the
spindle easily.
5. After servicing and inspecting the spindle, replace
the carrier and spindle shaft, and start the nut on
top to prevent the carrier from falling out. This will
require two people.
6. Place the pipe back through the access hole, and
tighten the spindle shaft retaining bolt.
7. Using a jack, lower the brush mower back to the
ground.
STANLEY® Brush Mower
13
Page 18

General Maintenance 36BS,36BDS
The Importance of Maintenance
Regular maintenance is essential to ensure your brush
mower continues to deliver safe and high-quality
performance.
To help you properly care for your brush mower, the
following pages include a recommended maintenance
schedule, routine inspection procedures, and simple
maintenance procedures using basic hand tools.
Maintenance is the responsibility of the owner and must
be performed regularly. More difficult service tasks or
tasks that require special tools are best handled by a
recommended service technician or other qualified
mechanic.
The maintenance schedule described on page 15
applies to mowers used under normal operating
conditions. If you operate your brush mower under
severe conditions, such as sustained prolonged use or
high-temperature operations, or use it in unusually wet,
dusty or rocky conditions, consult your servicing dealer
for recommendations applicable to your individual
needs and use.
Be sure to use genuine STANLEY mower replacement
parts when servicing your mower to assure the best
quality, safety and performance.
Need Help? Parts, Service and Technical Assistance
Call: 1-919-550-3259 www.mower911.corn
Fuel
I DANGER
DANGER: Gasoline is highly flammable and
explosive. Do not add fuel while the engine is
running or is hot. Keep open flames, sparks, and
heat away from the fuel and store fuel in containers
specifically designed for that purpose. Add fuel
outdoors only and if the fuel is spilled, do not start
the engine. Manually push the mower away from the
spill and wipe up immediately.
Refer to the Engine Owner's Manual for the type of fuel
to use.
A fuel shut off valve is located on
the bottom of the fuel tank. It is
recommended that the fuel be shut
off when transporting between job
sites and when storing the mower
for extended periods of time.
Engine Oil
CHECKENGINE OIL BEFOREEACHUSE. Refer to the
Engine Owner's Manual for the type of oil to use, oil
change intervals, and the proper procedures to check
and change oil.
I
CAUTION: Before making any adjustments and/or
servicing to your STANLEY mower, make sure the
mower is on a level surface, with the ignition switch off,
the key removed, and the blades disengaged. Also,
disconnect the spark plug wires from the spark plugs
and ground them against the engine to prevent
inadvertent starting.
If you are performing adjustments or maintenance after
operating the mower, allowthe unit to cool since heat
build up could cause severe burns.
Tire Pressure
Incorrect tire pressure may cause the mower to pull to
one side and/or result in uneven cut. Use caution when
filling the tires. NEVER exceed the recommended 24 PSI.
Air Filter
Refer to the Engine Owner's Manual for the
recommended maintenance.
CAUTION
I
Blades
I
CAUTION: Always wear work gloves when performing
blade maintenance and beware of the cutting edges.
Be sure the engine is off, the key removed, andthe
spark plug wires are disconnected from the spark
plugs to prevent accidental contact.
Inspect blades on a daily basis for nicks, bends, and
excessive wear. If the blades are worn, cracked, bent,
or damaged, replace them before using the mower.
Choose genuine STANLEY mower replacement blades
to ensure quality and performance. (See page 12 for
blade removal instructions.)
When sharpening the blades, sharpen onlythe cutting
edges and try to maintain the original angle of the blade.
Do not make the cutting edge razor sharp. Remove the
same amount from each side of the blade so that
balance in maintained.
CAUTION
I
Rev: Mar2011
STANLEY® Brush Mower
14
Page 19

Item
Procedure
Maintenance Schedule 36BS,36BDS
i i;i;; ;i;;;i;; ;i;; ;i;;;i;;;i;; ;i;;;i;;;i;;;i;; ;i;;;i;;;i;;;i;; ;i
Break-in Every 8 hrs Every 4e hrs Every lee hrs Every 2ee hrs
first 5 hrs) (daily) (weekly) (Bi-weekly) (monthly)
Belts
Blades
Engine Air Filter
Engine Cooling Areas
Engine 0il
Engine 0il Filter
Engine Spark Plug
Inspect (adjust if
needed)
Inspect and Sharpen
Inspect (see Engine
Owner's Manual)
Clean (see Engine
Owner's Manual)
Check (see Engine
Owner's Manual)
Change (see Engine
Owner's Manual)
Change (see Engine
Owner's Manual)
Inspect (see Engine
Owner's Manual)
____________i____________________________________________________________________________________________________________________________
Fuel Filter
Fuel Line
Replace
Check
Grease Fittings Refer to page 18
Hardware
Check for proper
tightness
Mower Main Frame
Safety Interlock System
Tires
Remove debris from
under belt cover
Check Operations
and Switches
Check Air Pressure
Rev: Mar2011
STANLEY® Brush Mower
15
Page 20

Service Adjustments 36BS,36BDS
I DANGER
DANGER: Before making any adjustments or servicing
your brush mower, make sure the brush mower is on
level ground, the blades are disengaged, the key is
removed, the engine is off and the spark plug wires are
disconnected from the spark plugs to prevent
accidental contact. If maintenance or adjustments are
being performed after operation of the brush mower,
allow the unitto cool since heat build up could cause
severe burns.
Engine-to-Blade Belt Adjustment
1. Remove the deck cover and move the blade control
lever onthe control console to the ON position.
2. With approximately 10 pounds of pressure, push
the clutch pulleyto tighten the belt. The linkage
should stop approximately 1 inch before contacting
the stop bolt. Ifthe belt moves more than ½-inch,
move the blade control lever back to the OFF
position.
3. Loosen locking nut.
4. Rotate turnbuckle until desired tension is achieved
(approximately 1inch from stop bolt)..
5. Tighten locking nut when finished.
6. Replace deck cover.
Engine-to-Hydrostatic Drive Belt Adjustment
1. The engine-to-hydrostatic drives belt is located
underneath the rear deck. The belt should move
approximately 5/16-inch to 3/4-inch with three (3)
to five (5) pounds of pressure applied to the belt
midway between the transmission pulley and the
engine output shaft pulley.
When installing a new belt, the tension should be
higher than the running tension. It is not necessary
to keep the belt atthe greatest (smallest
deflection) tension during normal operation.
Important: Do not over-tighten the belt.
.
To adjust the
belt, turn the
nut on
threaded
tension rod
found on the
right, rear
corner of the
mower.
.
Do not over-tighten. This could cause serious
damage to the hydraulic drive systems.
Locking nut
Rev: Mar2011
STANLEY® Brush Mower
16
Page 21

Service Adjustments 36BS,36BDS
Safety System Adjustments
I WARNING
WARNING: Do not bypass, modify, alter, or
disconnect the safety system. Make sure that the
safety interlock system is fully operational each time
before mowing. Failure to do so could present
danger to you and others around you.
There are generally three (3) ways to adjust the
sensitivity of a safety switch. The most appropriate way
to adjust each switch depends upon the application,
location, and the nature of the problem you are
encountering.
Hydro System Maintenance
The hydrostatic drives are coupled to the output drives
with a multi-v belt. Occasional retensioning of the belt
may be necessary. If performance decreases or hydro
control handles are activated and the wheels do not
turn, inspect the multi-v belt.
1. Remove the hydro
access panel.
2. Loosen jamb nut at
hydro tensioner.
3. Tighten nut to tighten belt. Belt tension should be
1/16-inch deflection under seven (7)of pressure.
4. Once tension is set, tighten the jamb nut and
reinstall the hydro access panel.
Method 1: Adjust location using the mounting
sc rews
1. Move the blade control lever to OFF.
2. Loosen screws (A) until safety switch (B) moves
freely.
3. Slide safety switch (B) firmly against blade bell
crank(C).
4. Tighten screws (A) and check that safety switch (B)
does not move.
Method 2: Adjust location using adjustment nuts on
switch body
1. Loosen locking nut(C) on the sensor shaft.
2. Adjust switch location by turning the nuts.
3. Tighten the locking nut when proper adjustment is
achieved.
Method 3: Relocate mounting holes
In rare cases where the components become
misaligned, the easiest means of adjusting the location
is to elongate the existing holes or add new holes to
achieve atighter fit between the activation rod and the
sensor.
Rev:Mar2011 STANLEY ® Brush Mower
I DANGER I
DANGER: Before making any adjustments or servicing
your brush mower, make sure the brush mower is on
level ground, the blades are disengaged, the key is
removed, the engine is off and the spark plug wires are
disconnected from the spark plugs to prevent
accidental contact. If maintenance or adjustments are
being performed after operation of the brush mower,
allow the unitto cool since heat build up could cause
severe burns.
17
Page 22

Lubrication Points 36BS,36BDS
To ensure proper lubrication of moving parts, GXi recommends that you lubricate the following components with a high-
quality, EP2 high-temperature-based grease or equivalent. Should the conditions of operation be more severe than
normal, the lubrication interval may need to be shortened. GTR/OPE grease is the recommended lubricant.
.
Lubrication Point Locations
STANLEY mowers have four (4)lubrication points.
Note: The brush mower spindle bearings are both
sealed top and bottom to prevent contaminants from
entering the spindle. There is no service point on the
spindle.
Lubricate after every 50 hours of usage
Mower deck idler pulley
brackets (1location)
Blade activation rod supports (2 locations: one at
the support under the fuel tank bracket and one
adjacent to the engine.)
.
Hydraulic drive
system idler
puller support (1
location)
Deck Interchange
Note: Be sure the hydro unit is disengaged (see page 11)
before interchanging the optional attachment deck.
Remove the deck cover
by releasing the three
(3) T-handles.
.
Disconnect the
clutch tension rod
connecting the deck
to the chassis.
3. Remove the belt from
the engine pulley.
.
Using an 18 mm
wrench or socket
remove the four (4)
deck retaining bolts.
.
Tilt handle bars forward and pull chassis from deck.
6.
Reverse the steps to reconnect the optional
attachment deck. Refer to the owner manual
supplied with the optional deck for assembly and
operation instructions.
Rev: Mar2011
STANLEY® Brush Mower
18
Page 23

Troubleshooting 36BS,36BDS
Problem
Engine will not start
Possible Causes Solution
1. Keyinthe OFFposition
2. Insufficient fuel in the tank
3. Air bubble in the fuel line
4. Fuel valve in OFFposition
5. Choke not ON
6. Choke linkage out of adjustment
7. Low engine oil
8. Blade control in ON position
9. Loose spark plug wire
10. Fouled spark plug
11. Plugged or dirty air filter
12. Bad gasoline
13. Plugged or dirty fuel filter
14. Safety switches out of
alignment or loose
15. Dead battery (electric start
models)
1. Turn keyto ON position
2. Add gasoline
3. Prime engine or shake bubble out
4. Turn valve ON
5. Turn choke ON
6. Refer to Engine Owner's Manual
7. Add engine oil
8. Push lever to OFFposition
9. Tighten wire or connections
10. Clean or replace the plug
11. Clean or replace the air filter
12. Brain and replace the gasoline
13. Replace the fuel filter
14. Adjust or tighten switches (p. 17) read warnings!
15. Recharge or replace battery
To test whether the blade activation safety switches
are a contributing factor to the engine not starting,
depress the Operator Presence Switch on the handle
bars while trying to start the engine. If engine starts, a
safety switch adjustment is required
Engine will not keep
running/quits
Engine stops when blades
are engaged
Blades do not turn 1. Broken belt
Belts squeal when blades 1. Incorrectbelttension
are engaged 2. Excessive belt wear
1. Water in the fuel
2. Loose safety switch
3. Fuel valve is OFF
4. Dirty fuel filter
5. Dirty air filter
6. Low engine oil
1. Loose safety switch
2. Belt tension too high
3. Blades jammed with foreign
material
2. Loose belt
3. Blade activation linkage out of
adjustment.
1. Drain and replace fuel
2. Adjust switch (p. 17)
3. Turn fuel valve ON
4. Replace fuel filter
5. Clean or replace air filter
6. Add engine oil
1. Adjust switch (p. 17)
2. Adjust belt(p. 16)
3. Remove foreign material
Note: Firmly pushing the blade control lever into the
OFFposition to ensure the safety switch is fully
engaged can sometimes resolve this problem.
1. Replace belt
2. Adjust belt(p. 16)
3. Adjust linkage(p. 13)
1. Adjust belt tension
2. Replace belt
Belts slip when blades are 1. Incorrect belt tension
engaged 2. Excessive belt wear
Rev: Mar2011
1. Adjust belt tension
2. Replace belt
STANLEY® Brush Mower
19
Page 24

Troubleshooting 36BS, 36BDS
Problem Possible Causes Solution
Mower will not move 1. Brake ON 1. Release brake on control panel
forward or reverse 2. Bypass levers pulled out 2. Ensure bypass pins are retracted
Cannot move mower 1. Bypass not engaged 1. Pull left and right bypass pins and set them in slots
when the engine is off in the chassis (p. 11)
Engine is overheating 1. Dirt inthe fuel line 1. Replace fuel filter and flush tank
2. Dirty air filter 2. Clean or replace the air filter
3. Low engine oil 3. Add engine oil
4. Fouled spark plug 4. Replace spark plug
5. Misuse of the mower 5. Mow slower, wait for grass to dry out
6. Dull blades 6. Sharpen cutting blades
7. Spindle bearing failure 7. Take in for service
Grass not cut smoothly or
cleanly
Mower always pulls to
one side
1. Dull blades
2. Mowing too fast for conditions
3. Grass is wet or bent over
4. Blades are bent
5. Tire pressure not equal
6. Beck is set at uneven heights
7. Blades are set upside down
8. Excessive grass and debris
build up underneath the deck
1. Controls out of adjustment
2. Transmission failure
1. Sharpen blades
2. Slow down while cutting
3. Let grass dry to stand up
4. Replace blades in sets
5. Add air pressure to low tires
6. Set deck at equal heights
7. Take blades off and install correctly
8. Clean out debris
1. Adjust controls (p. 11)
2. Take in for service
Rev: Mar2011
STANLEY® Brush Mower
20
Page 25

LimitedWarranty & Service 36BS,36BDS
Length of Warranty: *(from the date of original retail purchase)
Products Covered by this
Warranty
Engine
Transmission
Mower frame
Belts, Tires, Battery
Attachments
*LENGTHOFWARRANTY:Batteries supplied with applicable products as standard, original equipment are covered bythis warranty
for a period of90 daysfrom the date oforiginal retail product purchase. Consumablepartssuch as oil, spark plugs,filters, and
bladesare not covered bythis warranty.
To Qualifyforthis Warranty
The product must be purchased inthe United States from a dealer authorizedby GXiOutdoor Power, LLCto sell those products. This
warranty appliesto first retail purchaser/owner during the applicable warranty time period. NOWARRANTYREGISTRATIONIS
NECESSARYTOOBTAINWARRANTYONSTANLEYPRODUCTS.SAVEYOURPROOFOFPURCHASERECEIPT.
What GXiOutdoor Power Will Repair or Replace under Warranty
GXiwill repair or replace, at its option, any part that is provento be defective in material or workmanship under normal use during
the applicable warranty time period subject to the exclusions stated herein. This warranty isvoid ifthe owner fails to follow the
prescribed maintenance and operating procedures described inthis manual.This specifically refers to ensuring routine lubrications
and oilchanges are made, that fuel stabilizer isusedwhen the product isstored andthat the product isnot overloaded.
Residential
Manufacturer's warranty
Manufacturer's warranty
Lifetime(original owner only)
90 days
1 yr limited
Commercial Rental
Manufacturer's warranty Manufacturer's warranty
Manufacturer's warranty Manufacturer's warranty
Lifetime (original owner only) 90days
90 days 90 days
1yr limited 30 day limited
GXihas the right to recover warranty administration costs from the owner ifthe root cause of the malfunction is found to beother
than defective material orworkmanship. In particular, this warranty does not cover: contaminants inthe fuel or oil; damagecaused
bynotfollowing the prescribed warnings andoperating practices; failure to follow proper maintenance andstorage procedures; and
physical damagedue to misuse,shipping, handling or storage.
Warranty repairs will bemade without charge for parts andlabor for the first year.
Anything replaced under warranty becomesthe property of GXi. Parts replaced underwarranty will be considered as part ofthe
original product and any warranty on those partswill expire coincident with the original product warranty.
To Obtain Warranty Service
You must take the STANLEYproduct, accessory, replacement part, apparel or the power equipment on which the accessory or
replacement part is installed, and proof of purchase, at your expense,to anySTANLEYservice location inthe United States, who is
authorized to service that product, during the service location's normal business hours. Ifyou areunable to obtain warranty service,
or are dissatisfied with the warranty service you receive, take the following steps: First, contact the managerof the service center
involved; normally this will resolve the problem. However, if youshould require further assistance, write or call the GXiParts&
Service, LLC1-919-550-3259.
Exclusions
This warranty does not cover: normal wear, contaminants in the fuel oroil; damageas a result of use in an application for which the
product was not designed;damagecaused byincorporation or use of unsuitable attachments or parts,unauthorized alteration, or
other misuseand neglector; damage causedby failure to followthe prescribed warnings, operating practices, proper maintenance
and storage procedures; parts affected or damagedby accident and/or collision; damage dueto shipping,handling, storage or any
causes otherthan defects in material orworkmanship of the product.
Disclaimer of Consequential Damage and Limitationof Implied Warranties
GXidisclaims any responsibility for lossof time or use ofthe product, transportation, commercial loss, orany other incidental or
consequential damage.Any impliedwarranties are limited to the duration ofthis written limited warranty.
THISWARRANTYISV01DIFTHEMANUFACTURINGDATEAND THESERIALNUMBERONTHEEQUIPMENTHASBEENREMOVED
0RTHE EQUIPMENTHASBEENMODIFIED.
Rev: Mar2011
i
I t_t,_t_ f_N _N_ 6A_T
STANLEY® Brush Mower
21
 Loading...