

Standard APC-45 Replacement Manual

Provided By
http://www.MyBinding.com
http://www.MyBindingBlog.com
Standard APC45
Programmable
Paper Cutter
Knife Replacement
Guide
1
Lower Cover
Return the knife angle to the
standard position.
- Follow [4-2 Knife Angle Adjustment] in the
operation manual to return the knife angle to the
standard position.
Turn off the power switch.
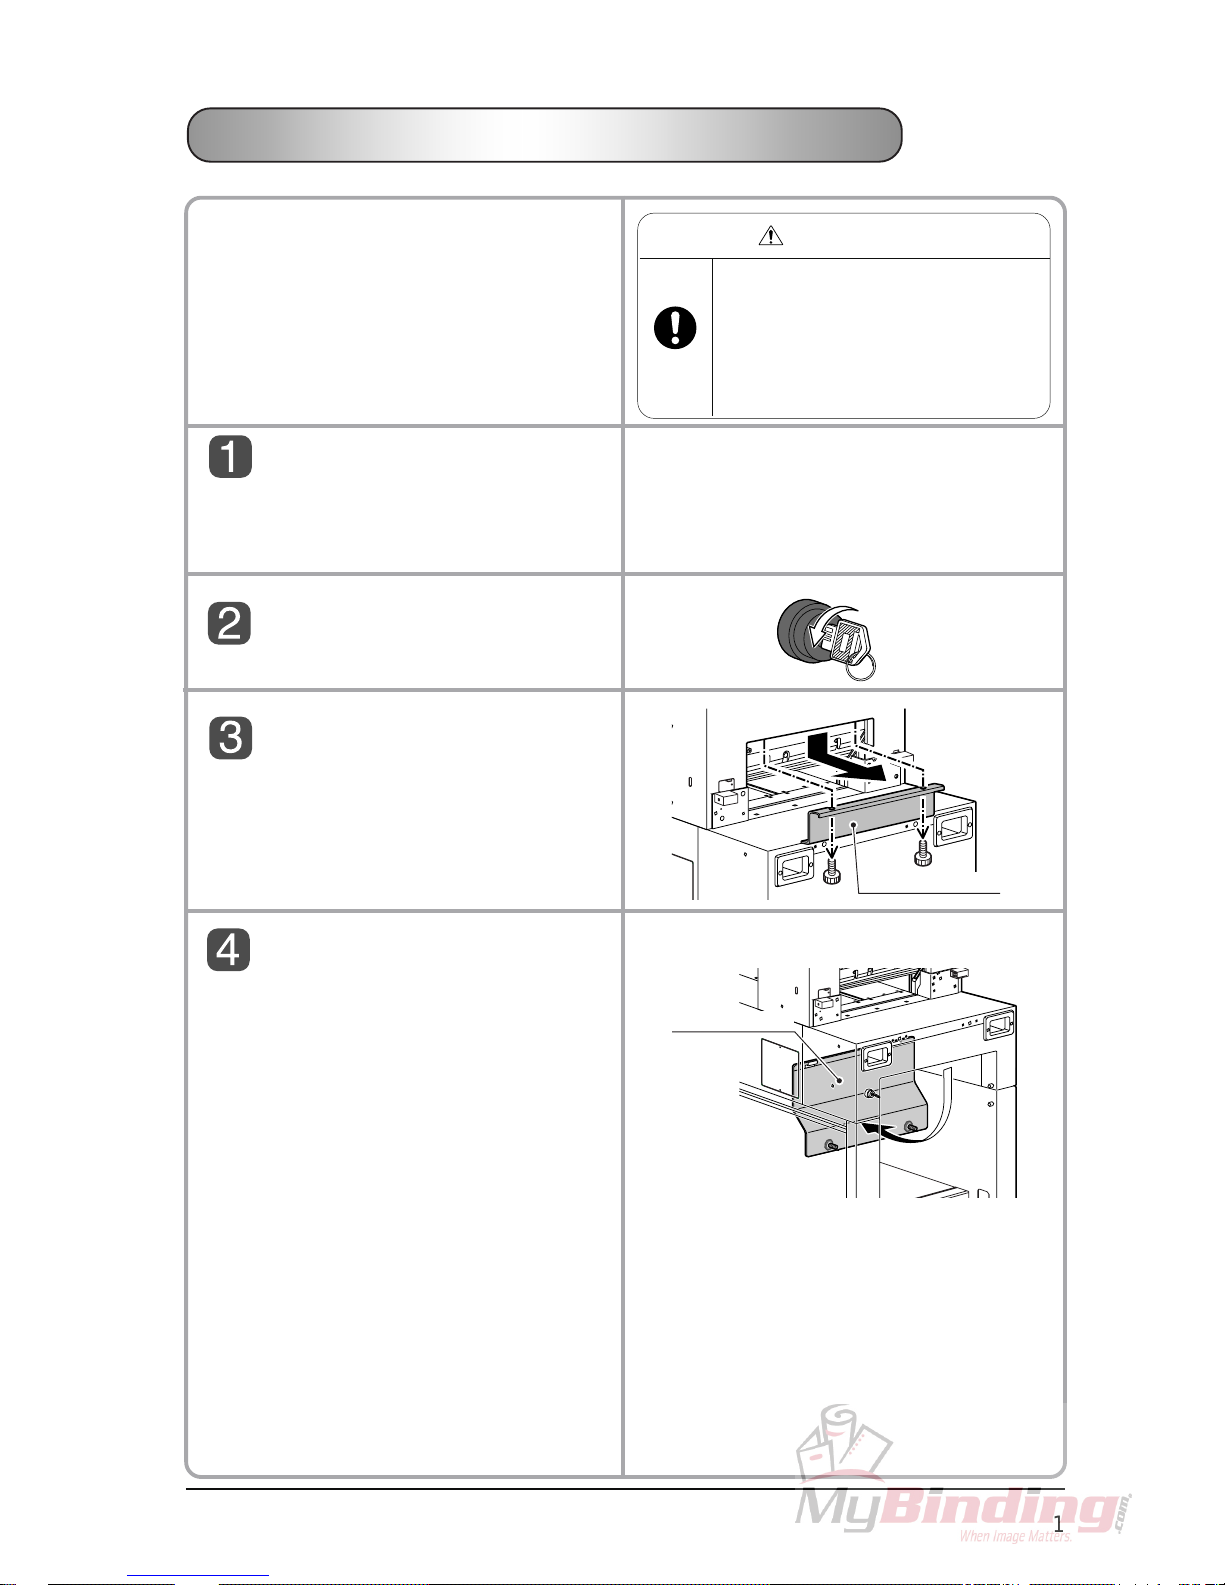
Remove the knife cover.
- Remove two screws and remove the knife
cover.
Open the lower cover.
- Steps 4 through 7 are to return the knife holder
to the standard height so that the knife does not
cut into the cutting stick too deeply when
installing the new knife instead of the resharpened knife.
APC-45 Knife Replacement
- The knife must be replaced by just one
person at a time.
- Wear gloves, and do not touch the knife.
The knife may cause severe personal
injury.
- Be careful for the removed knife. Do not
place the removed knife on the unstable
floor or place where knife edge is exposed.
WARNING
- Knife replacement procedures are shown on
the guide window while selecting the knife
replacing mode.
- Knife replacing mode is selected automatically when the knife cover is removed.
OFF
ON
Knife Cover
2
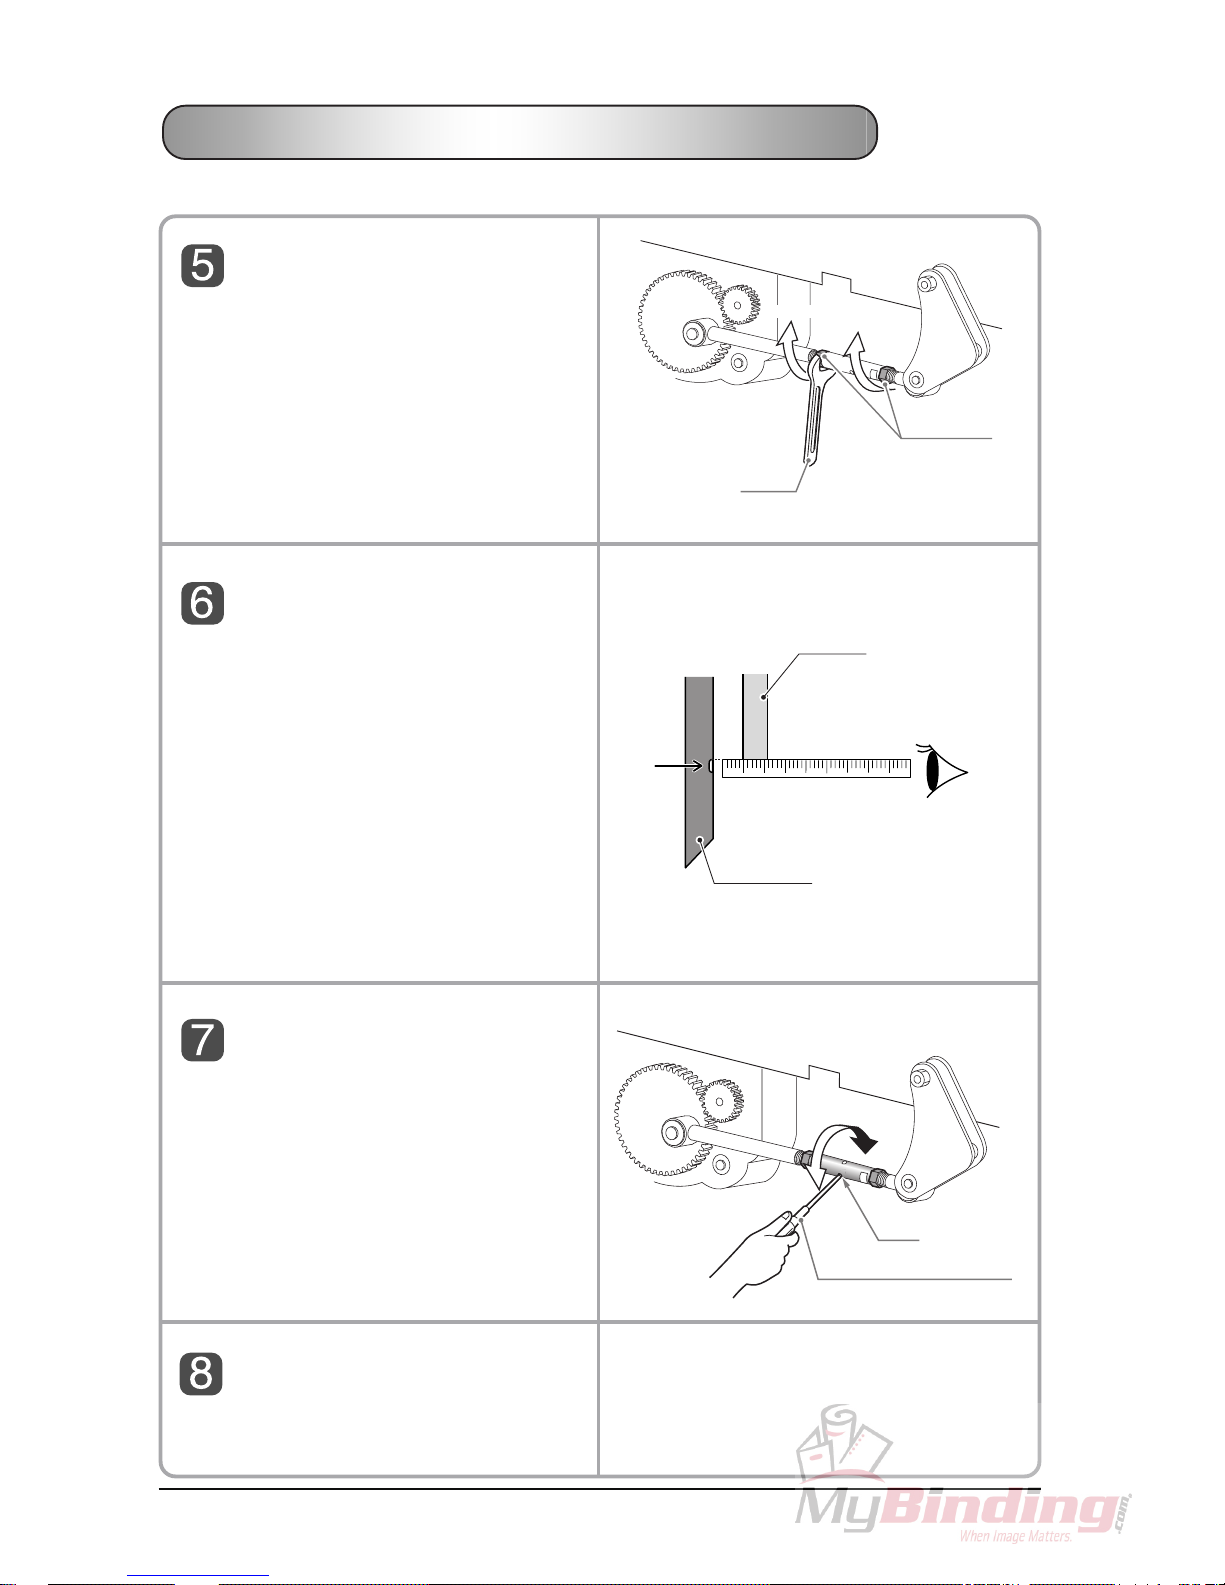
Loosen the locking nuts of knife
height adjusting turn buckle.
- There are two locking nuts.
- The right locking nut is a left-handed screw.
Return the knife holder to the
standard height.
- Adjust so that the white mark on the knife
holder aligns to the bottom of the frame when
you see the mark horizontally.
- Insert the screwdriver (accessory) into the hole
on the turn buckle and rotate it.
Tighten two lock nuts.
Close the lower cover.
APC-45 Knife Replacement
Wrench
Locking Nut
Loosen
Loosen
Loosen
Screwdriver (Accessory)
Hole
Lowers
Knife Holler raises
Side View
Frame
Knife Holder
See horizontally.
Check using the scale.
White
Mark

3
The following procedures show how to remove
the knife.
Turn on the power switch.
- The indication [REPLACE MODE] is shown on
the guide window and then it changes to [LOWER
CLAMP].
Press the cutting buttons.
- Only the clamp lowers and stops.
- The indication [TURN OFF POWER REPLACE
KNIFE] is shown on the guide window
Turn off the power switch.
Screw the knife replacing tools in.
- Screw the knife replacing tools into the screw
holes No.2 and No.5.
WARNING
Tighten the tools by hand as much as
possible. The knife will be supported just
by these two tools when removing the
knife.
APC-45 Knife Replacement
OFF
ON
KNIFE REPLACE MODE
LOWER CLAMP
TURN OFF POWER
REPLACE KNIFE
OFF
ON
Clamp
Knife
Cutting Buttons
NOTE
If the knife replacing tool cannot be screwed
because the screw hole is as shown in the figure
above -
1) Loosen the knife fixing screws,
2) Raise the fixing screw using the box wrench
which is used to loosen the knife fixing screws,
3) Bring out the screw holes and screw the knife
replacing tools in.
Knife
Knife Holder
Knife Replacing Tools
 Loading...