

Stairville MH-X50+ Owner's Manual
Owner‘s Manual
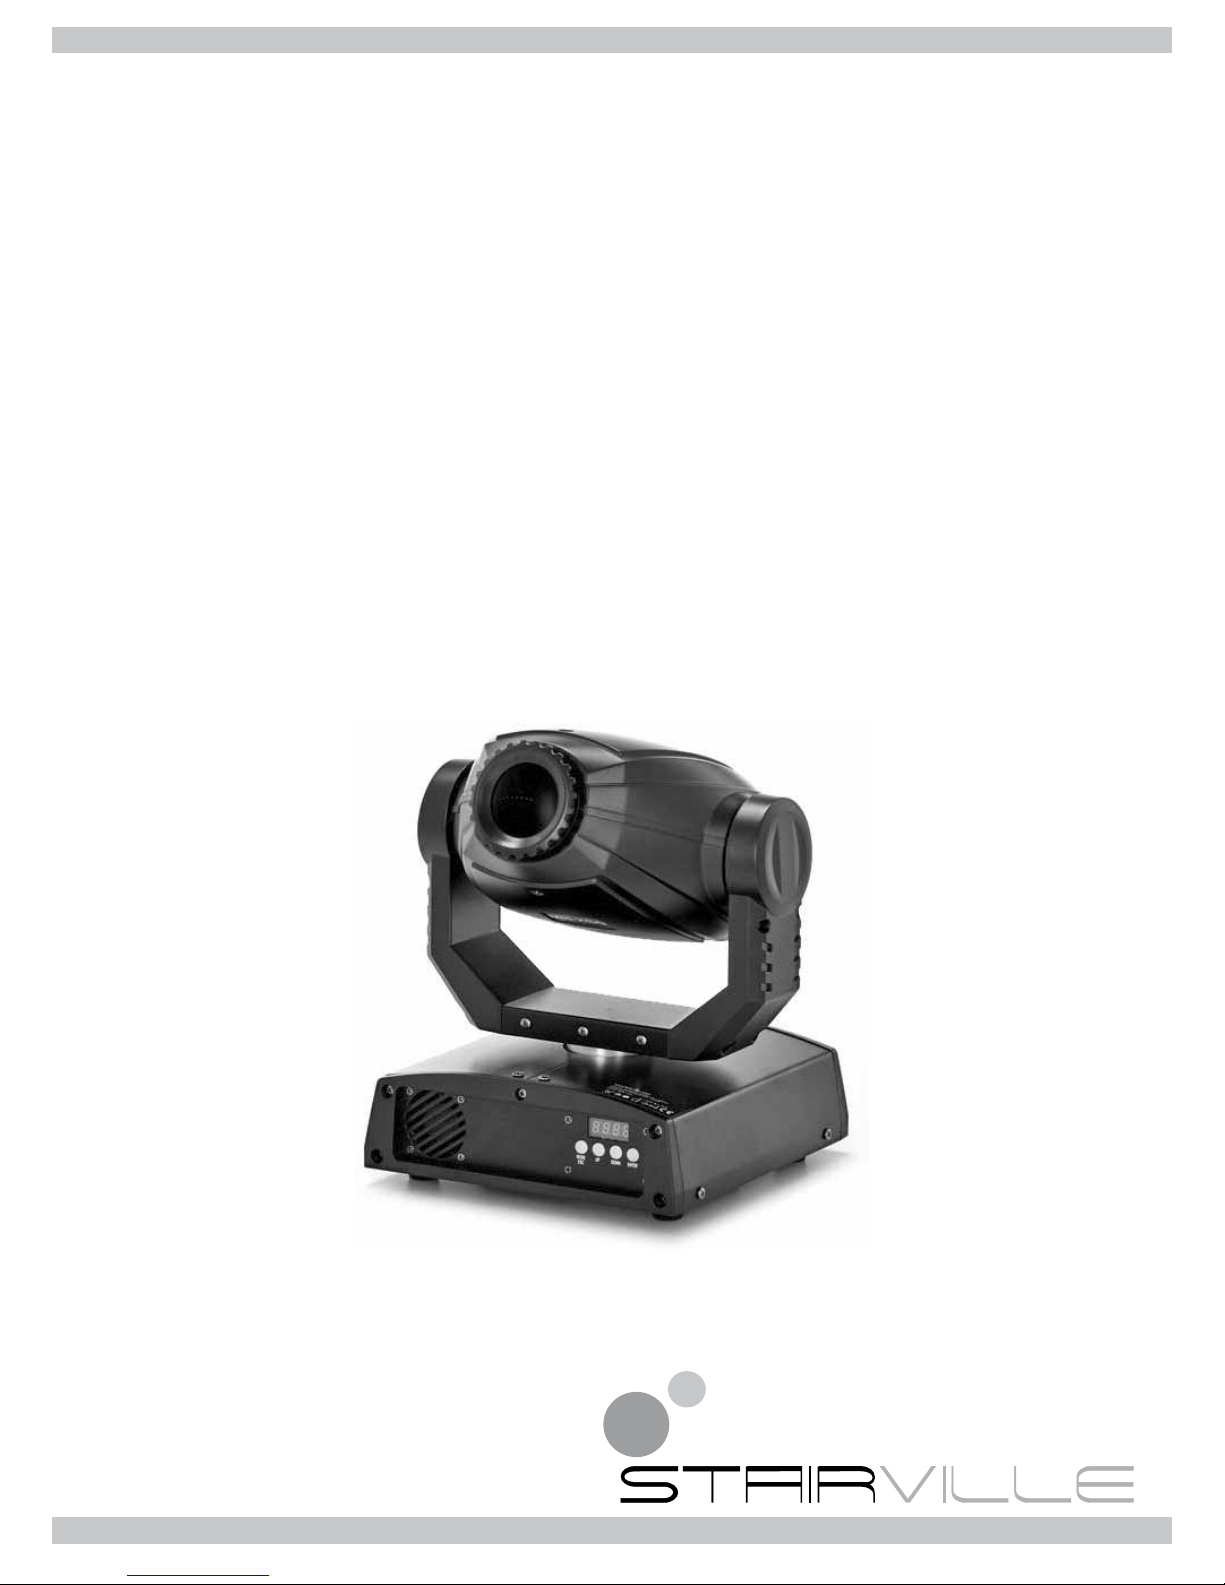
MH-X50+ led spOt
dMX-COntrOlled led spOt MOving Head

MH-X50+ LED Spot
2
Contents
Safety notes ........................................................................................................................................3
Power supply .............................................................................................................................3
Operating conditions .................................................................................................................. 3
Installation ...........................................................................................................................................4
Setup ...................................................................................................................................................5
Connections in DMX mode ........................................................................................................5
Connections in master/slave mode ............................................................................................ 5
DMX connectors ........................................................................................................................5
Components and functions .................................................................................................................6
Front side ...................................................................................................................................6
Rear side ...................................................................................................................................6
Operation ............................................................................................................................................7
Main menu ................................................................................................................................. 7
DMX address .............................................................................................................................7
Operation mode .........................................................................................................................7
Pan inversion .............................................................................................................................7
Tilt inversion ............................................................................................................................... 7
Display inversion ........................................................................................................................7
DMX mode .................................................................................................................................7
Panning range ............................................................................................................................7
Tilting range ...............................................................................................................................8
System reset ..............................................................................................................................8
Load defaults .............................................................................................................................8
Gobos ........................................................................................................................................8
Menu diagram ............................................................................................................................9
Functions in 8-channel DMX mode .........................................................................................10
Functions in 14-channel DMX mode ........................................................................................12
Troubleshooting ................................................................................................................................14
The device does not work, no light and the fan does not work ................................................ 14
No response to the DMX controller ..........................................................................................14
Cleaning ............................................................................................................................................14
Technical data ...................................................................................................................................14
Protecting the environment ...............................................................................................................15
Disposal of the packaging material .......................................................................................... 15
Disposal of your old device ...................................................................................................... 15

www.thomann.de
3
Safety notes
Read all safety warnings and all instructions. Failure to follow the warnings and instructions may result in elec-
tric shock, re or serious injury.
Save all warnings and instructions for future reference.
DANGER
Electric shock caused by high voltages inside!
Within the unit there are areas where high voltages may be present. To reduce the risk of
electric shock do not remove any covers unless the AC mains power cord is removed. Cov-
ers should be removed by qualied service personnel only.
There are no user-serviceable parts inside.
DANGER
Electric shock caused by short circuit!
Always use proper ready-made insulated mains cabling (power cord) with a protective contact plug. Do not modify the mains cable or the plug. Failure to do so could result in electric
shock/death or re. If in doubt, seek advice from a registered electrician.
WARNING
Eye damage caused by high intensity!
Never look directly into the light source.
WARNING
Risk of epileptic shock!
Strobe lighting can trigger seizures in photosensitive epilepsy. Sensitive persons should
avoid looking at strobe lights.
Power supply
Notice
Malfunction or damage to equipment!
Ensure that the input voltage (AC outlet) matches the voltage rating of the product. Failure to do so could
result in damage to the product and possibly the user.
Unplug the unit before electrical storms occur and when unused for long periods of time.
Operating conditions
Always install and use the device in accordance with these instructions.
Notice
Malfunction or damage to equipment!
This device has been designed for indoor use only. Do not expose the device to any liquid or moisture. Do not
install the unit near any direct heat source. Keep the unit away from naked ames.
Do not block areas of ventilation. Failure to do so could result in re.

MH-X50+ LED Spot
4
Installation
You can install the device on the wall, the ceiling or on the ground. A mounting bracket and the required screws
are provided together with the device.
WARNING
Injuries caused by falling parts!
Make sure that the installation complies with the standards and rules that apply in your country.
Always secure the device with a secondary safety attachment, such as a safety cable or a
safety chain.
Notice
Malfunction or damage to equipment!
Do not block the area that is needed for the pan and tilt function.
We recommend to keep an area of at least 300 mm (W) × 300 mm (D) × 400 mm (H) (11.8 in × 11.8 in ×
15.7 in) free of any objects.
The distance between light output and the illuminated surface must be more than 0.5 m (19.7 in).
Ensure also that there is enough room for ventilation.
The ambient temperature must always be below 45 °C (113 °F).
The device can be directly mounted on notinammable construction material.

www.thomann.de
5
Setup
The required connections depend on the operation mode of the device.
Notice
Malfunction or damage to equipment!
For failure-free operation of the DMX chain, use dedicated DMX cables. Never use ordinary microphone cables.
Never connect the DMX output to audio devices such as mixers or ampliers. The voltages used on the DMX
lines may severely damage the audio input circuits.
Connections in DMX mode
Connect the DMX input of the device to the DMX output socket of a DMX controller or another DMX device.
Connect the output of the rst DMX device to the input of the second one, and so on to form a daisy chain.
Always ensure that the output of the last DMX device in the daisy chain is terminated with a 120-Ω resistor.
When the device and the DMX controller are operational, the DMX indicator in the display shows that a DMX
signal is being received on the input.
Connections in master/slave mode
When you a group of devices in master/slave mode, the rst unit will control the other units for an automatic,
sound-activated, synchronized light show. This function is ideal when you want to start a show immediately.
Connect the DMX output of the master device to the DMX input of the rst slave device. Then connect the
DMX output of the rst slave device to the DMX input of the second slave device and so on.
DMX connectors
A female 3-pin XLR connector is used for the DMX output, a male 3-pin XLR connector for the DMX input. The
gure below and the following table show the pin assignment.
3
1
2
1 Ground
2 DMX data (–)
3 DMX data (+)
 Loading...