

Stahlwille multipower MP100-1500 Instructions For Use Manual
7
GB
Instructions for use
1. Intended use
The MULTIPOWER torque multiplier may only be used
for tightening and loosening screw joints. It is not to be
used for lifting loads or for applying a permanent torque,
for example as a tensioning device. We shall not be
held liable for any damage, injury or interruptions
in operations resulting from non-observance of this
operating manual or improper use.
2. Description of the product
and intended use
The MP100-1500 is a compact torque multiplier tool that
enables screw joints to be tightened and loosened when
higher torques (up to 1500 N m) are required and simple
manual force is no longer effective. The MP100-1500
features a torque multiplier ratio of 1:5 and is particularly
well suited to use with fastener sizes between M20
and M30.
This MULTIPOWER tool is constructed symmetrically and
will generate a constant rotary drive motion in 8° steps if
oscillating 60° drive input is applied.
Angle controlled tightening of joints is easily achieved
thanks to the angle scale printed on the tool.
The directions of rotation for tightening and loosening
are marked on the MULTIPOWER tool. To reverse the
direction of rotation, simply turn the MULTIPOWER over.
3. Technical specifications
Max. output torque: 1500 Nm
Max. driving torque: 300 Nm
Torque transmission ratio: 1:5
Gearbox ratio: 5,62:1
Drive: mechanical via
1/2" square drive
Take-off: internal hex drive, size 41
Torque monitoring: with torque wrench
Angle monitoring: angle scale; 8° per
rocking input action
Change of direction: clockwise/anticlockwise
by turning the tool over
Non-return lock: ratchet pawl
Adjustment mechanism: continuous; ratchet
Hex inserts: sizes 30, 32, 36
+1" outer square drive
Max. weight of MULTIPOWER: 1,890 g
Weight of torque absorption arm:550 g
Max. head radius: R35
Dimensions: 165x105x30 mm
Torque absorption arm: 400 mm
(when attached)
4. Safety regulations
This tool has been manufactured in accordance
with all applicable safety regulations. Always use the
MP100-1500 in conjunction with a torque wrench to
provide power input.
The maximum input torque of 300 N m must never be
exceeded as otherwise the tool, in particular its ratchet
and lever mechanisms, may be damaged. Before using
the tools, check carefully to see that it is ready for use
and functioning correctly (refer to Section 6.3):
Warning: Using accessories and inserts other than those
recommended in this operating manual may lead to
malfunctioning of the tool and even cause injury.
Note: Repairs must always be carried out by qualified
experts using only original spares as otherwise there
may be an increased risk of injury to the user.
Never use MULTIPOWER tools or reduction adapters that
are worn or damaged. They must always perfectly fit the
nut or bolt to be tightened or loosened.
Danger: When using the MP100-1500, always wear
protective goggles.
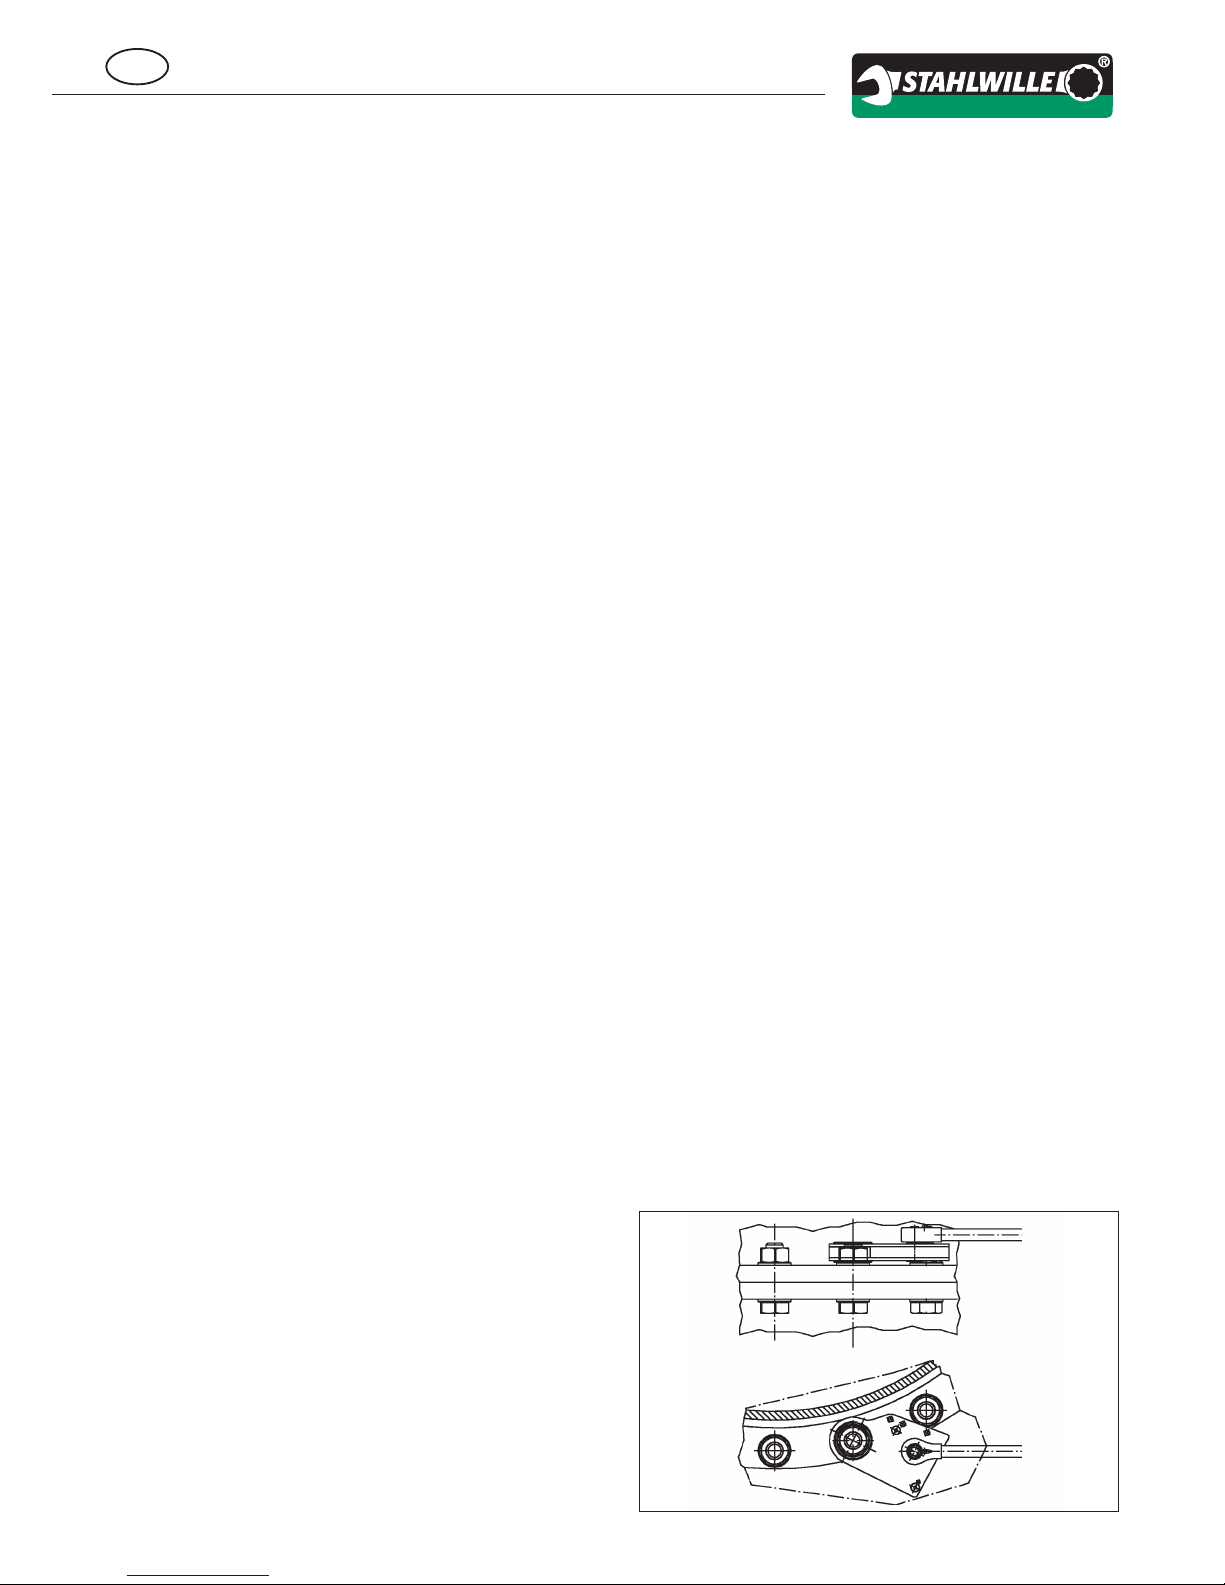
5. Torque absorption
For the torque to be effectively transferred, the
MULTIPOWER must always be steadied. The steadying
action for the MULTIPOWER may be provided by the tool
itself or, for greater distances, using a torque absorption
arm.
Important: Note that the torque wrench will always rotate
in the opposite direction to that of the MULTIPOWER.
Warning: Never steady the MULTIPOWER against parts
that are loose or likely to give. The reactive force from the
MULTIPOWER might cause such parts to break off and
cause injury to people in the vicinity or damage to other
objects.
6. Using the MULTIPOWER
6.1 Analysing the tightening job:
• Tighten or loosen the joint?
• Clockwise or anticlockwise?
• What size is the fastener (M...)?
• What size spanner or insert is needed?
• Is there a suitable steady point for the torque
absorption arm?
• Measure the length of the arm required
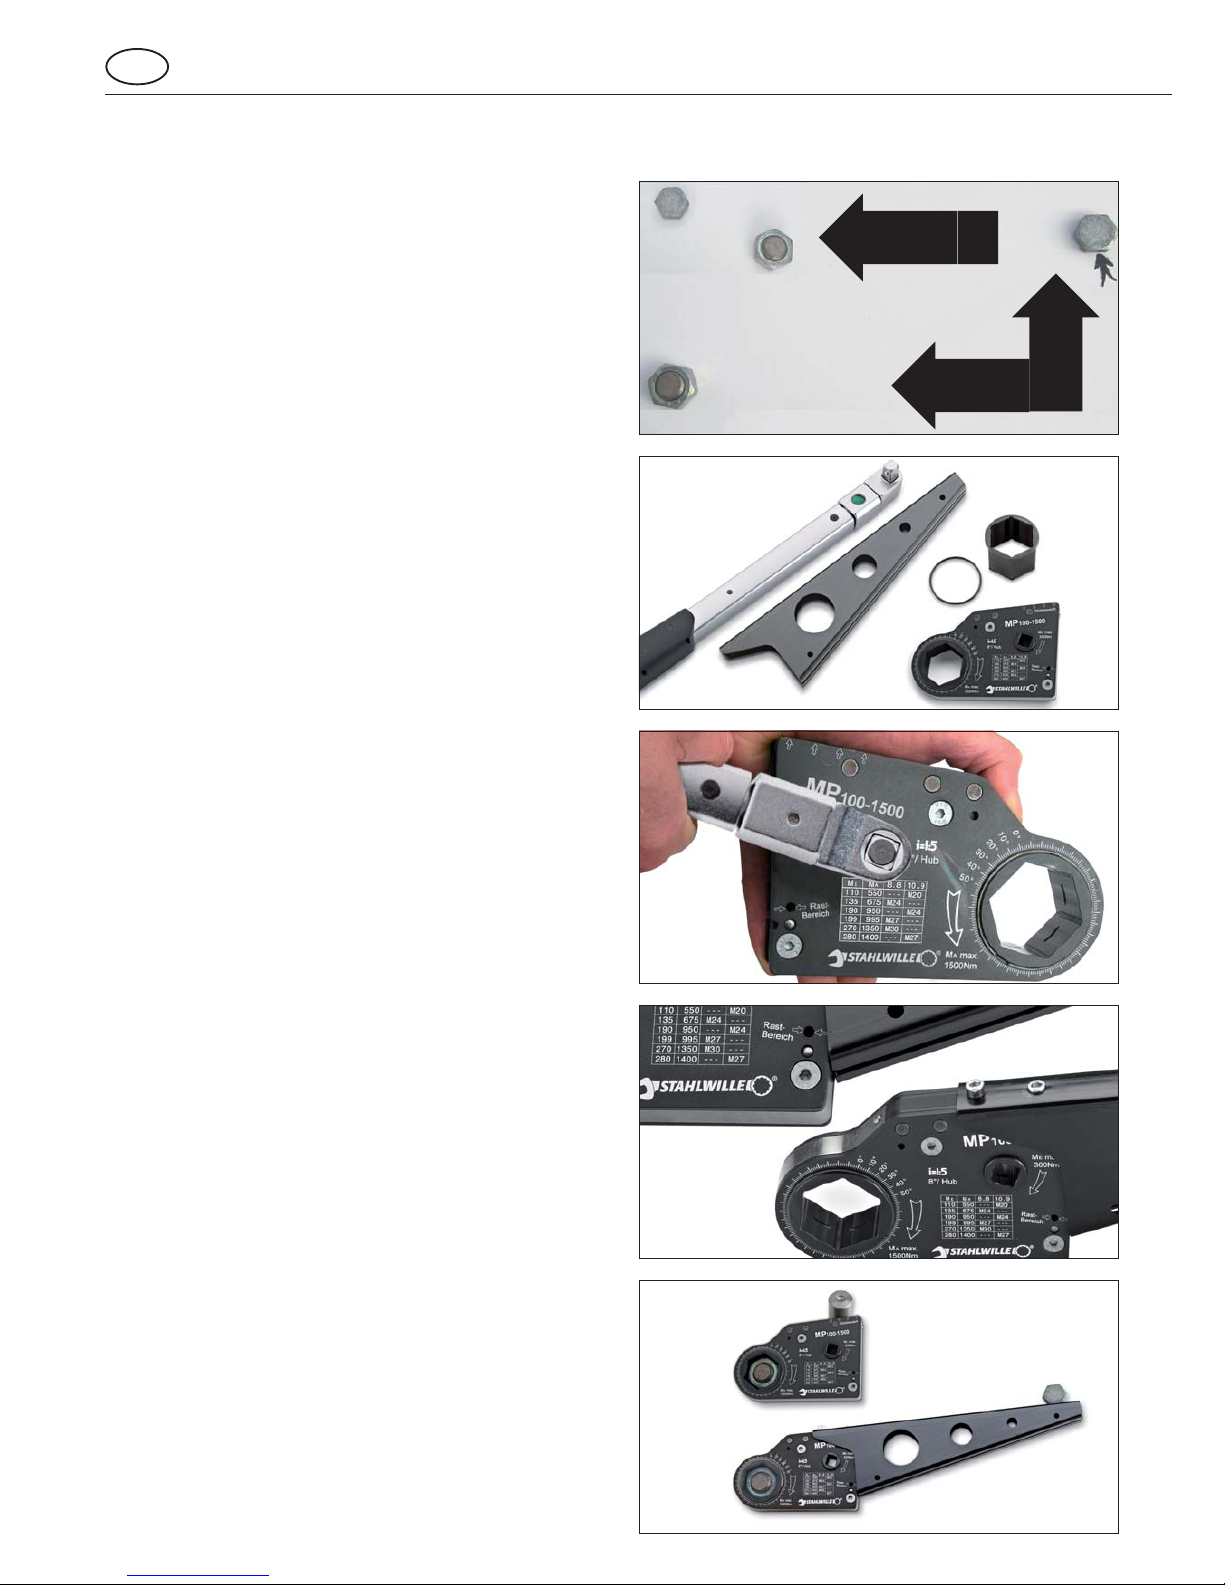
6.2 Get the required accessories together:
• Torque wrench with permanent
1
/2" square drive
• Reduction adapter, if size < 41.
• O-ring to secure the adapter
• Torque absorption arm, if steady distance
exceeds 140 mm.
• If necessary, additional spanner or wrench.
for the other end of a two-ended fastener.
6.3 Functional check of the MP100-1500:
• Check general state of the MP100-1500 torque
multiplier
➩ Any cracks, deformations, wear are not permitted.
• Using a torque wrench, move the drive back and
fore between the endstops (approx. 70°).
➩ Check that take-off wheel action and steps are
smooth.
➩ Oscillating, clearly audible pawl and ratchet
action.
6.4 Fitting the torque absorption arm:
• The arm is only necessary if the steady point is
more than 140 mm from the fulcrum.
➩ Put the torque absorption arm on as shown
and secure with the two M6 screws.
6.5 Positioning the MP100-1500 for
tightening/loosening:
• Place the MULTIPOWER on the fastener the right
way round for the required direction of rotation
(see arrows on housing).
• Swing the MULTIPOWER as far as the absorption arm
endstop (audible click as the ratchet re-engages).
• Set the cut-out value for the torque wrench in
accordance with the printed scale on the MP or the
table in Section 9.
➩ Input torque must be ≤ 300 N m.
• Fit the torque wrench into the input square drive and
fix it in the required position.
Fastener can be
tightened/loosened without
torque absorption arm
Fastener can be
tightened/ loosened without
torque absorption arm
8
GB
Instructions for use
 Loading...