

Page 1
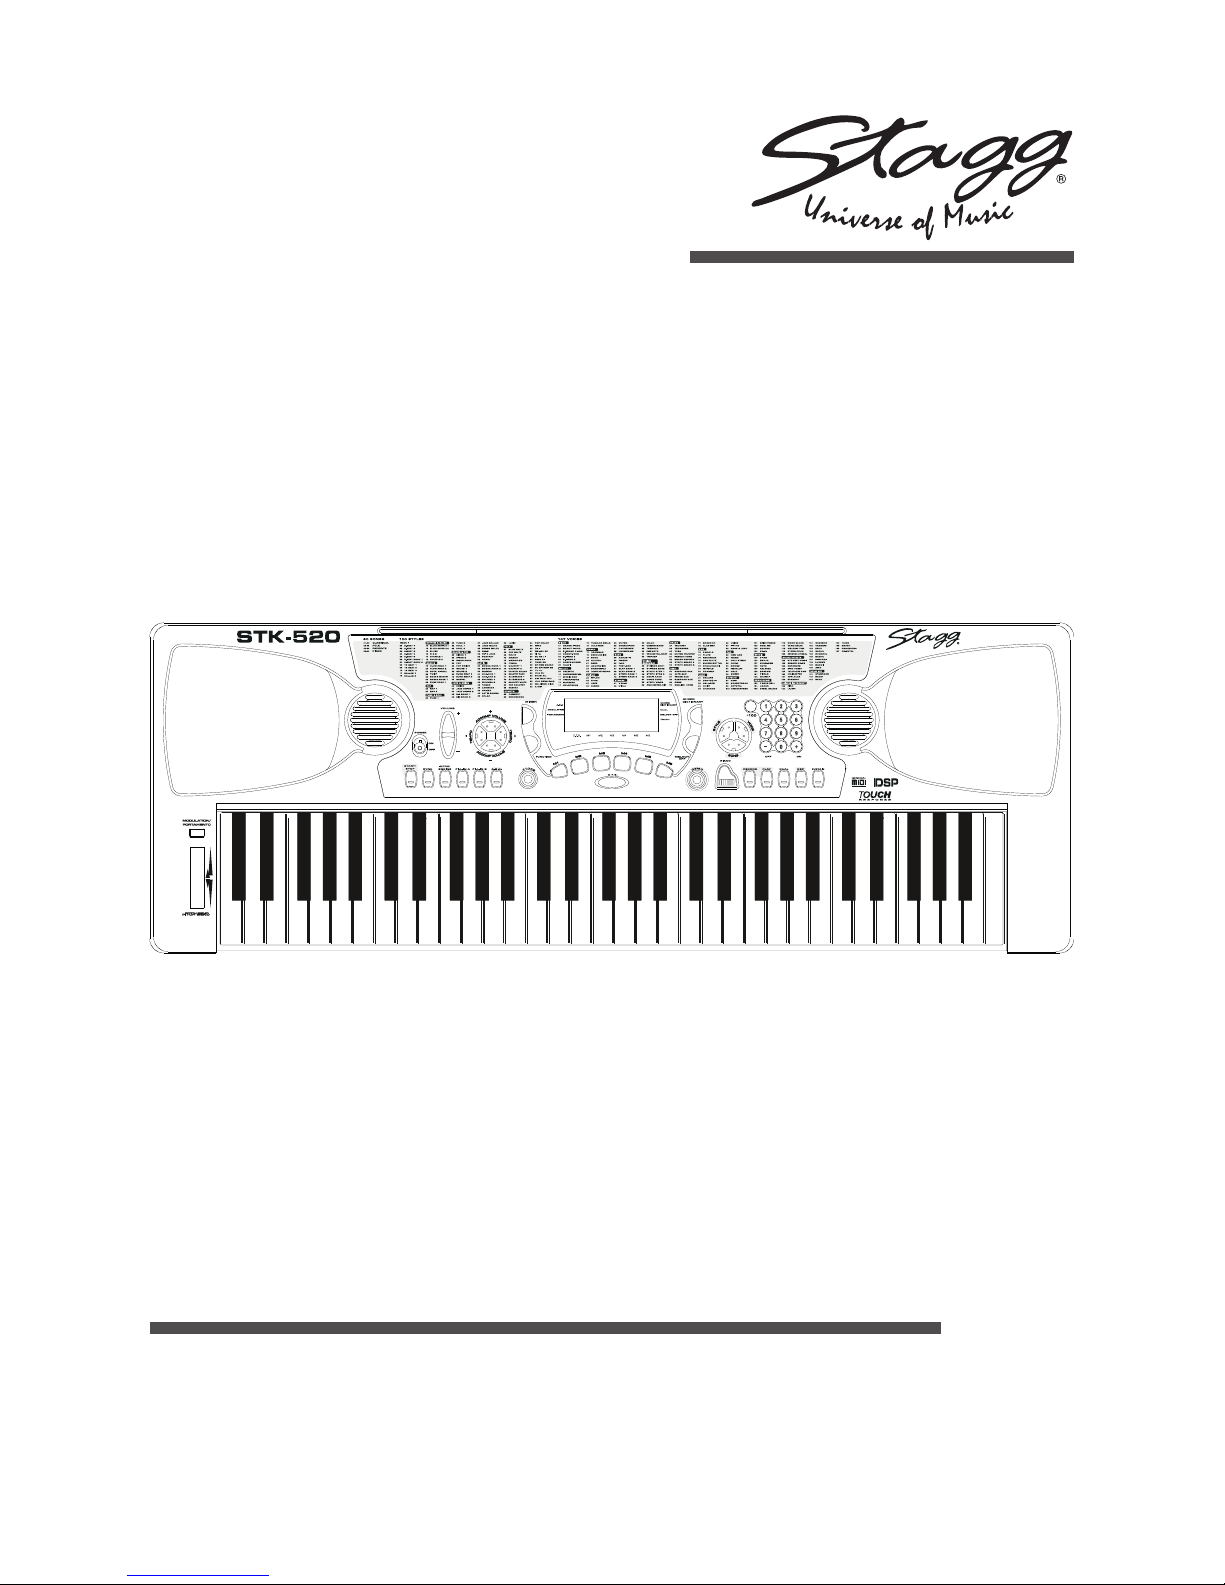
STK-520
16
14
15
Page 2

2
USER MANUAL
STK-520
- Using batteries
- Using the AC adaptor
- The headphones jack
- The sustain jack.
- The Aux. Out jack
- The MIDI IN/OUT
- Listen to a particularly demo song
- Play along with the demo song
- Selecting & playing voices
- Sustain voice effect
- Pitch bend
- Digital Signal Processor (DSP)
AUTO-ACCOMPANIMENT 12
- Selecting a style
- Playing the selected style
- To start the style with introductory pattern
- To stop the with ending phrase
- Use synchro to start the style
- Select the Fill-in and change Style Variation
- Accompaniment Volume
- Auto Bass Chord (A.B.C)
- Set the Tempo
4. Touch Response
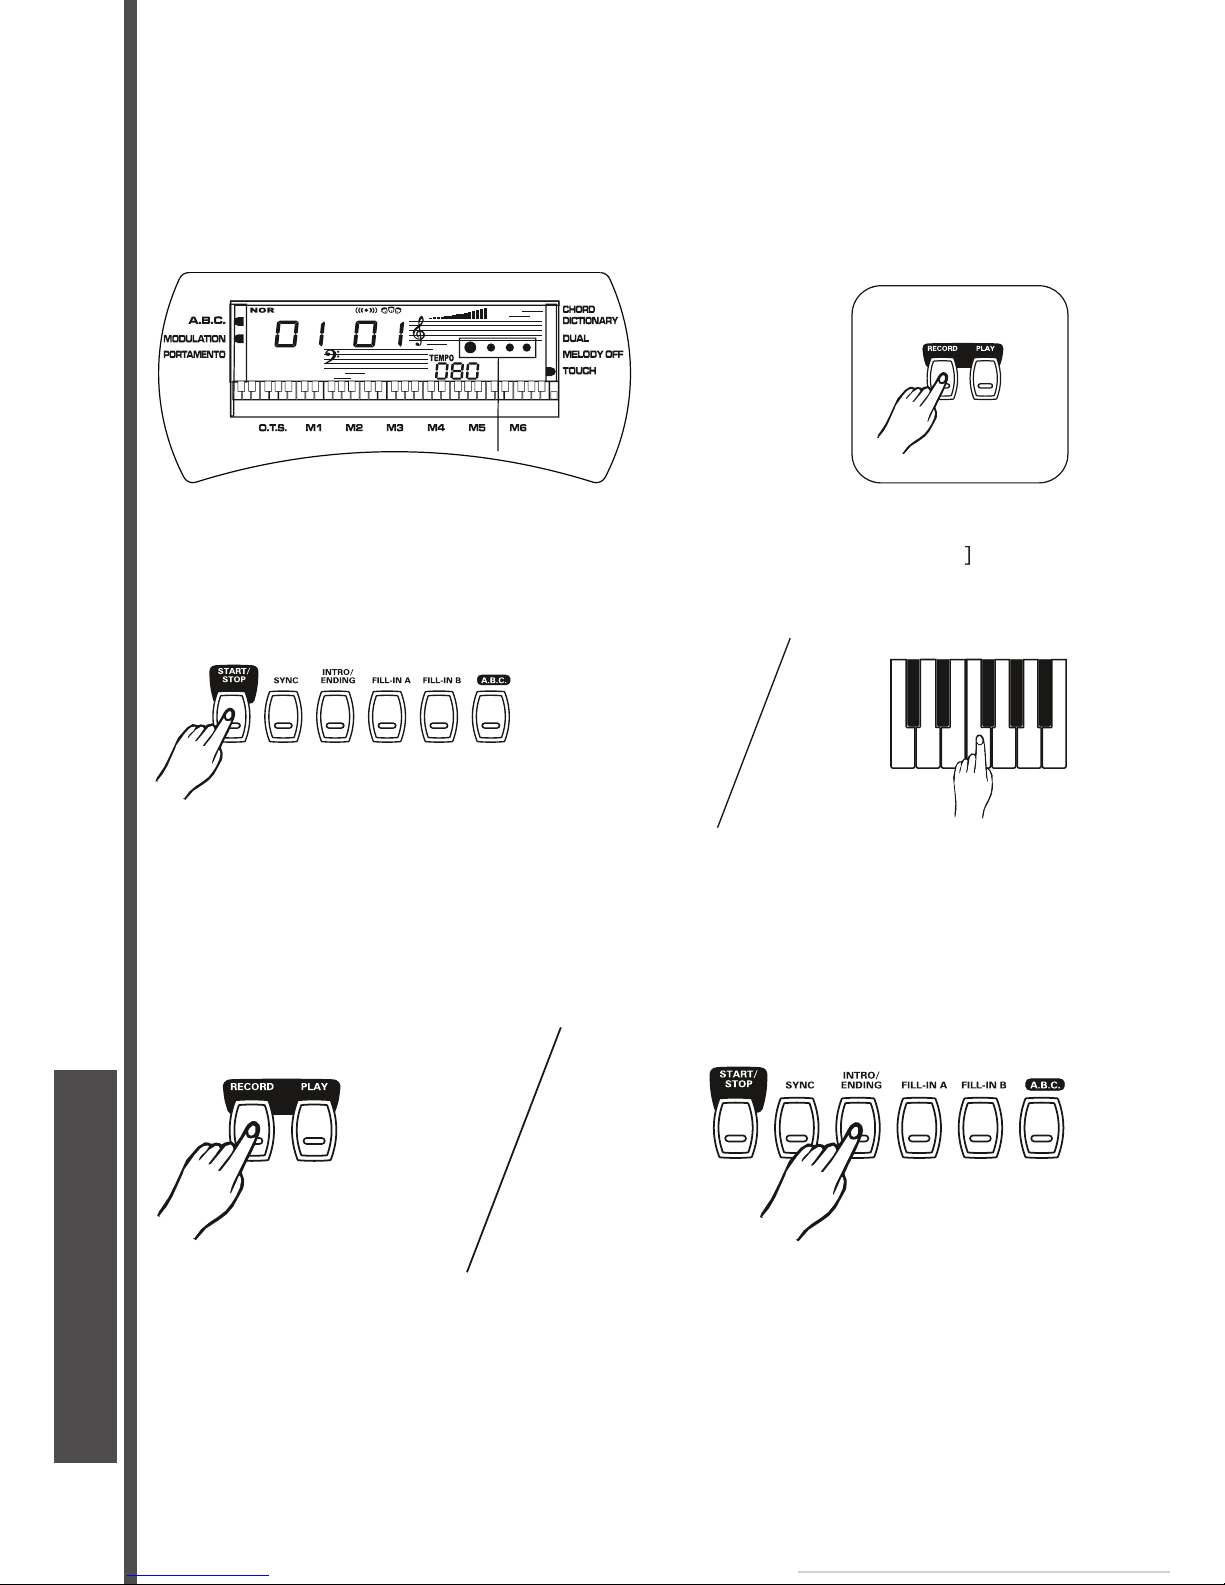
- Getting ready to record
- Start Recording
- Stop Recording
- Playback
Page 3
3
USER MANUAL
16
14
15
1
2
3
4
5
6
7
9
8
10
20
21
22 23
11
12
13
14
15
16
17
18
19
24
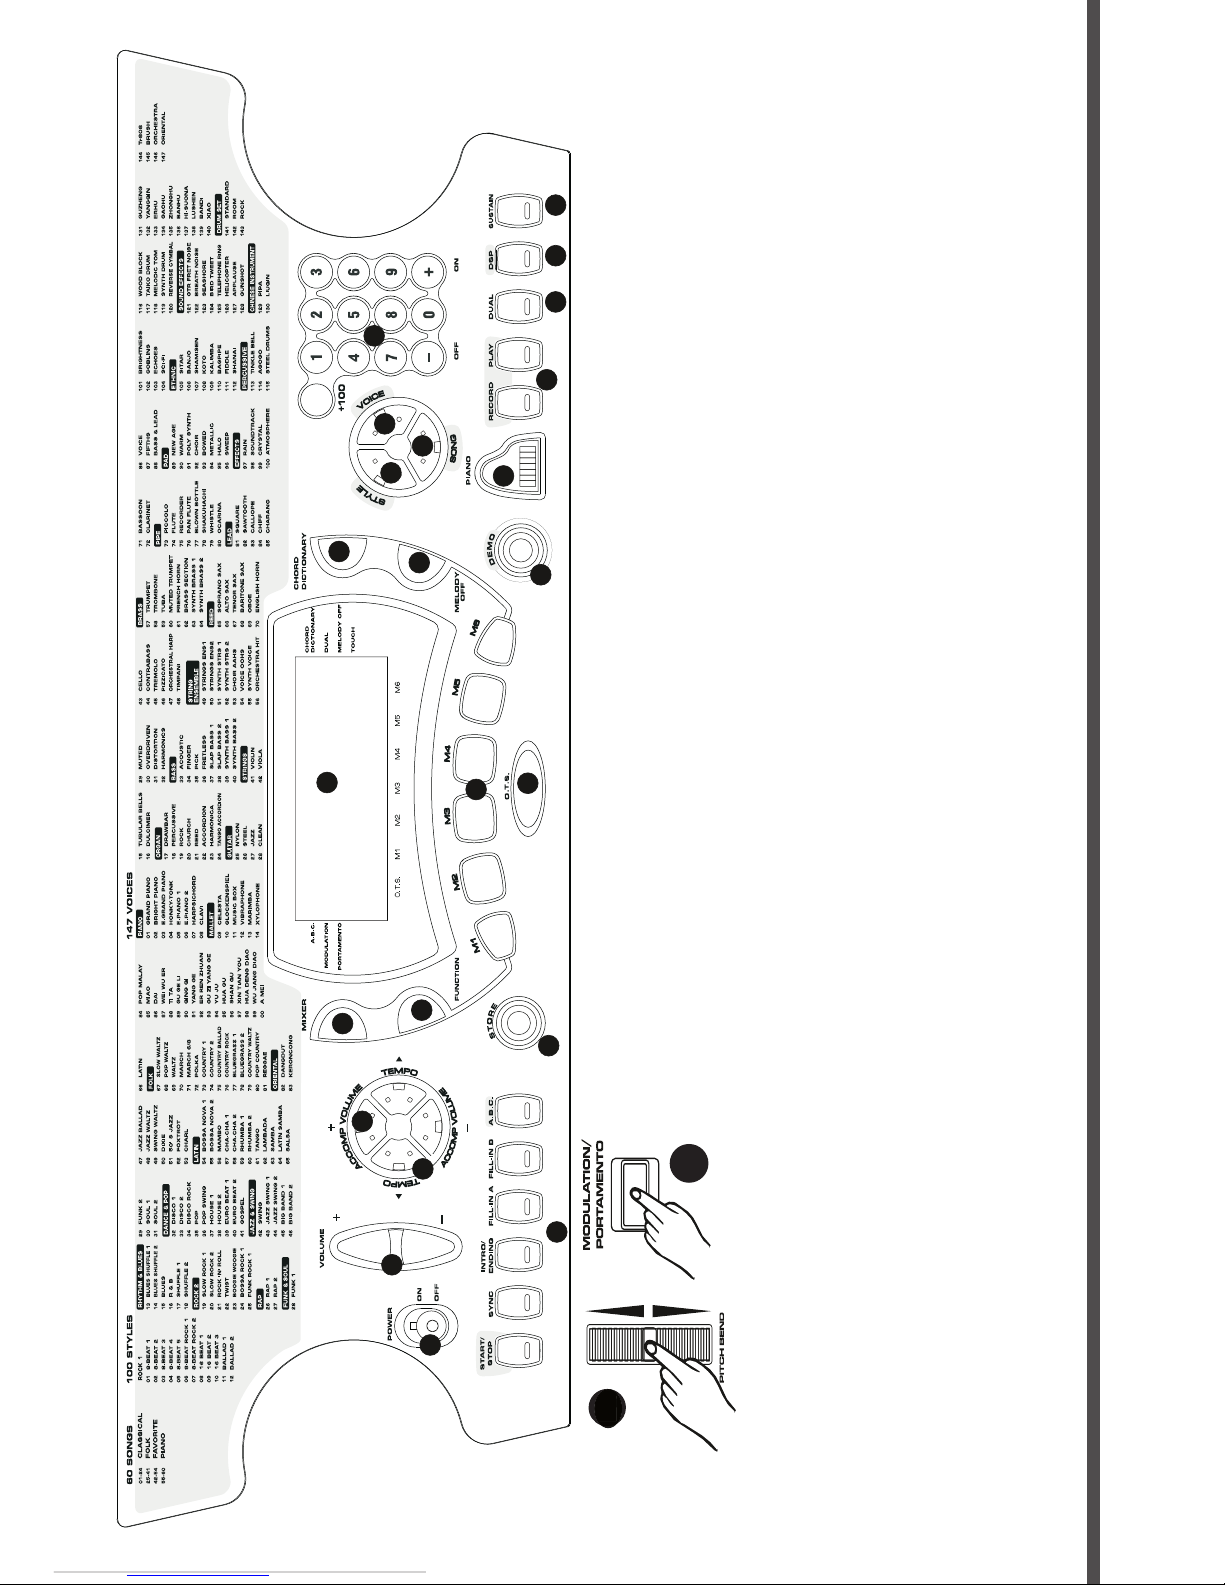
ACCOMP VOLUME +/-
ACCOMPANIMENT
- INTRO/ENDING
- FILL-IN A
- FILL-IN B
- A.B.C.
VOICE
25
24
Page 4
4
USER MANUAL
AUX. OUT JACK
1
2
3
4
5
6
1
2
3
4
5
6
7
8
9
10
11
12
13
14
15
16
17
18
19
20
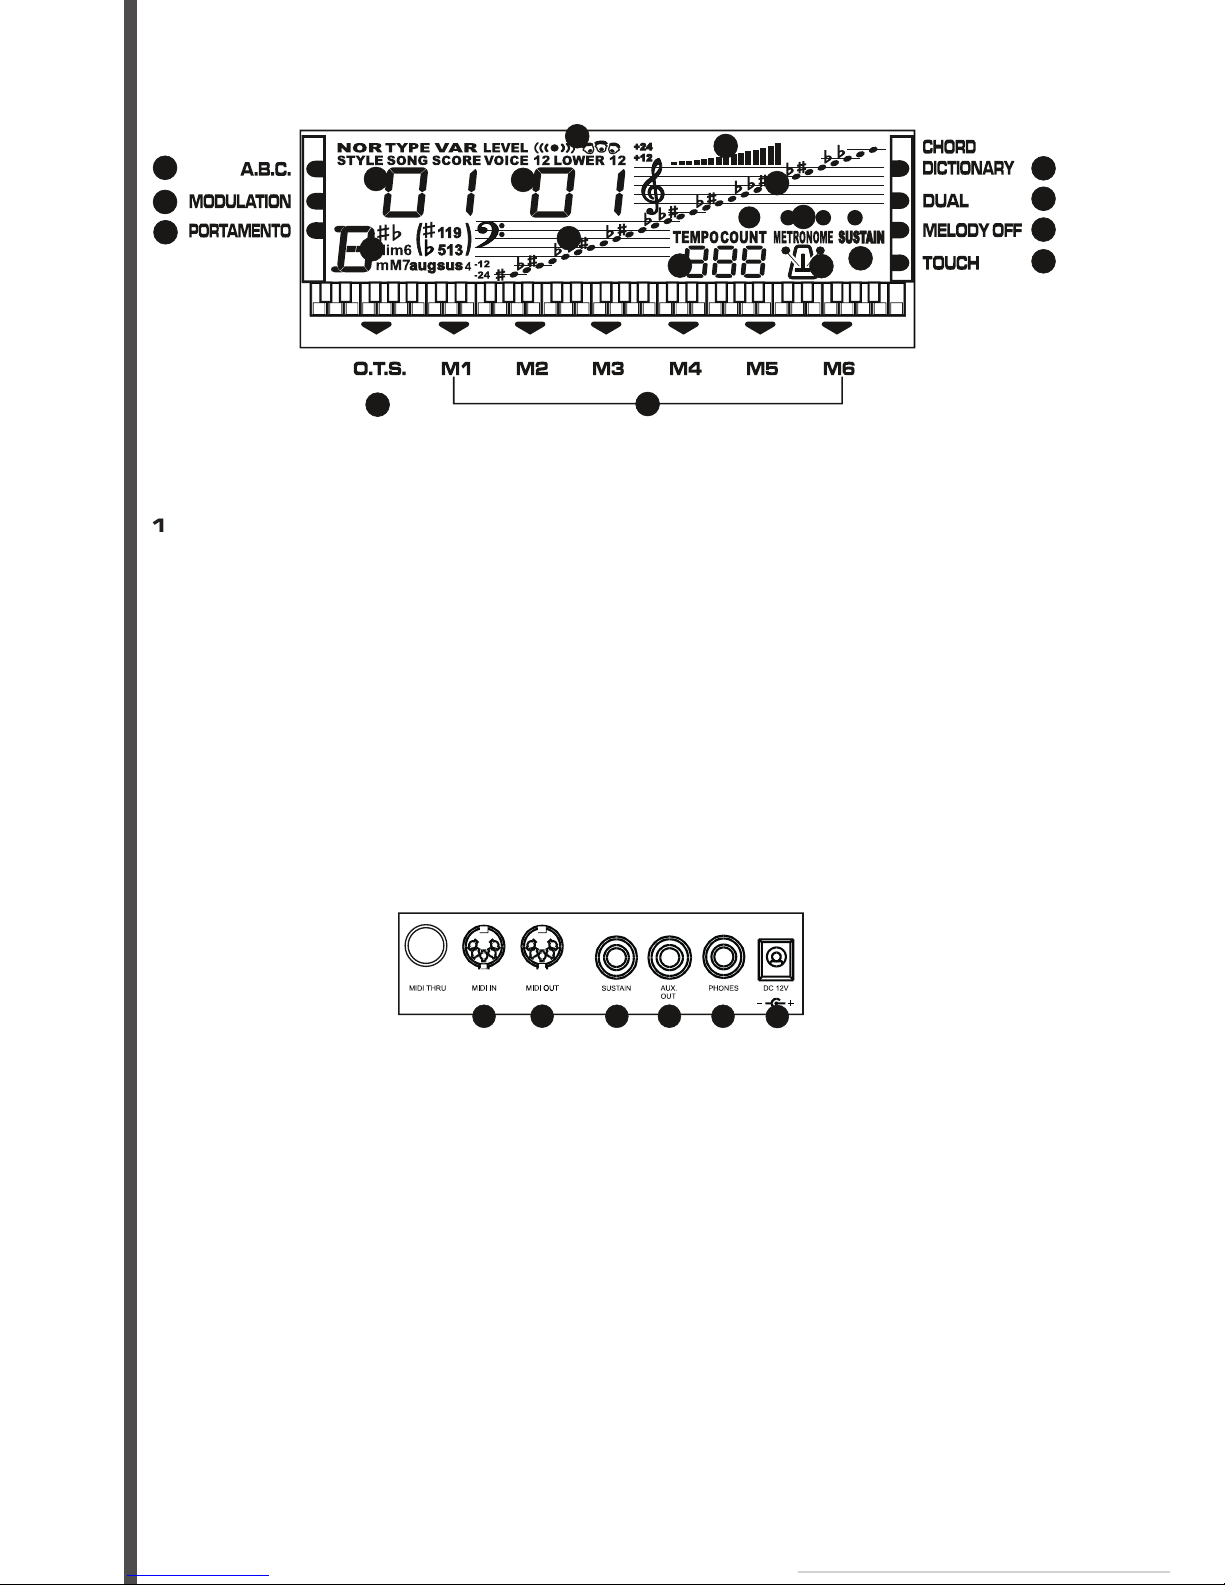
A.B.C.
VOICE 2
VOLUME
9 CHORD
10 BASS CLEF
11 TREBLE CLEF
12 BEAT
13 TEMPO
14 METRONOME
14 SUSTAIN
15 CHORD DICTIONARY
TOUCH
3. LCD DISPLAY
2. REAR PANEL
Page 5
5
USER MANUAL
Thank you for purchasing the
electronic keyboard. This keyboard provides you with the following features and functions:
Your keyboard will give you years of playing pleasure if you follow the simple rules below:
se the keyboard to the high temperature, direct sunlight, and excessive dust places
This keyboard can be powered by current from a standard household wall outlet (by using the specifi ed
AC adaptor INCLUDED) or by batteries
Using batteries
Always turn off the keyboard before loading or replacing batteries.
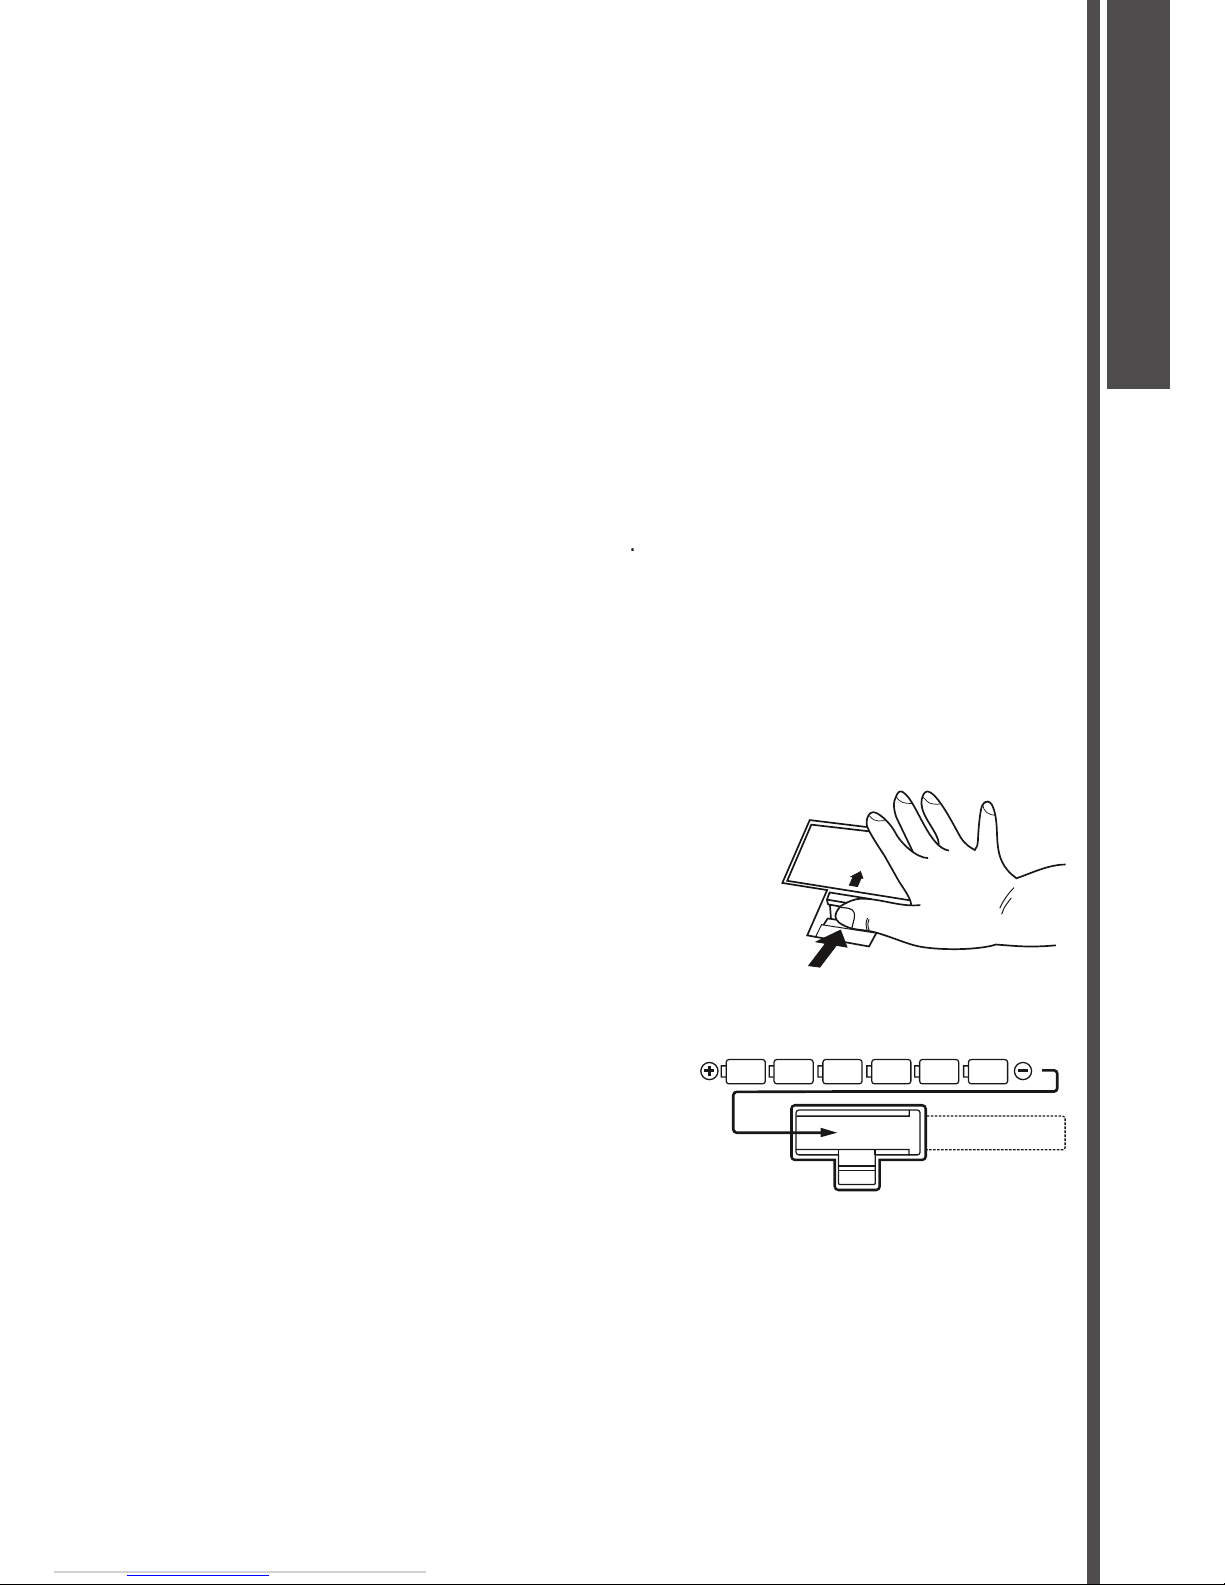
To load batteries:
1.
2.
(SUM-1 or R20) batteries into the battery compartment, being careful to follow
the polarity markings on the cabinet.
3.
Replace the compartment cover, make sure that it locks fi rmly in place.
Important battery information:
Any of the following symptoms indicate low battery power. Replace batteries as soon as possible
whenever any of the following occurs.
Abnormally low speaker/headphone volume.
Sudden power failure when playing at high volume.
Abnormal rhythm or demo song plays.
O
P
E
N
INTRODUCTION
Page 6
6
USER MANUAL
Cautions:
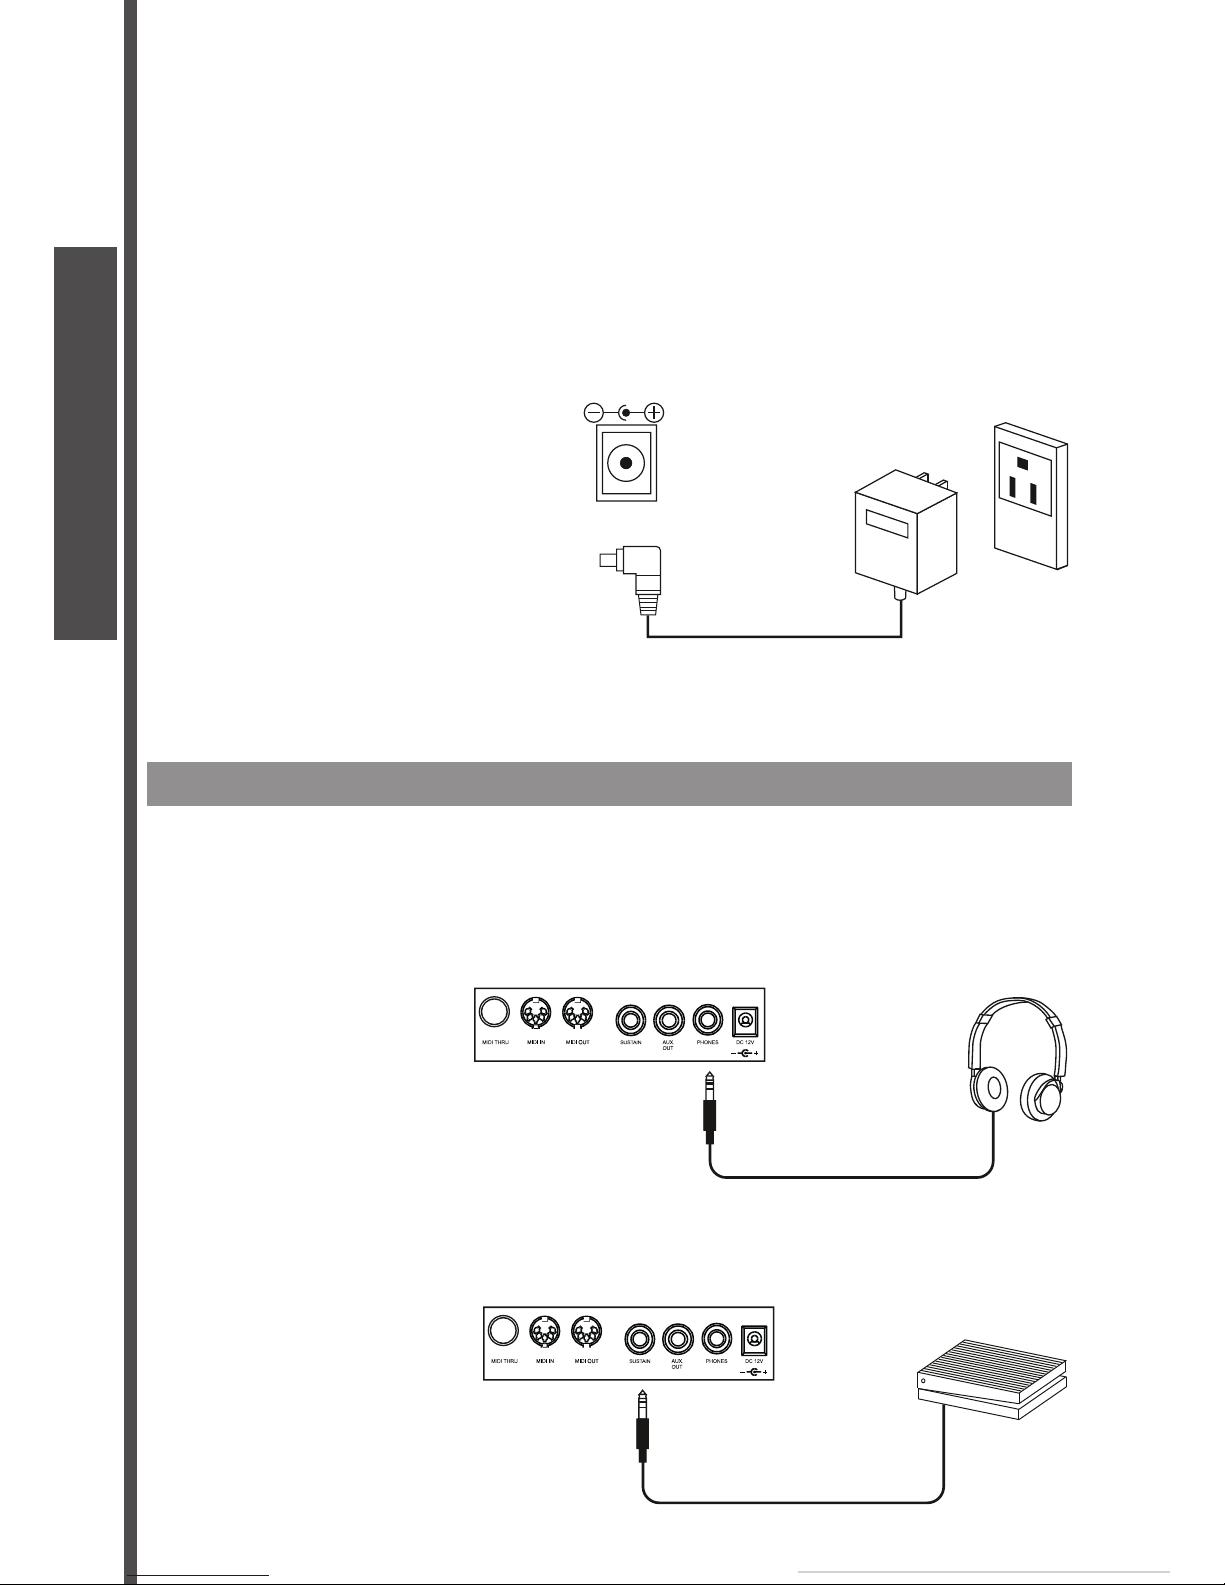
Using the AC adaptor
center positive type. Turn off the keyboard before you connect the adaptor into the AC wall outlet and
the cord into the unit.
Cautions:
shock.
The headphones jack
A standard pair of stereo headphones can be plugged in PHONES jack for private practice or late night
the PHONES jack.
The sustain jack
An optional foot switch can be plugged into the SUSTAIN jack for sustain control. The foot switch
functions like the pedal on a piano-press for sustain, release for normal sound.
DC 12V
CONNECTIONS
Page 7
7
USER MANUAL
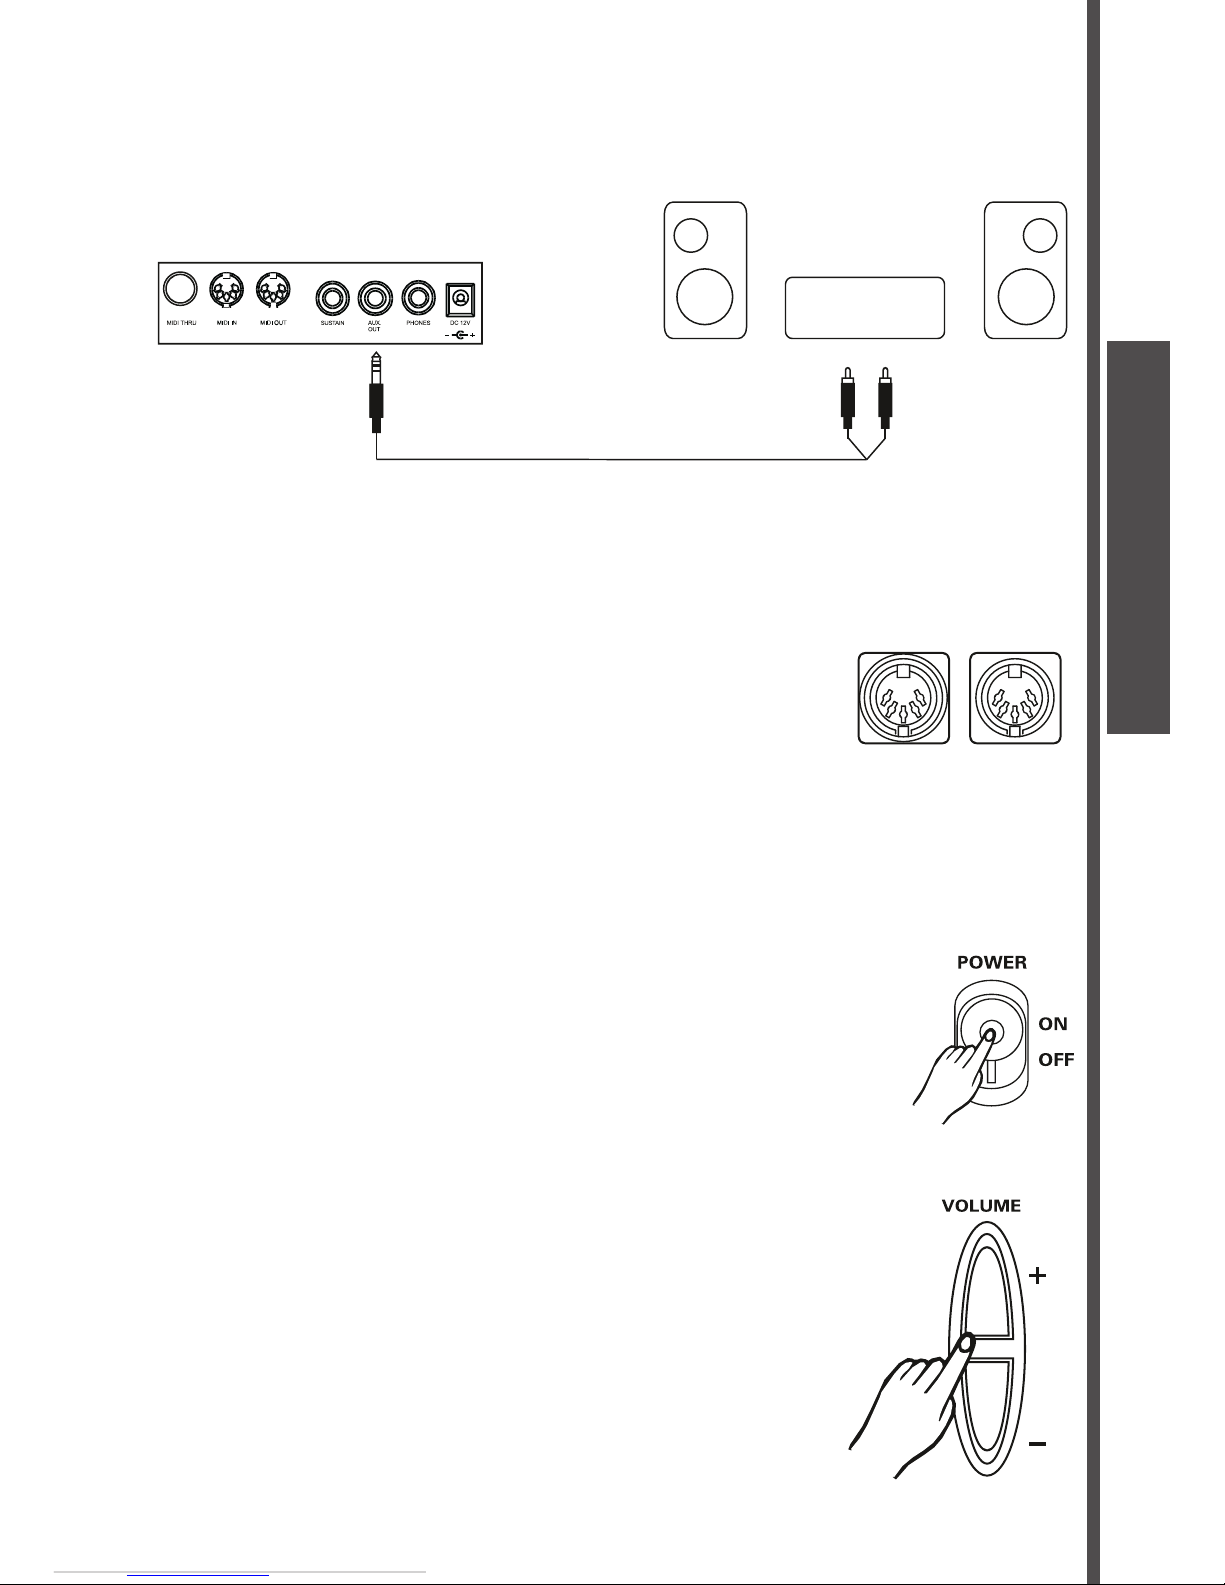
The AUX.OUT jack
The AUX.OUT jack delivers the output of the keyboard for the connection to an external amplifi er. Using
audio cord, plug into AUX.OUT jack located on the rear panel. Then plug the other end of the cord into
The MIDI IN/OUT ports
The MIDI IN connector receives MIDI data from an external MIDI device. The MIDI OUT connector
transmits MIDI data generated by the keyboard to an external MIDI device.
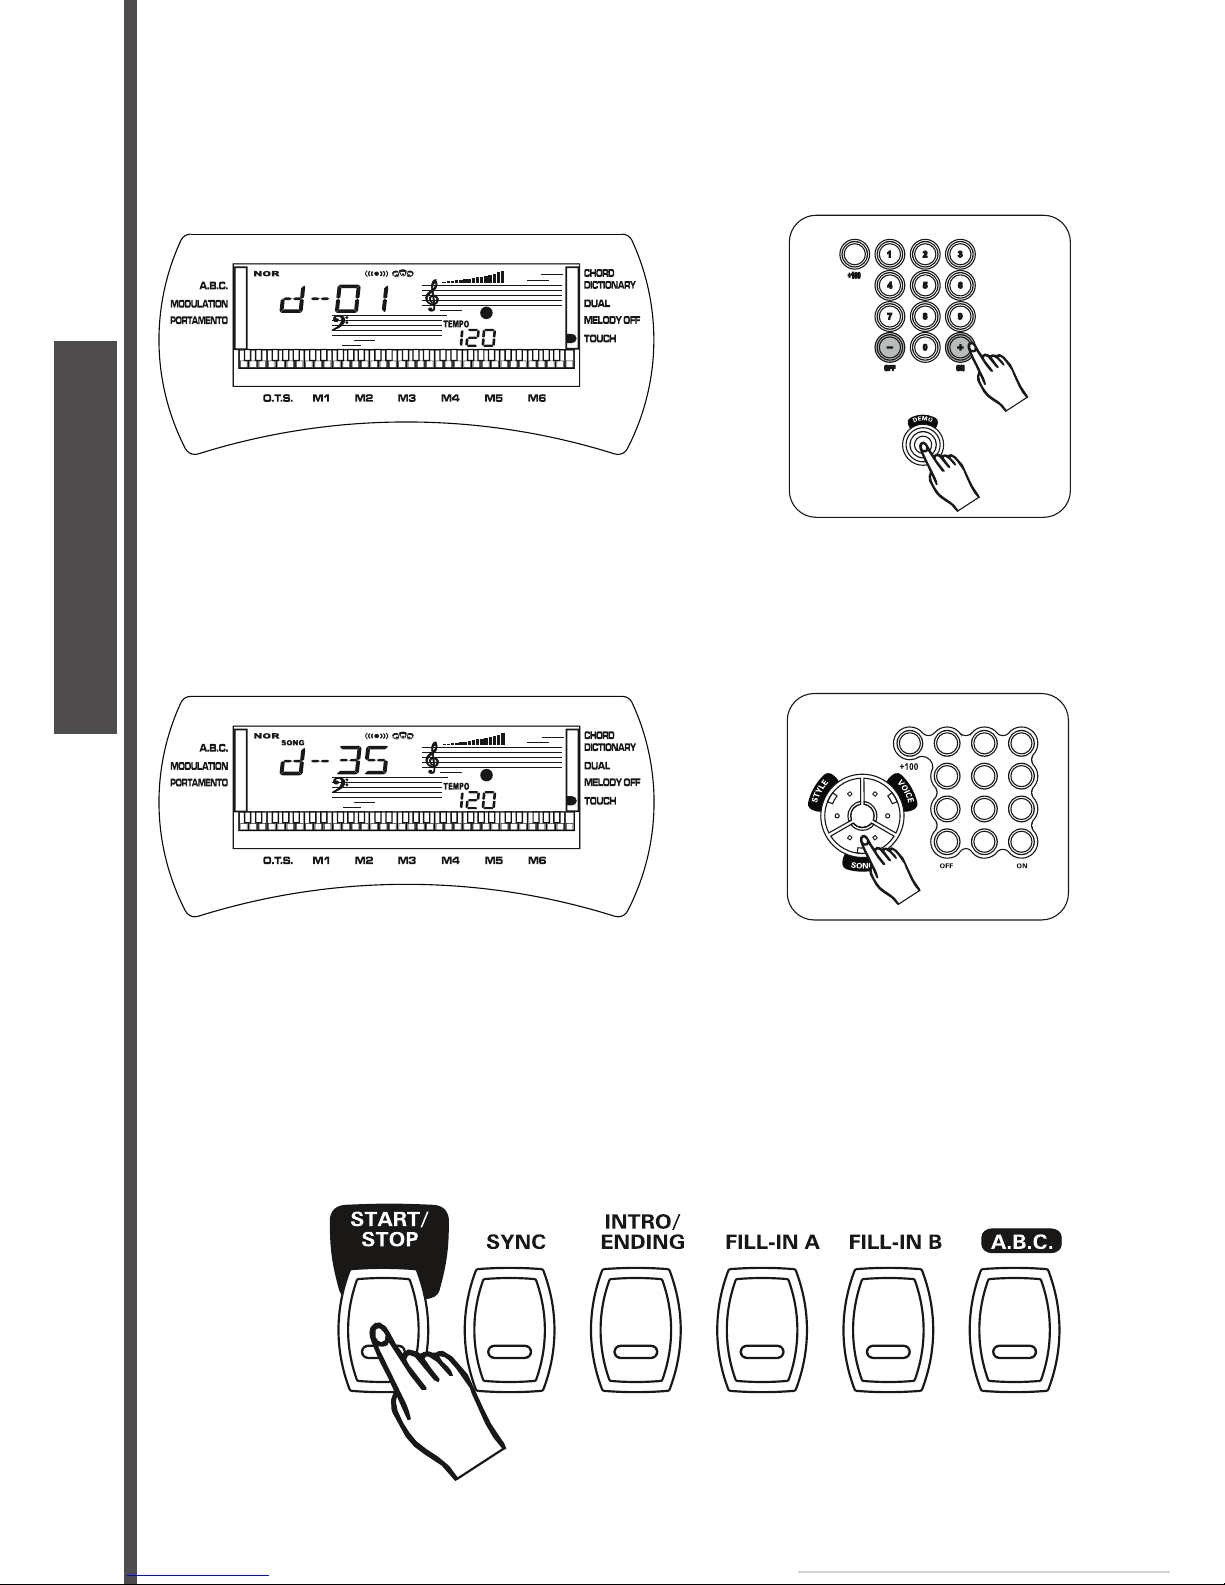
A selection of 60 demo songs come built-in for your listening pleasure or play along fun.
They will give you a good idea of what your keyboard can do.
1.
Turn the power ON by pushing the
switch upwards.
2.
Adjust the volume to a appropriate level by pressing the
button.
Stereo
System
MIDI OU TMIDI IN
PLAY DEMO
Page 8
8
USER MANUAL
3.
Press the
or
button to step to the next demo song in
the corresponding direction.
Listen to a particular demo song
1.
SONG
mode by pressing the
button.
2.
3.
Press the
button to start playing the demo song. The song will play in endless loop,
PLAY DEMO
Page 9
9
USER MANUAL
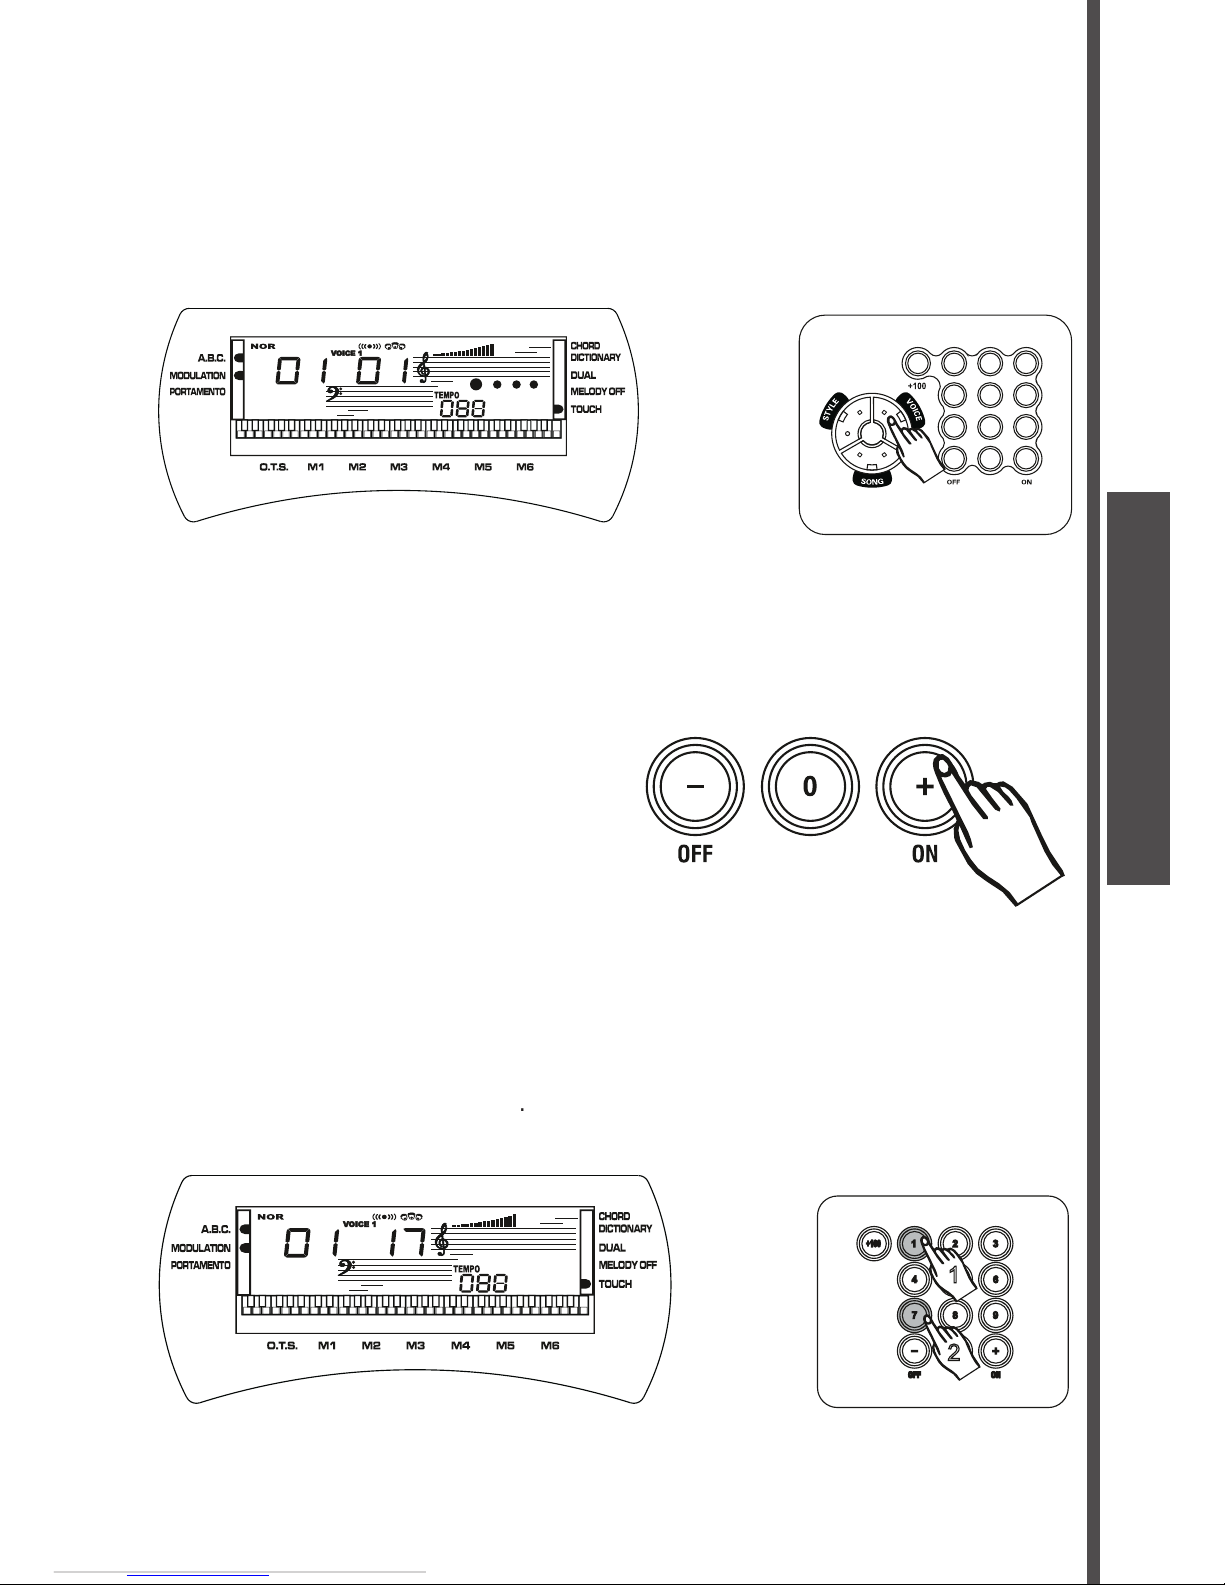
Selecting & playing voices
The keyboard has 147 PCM voices and percussion kits that you can select and play on the keyboard.
VOICE
mode. Press the
button to
select the
VOICE
mode.
The [-/OFF] and [+/ON] buttons:
When the
VOICE
mode is selected, these buttons step up or down through the voices list. Press these
display.
The number buttons:
The number buttons can be used to directly enter the number of the desired voice, thereby immediately
selecting that voice without having to step through a number of other voices.
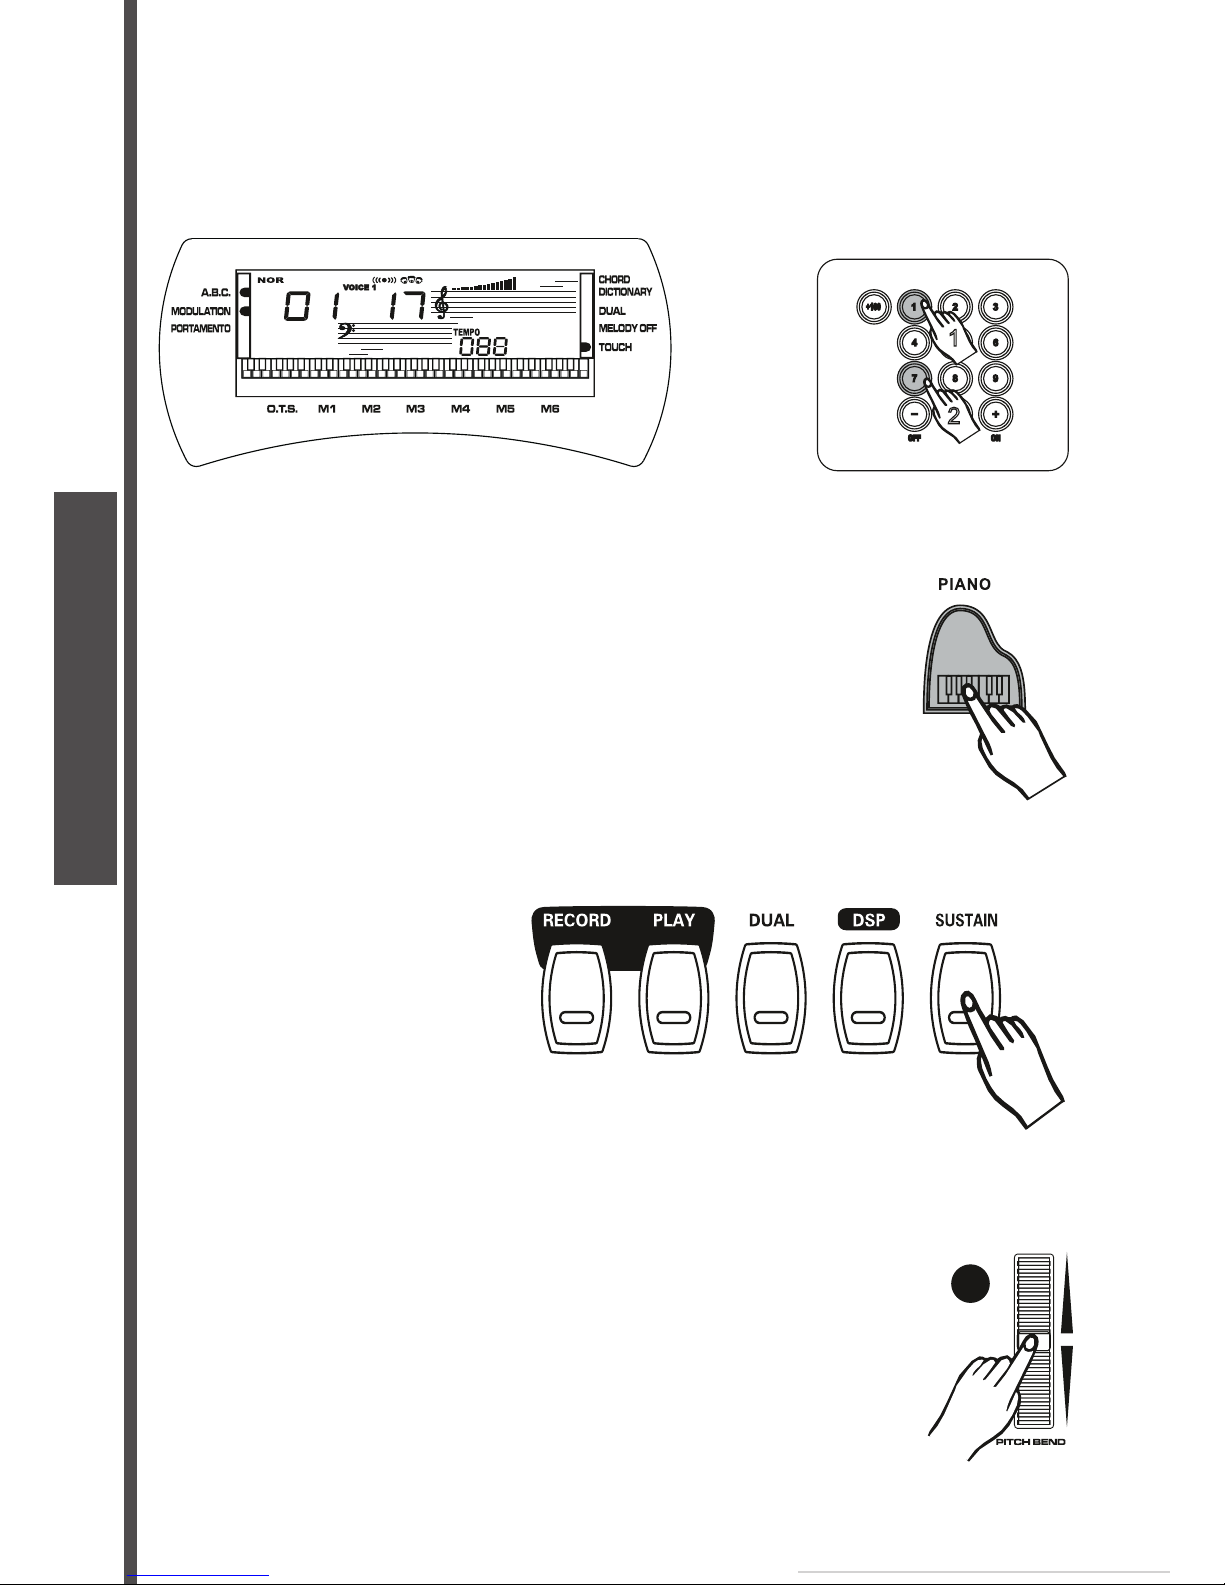
Two-digit voice number are selected simply by entering the two digits in sequence - e.g. to select
voice number 17, briefl y press the
[1]
button and then the
[7]
button. Three digit voice number
to select voice number 100,
are entered by fi rst pressing the
1
2
BASIC OPERATION
Page 10
10
USER MANUAL
Dual voice:
To create a dual voice effect, use the number buttons to input the fi rst voice digits. Pressing the
VOICE 2
appears in the display. Then input the selected second voice digits. Press the
VOICE 1
appears in the display.
Instant select Piano voice:
You can select the piano voices immediately by pressing the
button. Press the
[PIANO
Sustain voice effect
You can add a sustain voice effect to the overall of the sound simply by pressing the
[SUSTAIN]
button.
Pitch bend
The
wheel allows the pitch of notes played on the electronic keyboard to be bent up or
down. Roll the wheel away from you to bend up, and towards you to bend down. The pitch bend range
24
1
2
BASIC OPERATION
Page 11
11
USER MANUAL
Modulation/Portamento
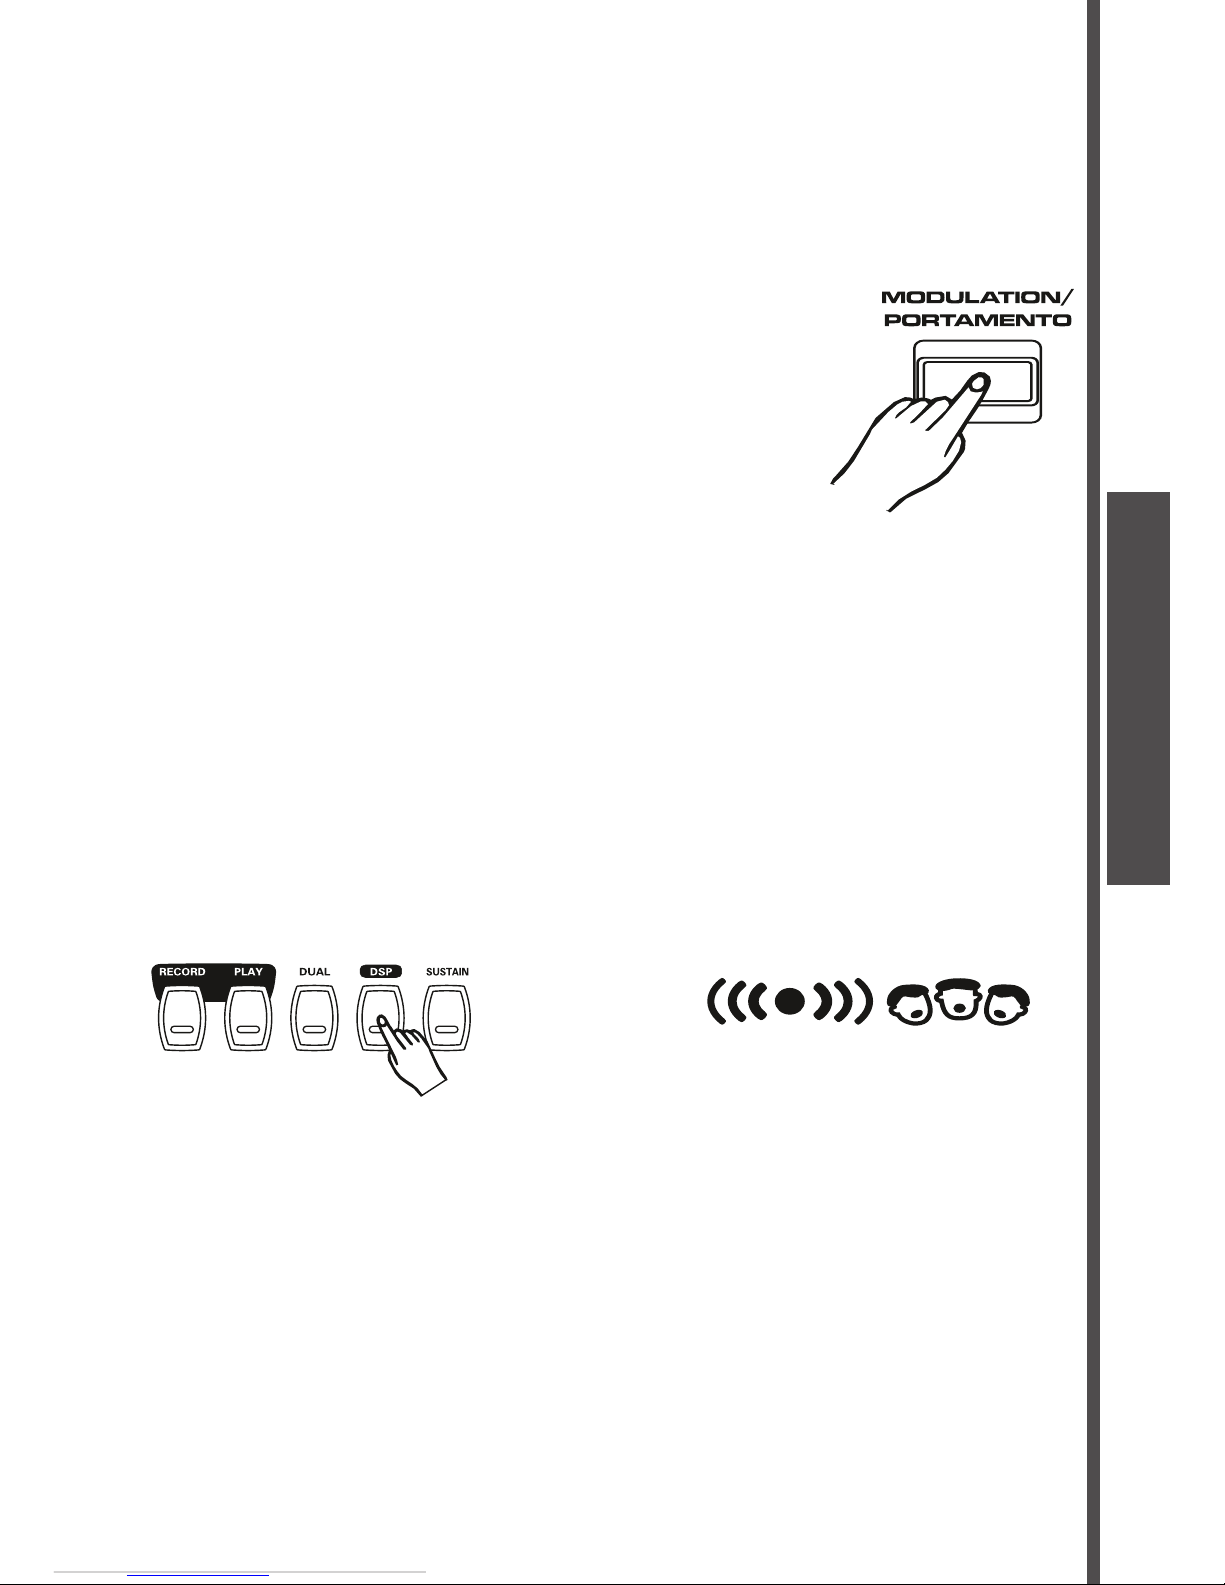
When you turn on the keyboard, the Modulation indicator appears in the display, indicates that the
electronic keyboard by holding the
button and play the keyboard.
When you release the
[MODULATION/PORTAMENTO]
To select the Portamento mode, you need to press the
button to enter the «Key» menu,
for details please see the section «Function Select». You can play the voice sliding on the electronic
button and play the keyboard. When you
Note:
1.
To activate the Portamento effect, you need to hold the key and then play another key.
2.
When the Split mode is activated, the Portamento effect at the left section will not take efect.
Digital Signal Processor (DSP)
The Digital Signal Processor (DSP) consists of two units (Reverb and Chorus) which process the
The Reverb and Chorus icon
BASIC OPERATION
Page 12
12
USER MANUAL
AUTO-ACCOMPANIMENT
Selecting a style
The keyboard has 100 different auto-accompaniment styles that can be used to provide fully
orchestrated accompaniment. Its sophisticated Auto Accompaniment system can provide automated
a style, make sure you have selected
mode. Press the
the
STYLE
mode.
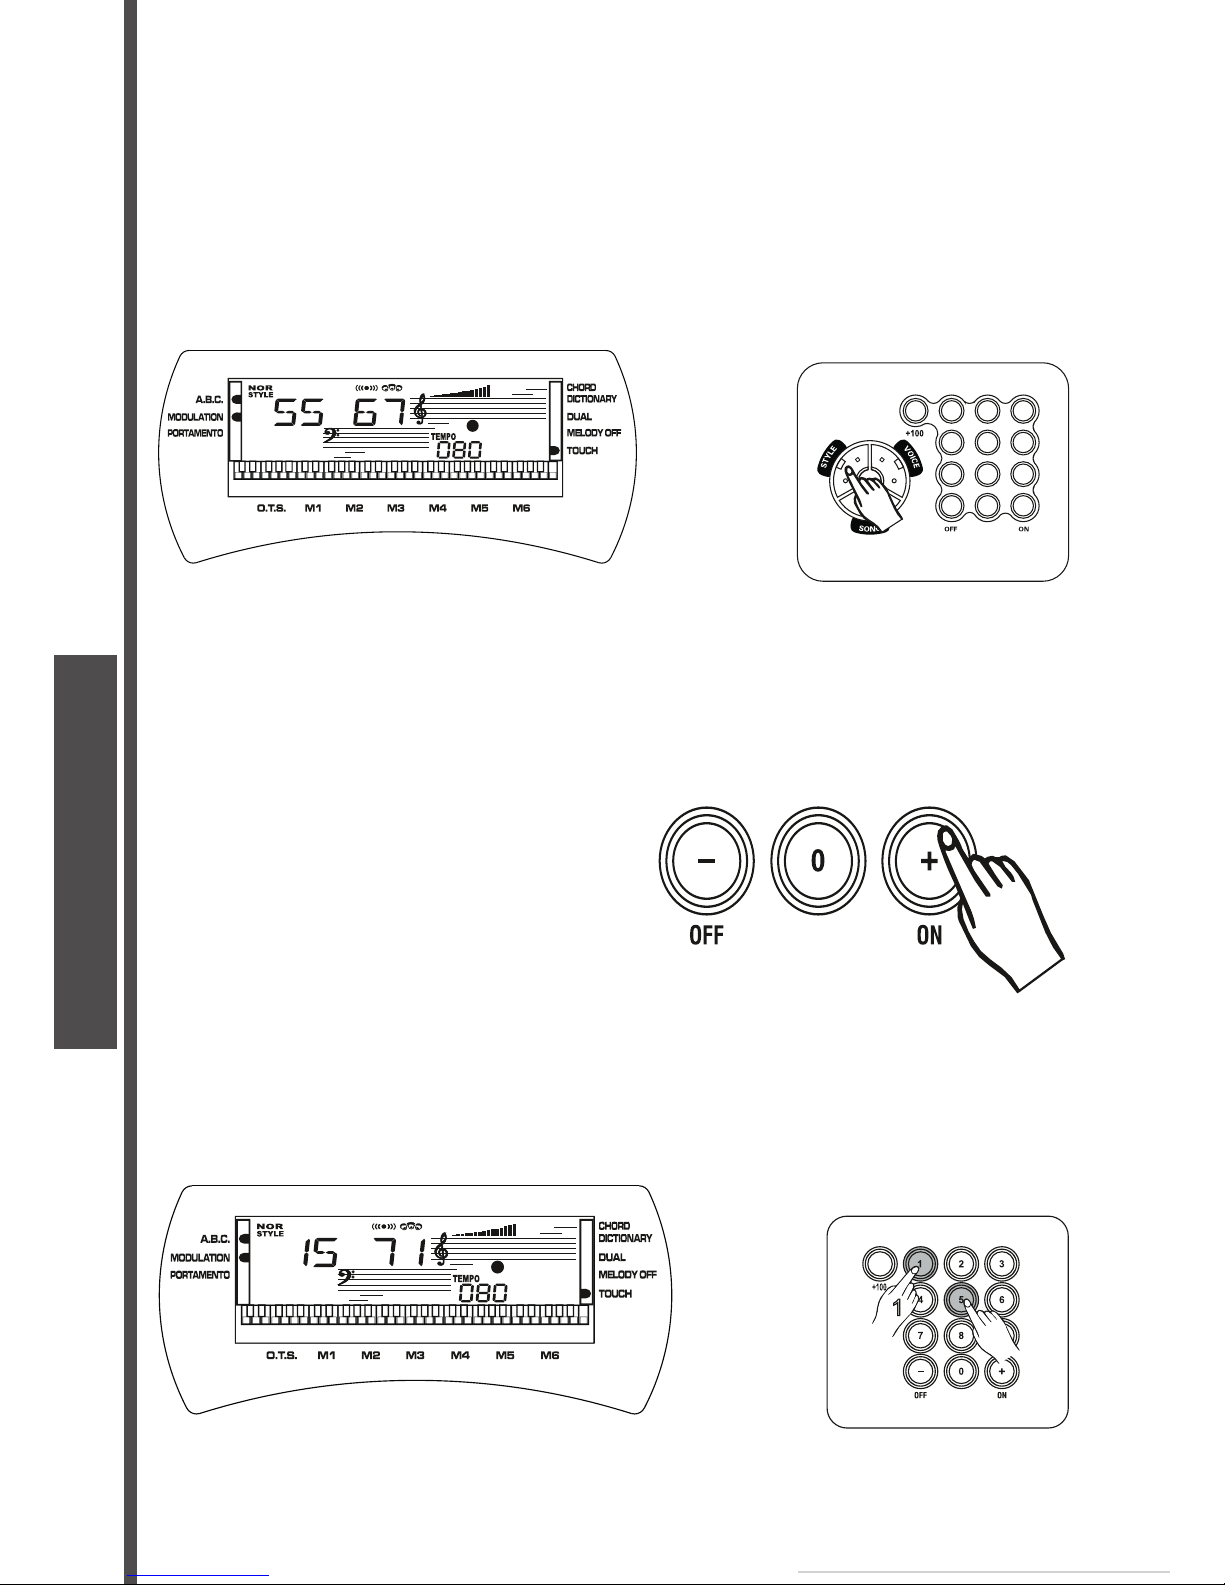
The [-/OFF] and [+/ON] buttons:
When the
STYLE
mode is selected, these buttons step up or down through the styles list. Press these
through the styles in the corresponding direction. The selected style number shows in the display.
The number buttons:
The number buttons can be used to directly enter the number of the desired style, thereby immediately
selecting that style without having to step through a number of other styles. To select a style simply
enter the two digits in sequence--e.g. to select style number 15, briefl y press the
the
button.
1
2
AUTO-ACCOMPANIMENT
Page 13
13
USER MANUAL
Playing a selected Style
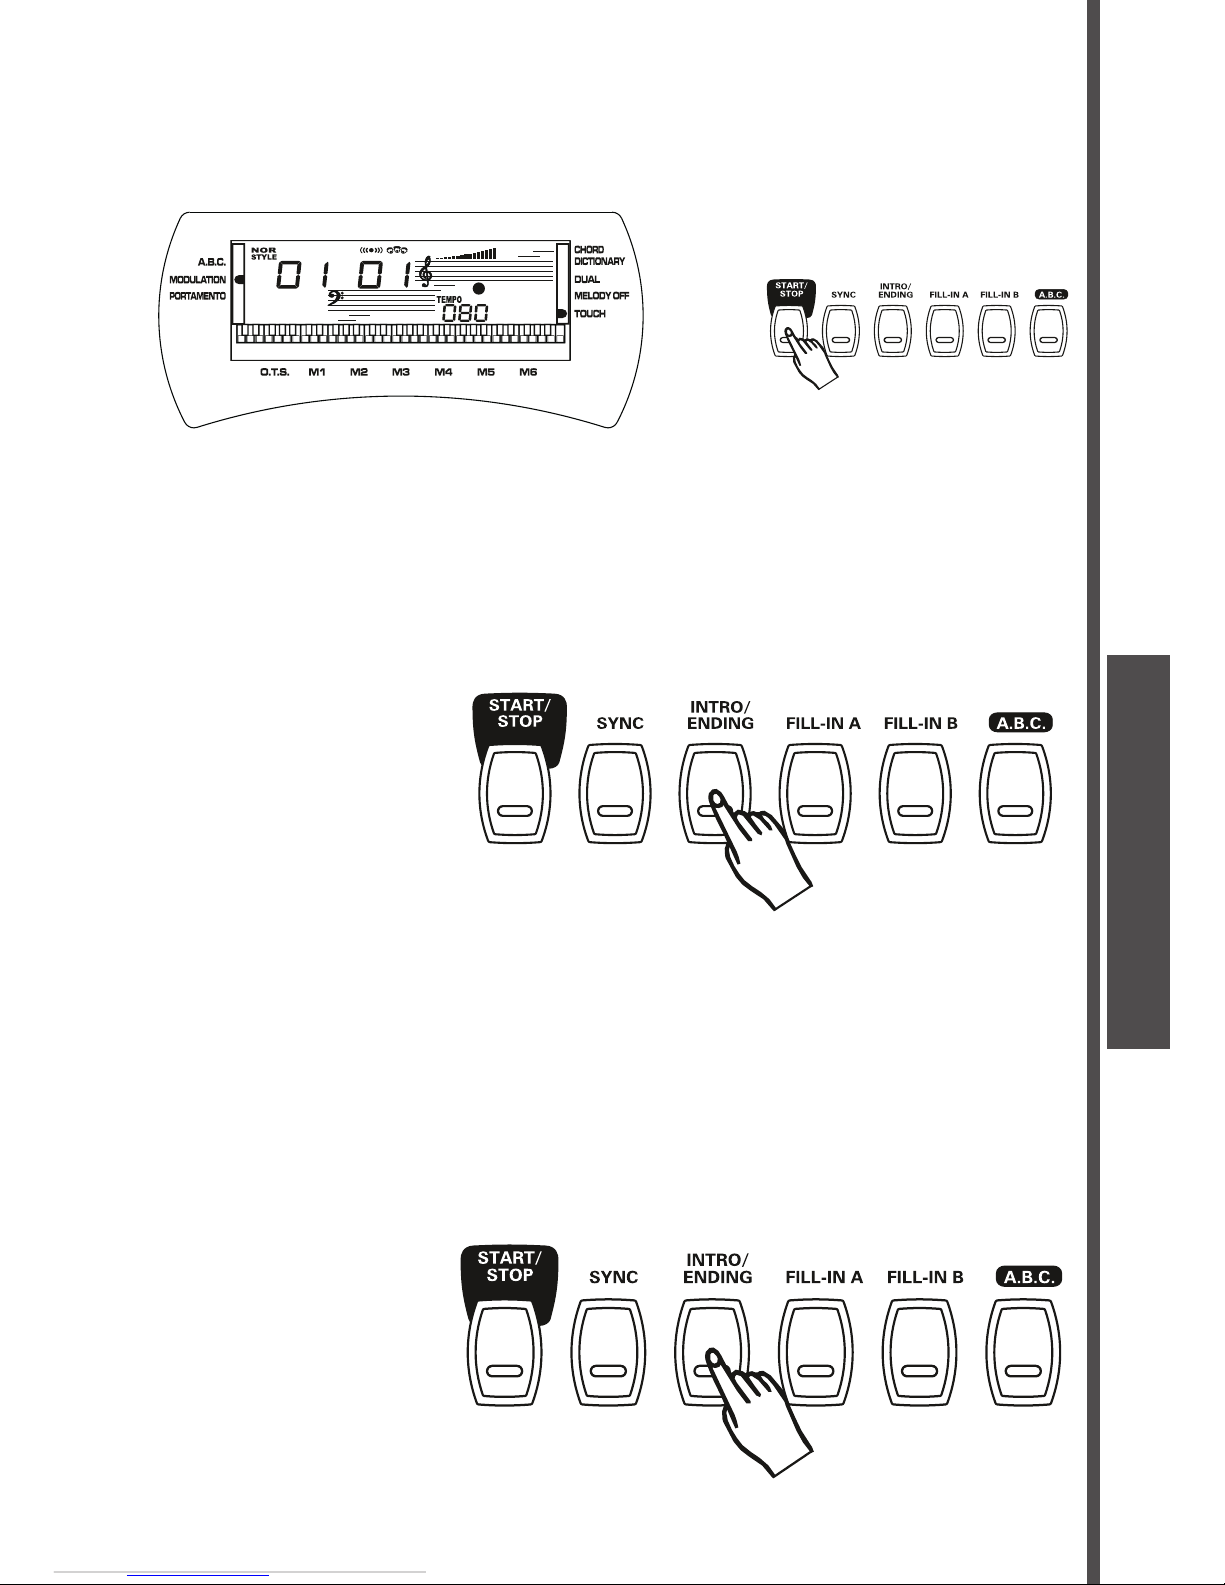
1.
button to start playing the selected style.
2.
To stop the style, press the
To start the style with introductory pattern
1.
[INTRO/ENDING]
button to put the keyboard into introduction start standby.
2.
Press the
button, and then play a chord on the keyboard.
The keyboard plays an introductory pattern and then the selected style.
To stop the style with ending phrase
While the style is playing, press the
button and the keyboard will play an ending
Use synchro to start the style
1.
button, the display shows the fl ashing beat indicator and put the keyboard into
synchro start standby.
2.
`
AUTO-ACCOMPANIMENT
Page 14
14
USER MANUAL
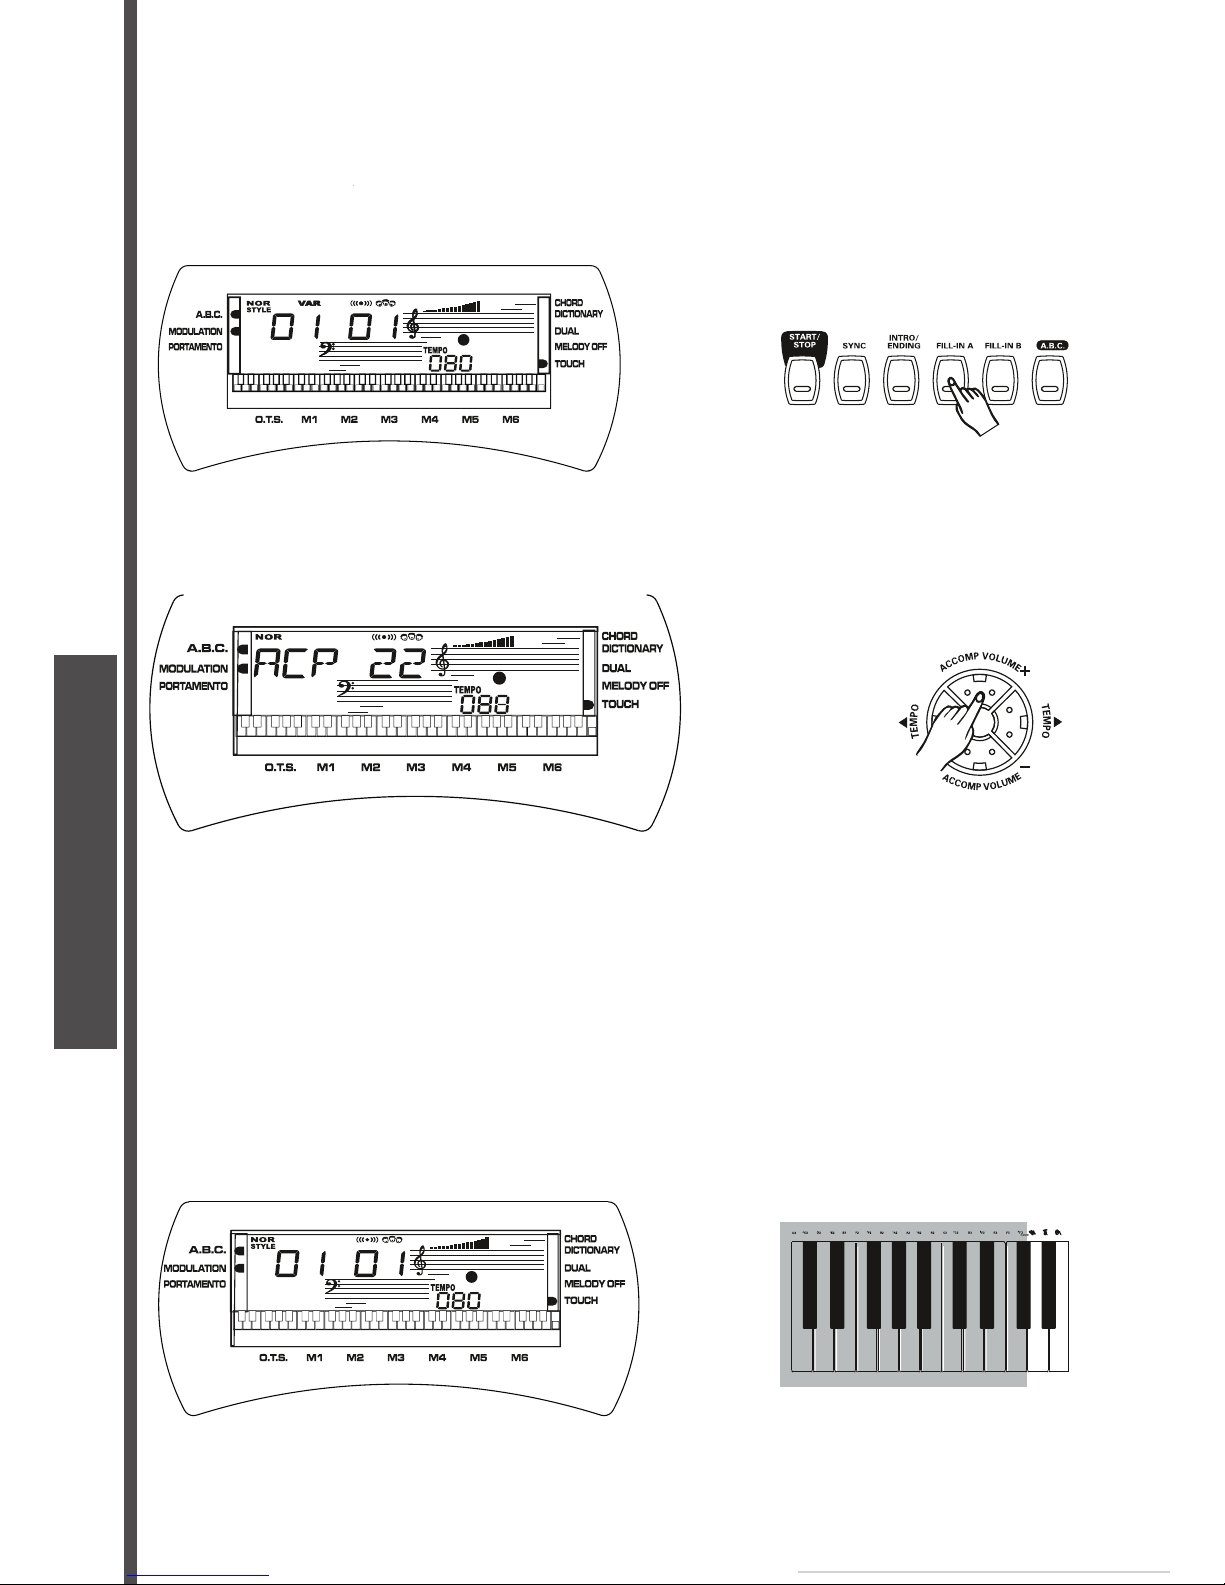
Select the Fill In and change Style Variation
and
VARIATION
any time before or after starting to play the Styles by pressing the corresponding button. The status is
shown in the display,
A
is Normal, and
is Variation. When you press the
or
the same pattern or variation, depending on which button you press.
Accompaniment Volume
1.
You can adjust the Accompaniment Volume with the
buttons. The
volume level ranges from 00 to 31.
2.
You can turn off the accompaniment volume by pressing the
and
buttons
simultaneously, the display shows the message «
ACPoFF
accompaniment volume by pressing the
[ACCOMP+]
and
or
Auto Bass Chord (A.B.C)
1.
A.B.C.
of the keyboard (from note C2 up to note F#3) to hear the effect. The keyboard allows you to play in
2.
To turn off the Auto Bass Function, press the
Button again.
Auto Bass
Chor
d
AUTO-ACCOMPANIMENT
Page 15
15
USER MANUAL
Set the Tempo
When you select a different style, the «default» tempo for that style is also selected, You can change the
tempo to any value between 30 and 280 beats per minute by using
TEMPO [+]
and
buttons. Press
either button briefl y to increase or decrease the tempo value by one, or hold the button for continuous
decrement or increment. The default tempo for the selected style can be recalled at any time by
TEMPO
and
[-]
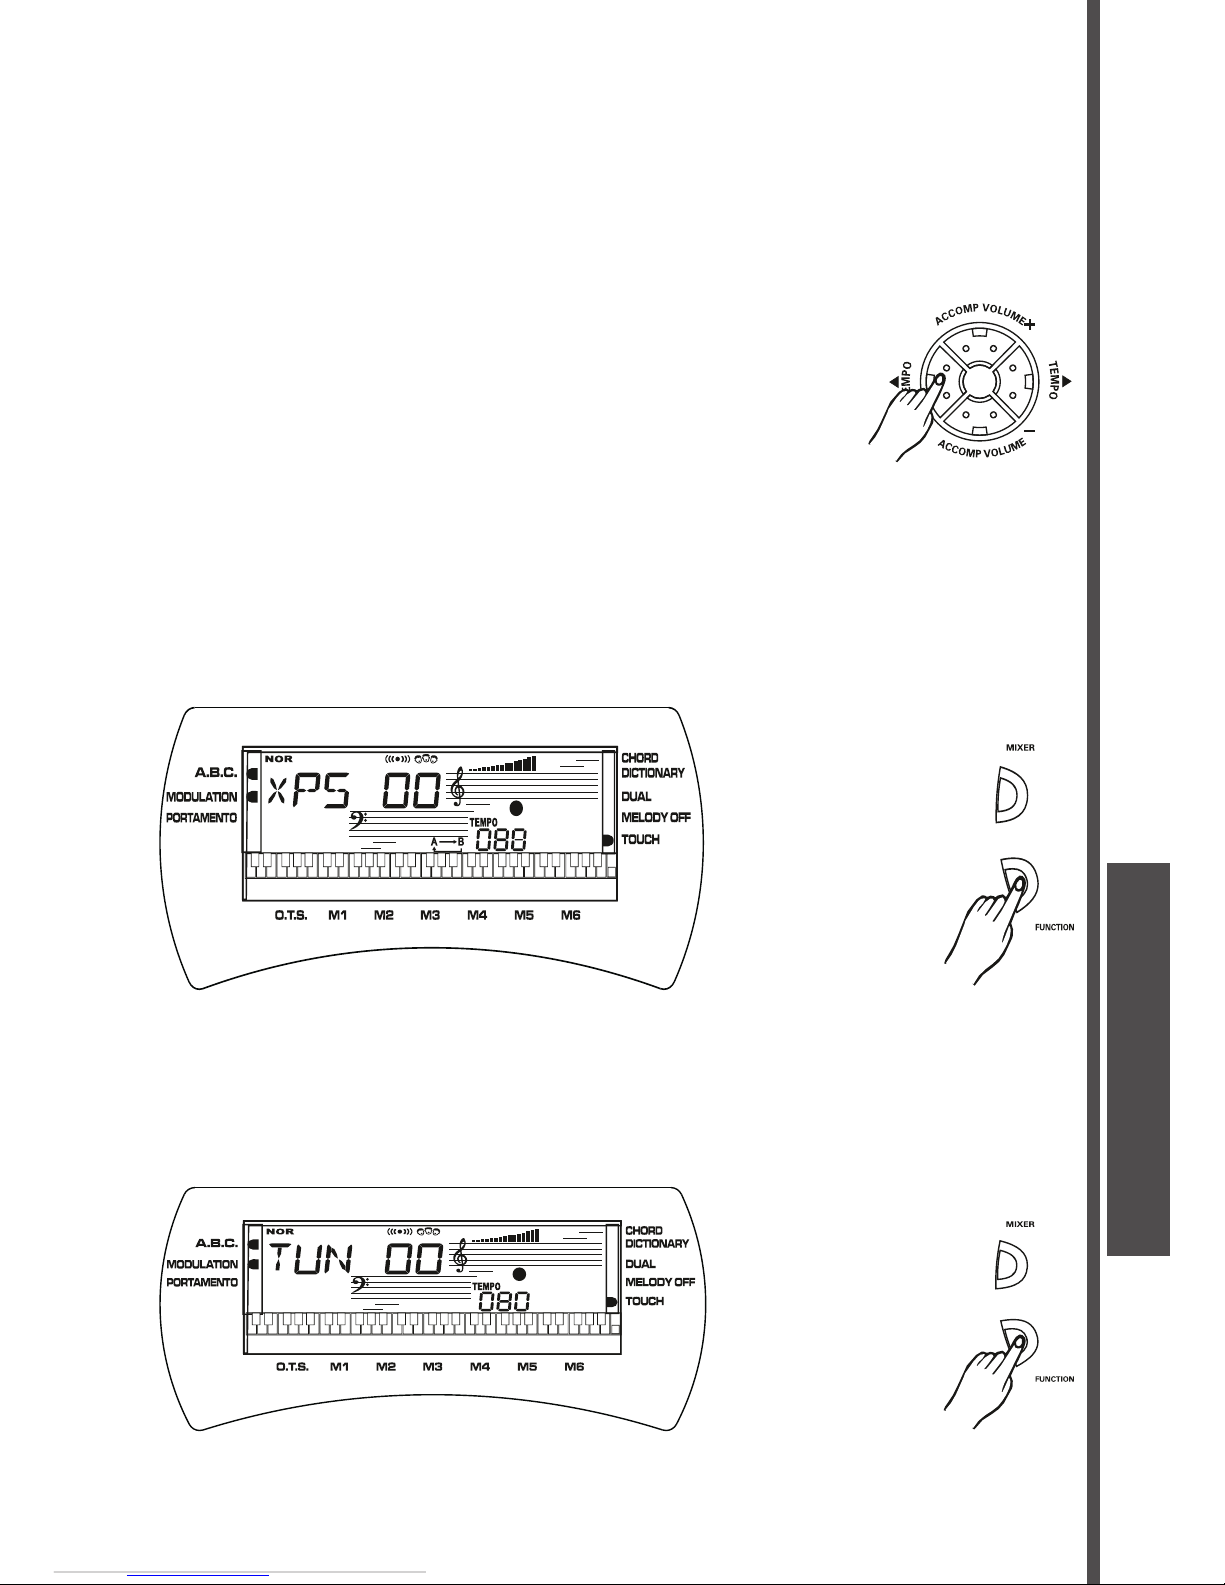
1. Transpose
button as many time as necessary until «
xPS xx
can use the
2. Tune
[FUNCTION]
button as many time as necessary until «
TUN xx
can use the
button to adjust the level.
FONCTION SELECT
Page 16
16
USER MANUAL
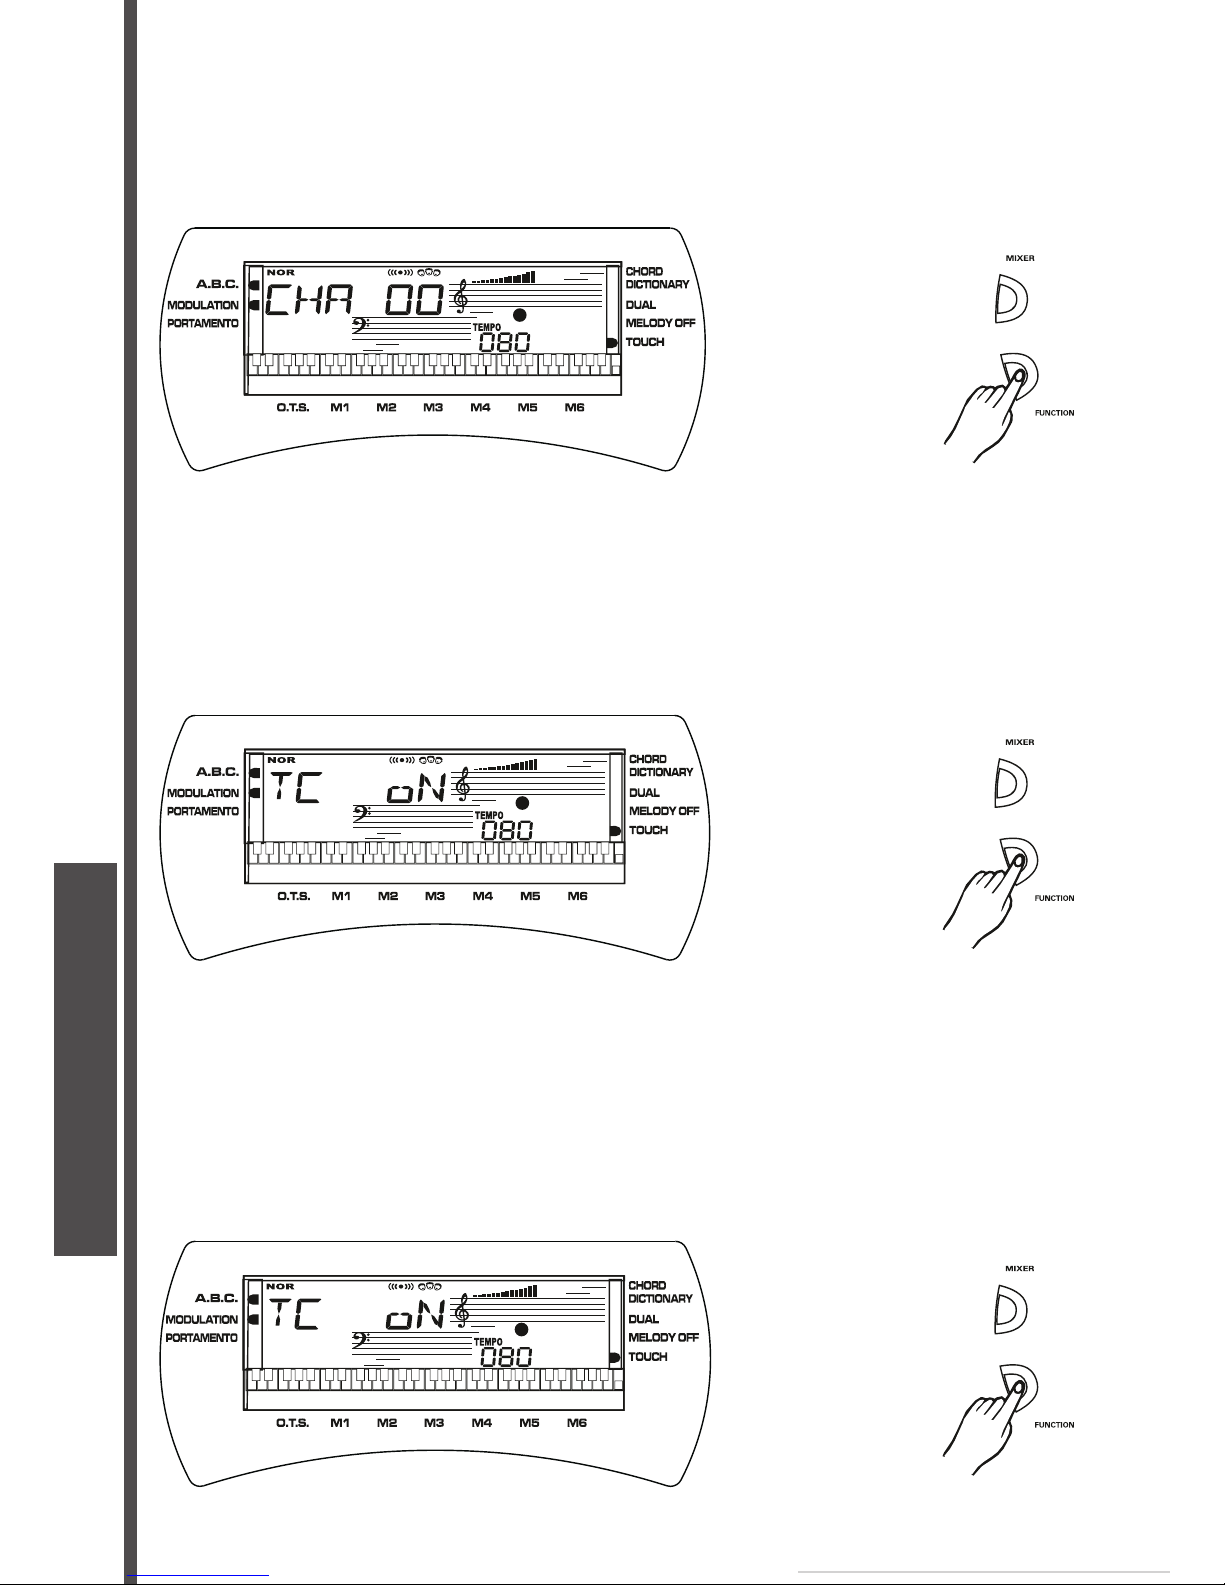
3. MIDI Channel
CHA xx
4. Touch Response
button as many time as necessary until «
TC oN
button to turn on/off the touch response function.
5. Octave
oCT
can use the
button to adjust the level.
FONCTION SELECT
Page 17
17
USER MANUAL
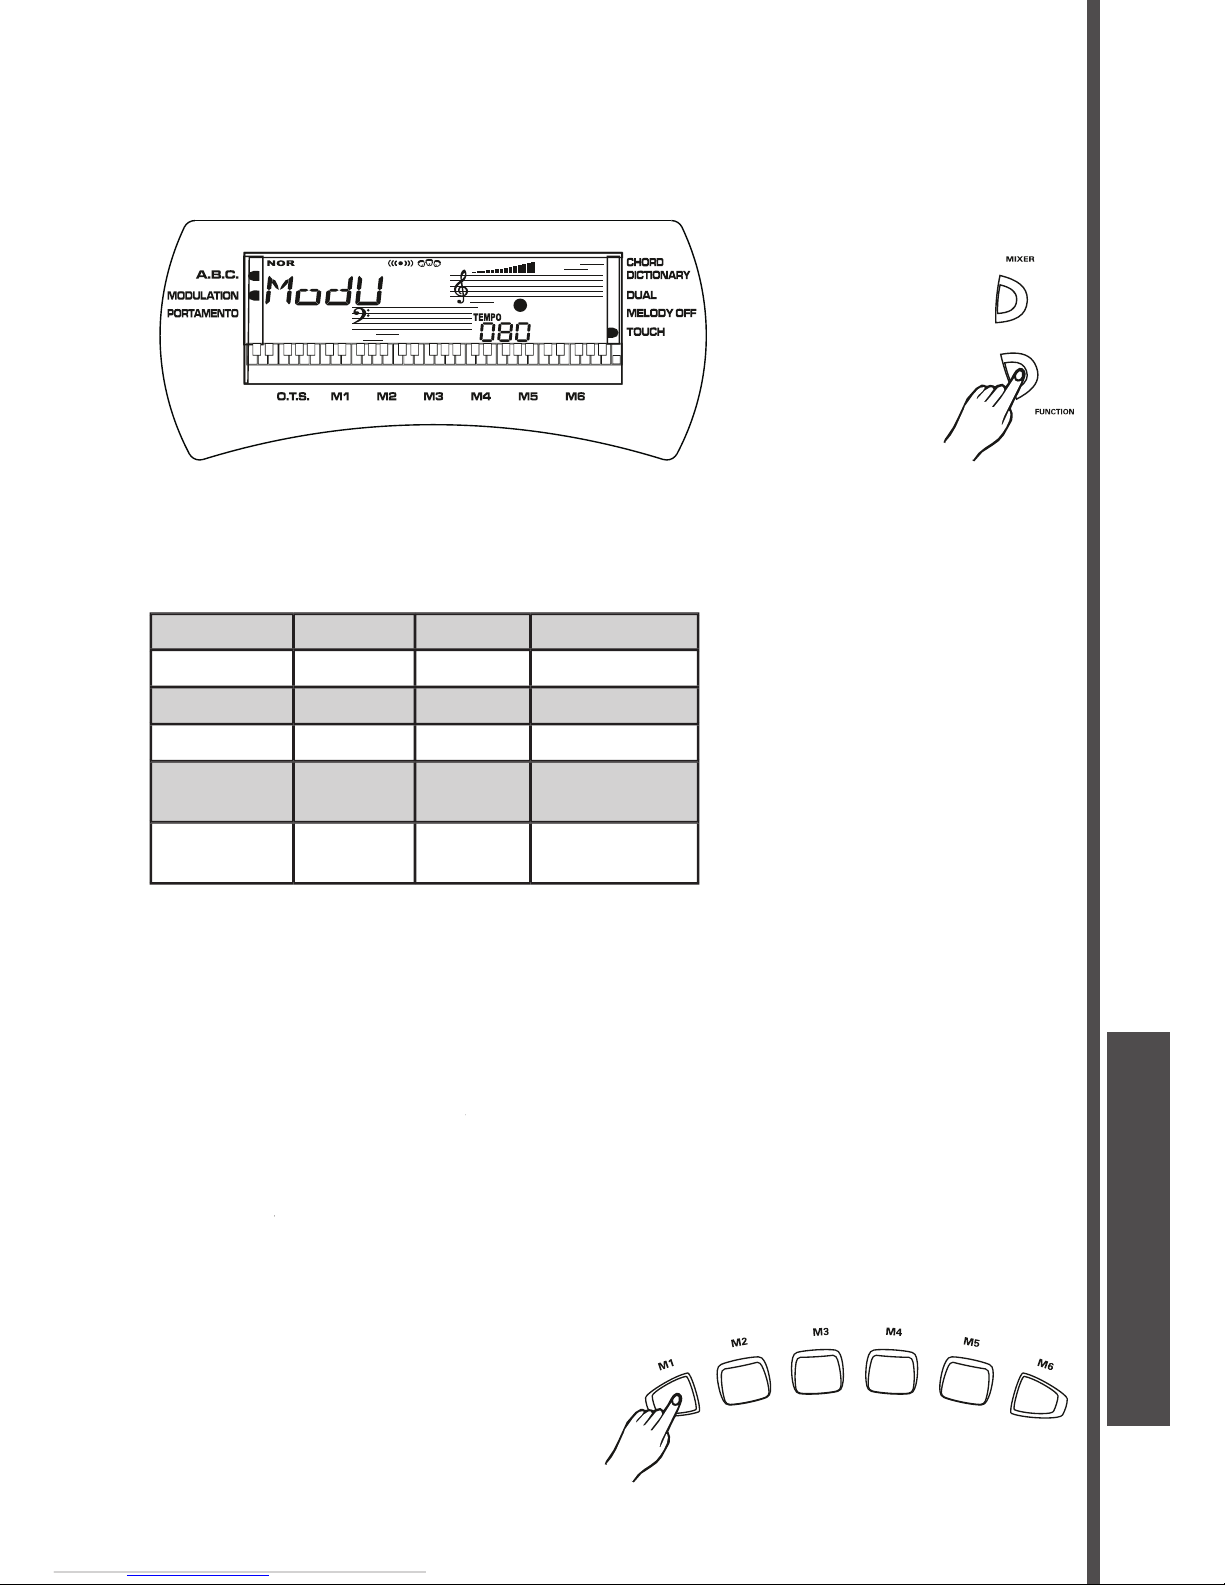
6. Modulation/Portamento
PoRT
display, you can use the
button to adjust the volume level of each track.
Track On Display Range Default Setting
OC
Volume
dR
Volume
When you press the
[-/NO]
and
buttons simultaneously, the keyboard will shut
down the volume of the selected track. Press the two buttons simultaneously again to turn
the accompaniment track volume on.
The keyboard has 6 memory pads which can be used to memorize the control-panel setups.
You can press one of the
button (
Register the settings:
When you have fi nished the settings, you press and hold the
the
MEMORY
button. Any data that was previously in the selected location is erased and
Note:
When you turn off the keyboard, the setting will be erased.
MIXER CONTROL
Page 18
18
USER MANUAL
Getting Ready to Record
button to engage the Record Ready mode. The Beat Indicator will
start to fl ash, and you can select the voice, style and track to record.
Start Recording
Stop Recording
while recording the Accompaniment track, recording will stop automatically with an ending
Playback
After you have recorded a performance, you can press the [
Flas hing
RECORD
Page 19
19
USER MANUAL
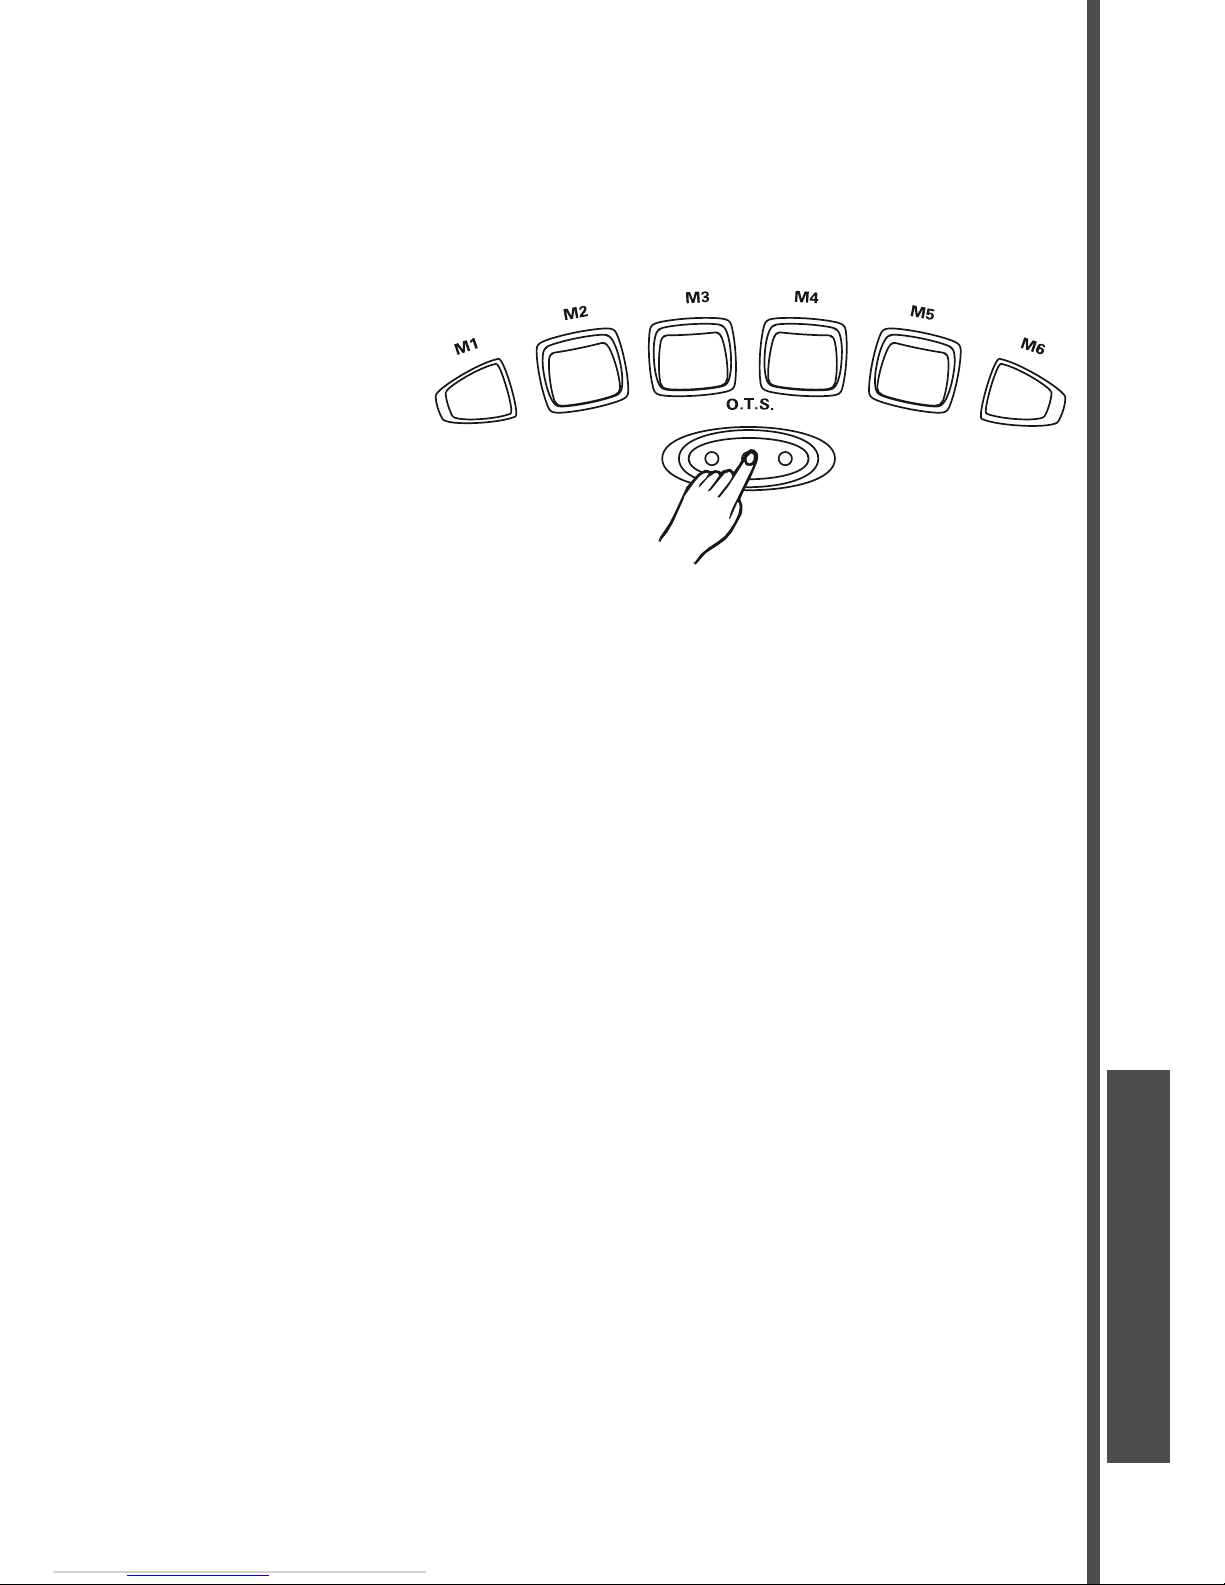
One Touch Setting lets you instantly select the appropriate panel settings suitable for the
current style. Each style contains four variations.
1.
2.
[M1]
through
to select the appropriate
settings.
or
is for FILL-IN A mode,
or
is for
3.
[OTS]
button again to turn off this function.
OTS
Page 20
20
USER MANUAL
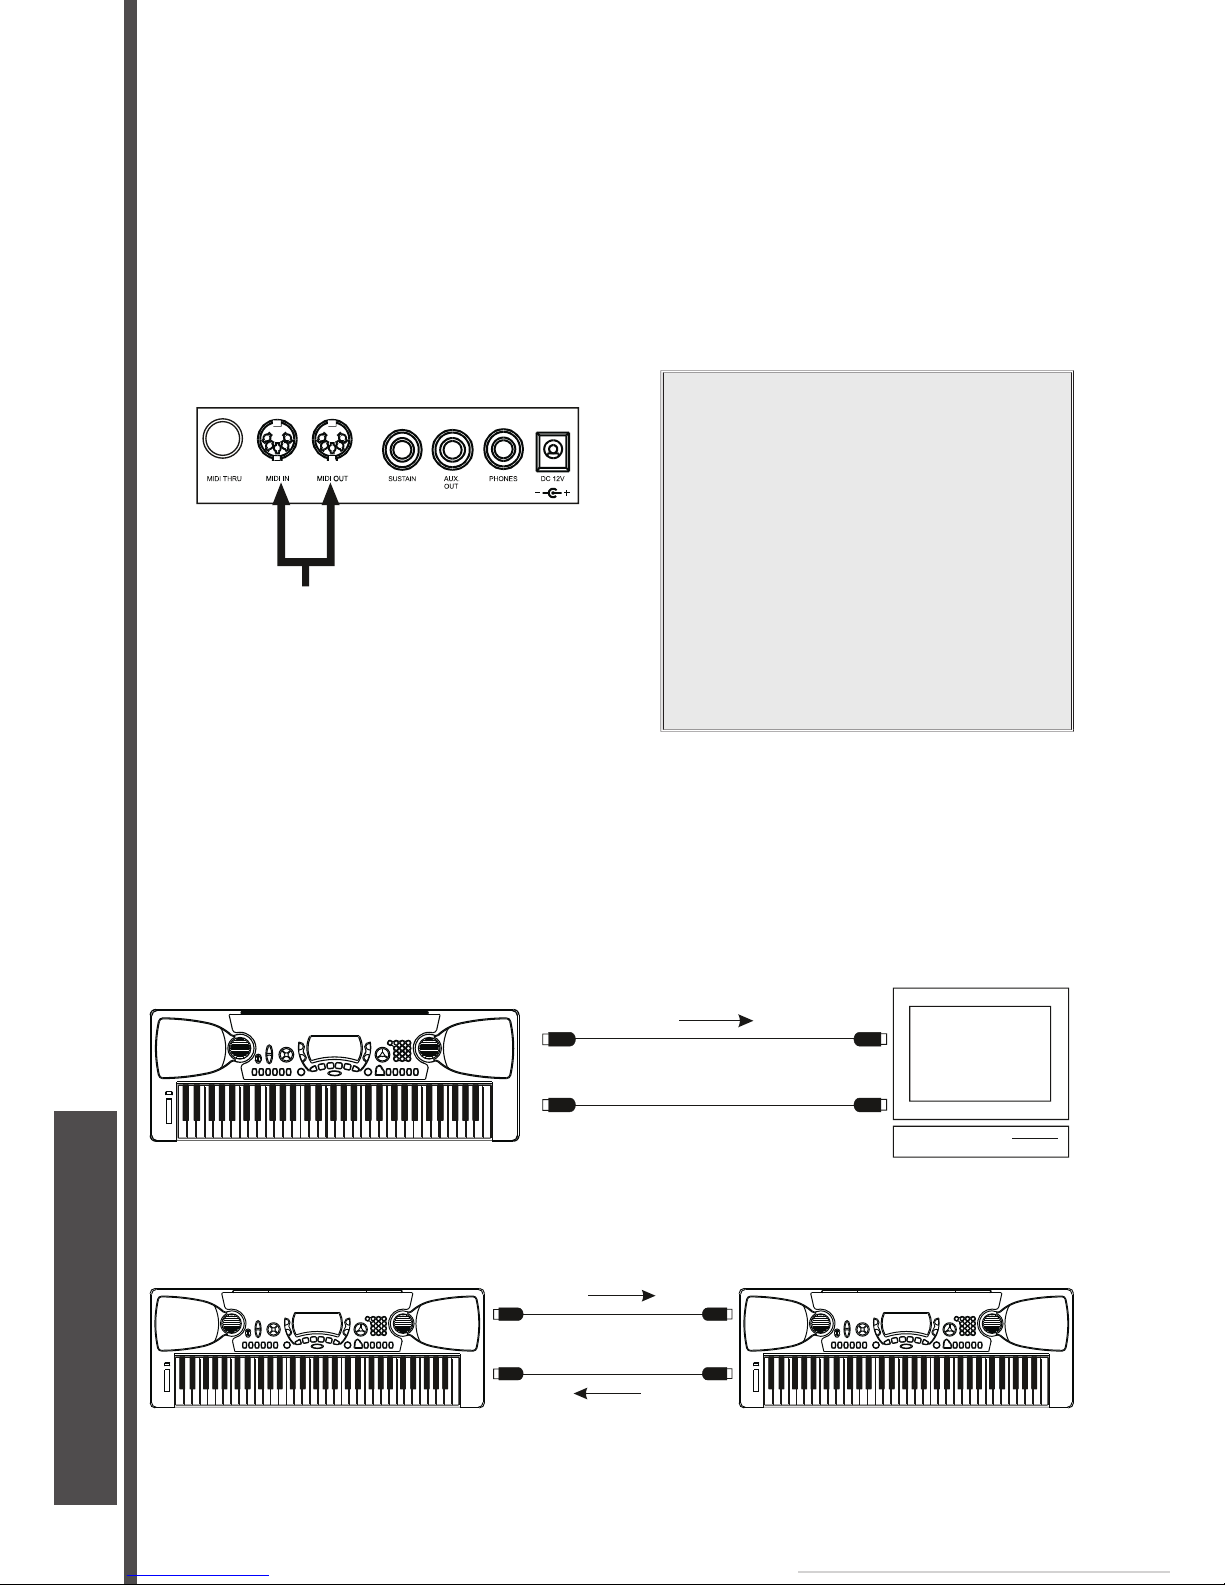
The MIDI IN and MIDI OUT terminals, located on the rear panel of the unit, offer broadened
What is MIDI?
The keyboard is equipped with two types
the rear panel.
MIDI IN
t this
terminal.
MIDI OUT
transmitted to other MIDI instruments
via MIDI from this terminal.
What you can do with MIDI?
STK-520
Computer w/ MIDI
STK-520
MIDI IN
MIDI
IN
MIDI
OUT
MIDI
OUT
MIDI trans mit
MIDI re ce ive
MIDI IN
MIDI
IN
MIDI
OUT
MIDI
OUT
MIDI tr an smit
MIDI
Page 21
21
USER MANUAL
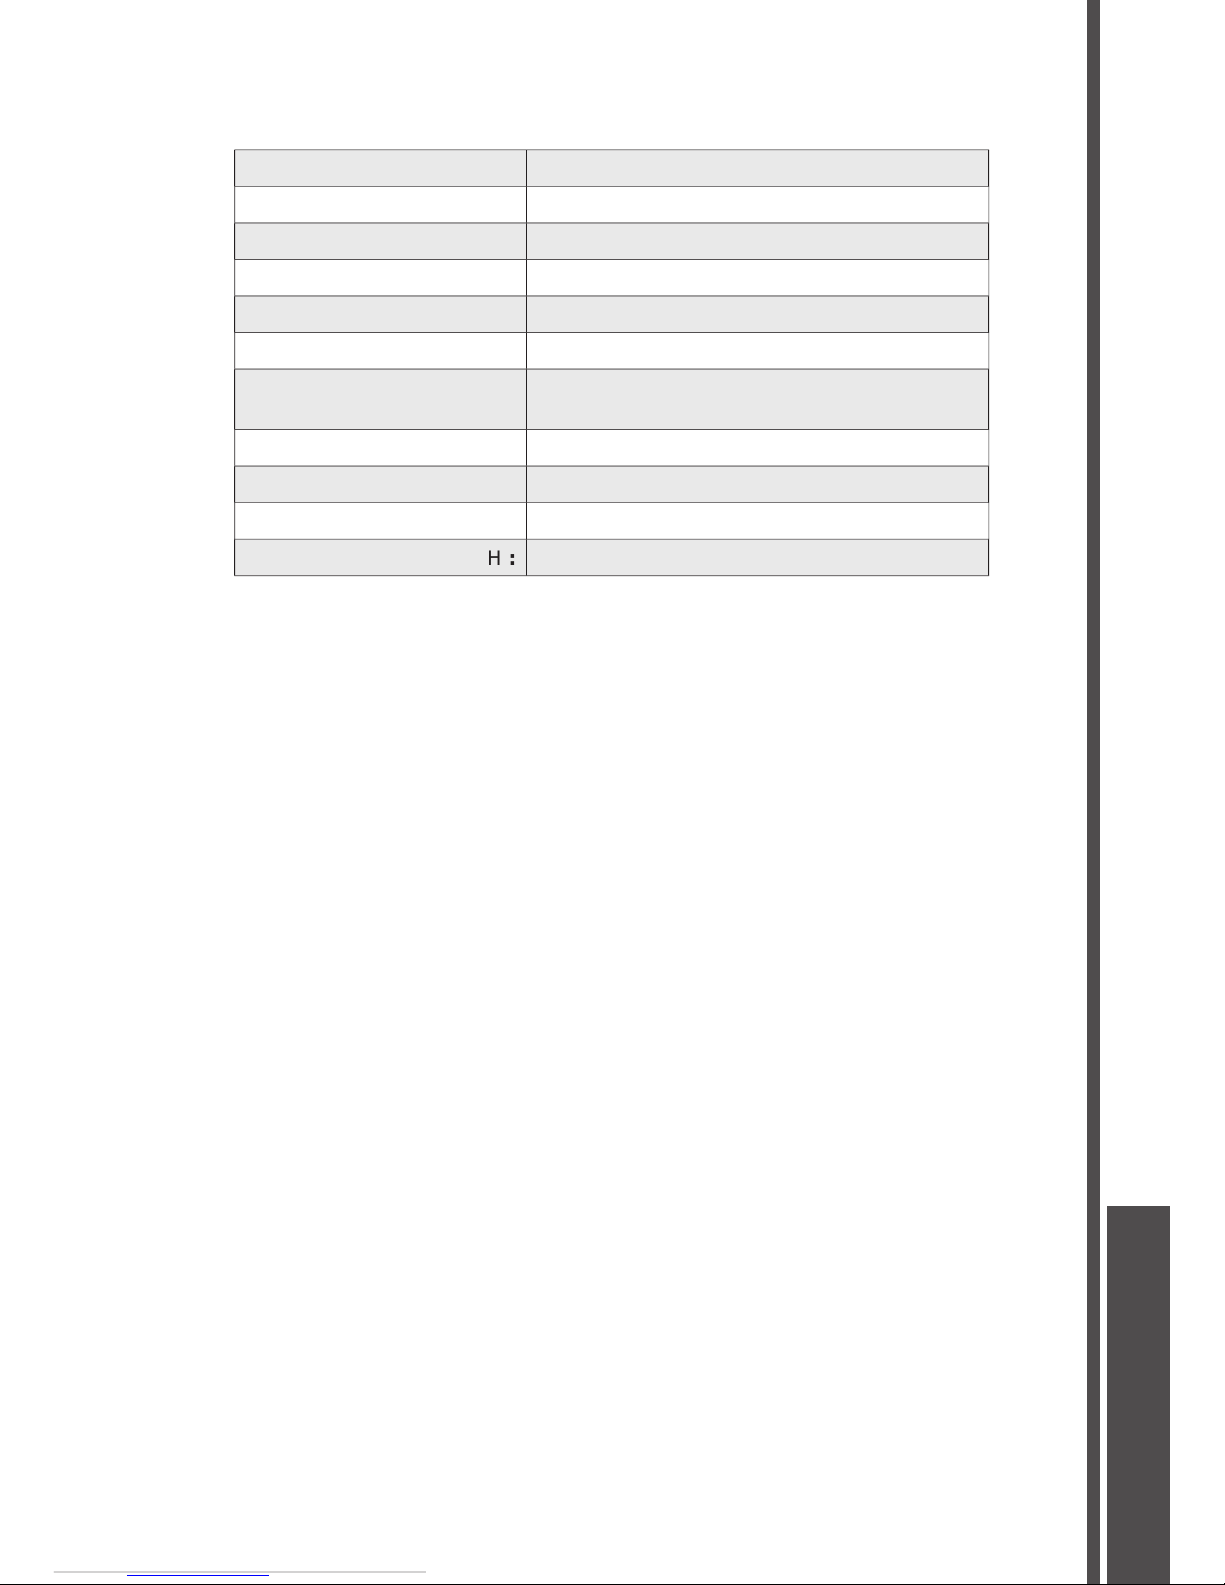
Voices:
Accompaniment Control:
Overall Control:
Transpose, Tune, MIDI Channel, Octave, Pitch
Other Control:
Connectors:
Weight:
975*350*135mm / 38.4*13.8*5.3 in
SPECIFICATIONS
Page 22

22
USER MANUAL
APPENDIX: CHORD TABLE
C
C
C6
C6
CM7
CM7
CM7#11
CM7#11
Cmadd9
Cm(9)
Cm9
CM7(9)
C6 9
C6(9)
augmented [aug]
Caug
Caug
Cm
Cm
9
Cm6
Cm6
Cm7
Cm7
Cm7b5
Cm7b5
Cmadd9
Cm(9)
Cm9
Cm7(9)
Cm11
Cm7(11)
CmM7
CmM7
CmM9
CmM7(9)
Cdim
Cdim
Cdim7
Cdim7
C7
C7
C7sus4
C7sus4
C7b5
C7b5
C7 9
C7(9)
C7#11
C7(#11)
C7 13
C7 13
C7b9
C7(b9)
C7b13
C7(b13)
C7#9
C7(#9)
CM7aug
CM7aug
C7aug
C7aug
Csus4
Csus4
One plus two plus fi ve [1+2+5]
C1+2+5
C
Page 23

23
USER MANUAL
Page 24

V 040506
 Loading...