

Page 1
Reference guide English
Version 1.0 04/2010
Page 2

Safety
Do not open; no user serviceable parts inside.
Guarantee invalid if opened.
Unit is not waterproof.
Keep away from water and other liquids.
Maximum operating temperature of this unit is 550C.
Keep away from electric heaters and ames.
Use a damp cloth for cleaning.
Do not use cleaning agents or solvents.
Legal
stageClix is a trade mark of QDES works BV. QDES
Works BV shall in no case be liable for damages arising
from use of this product.
A word of gratitude
Thank you for using stageClix! This unit has been designed with the professional musician in mind.
All units use only the best quality components and are
produced using RoHS compliant materials - this means
they do not contain any harmful substances like lead
or mercury. All materials used, including the
batteries, can and should be recycled!
ii
Page 3

Safety & Legal
Contents (this page)
1. What’s in the package?
2. Getting ready for use
3. In use
4. Digital or Wired sound
5. Radio Frequency Hints
6. Channels
7. Batteries
8. Receiver
9. Transmitter
10. Accessories
11. Other stageClix products
12. Conformities
ii
iii
1
2
3
4
5
7
8
10
11
12
13
14
Contents
iii
Page 4
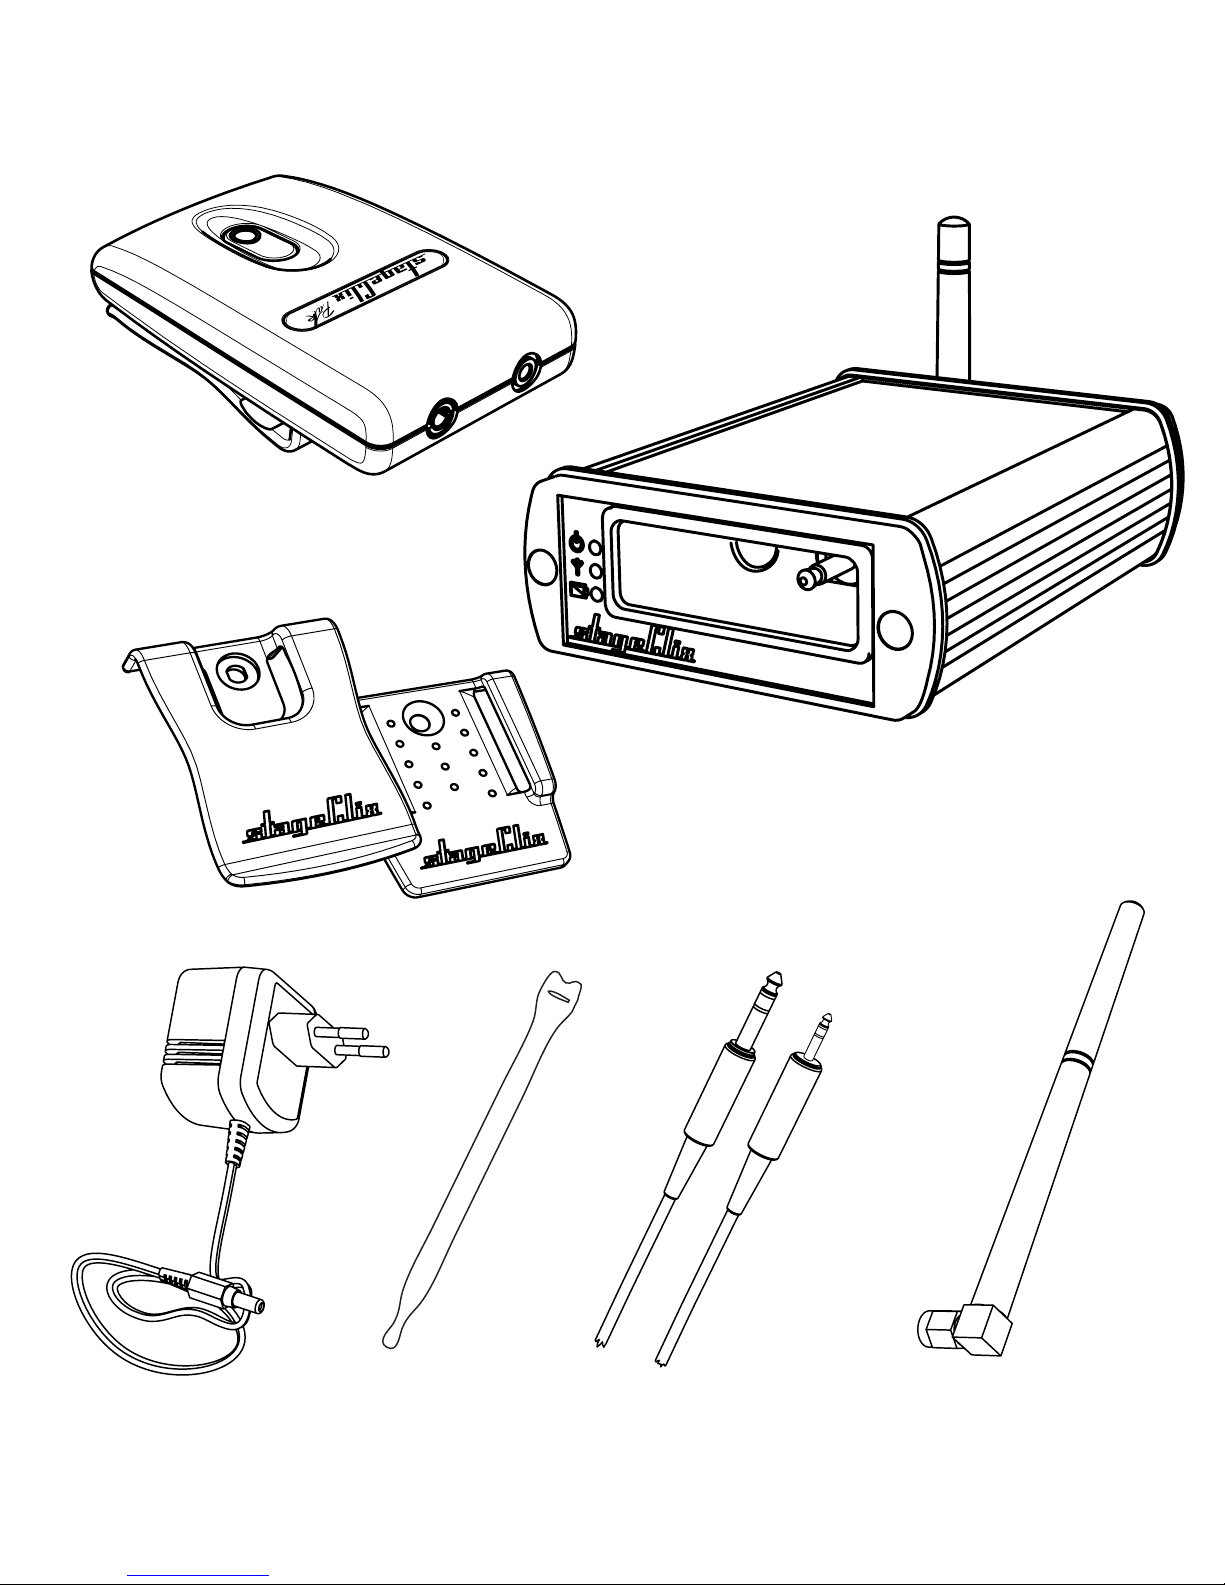
2 belt clips
1. What’s in the package?
transmitter
adapter 2 patch cablesvelcro strap antenna
receiver
1
Page 5

DONE!
2. Getting ready for use
1. Attach the antenna to the back of the receiver
by turning clockwise (do not use tools, do not
over tighten)
2. Plug the supplied adapter into a
110-230V supply, and the DC plug into the rear
panel DC socket. Only use the stageClix power
supply.
3. Use the supplied patch cable to connect the
rear panel output jack to your amplier or to
your amplier, the input of your effects unit,
mixer or stagebox.
4. Plug the transmitter into the front socket
marked ‘charge’ and leave the transmitter to
charge for some time, preferably more than
one hour.
2
Page 6
3
The transmitter will be automatically switched off
when you pull the transmitter out of the receiver.
The transmitter is activated by pressing the single
button.
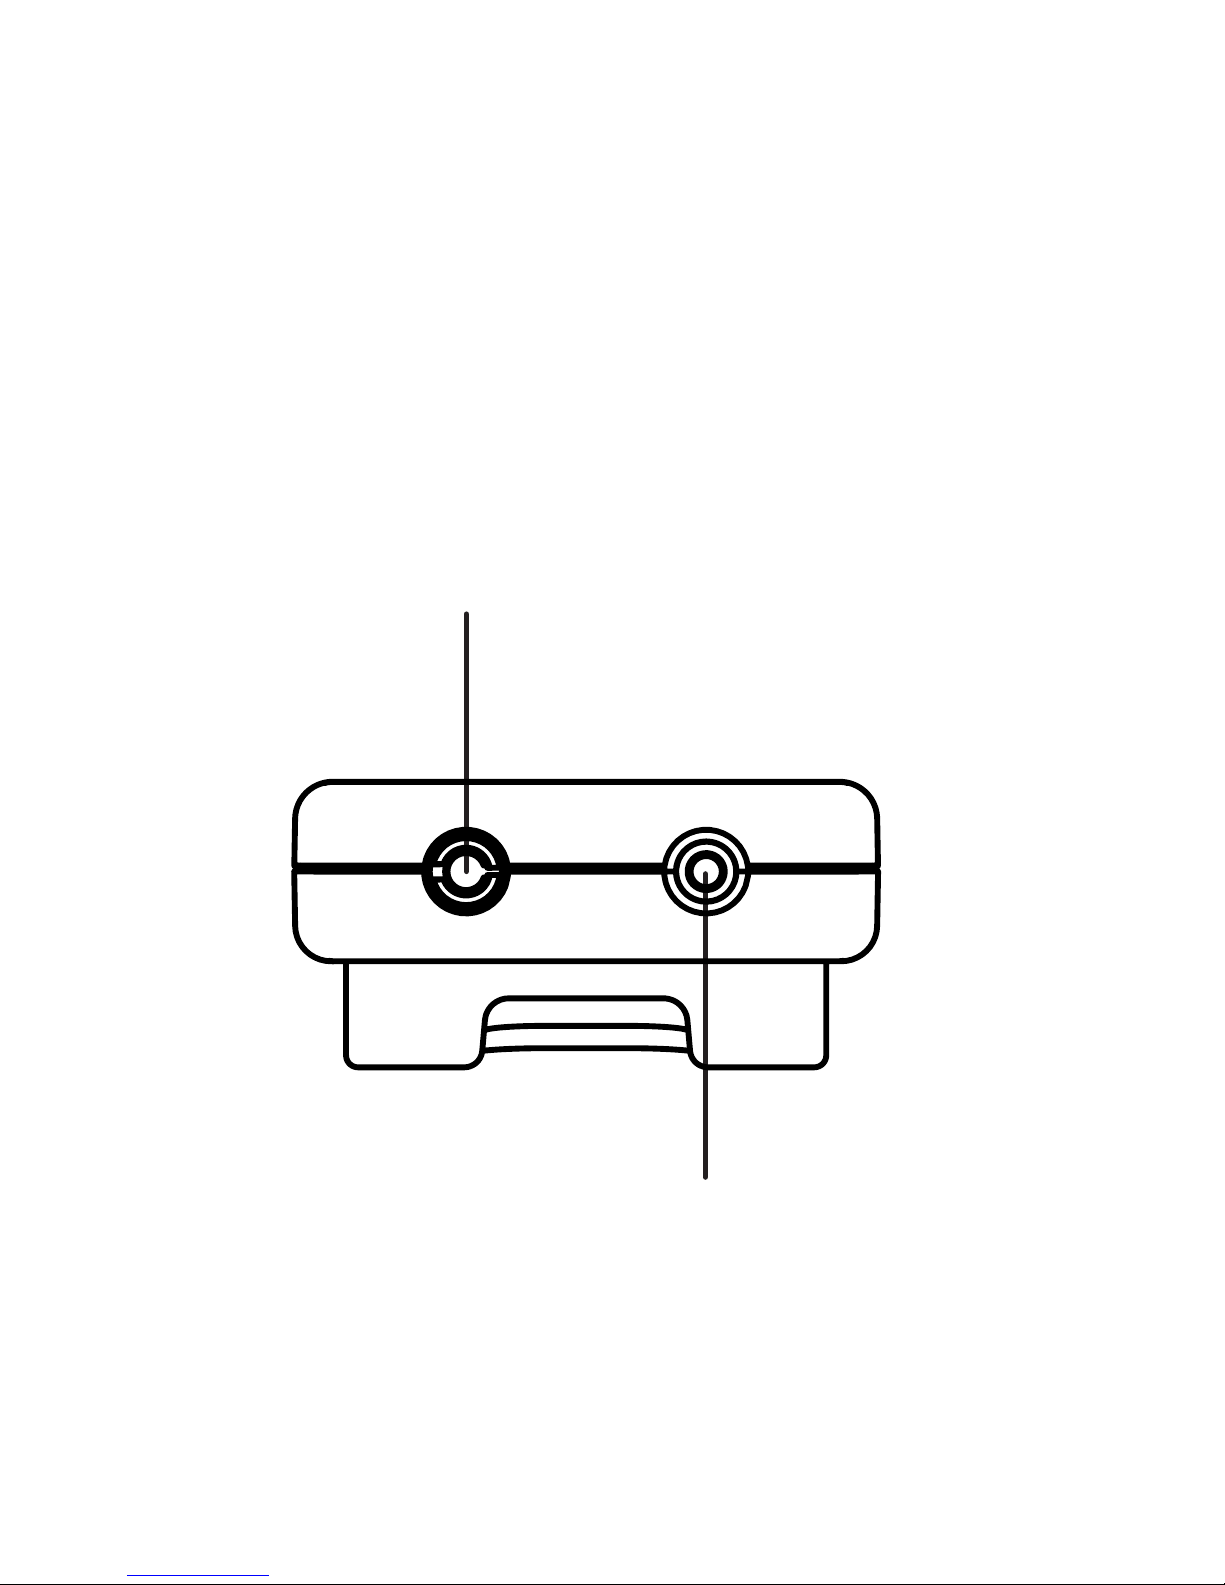
3. In use
3.5mm (high impedance)
This input is designed for line
level signals (eg. keyboards, active guitars and basses)
2.5mm input (Pre-amplied)
Input with a built-in preamp for
microphones (clip-on’s and pickups for acoustic instruments)
Page 7

4
4. Digital or Wired sound
This unit offers the advantage of two sound options,
thanks to some clever circuitry in the transmitter.
The default setting is a pure, full bandwith digital
sound, or there is the option of using a ‘wired’ sound.
To select (or switch between) sounds, proceed as
follows:
--note that the transmitter must not be inserted into the receiver.--
Make sure the transmitter is switched on (white
LED glows). Now press the button on the transmitter for at least ve consecutive seconds (the white
LED will stop glowing while doing this).
You have switched between sounds when the LED
on the transmitter starts to blink rapidly. This setting will be stored.
If the batteries are completely drained, your sound
setting will be reset to the default setting. To
recover your setting after the batteries are charged
again, follow the same procedure. Your sound setting can be switched at any time by following this
procedure.
Page 8

5
5. Radio Frequency Hints
• If possible, install the receiver in a slightly elevated
position.
• Keep away from broadband interference sources
like WiFi accesspoints or WiFi-enabled laptops, and
switching power supplies.
• For maximum range keep the antenna away from
other cables and pointing upwards if possible.
• Stone walls and reinforced ferro-concrete walls may
partially block the signal.
• This system uses a patented digital transmission
technique and triple frequency diversity for a reliable
noise-free link.
• This set contains a transmitter legal to be sold in the
EU. Some countries may restrict use.
• Refer to www.ero.dk for conformity information.
Page 9
6
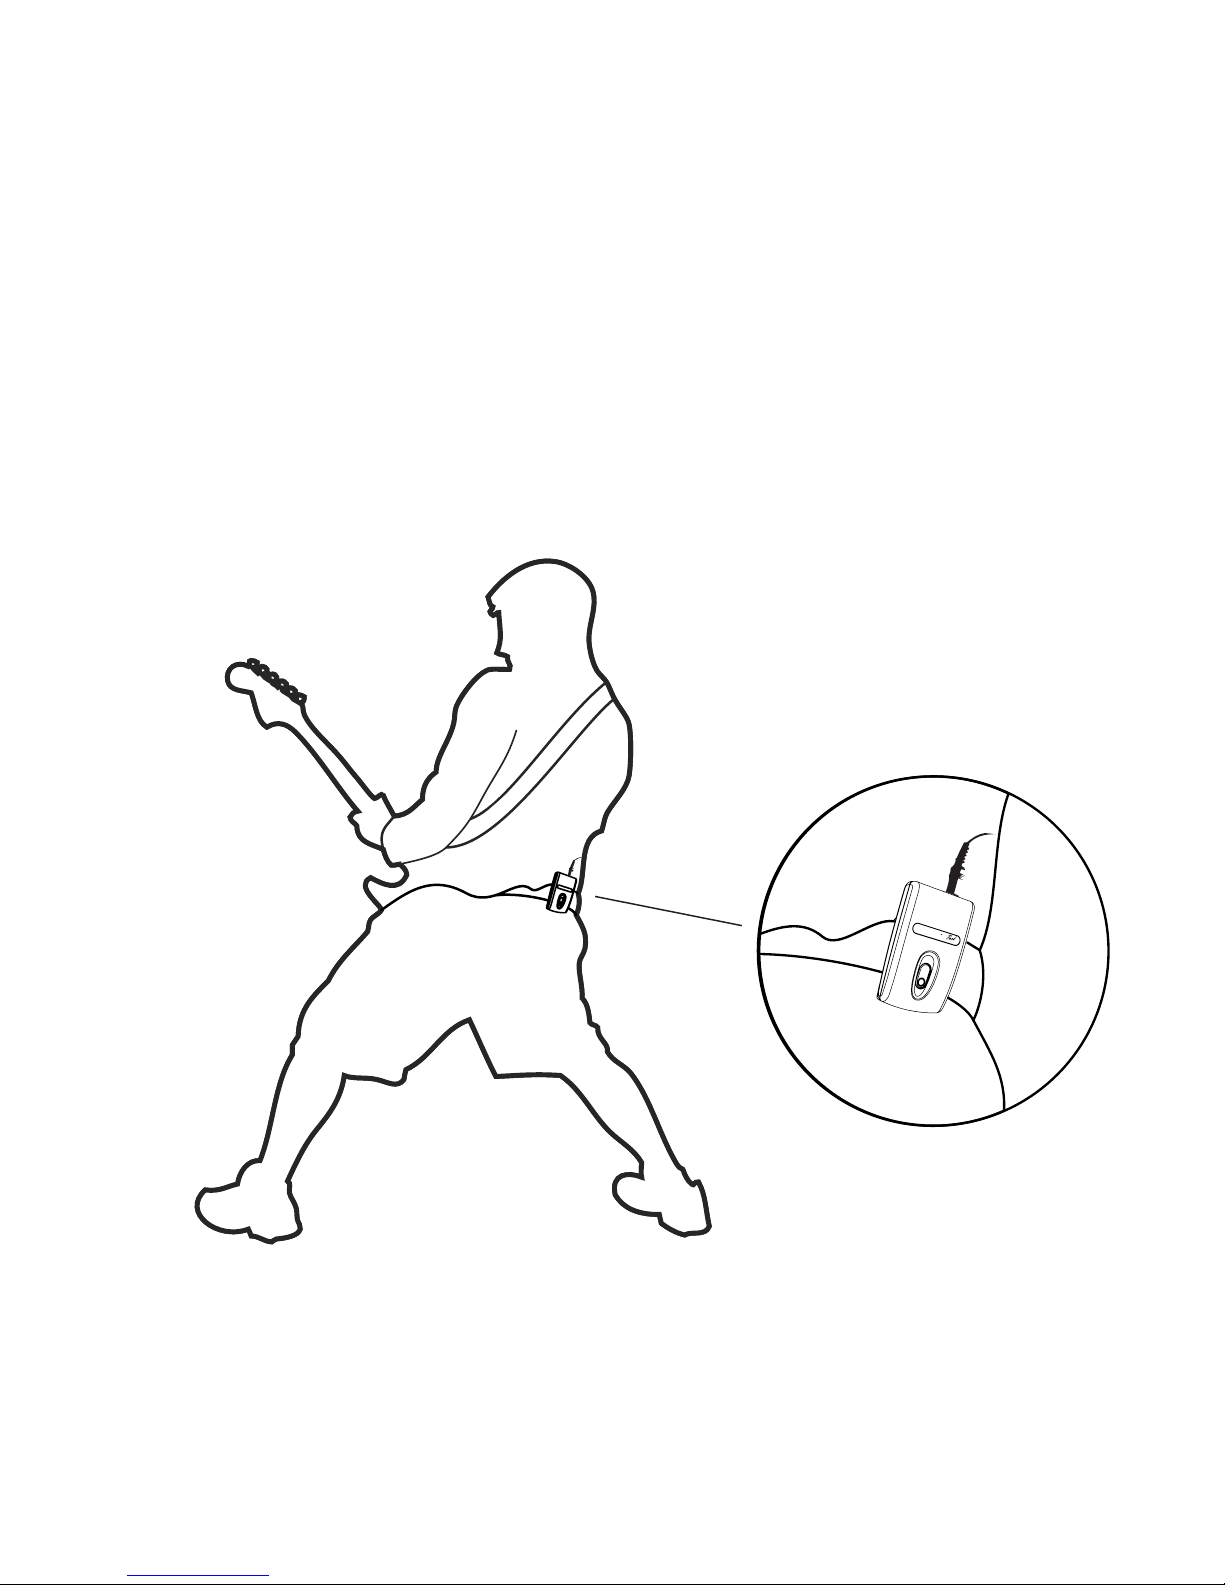
• Try to keep the transmitter as far as way as possible
from active electronics. Attach the transmitter therefore to your belt or guitar strap, or use the velcro
strap to attach it elsewhere, to keep it away from
interference caused by active electronics.
Page 10

7
6. Channels
You need to change channels if you are going to use
more than one stageClix unit simultaneously in the
same venue. Or to solve compatability / interference
issues with other equipment, follow this procedure:
1. When the transmitter is inserted into the
receiver and charging, press the on/off button
on the receiver once.
2. The LEDs on the receiver will start blinking
according to the table on the next page.
3. Each keypress on the button will advance one
step in the table.
4. If the button is not pressed for 3 seconds,
that particular channel setting is stored and
the unit will resume its normal charge mode.
It can then be used immediately on the new
frequency.
Page 11

8
power
signal
batt.
3 6
2 5 8
1 4 7
9
11
10
12
channel #
blink count
Channels table
Page 12

9
7. Batteries
• This system uses high quality (industrial)
NiMH cells
• These batteries do not contain heavy metals like mercury or lead.
• Battery life is expected to be about 5
years. Should the batteries deterioriate,
please return them and we will replace
them for a reasonable fee and dispose of
the returned batteries responsibly. Check
out www.stageclix.com for additional
information.
To recharge the transmitter, plug it into the
‘charge’ input on the front of the receiver.
After synchronising channels with the receiver
(rapidly ashing LED) the unit will go into fast
charge mode (fast blinking). This ‘fast charge
phase’ may take up to three hours, and will end
automatically.
Page 13

10
Very low temperatures can cause the batteries to discharge completely. If the transmitter
is exposed to low temperatures for some time,
it may be necessary to repeat the charging
process.
If the batteries are completely drained (the
transmitter doesn’t respond to the on/off
switch) it could take up to one minute before
the unit starts recharging again, after the transmitter is put into the ‘charge’ input.
Channel synchronisation starts automatically
at the beginning of every charging cycle. A
completely drained battery could occasionally
cause this channel synchronisation to fail, in
which case the synchronisation procedure must
be started again to link the transmitter with
its receiver, i.e. press the on/off button on the
transmitter once.
Page 14

11
8. Receiver
• Supply 9V 250mA
• Full aluminium housing
• Receiving frequency 2400-2483.5MHz
• Receiver sensitivity -82dBm
• Bitstream audio DAC
Page 15
12
9. Transmitter
• Dual inputs (line & microphone)
• Battery 2 x 950mAh NiMH cell
• Polycarbonate housing
• Transmitter frequency 2400-2483.5MHz
• RF output power 20mW
• Discrete Jfet preamp
• Input impedance 1.5MegOhm
• Input capacitance <100pF
• ESD protected
• No compander
• Bitstream audio ADC
• 10Hz-20KHz ±3dB @100mVpp
Page 16

13
10. Accessories
Spare battery pack
replacement of the transmitter
battery
Extra transmitter
Clip-on Mics
Page 17

14
11. Line up : stageClix products
stageClix Jack
Jack plug transmitter with
receiver for guitar and bass
stageClix Vox
Belt pack receiver for inear powered monitor use.
stageClix XLR
Transmitter for dynamic
XLR microphones.
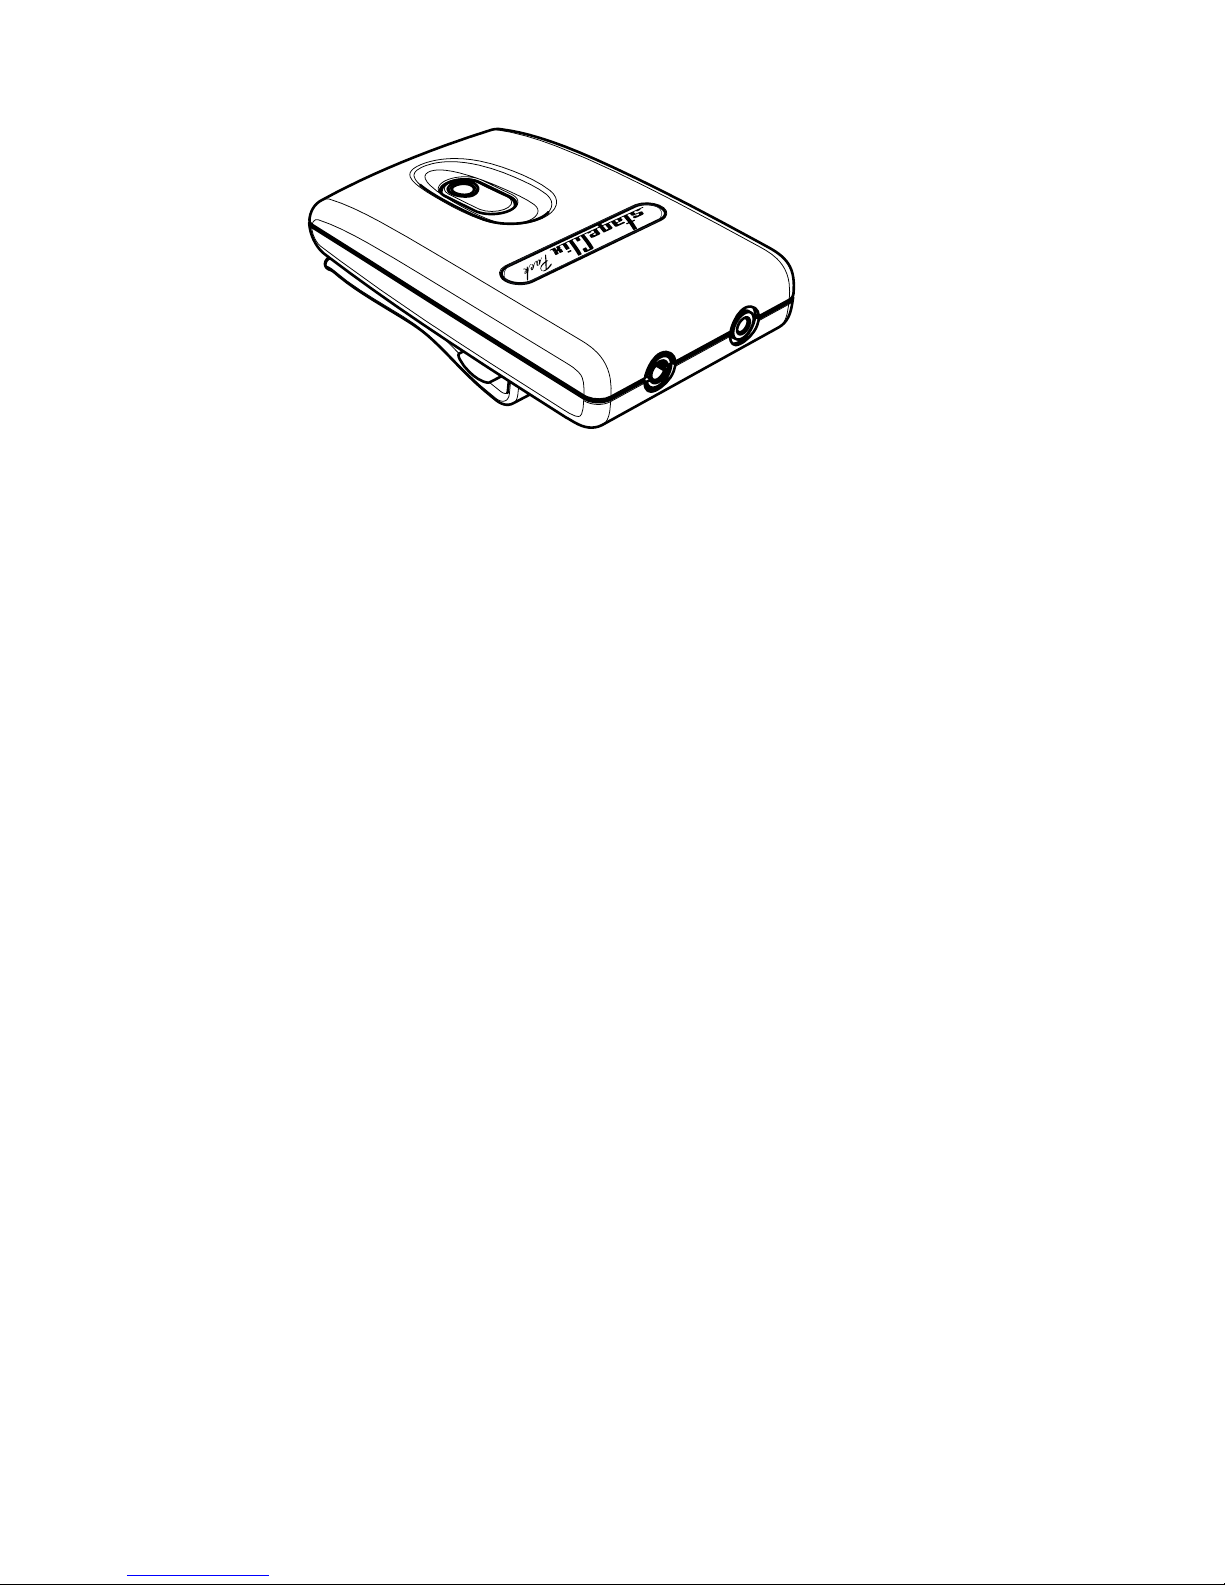
stageClix Rack
To combine several different stageClix systems in one
powered 19 inch rack.
Page 18

15
12. Conformities
CE declaration
of conformity
This unit is tested to comply with R&TTE:
• ETSI EN 300 328 V1.7.1 (Radio)
• EN 301 489 V1.4.1 (EMC)
• EN 60950 (Safety)
Manufacturer
declarations
This unit is RoHS (Restriction Of Hazardous
Substances) compliant.
Page 19

Warranty
The original stageClix product you have purchased
is covered by a warranty of 24 months. The warranty
period begins on the date of purchase. Please retain
your sales receipt as proof of purchase.
We shall satisfy our warranty obligations by remedying
any material or manufacturing faults free of charge
at our discretion either by repair or by exchanging
individual parts or the entire appliance.
Situations which are not covered by this warranty are:
• minor faults or deviations in the quality of the
product which do not affect the product’s value
or tness for its intended purpose.
• faults resulting from improper use, e.g. operating errors, mechanical damage, incorrect
operating voltage. Proper use for the purpose of
this warranty is dened as use of the product in
compliance with the conditions stated in these
instructions for use.
• faults due to normal wear and tear.
Purchaser bears the cost and risk of return shipment to his/her point of sale.
Warranty claims can be enforced in any country in which the statutory rights
of the country concerned are not in conict with our warranty regulations.
No other warranty claims or claims over and above the right stated in these
terms and conditions will be accepted.
16
Page 20

www.stageclix.com
The Netherlands
 Loading...