

Page 1
SuperDrive Upgrade Installation Guide
1
Thank you for purchasing the SuperDrive Extruder Upgrade Kit for your STACKER 3D printer! The new
double gear design of the Stacker SuperDrive provides more consistent filament movement through the
extruder and improves overall performance when printing with any filament -- including flexible filaments.
This Installation Guide is intended for the Stacker S4, but the SuperDrive Upgrade also works with the Stacker
S2 and Stacker 500 models. Please read and understand the entire SuperDrive Upgrade Installation Guide
before proceeding step-by-step through these instructions. Installation takes about half an hour. If you run into
problems or have any questions, please contact our customer support team at [email protected].
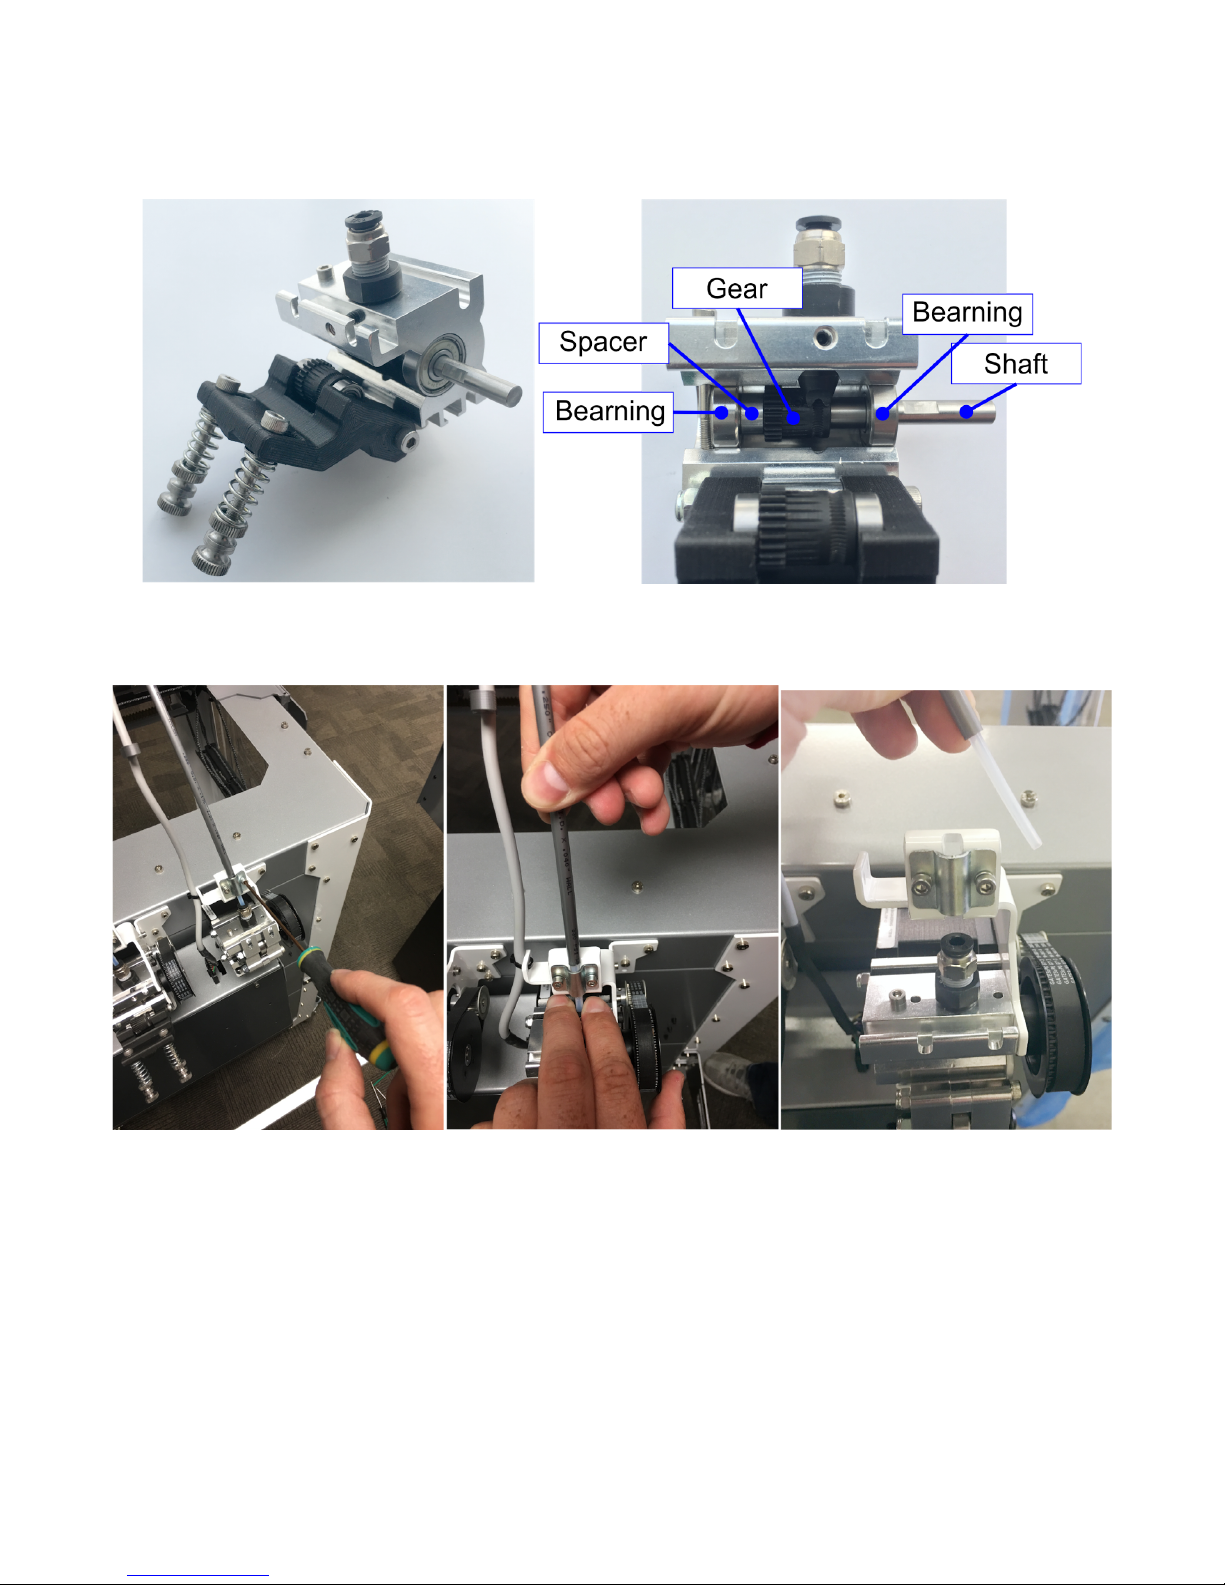
Required Tools:
Please Note: This Installation Guide only shows the installation on exturder 1. When installing the upgrade kit
on extruders 2, 3, and 4, access to the screws is limited due to the proximity neighboring extruders. You may
find it easer to remove the entire filament drive from the printer to perform the upgrade. To remove the entire
filament drive from the printer, use an M3 Hex Driver and remove the three screws indicated in the images
below. You will also have to disconnect the power connectors located underneath the extruder.
1
Last updated April 11, 2017
Page 2
SuperDrive Upgrade Page 2 of 6
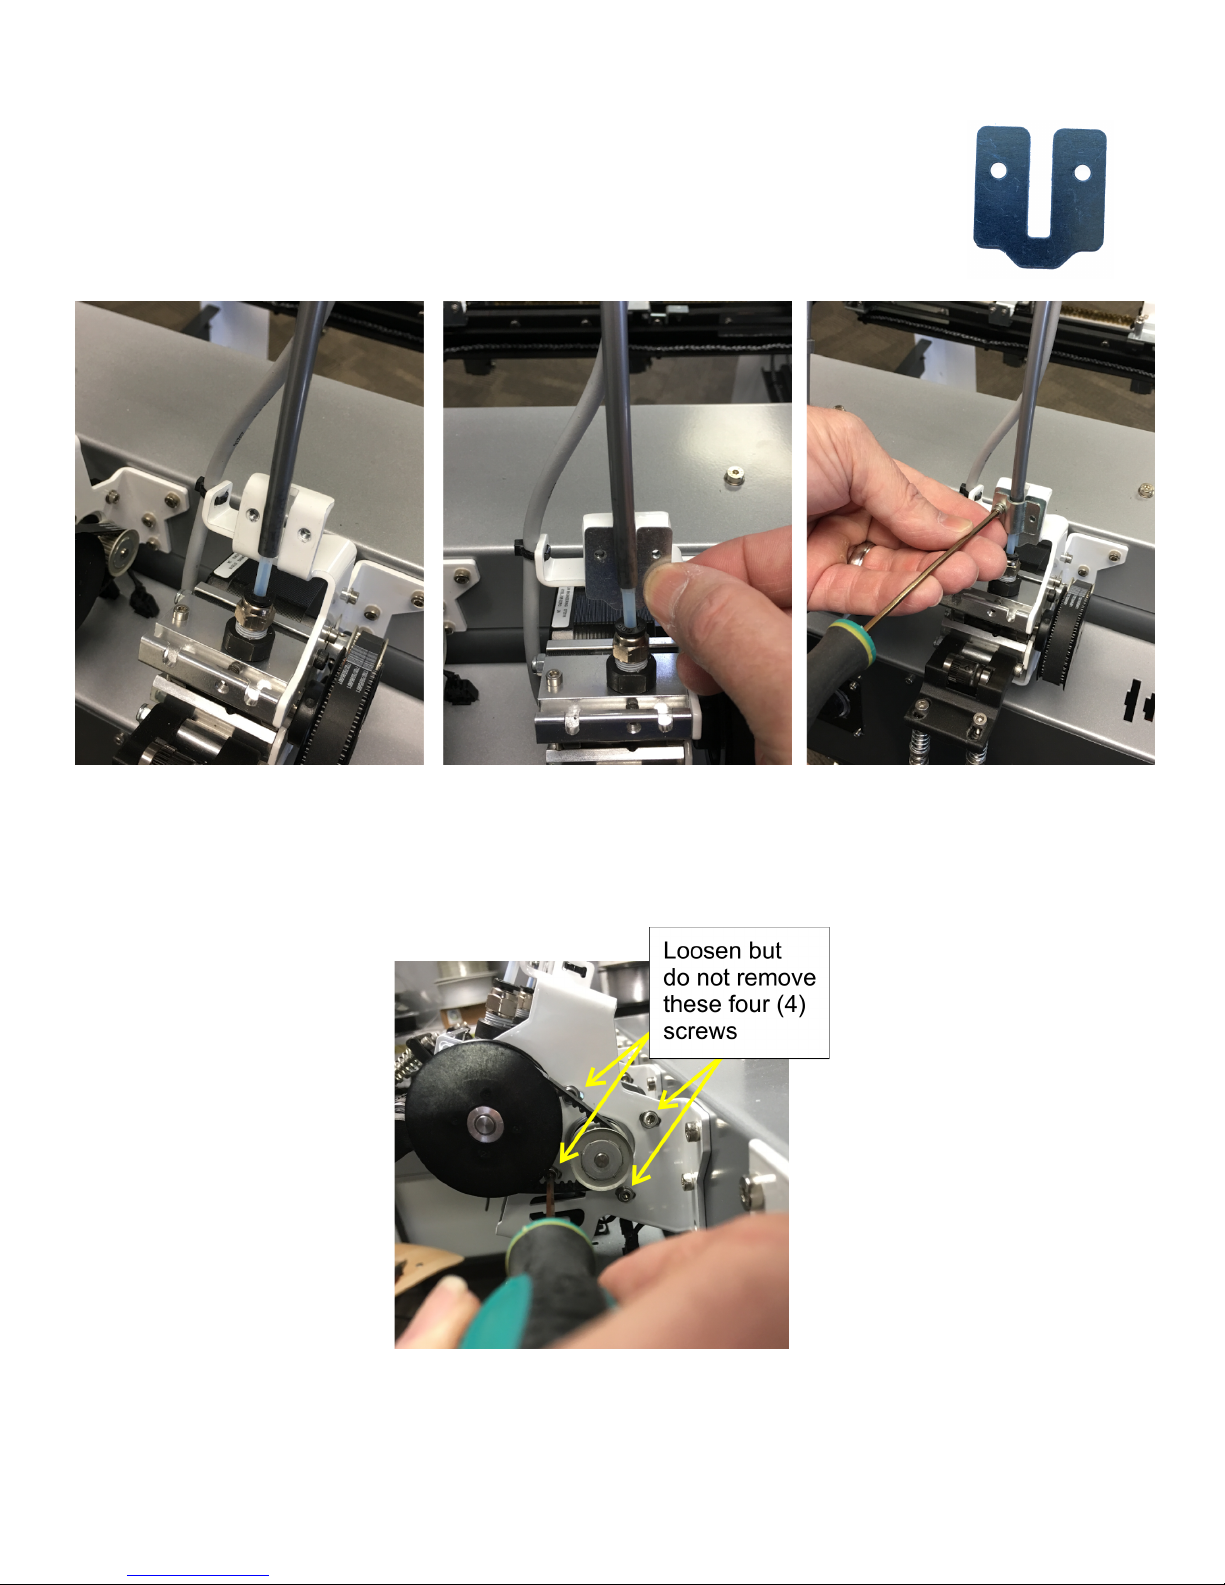
Step 1. Check Upgrade Kit Assembly: Your SuperDirve comes fully assembled, but the shaft is not held in
the housing. If the shaft separates from the assembly, the image below illustrates the orientation of the
bearings, spacer, and gear along the shaft.
Step 2. Remove Filament Guide Tube: Loosen the two screws which clamp down the silver filament guide
tube sleeve, then depress the push-fitting ring to detach the filament guide tube from the extruder.
Page 3
SuperDrive Upgrade Page 3 of 6
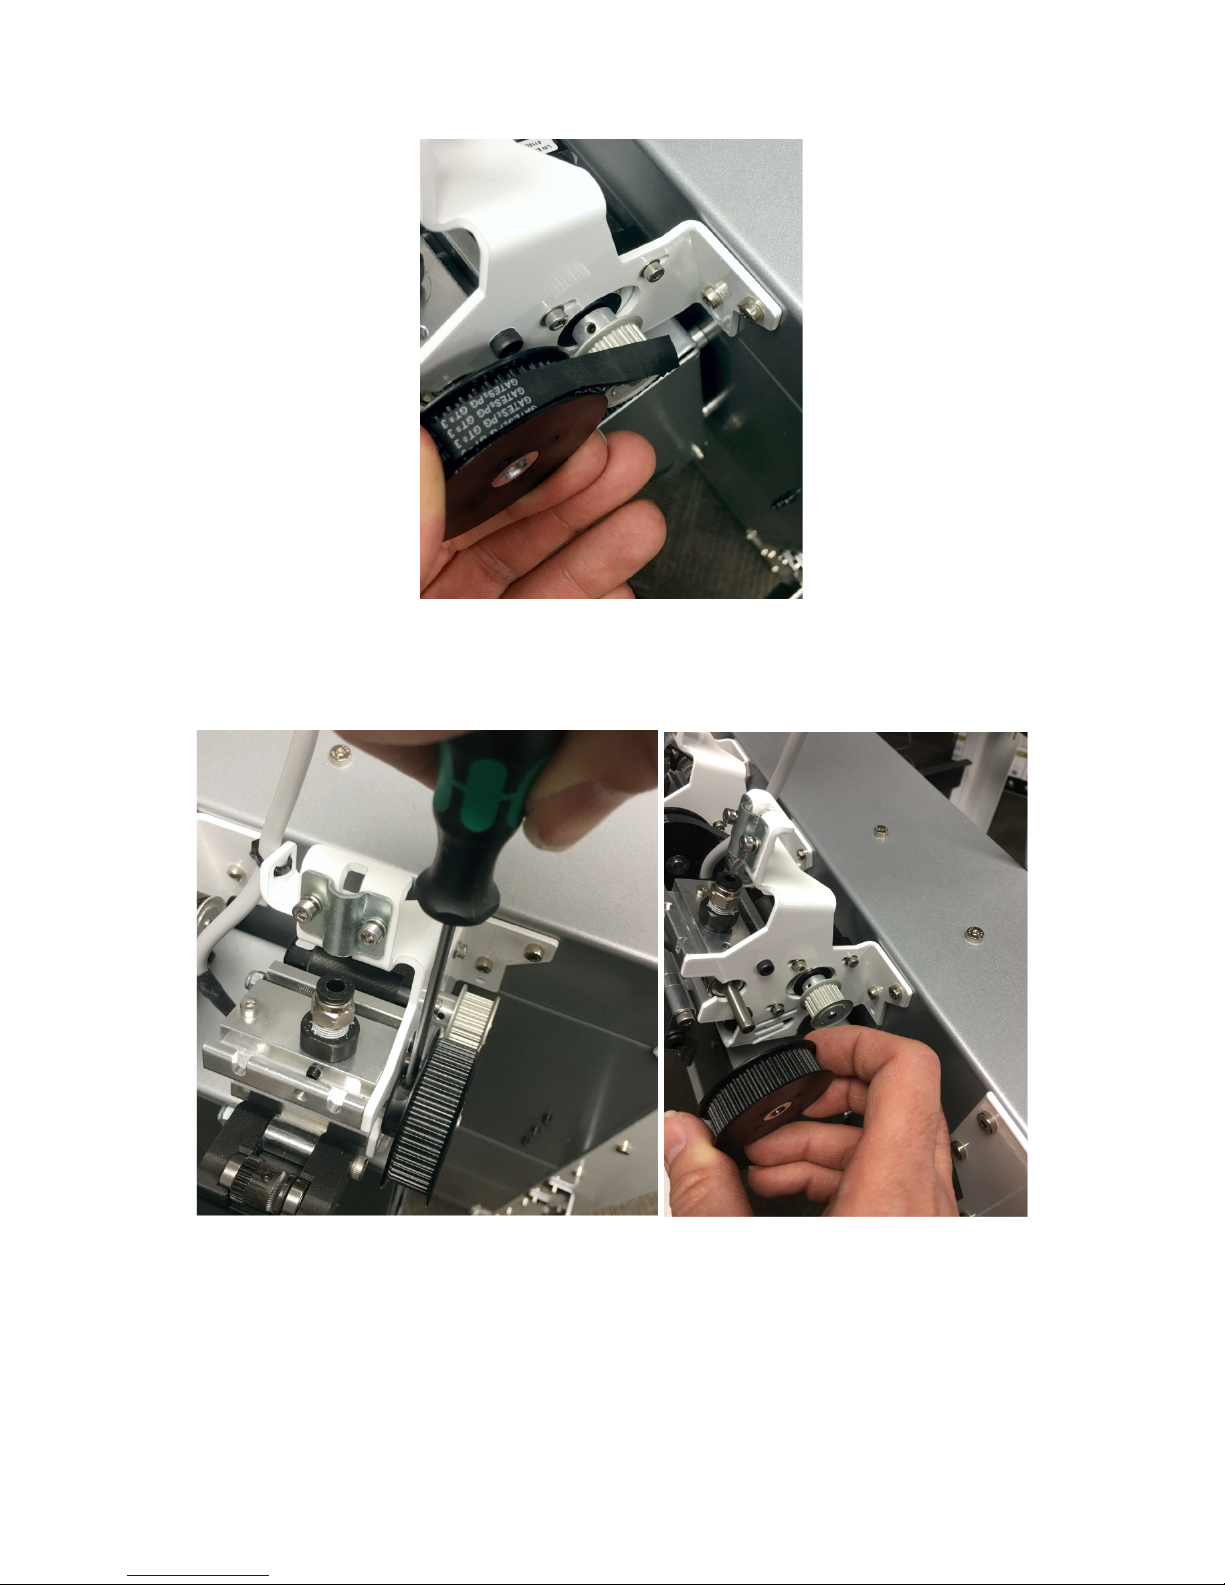
Step 3. Install Spacer Shim: Locate the tube shim (shown to the right). Then remove
the tube clamp from your printer, slide the shim behind the tube and reattach the tube
clamp.
Step 4. Loosen the Four Motor Screws: In order to remove the belt from the pulleys, you will need to loosen
(DO NOT REMOVE) the four of the screws securing the motor to the filament drive stepper motor bracket.
Page 4
SuperDrive Upgrade Page 4 of 6
Step 5. Remove Belt: With the four motor screws loose, the belt tension is reduced. To remove the belt, you
can place the belt partially off from the smaller pulley (shown below) and rotate the larger pulley by hand to
ease the belt from the smaller pulley.
Step 6. Detach the Large Pulley: To remove the large pulley, loosening the setscrew on the pulley, then slide
the pulley off the shaft.
Page 5
SuperDrive Upgrade Page 5 of 6
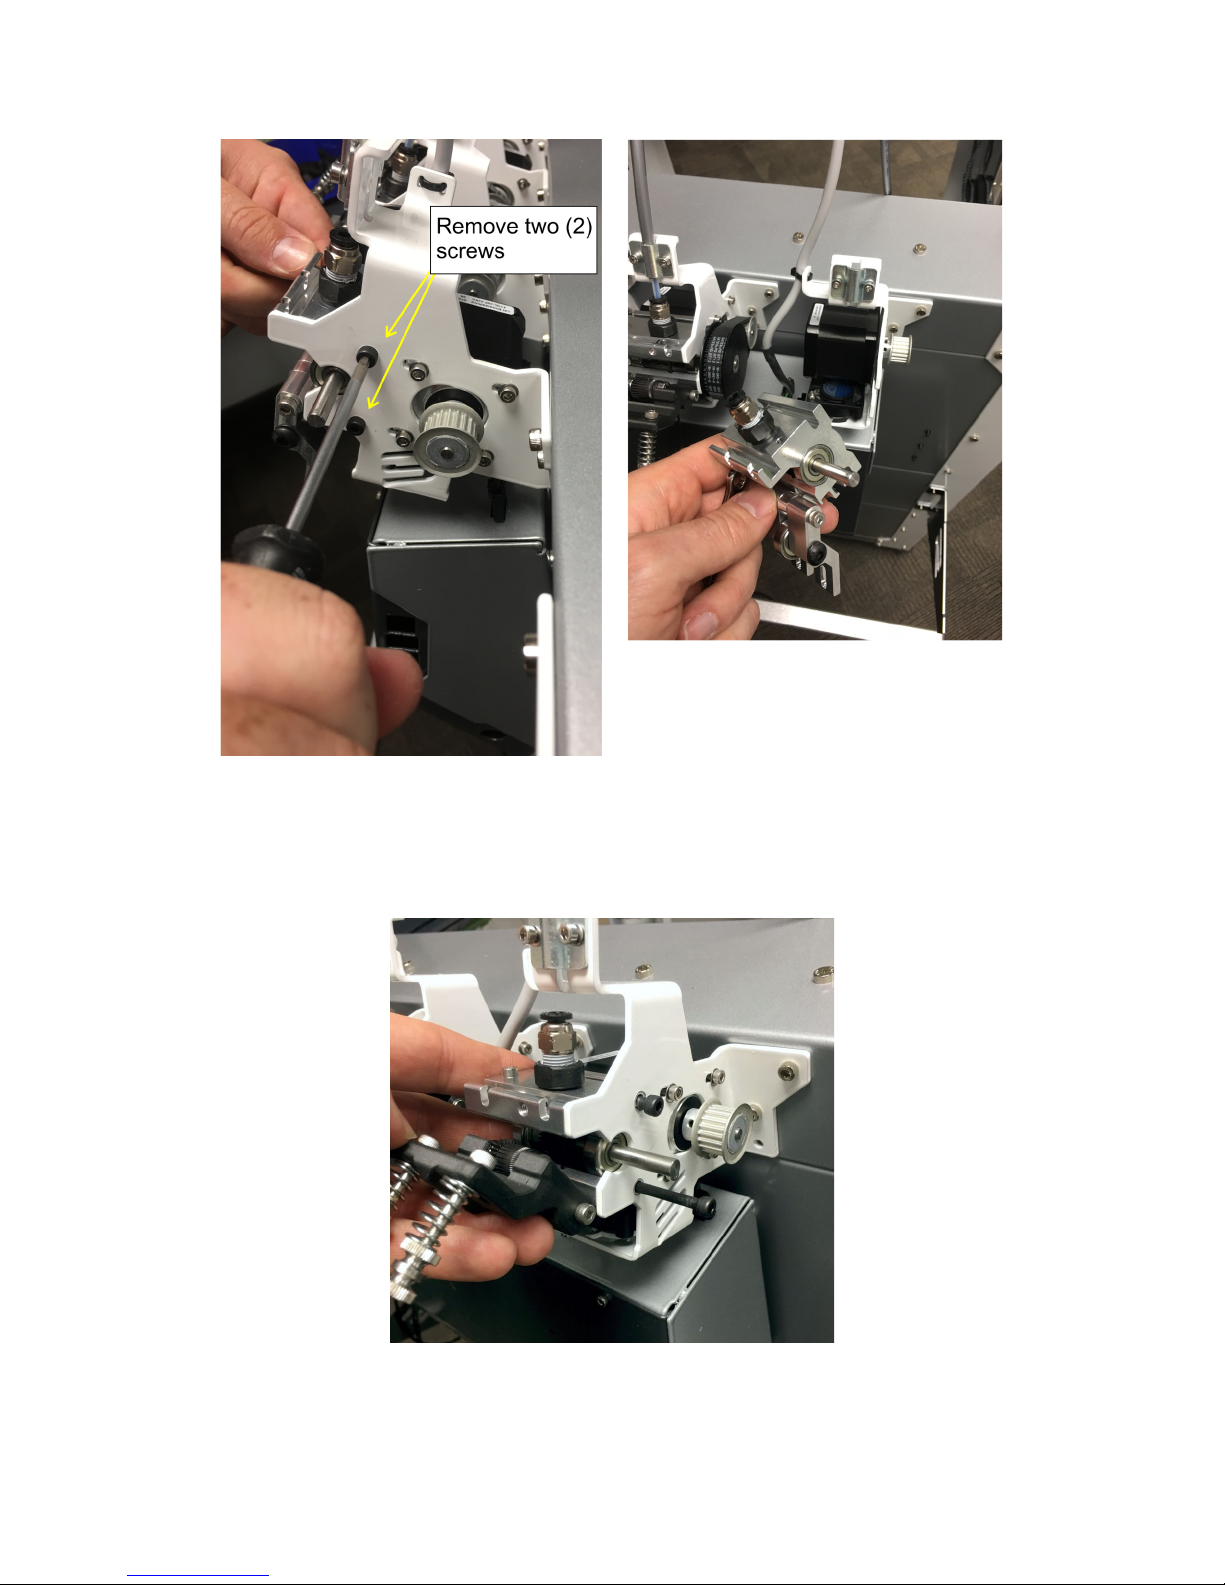
Step 7. Remove Extruder Assembly: Behind the large pulley you just removed are two screws. Remove
these screws with an M3 driver while using a 7mm wrench to hold the opposite nut. When the two screws are
removed, the entire extruder assembly will come free.
Step 8. Install New SuperDrive Extruder Assembly: Take the new SuperDrive assembly and attach it to the
filament drive stepper motor bracket by using the same two screws and nuts you removed in step 6. Confirm
the orientation of the shaft is correct (seen in Step 1).
Page 6
SuperDrive Upgrade Page 6 of 6
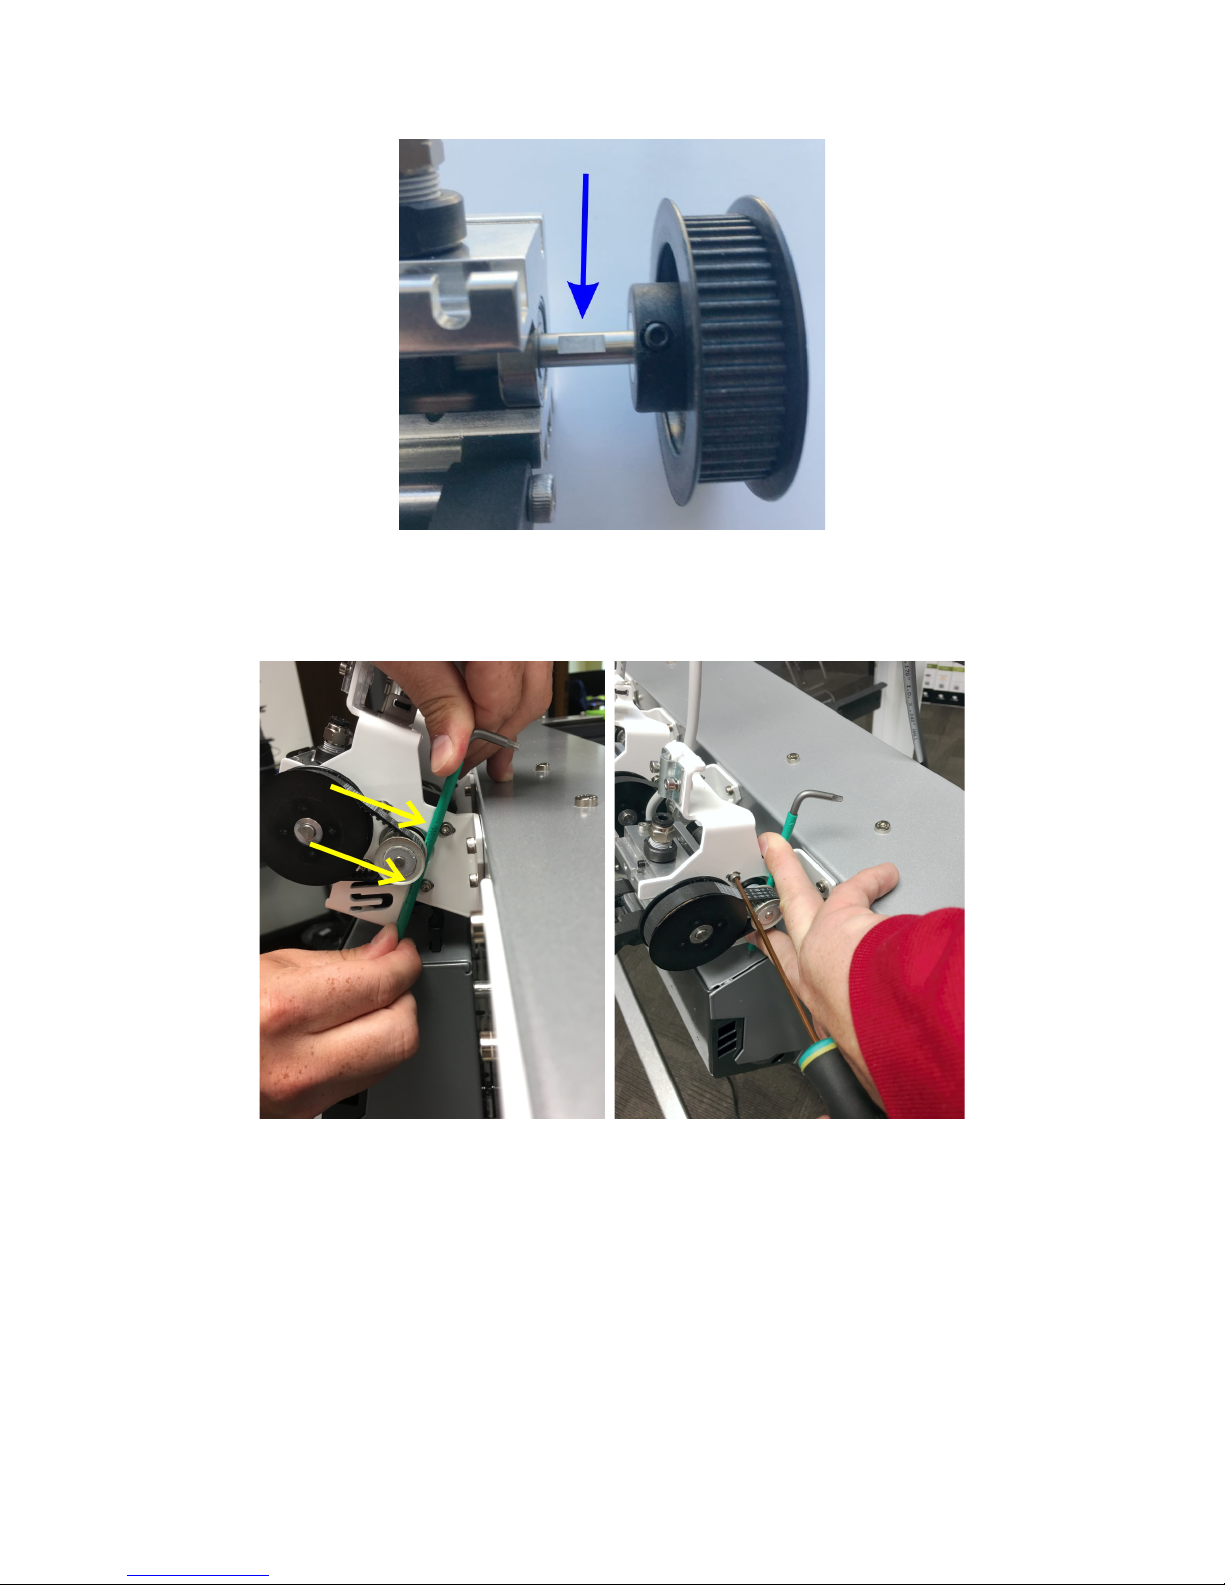
Step 9. Reattach the Large Pulley: While sliding the large pulley back onto the shaft, make sure the set
screw is aligned with flat area on the shaft (see image below) before tightening the set screw. The set screw
must make contact with the flat area of the shaft.
Step 10. Reattach and Retension Belt: First, reattach the belt to the two pulleys, then tension the belt by
using a hex key (or other small tool as shown below) to add tension to the belt by moving two of the two motor
screws away from the larger pulley. While applying tension to the belt, re-tighten the motor bolts.
You are done and ready to try the new extruder drive! Reattach the filament guide tube, load your filament
and calibrate ESTEPS.
 Loading...