

Stack Audio Link User Manual
LINK USER GUIDE
Stack Audio LINK User Guide. Version 1. January 2019.
© Stack Audio Limited
https://volumio.github.io/docs/FAQs/Audio_Sources.html

2
LINK User Guide
Contents
1. Safety Notice
2. Connections & installation
3. Set Up
4. Control software
5. Servicing & Maintenance
6. Warranty & Liability
7. Technical Data
8. Support
1. Safety Notice
• The LINK is provided with a 110/240v compatible mains 1-1.5amp, 18v DC
power supply with a 2.5mm jack. We recommend you use this power supply with
the LINK. The power supply connects the LINK to the mains; never handle the
power supply with wet or damp hands.
• Do not expose the LINK or the power supply to any liquid, water or moisture.
Never handle the power supply with wet or damp hands.
• Do not open the LINK or try servicing it yourself a this will void the warranty.
• Do not use the LINK in high temperatures (50c+) and near hear sources such as
radiators. Ensure it is well ventilated.
3
2. Connections & installation
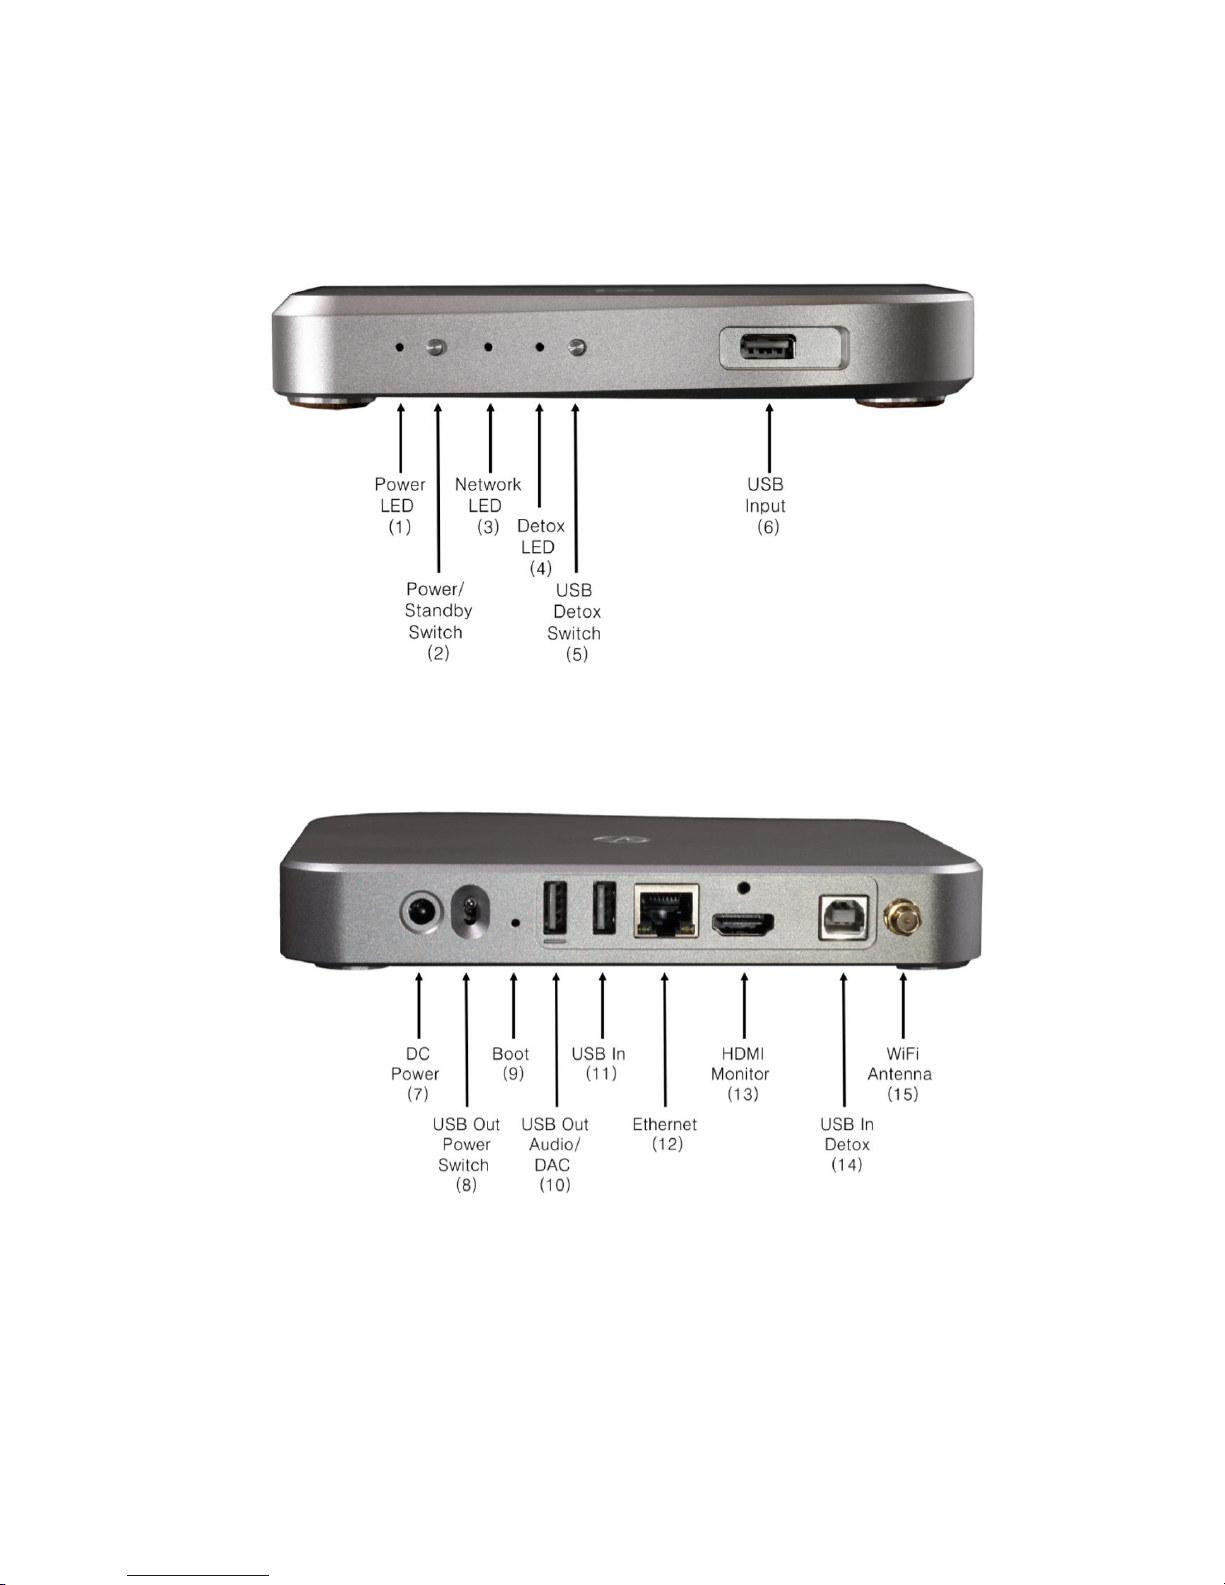
LINK Front Panel
LINK Rear Panel
Note: the numbers in brackets (n) alongside the front and rear panel labels on the
images above are used in the following sections to aid identification of the switches
and connections.
4
Mains Power Connection and Power/Standby
The LINK is supplied with a mains DC adaptor with the appropriate plug for different
countries. Connect the DC adaptor to the LINK’s power socket (7) on the rear panel
before connecting to the mains.
Use the Power/Standby Switch (2) on the front panel to turn the LINK on or back
into standby. After switching on, the Power LED (1) will change from red to blue.
The Network LED (3) will light up blue when the LINK is operational and the network
connection is established. This may take up to 60 seconds. Powering down also
takes up to 60 seconds to ensure all files are closed correctly. The Power LED (1)
will blink red and blue during the process and show red when in standby.
Do not disconnect from the mains without powering down fully.
Network Connections
The LINK needs to be connected to a home network (LAN) before it can be used.
Connection can be via ethernet or wi-fi.
The Ethernet port (12) is on the back panel for connecting an Ethernet cable to a
home router. A wired connection is recommended for maximum reliability and
performance, particularly for high-resolution music playback. We recommend using
a CAT5e, 6 or above cable capable of streaming at 1Gb/s.
The supplied wi-fi antenna should be attached to the connector (15) on the rear
panel to enable connection to a router via wi-fi either for streaming or control
purposes.
The Network LED (3) on the front panel will show blue when a stable network
connection has been established and the LINK has successfully booted. To follow
the set-up instructions and see the LINK on your web browser you will need to find
the IP address your router has allocated to the LINK. For instructions on the set-up
procedure refer to section 3 on page 7.
5
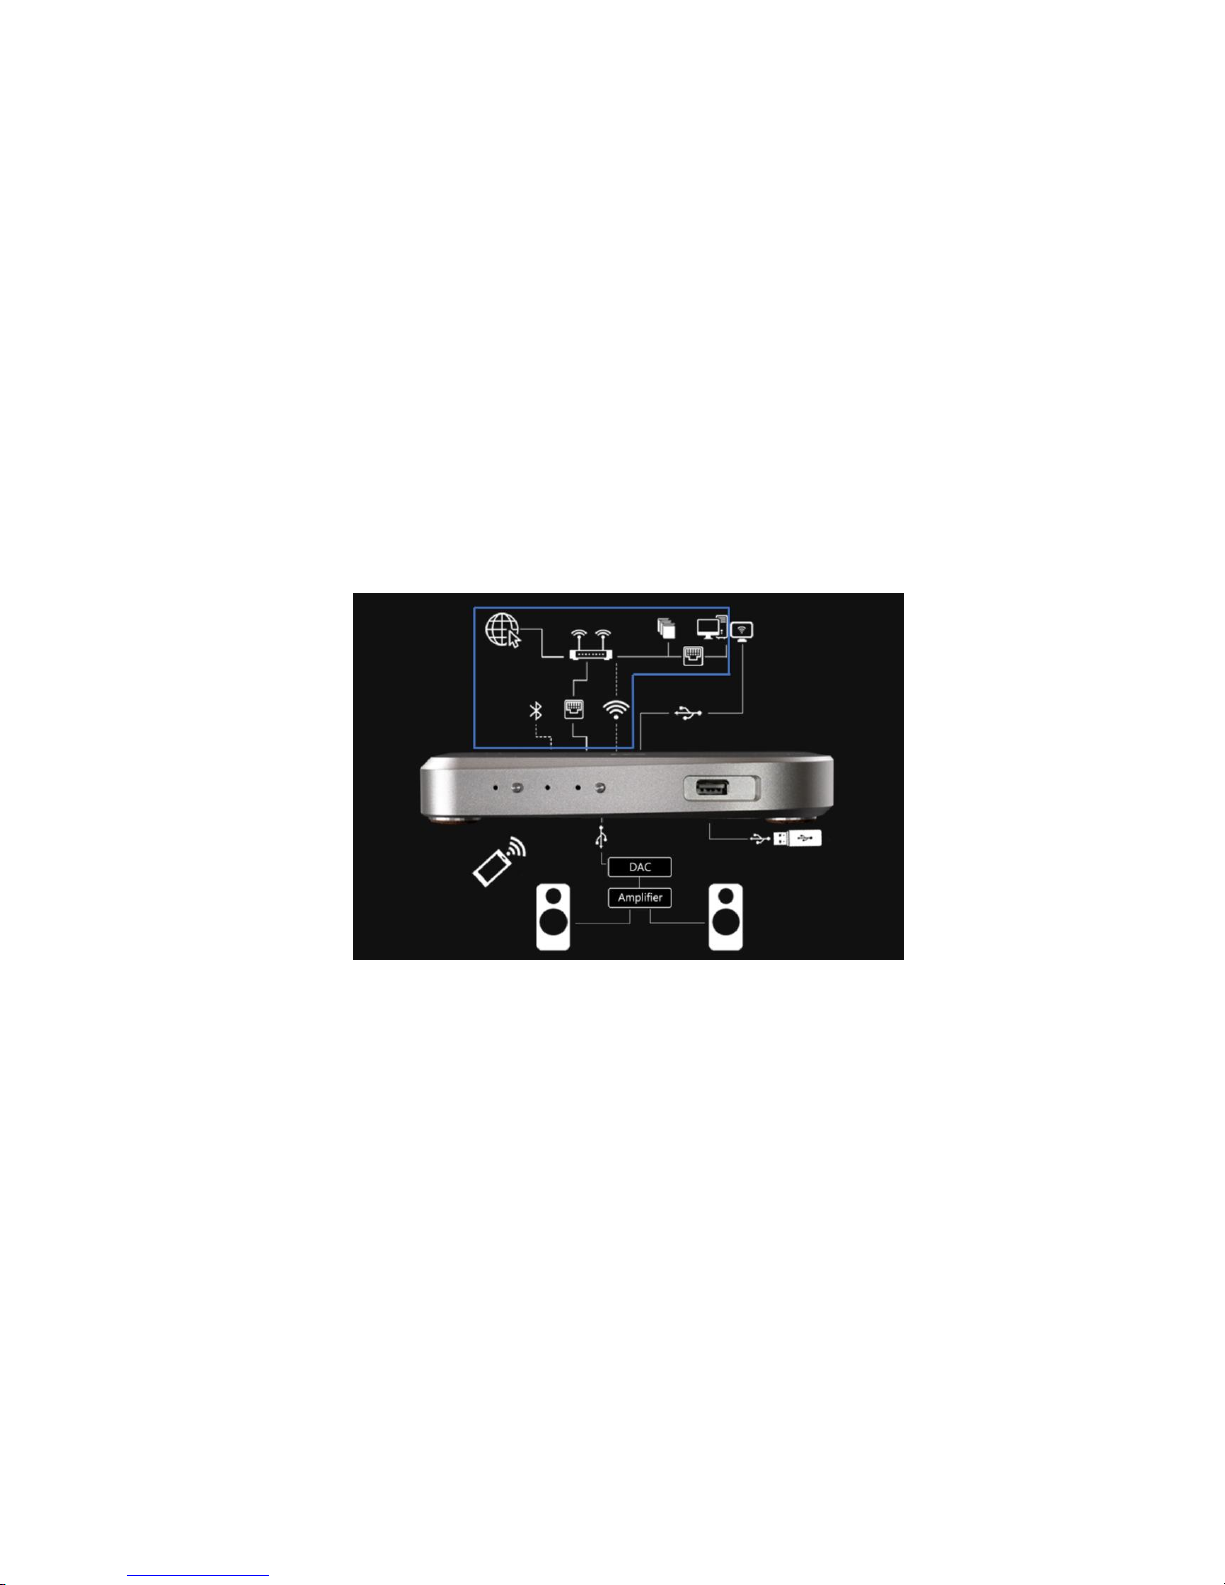
System connections
The LINK is designed to connect various streaming inputs to an existing DAC
(Digital to Analogue Converter) in a two-channel hi-fi system.
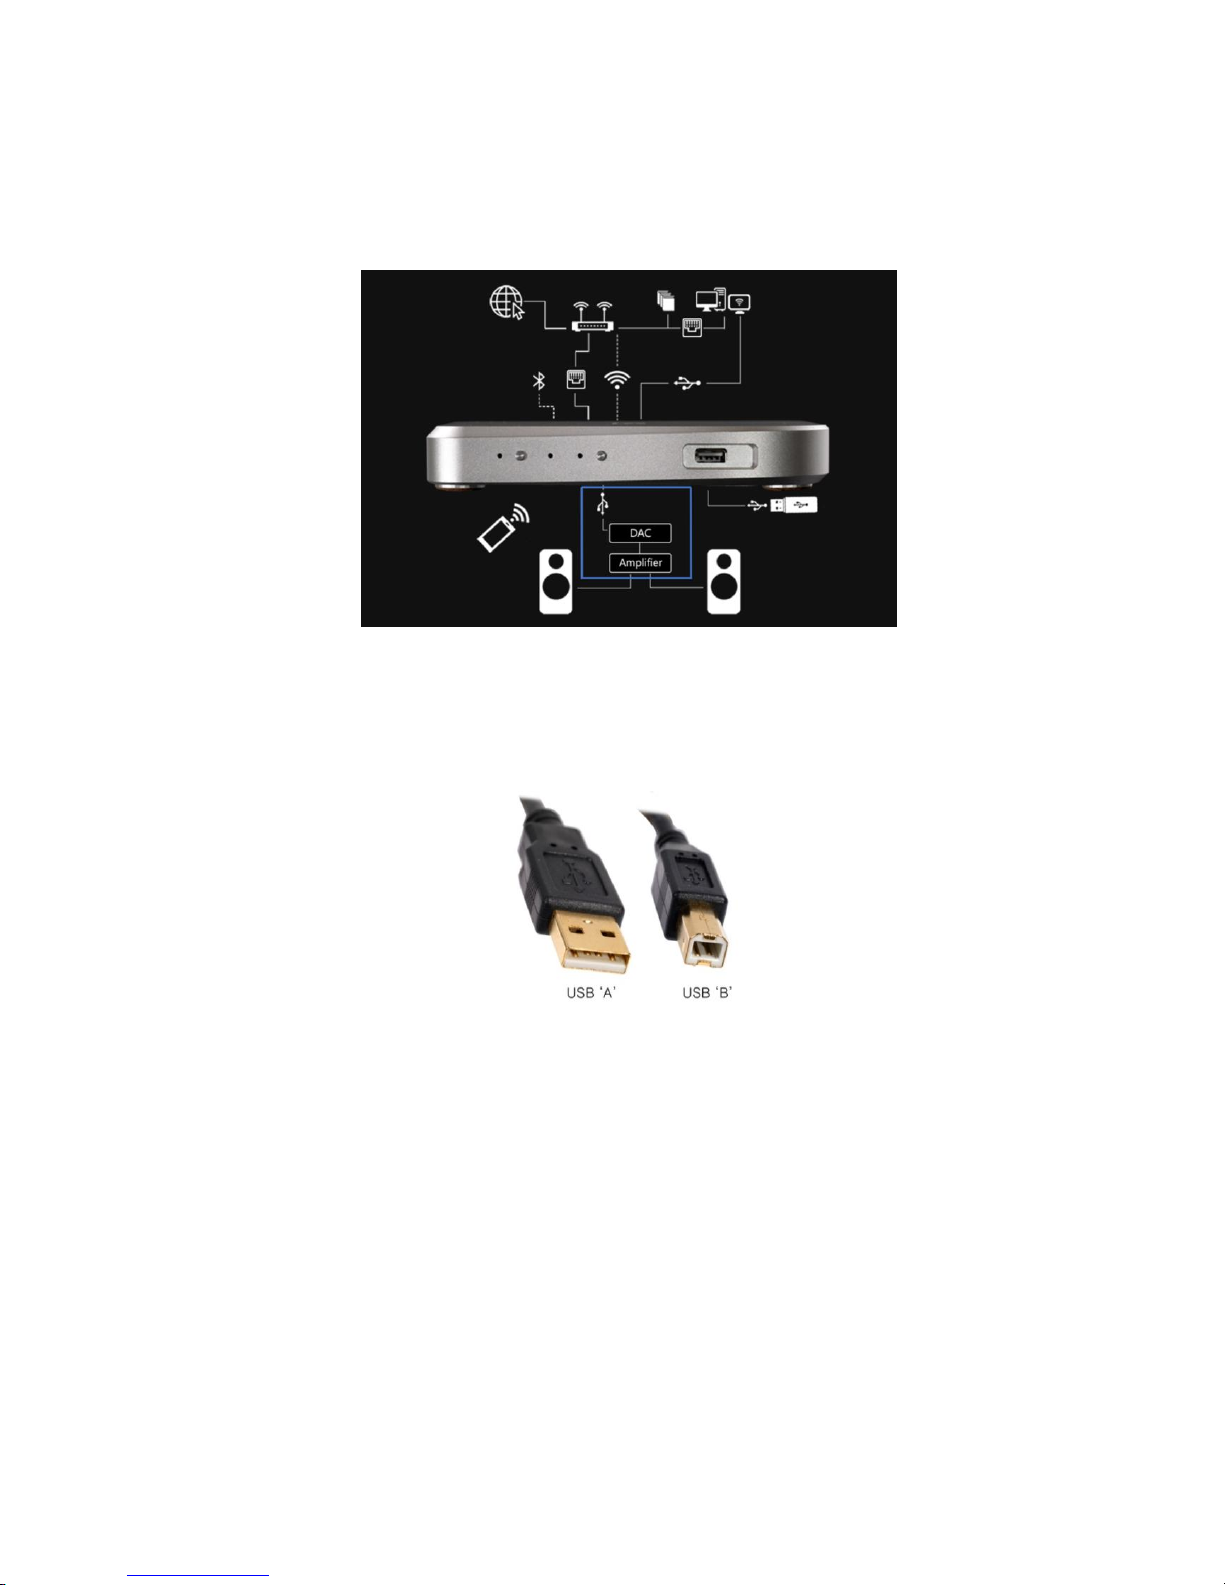
It has only one output, the USB Type A connector (10) on the back panel. This can
be connected to any USB equipped DAC or DAC/Amplifier. A USB cable with a
Type A connector for the LINK end and either a Type A or B connector for the DAC
should be used.
The LINK has a USB Out Power Switch (8) on the rear panel which enables users to
either send power to the DAC (switch up) or turn the supply off (switch down). If
your DAC has its own internal power supply, we recommend you turn the USB
Power Switch off for the best sound quality.
If you are unsure if your DAC has a power supply, try turning the USB Power Switch
off. If you can still hear music, your DAC has an internal power supply.
 Loading...