

SSV Works SS-FKP652 Installation Manual
SSV WORKS, 201 N. Rice Ave Unit A, Oxnard, CA 93030
www.SSVworks.com | Phone: 818-991-1778 | Fax: 866-293-6751
SS-FKP652
Polaris Slingshot
Front Kick Panels
WARRANTY INFORMATION:
All SSV Works enclosures are covered by a limited lifetime warranty against defects in
material or workmanship. All SSV Works Electronics are covered by a limited 1 year
warranty against defects in material or workmanship. Labor for replacement of defective
components is not covered. All SSV Works Speakers are covered by a limited 1 year
warranty against defects in material or workmanship. Contact SSV Works for further
warranty information.
TOOLS NEEDED FOR INSTALLATION
- Wire Crimpers
- Wire Strippers
- Drill with 1/8” and 1/4” Drill bit
- #2 Phillips Screwdriver
- #3 Phillips Screwdriver
- Scribe or Marker
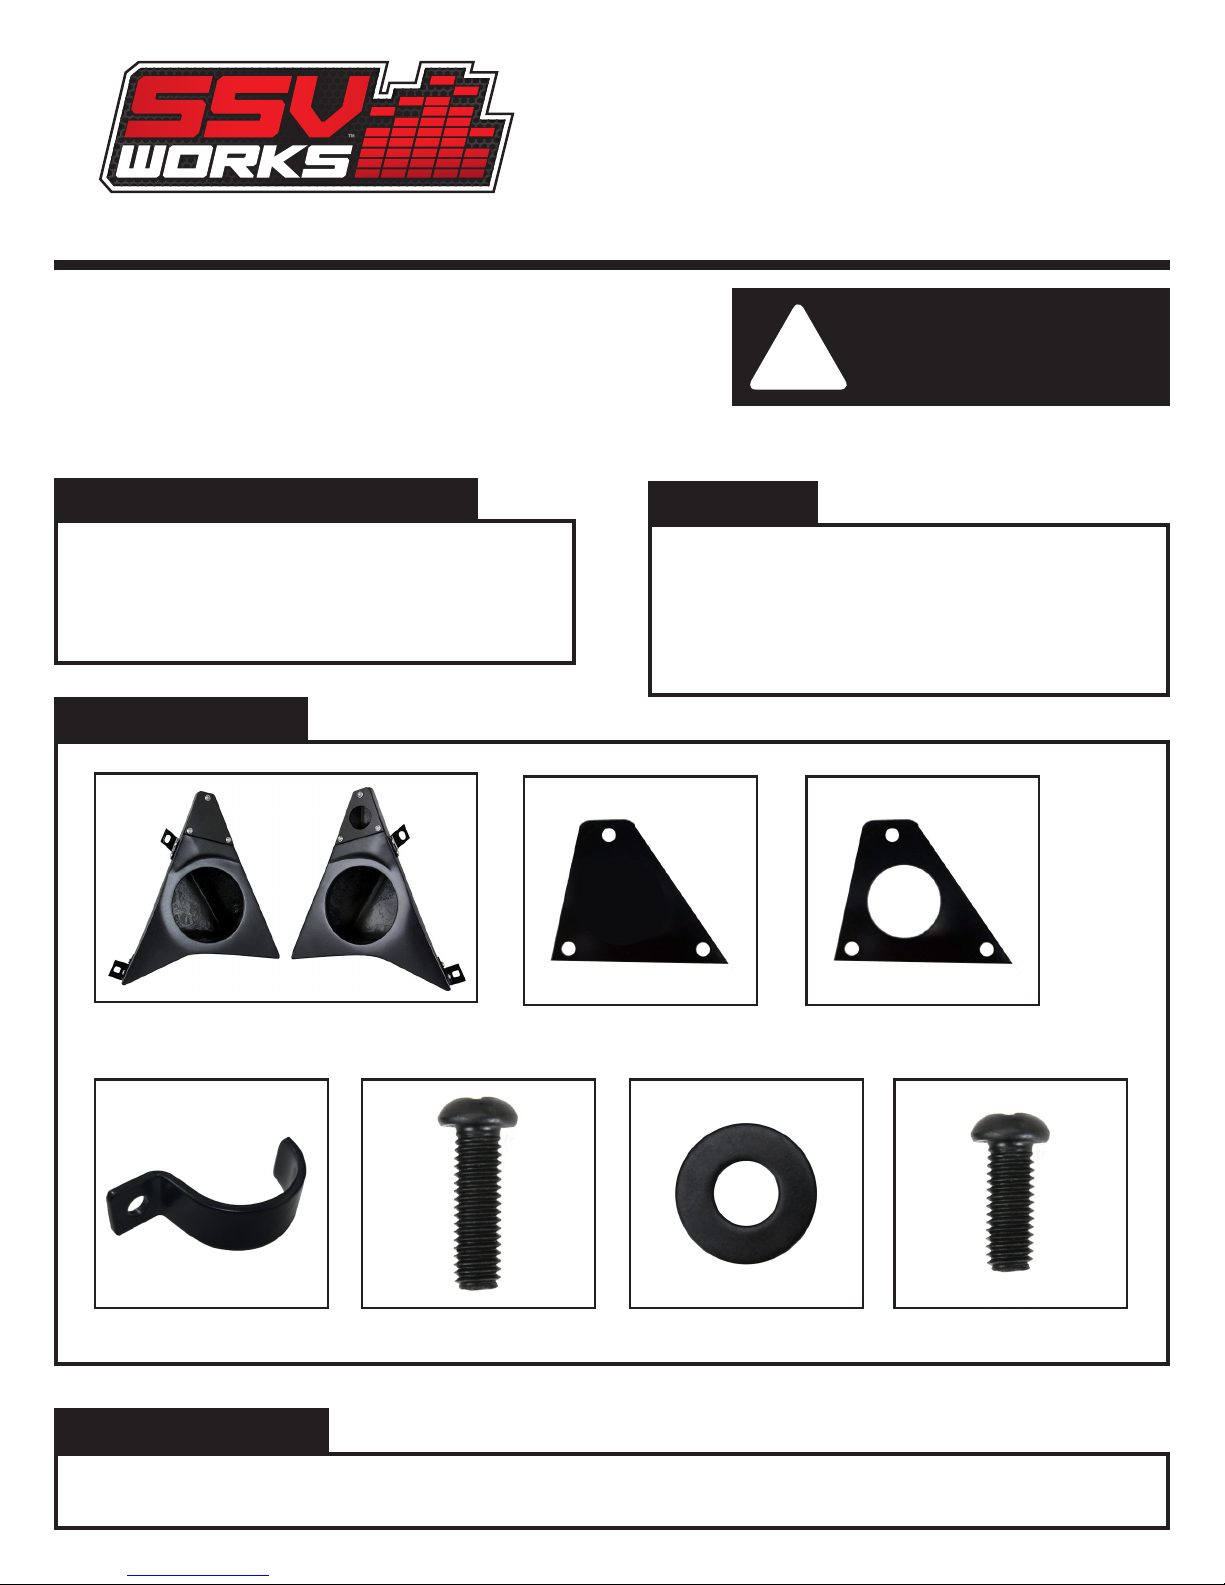
PARTS LIST
1. SS-FKP652-U Enclosures
2. Triangle Block off Plates x 2
3. Tweeter Mounting Plates x 2
PARTS LIST IMAGES
(1 pair)
!
Please read and understand these
instructions completely before
installation to avoid possible injury, or
damage to the accessory or vehicle.
4. “J” Bracket x 2
5. M6 x 1 x 20mm Screws x 6
6. M6 Washers x 12
7. M6 x 1 x 16mm Screws x 6
1. SS-FKP652-U Enclosures (1 pair)
4. “J” Bracket x 2 5. M6 x 1 x 20mm Screws x 6 6. M6 Washers x 12 6. M6 x 1 x 16mm Screws x 6
INSTALLATION NOTES
The use of a thread locker is recommended on all screws to prevent loosening due to vibration. If the vehicle is equipped with factory speaker
enclosures, remove those prior to beginning the installation.
2. Triangle Block Off Plates x 2
3. Tweeter Mounting Plates x 2
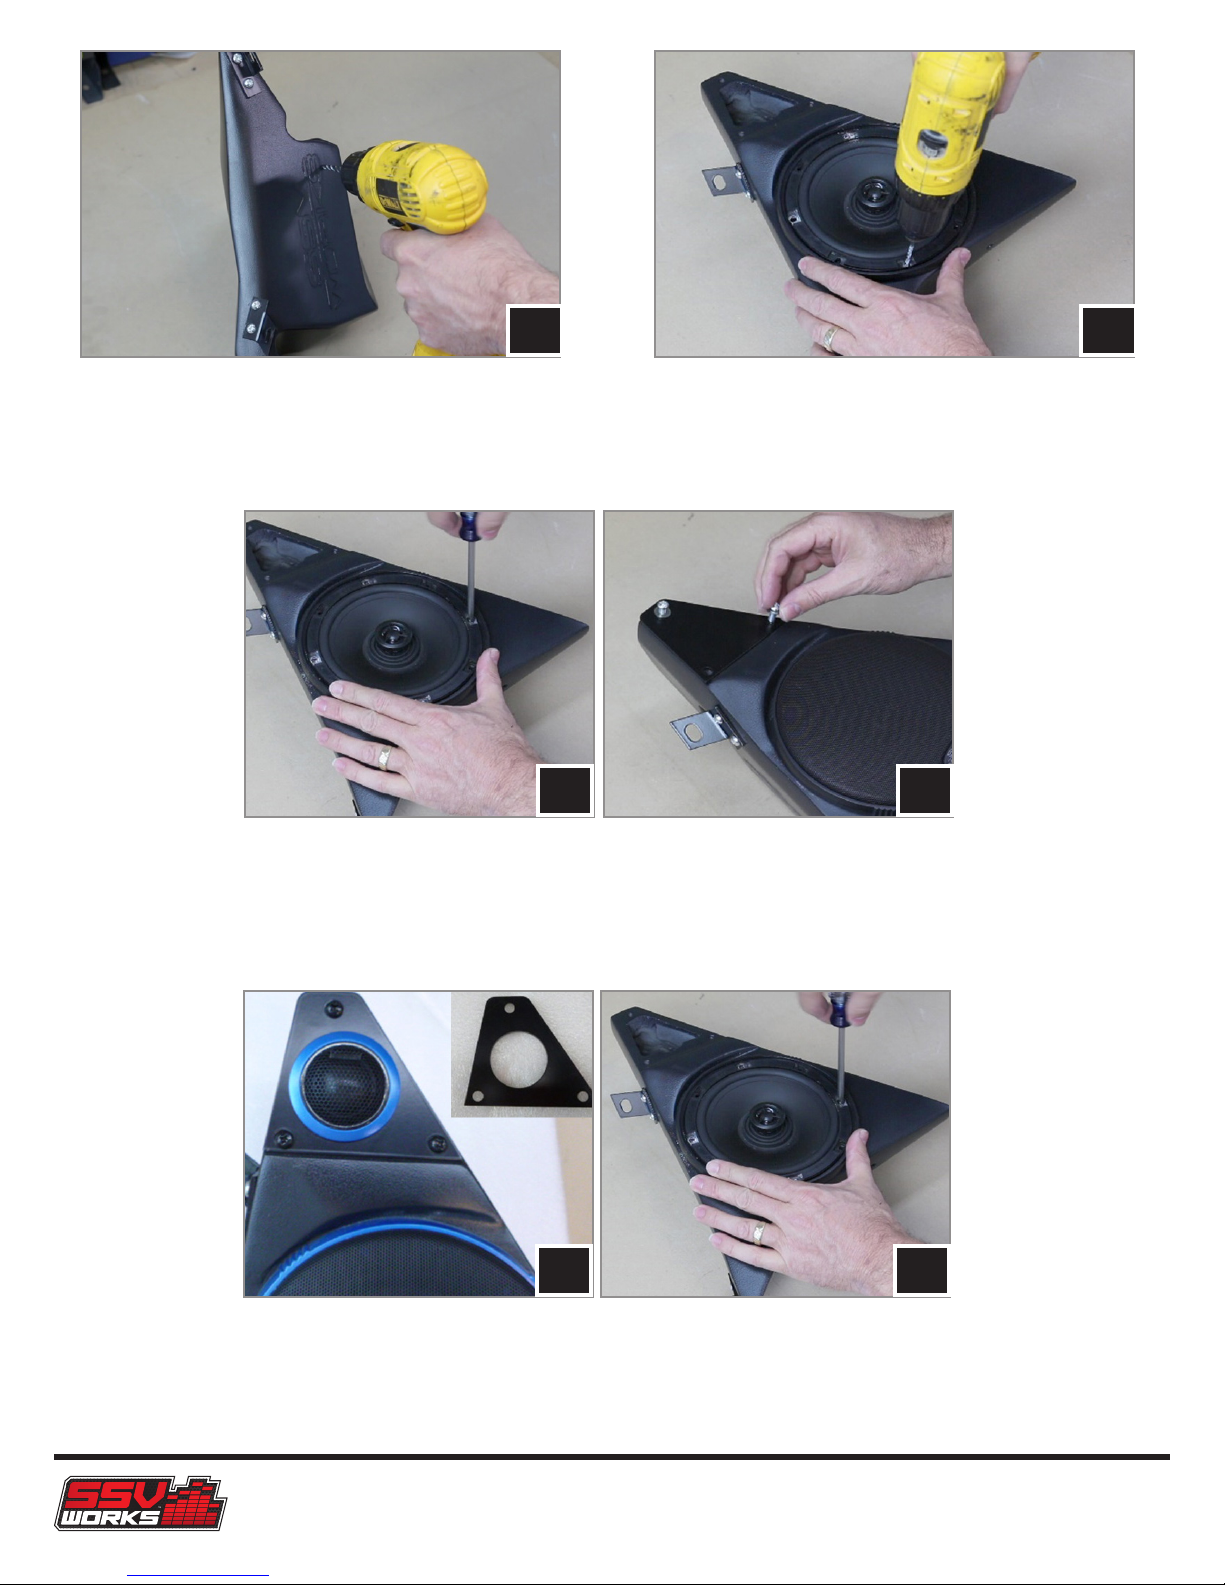
A
B
A. Drill a 1/4” hole in the enclosure for the speaker wire to run
out of, we recommend the at side under the logo, toward the
top of the enclosure.
B. If using a coaxial speaker, connect and install the speaker into the enclosure using the #2
Phillips screwdriver (be sure to connect the “+” speaker wire to the “+” terminal on the speaker
and the “-“ speaker wire to the “-“ terminal on the speaker), then install the triangle block off
plate using the 16mm (smaller) screws, repeat for other side.
B. Place the speaker into the enclosure and mark the 4 mounting
holes with a scribe or marker, Pre-drill the marked mounting
locations using a 1/8” drill.
C C
D. If mounting a component tweeter, mount the tweeter into the tweeter mounting plate using the
16mm (smaller) screws, install into the enclosure, then connect and install the speaker into the
enclosure using the #2 Phillips screwdriver (be sure to connect the “+” speaker wire to the “+” terminal
on the speaker and the “-“ speaker wire to the “-“ terminal on the speaker), repeat for other side.
SS-FKP652
D D
 Loading...