

SSV Works RZR XP1000, RZ3-BSSB10 Installation Manual
SSV WORKS, 201 N. Rice Ave Unit A, Oxnard, CA 93030
www.SSVworks.com | Phone: 818-991-1778 | Fax: 866-293-6751
RZ3-BSSB10
RZR XP1000
Behind Seat 10” Subwoofer Enclosure
WARRANTY INFORMATION:
All SSV Works enclosures are covered by a limited lifetime warranty against defects in material or
workmanship. All SSV Works Electronics are covered by a limited 1 year warranty against defects in
material or workmanship. All SSV Works Speakers are covered by a limited 1 year warranty against
defects in material or workmanship. Labor for replacement of defective components is not covered.
Contact SSV Works for further warranty information.
TOOLS NEEDED FOR INSTALLATION
- Wire Crimpers
- Wire Strippers
- T-30 Torx Wrench
- 5/32” Allen Wrench
- 7/16” Socket or Wrench
- Panel Removal Tool
- Drill with 1/8” and ¼” Drill bit
- Wrench for Battery Terminal
- #3 Phillips Screwdriver
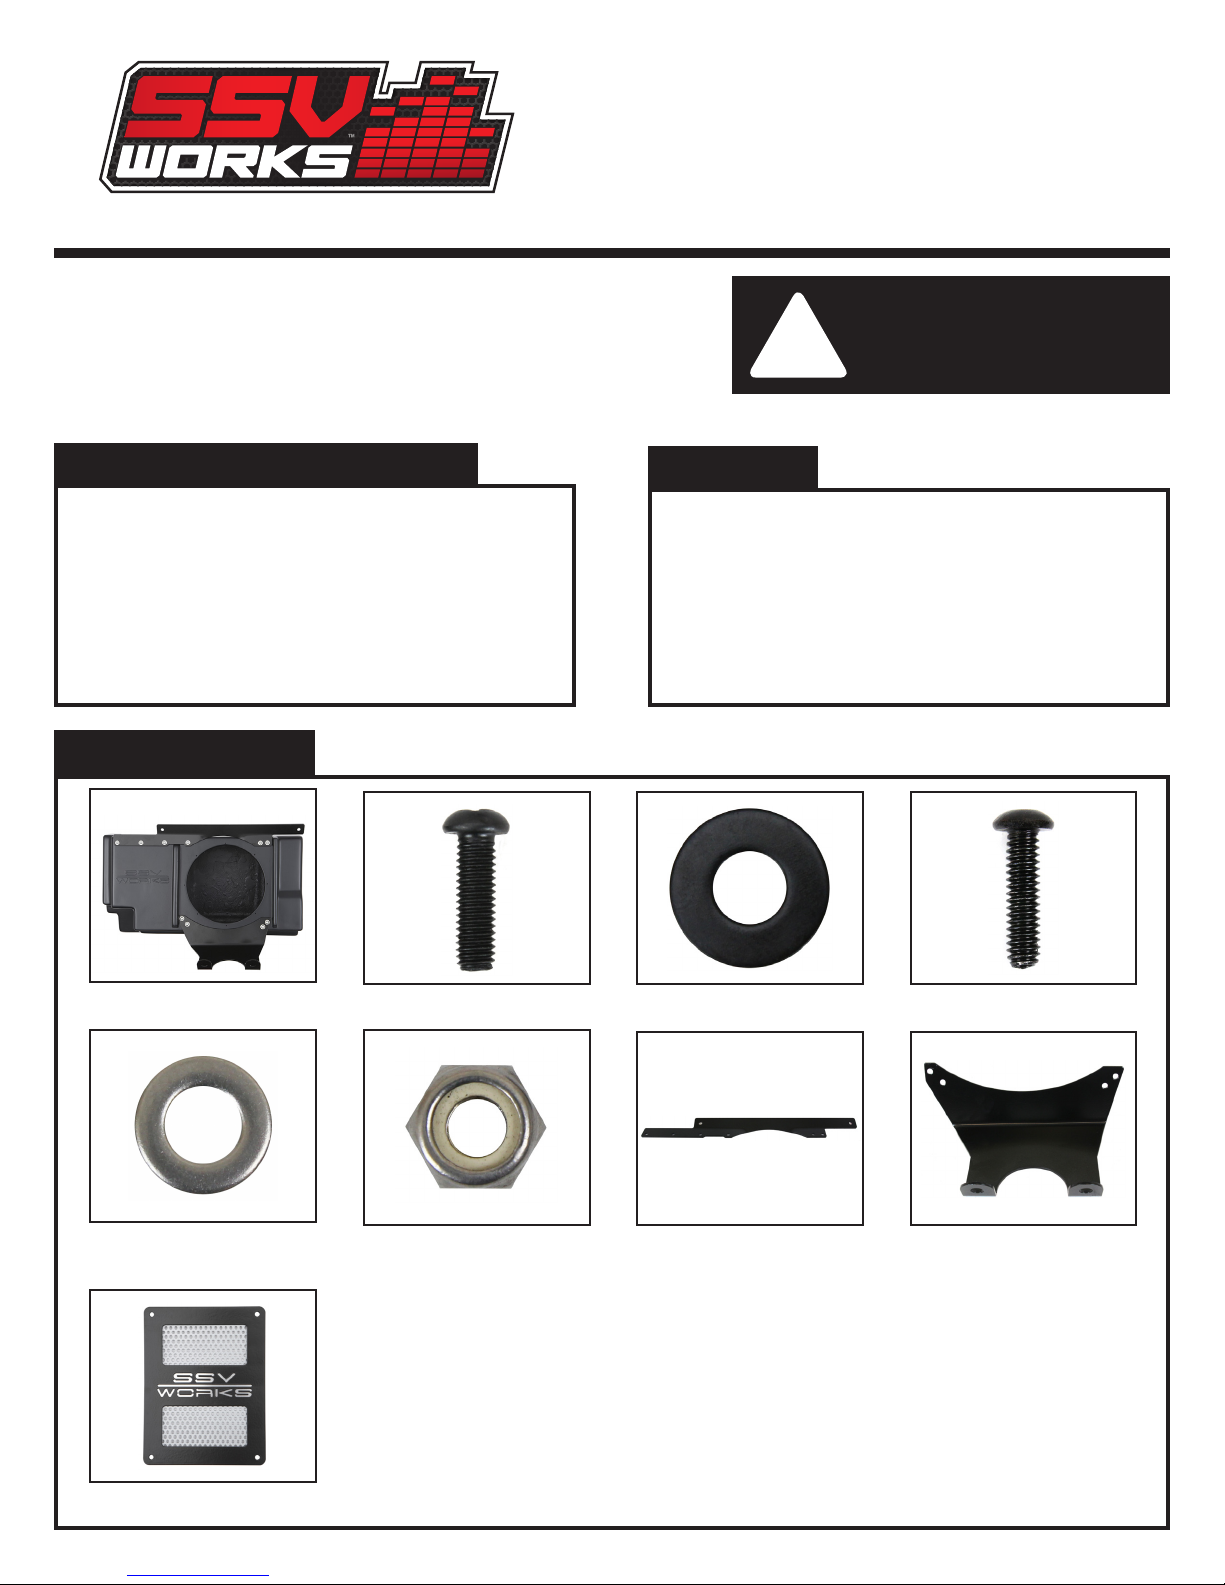
PARTS LIST
1. RZ3-BSSB10 Enclosure x 1
2. M6 x 1.0 Screws x 10
3. M6 Washers x 10
4. 1/4”x 20 Screws x 4
5. 1/4” Washers x 4
PARTS LIST IMAGES
!
Please read and understand these
instructions completely before
installation to avoid possible injury, or
damage to the accessory or vehicle.
6. 7/16” Nuts x 4
7. Top Mounting Bracket x 1
8. Bottom Mounting Bracket x 1
9. Subwoofer Grill x 1
1. RZ3-BSSB10 Enclosure x 1
5. 1/4” Washers x 4
9. Subwoofer Grill x 1
2. M6 x 1.0 Screws x 10
6. 7/16” Nuts x 4
3. M6 Washers x 10
7. Top Mounting Bracket x 1
4. 1/4 x 20 Screws x 4
8. Bottom Mounting
Bracket x 1
INSTALLATION NOTES
The use of a thread locker is recommended on all screws to prevent loosening due to vibration. This enclosure will not work with some
aftermarket headers, conrm t before beginning installation. Begin by unlatching the seats from the vehicle; remove the center hump using
the panel removal tool on the 5 plastic panel clips and the T-30 Torx for the top 2 bolts. Remove the rear panel that sits behind the seats
using a T-30 to remove the 7 Torx bolts, and a panel removal tool to remove the 4 plastic panel clips. Once the panel is loosened, unplug the
computer harness then “push” the panel down behind the seat belt retractors, after it is free from behind the top panel; pull up and away from
the vehicle. Once the panel is out, remove the 2 seat belt bolts that hold the center seat belt receivers.
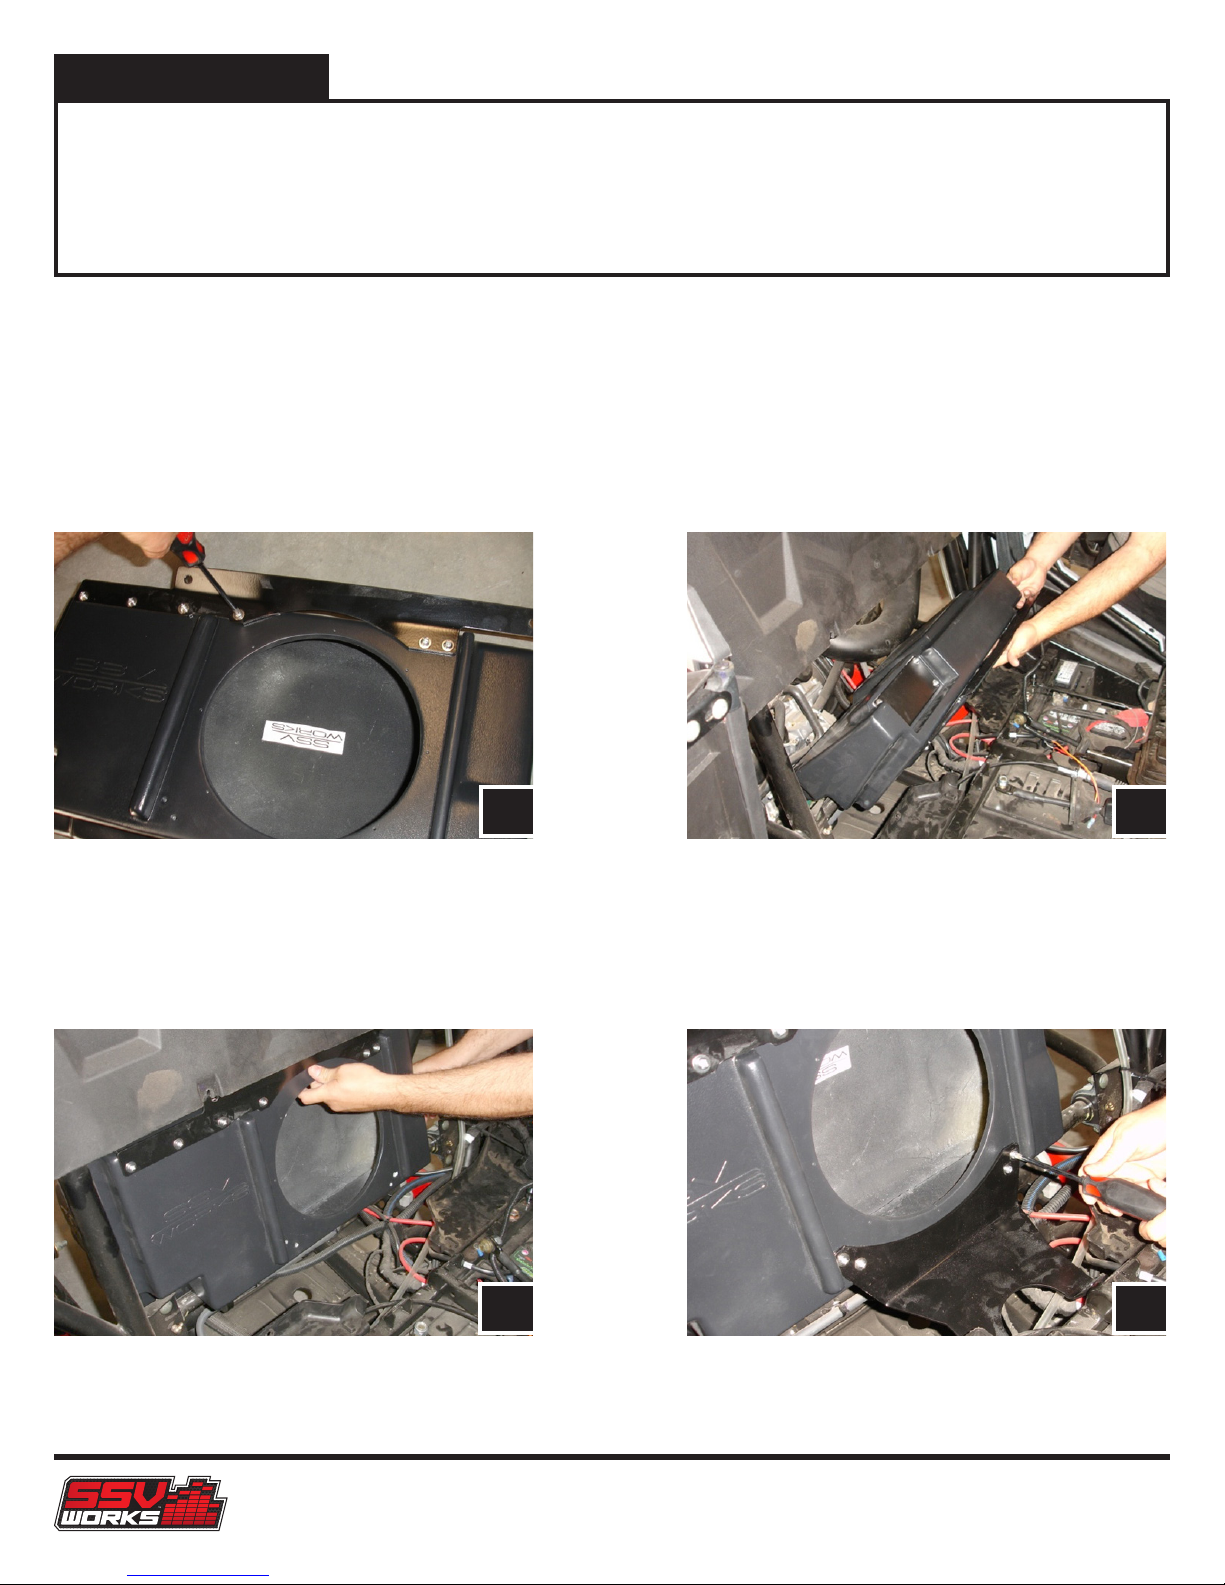
A. Loosely install the top mounting bracket onto the enclosure
C. The 2 holes in the top bracket will line up with the 2 holes in
the vehicle crossbar behind the plastic panel, the enclosure
can shift left or right to align these holes
A
B. Place the enclosure in the vehicle bottom rst and rotate
the top into place. The top bracket is in the proper location
when it is behind the plastic top panel (NOTE: For proper t on
2016+ models you may need to reverse the nut/bolt on the
rear crossbar, the bolt head should face downward and the
nut should be on the top of the bar)
B
C D
D. Once the enclosure is in position, loosely install the lower
bracket
RZ3-BSSB10
 Loading...