

Page 1
Installation and User Guide
MRB2
Bluetooth® Media Controller with AUX Input & USB Charger
Corporate: SSV WORKS, 201 N. Rice Ave Unit A, Oxnard, CA 93030
Web: www.SSVworks.com | Phone: 818-991-1778 | Fax: 866-293-6751
The Bluetooth
®
word mark and logos are registered trademarks owned by Bluetooth SIG,Inc. and any use of such
marks by SSV Works is under license. © Copyright 2016 SSV Works, Oxnard, CA 93030 MRB2 Rev. B 3-8-16
SAFETY INFORMATION:
Do not attempt to disassemble or repair the MRB2 yourself. Please call SSV Works for technical assistance or repair
information. Changes or modications to the MRB2 not authorized by SSV Works will void the warranty.
SSV Works recommends disconnecting the negative battery terminal before beginning any installation.
!
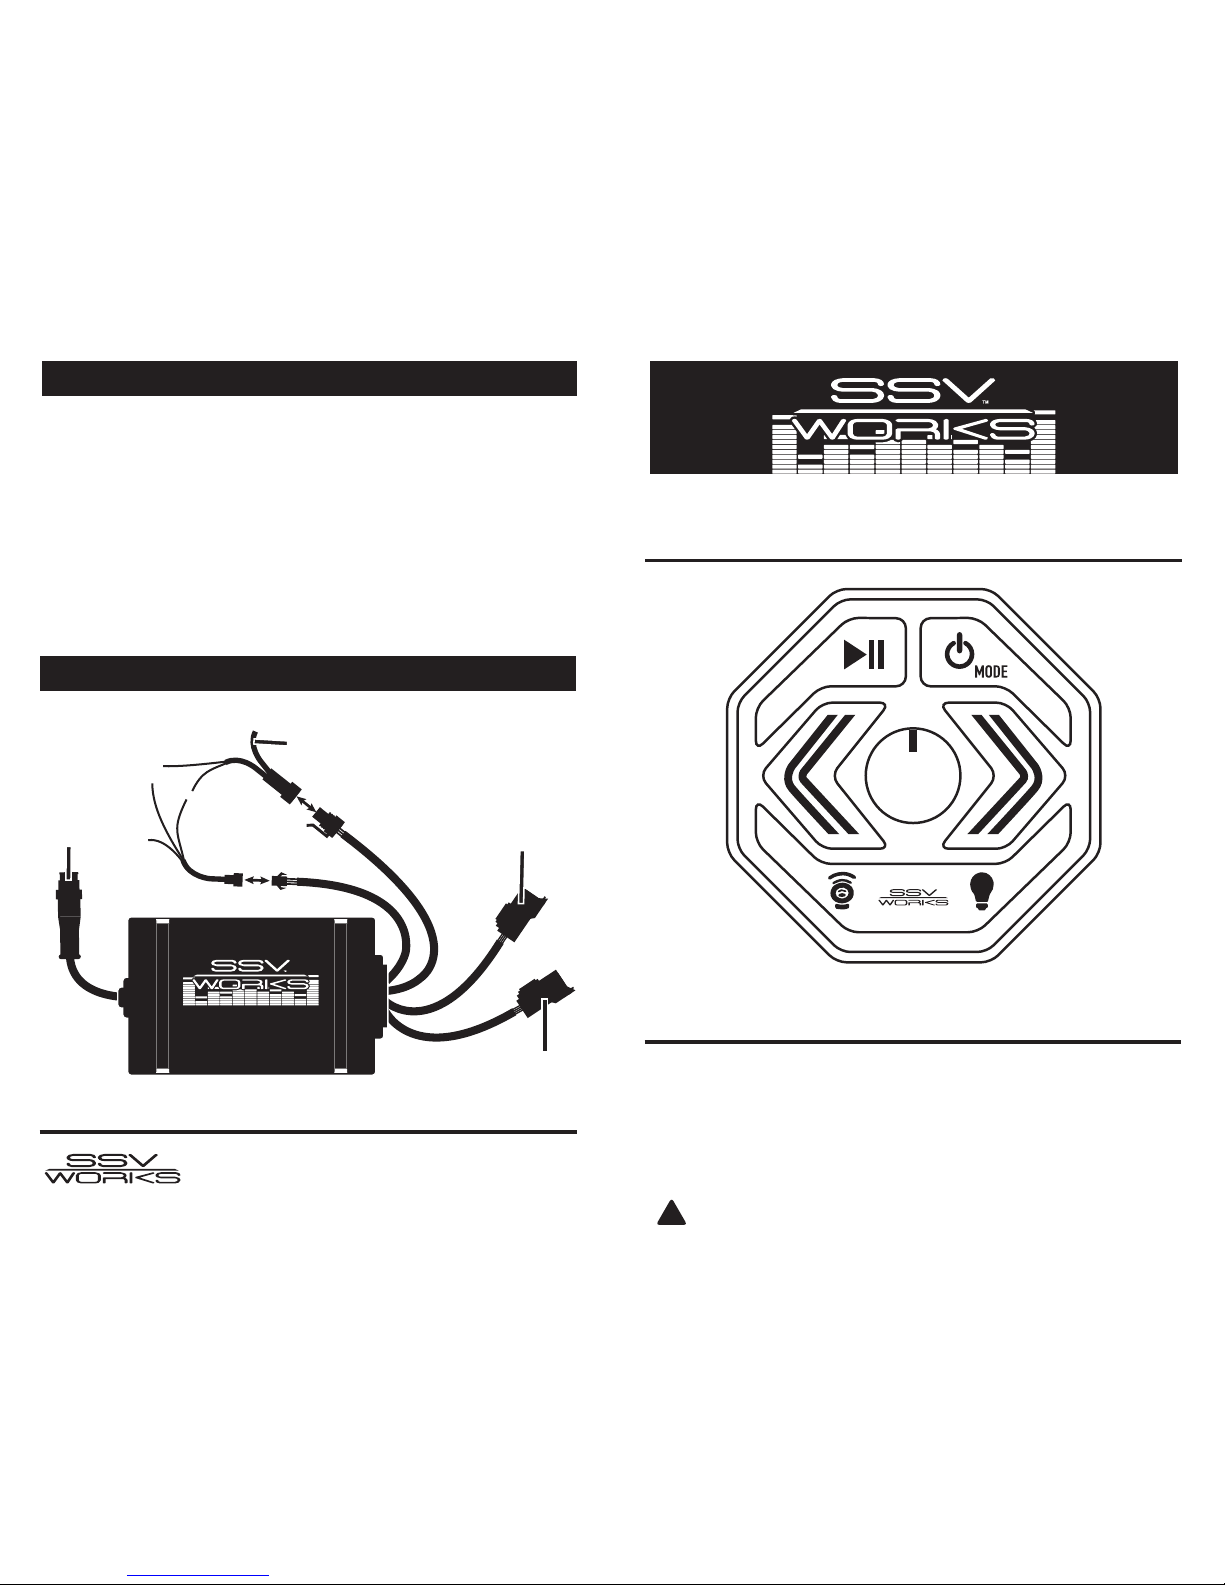
MASTER CONTROL UNIT MOUNTING
Ensure all wiring, input port wiring and media controller wiring will reach to the mounting
location for the master control unit.
There are two mounting options for the MRB2: A) Double sided tape B) Zip ties
A) Double sided tape:
- Find a at mounting surface
- Clean the surface with alcohol or other similar cleaner
- Peel the double stick foam disc and stick to the mounting location
B) Zip ties
- Use the provided zip ties to secure to a bracket or wiring harness in your vehicle
MRB2
Sub Audio
Out**
Front
Audio Out*
To Control
Unit
To USB/
AUX Port
Black
-
Red +
Orange
Dome Light
(Main Power Harness)
WIRING COLOR GUIDE
Red + 12volt Constant or Switched Black – Ground Orange + 12v Dome Light Out
(500MA)
* Front audio out is to be used for all 6.5” & 6x9” speakers in vehicle
** To convert Front & Sub outputs to standard RCA, part #SSV-WP-HRCA is required
WARRANTY INFORMATION:
All SSV Works enclosures are covered by a limited lifetime warranty against defects in material or workmanship. All
SSV Works Electronics are covered by a limited 1 year warranty against defects in material or workmanship. Labor for
replacement of defective components is not covered. All SSV Works Speakers are covered by a limited 1 year warranty
against defects in material or workmanship. Contact SSV Works for further warranty inf ormation.
Page 2
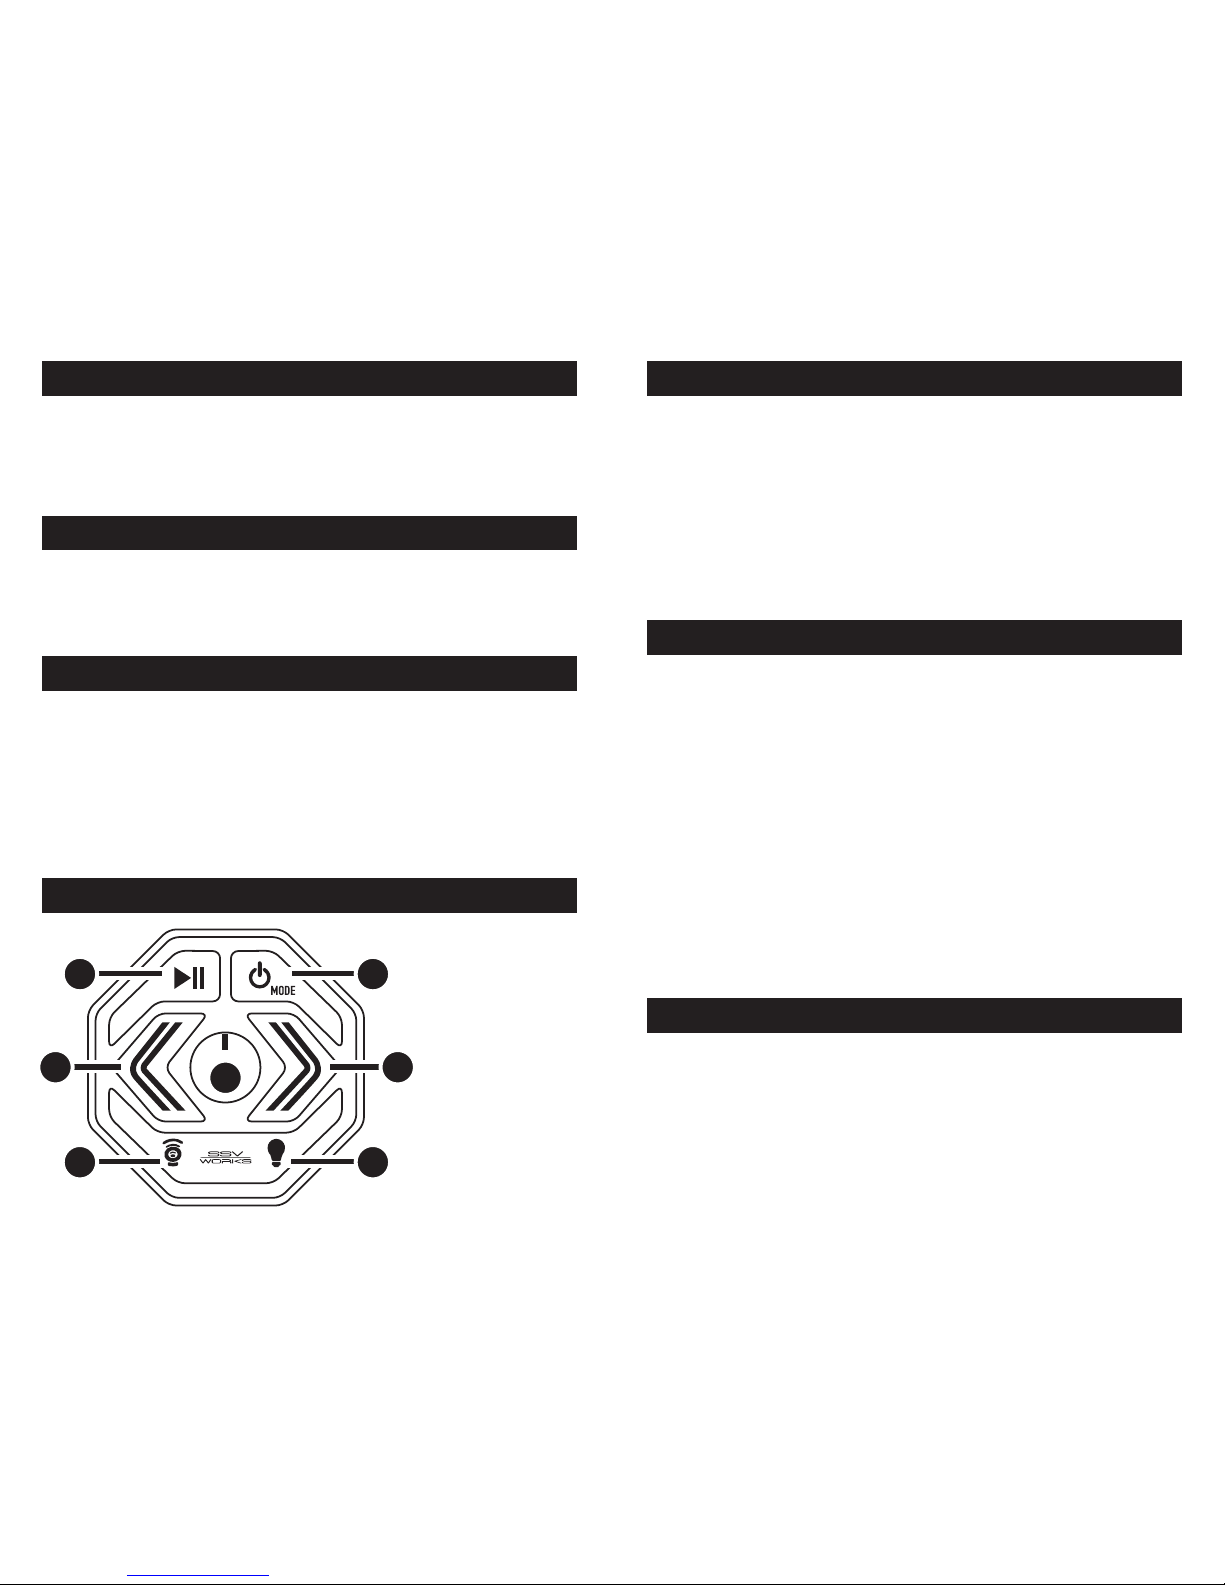
1. Power and Aux Souce Input
2. Play/Pause
3. Track Back
4. Rear Speaker
/Subwoofer Attenuation:
-6/-3/OFF*
5. Dome Light On/Off
6. Track Forward
7. Volume
- Bluetooth Media Controller
- Master Control Unit
- USB / 3.5mm AUX Input
- Retention Clip
- 3.5mm Cable
- Plastic Screws x2
- Power/Ground Harness
- Zip Ties
- Double stick foam disc
There are 3 components you will need to account for when installing your MRB2:
- Media Controller Unit
- Master Control Unit
- USB Charge/AUX Input Port
It is recommended to nd suitable mounting locations for all 3 components before
starting your installation. Due to wiring lengths, your maximum width between the media
controller unit and the USB charge/AUX input port can not exceed 60”.
- 1.75” and 1” Hole Saw
(1.75” for ush mount installation only)
- Wire Strippers
- Locate a suitable mounting location for the input port.
- Ensure you have at least 2.5” of clearance on the back side of your selected mounting location.
- With a hole saw, drill a 1” hole in your selected location.
- Remove the mounting nut from the input port.
- Route the wires through the hole you drilled and secure the input port into the hole with the
mounting nut.
- Route your wiring to the location where you will mount the master control unit.
KIT INCLUDES
BUTTON LOCATIONS AND FUNCTIONS
BLUETOOTH® PAIRING
TOOLS NEEDED
USB CHARGE / AUX INPUT PORT MOUNTING
1. Open the Bluetooth® setup program
on the mobile device and activate the
Bluetooth feature.
2. Turn on MRB2 using the power button
(MODE button will start blinking)
3. The device will show up as “SSVworks
MRB2”. Select this device.
4. The MODE button will go solid to indicate pairing is complete.
Note: A previously paired Bluetooth®
mobile device will automatically
connect to the MRB2 when unit is
turned on and within range.
- Wire Crimpers
- Phillips Screwdriver
7
2 1
54
3 6
CONTROLLER MOUNTING INSTRUCTIONS
INSTALLATION PLANNING
There are two mounting options for the MRB2 Controller:
A) Surface Mount
B) Flush Mount
A) Surface Mount:
- Find a suitable mounting location for the MRB2.
- Clean surface with alcohol or similar cleaner.
- Peel double stick tape & adhere to back of MRB2 then adhere it to mounting location
B) Flush Mount:
- Find a suitable mounting location for the MRB2 controller.
- Ensure you have adequate clearance on the back side of your selected mounting
location to access screws for mounting clip and a secure location to mount the master
control unit
- With a 1.75” hole saw, drill a hole in your selected location.
- Insert the MRB2 control unit in the hole and attach retention clip with the 2 screws.
*
OFF is only active when
using a separate amplier
for Rear/Sub output
 Loading...