

Page 1
Produktinformation
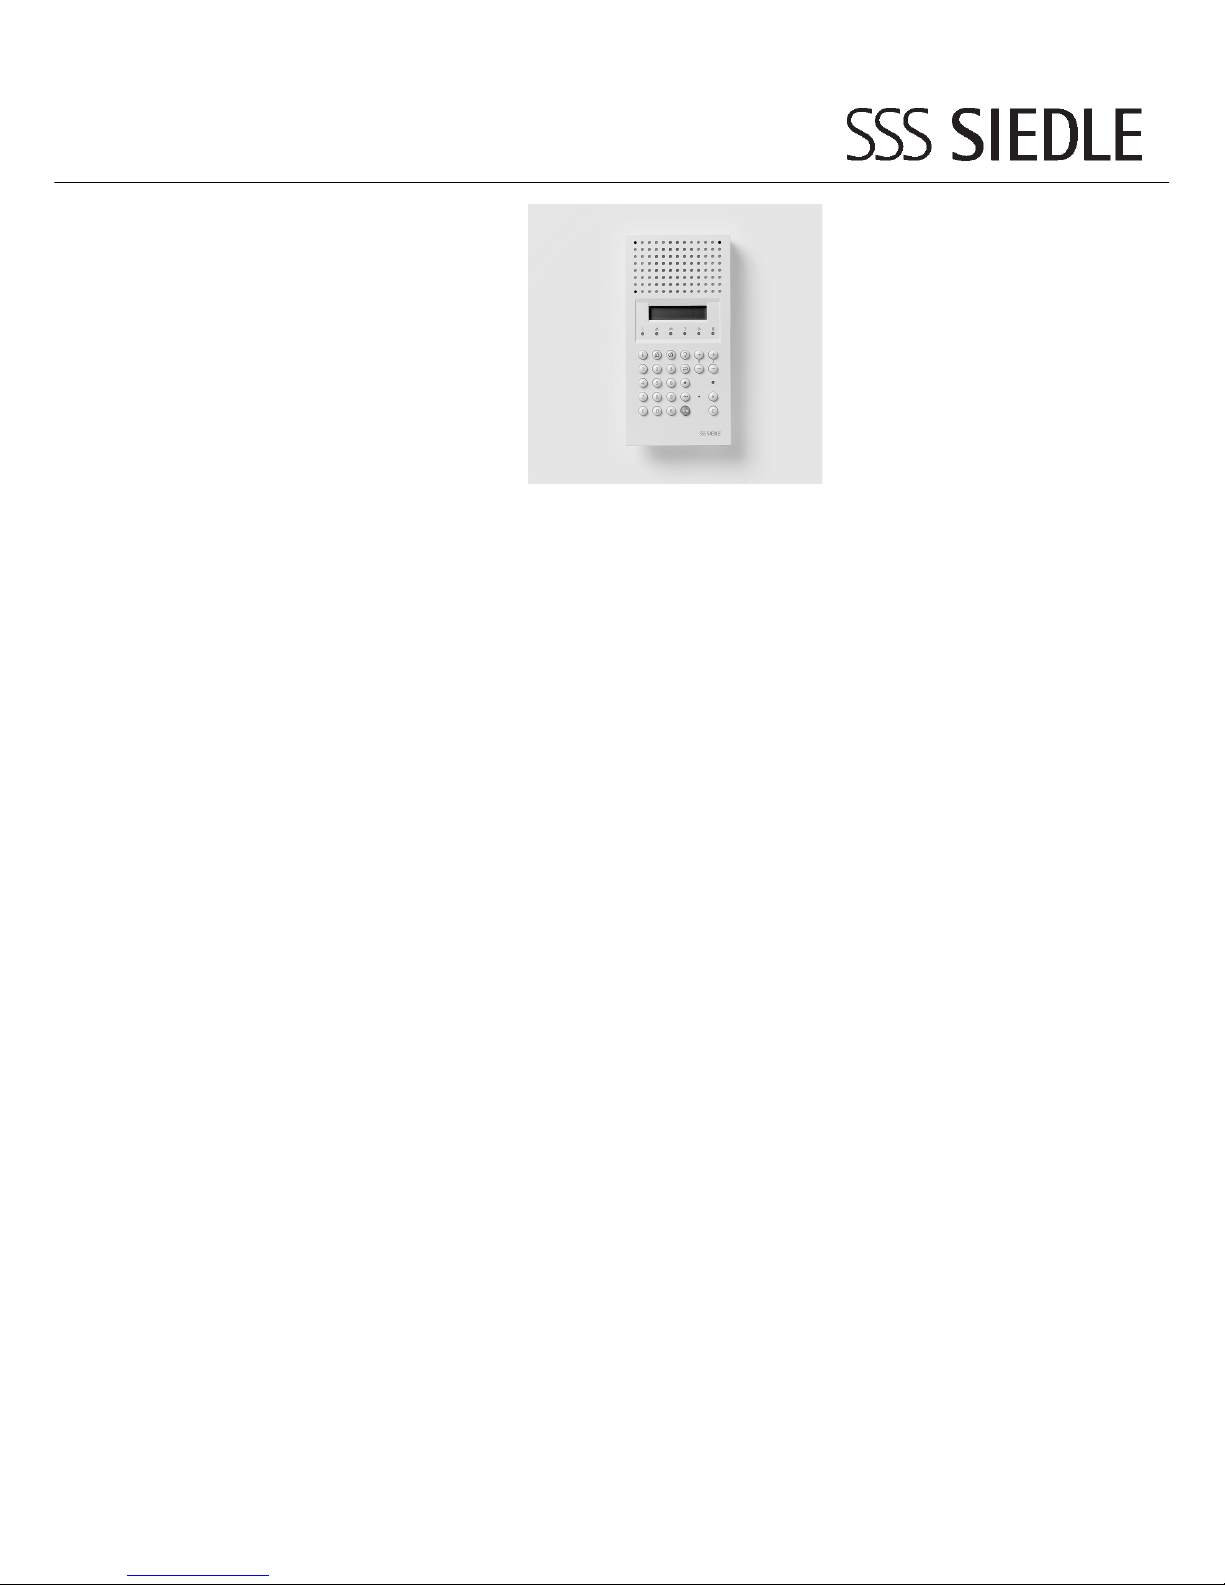
Siedle Intercom
SIC 3000-01
AICI 3000-01
UICI 3000-01
Page 2

3
und die Flachbandkabel auf der
Anschlussleiterplatte abziehen.
16 Gehäuse-Unterteil mit den beiliegenden 4 Schrauben M4 x 25 im
eingebauten UP-Gehäuse befestigen. Die Kabeleinführung kann
beliebig erfolgen. Erfolgt die Kabeleinführung von oben, muss die
Anschlussleiterplatte im Gehäuse
nach unten ummontiert werden.
An der 10poligen Klemmleiste J1
wird die System-Installation angeschlossen.
An der 4poligen Klemmleiste J4
kann zusätzlich, über die Verstärker
ZVI 2010 oder VZ 85859, ein bauseitiger Lautsprecher (4Ω) angeschlossen werden.
Alternativ zum eingebauten Mikrofon kann an dieser Klemmleiste, an
M+ und M-, ein handelsübliches
Mikrofon angeschlossen werden.
17 Wird ein externes Mikrofon angeschlossen, so müssen die Mikrofon-Steckbrücken auf der TastaturLeiterplatte von "Intern" auf
"Extern" umgesteckt werden.
An der 6poligen Klemmleiste J6
werden, wenn nötig, die externen
Signalgeräte für Ruf und Meldeton
(22-23, 32-33) und über einen
potentialfreien Kontakt der Eingang
E1-2 beschaltet.
18 Die Flachbandkabel auf der Anschlussleiterplatte an Stecksockel
JP1 bzw. JP3 stecken und Gehäuse
schließen.
19 Mit dem Poti P1 wird die Ruftonlautstärke eingestellt.
20 Anschlussplan
Achtung!
Nicht genutzte Kabeleinführungen
dürfen nicht ausgebrochen bzw.
müssen mit Blindstopfen verschlossen werden.
Wirkungsweise, Gerätebedarf und
Schaltpläne finden Sie in "Siedle
Intercom Planung und Installation"
Application
The Siedle Intercom SIC/ICI 3000-...
is a digital, voice-controlled Siedle
Intercom system designed for surface wall mounting. Using the various
accessories, the device can also be
installed flush or as a table-top version. By combining with the multifunction module MFM 611-10
and/or monitors MOM/MOC 611/
711-..., all mounting variations,
surface, flush or table-top, are possible.
The surface-mounted industrial call
station AICI 3000-... and the flushmounted industrial call station
UICI 3000-... are configured for
application in tough industrial environments. An additional floating
contact is available each for call and
alarm tone signalling.
A programmable input is also available. This can be freely programmed
in the same way as a key of the
MFM 611-10 with one of the same
functions.
Important!
For surface and flush mounting
of the Siedle Intercom SIC 3000-...,
the terminal distributor accessory
ZAV 3000-0 is required.
For industrial call stations AICI/
UICI 3000-..., the terminal distributor accessory ZAV 3000-0 is not required.
Surface mounting SIC 3000-...
A double switch box serves to
accommodate the ZAV 3000-0 and
the terminals.
1 Open the housing as shown.
2 Fix the housing base to the wall
using four screws.
The system installation is connected
at the 12-pole terminal strip J3/J4.
Using the 4-pole terminal strip J1, it
is possible to supply/control a monitor.
The 2-pole terminal strip J2 is used
to connect a storey call button.
The ribbon cable attached to JP1 is
plugged into JP1 at the Siedle
Intercom SIC 3000-...
English
Mounting
Caution!
When surface mounting, a double switch box must be mounted vertically below the Siedle
Intercom SIC 3000-...
Flush mounting SIC 3000-...
3 The connecting distributor acces-
sory ZAV 3000-0 is mounted centrally on the lower aluminium end
profile of the ZUR 3000-... with the
two enclosed M4 x 14 screws.
4 Open the housing as shown.
5 Fix the base of the housing into
the mounting frame accessory
ZUR 3000-... using four screws.
The system installation is connected
at the 12-pole terminal strip J3/J4.
Using the 4-pole terminal strip J1, it
is possible to supply/control a monitor.
The 2-pole terminal strip J2 is used
to connect a storey call button.
The ribbon cable attached to JP1 is
plugged into JP1 at the Siedle
Intercom SIC 3000-...
6 The call tone volume is set using
the potentiometer P.
Table-top mounting SIC 3000-...
7 Insert the ribbon cable with the
plug of the ZSIC 3000-0... through
the cable gland of the base plate
and insert the plug into JP1.
Fix the console onto the housing
base as shown and glue the two
provided rubber feet into the provided recesses on the lower inclined
side of the Siedle Intercom.
Page 3

Industrial call station
AICI 3000-... surface mounting
8 Open the housing as illustrated
and remove the ribbon cable on the
terminal pcb.
9 Fasten the bottom part of the
housing to the wall using 4 screws.
Cable entry via screw glands are
optional from above or below. If
cable entry takes place from above,
the terminal pcb must be removed
and replaced at the bottom.
The system installation is connected
at the 10-pole terminal strip J1. It is
possible to additionally mount a
loudspeaker (4 Ω) provided by the
user at the 4-pole terminal strip J4
via amplifier ZVI 2010 or VZ 85859.
Alternatively to the integrated
microphone, any standard commercially available microphone can be
connected at the M+ and M- terminals of this terminal strip.
10 If an external microphone is
connected, the microphone jumpers must be repositioned on the
keypad pcb from "internal" to
"external". At the 6-pole terminal
strip J6, if necessary the external
signal appliances for call and alarm
tone (22-23, 32-33) are connected,
and via a floating contact also the
input E1-2.
11 Plug the ribbon cable to socket
JP1 / JP3 on the connecting pcb,
and close the housing.
12 The call tone volume is set using
the potentiometer P1.
13 Wire diagram
Caution
Cable entries which are not used
must not be broken out, or must
be protected by a blanking plug.
Industrial call station
UICI 3000-... flush mounting
14 Insert the cable through the rear
wall of the provided flush mount
housing and mount.
15 Open the housing as indicated
and take the flat ribbon cable off
the connecting pcb.
16 Use the 4 provided screws
M4 x 25 to fasten the housing base
4
in the mounted housing. The
method of cable entry is optional. If
the cable enters from above, the
connecting pcb in the housing must
be removed and positioned at the
bottom.
The system installation is connected
at the 10-pole terminal strip J1. It is
possible to additionally mount a
loudspeaker (4 Ω) provided by the
user at the 4-pole terminal strip J4
via amplifier ZVI 2010 or VZ 85859.
Alternatively to the integrated
microphone, any standard commercially available microphone can be
connected at the M+ and M- terminals of this terminal strip.
17 If an external microphone is
connected, the microphone jumpers must be repositioned on the
keypad pcb from "internal" to
"external". At the 6-pole terminal
strip J6, if necessary the external
signal appliances for call and alarm
tone (22-23, 32-33) are connected,
and via a floating contact also the
input E1-2.
18 Plug the ribbon cable to socket
JP1 / JP3 on the connecting pcb,
and close the housing.
19 The call tone volume is set using
the potentiometer P1.
20 Wire digram
For operating characteristics, required appliances and circuit diagrams,
see "Siedle Intercom Planning and
Installation".
Français
Montage
Application
Le Siedle Intercom SIC/ICI 3000-...
est un système de communication
bidirectionnel, simultané commandé
par la voix à structure numérique et
prévu pour le montage mural en
saillie. Mais l'appareil peut également être encastré ou monté sur
table
avec les accessoires correspondants
disponibles. En outre, il peut être
combiné avec le module multifonctions MFM 611-10 et/ou le moniteur
MOM/MOC 611/711-..., et ce indépendamment de la variante de montage: encastrée, en saillie ou sur
table.
Le poste intercom industriel
AICI 3000-... pour montage en saillie et le poste intercom industriel
UICI 3000-... pour montage encastré
sont conçus pour l´usage professionnel. Deux contacts secs sont prévus
pour la signalisation des tonalités
d´appel et de réponse, plus une entrée programmable qui peut être
programmée au choix comme une
touche du module MFM 611-10.
Important
En cas de montage en saillie ou
encastré de l´Intercom Siedle
3000-..., il faut toujours l´accessoire
ZAV 3000-0 pour le branchement.
Pour les postes intercom industriels
AICI/UICI 3000-..., par contre,
l´accessoire ZAV 3000-0 n´est pas
nécessaire.
Montage en saillie SIC 3000-...
Une double prise est nécessaire pour
le branchement et la fixation du
distributeur ZAV 3000-0.
1 Ouvrir le boîtier comme illustré par
le schéma.
2 Visser la partie inférieure du boîtier sur le mur avec 4 vis.
Brancher l'installation système sur le
connecteur à 12 bornes J3/J4. Le
connecteur à 4 bornes J1 permet
d'alimenter ou de commander un
moniteur. La fiche à 2 bornes J2 sert
à brancher une touche d'appel de
l'étage. Le câble plat raccordé sur
JP1 doit également être raccordé sur
JP1dans l'Intercom Siedle SIC 3000-...
Page 4

1/4
2/6
3/5
7
Page 5

8/15
16
10/12/17/19
Page 6

13/20
 Loading...