

Page 1

ENGINEERING BETTER BEER
Jacketed Unitank
Page 2

IN THE CRATE
JACKETED UNITANK
(1) 8” or 12” TC Lid Cap w/ 3”
Combination Dry-hop, PRV, and CIP
Port (Spray Ball sold separately)
(1) DIN Nut Rotatable Racking
Arm w/ 1.5” TC Port
(10) 1.5” TC Clamp
(10) 1.5” TC Gasket (3) 1.5” TC Buttery Valves
(1) 8” or 12” TC Lid Clamp (1) 8” or 12” Lid Gasket
(1) 3” TC Clamp
(1) 3” TC Gasket
(1) 1.5” TC Blow-Off Arm
(1) Stainless Lower Shelf
(4) Threaded Stem
Adjustable Feet
(1) 1.5” TC Perlick Style
Sampling Valve
*NOTE: Certain features come preinstalled on the vessel for shipping purposes, some assembly is required.
(1) 3” TC Pressure
Release Valve (PRV)
(1) 1.5” TC Carbstone
w/ 3/8” Ball-Valve
(1) 1.5” TC Pro Sanitary
Pressure Gauge
(1) 1.5” TC PT100 Thermoprobe
(1) 1.5” TC Analog
Temperature Gauge
Page 2
Page 3
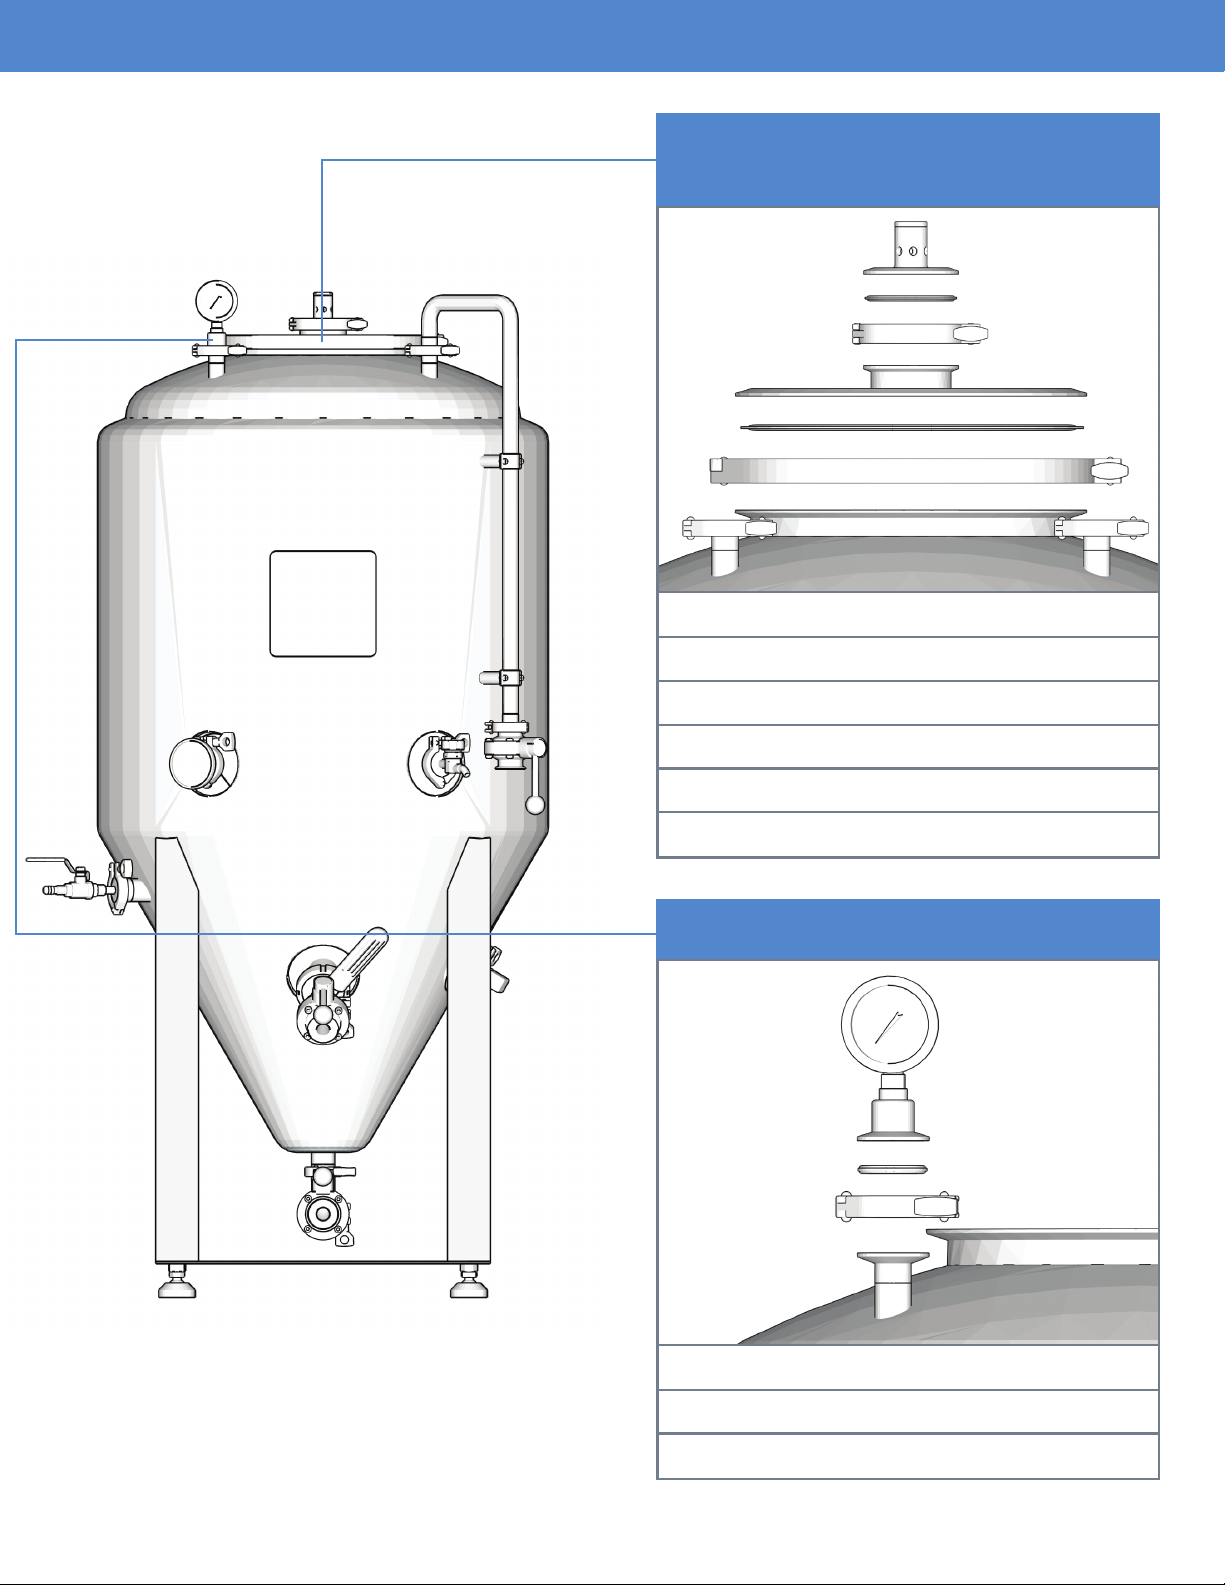
TANK FEATURES & ASSEMBLY
TC LID CAP W/ COMBINED 3” DRY HOP/
PRV/CIP PORT
A
B
C
D
E
F
A - 3” TC Pressure Release Valve (PRV)
B - 3” TC Gasket
C - 3” TC Clamp
8” or 12” TC Lid
D -
8” or 12” TC Lid Gasket
E -
8” or 12” TC Lid Clamp
F -
1.5” TC PRESSURE GAUGE
G
H
I
G - 1.5” TC Pro Sanitary Pressure Gauge
H - 1.5” TC Gasket
I - 1.5” TC Clamp
Page 3
Page 4
TANK FEATURES & ASSEMBLY
1.5” TC BLOW-OFF ARM W/ BUTTERFLY VALVE
J
H
I
K
J - 1.5” TC Blow-Off Arm
H - 1.5” TC Gasket
I - 1.5” TC Clamp
K - Clamp
L - Buttery Valve
K
H
I
L
Page 4
Page 5
TANK FEATURES & ASSEMBLY
1.5” TC CARBONATION STONE
WITH 3/8” BALL-VALVE
H
I
M - 1.5” TC Carbstone w/ 3/8” Ball-Valve
H - 1.5” TC Gasket
I - 1.5” TC Clamp
M
1.5” TC ANALOG TEMPERATURE GAUGE
H
I
M - 1.5” TC Analog Temperature Gauge
H - 1.5” TC Gasket
I - 1.5” TC Clamp
M
Page 5
Page 6

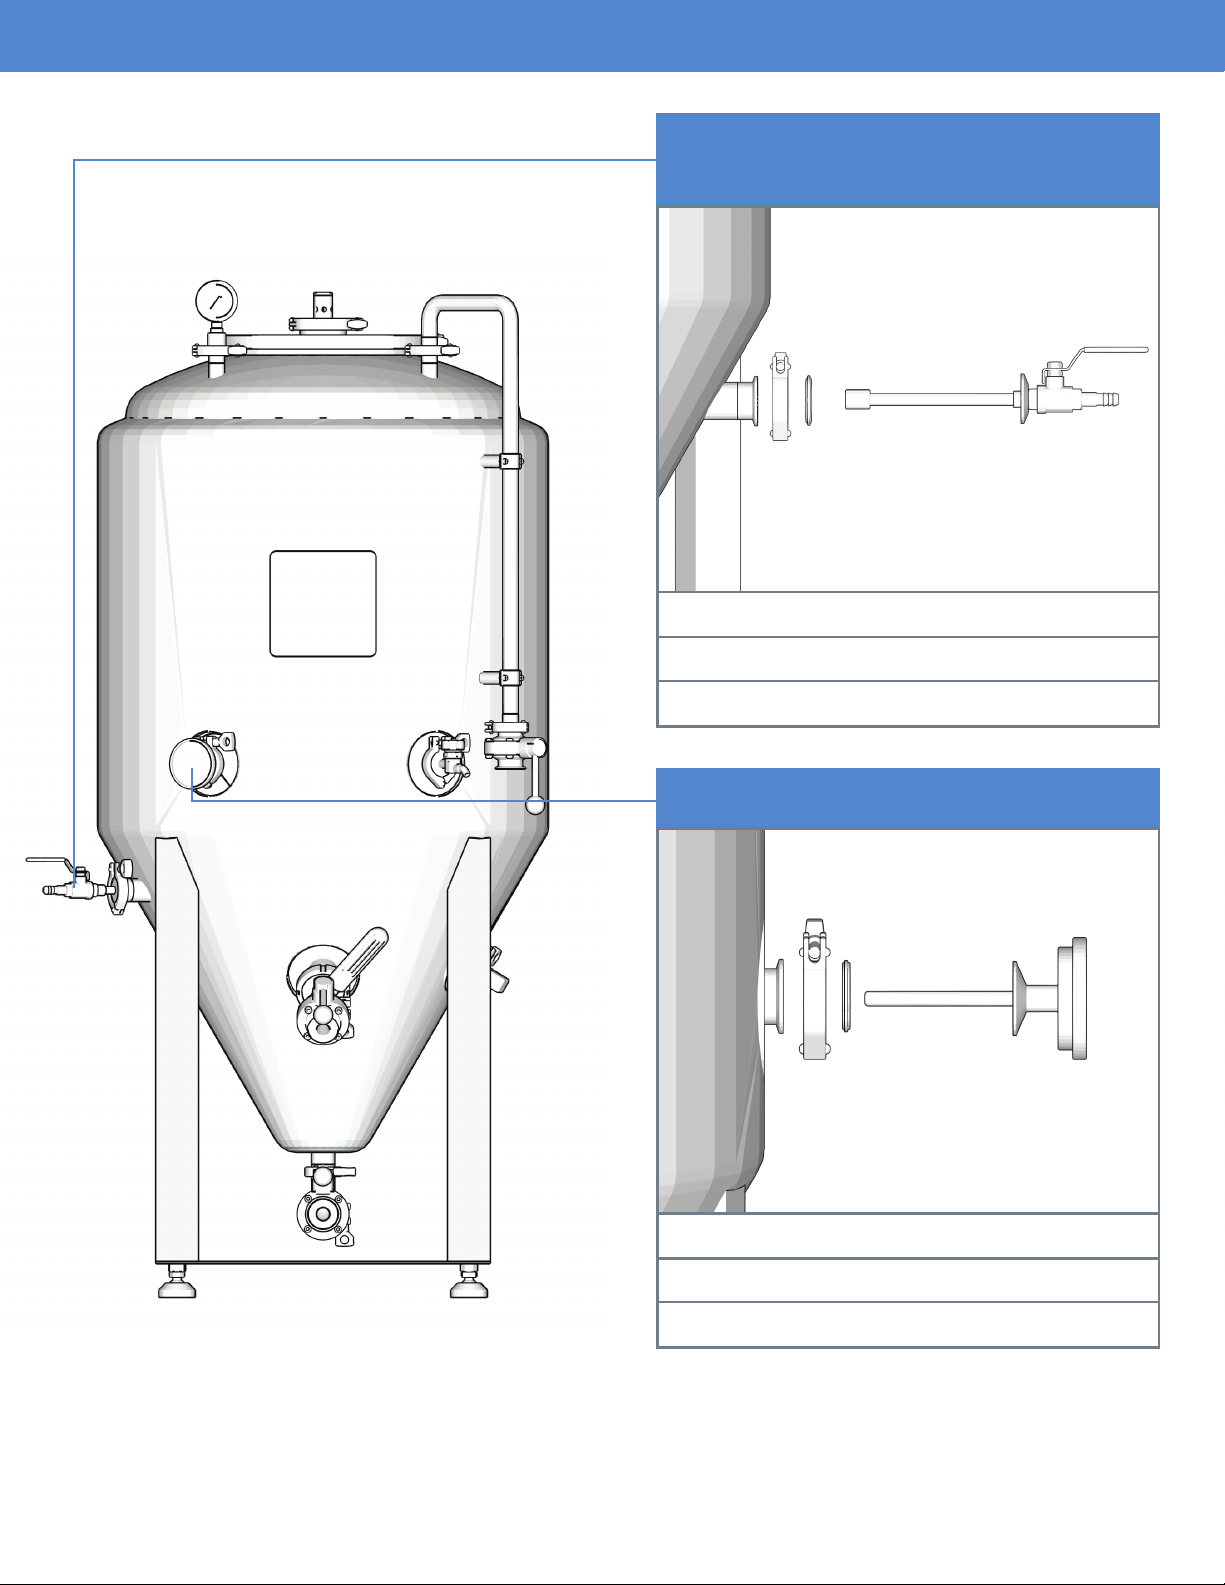
TANK FEATURES & ASSEMBLY
1.5” TC PERLICK SAMPLE VALVE
H
I
N - 1.5” TC Perlick Style Sampling Valve
H - 1.5” TC Gasket
I - 1.5” TC Clamp
N
1.5” TC THERMOPROBE
H
I
O
O - 1.5” TC Thermowell / Probe
H - 1.5” TC Gasket
I - 1.5” TC Clamp
Page 6
Page 7

TANK FEATURES & ASSEMBLY
ROTATABLE RACKING ARM
P
I
H
L - 1.5” TC Buttery Valve
H - 1.5” TC Gasket
L
I - 1.5” TC Clamp
P -
DIN Nut Rotatable Racking Arm w/ 1.5” TC Port
1.5” TC BUTTERFLY DUMP VALVE
I
H
H
I
Q
L - 1.5” TC Buttery Valve
L
H - 1.5” TC Gasket
I - 1.5” TC Clamp
Q - Elbow
Page 7
Page 8

TANK FEATURES & ASSEMBLY
STAINLESS STEEL SHELF & FEET
R
S S
R - Stainless Steel Shelf
S - Threaded Stem Adjustable Feet
Page 8
Page 9

TANK FEATURES & ASSEMBLY
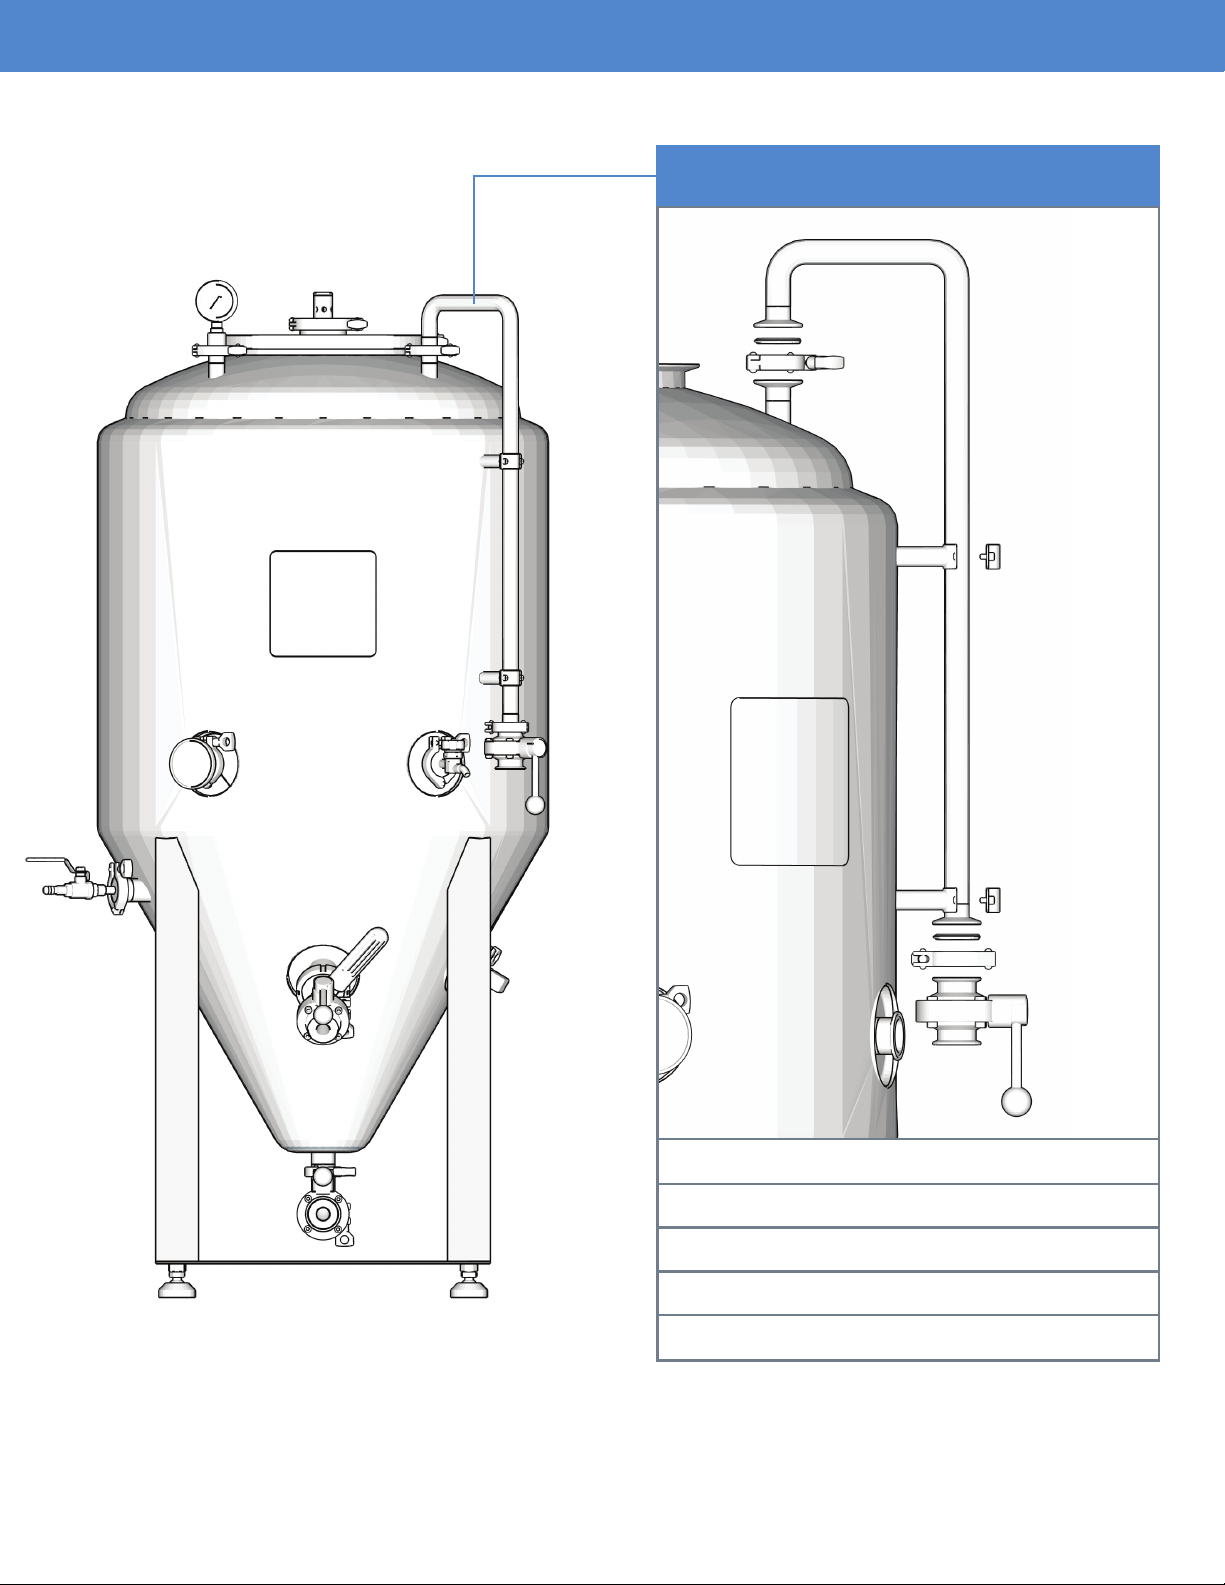
1/2” NPT GLYCOL RETURN LINE PORT
T
T - 1/2” NPT Glycol Return Line Port
1/2” NPT GLYCOL SUPPLY LINE PORT
U
U - 1/2” NPT Glycol Supply Line Port
Page 9
Page 10

PT 100 THERMOPROBE
WIRING INSTRUCTIONS
Screwdriver Insert Slot
1. Disconnect/unplug units from any power outlets.
2. Remove screw and unplug receptacle from the PT100 Thermoprobe.
3. Use the at head screwdriver slot to remove face of receptacle.
4. Feed temperature sensor wires through receptacle.
1.5” TC PT100 Thermoprobe Plug Receptacle
MSD 3
2
250V
10A
1
3
Screw
Temperature Sensor
Wires
5. Loosen set screws marked 1 and 2 and feed one temperature sensor wire into one of the ports.
There is no polarity, so either wire can be used in either port (one wire per port). Tighten set screws to
secure wires in place.
6. Reinstall face plate into plug receptacle and plug back in to the PT100 Thermoprobe. Secure assembly
with screw.
22
Use Ports 1 & 2 Temperature Sensor Wires
3
1
Page 10
Page 11

PRIOR TO USE
WARNING
It is very important that once the vessel is empty and ready to be cleaned that the residual
pressure buildup is released from the vessel before removing the lid cap. To perform this step,
open the sampling valve, and allow all pressure to bleed off before loosening any of the TC
connections on the vessel. Failure to do so could cause personal property damage, serious
bodily injury, or death.
Never allow a vacuum to form within the vessel. During crash cooling or liquid extraction
ALWAYS attach a CO2 system to the vessel and supply an amount of pressure that is less
than the rated operating pressure of 15 PSI. Alternatively, open the blow-off cane’s ball valve
to compensate for liquid contraction. Never attach a diaphragm, vacuum, or centrifugal pump
to the vessel without sufcient head venting. Failure to do so could cause personal property
damage, serious bodily injury, or death.
Always assume contents are under pressure. This vessel has been designed and tested to conform with widely accepted beer serving and carbonating pressures. Never exceed the pressure
threshold of 30 PSI, and never operate the vessel without the PRV in place. Never use the
vessel in a manner than is otherwise directed. Always keep out of reach of children.
PRESSURE / LEAK TESTING
After assembling your Unitank, we recommend a pressure / leak test before introducing any chemicals
for cleaning or product to the vessel. To do so, simply ll the vessel with enough water to cover the
lower ports then seal up the vessel by closing all valves. Next, introduce head pressure through the
blow-off arm. We recommend the full operating load of 15 PSI for testing purposes. Check for leaks
over the course of a few hours and take note of any gaskets or TC clamps that may need to be adjusted
or tightened. Once testing is completed, carefully vent the tank by slowly opening the buttery valve on
the blow-off arm.
Page 11
Page 12

PRIOR TO USE
PASSIVATION
Contrary to popular belief, stainless steel is not truly stainless. It is corrosion-resistant, but not corrosionproof. The ability of stainless steel to resist corrosion is dependent upon its protective oxide layer. This
layer must be periodically re-introduced by cleaning the stainless steel to remove any iron and surface
contaminants and allowing the surface to react with oxygen in the atmosphere. We recommended
passivation of your tank upon delivery, as well as setting a routine schedule for re-passivation. Your
basic procedure would be to clean the vessel with an acid solution (nitric, phosphoric, citric, etc.)
to remove iron or other contaminants from the surface of the stainless steel, then lightly rinse and
allow to air dry so that oxygen can react to form the protective oxide layer. We recommend contacting
a chemical provider to obtain the best practices for passivation of 304 stainless steel based on the
chemical being used.
CALIBRATING YOUR THERMOMETER / THERMO-PROBE
Before use, it is important to ensure that your analog thermometer and PT100 thermo-probe are properly
calibrated and consistent with one another. There are several ways of calibrating a thermometer and
thermo-probe, but the simplest way is to use an ice-water mixture. When you insert your thermometer
and/or thermo-probe into an ice-water mixture, they should read 32º F (0º C). There is a small screw
on the back of the analog thermometer that can be adjusted to correct for error, if any. Set an off-set on
your digital controller temperature readout to correct for any thermo-probe error.
*NOTE: In order to use your PT100 thermo-probe, you will need some type of digital temperature
controller. We recommend our FTSs Pro Modular Temperature Controller for ultimate compatibility. The
FTSs Pro Modular Temperature Controller and user guide can both be found at www.ssbrewtech.com.
Page 12
Page 13

CLEANING YOUR UNITANK
CLEANING AND SANITIZING: CIP
In simplest form, the basic principle of a vessel CIP (clean in place) is to recirculate a mixture of water
and cleaning agent from the bottom of the vessel up through the spray ball of the vessel using an
external pump in a continuous loop. This is accomplished by hooking up a hose from the trub dump
port to the inlet of the pump, and from the outlet of the pump to the CIP spray ball (spray ball sold
separately). This will allow you to pull uid from the cone of the tank and push it up through the spray
ball, where it will cascade down the inner walls of the vessel and collect back into the cone creating a
continuous loop.
WARNING
Be sure to use EXTREME caution anytime you are working with chemicals, high temperatures,
and pressure. Improper CIP procedures can lead to property damage, bodily injury or even
death if not performed properly and with the utmost attention to safety!
ACID-BASED CLEANSERS
Acid-based cleaners are best for removing hard water deposits, “beer stone” and other inorganic matter.
In many cases, the acid-based cleaning agent may be the same chemical you use to passivate (see
section on Passivation). While acid-based cleaners are generally used less often than alkaline-based
cleaners, it is important to set a routine schedule for cleaning with acid to keep the tanks polished and
passivated and heat-exchange surfaces free of fouling deposits.
ALKALINE-BASED CLEANSERS
Organic soil loads are most effectively cleaned using an alkaline cleaning agent. PBW (Powdered
Brewery Wash) has become the go-to cleaning product for many homebrewers. It is relatively safe to
use, and effective on light-medium soil loads. Professional breweries on the other hand tend to use
some type of non-chlorinated caustic for cleaning purposes. Caustic is far more powerful but must be
handled with EXTREME care, as exposure to skin can cause severe burns. It is important that the
caustic solution is non-chlorinated, as chlorine can cause pitting to stainless steel.
SANITIZER
It is important to remember that cleaning and sanitizing are separate but equally important processes.
Before lling, you must sanitize your Unitank (and any lines or ttings that will come into contact with
your product) to ensure microbial stability of your product. StarSan has become quite popular amongst
the homebrew crowd based on its effectiveness and safety toward humans and the environment.
Saniclean, much like StarSan, is relatively safe, easy to use, and a low-foaming option compared to
StarSan which may be better for pump driven CIP’s. In the professional brewing industry, paracetic acid
tends to reign supreme as the chemical of choice. Paracetic acid, or PAA, is low-foaming, effective, and
relatively easy on the wallet. That said, PAA is much more dangerous chemical and must be handled
with care.
Page 13
Page 14

SsBrewtech.com
REV 02112019
 Loading...