

ENGINEERING BETTER BEER
FTSs Pro Modular Temperature Controller
- Europe -
INTRODUCTION
OVERVIEW
The FTSs Pro Modular Temperature Controller works in conjunction with a pressurized glycol system to
provide temperature control over the contents of your vessel. It functions by using a temperature sensor
to read the present value (PV) of your vessel, and triggering an output based on the set value (SV) in
order to match PV with SV. When cooling is called for, the solenoid valve will open to allow the ow of
glycol through your vessel’s cooling jackets or coils until the set value is achieved.
FTSs Pro Controller
Temperature
Solenoid Valve
OFF
Run Crash
Page 2
SETUP
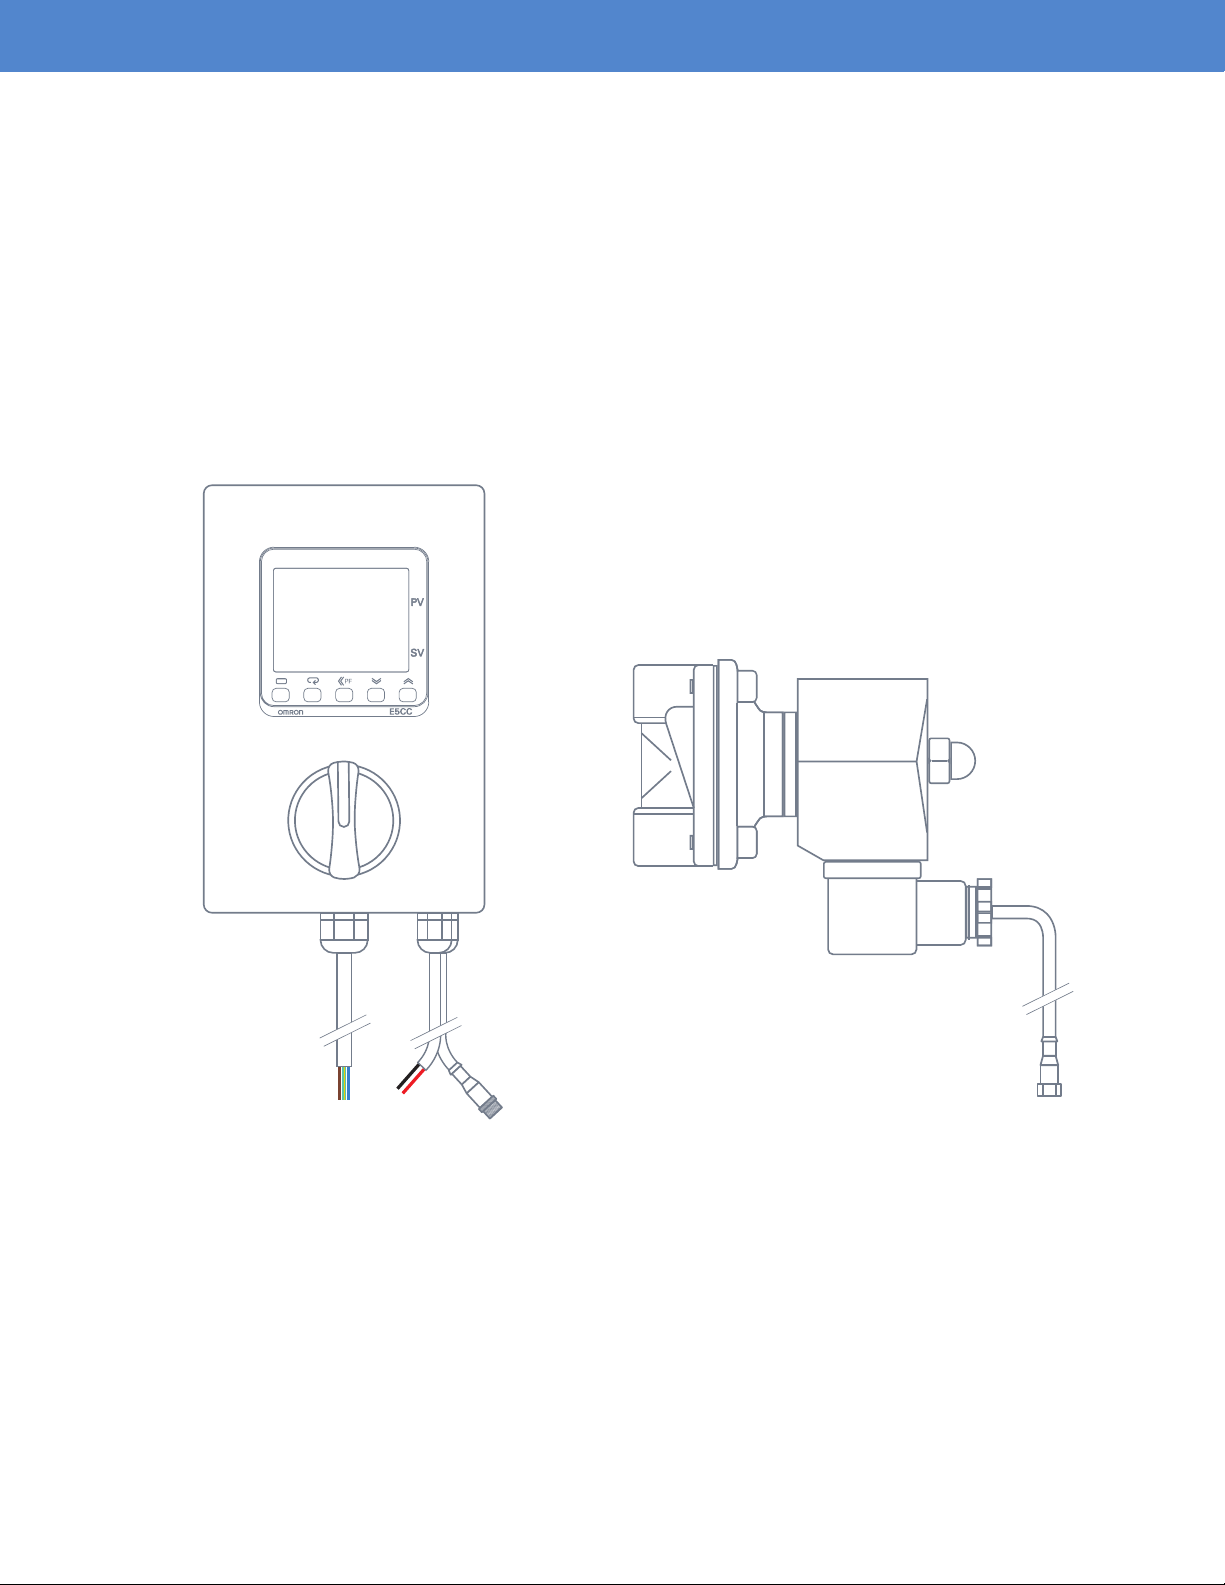
POWERING THE FTSs PRO
The FTSs Pro Modular Temperature Controller comes with a lead marked “110~240VAC-in”. The
three wires in this cable correspond to hot (brown wire), neutral (blue wire), and ground (green/yellow
wire). A plug is purposely omitted from the cable to accommodate various methods used for supplying
110~240VAC to the unit. If you are installing a plug, BE SURE that a GFCI breaker/receptacle is
installed.
Temperature
OFF
Run Crash
110~240VAC-In
Brown - Hot
Blue - Neutral
Green/Yellow - Ground
To Temperature Sensor
Solenoid Connection
SENSOR INSTALLATION
The FTSs Pro Modular Temperature Controller comes with a lead marked “Sensor”. The two wires in
this cable (red and black) will connect to your temperature sensor. If you are using an Ss Brewtech
vessel, your tank comes equipped with a PT100 platinum resistance thermometer. The red and black
wires will connect to terminals 1 and 2 on the thermometer’s plug. The orientation of the wires does not
matter, as long as they are connected to terminals 1 and 2.
SOLENOID INSTALLATION
The FTSs Pro Modular Temperature Controller comes with either a ½” (1-3.5 bbl Unitank) or ¾” (5 bbl
and larger Unitank) electric solenoid valve. Installation can be handled in a variety of ways based on
preference and setup. We recommend installation of a manual bypass piping/valve arrangement, as
well as piping/valve arrangement to clear the line of glycol in the event that service is needed.
Page 3
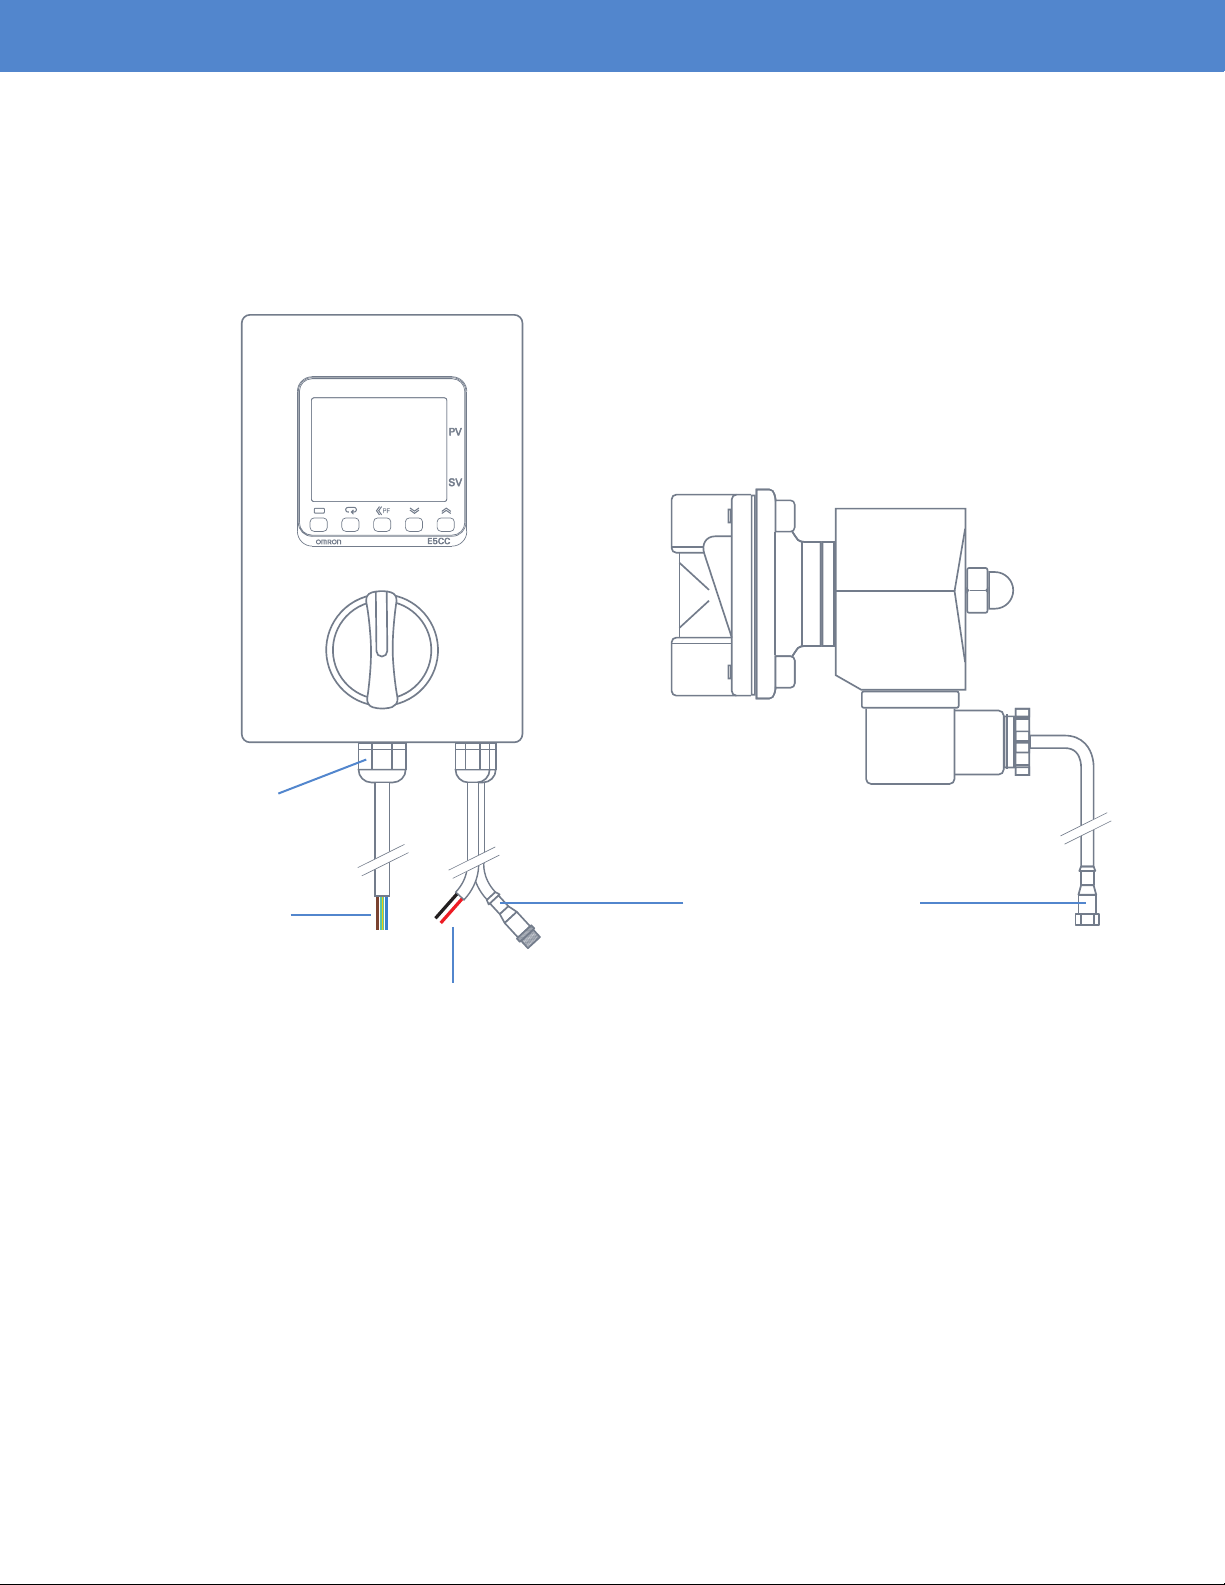
SENSOR: SETTINGS & CALIBRATION
SETTINGS
The input setting can be manipulated based on the type of sensor being used. The correct input setting
for a PT100 sensor is “Cn-t: 1”. This should be the default setting on your controller. If you are reading a
sensor error message (S.ERR), double check your connections to the sensor and ensure that “Cn-t” is
set to 1. If you are using a different type of sensor, see the included chart to determine the proper input
setting for your particular sensor.
Temperature Unit
No. 1 Display
Operation Indicators
No. 2 Display
Up KeyLevel Key
Down KeyMode Key
Shift Key
Ss Brewtech Pro Tanks ship with a PT100 type temperature senor included. To set the temp sensor
type, begin by pressing the “Level Key” (3 or more seconds).
Then press the “Mode Key” until you see “Cn-t”. Finally press the “Up” or “Down” Key to select “1” for a
PT100 probe. For other temp sensor options, please reference the table on the following page.
Press and hold the “Level Key” for more than 3 seconds to return to the primary display.
Page 4
SENSOR: SETTINGS & CALIBRATION (CONTINUED)
t
A
OTHER TEMP SENSOR OPTIONS
Platinum resistance thermometer input
type
Thermocouple
input type
Input type Name Set
Platinum
resistance
thermometer
Input type Name
Thermocouple
Infrared
emperature
sensor
ES1
Pt100
JPt100
K
J
T
E
L
U
N
R
S
10
B
11
Value
0
1
2
3
4
Set
Value
0
1
2
3
4
17
5
6
7
18
8
9
12
13
14
Input Temperature Setup Range
Input Temperature Setup Range
15
Page 5
SENSOR: SETTINGS & CALIBRATION (CONTINUED)
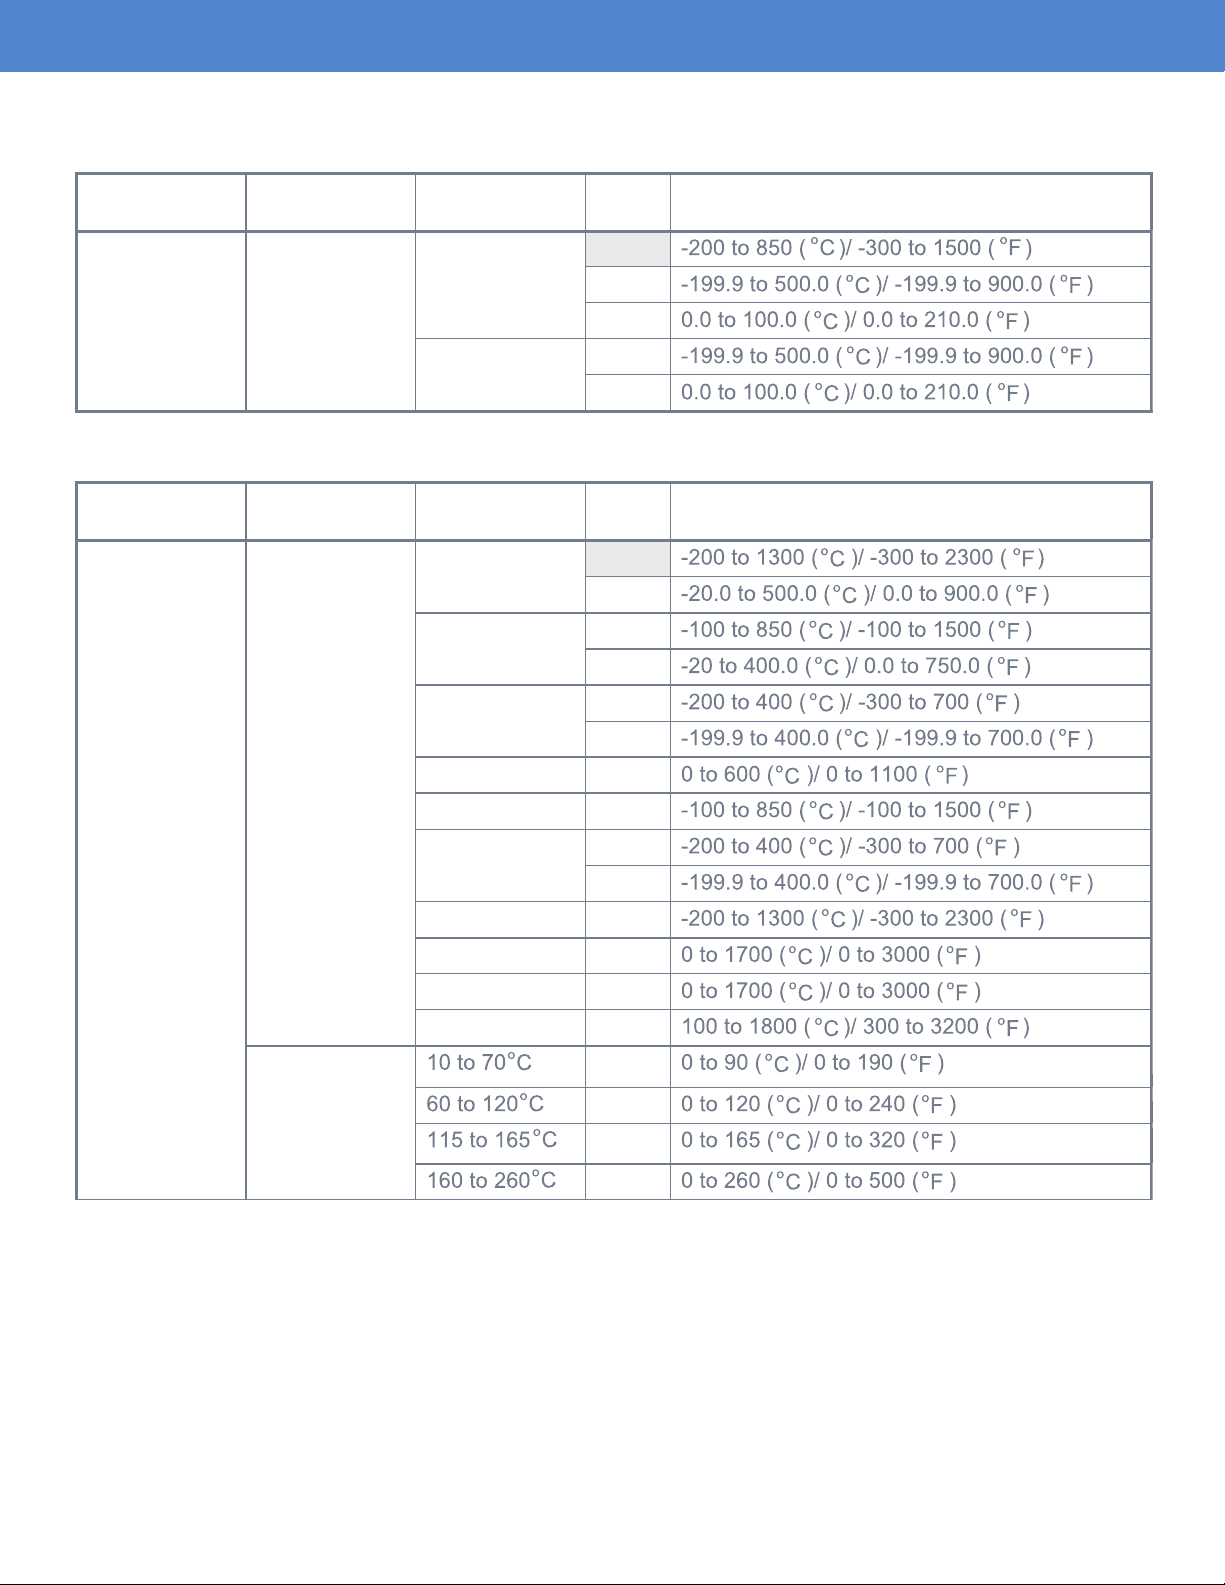
CALIBRATION
Before use, it is important to ensure that your sensor is properly calibrated. There are several ways of
calibrating a temperature sensor, but the simplest way is to use an ice-water mixture. When you insert
your sensor into an ice-water mixture, it should read 32°F (0°C). Perform the “ice method” of calibration
and document the offset, if any. You can then set a temperature offset on the controller to reect
this variation.
Press the “Level Key” for less than 1 second, and then use the “Mode Key” until you see “Cn5”. Next
use the “Up” or “Down” Key to change the temperature offset.
Press the “Level Key” for less than 1 second to exit to the main screen.
Temperature Unit
No. 1 Display
No. 2 Display
Up KeyLevel Key
Down KeyMode Key
Page 6
ADDITIONAL MENU SETTINGS
The FTSs Pro Modular Temperature controller uses an Omron Digital Controller as the “brains of the
operation”. It contains a whole host of menu options and settings that are not crucial to the basic
functioning of your FTSs Pro. Outlined below are a few of the more pertinent menu settings. For more
detailed information, please consult the Omron Programming Guides.
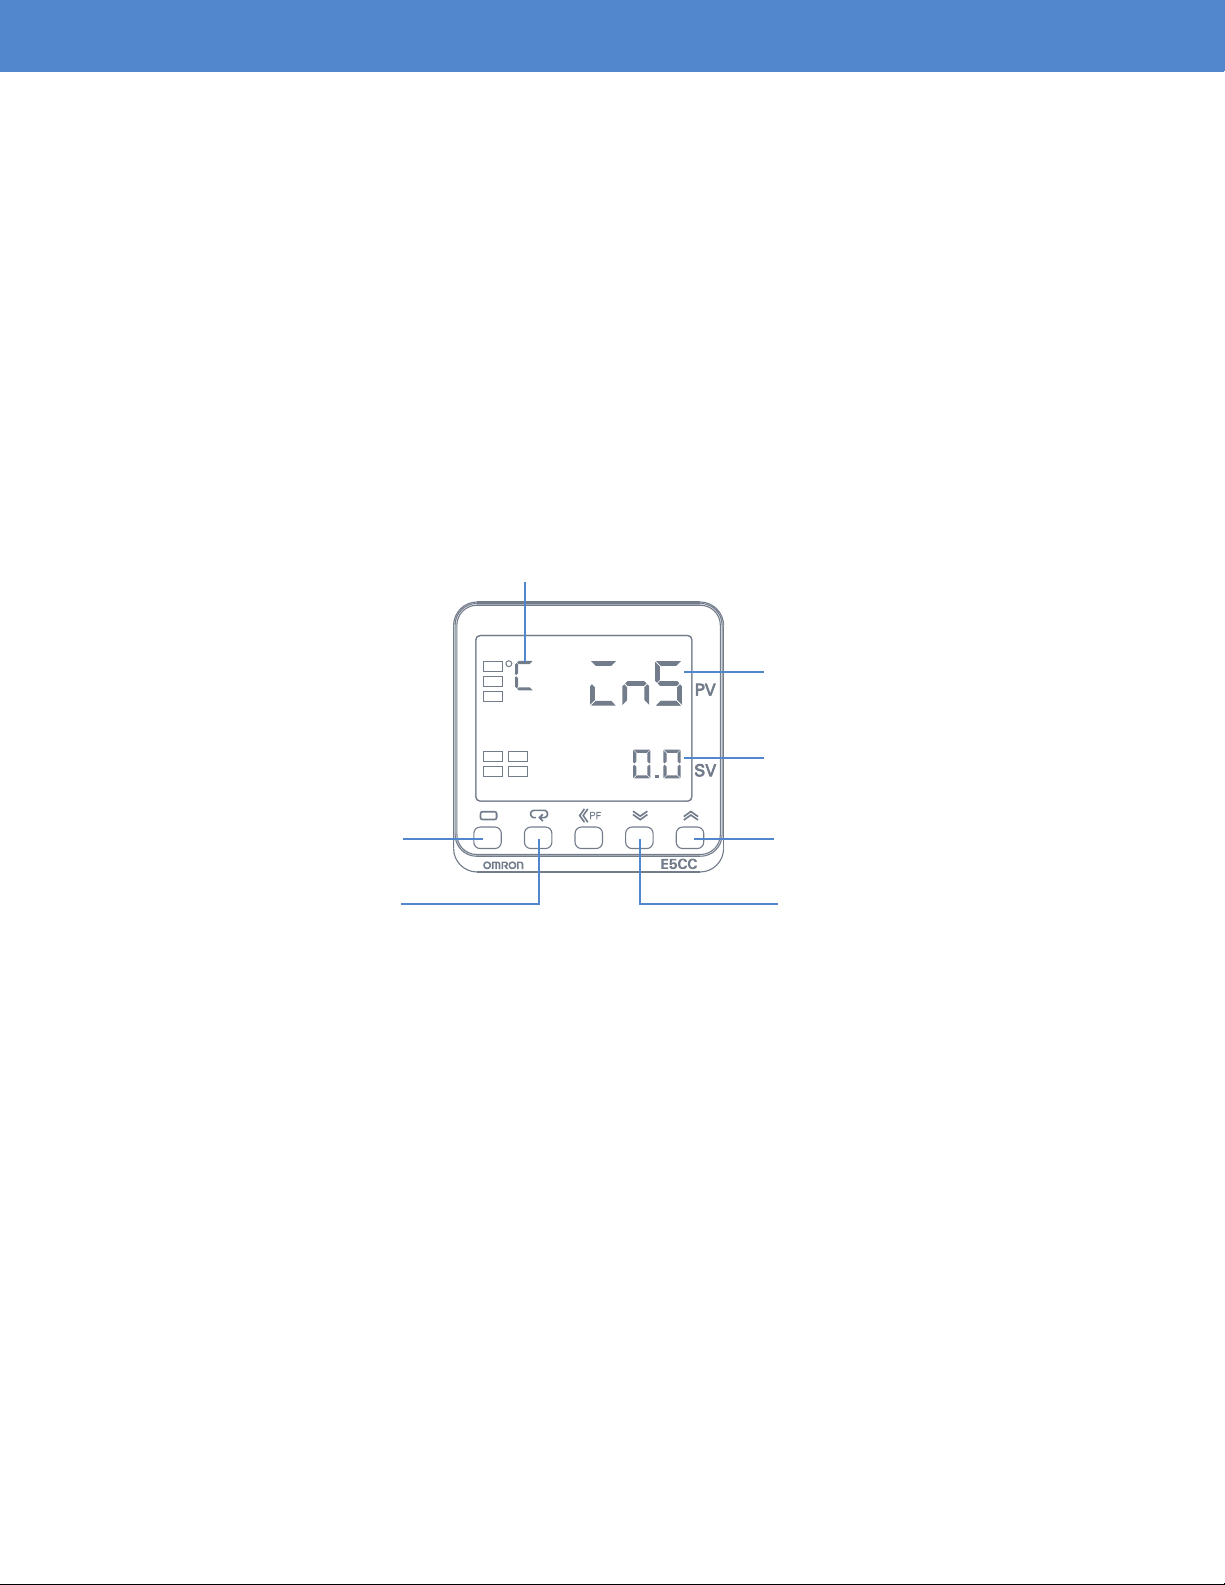
TEMPERATURE UNITS
The FTSs Pro Modular Temperature Controller allows the user to toggle between Fahrenheit and
Celsius. To do so, hold the “Level Key” for 3 or more seconds and then press the “Mode Key” until you
see “d-U”. Press the “Up” or “Down” Keys to toggle between Fahrenheit (F) and Celsius (C).
No. 1 Display
No. 2 Display
Level Key
Mode Key
Up Key
Down Key
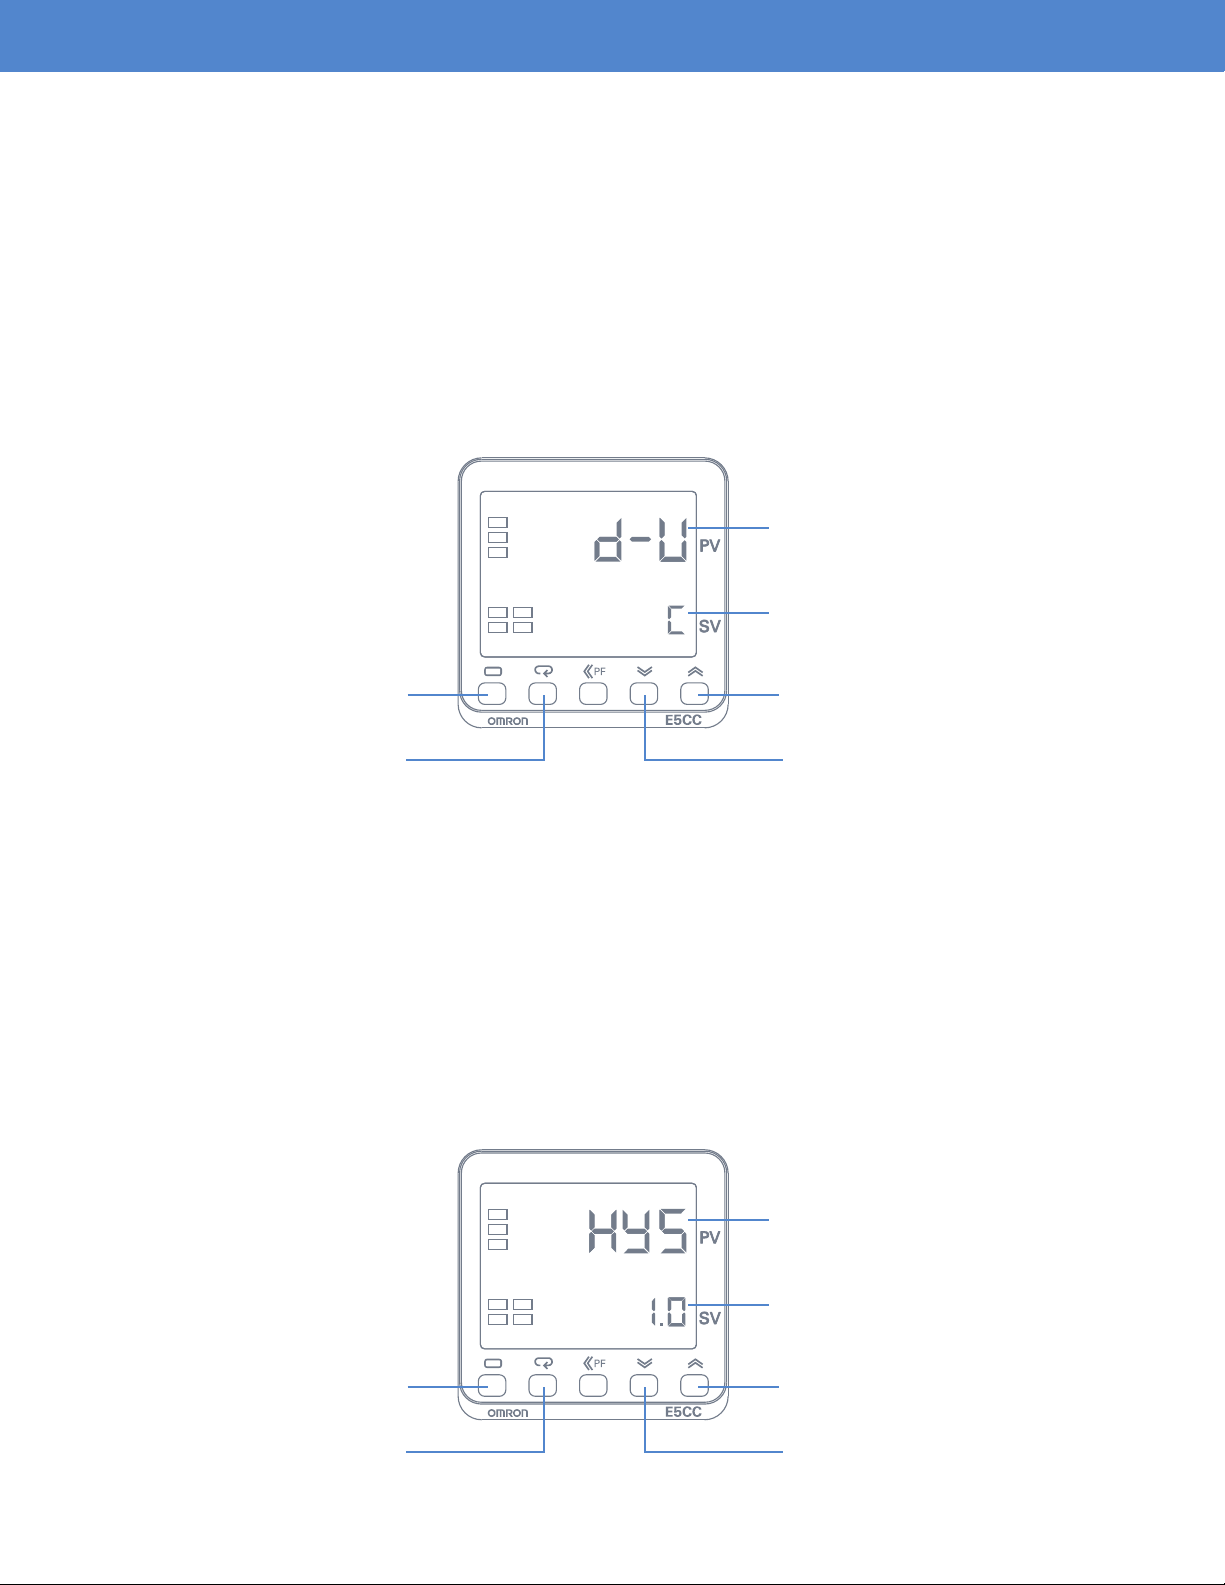
HYSTERESIS
The FTSs Pro Modular Temperature Controller allows you to set a hysteresis value. This value
represents the number of degrees away from the set value that the Omron will trigger an output. Press
the “Level Key” for 3 or more seconds and then press the “Mode Key” until you see “HYS”. Press the
“Up” or “Down” Keys to adjust the value.
For example, if the hysteresis is set to “1” (default setting), then the solenoid valve will only open when
the PV is one degree or greater above the SV. We recommend leaving this value at “1” to prevent
over-cycling of the system.
No. 1 Display
Level Key
Mode Key
No. 2 Display
Up Key
Down Key
Page 7

ADDITIONAL MENU SETTINGS (CONTINUED)
DECIMAL POINTS
The controller can be set to adjust the decimal point displayed on the controller. This is handy if you
wish to have ner temperature control, or if you are using a smaller hysteresis value. Press and hold
the “Level Key” for less than 1 second and then press the “Mode Key” until you see “dP”. Use the “Up”
or “Down” Keys to move the decimal points. Press the “Level Key” for less than 1 second to exit.
No. 1 Display
No. 2 Display
Up KeyLevel Key
Down KeyMode Key
Page 8

OPERATIONS
RUN
When in “Run” mode, the user can select a set value using the up and down keys. This can be used to
maintain fermentation temperatures, or for cooling purposes. When the set value is below the present
value, “OUT” will display on the controller and the solenoid valve will open. When the set value is
achieved, “OUT” will disappear from the display and the solenoid valve will close.
Temperature
OUT1
OFF
Run Crash
CRASH
When in “Crash” mode, the user can quickly toggle to a programmable “crash” temperature (0°C, for
example). The controller will memorize this temperature, and by simply turning the switch you can
switch to this temperature without toggling the up and down keys.
Temperature
OUT1
OFF
Run Crash
Page 9

SsBrewtech.com
REV 04182019
 Loading...