

Page 1

DVD-1 Instructions for Use. Page 1
of 22
INTRODUCTION
INSTRUCTIONS FOR USE
Thank you for purchasing the Musical Fidelity
DVD-1 24 bit DVD player.
Used properly and carefully, it should give you
many years of outstanding musical and video reproduction.
The DVD-1 plays a wide range of different format discs.
The list includes:- DVD-video, CD audio, CD-R,
CD-RW, video CD and S-Video CD.
Aesthetically, the DVD-1 is a perfect match for the
HTP Home Theatre Processor and HT600
5 channel power amplifier.
If you have any questions about anything in your
audio system, please consult your dealer who is
there to help and advise you.
Manufactured under license from Dolby Laboratories.
"Dolby" and the double-D symbol are trademarks of Dolby Laboratories.
Confidential unpublished works. Copyright 1992-1997 Dolby Laboratories. All rights reserved.
Manufactured under license from Digital Theater Systems.
TruSurround © Copyright 1998/1999 SRS Labs, Inc. All rights reserved.
DVD-1
24/192 DVD PLAYER
1
Page 2

DVD-1 Instructions for Use. Page 2
of 22
SAFETY
INFORMATION
IMPORTANT!
This unit is supplied in the U.K. with a mains lead fitted with a moulded 13 amp plug.
If, for any reason, you need to cut off this plug, please observe the following safety precautions.
Please dispose of the cut-off plug safely. It must not be plugged into a mains power supply.
The wires in the mains lead supplied with this appliance are coloured in accordance
with the following code:
Green and yellow..............Earth
Blue...............................Neutral
Brown................................Live
WARNING - This appliance must be earthed
As the colours of the wires of the mains lead of this appliance may not correspond with the
coloured markings identifying the terminals in your plug, proceed as follows:
The wire which is coloured green-and-yellow must be connected to the terminal in the plug
which is marked with the letter E or coloured green or green-and-yellow, or by the earth
symbol.
The wire which is coloured brown must be connected to the terminal which is marked with the
letter L or coloured red.
The wire which is coloured blue must be connected to the terminal which is marked with the
letter N or coloured black.
If connecting to a BS1363 plug, a 10 amp fuse must be used.
WARNING - Radio Frequency Interference (RFI)
This hi-fi product has been tested to ensure that its operation will not be adversely affected by
normal background levels of RFI. It is possible that if this product is subjected to abnormally
high levels of RFI the unit may be susceptible and not perform as expected. In the unlikely
event of this happening on a regular basis, please contact Musical Fidelity's service department.
The unit has also been tested to ensure that it does not radiate excessive levels of RFI that could
affect other pieces of electronic or electrical equipment.
The electronics in modern hi-fi equipment is complex and hence may be damaged by lightning.
It is possible that during electrical storms the operation of some equipment may be adversely
affected. For complete protection of your hi-fi system during such storms, mains plugs and aer
-
ial leads should be disconnected.
Always ensure that when disconnecting and reconnecting your hi-fi equipment the mains
supply is switched off.
Page 3

SAFETY INFORMATION
DVD-1 Instructions for Use. Page 3
of 22
To comply with North American regulations this equipment has been tested and found to
comply with the limits for a Class B digital device, pursuant to part 15 of the FCC rules.
These limits are designed to provide reasonable protection against harmful interference in a
residential installation.
WARNING - ANY MODIFICATIONS OR CHANGES TO THIS
UNIT NOT EXPRESSLY APPROVED BY MUSICAL FIDELITY
WHO ARE THE PARTY RESPONSIBLE FOR COMPLIANCE
COULD VOID THE USER'S AUTHORITY TO OPERATE THIS
EQUIPMENT
This equipment generates, uses and can radiate radio frequency energy and, if not installed
and used in accordance with the instructions, may cause harmful interference to radio com munications. As it cannot be guaranteed that interference will not occur in a particular installation the user is encouraged to try to correct any interference experienced, for instance to
radio or TV broadcasts, by one or more of the following measures:
• Identify the source of interference, turn off the DVD player, check whether the
interference disappears.
• Re-orientate or relocate the receiving aerial.
• Increase the separation between the DVD player and receiver.
• Connect the DVD player to a mains outlet on a different circuit from the receiver.
• Consult a dealer or experienced TV/radio technician for help.
WARNING - THIS DVD PLAYER CONTAINS A LASER
This equipment contains a laser which emits invisible radiation. Only a qualified service person should remove the cover or attempt to service this device due to possible eye injury.
Optical pick-up type: Manufacturer : Semiconductor AIGaAs
Numerical Aperture 0.6 VCD & CD
0.45 DVD
Wavelength : 780nm VCD &CD
650nm DVD
Page 4
SAFETY INFORMATION
DVD-1 Instructions for Use. Page 4
of 22
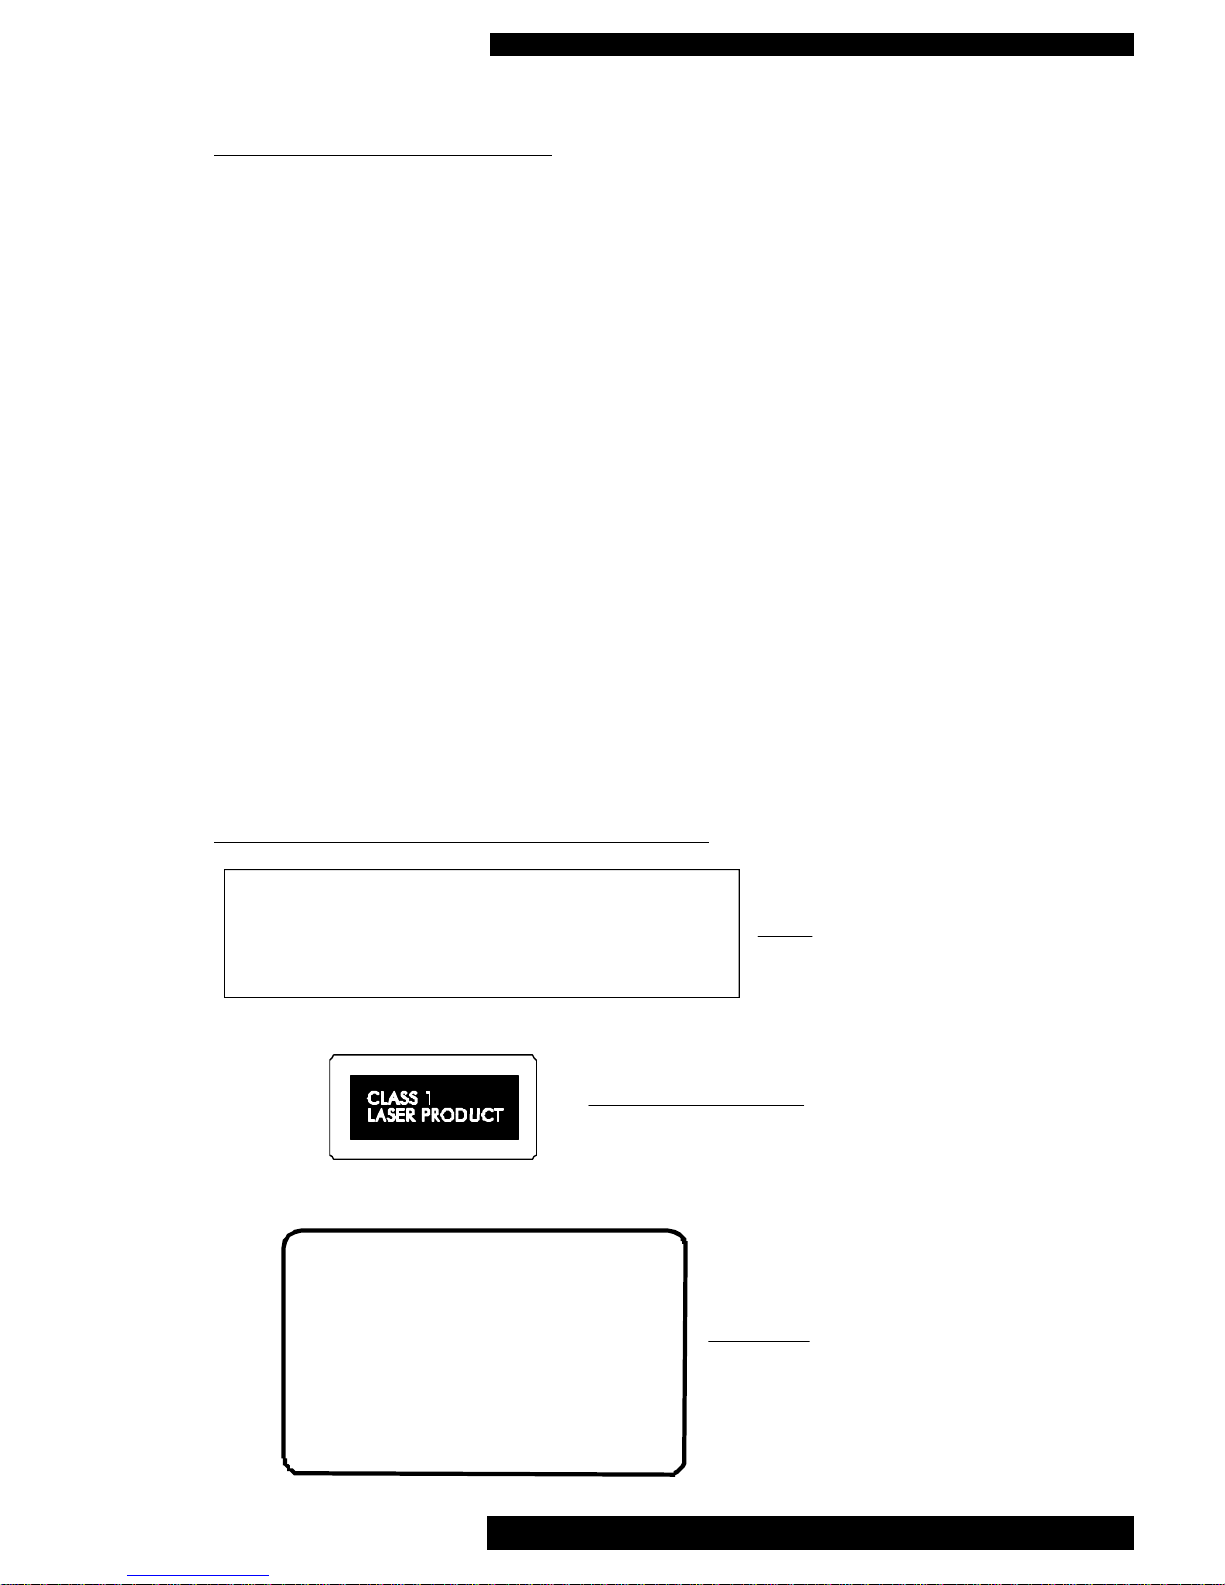
CLASS 1 LASER PRODUCTS
This DVD player has been designed and manufactured according to FDA regulations "title
21, CFR, chapter 1, subchapter J, based on the Radiation Control for Health and Safety Act
of 1968", and is classified as a Class 1 laser product. There is no hazardous radiation during
normal use because invisible radiation emitted inside this product is completely confined
within the protective housing. However you must comply with the following important cautions.
CAUTION !
• THIS DVD PLAYER OPERATES WITH INVISIBLE LASER
LIGHT.WHEN THE PLAYER OPERATES LASER LIGHT IS
RADIATED INTERNALLY. DO NOT REMOVE THE PROTECTIVE
HOUSINGS.
• USE OF CONTROLS OR ADJUSTMENTS OR PERFORMANCE OF
PROCEDURES OTHER THAN THOSE SPECIFIED HEREIN MAY
RESULT IN HAZARDOUS RADIATION EXPOSURE.
• IF THIS PRODUCT DEVELOPS A FAULT PLEASE CONTACT YOUR
AUTHORISED MUSICAL FIDELITY SERVICE AGENT. DO NOT
ATTEMPT TO SERVICE IT YOURSELF AND DO NOT
CONTINUE TO USE THIS PRODUCT IN A FAULTY STATE.
WARNING AND INFORMATION LABELS:
CAUTION - INVISIBLE LASER RADIATION WHEN OPEN AND
INTERLOCKS DEFEATED. AVOID EXPOSURE TO BEAM.
VORSICHT! - NSICHTBARE LASERSTRAHLUNG TRITT AUS,
WENN DECKEL GEOFFNET UND WENN
SICHERHEITSVERRIEGELUNG UBERBRUCKT IST.
NICHT DEM STRAHL AUSSETZEN!
VARNING - SYNLIG LASERSTRALNING NAR DENNA DEL
AR OPPNAD OCH SPARR AR URKOPPLAD.
STRALEN AR FARLIG.
ADVARSEL - USYNLIG LASERSTRALING VED ABNING, NAR
SIKKERHEDSAFBRYDERE ER UDE AF FUNKTION.
UNDGA UDSAETTELSE FOR STRALING.
VAROITUS! - SUOJAKOTELOA EI SAA AVATA. LAITE SISALTAA
LASERDIODIN, JOKA LAHETTAA (NAKYMATONTA)
SILMILLE VAARALLISTA LASERSATEILYA.
THIS PRODUCT COMPLIES WITH DHHS RULES 21 CFR,
CHAPTER 1, SUBCHAPTER J, PART 1040 AT DATE OF MANUFACTURE.
THIS PRODUCT COMPLIES WITH PART 15 OF THE FCC RULES.
OPERATION IS SUBJECT TO TWO CONDITIONS:
1 THIS DEVICE MAY NOT CAUSE HARMFUL INTERFERENCE, AND
2 THIS DEVICE MUST ACCEPT ANY INTERFERENCE RECEIVED, INCLUDING
INTERFERENCE THAT MAY CAUSE UNDESIRED OPERATION
FITTED INTERNALLY TO
CHASSIS
PRINTED ON BACK
PANEL OF PLAYER
LABEL STUCK TO BASE
OF PLAYER
Page 5
AUDIO
OUT
L
R
DIGITAL
OUT
AV CONNECTOR
OUT
VIDEO
'S' COMP
OUT
MUSICAL FIDELITY DVD-1
24/192 HIGH PRECISION DVD PLAYER
DVD-1 Instructions for Use. Page 5
of 22
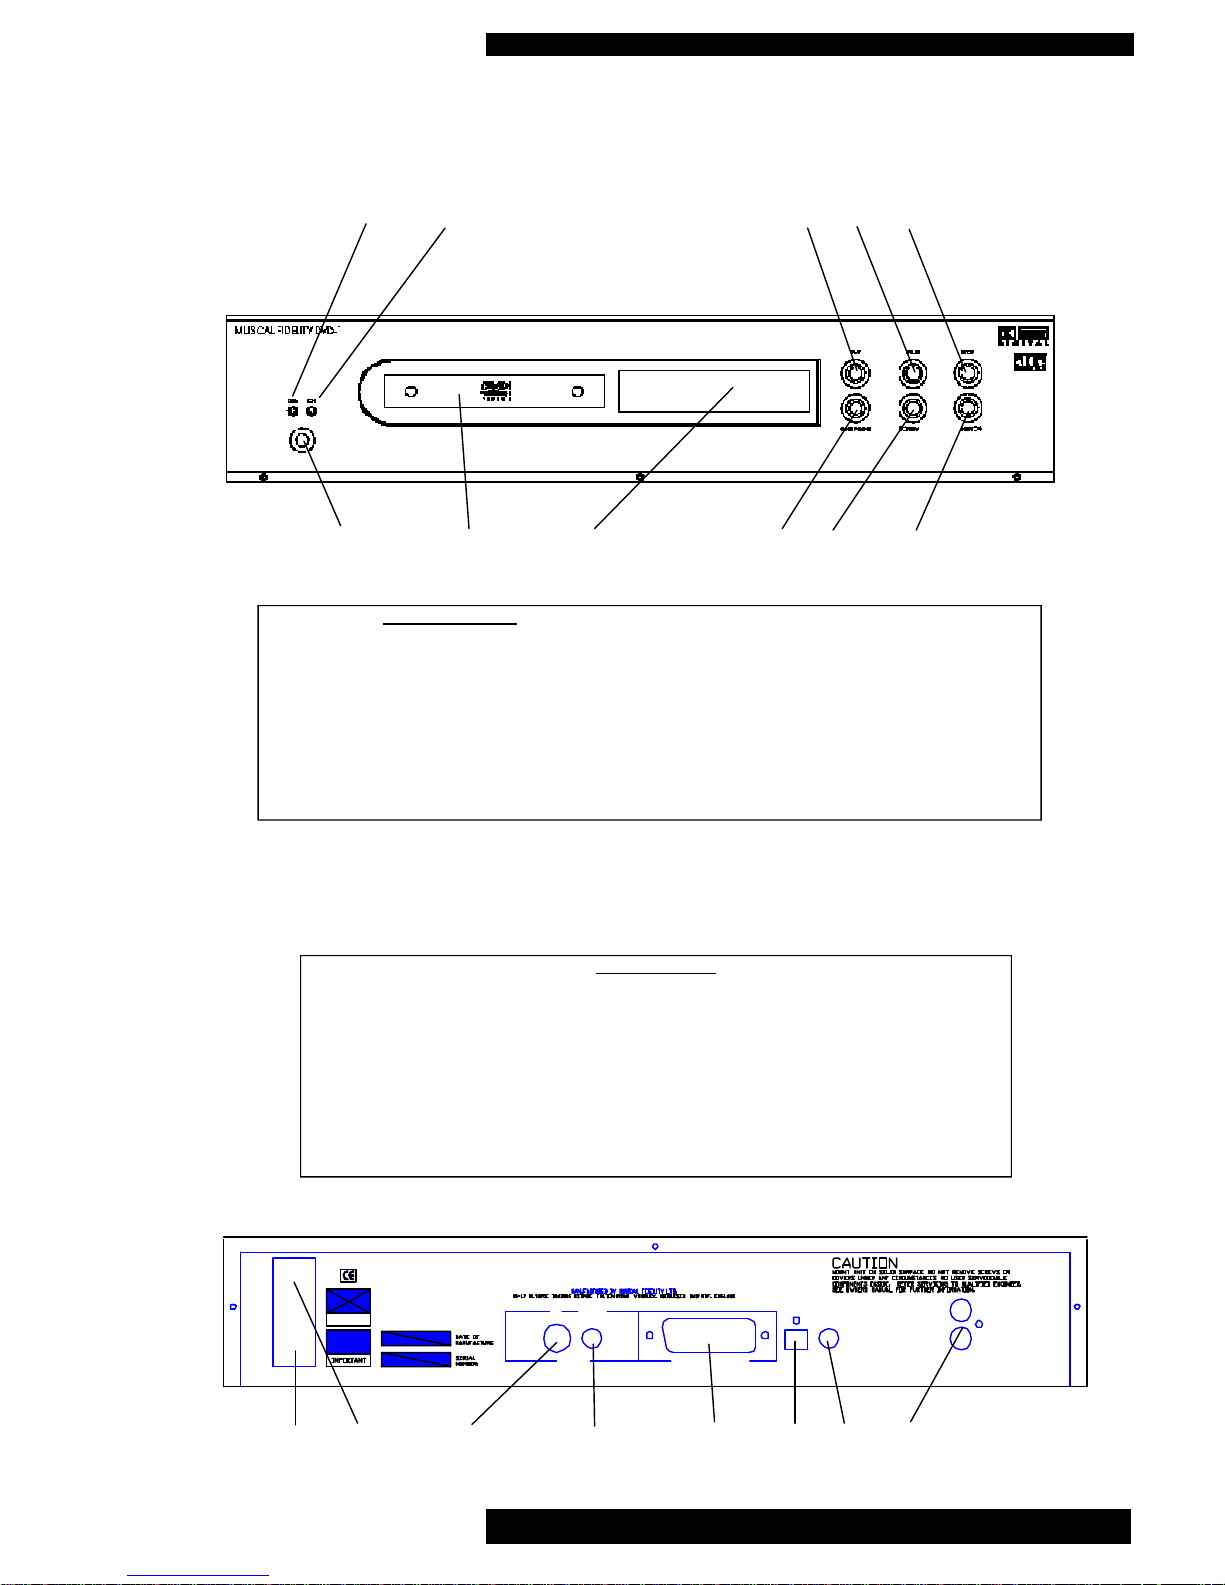
FACILITIES AND CONNECTIONS
FRONT PANEL
1 On/off switch
2 Yellow standby LED
3 Blue on LED
4 CD transport loading drawer
5 CD player display
6 PLAY to start CD playback
7 PAUSE to pause playback
8 STOP to stop CD playback
9 OPEN/CLOSE to open and close drawer
10 SKIP BACK track selector
11 SKIP FORWARD track selector
REAR PANEL
12 Mains IEC inlet
13 Mains on/off switch
14 ‘S’ Video output
15 Composite Video output
16 SCART socket
17 DIGITAL OUTPUT optical
18 DIGITAL OUTPUT coaxial
19 Left and right AUDIO OUTPUTS
12 13 14 15 16 17 18 19
1 4 5 9 10 11
2 3 6 7 8
Page 6
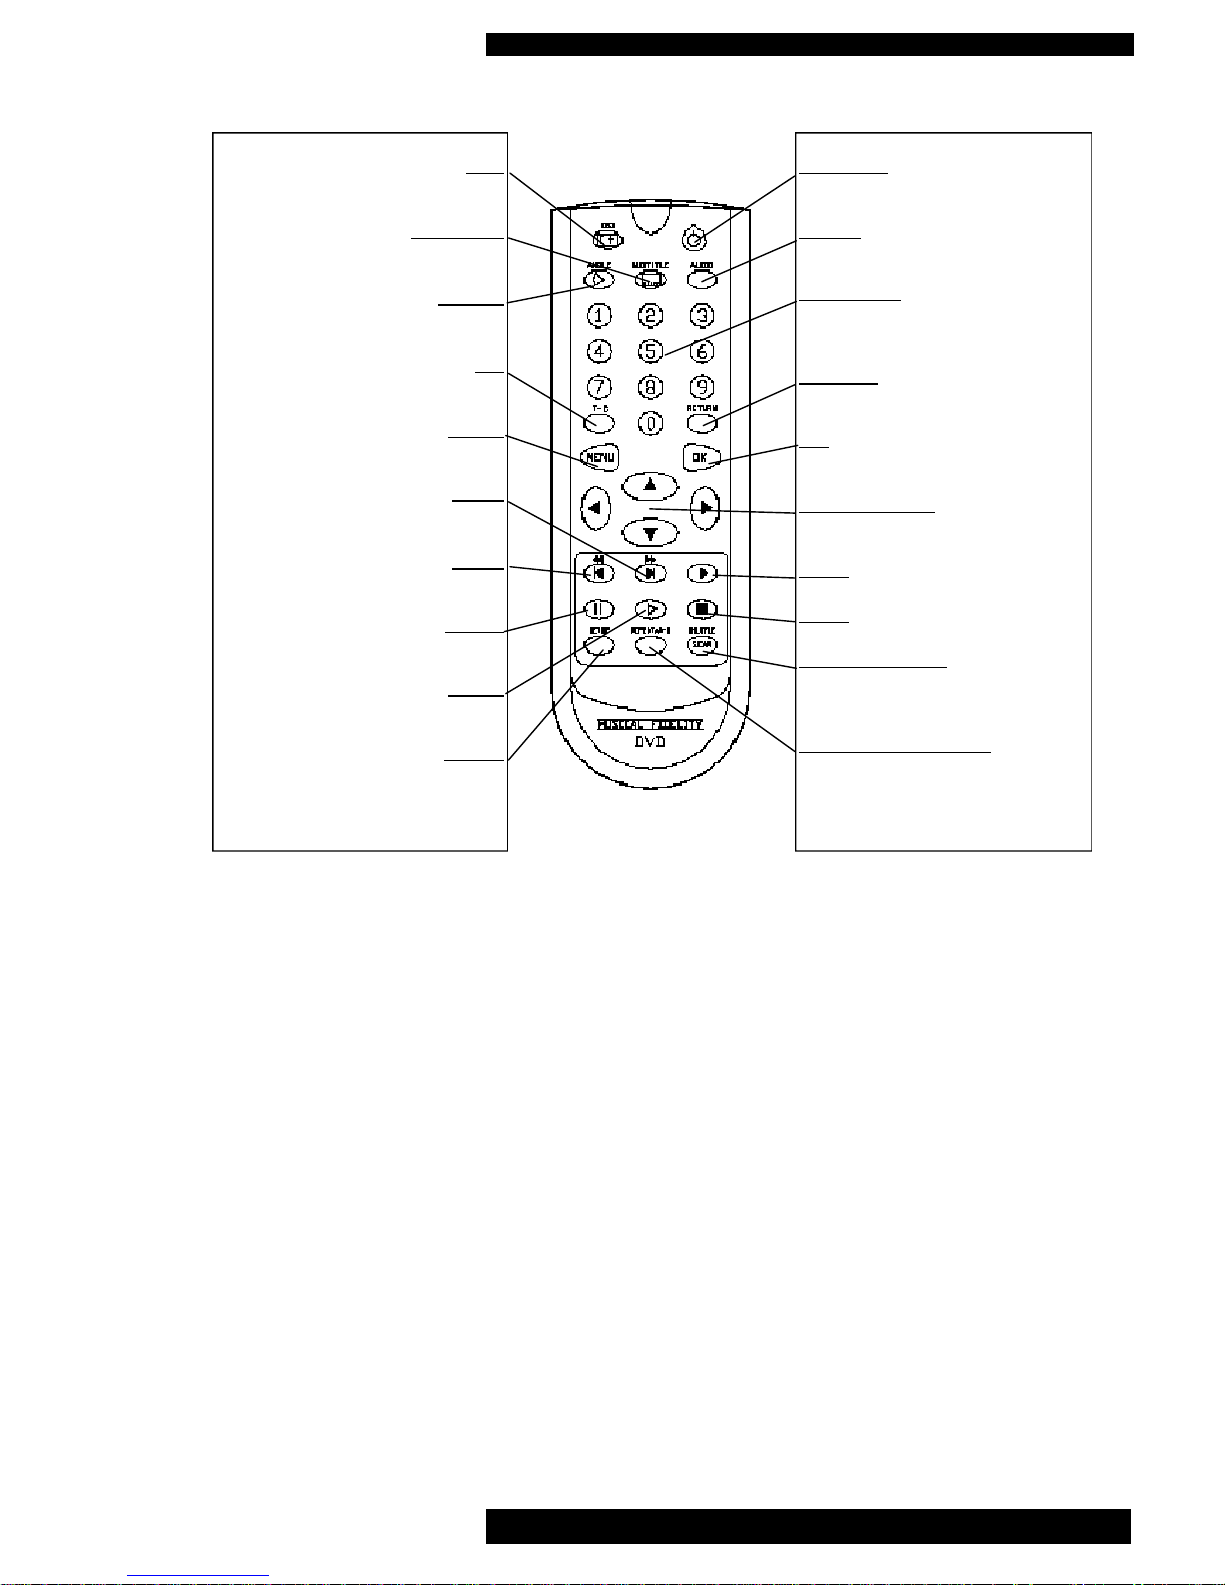
OSD
OSD (On-Screen Display) on/off
SUBTITLE
language selector or subtitle on/off
ANGLE
select DVD camera angle
T-C
title/chapter mode selector
MENU
select DVD-defined menu
NEXT
next chapter or track/ search forward
PREV.
previous chapter or track 1 search back
PAUSE
pause or still frame /step frame
SLOW
slow motion (1/2,1/4,1/8 speed)
SETUP
select player settings menu
(in stop mode only)
DVD-1 Instructions for Use. Page 6
of 22
REMOTE CONTROL
STANDBY
toggle between on and standby.
AUDIO
spoken language selector
0 to 9 Keypad
use to select track numbers on CDs or
Title and chapters on DVDs
RETURN
go back to previous menu step
OK
acknowledge menu selection.
CURSOR KEYS
orange cursor keys
PLAY
STOP
SHUFFLE/SCAN
shuffle or scan on/off (to shuffle hold but ton down for about 1 second)
REPEAT/A-B REPEAT
chapter, track, title, disc (to repeat chapter, track, title, disc hold button down for
about 1 second)
Page 7

DVD-1 Instructions for Use. Page 7
of 22
GENERAL ADVICE
INSTALLATION PRECAUTIONS and USER INFORMATION
Your new DVD player is designed and built to provide trouble-free performance, but as with all electronic devices
it is necessary to observe a few precautions.
ALWAYS disconnect your entire system from the AC mains before connecting or disconnecting any
cables, or when cleaning any component.
This product is equipped with a three-conductor AC mains power cord which includes an earth ground
connection. To prevent shock hazard, all three connections must ALWAYS be used. if your electrical outlets will not accept this type of plug an adapter may be purchased. If an adapter is necessary, be sure it
is an approved type and is used properly,
Heed all warnings on the back of the unit.
Only connect the DVD player to a mains outlet of the voltage marked on the back of the unit.
The DVD player will operate in accordance with its specifications as long as the environmental conditions are kept in the following ranges:-
Temperature 5 to 45 degrees Celsius
Humidity 10 to 90% non condensing
Position the mains lead and all interconnects where they are not likely to be walked on or trapped by
items placed on them.
Do not use near water. The unit shall not be exposed to dripping or splashing and no objects filled with
liquids, such as vases, shall be placed on the unit.
Do not place the unit near direct heat sources such as radiators or other equipment that produces heat.
Do not place the unit where it can be subjected to direct sun-light.
Do not remove any covers or try to gain access to the inside. The warranty is invalid if the unit has
been tampered with. There are no user adjustments within. Refer all service work to an authorised
Musical Fidelity agent.
Dust regularly with a soft duster or soft brush but be careful when using cleaning or
polishing agents - they may harm the surface finish.
NEVER use flammable or combustible chemicals for cleaning audio components.
There are fuses in the unit. In the unlikely event that one blows, take your unit to your audio dealer. Do
NOT try to replace the fuse yourself or you will invalidate the warranty.
No naked flame sources, such as lighted candles, should be placed on the unit.
Keep out of reach of children.
Important! Unauthorised opening of the equipment will invalidate any warranty claims.
Note: To help your dealer identify your DVD player if after-sales service is required, please quote the serial
number located on the rear panel of the unit.
Page 8

INTRODUCTION
INTRODUCTION
Thank you for choosing the Musical
Fidelity DVD-1. The unit is specifically
designed to reproduce all approved video
and audio formats.
The DVD-1 can be used as either a highend CD player, a home cinema audio/video
signal source or a combination of both.
The DVD-1 has digital out via an optical
link and also via coaxial output which will
output Dolby Digital, Dolby Pro Logic and
DTS Digital SurroundTMencoded signals.
For audio out the DVD-1 has left and right
analogue outputs, via a standard RCA connector.
For video outputs it has one ‘S’ video, one
composite video output and RGB via the
SCART socket.
The DVD-1 has been configured by the
factory only to play DVD video discs for
the region where the player was intended
to be sold. See the back panel for the
region that your DVD player is set to.
The DVD has also been set to output the
correct TV system for country where it was
intended to be sold. The two possible settings are PAL or NTSC. Europe, Hong
Kong, Malaysia, Singapore, and the Middle
East use PAL TV system. The USA,
Canada, and Taiwan use NTSC.
All DVD video discs are recorded in either
PAL or NTSC. Once the unit is playing
one of these discs, the player will output
the TV system that the disc was recorded
in.
If the unit is connected to a TV system of
the wrong type, i.e. a PAL DVD player
connected to a NTSC TV system, then the
Musical Fidelity picture (when the unit is
first turned on) will not be still on the
screen. Also if an audio CD is played the
same will happen.
The user can not change the default TV
system that the DVD player outputs.
If you have any questions about anything
in your audio system, please consult your
dealer who is there to help and advise you.
DTS Digital SurroundTMis a discrete 5.1 channel
digital audio format available on CD, LD, and DVD
software which consequently cannot be decoded
and played back inside most CD, LD, or DVD players. For this reason, when DTS-encoded software is
played back through the analogue outputs of the
CD, LD, or DVD player, excessive noise will be
exhibited. To avoid possible damage to the audio
system, proper precautions should taken by the consumer if the analog outputs are connected directly
to an amplification system. To enjoy DTS Digital
SurroundTMplayback, an external 5.1 channel DTS
Digital Surround
TM
decoder system such as the
Musical Fidelity HTP must be connected to the digital output (S/PDIF, AES/EBU, or TosLink) of the
CD, LD, or DVD-1 player.
DVD-1 Instructions for Use. Page 8
of 22
Page 9

INSTALLATION
DVD-1 Instructions for Use. Page 9
of 22
If you move your DVD player from a cold
place to a warm place, leave it switched off
for a few hours before using it again.
Condensation could form inside the unit
and must be allowed to evaporate.
CLEANING
Before cleaning the DVD player always
switch off the main switch and remove the
mains plug from the wall outlet. Clean the
housing and the remote control unit using a
moist cloth. We do not advise that you use
any solvents, white spirits, thinners, etc. as
they could damage the surface finish of the
unit.
NOTES ON USING CD and DVD DISCS
Always hold discs by the edges and make
sure they remain clean. Do not touch the
surface. Do not stick any paper or adhesive tape to either side of the disc. Keep
discs away from direct sunlight and heat
sources, such as radiators. Do not leave
discs in a car parked in direct sunlight,
since the temperature inside the car can
become extremely high. Clean discs with
a cloth before playing them. Do not use
any solvents such as benzene, thinners,
commercially available cleaners or antistat
-
ic spray intended for analogue discs, to
clean your discs. After playing, always
store a disc in its case again.
INSTALLATION
Place your DVD player on a stable, hori zontal, vibration-free surface where there
is no risk of it falling over or being subjected to vibrations. Avoid placing your
DVD player next to radiators or in direct
sunlight.
Protect your DVD player from humidity.
Avoid placing it under a window. Do not
place any containers filled with water on
the DVD player e.g. flower vases or potted
plants. If water does enter the DVD player, immediately pull out the mains plug
from the wall socket and inform your deal er, who should then check the set before
you use it again.
- Liquid entering the DVD player could
cause dangerous short-circuits which, in
the worst case, could cause a fire.
Page 10

CONNECTIONS
VIDEO CONNECTIONS
Your DVD needs to be connected to to a
TV, projector system or monitor. This is
done by using one of the 3 different types
of video connection at the back of the
DVD-1:-
Composite video connector
‘S’ Video connector
SCART connector
The SCART connector is the easiest way of
getting started quickly if your TV has one.
Connection using this method connects
both video and analogue audio using just
this cable.
Composite video connector
Use composite video output with a phono
cable suitable for use with video signals.
(your dealer will be able to advise on different cables)
‘S’ video connector
‘S’ video is generally considered to provide
a better quality video picture. If your TV
supports ‘S’ video it recommended that the
‘S’video connection is used on the back of
the DVD-1. You will need an ‘S’ Video
lead to use this type of connection. (‘S’
video is also know as Y/C or S-VHS)
SCART connector
The SCART connector provides an easy
method of connecting audio and video all
in one cable. The cable is commonly
called a SCART lead. The SCART connector on the back of the DVD-1 utilises
composite video.
The SCART output from the DVD-1 also
has a signal called AV control. When the
DVD-1 is turned on the control signal
automatically selects the SCART input on
the TV.
AUDIO CONNECTION
Your DVD player needs to be connected to
a device to play back the sound. This can
ether be the TV system, a preamplifer and
power amplifier or a digital to analogue
converter and then a preamp and power
amp.
Digital audio outputs
To use either the optical or the coaxial digi
-
tal output you will require a D to A converter. This ideally would be the Musical
Fidelity HTP (Home Theatre Processor).
The DVD-1’s digital outputs will provide
normal 2 channel PCM, Dolby Digital or
DTS digitally encoded bitstreams. On
some DVD discs the required type of digital output has to be selected using the
disc’s menu system.
Also ensure that the DVD-1 set-up has the
digital output enabled. (see page 13 for the
DVD-1 set-up options)
If both coaxial and optical connections are
available, Musical Fidelity recommend
using the coaxial output for slightly better
sound quality.
Connect the coaxial output from the DVD
player to the coaxial digital input on the D
to A unit using a phono cable suitable for
use with digital audio signals.
Alternatively connect the optical output
from the DVD-1 to the optical digital input
on the D to A unit using a TosLink optical
cable.
Analogue audio outputs
The DVD-1 has analogue audio outputs via
the RCA sockets (phono sockets/cinch
sockets, one for left one for right.) and the
SCART connector. Connect these to any
line level input on your preamplifer.
DVD-1 Instructions for Use. Page 10
of 22
Page 11

DVD-1 Instructions for Use. Page 11
of 22
BASIC OPERATION
REMOTE CONTROL
The remote control enables you to activate
the main functions of the DVD player from
the comfort of your armchair. Several of
the functions described in this manual are
only available on the remote handset.
Identical inscriptions on the remote control
and DVD player denote identical functions. The following should be noted when
operating the player using the remote control.
- Point the remote control (transmitter) towards the display on the player.
- Each press of a remote control but ton should be indicated in the top left
corner of the front panel display by a
flashing icon.
- Visual contact must exist between
the transmitter and receiver.
- If the range of the remote control
decreases dramatically, replace the
batteries with new ones.
MOISTURE
If the unit is exposed to extreme temperature fluctuations, moisture can form inside.
Condensation can form on the lens and on
other parts inside the unit. If the DVD
player is operated under these conditions,
the laser beam may not be able to read the
disc. In this case you should remove the
disc, close the disc compartment and leave
the unit switched on for an hour or so.
This will allow sufficient time for the
moisture to evaporate and you will then be
able to use your DVD player again.
SWITCHING ON
The mains switch is situated at the back of
the unit. The unit is designed to be left
switched on at all times. We do however
recommend switching the unit off, with
this switch, if the DVD is not going to be
used for a long time i.e. 2-3 weeks.
To turn the unit on press the button under
the STBY/ON LEDs. The blue LED and
the front panel display should light.
If the orange LED is lit on the front panel
the unit is in standby mode. Press the red
standby button on the remote control and
the unit will turn on. The blue LED on the
front panel will light and the display will
illuminate. If the unit is on, press either
the standby button on the remote and the
unit will switch back into standby or the
front panel button to switch the unit off. If
the unit is turned off all LEDs will go out.
LOADING DISCs
Press OPEN/CLOSE on the front panel to
open the disc tray. Place the disc in the
tray label facing up, (if the disc has a label)
press either PLAY or OPEN/CLOSE and
the tray will close and the disc will start
loading.
To open and close the tray using the remote
control press and hold the STOP
button for approx. 3 to 4 seconds.
The play button on the remote control will
also close an open tray
PLAYING DISCs CDs or DVDs
Many DVDs have a menu function at the
start of the disc. To play the movie select
the appropriate function using the orange
cursor buttons on the remote control.
Pressing the PLAY button on the front
panel or remote control will start
CDs and non-menu DVDs playing.
Page 12
BASIC OPERATION
PAUSING PLAYBACK
Pressing the PAUSE button on the front
panel or remote will pause the
playback. To restart playback
press PLAY.
STOPPING PLAYBACK
Pressing the STOP button on the front
panel or remote will stop the play-
back.
To resume from the point where the movie
was stopped press PLAY twice.
The resume feature also applies to the last
4 discs you have played. Simply insert the
disc press PLAY if autoplay is off. When
you see the RESUME icon on the
screen press PLAY again.
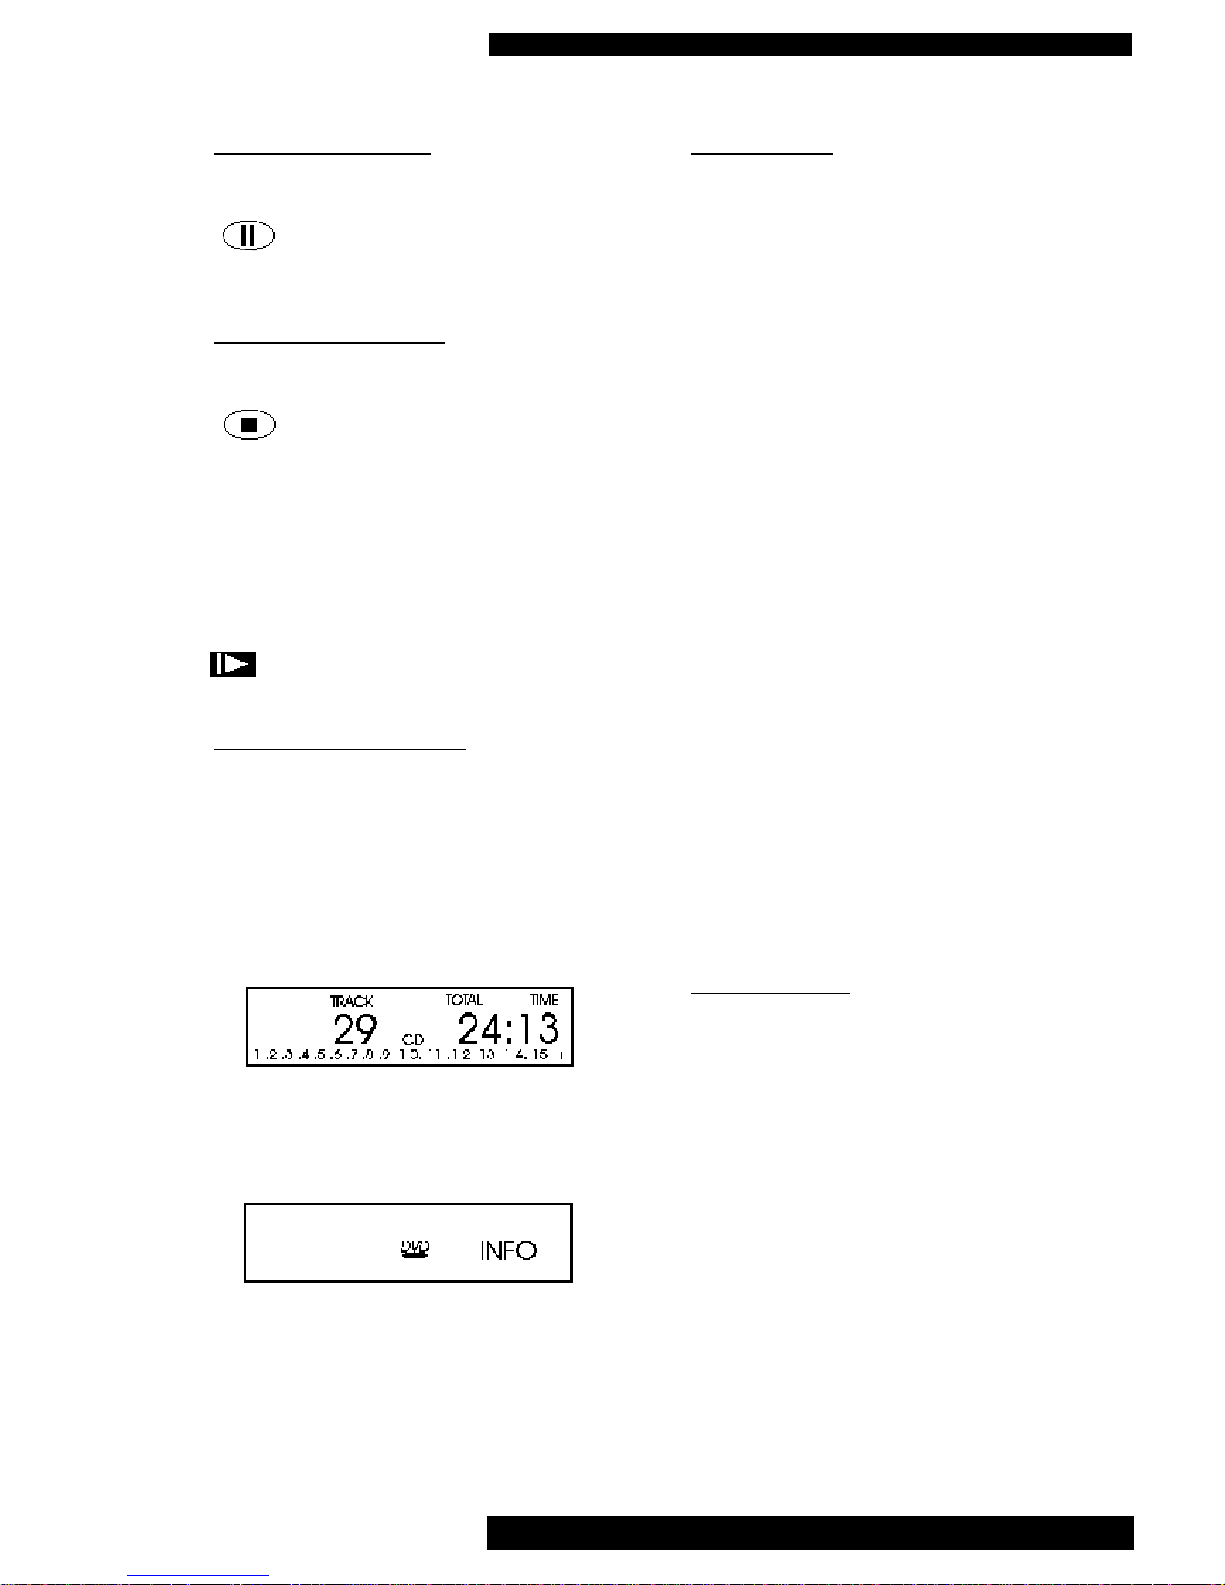
FRONT PANEL DISPLAY
The front panel display gives shows useful
information concerning the operation of the
DVD player.
When a disc is first read the display will
advise on the type of disc that has been
loaded.
The example above indicates that there is a
CD disc in the player, it has 29 tracks and
the total playing time is 24 minutes and 13
seconds.
The example above indicates that there is a
DVD disc in the player. The INFO indicates that this has a menu function that
needs to be selected before the disc will
start playing. Pressing PLAY will normal ly start the playback.
PLAYING CDs
Depending on the SETUP menu settings
the DVD-1 will automatically start playing
a CD about after 3-4 seconds and information about the disc will be displayed on the
front panel display and the TV screen.
On the front panel display the first digit
indicates the number of the currently playing track and the final digits indicate the
elapsed playing time for the current track
The small row of numbers on the bottom
line indicate the next tracks to be played.
If FTS (Favourite Track Selection) is active
the TV screen will look slightly different.
See pages 16 & 17 for more information.
If a CD is loaded and the auto start function not enabled, the display and screen
will indicate the number of tracks on the
disc and the total playing time. When all
tracks on the CD have been played, playback stops and this indication appears on
the display and screen.
Use the PLAY, PAUSE and STOP buttons
as previously described for operating the
player with a CD loaded.
PLAYING DVDs
As previously mentioned some DVDs have
a menu at the beginning of the disc. This
should be used to select the required function. Use the orange cursor keys and the
OK button to navigate the menu.
Some of functions normally found on the
DVD menu are as follows:-
Language selection, Subtitles selection, a
choice whether to play the film or watch
trailers and digital soundtrack selection.
At the start of some DVDs there are small
advertisements and notices that disable any
other functions while they finish playing.
DVD-1 Instructions for Use. Page 12
of 22
Page 13

SETUP
MENU
SETUP BUTTON
The setup button on the remote control is
only active when the DVD is in STOP
mode.
Press the button to access the setup menu.
The screen will display 2 columns, the left
column shows the functions and right
shows the setting.
Use the UP and DOWN keys to select the
option you want to change then use the
LEFT and RIGHT buttons to select the different settings.
When you have completed the changes
press the SETUP button again to store the
changes and exit the SETUP mode.
AUDIO
Select the required audio language.
SUBTITLE
Keep pressing the subtitle button to select
the required subtitle language. To turn off
the subtitles press and hold the button until
off is displayed on the screen.
PARENTAL CONTROL
If parental control has been activated only
DVDs or Video CDs that have already
been authorised can be played.
To play other DVDs or Video CDs you will
be required to enter the parental control
PIN number.
To activate parental control select the
option press the right arrow key. You will
then be asked to enter your chosen number.
You will then be asked to repeat the same
number. The parental control is now set.
Each time you want to play a DVD or
VCD you will be required to enter the PIN
number. (Parental control does not affect
audio CD playing).
To cancel parental control, enter setup,
select parental control and enter your PIN
number. Parental control is now cancelled.
Note, if you forget your parental control
PIN number, you can erase it by pressing
STOP button 4 times when the PIN number
is requested. Parental control is now deactivated. Do not forget to re-activate to
prevent un-suitable discs being played.
Whilst parental control is active it is possible to authorise any disc that you consider
suitable.
To authorise a new disc follow the instructions below.
1) Insert the disc and close the tray
2) Enter the pin code
3) Press STOP on the remote
4) Wait for the options to be displayed
on the screen.
5) Select parental control by
pressing right arrow key
6)
The disc is now authorised and will
play in the normal way.
To cancel authorisation repeat steps 4 and 5
Please note, you can have a total of 50
authorised discs. If you exceed that number the least frequently played discs are
automatically de-authorised.
DVD-1 Instructions for Use. Page 13
of 22
Page 14

SETUP MENU cont.
TV SHAPE
Use this setting to match the type of TV
you have and your preferred display shape.
4:3 Letterbox:- Use this setting for conventional TVs. You will now have a black
bar at the top and the bottom of the screen
when watching wide screen movies.
4:3 Panscan:- Use this setting for conventional TVs. and viewing in Pan & SCAN
format. Now when watching wide screen
movies the side of the picture will be
reduced. Please note to use Pan & Scan
the DVD disc must support this.
16:9 :- Use this setting if you have a wide
screen TV. If the DVD disc is now in 16:9
the picture will fill the screen.
Auto Play
This can be set to either ON or OFF and
simply sets whether the players starts playing a CD as soon as it is loaded. Set it to
OFF if you prefer to press PLAY to start
the disc playing.
Auto FTS (Favourite Track Selection)
This can be set to either ON or OFF.
When ON it activates the automatic
favourite track selection facility. See pages
16 & 17 for a detailed explanation
Digital Output
Use this option to select which digital outputs you require. Please note it is possible
to disable the digital output. This output
must be enabled for any external digital
decoders to work.
Sound
Select between Dolby Surround, 3D and
Stereo. If you only have 2 speakers you
can enjoy multichannel sound by selecting
3D.
3D TruSurround
TM
is a virtulizer technology that allows for a virtualized surround
sound experience from a two speaker playback using any multichannel audio source,
including Dolby Digital, Dolby Surround
or Dolby Pro Logic. TruSurround retains
all of the original audio information of the
multi-channel audio source giving the listener the sensory perception that they are
surrounded by additional "phantom" speak
-
ers. This completely immersive sound
experience is achieved through only two
standard stereo speakers.
Video Shift
Use this setting to adjust the left/right
position of the picture on your TV screen.
OSD Language
Choose the language that best suites your
requirements.
DVD-1 Instructions for Use. Page 14
of 22
Page 15

BASIC OPERATION CDs
DVD-1 Instructions for Use. Page 15
of 22
TRACK SELECTION
To change track, the NEXT and PREV.(on
the front panel) can be briefly pressed to
jump forwards or backwards one track in
either direction.
Pressing either of these buttons on
the remote control has the same
action as using the NEXT and
PREV. buttons on the front panel.
Alternatively, you can select a specific
track by directly entering a track number
(using the numeric push-buttons on the
remote control) For example to select
track 2 you would press 2 the player will
then start playing track 2
To play track 15 just press 1 and 5 and the
player will start playing track 15.
SEARCH
To search forwards or backwards through a
disc at 4X the normal speed press and hold
(for approx 1 second) the NEXT or PREV
button.
Search will now begin and the sound will
be partially muted.
To step up to 8X normal speed briefly
press NEXT or PREV again.
Search will now begin at 8X normal speed
and the sound will be muted.
To revert to 4X normal speed press either
button again.
When using either the remote control or
front panel to fast forward through a track
press PLAY to resume at normal speed,
PAUSE or STOP will also end the search.
Page 16

SPECIAL FEATURES WHEN PLAYING CDs
REPEAT /A-B BUTTON
The REPEAT/A-B button allows you to
repeat either, the current track the complete
disc or a piece within a track selected by
the A-B function.
A-B PLAYBACK
Continuous play provides you with the
option of playing just a certain section of
the track over and over again.
When you reach the desired starting point,
press button A/B. The front panel display
will show the symbol A- in the middle of
the top line, this will also be indicated on
the screen.
When you reach the desired finishing part,
press the A-B button again. The letters AB will now be illuminated in the display
and indicated on the screen. Now the
selection you have chosen will be repeated
until the continuous play is switched off by
pressing button A-B again or by pressing
buttons STOP or SHUFFLE.
REPEAT TRACK
By pressing and holding the REPEAT button once, you can repeat the entire track
over and over again. The legend REPEAT
TRACK appears on the display and the
REPEAT 1 icon is shown on the screen.
REPEAT DISC
By pressing and holding the REPEAT button again, you can select to repeat the
entire disc over and over again. The legend REPEAT appears on the display and
the REPEAT icon is shown on the screen.
Press and hold the REPEAT button again to
cancel all repeats. Pressing STOP will also
cancel the repeat function selected.
SHUFFLE BUTTON
If SHUFFLE is pressed the tracks on the
discs are not played in consecutive order
but in random order. The word SHUFFLE
appears on the display to provide a visual
reminder that the SHUFFLE function has
been activated.
The tracks in random order are also displayed on the screen along with the words
SHUFFLE.
To cancel shuffle mode press SHUFFLE
again.
SCAN
Press and hold the SCAN button (for
approx 1 second) to play the first 10 seconds of each track on the disc. When the
desired place has been found press and
hold SCAN again and the player will continue playing normally.
FTS (Favourite Track Selection)
Once a CD has been loaded (and stopped if
it started playing) on the lower half of the
TV screen there will be two boxes. One
called ‘Exclude Tracks’, the other ‘Track
Selection’.
EXCLUDE TRACKS
To select the tracks that are not played
(Exclude tracks) press the orange LEFT
cursor key. The screen will change. You
now have the complete track list along the
top in the PLAY list and a row below
where the excluded track numbers will
appear. Move the arrow along the track list
using the left and right arrow keys. When
the track you want to exclude from the
play list is between the arrows, press the
orange DOWN button. This puts that track
number to the second row and indicates
that this track will not be played. If you
change your mind move the the cursor to
DVD-1 Instructions for Use. Page 16
of 22
Page 17

SPECIAL FEATURES WHEN PLAYING CDs
the track you now want to play and press
the UP arrow button. The track number is
then put back into the Play list. When you
have finished excluding all the tracks you
do not want played press PLAY. As the
DVD starts playing, FTS is illuminated on
the front panel display to remind you that
FTS is operating.
TRACK SELECTION
To activate track selection the DVD player
must be in STOP mode.
To select the tracks that are played press
the orange RIGHT cursor key. The screen
will change. You now have the complete
track list along the middle of the screen
called Disc. Move the arrow along the
track list using the left and right arrow
keys. Select the track you want to move to
the favourite list (above the disc list) press
the orange UP button. This puts that track
number to the Favourite row and indicates
that this track will be played. If you
change your mind move the the cursor to
the track you now want to change and
press the DOWN arrow button. The track
number is then put back into the Play list.
When you have finished listing all the
tracks you want to play press PLAY. As
the DVD starts playing, FTS is illuminated
on the front panel display to remind you
that FTS is operating.
The selection made using TRACK SELECTION or EXCLUDE is remembered until it
is changed or cleared. Each time you play
the same CD and select FTS your original
selection will still be active.
If you load a disc that previously had a
selection made and just press PLAY or
have auto start active the FTS selection
will be ignored.
AUTO FTS
If auto FTS is set to ON then the FTS
selection made will be remembered and
activated automatically every time that par
-
ticular disc is played. To remind you that
you have FTS selected the front panel display has FTS illuminated.
Please note, you can have a total of 100
FTS programmed discs. If you exceed that
number the least frequently played discs
are automatically deleted.
DVD-1 Instructions for Use. Page 17
of 22
Page 18

SPECIAL FEATURES WHEN PLAYING DVDs
DVD-1 Instructions for Use. Page 18
of 22
TITLES and CHAPTERS
DVD’s are divided into different sections.
These are called Titles and Chapters. Most
DVD movies will have one title which is
the main movie. The title is then split into
different chapters.
Whilst a DVD is playing, pressing and
releasing the NEXT or PREV. buttons on
the front panel will increment or decrement
the chapter currently being played.
If the button is pressed and held down, the
DVD player will scan through the movie.
Pressing either of these buttons on the
remote control has the same action
as the NEXT or PREV. buttons on
the front panel .
When using either set of buttons to scan
through the film press PLAY to resume at
normal speed.
Pressing the button shown below (slow)
plays the movie at 1/2 speed.
Pressing again reduces the speed
to 1/4 and again to 1/8 speed.
To revert to normal playback speed press
PLAY
Pressing this button on the remote during
movie playback will scan backwards
through the film at 4 times the normal speed. Pressing again scans
backwards even faster.
To return to normal playback press PLAY
Pressing this button on the remote during
movie playback will scan forwards
through the film at 4 times the normal speed. Pressing again scans
forwards even faster.
To return to normal playback press PLAY
Pressing the orange arrow up button during
playback pauses the playback.
To resume normal playback press PLAY
Pressing the orange arrow down button
during playback plays the movie
at 1/2 speed. Pressing again
reduces the speed to 1/4 and again to 1/8
speed. (This is the same as pressing the
slow button)
To resume normal playback press PLAY
STILL PICTURE & FRAME STEP
Pressing the PAUSE button on the front
panel or remote will pause the
playback and give a still frame.
To step forward to the next picture frame
press PAUSE again.
To restart playback press PLAY.
T-C Button
T-C stands for Title and Chapter. Pressing
the T-C button once shows, on the screen,
the current title being played. Pressing it
again (whilst the tile number is still displayed) indicates the current chapter within
that title.
Titles and Chapters can be selected using
this button and the numeric keys on the
remote control. To select title 3, press the
T-C button once, press number 3 then press
OK
To select chapter 23 in Title 1, start playing
Title 1, press the T-C twice press number
23 then OK.
Page 19

SPECIAL FEATURES WHEN PLAYING DVDs
REPEAT /A-B BUTTON
The REPEAT/A-B button allows you to
repeat either the current chapter, the current
title or a piece of a movie selected by the
A-B function.
A-B PLAYBACK
Continuous play provides you with the
option of playing just a certain section of
the movie over and over again.
When you reach the desired starting point,
press button A/B. The front panel display
will show the symbol A- in the middle of
the top line, this will also be indicated on
the screen.
When you reach the desired finishing part,
press the A-B button again. The letters AB will now be illuminated in the display
and indicated on the screen. Now the
selection you have chosen will be repeated
until the continuous play is switched off by
pressing button A-B again or by pressing
buttons STOP or SHUFFLE.
REPEAT CHAPTER
By pressing and holding the REPEAT button once, you can repeat the entire chapter
over and over again. The legend REPEAT
CHAPTER appears on the display and the
REPEAT C icon is briefly shown on the
screen.
REPEAT TITLE
By pressing and holding the REPEAT button again, you can select the repeat entire
title over and over again. The legend
REPEAT TITLE appears on the display
and the REPEAT T icon is briefly shown
on the screen.
REPEAT DISC
By pressing and holding the REPEAT but-
ton again, you can select to repeat the
entire title disc over and over again. The
legend REPEAT appears on the display and
the REPEAT icon is briefly shown on the
screen.
Press and hold the REPEAT button again
to cancel all repeats. Pressing STOP will
also cancel the repeat function selected.
SHUFFLE BUTTON
If SHUFFLE is pressed the chapters on the
discs are not played in consecutive order
but in random order. The word SHUFFLE
appears on the display to provide a visual
reminder that the SHUFFLE function has
been activated.
SCAN
Press and hold the SCAN button to play
the first 10 seconds of each chapter in the
current title.
ANGLE BUTTON
Some DVDs have been recorded using
more than one camera from different
angles. If the disc you are watching has
this facility pressing the ANGLE button
will change to different camera angles.
SUBTITLE BUTTON
Many modern DVDs have a selection of
different subtitles recorded on them. You
can select these subtitles by pressing the
SUBTITLE button. Keep pressing the button until the desired subtitle language is
displayed.
To clear the subtitles press and hold the
SUBTITLE button
Some discs do not have different subtitles
recorded on them in which case
the subtitle no icon appears on
the screen when the button is pressed.
DVD-1 Instructions for Use. Page 19
of 22
Page 20

* * * * * * * * * * * Play
* * * * * * * * * * * Pause
* * * * * * * * * * * Stop
* * * * * * * * * * * A-B repeat
* * * * * * Search Forward
* * * * * Search Backwards
Slow Forward
* * * * * * * * * * * Repeat Disc
* * * * * * * * * * * Repeat Title
* * * * * * * * * * * Repeat Chapter
* * * * * * * * * * * Chapter Shuffle
* * * * * * * * * * * Title Indication
* * * * * * * * * * * Chapter Indication
* * * * * * * * * * * Disable Function
* * * * * * * * * * * Angle
* * * * * * * * * * * No Alternative Angle
* * * * * * * * * * * Subtitle language
* * * * * * * * * * * Audio language
* * * * * * * * * * * Audio System
* * * * * * * * * * * Remaining time of title
* * * * * * * * * * * Elapsed time
* * * * * * * * * * * Resume
* * * * * * * * * * * Total time
A3CD Instructions for Use. Page 20
of 22
SPECIAL FEATURES WHEN PLAYING DVDs
AUDIO BUTTON
This changes the language and the audio
channel configuration when alternatives
are available on the disc.
Pressing the AUDIO button during play
will display the language and channel
configuration on the screen for approx 2
seconds.
To step through the different language
and channel options keep pressing the
audio button until the desired setup is
displayed.
OSD
During playback various different icons
will appear on the screen to indicate
which function is active. These will be
displayed for approximately 2 seconds
and then disappear.
At any time during playback, pressing
the OSD button will display the PLAY
BANNER on the screen. This gives
information about the title, chapter, language etc.
To keep the banner on the screen press
and hold the button for approx 2 seconds.
To clear the banner press the OSD button
again.
Page 21

DVD-1 Instructions for Use. Page 21
of 22
TROUBLESHOOTING
Basic troubleshooting of a DVD player is similar to troubleshooting of any other electrical or
electronic equipment. Always check the most obvious possible causes first. To give you a few
ideas of what to look for, check the following:
Remember: the most vulnerable part of a CD/DVD playing system is the disc itself. The
most likely cause of a non-playing disc is that the disc itself is faulty, scratched or simply
dirty.
If none of these actions effect a cure, please contact your dealer, or an authorised Musical Fidelity service agent.
Remember, never open the case of the DVD-1 yourself, as this will invalidate the guarantee.
Front Panel display does not light,
1) Power cord disconnected, 1) Re-connect
2) Mains switch switched off, 2) Switch on switch on back panel
3) On/Off switch not on 3) Switch on using switch on front panel
Blue on LED does not light,
1) Unit not turned on 1) Switch on using standby button
2) HTP requires resetting, 2) Switch off the mains, wait 1 minute and then switch back on
No sound
1) DVD analogue not connected 1) Connect R&L analogue outputs to line level input on a pre
amp etc
2) DVD digital output not connected 2) Connect optical or coax digital output to a D to A converter.
No Video
1) Display device (TV) not connected 1) Connect TV to the correct DVD video output
2) Display device not switched on 2) Switch on TV
No colour
1) DVD video output not compatible with TV 1) Ensure that if composite video output is used composite
input is used on the TV.
2) If S-Video out used on DVD player, S-Video I/P must be
used on TV
Poor Picture quality
1) Incorrect input type selected on TV 1) Select correct input and type of input on TV.
Musical Fidelity picture not steady on screen (‘jerky’)
1) TV & DVD not using the same TV system 1) Contact your Musical Fidelity dealer for assistance.
(PAL/NTSC see page 7)
PIN number requested when trying to play DVDs
1) Parental control is active 1) Either enter the correct PIN number to play the disc or
cancel parental control using setup menu. see page 12
Disc does not play
1) Wrong region disc inserted 1) Only use discs for your region, (see back panel for DVD
region setting)
2) Disc is damaged or dirty 2) Check disc for dirt or damage
Can not enter setup menu
1) DVD disc loaded 1) Remove the DVD then enter setup menu
Remote control does not function correctly
1) Operating range of remote control has 1) Change batteries, or remote control not pointed at DVD front
reduced range or does not work panel display.
Page 22

DVD-1
24 BIT CD and DVD PLAYER
Audio Out
Analogue connections Right and Left out via RCA (Cinch/phono plugs)
Right and Left out via SCART connector
Output level 2.2V RMS at 0dB
Frequency response 20Hz - 20KHz + 0.2 -1.0dB
S/N ratio > 96dB unweighted
> 105dB 'A' weighted
THD < 0.006% 10Hz - 20KHz unweighted
< 0.003% 10Hz - 20KHz 'A' weighted
Digital Audio Out
Digital Audio Connections Coaxial via black RCA (Cinch/phono plug)
Optical via TosLink
TV Standard PAL NTSC
50Hz 60Hz
Number of lines 625 525
Playback Multistandard (PAL/NTSC)
Musical Fidelity Picture PAL/NTSC (preset at factory)
Video Out
Video Connections Composite via yellow RCA (Cinch/phono plug)
S-Video out via S-Video 4 pin mini DIN
Composite video out via SCART connector
RGB via SCART connector
Video output level (Composite) 1Vpp
Video output level (S-Video) Y = 1Vpp C = 0.3Vpp
Video output level (RGB) 0.7Vpp
Video output impedance (Composite) 75R
Video output impedance (S-Video) Y = 75R C = 75R
Video output impedance (RGB) 75R
General
Power requirements 100/115/230V AC 50/60Hz
Factory preset for country
Power consumption operating 25 Watts
standby less than 5 Watts
Dimensions (approx..) 440 x 95 x 400 mm (W x H x D)
Height includes feet
Depth includes terminals
Weight 6kg (un-boxed)
Standard accessories AC power cord, Remote control handset, 2 batteries
(SUM-4, AAA, LR03)
DVD-1 Instructions for Use. Page 22
of 22
Musical Fidelity reserves the right to make improvements which may result in
specification or feature changes without notice.
SPECIFICATIONS
DVD-1 Issue 1 January 2001
Page 23

CORRECTION
Model DVD-1 Instructions For Use
Page 21
There is no “Remaining time of title” icon available on this model:
CORRECTION
Model DVD-1 Instructions For Use
Page 21
There is no “Remaining time of title” icon available on this model:
 Loading...