

SRM SmartIT User Manual
USER MANUAL
Schoberer Rad Messtechnik GmbH
Rudolf Schulten Str. 6
D-52428 Jülich
Tel.: +49-2461-69123-0
www.SRM.de

CONTENT
1. Introduction 3
2. Important Safety Instructions 4
3. What is included? 4
4. Setting up your SmartIT 5
4.1 Placing the SmartIT 5
4.2 Adjusting the Seat Position 5
4.3 Clamping the seat and handlebar sliders 5
4.4 Adjusting the Handlebar 6
4.5 Gears and Drive-train 6
4.6 Installing pedals 6
4.7 Power Supply 6
4.8 Remote 7
5. Getting Started 7
5.1 Remote Button Denitions 7
5.2 SmartIT Ride Modes 8
5.3 Connecting to external apps (e.g.. Zwift) 9
5.4 Connecting the SRM SmartIT Apps 9
6. Settings Menu 10
6.1 Pairing the PowerMeter 10
6.2 Pairing Heartrate 10
6.3 Pairing sensors to PC8 10
6.4 Personalising the Brake gain and speed 11
6.5 Speed Sensor 11
6.6 Power smoothing 11
6.7 Interval Start Preferences 12
6.8 Enabling and Disabling External Control 12
6.9 Ride Simulation Settings - Bike and Rider Weight 13
7. Maintenance and Care 14
7.1 Daily Care 14
7.2 Monthly Care 14
7.3 Yearly Care 14
8. Technical Data and Specifications 15

1. Introduction
Welcome to the next generation of SRM Indoor Training. The SRM Smart IT, developed by cyclists
for cyclists, is the ultimate, no-compromise indoor training experience.
The third generation SRM SmartIT enables many modes of operation including:
• Standalone operation by power or gear
• Interval operation by power or gear
• Control by SRM SmartIT app,
• Control by external app such as Zwift, Trainerroad.
SmartIT includes 11-speed shifting to provide realistic ride experience similar to riding on the road,
enabling the greatest riding experience and training control.
The kinetic energy stored in the rotating ywheel enables a lifelike and realistic simulation of real
road riding, and the sturdy construction enables all-out intervals and efforts to enable the best
training platform.
3

2. Important Safety Instructions
SmartIT has a number of moving parts that may cause serious injury if touched during
operation. Do not touch the moving parts including spinning ywheel, gears, cranks/
pedals or chain during use. Note that the ywheel may become extremely hot during
I
When in use, all people other than the rider should be a safe distance (at least 1m) away from the
unit.
The seat-post and the handlebar post are height-adjustable and not secured by springs. While
making any adjustments to the seat and bar height, be sure to hold on to the post to avoid the posts
hitting the frame or pinching hand/ngers.
The brake electronics are located in the black box which is attached at the back of the brake. The
black box is not waterproof, so when cleaning the SmartIT, do not let water get inside the brake
box. Disconnect the power and clean the box only with a damp cloth. Before cleaning make sure to
disconnect the trainer from 12V DC power.
use!
3. What is included?
Indoor Trainer frame
SmartIT Brake with control
unit
Remote ControlOrigin PowerMeter
4
PowerControl 8 Heartrate Belt PC8 Handlebar clip Power Supply
4. Setting up your SmartIT
4.1 Placing the SmartIT
Ensure that the SmartIT is installed on rm ooring, and is level and balanced before use. The four
extendable feet can be adjusted in and out to accommodate small variances in the level of the oor.
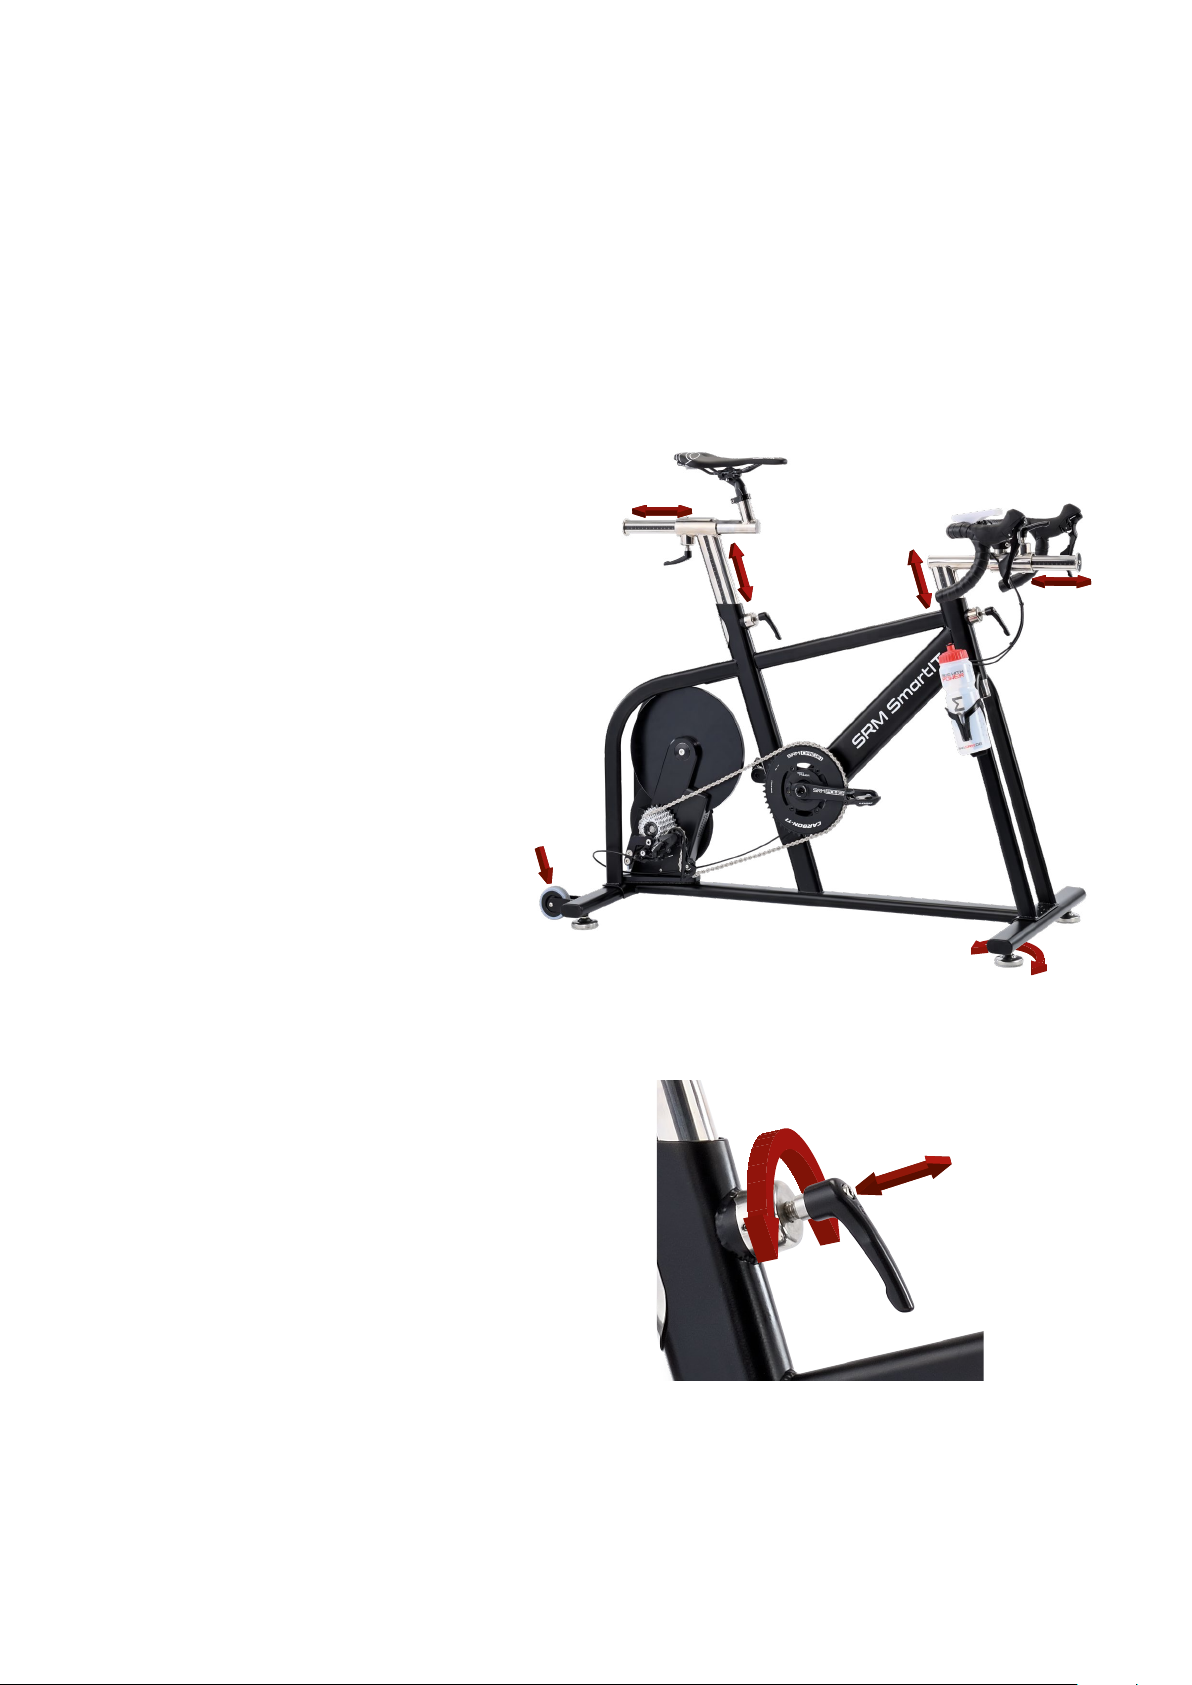
4.2 Adjusting the Seat Position
The SRM SmartIT is designed for riders between 165 cm (5’5’’) and 200 cm (6’7’’) of height. The
seat height and position are fully adjustable.
The saddle and the handlebars can be
adjusted continuously, as shown by the
red arrows.
Two wheels make it easy for one person to
move the SmartIT.
4.3 Clamping the seat and handlebar sliders
Adjust the seat and handlebar position by
loosening the appropriate lever, moving
the slider, and tightening the lever.
Once the position is adjusted, the levers
can be moved out of the way by lifting,
turning and letting them lock into place in
the desired position.
5
 Loading...