

Page 1

SP Series IP Camera
Quick Start Guide
1. Product Introduction
1.1 Indoor IP Camera
1. IR Sensor
2. IR LED
3. Lens
4. Recording Indicator Light
5. Network Indicator Light
6. Microphone
7. Network Interface
8. microSD Card Slot
9. DC Power Interface
Indicator Light
Solid
Blinking
Off
Network (Red)
Network
Connected
Network
Connecting
Network
Disconnected
Record (Blue)
microSD
Card Inserted
Recording
No microSD card
inserted
1.2 Outdoor IP Camera
Page 2
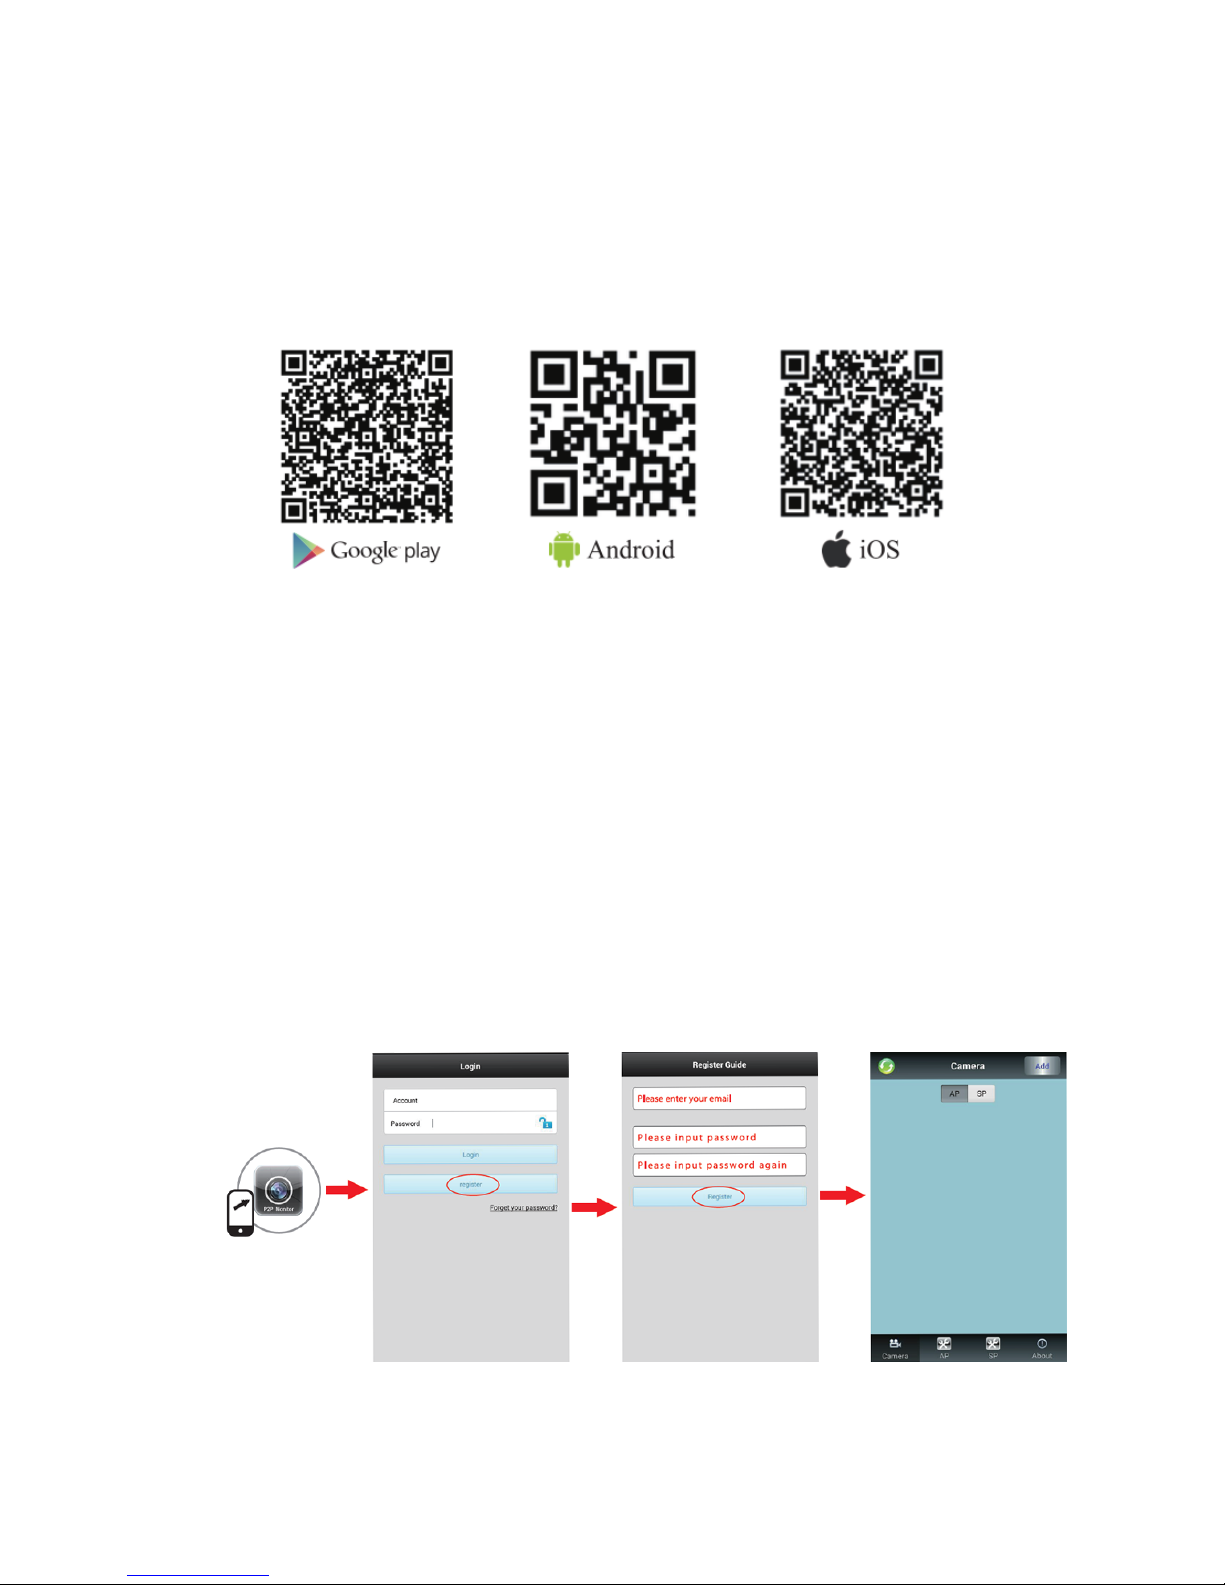
2. Application Installation
2.1 APCam App Installation
Method 1: Scan the QR code that corresponds to your device to download the
APCam application
Method 2: Search “APCam” on Google Play or iOS App Store
Method 3:
Android App Download Link:http://www.videoipcamera.cn/
iOS App Download Link:https://itunes.apple.com/us/app/apcam/id943353529
2.2 Register for an APCam Account
Before using the APCam App, you will need to register for an account.
Step 1: Launch the APCam App and navigate to the login screen.
Step 2: Touch the “Register” button and input your email and desired password. Your
account will then be created and signed in automatically every time the app is launched.
Page 3
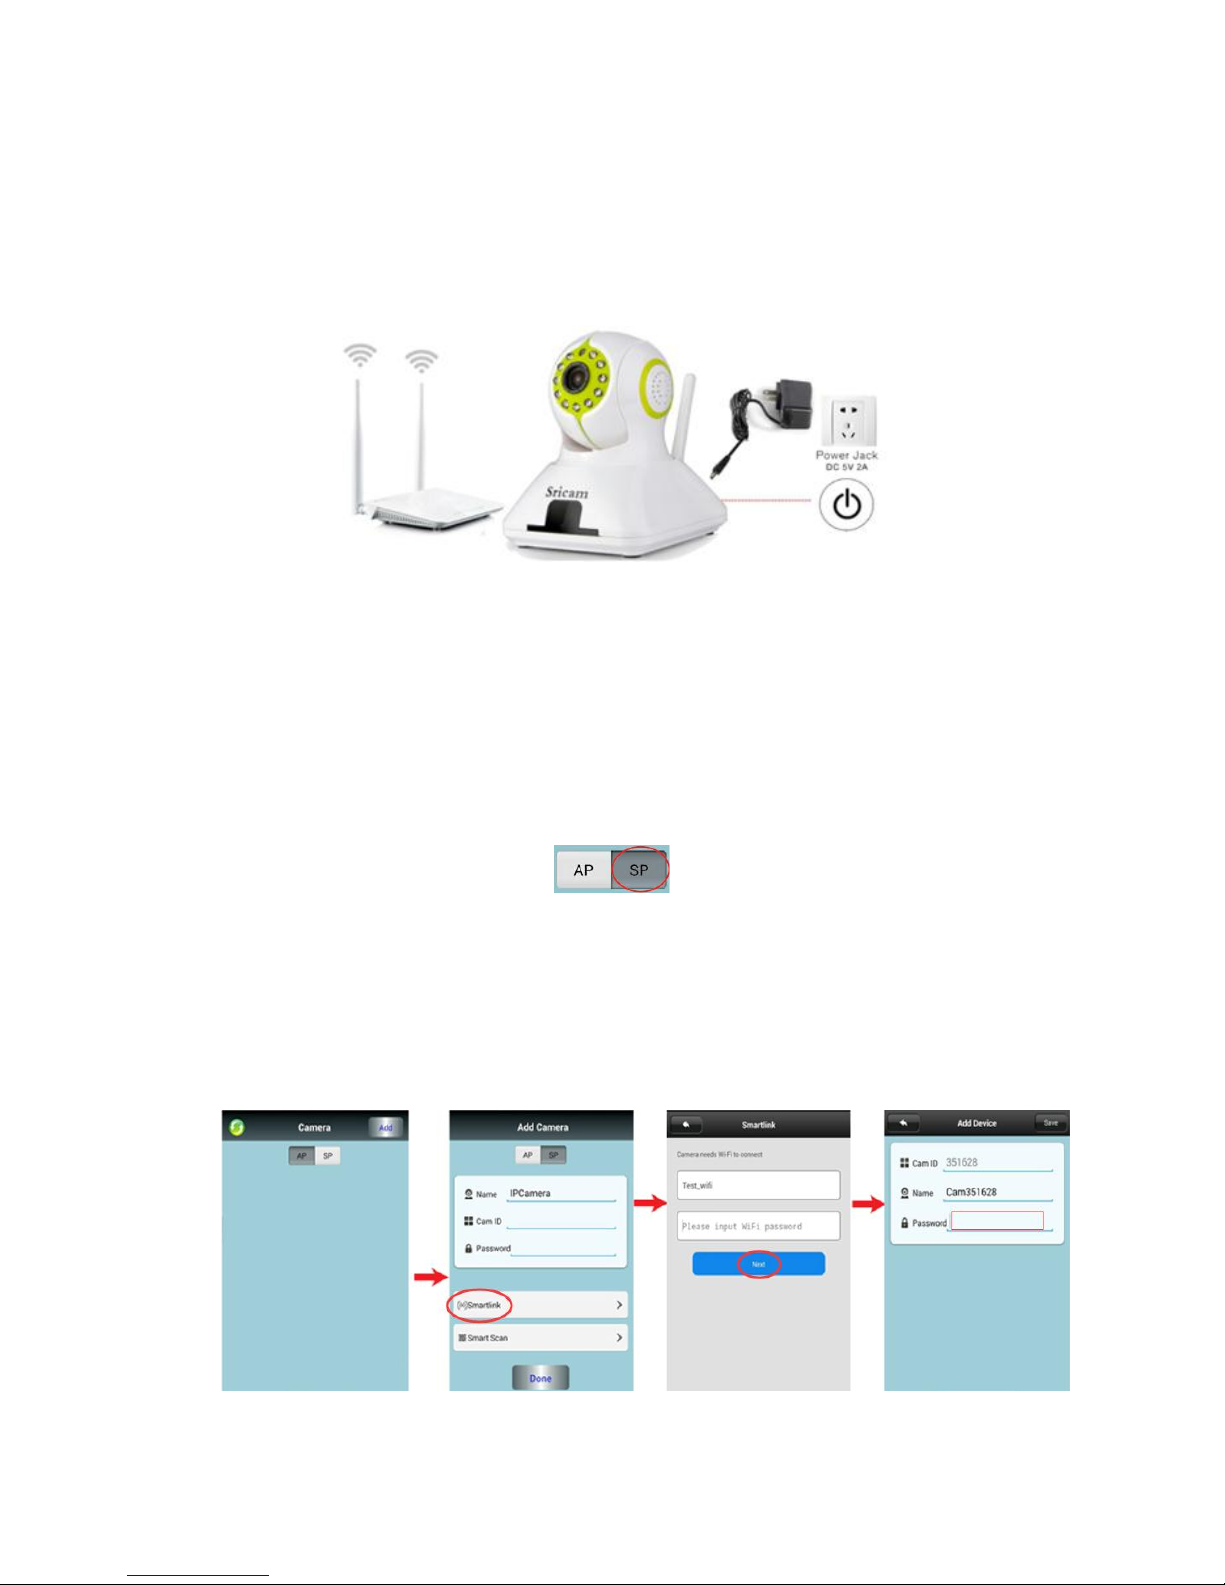
3. Using the APCam App
3.1 Power on the IP Camera
After the camera has been powered on for 20 seconds, a beeping sound will be emitted.
This sound indicates that the network is disconnected and will require setup.
3.2 Add a camera to the APCam App
Before beginning the setup process, your phone must be connected to a WiFi network
Step 1: Launch the APCam App and press the “Add” button.
Step 2: Press the “SP” button to add a Sricam model from the SP series.
Step 3: Press the “Smartlink” button, then input the correct WiFi information, and any other
additional information that is required.
Once complete, the camera should emit a beeping sound indicating a successful
network setup.
Step 4: Input the camera’s password (Factory Default Password: 888888).
Step 5: Finally, press the “Save” button to complete the setup process.
Page 4
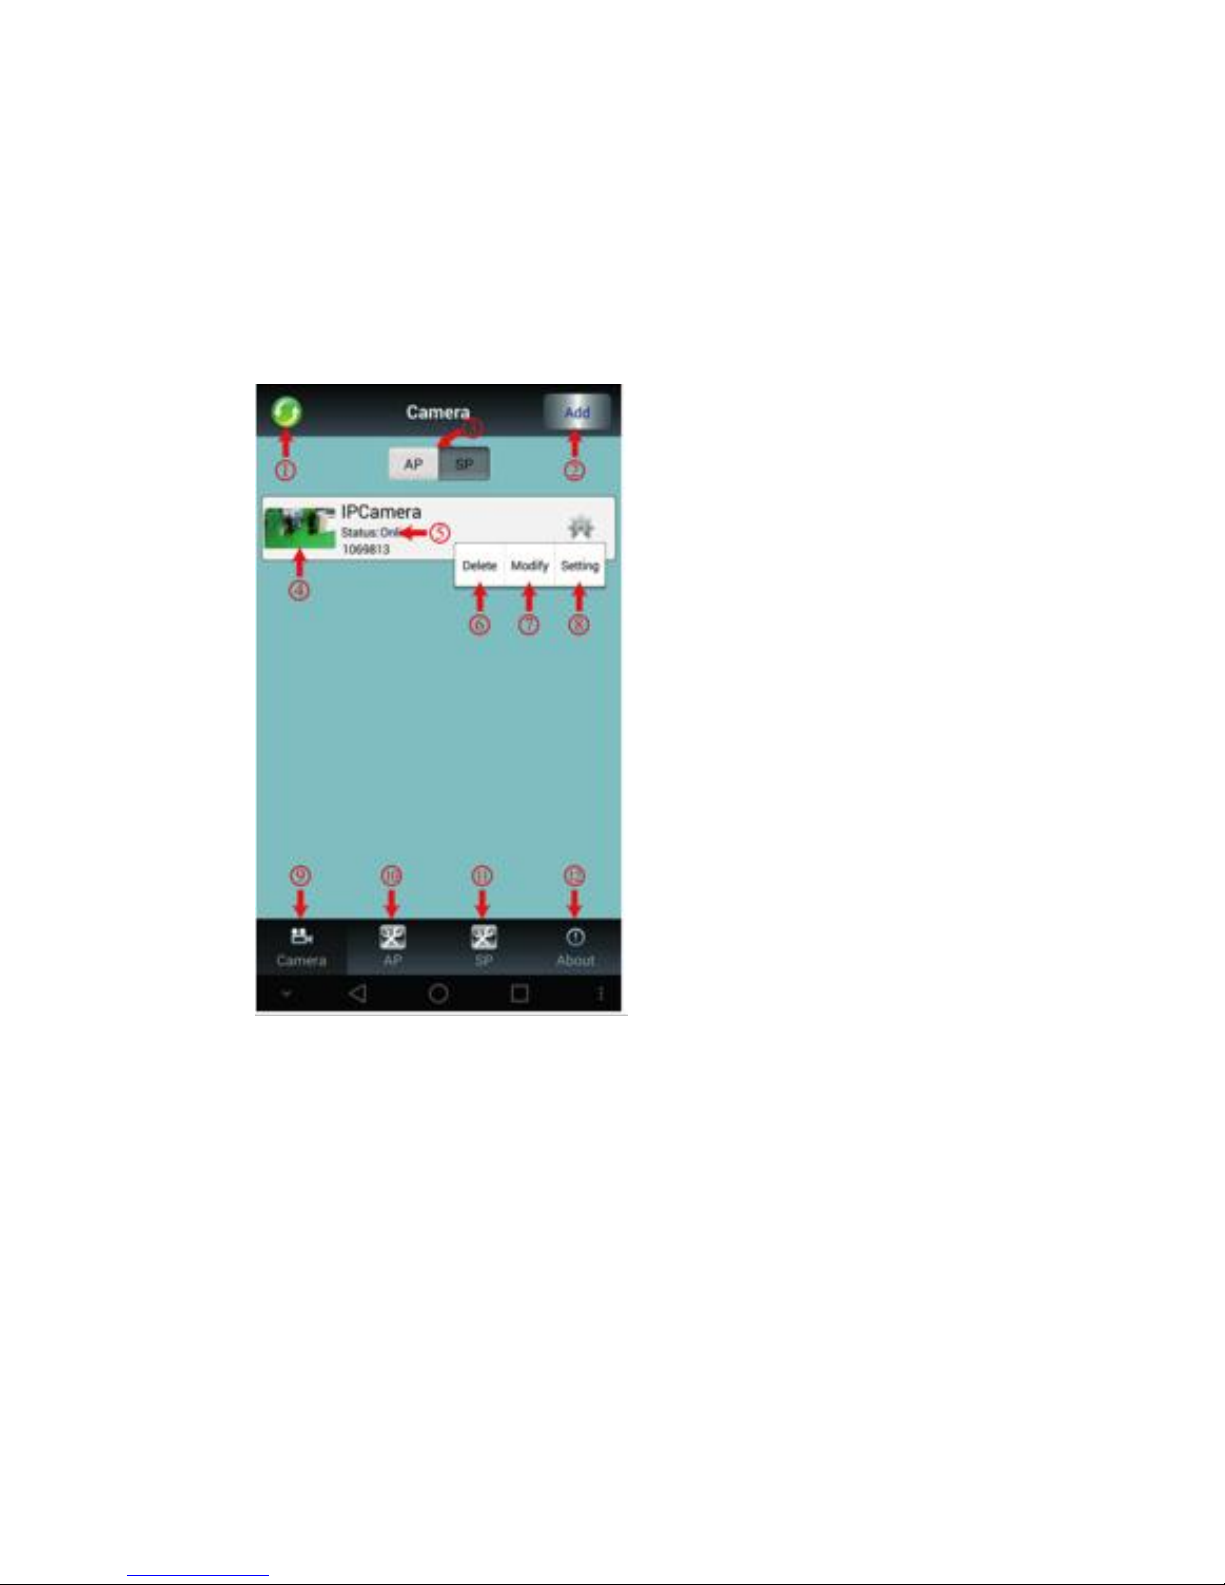
3.3 APCam App Usage
Camera Interface Key
1. Refresh: Refresh the camera
index
2. Add: Add a camera to the app
3. Switch: Switch between AP and
SP model configurations
4. Live Feed: Press to view live feed
5. Device Status: Indicates whether
the device is online or offline
6. Delete: Delete a device from the
camera index
7. Modify: Modify the camera’s name
and password
8. Settings: Modify the camera’s
network, alarm, recording, and
date settings
9. Camera: Show the entire camera
index
10. AP Series: Check the alarm
event logs, screen shot history, and recorded video on your AP Series device
11. SP Series: Check the alarm event logs, screen shot history, and recorded video
on your SP Series device
12. About: See up to date application version information
Page 5
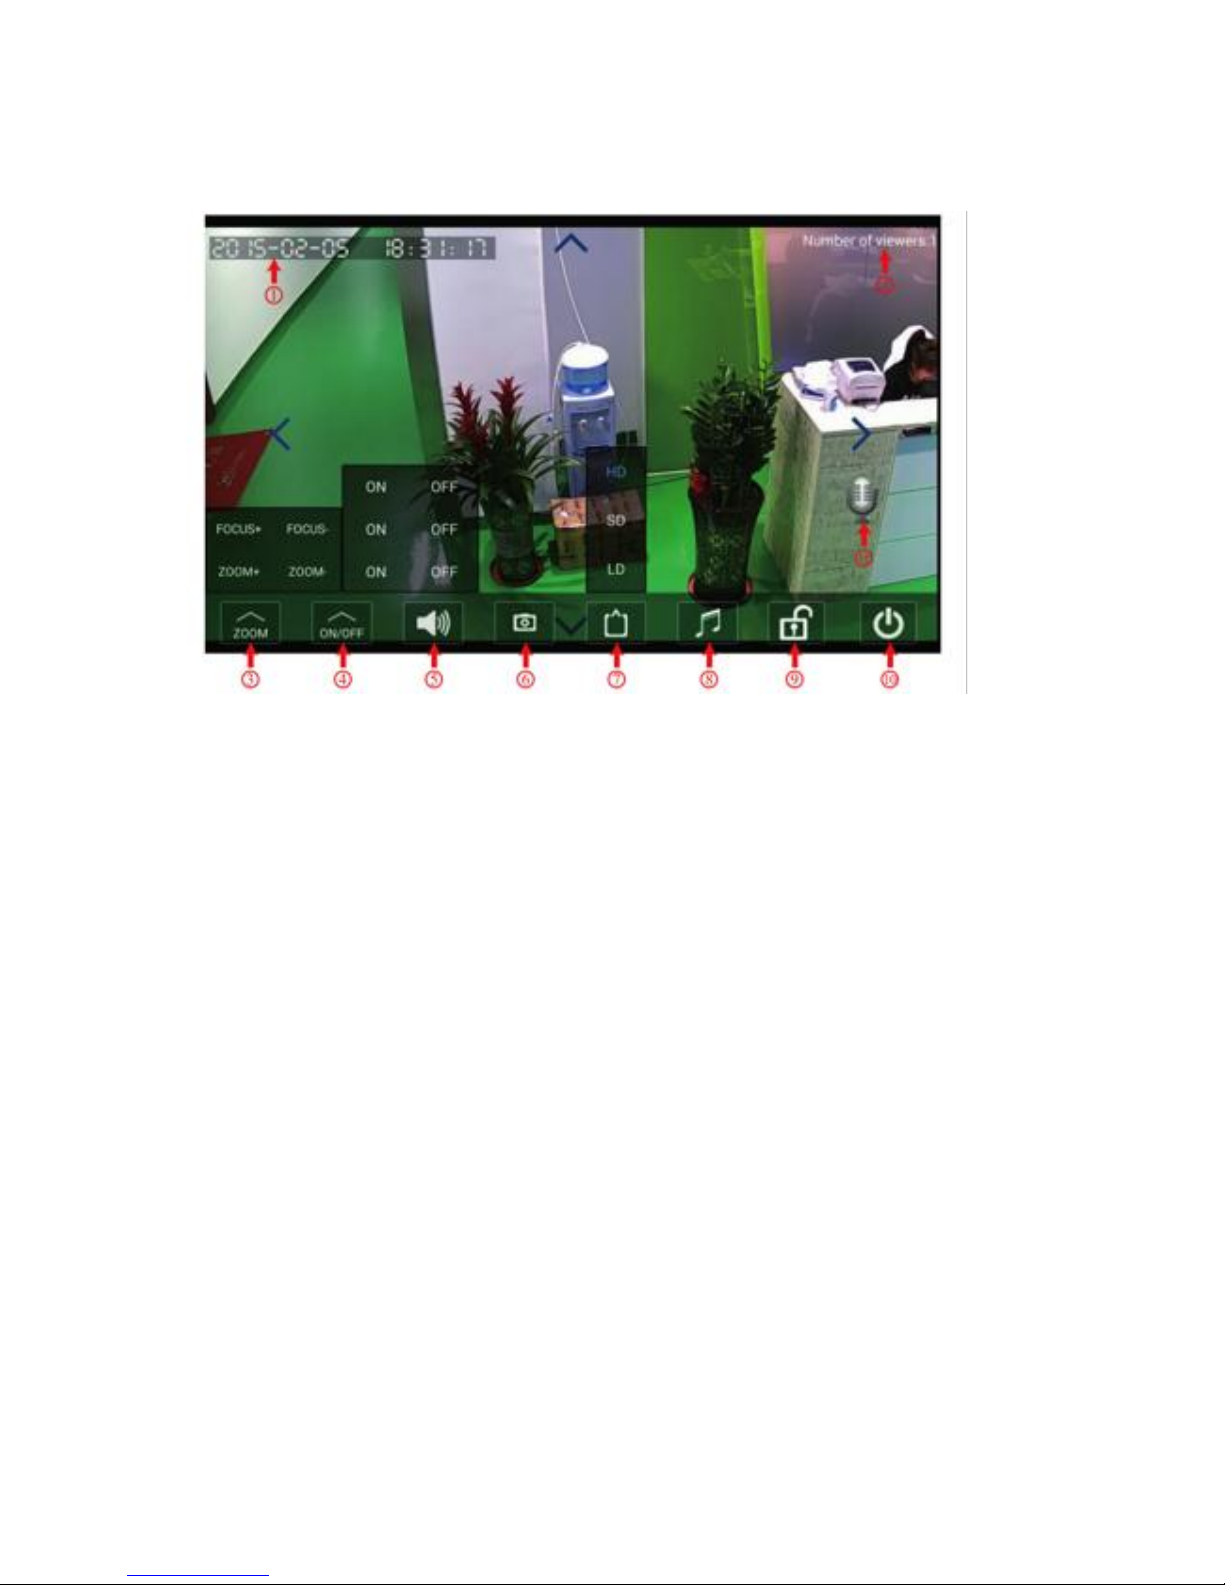
3.4 Live Feed Key
1. Device’s time and date
2. Number of current viewers
3. Zoom (Compatible Models Only)
4. Power Button (Requires WiFi Smart Outlet, Compatible Models Only)
5. Audio Monitor / Listen-In
6. Screen Shot Capture
7. Streaming Quality (HD, SD, LD)
8. Music Player (Compatible Models Only)
9. Alarm (Toggle Alarm On/Off)
10. Exit
11. Talk Button
For more information on the Sricam SP Series models, please visit sricctv.com.
Page 6

Shenzhen Sricctv Co., Ltd.
The 3rd Floor, C9 Building,C District ,Fu Hai Industrial Park, Fuyong Street,
Baoan,Shenzhen ,Guangdong,China
Customer Service
Monday – Friday
9:00-18:00 Beijing Time (UTC +8)
Telephone: +86-755-29360806
E-Mail Support: [email protected]
Skype Support: tech.sricam
 Loading...